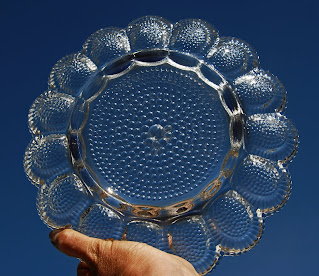
First, I needed an old lamp and bird bath basin, so I took a little field trip to a couple of thrift stores. Goodwill had exactly what I needed. On my first shopping expedition, I found a glass serving dish that reminded me of a sunflower. Amazingly, that is the exact vision I had for the theme of my creation. Who knew an egg platter could be so lovely?
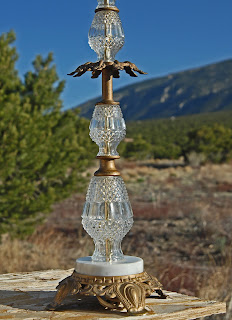
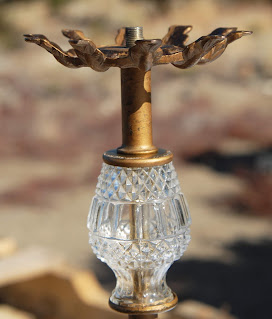
Next, I went on the hunt for the right lamp to complement my new bird bath dish, and to serve as its base. Because thrift stores are always receiving new donations, I found the perfect lamp on my very next trip to the store. The crystal, marble, and brass features, along with the size of the lamp, were just right in every way. I couldn't wait to get home and put the finishing touches on my vintage bird bath.
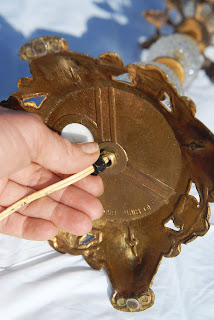
Step One: Unscrew the light socket and remove it from the top of the lamp.
Step Two: Clip the electrical cord and pull it out through the lamp base.
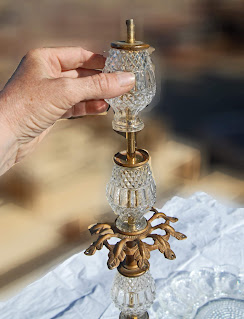
Step Three: I removed each individual section of the lamp and reassembled the pieces to better support the basin section of my bird bath. I moved the brass leaf section to the top of the column and reversed it (turned it upside down) to serve as the support arms for my glass dish.
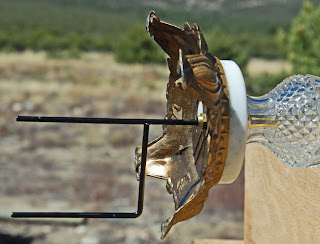
Step Four: Though I had intended to glue the platter directly to the brass arms, I found that they weren't totally level, so I riveted a circular metal candle holder to the brass piece. I spray painted the metal silver since it would show through the bottom of the water basin. I wanted a natural looking reflection.
Step Five: I used E6000 glue to affix the glass dish to the candle holder. I ran a bead of glue all along the circular rim on the bottom of the egg platter and carefully applied pressure for a minute or two after centering the dish on the metal plate. Then, I let the glue cure for a couple of days.
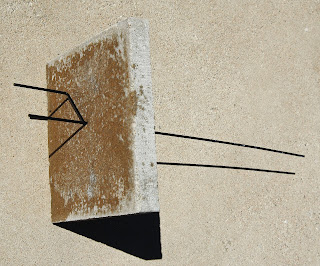
Step Six: Since I don't want my glass bird bath to tip over and shatter, I ran a metal post up into the center column where the cord used to be housed. I purchased an inexpensive plant hanger at the dollar store. It has stakes to anchor the base of the lamp into the ground. I measured the height of the lamp and then cut off the hook top of the planter stake. For extra insurance, since the winds are often incredibly strong where I live, I drilled a hole through the center of a cement patio paver and inserted the metal rod through it before installing the rod inside the lamp. Now my bird bath is very stable and far less likely to get knocked over by the wind or wild critters. As a bonus, it now has a level platform on which to stand. I'll be planting flowers around the paver to make it more attractive.
Your steps may not be identical to mine, because every lamp is slightly different, but there are enough similarities to give you a sense of how to go about assembling your bird bath. You may be able to find a lamp that already has a glass shade. In that case, you won't need a separate glass dish. I preferred knowing that my glass dish would not be toxic to birds and I didn't have to seal any holes that had been drilled through a lamp shade.
I am very pleased with my unique bird bath. It is so satisfying to take an unwanted item or two and turn them into a conversation piece. More than that, I feel like I am showing a little love to the beautiful creatures who share my garden habitat. It has been an especially dry season. With the mountain creek dried up at the moment, it feels wonderful to provide a source of sustenance for the precious birds that fill my life with their sweet presence and songs.
Let me know if you decide to make your own bird bath or garden art with a vintage lamp. I would love to see how you use your creative gifts.
Note: The author may receive a commission from purchases made using links found in this article. “As an Amazon Associate, Ebay (EPN), Esty (Awin), and/or Zazzle Affiliate, I (we) earn from qualifying purchases.”


