Friday, May 30, 2014

Flip Flop Time!


flip flop craft idea
With summer on the horizon and beach vacations in the works, I have decided that it is definitely "Flip Flop Time!"

What better way to get your family excited about summer than creating cute, inexpensive footwear to wear on that beach vacation?  If you shop wisely and use stuff you already have on hand, you could create new sandals for every summer outfit or bathing suit you own. Of course, you should remember that "You Get What You Pay For",  so if you want your personalized sandals to last, buy the best shoe you can afford.  Really examine the shoe to make sure it is made well and will not break the first time you wear it.  Bend that shoe and pull on the straps!

If you have a ton of buttons in your craft cache, you should read DIY Button Flip Flops . One of the best ideas I found on malina123's page on Squidoo, involved recycling an old pair of shorts for use on her summer flipping footwear! By reusing a bit of fabric, she completely refashioned an ordinary pair of beach thongs into a colorful fashion statement. (Thank you, malina123 for letting me use the image below!)

colored button flip flops


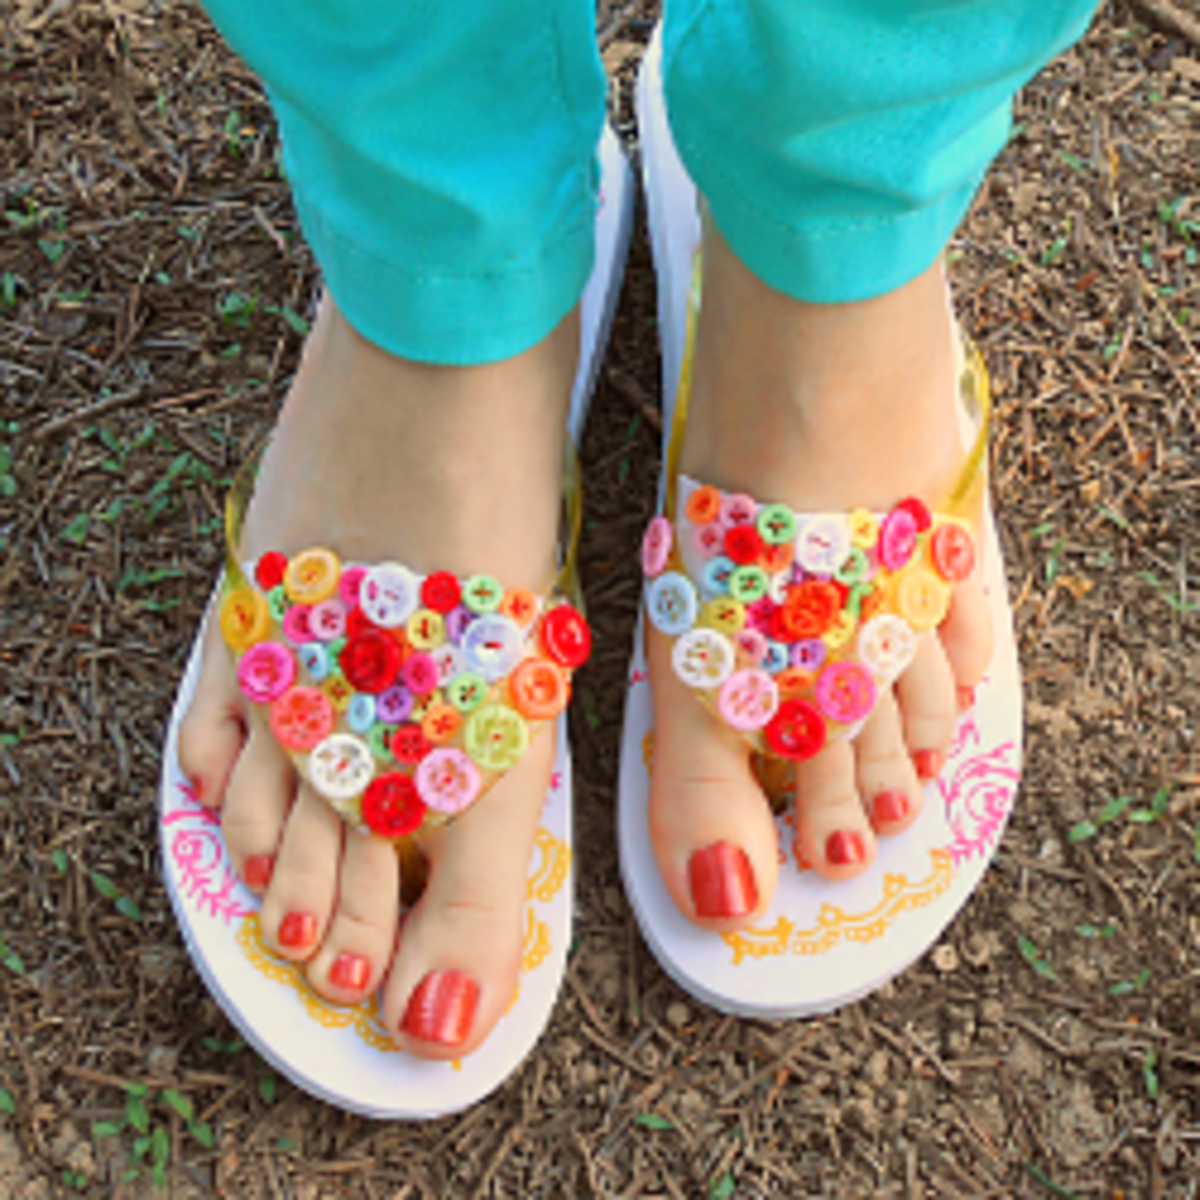
Of course if you think you might try this project shown above, you should probably own a glue gun. (Click here to find a top rated glue gun on Amazon!glue gun)

However, one does not have to use a glue gun to decorate your flips if you want to use beads or rhinestones. One blogger suggested using E6000 Adhesivedecorate flipflops with beads and rhinestones.  I have read many good reviews for this product on Squidoo and on the Amazon website. I highly recommend that you research products before you buy them.

Need more ideas for creating summertime sandals with lots of bling? Then I would like to send you to Make Your Own Bedazzled Flip Flops on Hubpages.com. There you find will several suggestions (ie. buy your flip flops at Old Navy) and tips for adding your own style to your flip-floppy summer shoes.

Another blogger alerted me to a product I had never heard of before, Beacon Flip Flop Glueflip flop glue.


One last Tip: Prepare the rubber straps on your purchased flip-flops by cleaning them with rubbing alcohol or vinegar to remove any reside that might inhibit the glue from sticking to the shoe. It also helps to scuff up the surface of the strap with an emery board, too.

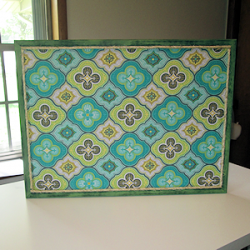
Now that you have all of these wonderful summer sandals, you might need to store them somewhere! I saw an "green" idea to recycle old wire clothes hangers that just might help you out! Click "Shoe Hanger"  to be taken directly to a photo of that shoe hanger. Lensmaster lbrummer found  lots of ways to upcycle clothes hangers from all over the web.

Now, you can begin summertime with your best-looking foot forward.


(flip flops with ribbon photo credit: Lyn Lomasi via photopin cc)


Note: The author may receive a commission from purchases made using links found in this article. “As an Amazon Associate, Ebay (EPN) and/or Esty (Awin) Affiliate, I (we) earn from qualifying purchases.”


Thursday, May 29, 2014

Photography Field Trip

This week was the end of my photography class.  I will have to say that I learned a lot and feel that I have lots of new information to enhance my skills as a photographer.  Our last two sessions included a field trip to the Missouri Botanical Garden and then a classroom session to go over the photos that we took during the trip.  I thought I would take this week's blog post to share with you the photos that I took on the trip and a few tips I learned along the way.
purple iris photo by mbgphoto
The Irises were at their peak when we visited the garden so I was able to get several nice shots. This photo of the purple iris was taken with my 50mm lens using aperture priority at F1.8.  This lens was new to me so I used it the entire trip to get myself comfortable with the lens.  You will note how when I focused on the main iris it put it in focus and gave a soft focus to the rest of the photo. I used the same lens and aperture for the daisies that you see in the photo below.   In this case I was closer to the daisies in the foreground so I got an even greater blur in the background.
yellow daisies photo by mbgphoto

I had a bad habit of using my screen to look at when I took photos instead of the viewfinder.  I worked hard at trying to break this habit during this field trip and was successful for the most part.  My instructor encouraged the use of the viewfinder in taking photos and after using it I could really see the difference.

The other tip that I learned from the instructor during the trip was to turn off my automatic ISO setting.  I am not sure how I ever got in the habit of leaving it on but it was interfering with some of my close up shots and I found my problems were taken care of when I used the manual settings for the ISO.  I kept it at 100 for most of this trip.
flower photo by mbgphoto
Here is another flower using the F1.8 setting.  In addition to photographing flowers we also photographed a waterfall using different aperture settings in aperture priority.  What this does is changes the speed the camera is using and gives you a completely different look to the water.  In this photo I used the F4 setting and you see the more distinct water in the photo.
waterfall photo by mbgphoto
For getting the smooth flowing look in the water I changed the aperture to f22 which slowed down the speed of the camera.  The result is seen in the photo below.
waterfall photo by mbgphoto
I hope you have enjoyed my series of posts on my Nature Photography class.


Note: The author may receive a commission from purchases made using links found in this article. “As an Amazon Associate, Ebay (EPN) and/or Esty (Awin) Affiliate, I (we) earn from qualifying purchases.”


Monday, May 26, 2014

5 Star Book Review: Wild Horse Scientists

Last weekend I made a day trip to Assateague Island, Maryland.  I met my oldest son and his girlfriend there for the day.  I have been there many, many times and it is one of my favorite places to be.

Luckily, during this trip, I was a bit ahead of schedule and I stopped at the “new” Visitors Center on the way.  I say new because it was built a few years ago but I just never bothered to stop. After all, I had visited the old Visitor’s Center, what more could I possibly be missing? But I stopped anyway and found a gem hiding inside.

Wild Horse Scientists  is a wonderful little book for children. However, I am quite certain that every adult who is a wild horse lover, barrier island lover, or who is interested in the process of wildlife preservation will love this book as much as I do.  This book gives an excellent explanation of how birth control is being used successfully on the ponies of Assateague Island.  I definitely would give this book a 5 out of 5 stars rating.

If you would like to see a list of more books related to that area, have a peek at my reading list.  I welcome you to help me read or review these books. Some of the books I have read and the remainder are on my to-read list. I’d love to know your thoughts about any or all of them. Angelatvs wrote a wonderful review of Assateague Island of the Wild Ponies  It was fantastic reading what she had to say about both the Island and the book I have on my to-read list.

During the times that I am not able to physically travel to the Island, I go there through the wonderful stories and photographs in books. And don’t forget that I’m your Mid-Atlantic States Travel Contributor onSquidoo.  If you want to travel this area from the comfort of your favorite chair, please come along with me.

Image Credit: Photograph ©Dawn Rae – All Rights Reserved


Note: The author may receive a commission from purchases made using links found in this article. “As an Amazon Associate, Ebay (EPN) and/or Esty (Awin) Affiliate, I (we) earn from qualifying purchases.”


Sunday, May 25, 2014

Kick off the Summer with a Party!

waterfall in historic falls park in pendleton indiana
Historic Falls Park, Pendleton, IN
I do love the summer! Here in the Midwest, we might not have a gorgeous ocean and beach but we do have our own great summer sights. The flowers, the creek falls, the kelly green grass, the blue sky, the vitamin D filled sunshine and 3 fun holidays to boot wrap up our summer season!

Memorial Day starts everything in late May, Independence Day is midway and the end of summer is signified by Labor Day every year.

Memorial Day/Weekend Party or Get-Together

Since we are smack in the middle of Memorial Weekend today, I thought I would take you through our celebration last year (this year's is tomorrow.)  Each year, my family gets together for and on Memorial Day. It's our "Kick Off to Summer Party" and one of my favorites.

I know I have mentioned it before but here I go again... I am a military brat -- specifically the U.S. Navy. My dad was career Navy. My parents actually met when both were stationed at the Naval Air Station in Pensacola, Florida. Both my grandfathers were U.S. Navy veterans as is my only brother.

Suffice is to say, we are a patriotic bunch! So, because the Memorial, Independence and Labor Day holidays are patriotic in nature, that's the theme we use for all three. It's a lot of fun and we leave some of the decor up all summer -- red, white and blue is very appropriate for a summer season boasting 3 patriotic holidays.

Stars & Stripes -- Red, White & Blue

The color combination is timeless. The primary color scheme is used by Countries for their flag, sports teams and schools for their colors, in home decorating (especially in the cottage, vintage and nautical decor themes) and so much more.

Last year, I decided to use a "vintage feel" with the patriotic theme and loved the way it turned out. I wrote about it here: My Patriotic Buffet Table for our Summer party. Burlap, baskets, bandanas and mini flags come together to create a festive, fun and whimsical buffet table for our party. What do you think?
buffet table set up outside for a summer party
My Patriotic Summer Buffet Party


Summer Parties

The summer is filled with parties, occasions and get togethers in addition to the holidays mentioned above. Do you have a traditional get-together each summer or a special occasion you'll celebrate this year? Could be anything, like:

  • Graduation Party
  • Neighborhood Block Party
  • Birthday
  • Wedding
  • Baby or Bridal Shower
  • Class Reunion
  • Family Reunion
  • Annual Luau Party 
  • Summer Picnics

Think about sharing your ideas and experiences with others that want to hold a successful event. Do you have a favorite pot luck dish you always make or take? Are you throwing a shindig to celebrate your daughter's graduation or your son's wedding rehearsal dinner? Are you the "Picnic King/Queen"?

Being the Party Planning Contributor on Squidoo, I can point you to a great outlet for sharing your experiences with others here on the world wide web. Best of all -- Squidoo is FREE!!! You might even earn a little you can put towards your next big party!

Let me know (in the comments) if you write an article about a party so I can help you promote it! Most of all, have a wonderful summertime!


Note: The author may receive a commission from purchases made using links found in this article. “As an Amazon Associate, Ebay (EPN) and/or Esty (Awin) Affiliate, I (we) earn from qualifying purchases.”


Saturday, May 24, 2014

Little Artists

coloring or painting on paper towels
As the Little Crafty Kids Contributor for Squidoo, I don't just look at craft projects for the under-fives, I look at art ideas, too, because to me, the two subjects are inextricably linked! Many crafts involve at least some painting, drawing or artistic input, and all the creativity that goes into them can only serve to enhance the art that kids go on to produce.

I'm writing about art for preschoolers this week because my daughter has done very little crafting, but a heck of a lot of drawing. She is obsessed at the moment, and is really exploring color, too. So much so, that even food cannot get in the way of this current passion - she doodles away on the paper towel that I put under her breakfast, lunch and dinner plates, so I am currently the proud owner of numerous sheets of beautifully decorated kitchen roll, including numerous rainbow designs like the one on the left, which I am working out how to effectively display in some kind of scrap book!

Engaging with children and their art is a wonderful way to connect and encourage, I feel. Don't simply say, "Oh, that's nice," and definitely never ask, "What's that?" - instead, talk about the shapes and colors and styles used. Comment on what you like about the picture, or why they decided to put that particular object there, or whether there is a story behind it. Today, I was telling my little girl how much I liked the way she had drawn the mountains in the background, and the pattern she had colored on the girl's dress. This led to her explaining more about what the picture meant to her and why she had drawn it.

They may only be young at this age, but don't let that put you off exploring the art world! I have been reading lots recently about introducing different artists to preschoolers, and I heartily agree with this idea.
childs artwork
I recently showed my daughter (4) some of my high school artwork, and she was particularly captivated by this pointillism painting I had done (right). So I explained a little bit about pointillism, impressionism, and Monet, and she expressed interest in having a go herself. As serendipity would have it, one of the books we had taken out the library, Katie and the Waterlily Pond, was about a little girl exploring an art gallery, and she magically hopped in and out of, yes, you guessed it, various Monet paintings whilst trying to paint her own impressionist painting! My little girl was now definitely hooked, and we're in the midst of starting an impressionist project as I write!

The beauty of art is that you can make it as simple or complex as you like - great for deconstructing artists and interpreting them at home for age appropriate activities! 

One of the great things about art for kids is that, like crafts for kids, there is plenty of scope for recycling things! I'm slightly obsessed with melting things at the moment, especially with all the terrific ideas for melted crayon art and melted bead crafts. These projects do of course need adult supervision, but under-fives will just love the things you can do - such as seeing what amazing patterns and colors you can make on canvas with this Melted Crayon Art project by neeznoodle.

modeling with clay and decorating with twigs, stems & leaves
Another wonderful form of art for children is modelling with clay. We were using it out in the forest this week, making marvelous mini beasts at forest school (here's Pud's lovely ladybug on the left, decorated with twig legs, leaf wings and catkin spots!) 

As this was a fun activity outdoors, the bug is left unbaked. For ideas at home, don't worry if you don't have access to a kiln for proper clay. There are lots of air drying clays available, as well as non-toxic polymer clays such as Fimo, that you can bake in the oven. You can also make salt dough or your own homemade clay too. 

So, are you inspired? What masterpiece of artwork can you create with your children or grandchildren? If you have enjoyed some great art projects with your under-fives, please and share them !

As always, happy crafting.

(c) All photos are copyright of the author


Note: The author may receive a commission from purchases made using links found in this article. “As an Amazon Associate, Ebay (EPN) and/or Esty (Awin) Affiliate, I (we) earn from qualifying purchases.”


Friday, May 23, 2014

A Knight in Shining Armor ~ A Romantic Book Review

 A Knight in Shining ArmorFinding a good book to read is often not easy and I rely heavily on reviews written by other unbiased readers.

I am always reading a book.  As soon as I finish one book, I start another.  Some books, like The Hunger Games Trilogy are so captivating that once I start reading, I simply cannot put them down until I have finished reading the entire book.  Most books I read over the course of a few days an hour or so at a time.  

My reading time is my unwinding time.  A time were I allow my mind to shift from reality to fiction and to get lost, for just a little while, in a made up world.  I prefer romance novels, or at least a book that has a strong romantic story woven into it like the Hunger Games.


A Knight in Shining Armor


 A Knight in Shining Armor
(The Montgomery/Taggert Family Book 15)
Check Price
Upon-Request captured my interest in her review of A Knight in Shining Armor with her very first words, "A love that is timeless...".  For a truly forever hopeless romantic, I honestly don't know a more appealing phrase.

The book was originally published in 1989, but apparently it's appeal is timeless.   


Upon-Request explains that even though she read it decades ago, she still remembers it fondly, but you will want to read her review for yourself! 


An Invitation to Share Your Review


I would love to read more romantic book reviews and I would certainly be thrilled to be able to share them here with our readers of Review This! 

If you have written a review of a romantic book that you would like to share,  simply leave us the link in the guestbook.


Note: The author may receive a commission from purchases made using links found in this article. “As an Amazon Associate, Ebay (EPN) and/or Esty (Awin) Affiliate, I (we) earn from qualifying purchases.”


Thursday, May 22, 2014

Macro/Close Up Photography


close up photo of a yellow daisy photo by mbgphoto


Taking photos close up can really be a lot of fun.  You see the world in a whole new light.  I am always amazed by the details in flowers when I get close up.  In the last session of our nature photography class the instructor talked about equipment for macro and close up photography.  If this would be my primary focus for photos I would want to buy a macro lens but they are rather costly and my primary focus is lighthouses and landscapes.  The instructor suggested several alternatives.  The one that seemed to fit my needs was to buy a 50mm 1.4 or 1.8 lens and then to get extension tubes for even closer shots.

The photo above was taken with the 50 mm lens at at 1.8 aperture. I have a bit to learn about getting the focus in the right spots, but overall I am very pleased with my first results.  The 1.8 aperture allows a lot of light into the camera and I am able to focus at a very close range.  The daisy above was taken with this camera.  You will not how just the very center of the flower is completely in focus.  The primrose below is another of my first tries with the new lens.
close up photo of a primrose photo by mbgphoto


Close up and Macro photography can be a lot of fun.  I hope you have enjoyed the tips on this page.  Happy Photographing!!

Stop by my page for the latest tips on Field Photography http://www.squidoo.com/field-photography-tips


Note: The author may receive a commission from purchases made using links found in this article. “As an Amazon Associate, Ebay (EPN) and/or Esty (Awin) Affiliate, I (we) earn from qualifying purchases.”


Wednesday, May 21, 2014

Recipe Recyclers: Keeping Food Fun and Healthy


biscuits on a cooling rack
The man in my life is a true Southern Gentleman who loves his granny's buttermilk biscuits. I'm a latte loving, health nut kinda Seattle girl. When my guy insisted on Biscuits Like Granny Used to Make, my whole grain spine shuddered at the thought of all that butter.

I wanted to please my man but I didn't want to clog our arteries. It was time to put on my apron for a session of Recipe Recycling. After a few experiments, my Old Fashioned Southern Buttermilk Biscuits Done Seattle Style successfully fooled my Southern Gentleman's taste buds.

Some people spend hours flipping through cookbooks looking for the perfect recipe. Others are content to follow a single cookbook and only venture into the suggested variations. Then, there are the Recipe Recyclers, like me, who are always testing new taste combinations, questing for new variations on an old theme, searching for the perfect taste treat.

When I need a basic recipe, I turn to my Better Homes and Gardens Cookbook. It contains over a thousand recipes and is my best source of cooking inspiration. Recipes are just guidelines and ingredients can be changed to satisfy taste buds, to meet dietary restrictions or to substitute healthier ingredients. Sometimes these recipe experiments turn into a new family favorite. Sometimes a flopped dessert can be salvaged.

A few of my friends are also Recipe Recyclers and put an international twist on the recycled and personalized recipe. I'm always surprised at what new culinary delights can be found in the Cyber Kitchen.

Marathon Running comes from Croatia and she specializes in dainty morsels that pack a powerful taste. Along with some great recipes, she uses step-by-step instructions and photographs to make sure your recipes turn out exactly right.

Smine27 lives in Japan and has family in Hawaii. He is always looking for great foods and ways to reduce the sugar and gluten from his diet. He knows that he needs to eat right to maintain a happy body weight. Yes, diet food can taste good. Try these delicacies:
Recipe Recyclers aren't just about creating new and improved food sensations. Recipe Recyclers are also on the lookout ways to reduce food waste by reusing leftovers. My neighbor to the north of me, Ruthi, has been known to make a Not Quite Paella Surprise when she has leftover vegetables in the refrigerator. Around our house, those wilted vegetables are turned into a Chicken Stew.

I hope you enjoyed our gastronomic journey into the world of the Recipe Recyclers. Do you try your hand at recipe recycling? I'd love to hear about your food experiments. Leave a note in the Comments section below and, if you've written a story about your recycled recipe, share the link to your recipe.

Until next time, be safe, buy real food and eat well!

Coletta


Posted by Coletta Teske
Coletta Teske

About This Contributor

Coletta Teske writes reviews on books, business management, writing, crafting, cooking, and gardening. She is also an avid recycler and shares her tips on recycling. She delights in upcycling an old object, recycling or transforming discarded items into a new treasure.


Note: The author may receive a commission from purchases made using links found in this article. “As an Amazon Associate, Ebay (EPN) and/or Esty (Awin) Affiliate, I (we) earn from qualifying purchases.”


Tuesday, May 20, 2014

A Penny for Your Thoughts


hammer and nails and pennies
Will Work for Pennies

My DIY reality this week is all about pennies.  Not the kind I used to purchase penny candy when I was a child, or the bright copper ones I put in my penny loafers forty years ago.   My pennies these days are 12d’s, 8d’s, 6d’s, and everything in between.

As I pounded in several hundred nails over the past few days, I had lots of time to think about such things as the medieval system for classifying nails.  This is my brain hot-dipped, galvanized, common, shanked, ringed, sinkered, and bright box nailed.

So why are they called 12-penny nails… those three and a half inch nails that are giving me blisters and hammer elbow?  It goes back to how many pennies were needed to buy 100 nails back in the 1500s.  It turns out that the letter “d” after the number is an abbreviation for the most commonly used Roman coin (the denarius).  The number refers to the length of nail.

If I’m doing the math correctly, which is never a given, twelve pennies bought 100 nails back in the day.  I paid 445 pennies for 96 ring-shanked nails this past weekend.  Kind of made me long for the days of yore.  Can you picture it?  Me in a toga, eating figs, tapping in twelve denarii worth of nails? 

In the process of building a studio addition onto my mountain cabin, I am learning invaluable lessons that go beyond the importance of purchasing and using the right nails.  It seems each stage of the building process needs a different kind of fastener.  Early in the process I was tempted to use screws to make parts of the job easier and faster to complete.  It turns out that would have been a big mistake.  Screws don’t have the sheer strength provided by 12d nails.

Isn’t that true of building a life also?  Finding the strength that matches each phase of the process of becoming?  Just as I used the right kind of anchor hardware in the foundation stage of this do-it-myself project, I seek to live a life anchored in ways that ensure the stability to weather any storm.  

Isn’t it amazing that something we often take for granted, nails and pennies, are essential to building something lasting?  I invite you to join me in creating something worth every single blister.  As Squidoo's Home Renovator Contributor, I'm looking for a few kindred hammer swingers.  Please stop by today.  I'll give you a penny (worth at least $4.45 with inflation) for your thoughts.


Note: The author may receive a commission from purchases made using links found in this article. “As an Amazon Associate, Ebay (EPN) and/or Esty (Awin) Affiliate, I (we) earn from qualifying purchases.”


Monday, May 19, 2014

A Craft Project that eases my fear of Spray On Glue!

I have always been afraid to try aerosol adhesives! Yes, I am a chicken when it comes to paying good money for something that I have no idea how to use -- also, I have heard "glue everywhere!" horror stories from my friends who have tried using such products and I was definitely scared off. Even my own daughter tried using a  good name brand  spray adhesive for a design project when she was in college and told me in precise detail why she would never use a spray glue again. 


spray glue demonstation

(*Always follow manufactures's suggestions on the safe usage of their products! Click 3M: Tips and Techniques to read about how to use a spray on glue.)


Today, however, I am inspired to give spray on glue a try. "Why?" you are asking. Well, I recently read an article that gave me inspiration for a project that would put this sticky product to a good use.

retro style bulletin board made with spray glue


How I Made My Retro-Style Bulletin Board for My Craft Room  written by a Review This! contributor, decoratingforevents, showed me in excellent photographic detail how to create a bulletin board for my own home office. One tip I found especially helpful was to use "re-positionable" spray-on glue. That tip totally made good sense for someone like me who is very often a crafting klutz.


Lensmaster Decoratingforevents also found some very attractive retro-fabrics that took me back to the 50's and 60's. (Who would have ever predicted that the futuristic designs of that bygone era would EVER come back in fashion?) Another reason I like this bulletin board project: the author used a Glue Gun! As as a Glue Gun Slinger  that made me very happy, indeed.

Now, I am off to drool over the fabrics that decoratingforevents found on Amazon to see which one I can use to pull my "office" together with my own retro-style bulletin board. I just might purchase some spray adhesive, too.


Note: The author may receive a commission from purchases made using links found in this article. “As an Amazon Associate, Ebay (EPN) and/or Esty (Awin) Affiliate, I (we) earn from qualifying purchases.”


Sunday, May 18, 2014

Graduation Party Ideas for Your Graduate

graduation cap and diploma
It's May and "graduation season" is just starting. If you have a graduate in the family, you may be in need of graduation party ideas. Luckily, Squidoo can help!

Whether graduating from pre-school, kindergarten, middle school, high school or college, a graduation party is in order. Graduating is a big achievement regardless of the level. Family and friends will love to celebrate with your graduate, so let's get started with some graduation party ideas.

Graduation Time!

This time of year, every time I check my mailbox I get another graduation announcement. Between friends and family, I definitely keep busy during May and June with all the graduations.

At this point, my kids have graduated from everything except college -- and that's coming soon enough. Graduation parties are one of my favorites. It's a time to let the student shine, show accomplishments and revel in the attention for their success.

A few years ago, I noticed there were hardly any lenses about hosting graduation parties. So, I wrote a lens sharing my experiences with the grad parties I have hosted and helped plan. It was and still is a popular reference for parents of graduates.

Today, I started looking around and realized there are a lot more lenses dealing with graduation parties. I decided to visit and maybe get a few new ideas I can pass along to friends and family.

Graduation Party Ideas

Here are a few lenses that should definitely be on your list if you are planning a graduation party.
graduation party memorabilia table
My Daughter's Grad Party Memorabilia Table 

Graduation Centerpieces is an eclectic mix of ideas for table decorations for you party. Everything from very simple to ornate. Lensmaster celebrate has something for everyone.

Another great resource I found was Graduation Party Decorations. Every party needs decorations and lensmaster 3QuartersToday shares some of her ideas. Drawing from her experience hosting parties for her daughter and step-daughter, she has some great grad party decorating ideas.

Lensmaster, DinosaurEgg, has some great suggestions for a graduation cake for the party. In her lens titled, Graduation Cakes -- Hooray!, we find everything from sheet cakes to shaped cakes to candy all appropriate for graduation. 

Check out all that Squidoo has to offer on the subject of graduation parties. Your party will be a resounding success when you use Squidoo for ideas!


Note: The author may receive a commission from purchases made using links found in this article. “As an Amazon Associate, Ebay (EPN) and/or Esty (Awin) Affiliate, I (we) earn from qualifying purchases.”


Saturday, May 17, 2014

Babies Can Craft, Too!

When it comes to crafting with small children, there are always lots of ideas out there for toddlers and preschoolers. But what about the babies? 

Believe it or not, it's never to early to start getting arty with the bubs! Once they are of an age where they can sit unaided and grip things, you can start experimenting with them. Most activities will need to wait until they are between 18 months and 2 years old, but there are some things you can do as early as 8-9 months. 

My 9-month-old son LOVES getting his hands dirty. The gooier and stickier, the better! Unlike my now 4-year-old daughter, who hated getting her hands messy as a babe, my little boy has his hands straight in his breakfast, lunch and tea as soon as he possibly can. As he loathes having his hands and face wiped, I encouraged him to dab his messy fingers onto some kitchen roll (paper towels) and showed him the "finger painting" he had done - which made him giggle! 

baby finger painting
(c) Image copyright of the author

Once he got the idea (rinse and repeat until it clicks with baby that he is the one making marks), I whipped up some homemade edible finger paint (made from squished fruit and veg, mainly!) and let him start having fun on paper. You can do this with edible play-dough and sensory materials like rice, pasta and so on, too! Baby can even try stamping with potato stamps using food-based "ink"! 

If baby doesn't mind having food and edible paint on his or her hands, then hand printing is a lovely craft to do! It makes a beautiful keepsake to enjoy for years to come. All you need to do is cover baby's hands with the paint and help them press down onto the paper. We have done this with all the family, printing the hands inside one another according to size (Daddy's first, then mine on top, then my daughter's, then my son's) to create a lovely "our family" picture for the wall. You could make cards for friends and family, too (which older siblings can get involved in making).

I cover this and many other ideas for older babies in Crafts for 1 Year Olds. If you like the hand print idea, then crafting connoisseur Pastiche has lots more of them in her Hand Print Crafts guide.

If you want to have a go at making homemade paint for baby, then you'll find several recipes in Homemade Paint for Kids  (just make sure you pick the ones that are entirely food-based and edible, so it is safe for baby to put in his mouth). As for play dough and clay, homemade recipes are covered in Recipes for Fun - Kids Play Doughs and Clays by jkvkdailey.

Now go and enjoy nurturing your tiny one's creative spark!


Note: The author may receive a commission from purchases made using links found in this article. “As an Amazon Associate, Ebay (EPN) and/or Esty (Awin) Affiliate, I (we) earn from qualifying purchases.”


Thursday, May 15, 2014

Your Photography Kit

ducks on the water photo by mbgphoto

This is the 4th in a continuing series on a Nature Photography class I am taking.  For week 4 we talked about equipment and what a photographer should have in their kit.  Our instructor showed us much of his equipment and talked about some good options depending on what type of photography you take.

My primary camera is a Sony DSLR A57.  The list below is what I have in my kit.  The starred items are ones that I'm hoping to get in the future.


  • Lens coverage from 18mm to 300 mm.  I have two zooms to cover this area.  One is a 18-70 and the second is a 75-300 zoom lens.
  • *  I have just ordered a 50mm 1.8 lens
  • * An off camera flash is on my wish list.
  • Extension tubes
  • Polarizing Filter
  • Tripod
  • *Cokin gradient Neutral Denisity filter is on my wish list.
  • Monopod
  • Pop out Reflector set
  • Cable  Release
  • Extra Battery
  • Extra memory cards
I use a lowepro sling backpack type bag to carry my camera equipment.  It is lightweight and carries everything I need when on a photograpy outing.
fountain photo by mbgphoto

The photos on this page are ones I took for our assignment this past week. We were to go to a remote place and carry with us the equipment we would need to take our photos. I used my 75-300 mm zoom telephoto lens.  Since it was evening and the sun was setting, I used my tripod and my cable release to get a clear photo.  
blue irises photo by mbgphoto


Note: The author may receive a commission from purchases made using links found in this article. “As an Amazon Associate, Ebay (EPN) and/or Esty (Awin) Affiliate, I (we) earn from qualifying purchases.”


Tuesday, May 13, 2014

Mod Podge can make miracles happen!

craft idea modpodge
A Dictionary Lamp--just needs some trim!
A few years ago I got the "make over" bug and decided to re-do an old lampshade (that is a link to my DIY page, btw).  I used what I had on hand and you can see the result in the photo to the left. Yes, I did rip up an old dictionary! Do not hate me, because the book was already headed to the recycle bin. Those of you who know me will confirm that I never destroy a book that is still in good shape. I then decoupaged the pages from that torn up book onto the lamp using watered down craft glue. This recycled lampshade project turned out pretty good. 


While I was the The Glue Gun Slinger Contributor on the now defunct website, Squidoo, I  discovered that I could have used ModPodge (by Plaid) for the project instead of that diluted glue! Using a glue + water mixture was successful for me at the time, however. As it turns out, lots of people use a homemade version of ModPodge just as I did on my lampshade project. Tracy Boyer wrote and article and shared a recipe for this economical adhesive mixture for those of us who don't want to guess at proportions.  The Tracy suggests 2 parts glue to 1 part water.

Sometimes using a name brand commercial product will produce consistently good looking results. I have to admit that my own decoupage medium did not look as good after it dried as some other projects that I have seen at craft fairs and such. 


Now, I need to haul out the glue gun and put some trim on that dictionary themed lampshade. Who knows, I just might give it a fresh coat of ModPodge! Stay tuned for the results!


Note: The author may receive a commission from purchases made using links found in this article. “As an Amazon Associate, Ebay (EPN) and/or Esty (Awin) Affiliate, I (we) earn from qualifying purchases.”


Monday, May 12, 2014

A Rolling Stone Occasionally Stops to Gather Moss and Other Vegetation

As much as I would like to explore each nook and cranny of the Mid-Atlantic region during my every waking moment, there are times that I need to remain home and get things done. I miss the adventures when I don't wander but the silver lining of staying close to home is that I get to work on some of my other hobbies.

Tomatoes grown indoors after frost
In addition to hiking, camping, and sight-seeing, I dream of living a sustainable and small lifestyle somewhere off-grid.  Currently, that dream feels as though it will always remain a distant and hazy vision. A fantasy.  Then when I spend time “gardening”,  it suddenly feels as though my dream of taking the middleman out of feeding myself is closer to being true than I had thought.

For the past two weekends, I have spent a bit of time preparing my balcony for this season’s vegetable garden.   I moved here in the heat of the summer last year but even so, I started a balcony vegetable garden almost immediately.  

Cold weather came quickly and I moved my tomatoes indoors. Luckily, I had great success with the inexpensive kitchen garden lighting I chose. 

I am so excited that another growing season has arrived and I am working hard to make more space for vegetables by going vertical.

If you are interested in gardening (either in the yard or in containers) I strongly recommend that you search out our gardening experts on Squidoo. I am only listing four links to Squidoo gardening experts here.  However, there are many, many more garden gurus in our writing community.  

  • AnnaMKB has excellent tips about balcony gardening. 
  • JaguarJulie is the backyard garden contributor.    
  • A list of 5 gardening lenses of various Squidoo contributors 
  • A fantastic garden planter idea from angelatvs 

I hope you enjoyed my brief break from wandering across the mid-Atlantic.  I would love to hear from you, how does your garden grow?


Image Credit: Images are mine ©Dawn Rae – All Rights Reserved (Click on photo for larger view)


Note: The author may receive a commission from purchases made using links found in this article. “As an Amazon Associate, Ebay (EPN) and/or Esty (Awin) Affiliate, I (we) earn from qualifying purchases.”


Sunday, May 11, 2014

Party Ideas for Mother's Day

Happy Mothers Day heart banner
First of all:  Happy Mother's Day to all the moms out there!

Now, I realize that today is actually Mother's Day so these ideas for a Mother's Day shindig will probably go on the back burner until next year. Still, it'll give you plenty of time to come up with something to blow mom's socks off with next year!


A Party? For Mother's Day?

Sure! A party is really just two or more people celebrating something -- a holiday, milestone, achievement, success, etc... Mother's Day certain falls in this realm. Mother's are forever planning parties and events for their children, why not plan something in her honor?

I ran over to Squidoo to see what suggestions were available. As always, I was not disappointed. Squidoo really is a fount of information. If you search for "Mother's Day", you will be rewarded with ideas for gifts, crafts, trivia, cards, poems, songs, gift baskets and, of course, food.

Then, I searched for Mother's Day Party and was pointed towards some really cool ideas for celebrating this wonderful person in your life.


A Mother's Day Tea Party

WriterJanis tells us, "This is a chance to get dressed up and give Mom an elegant celebration"  in her lens titled How to Throw a Mother's Day Tea Party. She gives us ideas for invitations, decorations, which teas to serve, food and dessert ideas as well as music and even games.

This lens is truly a one stop shop for inspiration for your Mother's Day celebration. Bookmark it for future reference!


Mother's Day Picnic

A cool and different idea for celebrating mom's day is a picnic. It's May, warmer and people are itching to get outside. The Perfect Mother's Day Picnic by vermontmom has a host of ideas to choose from, even getting the kids involved in the preparations.

As she says in her intro, you'll find some tips and ideas to make your picnic "almost as special as your mom." What a sweet sentiment. 

Do Something for Mom

Moms are great and we should celebrate them more than once a year but doing it up nicely on Mother's Day can't hurt. Take some time to research and plan a wonderful party or get-together for your mom. She'll always remember...

Wishing everyone and their mother a wonderful Mother's Day, 2014!


Note: The author may receive a commission from purchases made using links found in this article. “As an Amazon Associate, Ebay (EPN) and/or Esty (Awin) Affiliate, I (we) earn from qualifying purchases.”


Saturday, May 10, 2014

Crafting is for Life, Not Just the Holidays!

I love how crafts can seep into every area of life. My daughter is an autonomous learner, which means an unstructured home education that is child-led and follows subjects that she is interested in. Right now we are learning about the body, and building a skeleton. This term at forest school is all about minibeasts, and there is a new show on the CBeebies channel all about minibeasts too, so we are learning lots about insects! My daughter has taken a great interest in musical instruments recently, and also wants to learn about the vikings. And, as I mentioned last week, we do weekly crafts and activities based around a picture book of choice. All of these topics can include crafts, so not only are we getting creative and arty, we are learning lots, too!

big rainbow painted onto a large sheet of paper

 At the start of the week, we went on a lovely morning out in the forest for the May Bank Holiday. An author was visiting with her book, Teddy Edward's Rainbow Walk, and along with the storytelling and songs was a "rainbow walk" to find lots of different colored "nature treasures" which the children then glued onto a beautiful big rainbow painted onto a large sheet of paper (above). The collage created from the many shades of leaves, twigs, flowers and pine cones was a sight to behold!


diy trampoline
Yesterday, we made a tambourine (left) and a kazoo. Both were simple to make and used mostly everyday materials, but the process was super fun and produced great results! Whether crafting from nature, junk or actual craft materials, there are so many DIY instruments you can make. My latest lens on how to Make your Own Tambourine shows you just how easy it can be!

Our skeleton crafts have encompassed both literacy (we recently read and had fun with the book Funnybones), art (chalk drawings, glow in the dark paint, moving paper skeletons), puzzles (printing out and piecing back together skeleton bones) and science - we're building a skeleton week by week with a cool partworks series, which comes with a magazine explaining all about how the body works, and to demonstrate how strong our bones are, despite being hollow, we did a fantastic craft where we stuck about 30 drinking straws inside cardstock and rolled them up to make a bone, before placing things on top to see how strong the construction was!


skeleton made out of q-tips
We also made cotton bud skeletons (right) and pasta skeletons, which LeanneChesser explains how to make in her Spooky Skeleton Crafts, along with toilet roll skeletons, skeleton mobiles and more!  

Minibeasts have also brought out the crafters in us - insect nature collages, making up mud minibeasts at forest school, and even creating our own ant farm out of a plastic container. I can't wait to have a go at making the super cute pom pom peg butterflies that Spelloutloud shows us how to make as part of their Butterfly Unit for Young Children.

You don't have to be a home educator to nurture your child with creativity and learning through crafts - taking time to do this one evening a week or at the weekend will create wonderful memories and teach them so much.


Note: The author may receive a commission from purchases made using links found in this article. “As an Amazon Associate, Ebay (EPN) and/or Esty (Awin) Affiliate, I (we) earn from qualifying purchases.”


Friday, May 9, 2014

Pride and Prejudice

pride and prejudice starring colin firthThere is one movie and book that stands out in our hearts as an all time favorite for most forever hopeless romantics.  Pride and Prejudice is not only a classic in literature, but it is also a work of art in the movie industry.  

It is truly my own personal all time favorite.  Perhaps, largely owing to the fact that my daughter and I spent countless hours watching the BBC version of Pride and Prejudice throughout her high school years.   Any rainy weekend or holiday break was all the reason we needed to break out the dvds.

As soon as the new version starring Keira Knightley was released in the theaters, we were in attendance for it's debut.  We both now own a copy of that dvd as well. 

Ironically, we each have a different movie version of Pride and Prejudice that we prefer.


PRIDE & PREJUDICE DVD'S REVIEWED

I have personally seen 3 of the 4 versions available and I do have my own preference.   Obviously, the story-line is the same, but the actors do play a major part in personal choice, as well as the depth of detail.  I tend to always prefer the movie that most closely aligns with the original book, mainly because I usually watch the movie because I first loved the book.  

I find deviations distracting even when I do appreciate some things simply don't come across as well on the screen.  I completely understand that screenwriters and directors take liberties to make a more entertaining movie.  

I would love to hear your opinions.  Please leave your comments and tell us which version you prefer.  

However, I will warn you in advance, her reviews will send you running to your dvd players and searching for your own copy, or copies, of Pride & Prejudice.  

I look forward to hearing your thoughts!


pride and prejudice comparison of versions


Note: The author may receive a commission from purchases made using links found in this article. “As an Amazon Associate, Ebay (EPN) and/or Esty (Awin) Affiliate, I (we) earn from qualifying purchases.”


Thursday, May 8, 2014

Field Photography and Close Ups

yellow flower photo by mbgphoto
This is the third post in my series on the Nature Photography Class I am taking.  Each week we have a homework assignment and the assignment for this past week was to take an artistic photo of a flower.  The photo above is the one I submitted.  It is the backside of a Gerbera daisy.  In order to take the photo I made my own background by draping a black velvet skirt over a chair and sitting the potted plant on the chair.  I used my tripod and zoomed in close to capture this photo.  Here is the photo of the front of that same flower.  The instructor said that although the front flower was a good one he enjoyed the photo of the back since it was a side people usually don't see.  He also said it was good that I did not center the back flower photo.  It gives it more interest.
pink flower photo by mbgphoto

Field Photography

In the class we talked a bit about field photography with an emphasis on what to bring when you go into the field to photograph.  The main point that I got from this was that you should think careful about what you want to photograph and not try to bring all your gear but rather just what will be needed.  Here are some considerations and items to pack in your bag to overcome them.

  • Wet Grass/Mud--carry a folded up heavy duty trash bag to kneel or sit on.
  • Wind- consider carrying an umbrella to use to block the wind
  • Controlling light- reflectors in various colors-black,white, gold, silver
  • Transporting gear- pick a bag that is lightweight and fits what you are doing....you wouldn't want a heavy bag for a longer hike

Macro  Photography

We also discussed macro and closeup photography in the class.  The instructor said the difference is that macro photography would be taking a photo  at 1/2 life size or greater.  Less than that it would be close up photography.  He said most macro settings on cameras are really close up photography.  He talked about several options for taking macro photos.
  • Macro Lenses--these are great for getting small details.  The lens come in a variety of size and the instructor said if you were to get just one he would suggest something in the 70-80 mm range.  Macro lenses are a bit on the expensive size so you may want to consider the next less expensive option.
  • Extension tubes--these tubes help you to get macro photos without the expense of the macro lens.  They can be purchased usually in sets of 3 and can be used in combination with any lens...zoom or otherwise.
  • Diopter lenses- these lenses will magnify and help in macro photography.  They DO NOT work well with zoom lenses.
  • Focus Rails--this is a great tool that can be attached to your tripod to move the camera back and forth when you are focusing.  Much easier than trying to move tripod to focus.


Note: The author may receive a commission from purchases made using links found in this article. “As an Amazon Associate, Ebay (EPN) and/or Esty (Awin) Affiliate, I (we) earn from qualifying purchases.”


Most Recent Reviews on Review This Reviews


Search for Reviews by Subject, Author or Title

The Review This Reviews Contributors


SylvestermouseSylvestermouseDawn Rae BDawn Rae BMbgPhotoMbgPhotoBrite-IdeasBrite-IdeasWednesday ElfWednesday ElfOlivia MorrisOlivia MorrisTreasures by BrendaTreasures by BrendaThe Savvy AgeThe Savvy AgeMargaret SchindelMargaret SchindelRaintree AnnieRaintree AnnieLou16Lou16Sam MonacoSam MonacoTracey BoyerTracey BoyerRenaissance WomanRenaissance WomanBarbRadBarbRadBev OwensBev OwensBuckHawkBuckHawkDecorating for EventsDecorating for EventsHeather426Heather426Coletta TeskeColetta TeskeMissMerFaeryMissMerFaeryMickie_GMickie_G


Review This Reviews is Dedicated to the Memory of Our Beloved Friend and Fellow Contributor

Susan DeppnerSusan Deppner

We may be apart, but
You Are Not Forgotten


“As an Amazon Associate, Ebay (EPN) and or Etsy (Awin) Affiliate, I (we) earn from purchases.” Disclosure Statement

X