Showing posts with label floral photography. Show all posts

Thursday, May 11, 2023

Review of Spring Flowers 2023

Photo of Daffodils in early Spring

 I love photography and, in the springtime, flowers make particularly great subjects.  Each year I have been trying to post some of my favorite flowers from that year.  In this post I will highlight some of my favorites from 2023.  The photo above is of some daffodils in one of our city parks.  It was taken in early March when they were just starting to bloom and since it was a rather cloudy morning the blossoms were "bowing down" waiting to be warmed by the sun.

A Few Tips for Photographing Spring Flowers

  • Cloudy days are great for showing off the colors in the flowers.
Bright Yellow Daffodils


  • Right after a rainstorm you can get some great photos including raindrops on the flowers.
  • Be sure to get some closeups and some wider shots of a grouping of flowers.
A group of Primrose Plants

Closeup photo of a Primrose


  • Look for unusual angles.
  • Set your aperture to blur out the backgrounds.
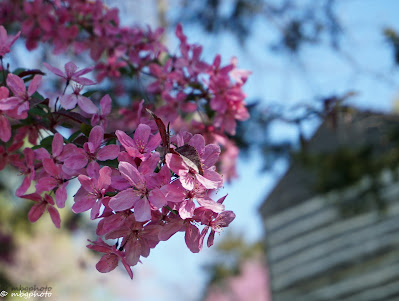
    Bright blooms on Spring Bush

  • Don't forget to photograph the beautiful blossoms in trees as you see in the photo above and the one below.
Bright Pink Blossoms on Bush

  • I like taking photos of the buds of a flower and then of the fully opened bloom.
    Early spring flower buds

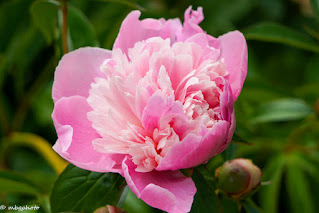
    Pink flower Just Opening

Flowers around my Neighborhood

The great part about spring flowers for me is that I don't even have to travel far.  I can find lots of spring blooms in my own yard or on my neighborhood walks.
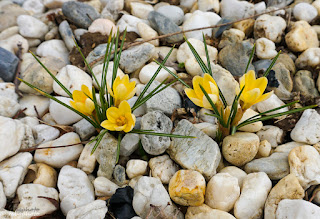
Yellow crocus Popping out of Ground

Pale yellow Daffodils

Hyacinths in Early Spring

Dark Purple Iris

Enjoy the Beauty of Springtime!!


Note: The author may receive a commission from purchases made using links found in this article. “As an Amazon Associate, Ebay (EPN) and/or Esty (Awin) Affiliate, I (we) earn from qualifying purchases.”


Thursday, May 23, 2019

Creative Photography- Combining Techniques

pansies through lensball photo by mbgphoto
In this post I will review two techniques I have talked about in previous posts and give tips on how to combine them to create some fun and creative photographs.

Lensball

A lensball is a fun way to break away from the normal photos and get a bit creative. Here is a photo I took of a friend photographing the St. Louis Arch,  I took his photo through a lens ball that was sitting on a tripod next to him.
photographer through lensball photo by mbgphoto
On this post Crystal Photography Ball , I show you basic techniques on using a lensball.  These basic techniques are the first steps in creating the combined technique you see in the introductory photo.


Textured Backgrounds

Whenever you want the background to be different from your photo it is quite simple to change backgrounds in Photoshop.  Some backgrounds I make myself and others I get online.  Whichever method you choose, the tips in this post will help you to change your background. Photoshop Texturing Techniques
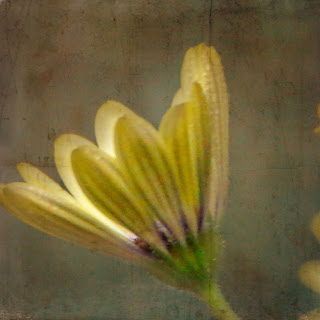
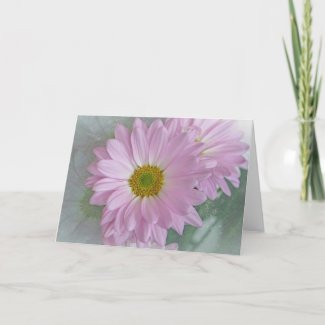
African daisy photo by mbgphoto
The photo above is a shot of an African daisy put on a textured background.

Combining Techniques

Now for the fun and creative part. When you take photos with a lensball first of all the photo is upside down and second the background just never seems to look right. At least mine usually doesn't.  I was contemplating this problem when I thought about my textured background technique I love to use and decided I could apply it to my lensball photos.  Here is a photo I created using these combined techniques and then the steps I followed to create the photo.
dipladenia flower through lensball photo by mbgphoto


  • First I took a photo of my new Dipladenia plant and edited it in Lightroom.  I saved the photo on my desktop.
  • Next I took a photo of the same plant using my crystal photo ball.  I put the photo ball stand on a table right next to the plant and focused my camera on the plant image inside the ball.  I brought the photo into Lightroom and inverted the photo so the image in the ball is right side up.
  • Next I opened the first photo in Photoshop.
  • With the first photo open I clicked on File and Place Embedded in Photoshop.
  • This brought the ball photo into photoshop covering the original photo.  I then used the Lasso tool to outline the ball and I clicked on Create and Mask in the top bar.
  • Now I used the slider to get the effect that I wanted.  I used the transparency and the feather sliders.  I next clicked done.
  • Now I click on the little square mask symbol at the bottom of the layers column and again moved the sliders to get the desired effect.
  • Finally I used Save As and named my file and saved it as a JPeg file.
I do this procedure as second nature now, but it took me a lot of practice before I got any results that I was happy with.  I wish you much fun and success in your quest for Creative Photography.


Note: The author may receive a commission from purchases made using links found in this article. “As an Amazon Associate, Ebay (EPN) and/or Esty (Awin) Affiliate, I (we) earn from qualifying purchases.”


Thursday, June 25, 2015

Review of Garden Photography Tips

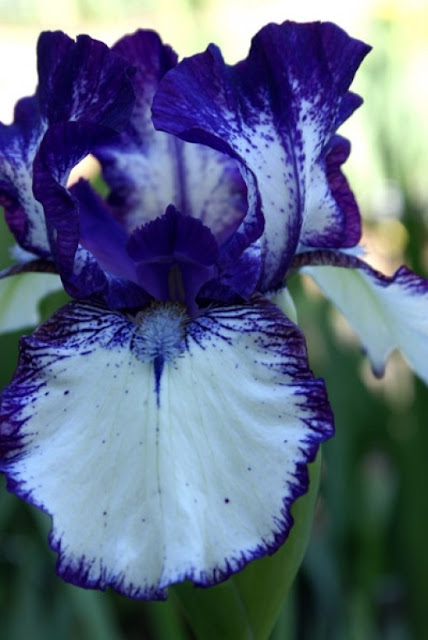
White & Purple Iris photo by mbgphoto
Garden photography can be a very rewarding hobby and one that can be practiced in your own backyard or in many public gardens. I decided that it was time for me hone my skills in photography so I signed up for a 5 week course in Garden Photography. This class is held at Missouri Botanical Garden during the month of May, so in addition to learning some new photography skills, I got to spend a lot of time at one of my favorite public gardens.

 
Missouri Botanical Garden was founded in 1859 and is the nations oldest continuously operating garden. I feel fortunate that this beautiful garden is only 45 minutes from my home.


Garden Photography Class

Class One


The first photography class covered a review of the basics including use of aperture, shutter speed and ISO. The instructor spent a good amount of time talking about composition and gave us lots of tips that he found helpful in his photography. Here are a few of the tips that I found particularly useful.
  • Take the safe shot first and then fine tune.
  • Slow down...take your time (this is one area where I need to listen).
  • Find a subject that you want to photograph and then keep fine tuning to find the best shot.
  • Get eye level with what you are photographing
  • The higher the number of the f-stop (aperture) the smaller the opening and more of the photograph is in focus.
  • Try using the Aperture mode on the camera where I set the f-stop and the shutter speed is set automatically. This is particularly good for still shots.
  • Use a tripod most of the time---buy a good tripod. Use especially for closeups and low light conditions but it is good to use it most of the time. ( I really need to work on this one)
  • Turn off camera to change lenses.
  • Don't delete in the camera
  • Work on getting closer and filling frame with subject.

After some time in the classroom we went out into the garden. The irises were in full bloom so we went to that section to work on our photography. It was a sunny day and there was a wind so it was not the best time to be shooting the irises. The instructor gave us several tips while we were shooting to help us get some good shots in that light. He steered us toward the edges of the beds were there was some shade and we could get some photos without the bright sunlight. He also suggested that when we shot in the sun we should look for brightly colored flowers because the pastels would complete fade out in the bright light.

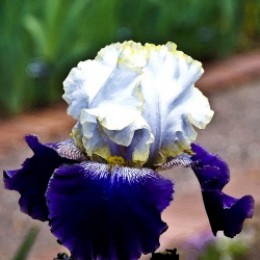
Here is one of the photos that I took. I know I have a lot to work on, but I felt very good about what I learned in the first session.


Purple and White Iris

purple and white iris photo by mpgphoto

Landscape Photography - class 2

waterfall by mbgphoto
Our second class was on landscape photography. It was a overcast day so we also got a lot of tips on photographing on overcast days. We were out in the garden about 30 minutes and it started to rain so we headed back to the classroom. Scott, the instructor is great on turning everything into a learning experience so we then got a lot of good tips for shooting on rainy days.
 
During the short time we were out in the garden shooting I took the photo of the waterfall above using Scott's formula for making the water look "silky". The photo I shot was using a F18 aperture at 1/8th of a second. Here is the formula: 
  1. Cloudy Day 
  2.  ISO100 
  3. Tripod (a must) 
  4. Polarizer filter (I don't have one yet...so I didn't use this) 
  5. Aperture set between F16-F22

Here are some of my favorite tips from the Landscape Class.
 
 
  • Move things out of center...imagine a grid like a tic-tac-toe and place center of interest at one of the intersections. 
  • Rarely put horizon line in center of photo (reflections are an exception) 
  • On dreary day eliminate sky from picture (or minimize it if you can't eliminate) 
  • Frame your photo...use trees--leaves etc. to frame the picture and draw your eyes into the scene
  • Curved lines bring interest to photo 
  • Avoid bright spots near the edges..they draw you out of picture 
  • Most images fail because they are too busy and do not have a point of focus 
  • Use more vertical shots 
  • Layers give more depth i.e. flowers in foreground, lake, mountain, sky ...use wide angle 17-35 and get close to foreground 
  • For landscapes focus about 1/3 of the way into the photo and use a F16 aperture. 
  • Polarizer filter is great for fall shots.


Practicing Photographic Techniques

Class 3


For our third class we spent most of the morning in the garden practicing the techniques we have been learning in class. There were two instructors that went out with us and gave us a lot of personal tutoring. I really enjoyed being able to ask questions as I was photographing. We first went to the Iris garden and worked more on closeup photography. The instructor had some diffusers with him and showed us how they work to bring light into a subject. One of the tips that really hit home with me was to always look at what is in the background even though you are taking a closeup of a certain item. In the case of the irises I saw what a difference it made when I moved just a bit to make sure I had a darker background. 


Session 4

In our fourth class we studied both water photography and close up photography. 

For the first section we took our cameras and tripods and went into the woodland gardens. There was bright sunlight so in order to understand the effects of aperture and speed on our photos we needed to get out of the bright sunlight. In the woodlands we found a small stream running through the area with many small waterfalls as the water went over the rocks. We took the same scene using various apertures and speeds. Although the lighting was not the best we were able to get a good idea of how the different settings would effect the photo. I am anxious to go out again on a overcast day or in the early morning and take the same photos in a better light.


Garden Photography - class 5

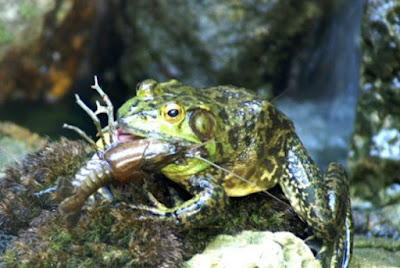
frog photo by mbgphoto
When the last day of class came I was really sad to see it end. I enjoyed the people in the class and I feel that I really learned a lot. The instructor was great and I will definitely take one of his classes again. It turned out to be a very hot and sunny day, not really a good day to photograph. Like all of our classes the instructor used the weather circumstances to give us tips. He talked about the summer not really being the best time to photograph. Early morning and at dusk are the best times all year, but this is particularly true in the summer months. He suggested that you use mid day to work on your photos or to go to museums and view other photographers. There is so much to be learned but viewing the works of others.
 
Here are some of the tips that I took away from todays session. 

  • Light will tell you what to photograph and how to photograph. 
  • Polarizer works well on sunny days. 
  • Tips to photograph fireworks--bulb setting--ISO 400--Aperture F11-F16 Tripod is a must. 
  • You need to know the rules..but don't be afraid to go outside the box and break the rules. 
  • Try to photograph underneath flowers...get on the ground 
  • Wearing a hat forces you to look down..also great to take off and block sun from lens.
 
In the last class we visited the Chinese garden to photograph. The instructor took a few minutes with each of us individually and answered any questions we had. I had just gotten a new polarizing filter so he gave me hints on how to best use it. It works best when sun is coming in from the side. It mades skies and clouds pop. It is great for landscapes but not so good for water reflections. After my time with the instructor I was working on photographing a small waterfall. Someone said there was a statue of frog sitting on a rock at the bottom of the falls, but just when I was going to take the shot he jumped off into the water. For a second I was disappointed, but then he came up with a crawdad and I captured the photo above. Not a great shot, but a fun one and we all had a laugh about the "statue" catching the crawdad.

Books on Photography

I pick up a lot of tips from other photographers from reading and looking at books on photography.  Here is one on Garden Photography.
art of garden photography
Click to view on Amazon


Note: The author may receive a commission from purchases made using links found in this article. “As an Amazon Associate, Ebay (EPN) and/or Esty (Awin) Affiliate, I (we) earn from qualifying purchases.”


Thursday, May 29, 2014

Photography Field Trip

This week was the end of my photography class.  I will have to say that I learned a lot and feel that I have lots of new information to enhance my skills as a photographer.  Our last two sessions included a field trip to the Missouri Botanical Garden and then a classroom session to go over the photos that we took during the trip.  I thought I would take this week's blog post to share with you the photos that I took on the trip and a few tips I learned along the way.
purple iris photo by mbgphoto
The Irises were at their peak when we visited the garden so I was able to get several nice shots. This photo of the purple iris was taken with my 50mm lens using aperture priority at F1.8.  This lens was new to me so I used it the entire trip to get myself comfortable with the lens.  You will note how when I focused on the main iris it put it in focus and gave a soft focus to the rest of the photo. I used the same lens and aperture for the daisies that you see in the photo below.   In this case I was closer to the daisies in the foreground so I got an even greater blur in the background.
yellow daisies photo by mbgphoto

I had a bad habit of using my screen to look at when I took photos instead of the viewfinder.  I worked hard at trying to break this habit during this field trip and was successful for the most part.  My instructor encouraged the use of the viewfinder in taking photos and after using it I could really see the difference.

The other tip that I learned from the instructor during the trip was to turn off my automatic ISO setting.  I am not sure how I ever got in the habit of leaving it on but it was interfering with some of my close up shots and I found my problems were taken care of when I used the manual settings for the ISO.  I kept it at 100 for most of this trip.
flower photo by mbgphoto
Here is another flower using the F1.8 setting.  In addition to photographing flowers we also photographed a waterfall using different aperture settings in aperture priority.  What this does is changes the speed the camera is using and gives you a completely different look to the water.  In this photo I used the F4 setting and you see the more distinct water in the photo.
waterfall photo by mbgphoto
For getting the smooth flowing look in the water I changed the aperture to f22 which slowed down the speed of the camera.  The result is seen in the photo below.
waterfall photo by mbgphoto
I hope you have enjoyed my series of posts on my Nature Photography class.


Note: The author may receive a commission from purchases made using links found in this article. “As an Amazon Associate, Ebay (EPN) and/or Esty (Awin) Affiliate, I (we) earn from qualifying purchases.”


Thursday, May 22, 2014

Macro/Close Up Photography


close up photo of a yellow daisy photo by mbgphoto


Taking photos close up can really be a lot of fun.  You see the world in a whole new light.  I am always amazed by the details in flowers when I get close up.  In the last session of our nature photography class the instructor talked about equipment for macro and close up photography.  If this would be my primary focus for photos I would want to buy a macro lens but they are rather costly and my primary focus is lighthouses and landscapes.  The instructor suggested several alternatives.  The one that seemed to fit my needs was to buy a 50mm 1.4 or 1.8 lens and then to get extension tubes for even closer shots.

The photo above was taken with the 50 mm lens at at 1.8 aperture. I have a bit to learn about getting the focus in the right spots, but overall I am very pleased with my first results.  The 1.8 aperture allows a lot of light into the camera and I am able to focus at a very close range.  The daisy above was taken with this camera.  You will not how just the very center of the flower is completely in focus.  The primrose below is another of my first tries with the new lens.
close up photo of a primrose photo by mbgphoto


Close up and Macro photography can be a lot of fun.  I hope you have enjoyed the tips on this page.  Happy Photographing!!

Stop by my page for the latest tips on Field Photography http://www.squidoo.com/field-photography-tips


Note: The author may receive a commission from purchases made using links found in this article. “As an Amazon Associate, Ebay (EPN) and/or Esty (Awin) Affiliate, I (we) earn from qualifying purchases.”

Thursday, April 17, 2014

Photographing Spring Flowers

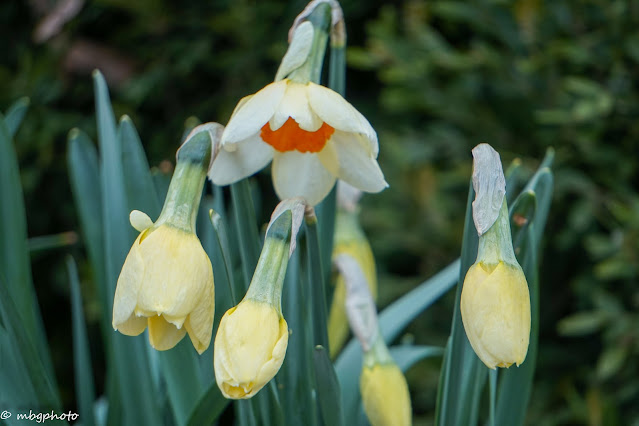
I love springtime with all of the beautiful flowers peaking out of the brown earth.  What a wonderful way to come out of the long, cold days of winter.  I would have a hard time picking a favorite flower but I would think that tulips would be close to the top followed closely by daffodils.  Here are some daffodils I photographed at a rest area in Tennessee in early April.


daffodils photo by mbgphoto

flower photo by mbgphoto


As I was browsing through Squidoo, I found this great lens by thewayeyeseeit, giving us tips on photographing spring flowers. http://www.squidoo.com/photography-tips-for-spring-flower-pictures.  He talks about perspective, timing, lighting, camera settings and much more.  You will also get to enjoy some of his beautiful photographs.

Happy Spring!  Hope you enjoy photographing all those beautiful flowers.


Note: The author may receive a commission from purchases made using links found in this article. “As an Amazon Associate, Ebay (EPN) and/or Esty (Awin) Affiliate, I (we) earn from qualifying purchases.”

Most Recent Reviews on Review This Reviews


Search for Reviews by Subject, Author or Title

The Review This Reviews Contributors


SylvestermouseSylvestermouseDawn Rae BDawn Rae BMbgPhotoMbgPhotoBrite-IdeasBrite-IdeasWednesday ElfWednesday ElfOlivia MorrisOlivia MorrisTreasures by BrendaTreasures by BrendaThe Savvy AgeThe Savvy AgeMargaret SchindelMargaret SchindelRaintree AnnieRaintree AnnieLou16Lou16Sam MonacoSam MonacoTracey BoyerTracey BoyerRenaissance WomanRenaissance WomanBarbRadBarbRadBev OwensBev OwensBuckHawkBuckHawkDecorating for EventsDecorating for EventsHeather426Heather426Coletta TeskeColetta TeskeMissMerFaeryMissMerFaeryMickie_GMickie_G


Review This Reviews is Dedicated to the Memory of Our Beloved Friend and Fellow Contributor

Susan DeppnerSusan Deppner

We may be apart, but
You Are Not Forgotten


“As an Amazon Associate, Ebay (EPN) and or Etsy (Awin) Affiliate, I (we) earn from purchases.” Disclosure Statement

X