Thursday, May 23, 2019

Creative Photography- Combining Techniques

pansies through lensball photo by mbgphoto
In this post I will review two techniques I have talked about in previous posts and give tips on how to combine them to create some fun and creative photographs.

Lensball

A lensball is a fun way to break away from the normal photos and get a bit creative. Here is a photo I took of a friend photographing the St. Louis Arch,  I took his photo through a lens ball that was sitting on a tripod next to him.
photographer through lensball photo by mbgphoto
On this post Crystal Photography Ball , I show you basic techniques on using a lensball.  These basic techniques are the first steps in creating the combined technique you see in the introductory photo.


Textured Backgrounds

Whenever you want the background to be different from your photo it is quite simple to change backgrounds in Photoshop.  Some backgrounds I make myself and others I get online.  Whichever method you choose, the tips in this post will help you to change your background. Photoshop Texturing Techniques
African daisy photo by mbgphoto
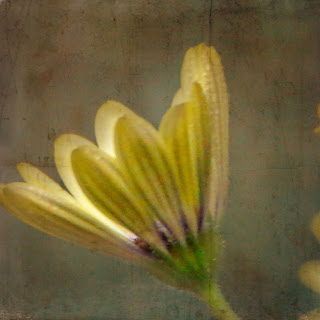
The photo above is a shot of an African daisy put on a textured background.

Combining Techniques

Now for the fun and creative part. When you take photos with a lensball first of all the photo is upside down and second the background just never seems to look right. At least mine usually doesn't.  I was contemplating this problem when I thought about my textured background technique I love to use and decided I could apply it to my lensball photos.  Here is a photo I created using these combined techniques and then the steps I followed to create the photo.
dipladenia flower through lensball photo by mbgphoto


  • First I took a photo of my new Dipladenia plant and edited it in Lightroom.  I saved the photo on my desktop.
  • Next I took a photo of the same plant using my crystal photo ball.  I put the photo ball stand on a table right next to the plant and focused my camera on the plant image inside the ball.  I brought the photo into Lightroom and inverted the photo so the image in the ball is right side up.
  • Next I opened the first photo in Photoshop.
  • With the first photo open I clicked on File and Place Embedded in Photoshop.
  • This brought the ball photo into photoshop covering the original photo.  I then used the Lasso tool to outline the ball and I clicked on Create and Mask in the top bar.
  • Now I used the slider to get the effect that I wanted.  I used the transparency and the feather sliders.  I next clicked done.
  • Now I click on the little square mask symbol at the bottom of the layers column and again moved the sliders to get the desired effect.
  • Finally I used Save As and named my file and saved it as a JPeg file.
I do this procedure as second nature now, but it took me a lot of practice before I got any results that I was happy with.  I wish you much fun and success in your quest for Creative Photography.


Note: The author may receive a commission from purchases made using links found in this article. “As an Amazon Associate, Ebay (EPN) and/or Esty (Awin) Affiliate, I (we) earn from qualifying purchases.”


5 comments:

  1. You have really become a professional in the world of photography, Mary Beth, and in regard to editing your photos creatively in Photoshop. Your creative photography tips are always so interesting and your photographs a joy to view.

    ReplyDelete
  2. As always, you have not only given us wonderful photography tips, but awesome inspiration with you own photos. I really love your textured backgrounds. I can see that I really need to take the time to play around with Photoshop.

    ReplyDelete
  3. You are such a talented photographer and image editor! Thanks for another wonderful tutorial.

    ReplyDelete
  4. You are so talented. I need to break my husbands hold on the digital camera we bought, so that I can try my hand at taking some amazing pictures too!

    ReplyDelete
  5. That's a great tutorial and it sounds like fun to experiment with these techniques. Have you considered putting your tutorials into a book yet? Or a video?

    ReplyDelete

Most Recent Reviews on Review This Reviews


Search for Reviews by Subject, Author or Title

The Review This Reviews Contributors


SylvestermouseSylvestermouseDawn Rae BDawn Rae BMbgPhotoMbgPhotoBrite-IdeasBrite-IdeasWednesday ElfWednesday ElfOlivia MorrisOlivia MorrisTreasures by BrendaTreasures by BrendaThe Savvy AgeThe Savvy AgeMargaret SchindelMargaret SchindelRaintree AnnieRaintree AnnieLou16Lou16Sam MonacoSam MonacoTracey BoyerTracey BoyerCheryl Paton Cheryl PatonRenaissance WomanRenaissance WomanBarbRadBarbRadBev OwensBev OwensBuckHawkBuckHawkDecorating for EventsDecorating for EventsHeather426Heather426Coletta TeskeColetta TeskeMissMerFaeryMissMerFaeryMickie_GMickie_G


Review This Reviews is Dedicated to the Memory of Our Beloved Friend and Fellow Contributor

Susan DeppnerSusan Deppner

We may be apart, but
You Are Not Forgotten


“As an Amazon Associate, Ebay (EPN) and or Etsy (Awin) Affiliate, I (we) earn from purchases.” Disclosure Statement

X