Showing posts with label Crafts for Everyone. Show all posts

Friday, October 7, 2022

Make Halloween Ornaments With Easy Craft Kits Reviewed

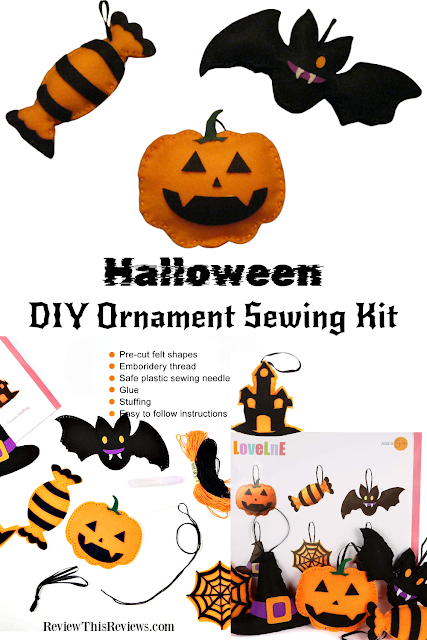
Halloween Ornaments Kit

I love craft kits! Especially holiday craft kits that everyone in my family can make together.

The first week of October, my husband, son, and I gathered around the dining room table to investigate my new Halloween ornament sewing craft kit. We each selected an ornament to make and went to work. The ornaments you see at the top of the image (on the right) are the first 3 ornaments we made. My husband selected the pumpkin, our son grabbed the bat, and I chose the candy. It was a lot of fun watching the guys sew their ornaments together. These will be ornaments I treasure forever, as well as the memory of making them together.

The ornaments are very easy to sew together because they have pre-poked holes in the pre-cut fabric pieces.

Most often, a craft kit will include everything you need to complete a project. The Halloween DIY Ornament Craft Kit I have featured is awesome and really does include everything except scissors.  I did substitute my preferred Aleenes Craft Glue instead of using the glue in the kit, but that is simply a preference on my part because I have used it for decades.


Halloween Ornaments Sewing Craft Kit

 Halloween Ornament Craft KitCheck PriceThe kit includes:

  • Pre-cut felt pieces with punched stitch holes for sewing together
  • Pre-cut detail or finishing pieces like eyes, teeth, stripes, etc
  • Floss / thread 
  • Ribbon for Hangers
  • Plastic Needles
  • Stuffing
  • Glue

While the instructions are in picture form, I would have preferred they included written directions along with the images for greater clarity.  As a lifelong crafter, I knew what to do without instructions, but I am not sure that would be true for a beginner.  While making the ornaments would be easy enough for a child, they would probably still need some assistance from an adult to know exactly what to do.


To Make the Felt Halloween Ornament

contents in the box to make Halloween ornaments
Each ornament is separately packaged with all it's pre-cut pieces. Stuffing, plastic needles, thread and ribbon are packaged separately which makes it easy to find everything you need to complete an ornament.

  1. Open the individual ornament package and lay out the pieces
  2. Open the package with the thread & plastic needles
  3. Thread the plastic needle with the thread color that matches the two foundation ornament pieces 
  4. Stitch the two foundation pieces approximately 3/4 of the way together, leaving an opening to stuff the ornament (do not cut your thread yet)
  5. Stuff your ornament with the included filling (do not overstuff. Felt tears easily)
  6. Stitch the remaining opening together and tie off the thread
  7. Cut a piece of the included ribbon and make a hanger for the ornament
  8. Glue the details (like eyes, teeth, etc.) on the ornament


Why Choose This Craft Kit for the Whole Family

 Halloween Ornament Craft KitCheck Price

Everyone should know the basics of sewing. These kits will allow parents to teach their children to make the basic straight stitch, plus allow the child to get comfortable threading and using a needle safely because the included needles are large, plastic needles.

Not only are these kits great for children, but also for seniors with decreased dexterity.  Again, the plastic needles won't poke or cut fingers. 

No special crafting ability required.  While I did find my experience helpful for stuffing amounts & glue preferences, it wasn't necessary. My son and my husband made their ornaments without needing my help, including threading their own needles, stuffing the ornaments, and gluing on the finishing details.

This kit really does allow family members of varying ages to make the perfect Halloween felt ornaments. 

We will use our ornaments on our Halloween tree, but they would also make a lovely banner for the door, mantle, or wall.  They could be hung on cabinet knobs for fast Halloween decor.

The kit is recommended for ages 5 and up.


 Read More Crafts & DIY Reviews On
ReviewThisCrafts.com!


House of Sylvestermouse


Note: The author may receive a commission from purchases made using links found in this article. “As an Amazon Associate, Ebay (EPN) and/or Esty (Awin) Affiliate, I (we) earn from qualifying purchases.”


Friday, January 3, 2020

How to Make a Quilt Magic Kit Wall Hanging Reviewed

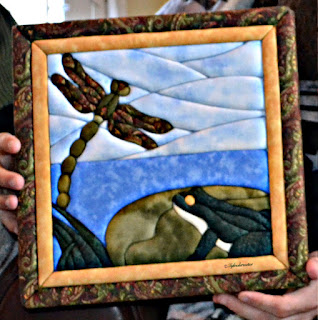
Last year I made a Quilt Magic wall hanging for each of my children for Christmas.  They turned out to be really beautiful gifts and a surprise that I hope my children will treasure.  

How to Make a Quilt Magic Kit Wall Hanging Reviewed
Quilt Magic Kits are awesome! They make a great beginner craft, as well as a unique project for more experienced crafters.  The kits take more time than you might expect, but that is part of the value of a finished project. 

I am well accustomed to working with fabric.  After all, I have been sewing since my early teens.  As an experienced crafter, I enjoy taking on new crafting challenges.  I tend to consider any new craft technique a call to action.  The Quilt Magic kits caught my attention immediately and seemed to beckon me.  Needless to say, I answered the call.

I immediately purchased a fabulous Quilt Magic wall hanging to make for our son.  However, I needed one for our daughter.  It took me two years to find the right kit for her, but as soon as I laid eyes on the elephant Quilt Magic Kit, I knew I had finally found the right one.  Then the fun began!


Quilt Magic Kits


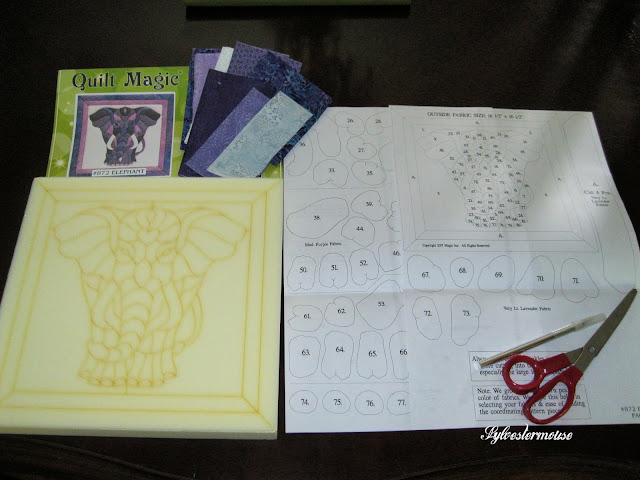
The kits include almost everything you need.  You will also need scissors, an iron, and a punch tool for pushing the fabric into the form.  You can use a dull kitchen knife, but I highly recommend purchasing the Quilt Magic punch tool separately.  A standard kitchen knife doesn't have a pointed end, which you need for some corners.


How to Make a Quilt Magic Kit Wall Hanging Reviewed
Kits Include:  Pre-cut Form, Easy to Follow Pattern, & Fabric Pieces (to cut)


How to Make a Quilt Magic Kit Picture


How to Make a Quilt Magic Kit Wall Hanging
I know you will be excited to get started on the project, but you need to iron the fabric first.  This is extremely important!  You will not want the fabric to be creased.  You need it to lay flat when "punching" it into the form. 

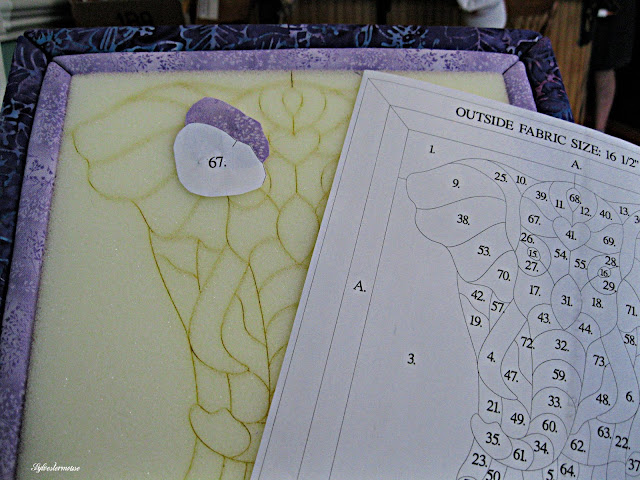
I cut out the pieces from each fabric, pinned their numbered pattern piece to the cut fabric, and placed them in a baggy until I was ready to add the piece.  I had a separate baggy for each fabric.

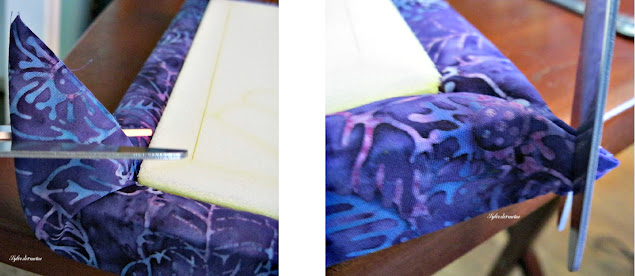
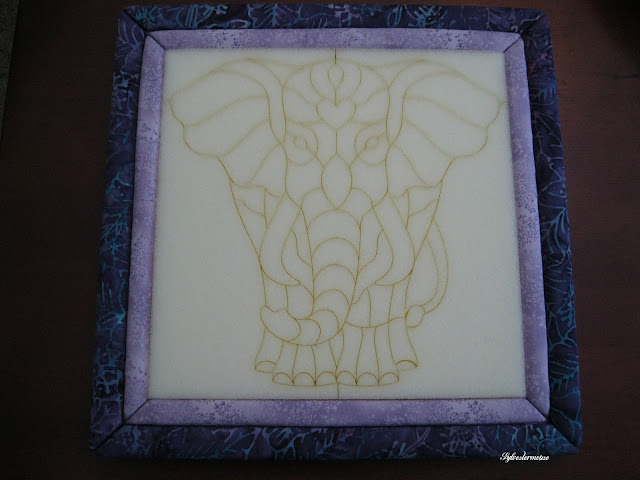
Start with the border & back.  The back piece is one large piece that you attach to the form by folding the ends over the front side and pressing the edges in the border grooves.  You will need to trim the fabric at the corners twice to make the fabric slip into the cut corner grooves.  Be careful not to cut too much off.  There is no extra fabric included for mistakes.

Note:  The corners of the form are not pre-cut deep enough to hold the fabric.  You will need to cut the corner form groove with a sharp knife per the enclosed instructions.  Otherwise, all of the grooves are pre-cut for you.

trimming the fabric corners
   
quilt magic border is finished

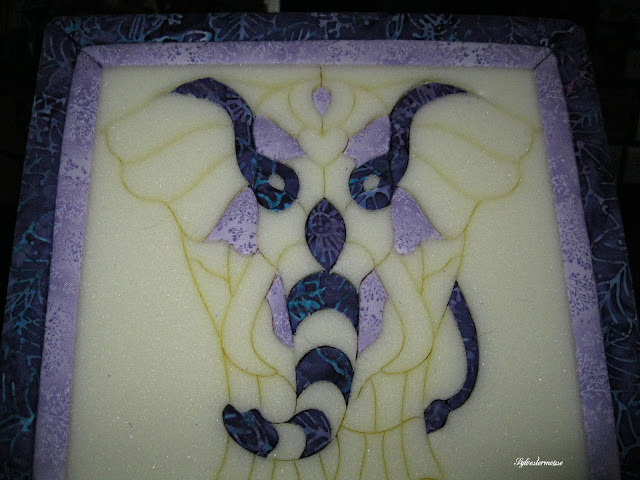
From here on, it is pretty smooth sailing.  You simply match the number on the piece to the number on the pattern and push the fabric into the pre-cut grooves for each section.


How to Make a Quilt Magic Kit Wall Hanging


I opted to add the the pieces cut from each fabric all at one time.  However, you may prefer to add the pieces section by section, left to right, or whatever type of layout organization works best for you.  I have friends who would rather see the project come to life one area at a time.


making a quilt magic elephant kit


adding the cut fabric pieces to a quilt magic picture

 
The Quilt Magic no-sew kits are easy, but they do take longer than advertised to make.  Each picture kit took several days to cut and assemble, but the end results were definitely worth the time.

How to Make a Quilt Magic Kit Wall Hanging Tutorial
Quilt Magic Wall Hanging Gift for My Son
 
How to Make a Quilt Magic Kit Wall Hanging Tutorial
Quilt Magic Wall Hanging Gift for My Daughter

You may or may not wish to frame your finished Quilt Magic wall hanging.  Both of my children opted for a Quilt Magic Frame for easy hanging.  But, they are not necessary.


A Variety of Quilt Magic Kits Are Available


Quilt Magic Kits are available in many different styles, colors and themes. There are even holiday Quilt Magic Kits for those who enjoy holiday wall decor.

 Quilt Magic 12-Inch by 12-Inch Butterfly Kit, 11.75Check Price Quilt Magic 12-Inch by 12-Inch Happy Home KitCheck Price Quilt Magic Lion Kit, LionCheck Price Quilt Magic 10-Inch by 19-Inch Lighthouse KitCheck Price


See More Quilt Magic Kits by Clicking Here!


 Read More Crafts & DIY Reviews On
ReviewThisCrafts.com!


House of Sylvestermouse


Note: The author may receive a commission from purchases made using links found in this article. “As an Amazon Associate, Ebay (EPN) and/or Esty (Awin) Affiliate, I (we) earn from qualifying purchases.”


Thursday, September 29, 2016

Halloween Countdown Calendar Reviews

A countdown calendar will help put the "How many days 'til Halloween?" question to rest. Here are three Halloween countdown calendars that you can make yourself.

October is a long month and with Halloween coming at the very end, it can seem like forever to a child who can't wait to wear his new costume and go trick or treating around the neighborhood.

A Halloween countdown calendar will help put the "How many days 'til Halloween?" question to rest. Here are three easy Halloween countdown calendars that you can make yourself.

Downloadable Halloween Countdown Calendar | ReviewThisReviews.com | AbilityPoweredDesign on Etsy
AbilityPoweredDesign on Etsy

Downloadable Halloween Countdown Calendar


Since I'm sure I'm not the only one who puts off projects until the last minute, I'm going to start with this one. It's super-quick and easy to make for as little as three dollars if you have a spare picture frame on hand.

Simply purchase this Halloween Countdown Calendar download, print it out immediately, put it in an 8 x 10-inch frame and you're ready to start counting down the days 'til Halloween. Each day, use a dry erase marker (available at the link or at your local discount store) to write the number on the glass. Next day, wipe off the number and update. Hooray, you're one day closer to trick-or-treat!

I've personally purchased many downloadable files from Etsy and just love the ease and convenience. This is a great project, simple and fun. I think this would make a cute gift for a teacher, neighbor, relative, or friend, too. Choose a pretty black, orange, or gold frame, include a new marker with the gift, and voila! I know I'd be impressed if someone made one of these for me. Oh, and if you like the idea but would prefer another design, you'll find many more choices in AbilityPoweredDesign's Etsy store.


No Tricks! Halloween Countdown Calendar With Treats


No Tricks! Halloween Countdown Calendar With Treats | ReviewThisReviews.com | OhHappyDay.com
OhHappyDay.com
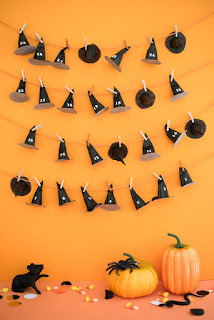
This next project is from the Oh Happy Day blog and I think it's adorable. It takes more time to make, but it's actually quite simple, the supplies are easy to find, and the end result is quite impressive and makes a beautiful, seasonal display. What's more, you'll be able to add little candies or stickers to the adorable cupcake-cup witch's hats to add even more fun each morning when your child counts down one more day.

Chiara, who wrote the post, includes complete directions and awesome photos to help make this project really easy. I hope you'll leave a comment on her blog if you like this project.


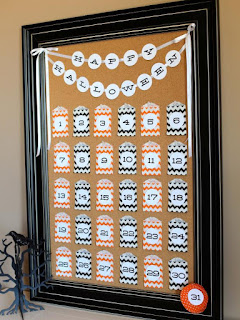
DIY Halloween Countdown Calendar With Printable Numbers


DIY Halloween Countdown Calendar With Printable Numbers | ReviewThisReviews.com | DIY Network
DIYNetwork Blog
Next we have a Halloween countdown calendar project from the DIY Network blog. This is another countdown calendar that will take a bit of time to put together, but it's a simple craft that even a beginner can handle.

I love the popular chevron-patterned gift bags and the printable letters and numbers, all in seasonal black, orange, and white. (Note: I can see this project being carried over to other holidays, using other colors, can't you? Love it!)

The project calls for either a bulletin board, as shown, or a foam board. The supplies are inexpensive, the instructions are complete, and the final product is adorable.


So there you have it, three easy DIY Halloween Countdown Calendar projects. I hope one or all appeal to you. Which one do you like best? If you make and use one of these, I'd love it you come back to let me know. Have a happy Halloween!

~Susan

Click Here to Read More Halloween Reviews From Our Review This! Team


~Susan Deppner
Read more of my reviews.


Posted by Susan Deppner

Susan Deppner

About the Author

Susan Deppner is a baby boomer, a cancer survivor, and a Southerner who believes in the Golden Rule. She enjoys writing about food, faith, and fitness; health, home, and holidays; people, places, pets, and patriotism, and more. Follow Susan on Twitter, Facebook, and Pinterest.


Note: The author may receive a commission from purchases made using links found in this article. “As an Amazon Associate, Ebay (EPN) and/or Esty (Awin) Affiliate, I (we) earn from qualifying purchases.”


Tuesday, March 22, 2016

Reviewing Fine Art Colored Pencils

Use Good Pencils When Coloring or Sketching

coloring pencils
Colored Pencils
I mentioned in another post a few weeks back that I love to color in the coloring books that are on the market specifically for adults. What I  am finding is that the quality of the pencils does make a difference in the outcome of your finished piece. I have decided that for future coloring pages, I want to use the fine art colored pencils when I color. 

The picture on the left is an example of one variety of colored pencils (I found the image at Pixabay). Now, I can't tell from the image if they are what is considered fine art pencils or not but they look to be of a good quality. If you have done much coloring or if you are an artist, you know that not all colored pencils are the same. As a general rule the less expensive the the pencil the lower quality of the pencil. With the lower quality pencils the colors are not as vivid, they might not blend well and the end result may not be as vibrant as you want them to be.

I have a birthday coming up and I've decided to ask my family for some Marco Raffine Fine Art colored pencils. They are a better quality than the pencils that I use right now. From what I can tell from my research they would be considered a high end student pencil or a low end artist grade pencil. They are a good choice for me to move up to. Maybe later, I can get some even higher quality colored pencils as I progress in my skills but for now this seems like the logical next step in my growing collection of coloring supplies.


I think that I will be happy with the upgraded quality of these pencils over the ones that I am coloring with now. With the less expensive pencils I can blend and shade and layer but it takes quite a few steps to accomplish the look that I am going for. The Marco Raffine pencils should do a better job with those techniques than the cheaper pencils that I use at the moment.

As much as I love to color and that it relaxes me, I do want to have my finished coloring pages to look a little more refined. My own little pieces of fine art, if you will. As I hone my skills, I would like to frame some of the finished pages at some point and time. I think that I will be happier with a higher grade of pencil and eventually be proud enough of something to frame it.

How about you? Had you considered that not all colored pencils are created the same? Would you be willing to pay a little more if you knew that the quality of the pencil was going to give you better results? Or does it even matter to you?


Note: The author may receive a commission from purchases made using links found in this article. “As an Amazon Associate, Ebay (EPN) and/or Esty (Awin) Affiliate, I (we) earn from qualifying purchases.”


Saturday, March 19, 2016

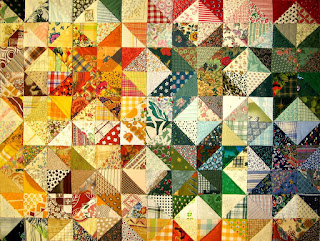
A Brief Review of Quilting for National Quilting Day.

Image of a quilt
Patchwork Quilt (Pixabay)
National Quilting Day

When: The third Saturday of March

Where: Celebrated worldwide

National Quilting Day was begun in 1991 by the National Quilting Association to celebrate all quilt-makers and quilt lovers and to give recognition to the special art form called 'Quilting”. It has  evolved into a worldwide celebration, often connected with quilting shops with quilters getting together to work on a quilt. 


Basic History of Quilting


Handmade quilted vest
Handmade Quilted Vest - Etsy
Early records date quilting back to the 11th and 12th century where quilted garments were worn by the Crusaders.  Not accustomed to the cooler climate and needing clothes with warmth, quilted vests were invented.  These vests had 3 layers (top, filling, and backing) stabilized by a few stitches at critical points (called counterpoints).  Counterpane quilting (decorative stitches only) evolved from these first vests.

*Handmade Quilted Vest can be found in the Etsy Shop Couleurs Patchwork.

Patchwork Quilts 


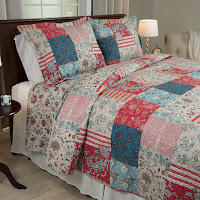
Bedford Home Quilt Set for the bedroom
Bedford Home Quilt Set - Amazon
Patchwork quilting goes back to the founding of colonial America and filled the need for warmth and decoration.  The cold weather and a rough life  wore out the original quilts brought with the pioneers from Europe and the quits needed to be repaired ~ thus, beginning the “patchwork” quilt.


Quilting Book
Quilting Book available on eBay

Later, quilting became a social event with women gathering together and cutting fabric into various shapes, resewing them to form a design.  Many designs well-known today came out of these social circles.


Family Quilting


I can remember my grandmother spending hours at a time in her favorite rocking chair hand-sewing tiny pieces of material together for her beautiful quilts.  Since she was an accomplished seamstress as well (making most of the clothes my siblings and I wore), we could often recognize several of the fabric pieces used in her quilts as being from leftover material from the dresses or shirts we were wearing). Fifty years later I still have some of her handmade quilts.  A true treasure. 


Quilting Has Evolved


Quilting is not just for quilt blankets these days.


Collage of handmade quilted items
Quilted Purses, Lanyards & Table Runners


Quilting, both hand-sewn and machine quilted, is used for everything from clothing to accessories to home décor.  


CutePurseNalities on Etsy creates fantastic machine quilted purses on her quilting sewing machine.  


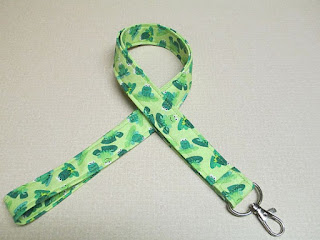
Green Frogs quilted fabric handmade lanyard
Green Frogs Fabric Lanyard
Kathie, an Iowa quilter, began making quilts and quilted wall hangings, then her quilting evolved to purses.  When she opened her Etsy Shop featuring quilted purses, she used the word purse in her shop name; thus, Cute PurseNalities came about.  


Over time, Kathie has added more quilted items in the form of coin purses and colorful fabric lanyards.  She has a wide variety of lovely creations made in interesting fabrics in her Etsy Shop.  


Quilting Today


Today there are numerous pattern books available for the quilter, as well as classes and quilting workshops.  My creative daughter-in-law attends at least two quilting weekend workshops every year.  She says it brings back the fun of the early days of women getting together in those social quilting circles. 


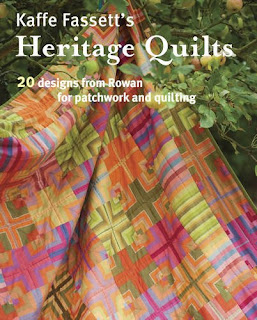
Heritage Quilts Book Cover
Heritage Quilts on Amazon


So, take a class, get some quilting pattern books with templates for various designs, or get together with a quilting circle at your church or community center to enjoy the art of quilting and celebrate National Quilting Day.  


*Check out more crafting ideas @ ReviewThisCrafts.com


(c) Wednesday Elf (Written 3/19/16; Updated 3/19/2022)


Note: The author may receive a commission from purchases made using links found in this article. “As an Amazon Associate, Ebay (EPN) and/or Esty (Awin) Affiliate, I (we) earn from qualifying purchases.”


Friday, February 5, 2016

Valentine Crafts Reviewed

Valentine Crafts Reviewed
My loyal readers will not be the least bit surprised to hear me say, I love crafts!  Not only do I enjoy creating things myself, but I love to look at tutorials.  Even if I don't end up making a particular craft, I often take away really valuable advice and tips when watching or reading tutorials.

Some of my personal favorite gifts have been handmade crafts.  My mom quilted a throw for me several years ago.  My grandmother made a huge stuffed mouse for me when I was little.  I have ornaments on my Christmas tree that friends and family have made for me.  Year after year, I loving place them in their "spot" on the tree.  

Some of my best childhood memories were opening my gifts and discovering that Mom had made me a new dress, blouse, or rayon* overalls.  Yes, I expect I was the only person ever to have silky overalls, but I loved them!  They suited my feminine tomboy image.  Although, I admit it.  I did not climb trees in those overalls, but I do believe I wore them fishing.  

By the way, did I mention that those rayon overalls were a Valentine's Day gift?  If memory serves me correctly, I do believe they were.  They were certainly lovingly sewn and made just for me.  Isn't that really the best kind of Valentine's Day gift?

Now, let's explore some really wonderful Valentine's Day crafts that would make fabulous gifts!

  *For those who may not know, rayon is a material that looks like silk or satin, but is actually more durable than either.


Valentine's Day Crafts Make Great Gifts


The Keepsake Box


Valentine Crafts for Seniors
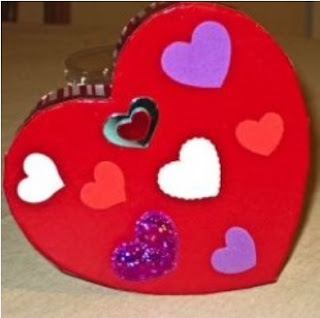
Here is a great Valentine's Day craft!  One of our very own contributors, Mary Beth, shared how to decorate a heart shaped keepsake box in her article, Crafts for Seniors.  This is such a perfect craft for parents to make with their young children.  It requires very little, if any, crafting experience and gives a child a real sense of accomplishment.  

But the really cool thing about this craft is that it is not limited to little children.  Anyone could make a beautiful keepsake box for their sweetheart, mom, dad, friend, sibling, or child.  In Mary Beth's case, she helped her own mother make a beautiful box.  These types of memories, and times spent with the people we love, are a big part of what makes me love crafting so much.  Both the memory and the box are true cherished keepsakes.


The Sailor's Valentine


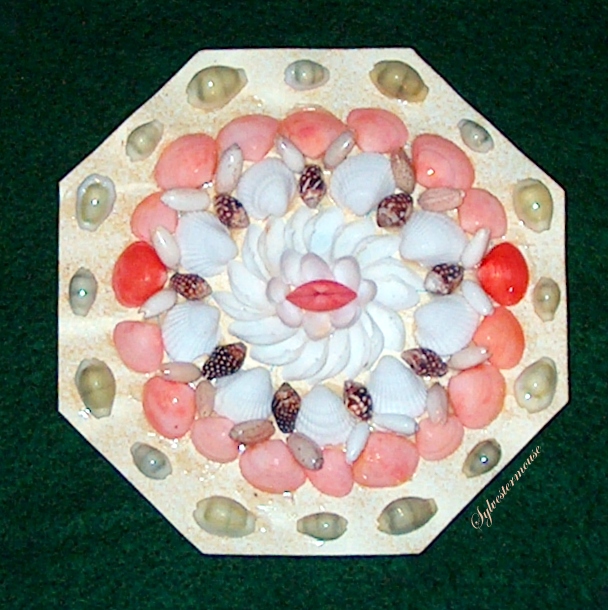
Sailor's Valentine by Sylvestermouse
The Sailor's Valentines that I made for our children is one of my own personal favorite crafts.  It is a simple technique that has stunning results.

A sailor's valentine is made with a variety of seashells.  The art of creating a sailors valentine is simply laying the shells out in a pattern that is visually appealing.  As my grandmother used to say, "how can you fail when you are using such beautiful things to begin with?"  She was absolutely right, of course.  Seashells are quite beautiful individually.   Placed in a pattern or design, seashells are spectacular!

You can learn the history of this craft as well as how to make an easy Sailor's Valentine in this tutorial:  Sailor's Valentine


Heart shaped Puzzles

The Heart Shaped Puzzle


If you want to give, or send, a secret message to your sweetheart, you will love the idea of creating a Heart Shaped Puzzle.

There are a couple of ways to craft a puzzle.  You can either purchase a puzzle kit, print your own design and completely make the puzzle yourself.  Or, you can simply craft your design with a message and allow the online company to print your image on the puzzle and send it to you to give completely ready to assemble.


I absolutely love the idea of making a one of a kind puzzle for your sweetheart with a private message or photo.  The question is, will you help put the puzzle together or simply watch the process in anticipation of the moment you sweetheart figures it out.


Handmade that is Ready-Made for You to Purchase

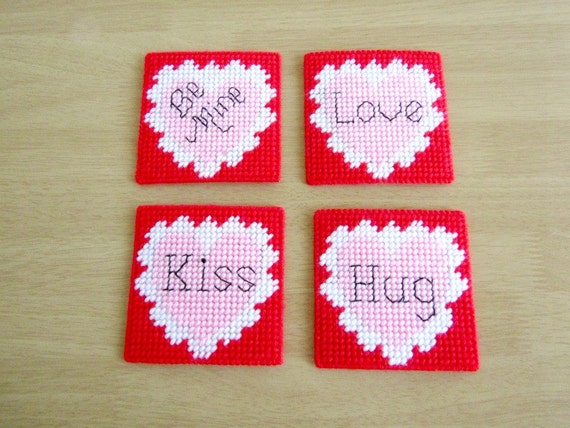
If the holiday has sneaked up on you, as holidays are apt to do, then I have a suggestion for you too!   You can still give a handmade gift.  Our own Elf has you covered.  In her Etsy shop, Wednesday Elf offers these really fabulous Valentine Heart Coasters.  Now, I shall forewarn you, there is only one set left, so you will want to act quickly.  I heard tell of a certain mouse that had her eye on these lovelies.  She might sneak right in there and snatch these coasters for her sweetheart.

Handmade Valentine Heart Coasters


Your Turn!


I have shared some ideas, but I would love to hear from you too!  Please leave your Valentine's Day Craft link in the guestbook below.  I know I am not alone!  We would all love to discover more Valentine's Day crafts that would make great gifts.


Valentine's Day Crafts Review by:
House of Sylvestermouse


Note: The author may receive a commission from purchases made using links found in this article. “As an Amazon Associate, Ebay (EPN) and/or Esty (Awin) Affiliate, I (we) earn from qualifying purchases.”


Thursday, January 28, 2016

Valentines Crafts for Seniors

Valentine Crafts for Seniors The following information is a review of some Valentine crafts I did at my Mom's nursing home during the last year of her life.  I hope you will find it useful in working with Seniors or Children in your life.

Easy Valentine Crafts

 
Crafts for the elderly with dementia need to be very basic. I work with the residents at my Mother's memory unit and help them to do a different craft activity each week. I have been doing this for the past year and have learned by trial and error which types of crafts seem to work well with the group of women. The crafts need to be involved enough to keep their interest, but simple enough that they can do the majority of the work by themselves.

On this page I will tell you about two crafts that they will be doing for Valentines this year.

photos by mbgphoto


Valentine Treasure Box - a place for trinkets and treasures


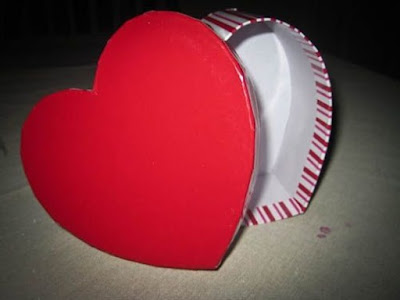
heart shaped box

The ladies in my Mom's group love to make special boxes for different occassions. They will then put the boxes in their rooms and keep small items such as candies, jewelry or other trinkets in them. For Valentines day I was able to find some great boxes in the dollar racks at Target. These boxes are heart shaped and made of heavy cardboard. As you can see from the photo, they have a design on the box but the lid is a solid color. This will leave plenty of space for the ladies to decorate the top of their special box.

Heart Decorations - provide lots of variety

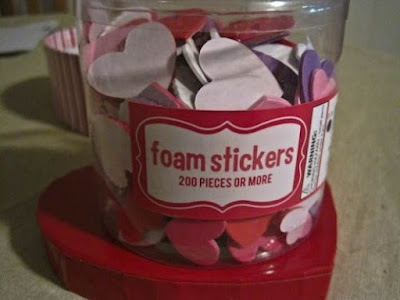
foam stickers

I am keeping the heart boxes fairly simple. I give each lady a box and a variety of stickers. I show them a sample of a box that I have made and then encourage them to design their own boxes. The decorations that we are using include a variety of different heart shaped stickers. I have puffy stickers, 3D stickers, foam stickers and rhinestone stickers. From experience I have found that some of the ladies like to line up their design very precisely and others like to cover their box with lots of different stickers. I have also found that some of the ladies like to copy exactly what I have done and feel frustrated if they don't have an example, so I also make an example and tell them they can make the box like mine or design it however they would like. Although, I am only using different stickers this time, you could use a variety of materials to decorate the boxes. Some thoughts that come to mind are buttons, rickrack, or cut out hearts. They could also paint a design on the boxes or use markers.

heart stickers

Puffy Sticker to Decorate

puffy stickers

Homemade Valentine Card

Blank Cards Ready to Decorate

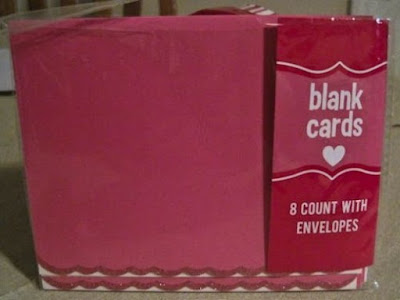
blank cards
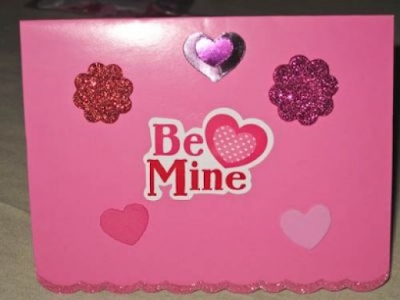
I found these blank cards in the Target dollar bins. They came 8 in a pack with a bright pink plain outside and a white inside. They will be perfect for making some Valentine cards. You can also find these types of cards at craft stores or you can make your own from construction paper.
 

Valentine Sticker Sayings

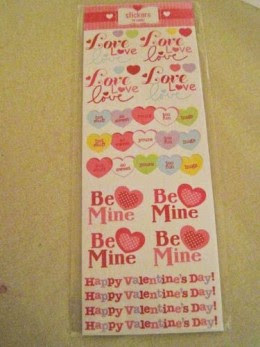
valentine stickers
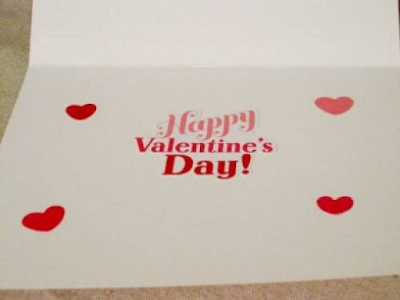
These stickers are one of the varieties I will have out for the ladies to use in decorating their cards. I liked them because they include a variety of sayings for Valentines day. The ladies can use these to add a message to their cards. As an alternative I could have them cut sayings out of old magazines or cards. I could also provide markers for them to write their own messages.
 

Finished Card

finished card

Inside Card

inside card


Note: The author may receive a commission from purchases made using links found in this article. “As an Amazon Associate, Ebay (EPN) and/or Esty (Awin) Affiliate, I (we) earn from qualifying purchases.”


Wednesday, November 11, 2015

Reviewing Knitting Handbooks

Learning To Knit: Will I master the needles?

I have been looking at Knitting Handbooks lately, because I have decided that 2016 will be the "year of the needles" for me. I want to learn to knit or at least become better with what little (very little) skills I have in this hobby. I can do the basic knit stitch and the basic purl stitch but I'm very slow and awkward with the needles and yarn. So, I plan to ask my family for a couple of books that can help me in this journey.

knit sampler and knitting needles
I know from my many years of crocheting that you need to practice, practice, practice in order become proficient in the craft. I am in no way a master in crochet but can hook my way around just about any pattern. In order to get started, I am working on a scarf using the knitting needles and some blue yarn. If it turns out looking good, it will be a Christmas present for my husband; if it turns out looking like a 5 year old did it I can always use it as a dusting cloth. I figure that I won't learn unless I just dive in and work on something. A scarf seems like a good project to start with and I liked this pretty simple waffle stitch since it will give me practice with both the knitting stitch and the purl stitch, counting and working with the needles and yarn. It won't be much different than crocheting a scarf in that you follow the pattern and remember when to do the knit stitch and when to do the purl stitch. I am finding it is a little harder to determine which row you are on unlike crochet where it seems more obvious but that may be a matter of training my eyes to look for certain stitches so that I will know. 

What books should I start with?

I am thinking that the best place to start is with a book or two that covers the basics along with moving on to more advanced knitting techniques. Sure, I could just ask for a book with patterns but until I understand the basics, I know I will just get frustrated. In my search for the right book, this one caught my eye. I liked the title but then I think the book would be very helpful, too.


Not only does the author cover the basics but she goes further in explaining more advanced knitting techniques and she does it with humor which I think I would enjoy. She also tells the reader how to fix mistakes (I'm sure I will make many) and that will be really helpful for my beginner skill level. I think I may be able to join the "chicks with sticks" (knitting needles) in the quest to make some fun and funky along with some traditional knitted items following Debbie Stoller's instructions.

I know when I was first learning to crochet, the terminology sometimes confused the daylights out of me. I might see something like FPDC and think what the devil does that mean? Well, now I know it means to do a front post double crochet stitch and I also know how to do that with my yarn and hook. I am guessing that knitting will be no different. There are going to be directions in a pattern that will at first glance make no sense to me at all. So, this book looks like a wise choice for a beginning knitter like myself.


What I like about this knitting handbook is that it promises to teach in plain English and not in terms that I am going to have to go to a glossary to figure out. I like that idea! Learning the way to use my needles and yarn to make something neat without having a thesaurus next to me to determine just what she is telling me to do. The basics in basic terminology, that sounds pretty darned helpful.

It remains to be seen if I will learn to knit with the same confidence that I have for crocheting. I am determined, though. In the past the using of two needles instead of one hook just seemed to be beyond my capabilities but that was a mental block, I think. So, maybe I have passed the first hurdle...I CAN do this. It will take persistence and practice and I am willing to put in the hours to really learn to knit.

knitting a blue scarf
I have some time left before Christmas morning to find out if my family paid attention and got me at least one of these books. So, in the meantime I am working on my little scarf that may be under the tree for my hubby or it might be in the rag drawer, only time will tell. By the way, the color I chose will look good on my husband and it is the team color for the Indianapolis Colts which is his favorite football team. I figure he might actually wear it, at least on game day, if it doesn't look too amateurish. Here is what I have so far. It is working up very slowly but I don't mind being the turtle in the race, after all that rabbit never wins anyway! I will continue to work with the yarn and needles and keep a piece of paper next to me to mark down which one of the rows I am doing in the repeat of the pattern to make the waffle look and hopefully it will turn out to be something my husband will be proud to wear.


Note: The author may receive a commission from purchases made using links found in this article. “As an Amazon Associate, Ebay (EPN) and/or Esty (Awin) Affiliate, I (we) earn from qualifying purchases.”


Saturday, October 17, 2015

I Love Yarn Day - October Fun for Crafters

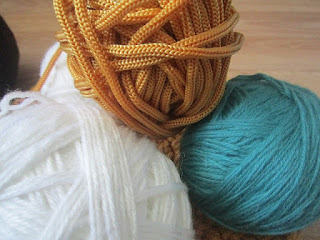
Balls of yarn
Yarns
 The Craft Yarn Council (CYC), which represents the leading yarn companies, accessory manufacturers, and magazine and book publishers in the yarn industry, created I Love Yarn Day to share their affection for yarn and “stitch it forward” by teaching at least one newbie to knit, crochet, weave, spin or bomb.  It's a way to honor all those who create in the fiber arts and is held on the second Saturday of October.

My favorite crafts involve yarn – thus, there's nothing I like better than to talk about the projects my fellow fiber fans and I love to create.

The Crochet Crowd


My main (and favorite) yarn craft is crochet, a craft I've been doing for more than 40 years.  I taught myself to crochet as I am left-handed and no one could seem to teach me as everyone I knew who crocheted did it 'backwards'. (Well, maybe I'm the one who is backwards!). :) 


Plush Penguin in handmade crochet
Plush Soft Toy Penguin
My favorite items to crochet are plush animals, especially soft toy penguins.  I make them in all the colors of the rainbow, including the actual black and white tuxedo penguin. 

Penguin is crocheted in a round and roly-poly Amigirumi style and measures about 5 x 5 inches.


Handmade penguins in this round style are very popular as a child's playtime pet plush animal, as it's just the right size for little hands to hold. This one is particularly adorable!


My plush penguins can be found in my Etsy Shop (Coastal Crochet Crafts), along with a whole bunch of stuffed animals and plush toys. 


Crochet Your Own Plush Animals


If you love to crochet plush animals, this pattern book called Edward's Menagerie has over 40 patterns for soft and snuggly toy animals in four different sizes, giving you 160 different possibilities.  The patterns use simple crochet techniques with step-by-step instructions which enable even a complete beginner to get started right away.

It's available on Kindle and in paperback on Amazon. 


The Nifty Knitters


I've tried knitting in the past, but will never be as expert at it as these knitters whose work I admire.


Lots of knitters make handmade hats and scarves, afghans and sweaters, but a few make really unique and one-of-a-kind items.  A group of Australian crafters (two daughters and their moms) have banded together to produce a a shop (Made with Altitude ~ the "Store Where Your Imagination Will Soar!") filled with four different crafts from 4 unique individuals whose stories and perseverance will amaze you.  My admiration for them and their work amazed me when I read their story.  


Knitted Flower handmade in yarn
Smiling Sunshine Flower

Since this is an article about yarn crafts, I chose to feature here the shop's unique knitted item called Smiling Sunshine Flower, a flower toy hand-knit with a splash of love, and a little ray of sunshine.  Flowers always bring smiles and delight, and with this handmade knitted flower you can have flowers all year through.  Smiling Sunshine Flower has big full blooms measuring 9 ½ inches across, and is 15 inches long.  A wonderful gift to brighten someones day. 


Plastic Canvas Projects


Crafting designs on plastic canvas with yarn is a fairly new endeavor for me.  I began just a few years ago when I realized that my little balls of yarn leftover from my crochet projects were filling up an entire plastic bucket.  Since plastic canvas crafts, such as coasters and tissue box covers, take only a very small amount of yarn, this craft is a great way to use it up. Waste not, want not… as they say! 


The most enjoyable part of working with plastic canvas is watching the design come to life as you stitch with various colors.  My favorite project to create in this medium is beverage coaster sets. 


Handmade Pineapple Beverage Coasters
Pineapple Beverage Coasters
This is a set of four (4) beverage coasters with a design of a pineapple. The pineapple is a symbol of hospitality and friendship, particularly throughout the South, so using coasters with this design in a social situation is perfect.

Pineapple coasters measure 4 x 4 inches. Created in acrylic yarn colors of yellow, gold and green for the pineapple design on an eggshell white background. Each coaster is trimmed in light green. The pineapple design is outlined in embroidery black outline stitch with crochet thread.


A pretty set of Pineapple coasters for your tabletops. They also make a lovely hostess gift for a holiday dinner invitation or a housewarming gift. Lovely home décor for any home.

The design is created on plastic canvas using acrylic yarn in harvest colors. The set has since sold, but you can request another in a custom order in my Etsy Shop, Coastal Crochet Crafts.


A Favorite Etsy Yarn Crafter


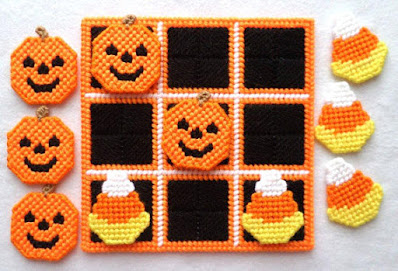
Halloween themed tic-tac-toe games handmade by GailCrafts
Halloween Treats Tic-Tac-Toe Game

Gail of Gails Crafts on Etsy has a very clever line of Tic-Tac-Toe games created with plastic canvas and yarn.  She makes these games for a variety of seasons and holidays and each one is cute and creative.  


This set includes a game board and 10 game pieces (5 each Jack-O-Lanterns and candy corns) and two fabric storage bags.

Game board is made from 7-mesh plastic canvas and 4-ply yarn. Game board is a 7”square  This and other sets, along with a wide variety of plastic canvas projects and other creative crafts, can be found in Gail's Etsy Shop called Gail's Crafts


Helpful Hints for Yarn


Beverly Owens, one of our creative crafters here on Review This, has reviewed a very handy tool every yarn crafter needs ~ the Stanwood Yarn Ball Winder.  If you have a large 'stash' of leftover yarn, like I do, this tool is perfect!

Now that you have your scraps of yarn neatly wound, check out these ideas from Favecraft on ways to use up those scraps. You don't even have to be a knitter or crocheter to find creative ways to use yarn.


50 Yards of Fun


50 Yards of Fun Knitting Book Cover

This book is perfect for using up your yarn stash.  There are patterns for a delightful collection of over 30 irresistible toys and each project uses only about 50 yards of yarn!


Knit just five basic body shapes, each shown in several variations, to create knitted animals, robots, monsters, and characters of every description.


Celebrate I Love Yarn Day


So, for 'I Love Yarn Day' or any day, grab your skeins and balls of yarn, your knitting needles, crochet hooks or yarn needle and begin a new project.  Hand-crafting with yarn is a very relaxing hobby and your finished projects are a delight to behold.


*I Love Yarn Day was written by Wednesday Elf


Note: The author may receive a commission from purchases made using links found in this article. “As an Amazon Associate, Ebay (EPN) and/or Esty (Awin) Affiliate, I (we) earn from qualifying purchases.”


Most Recent Reviews on Review This Reviews


Search for Reviews by Subject, Author or Title

The Review This Reviews Contributors


SylvestermouseSylvestermouseDawn Rae BDawn Rae BMbgPhotoMbgPhotoBrite-IdeasBrite-IdeasWednesday ElfWednesday ElfOlivia MorrisOlivia MorrisTreasures by BrendaTreasures by BrendaThe Savvy AgeThe Savvy AgeMargaret SchindelMargaret SchindelRaintree AnnieRaintree AnnieLou16Lou16Sam MonacoSam MonacoTracey BoyerTracey BoyerRenaissance WomanRenaissance WomanBarbRadBarbRadBev OwensBev OwensBuckHawkBuckHawkDecorating for EventsDecorating for EventsHeather426Heather426Coletta TeskeColetta TeskeMissMerFaeryMissMerFaeryMickie_GMickie_G


Review This Reviews is Dedicated to the Memory of Our Beloved Friend and Fellow Contributor

Susan DeppnerSusan Deppner

We may be apart, but
You Are Not Forgotten


“As an Amazon Associate, Ebay (EPN) and or Etsy (Awin) Affiliate, I (we) earn from purchases.” Disclosure Statement

X