Quilt Magic Kits are awesome! They make a great beginner craft, as well as a unique project for more experienced crafters. The kits take more time than you might expect, but that is part of the value of a finished project.
I am well accustomed to working with fabric. After all, I have been sewing since my early teens. As an experienced crafter, I enjoy taking on new crafting challenges. I tend to consider any new craft technique a call to action. The Quilt Magic kits caught my attention immediately and seemed to beckon me. Needless to say, I answered the call.
I immediately purchased a fabulous Quilt Magic wall hanging to make for our son. However, I needed one for our daughter. It took me two years to find the right kit for her, but as soon as I laid eyes on the elephant Quilt Magic Kit, I knew I had finally found the right one. Then the fun began!
Quilt Magic Kits
The kits include almost everything you need. You will also need scissors, an iron, and a punch tool for pushing the fabric into the form. You can use a dull kitchen knife, but I highly recommend purchasing the Quilt Magic punch tool separately. A standard kitchen knife doesn't have a pointed end, which you need for some corners.
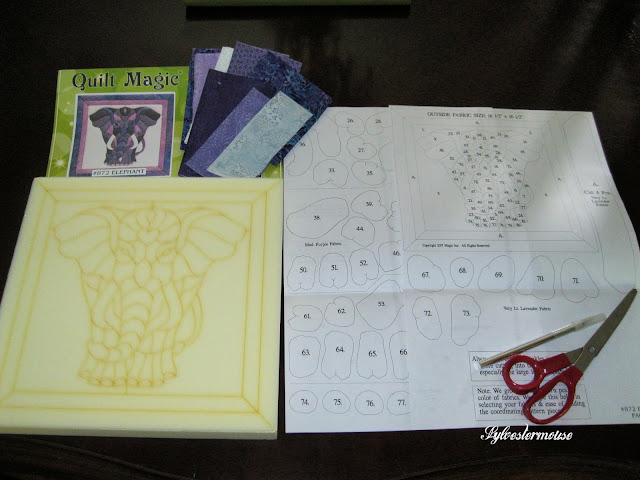 |
| Kits Include: Pre-cut Form, Easy to Follow Pattern, & Fabric Pieces (to cut) |
How to Make a Quilt Magic Kit Picture
I know you will be excited to get started on the project, but you need to iron the fabric first. This is extremely important! You will not want the fabric to be creased. You need it to lay flat when "punching" it into the form.
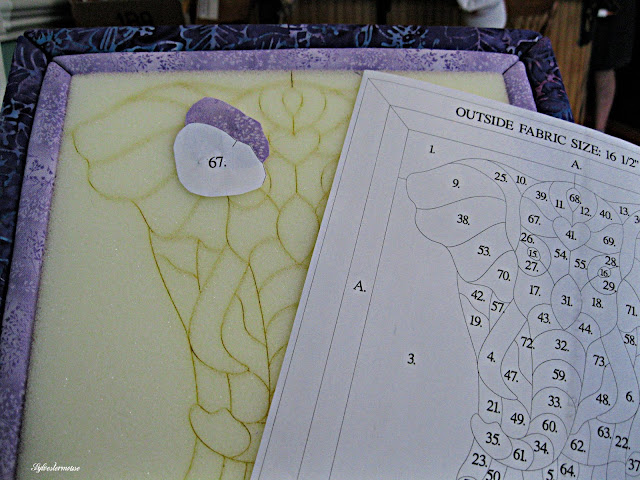
I cut out the pieces from each fabric, pinned their numbered pattern piece to the cut fabric, and placed them in a baggy until I was ready to add the piece. I had a separate baggy for each fabric.
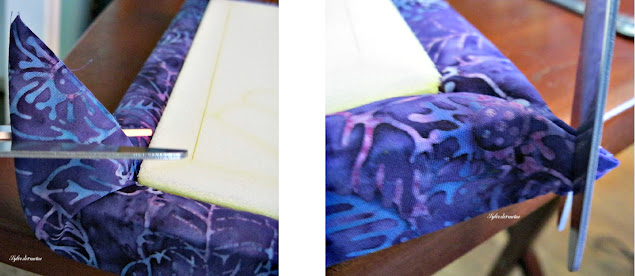
Start with the border & back. The back piece is one large piece that you attach to the form by folding the ends over the front side and pressing the edges in the border grooves. You will need to trim the fabric at the corners twice to make the fabric slip into the cut corner grooves. Be careful not to cut too much off. There is no extra fabric included for mistakes.
Note: The corners of the form are not pre-cut deep enough to hold the fabric. You will need to cut the corner form groove with a sharp knife per the enclosed instructions. Otherwise, all of the grooves are pre-cut for you.
From here on, it is pretty smooth sailing. You simply match the number on the piece to the number on the pattern and push the fabric into the pre-cut grooves for each section.
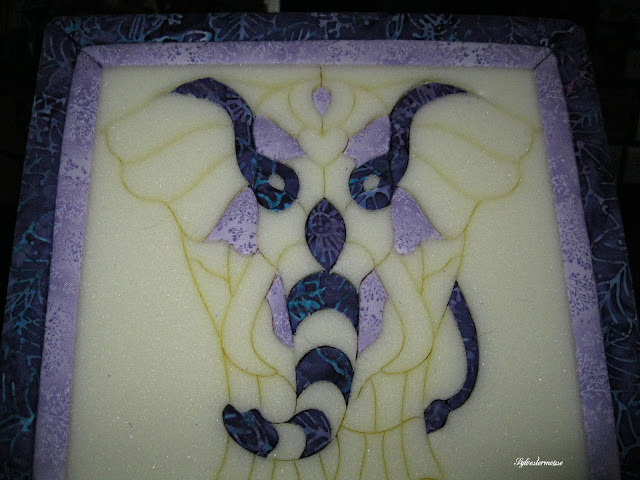
I opted to add the the pieces cut from each fabric all at one time. However, you may prefer to add the pieces section by section, left to right, or whatever type of layout organization works best for you. I have friends who would rather see the project come to life one area at a time.
The Quilt Magic no-sew kits are easy, but they do take longer than advertised to make. Each picture kit took several days to cut and assemble, but the end results were definitely worth the time.
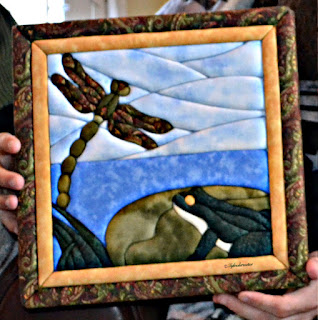 |
| Quilt Magic Wall Hanging Gift for My Son |
 |
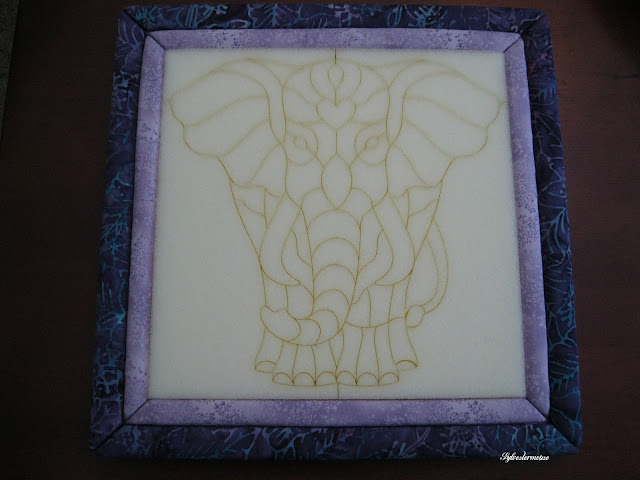
| Quilt Magic Wall Hanging Gift for My Daughter |
A Variety of Quilt Magic Kits Are Available
Quilt Magic Kits are available in many different styles, colors and themes. There are even holiday Quilt Magic Kits for those who enjoy holiday wall decor.
Quilt Magic 12-Inch by 12-Inch Butterfly Kit, 11.75Check PriceQuilt Magic 12-Inch by 12-Inch Happy Home KitCheck PriceQuilt Magic Lion Kit, LionCheck PriceQuilt Magic 10-Inch by 19-Inch Lighthouse KitCheck Price
See More Quilt Magic Kits by Clicking Here!




These kits look great. What an ingenious idea to make it so that even those without your experienced sewing skills can make a beautifully framed quilted picture! I really like the purple fabrics in the elephant quilted picture kit. I'm sure both your son and daughter adore these special gifts made by your hands! Thanks so much for introducing us to these great kits and for your excellent step-by-step explanation, helpful tips and photos. Great review!
ReplyDeleteSo pretty! I have always wanted to quilt ! This looks like a project I could handle w my still learning skill set .
ReplyDeleteThese Quilt Magic Kits are darling. And you chose just the right ones for each of your children. I'm sure they love them. Handmade gifts are the best! I've never done quilting, but my DIL does. I'll have to ask her what she thinks of these.
ReplyDeleteI love, love, love this! That purple elephant calls out to me. How did I not know about Quilt Magic kits? What a fabulous gift project. I just may have to make one, or two, or three. What a great review!
ReplyDeleteI love this! I've never heard of it. If I need a distraction craft from life, this is what I would choose. I wouldn't mind getting this as a gift. People who make quilts are so impressive to me, what talent. I would love to be able to make a quilt. One day I may tackle it. In the meantime, wouldn't this be a great place to start.
ReplyDeleteOh that is so pretty! I love crafts that are beautiful to give as gifts and this certainly is just that. What a lovely way to spend some time making something beautiful. Thank you for this post, I had not heard of these before. I will have to look into doing one or more of these for my children as a gift as well.
ReplyDeleteThese look lovely, the elephant would be perfect for one of my nieces.
ReplyDelete