I've always loved a seasonal wreath on a front door. There's just something about walking up to a house and being greeted by a cheerful wreath that feels warm and inviting.
It's like the house itself is smiling at you. When spring rolls around, a bright, floral wreath is the perfect way to welcome the season of renewal right at your doorstep.
1. The Meaning Behind a Spring Wreath
Spring wreaths aren't just pretty; they carry symbolic meaning as well. Wreaths, in general, have long been symbols of growth, renewal, and the cycle of life, which makes them a perfect match for spring.
Flowers represent the blooming of new beginnings, while greenery symbolizes life and vitality.
A spring wreath can be a quiet but meaningful reminder to embrace change, fresh starts, and the beauty of nature awakening around us.
Whether you choose a floral design, a greenery wreath, or something whimsical like one made with Easter eggs or butterflies, it's a lovely way to mark the season.
2. Decorative Impact That Elevates Your Curb Appeal
Let's be honest — a spring wreath just makes your home look good!
It's a simple yet powerful way to add color and personality to your front door. Even if your porch is basic, a vibrant wreath can instantly brighten things up.
I've found that a spring wreath can also tie together other decorative elements.
If you enjoy putting out a welcome mat, potted plants, or seasonal decor on your porch, a wreath can pull the whole look together. The combination creates a cohesive and inviting entryway that leaves a lasting impression.
Check out this collection of spring wreaths for unique ideas on different wreath styles. Whether you prefer bold colors or soft pastels, there's something to suit various styles.
3. Practical Tips for Choosing and Hanging a Spring Wreath
If you're like me, you want a wreath that not only looks great but holds up well. Here are some quick tips I've learned over the years:
Go Artificial for Longevity: While fresh flower wreaths are stunning, they don't last long. Artificial options can look just as beautiful and will stay vibrant all season.
Choose Weather-Resistant Materials: If your front door is exposed to the elements, look for UV-protected or weather-resistant wreaths to prevent fading.
Pick the Right Size: A wreath that's too small can get lost on the door, while one that's too big may overwhelm it. Aim for a size that fits comfortably within the door's center.
Use a Sturdy Hanger: Over-the-door wreath hangers are easy to use, but adhesive hooks can work well if you'd rather avoid a visible hook on top. I prefer the over-the-door hanger, but that's just a personal thing. Check out both hanging devices and decide which works best for your door.
As a reminder, if you're ready to find the perfect wreath for your door, I've gathered some wonderful ideas in this spring wreath roundup. There's something for many tastes and styles.
Final Thoughts
Putting a spring wreath on your front door is such a simple way to celebrate the season and make your home feel warm and welcoming.
Whether you choose a floral masterpiece, a greenery-inspired design, or something playful and fun, it's a beautiful way to show off your style and greet guests with a smile before they even step inside.
Happy spring decorating!
Note: The author may receive a commission from purchases made using links found in this article. “As an Amazon Associate, Ebay (EPN), Esty (Awin), and/or Zazzle Affiliate, I (we) earn from qualifying purchases.”
When it comes to designing a home office, one element that often gets overlooked but plays a huge role in functionality and aesthetics is the area rug.
Having spent countless hours experimenting with layouts and designs, I've discovered a few strategies to help you select a practical and visually appealing rug. Let's dive into my personal tips for making the right choice.
Positioning Your Home Office Rug: Setting the Stage for Productivity
The placement of your rug can make or break the flow of your workspace. Here are a few considerations to help you position your rug effectively:
Anchor Your Desk and Chair: I recommend placing the rug directly under your desk and chair to define your workspace. Make sure the rug is large enough so that when you pull your chair back, it stays on the rug. This creates a comfortable zone that enhances both form and function.
Balance the Room: If you have additional furniture like bookshelves or a filing cabinet, consider how the rug interacts with these pieces. Centering the rug in the room or aligning it with your furniture can create a cohesive and balanced look.
Keep It Clear: Avoid placing the rug where it might obstruct doorways or high-traffic areas. A well-placed rug should enhance the room's flow, not hinder it.
Size Matters: Choosing the Right Dimensions
Picking the right size rug is essential for maintaining harmony in your home office. Here's how I approach this:
For Small Setups: If your office space is compact, opt for a smaller rug that fits neatly under your desk and chair. A 5x7 or 6x9 rug is typically ideal for tighter spaces.
For larger spaces, I Recommend a rug large enough to accommodate multiple furniture pieces in a bigger office. Rugs measuring 8x10 or 9x12 can anchor the entire room, making it feel more unified.
Think Beyond the Desk: Sometimes, a larger rug that extends beyond your desk can create a warmer, more inviting atmosphere. This works exceptionally well in open-concept spaces.
Color and Pattern: Setting the Mood
Your rug's color pattern significantly impacts the vibe of your home office. Here are a few ideas based on my experience:
Neutral Tones for Focus: Rugs in neutral shades like beige, gray, or soft blues create a calm and professional environment. They're versatile and pair well with most décor styles.
Bold Hues for Creativity: Try a vibrant red or emerald green rug to energize your space. These colors can inspire creativity and make your office feel more dynamic.
Patterns for Personality: Don't be afraid to choose a patterned rug to add character. Whether geometric, floral, or abstract, a well-chosen pattern can bring texture and depth to your workspace. Just keep the rest of the room's déroom's mind to avoid clashes.
My Wool-Patterned Office Area Rug is 30 Years Old! It was purchased in 1994. Here's a Photo. Yep, I Prefer Patterns.
Note: The author may receive a commission from purchases made using links found in this article. “As an Amazon Associate, Ebay (EPN), Esty (Awin), and/or Zazzle Affiliate, I (we) earn from qualifying purchases.”
Transform Your Space with These 5 Stunning Textured Wall Ideas
Did you know that textured walls are one of the 2025 home decor trends?
When decorating your home, textured walls are the secret ingredient to adding depth, warmth, and personality to any room.
Whether creating a bold statement or a subtle layer of interest, these ideas will inspire you to reimagine your walls in ways that evoke emotion and style.
Let’s explore five fabulous textured wall ideas, complete with tips on color, balance, and how to maximize each option.
1. Faux Brick Walls: The Charm of Urban Sophistication
Faux brick walls bring the rugged charm of a city loft into your home without the structural overhaul. These panels or wallpapers mimic the texture and appeal of exposed brick, creating a cozy yet industrial vibe.
What It Adds:
Brick walls add a sense of authenticity and character to your space, perfect for creating a warm, inviting atmosphere. Use them in a living room or home office to make the space feel grounded and stylish.
Color Tip:
Go with classic red bricks for a rustic charm or whitewashed bricks for a lighter, more modern feel. To avoid overwhelming a room, balance the texture with smooth surfaces, like sleek furniture or polished floors.
Textured paint was a hot trend in the 1990s, and I added it to my home as well. Fortunately, this textured look is making a comeback! Because I still have it featured in my hallways. I find it very durable, especially when you seal the sponge work with a sealer.
Textured paint techniques, like sponging or rag rolling, bring soft, layered textures to your walls, evoking a sense of movement and depth. These techniques work wonderfully in bedrooms, hallways, or bathrooms for a soothing yet elegant touch.
What It Adds:
This option adds a luxurious, artistic flair to any room, drawing the eye while remaining understated. It’s perfect for creating an intimate, serene space.
Color Tip:
Choose soft hues like lavender, sage green, or pale blue for a calming effect. Avoid overly bold colors, as they can make the texture feel chaotic. Stick to a monochromatic palette to keep things cohesive.
3. Wood Paneling: Rustic Warmth with Modern Appeal
Wood paneling should have a modern flare—not those found in 1960s basements. Unless you love that, then go for it.
Whether reclaimed or new, wood paneling or shiplap makes a space feel cozy and organic. Vertical or horizontal slats can create illusions, like making a ceiling appear higher, or a room appear longer.
What It Adds:
The natural texture of wood infuses warmth and a tactile quality into a room, making it feel grounded and serene. It’s especially effective in dining areas or bedrooms.
Color Tip:
Light oak or ash wood brings brightness, while darker shades like walnut create a dramatic, moody vibe. Pair dark wood with light-colored walls or ceilings to avoid making the room feel heavy.
4. 3D Wall Panels: Drama and Depth
3D wall panels create a dynamic visual experience for a bold, modern look. These panels, available in geometric, floral, or abstract designs, turn any wall into a statement piece.
What It Adds:
These panels add drama, sophistication, and a futuristic vibe. They’re perfect for accent walls in living rooms or behind a bed as a headboard feature.
Color Tip:
White or neutral panels keep the design crisp and modern, while bold colors like navy or emerald green make a room pop. Use sparingly, as too much texture and color can overwhelm a space.
Here comes the 1980s. We created a featured grasscloth wall in our first apartment in 1982! Oh, and I loved it, and I still love grasscloth.
Grasscloth wallpaper is made from natural fibers like jute, sisal, or bamboo. It gives walls a soft, woven texture, perfect for creating a tranquil, spa-like ambiance.
What It Adds:
Grasscloth brings an organic, earthy feel to a room, creating a sense of calm and balance. It’s ideal for home offices, libraries, or even entryways.
Color Tip:
Earthy tones like beige, olive, or sand enhance the natural vibe. Because grasscloth has subtle patterns, pairing it with solid-colored furniture is best to maintain balance.
How to Avoid Overwhelming a Space with Textured Walls
Start Small: Use texture on a single accent wall rather than an entire room to keep the look balanced.
Coordinate Colors: Choose complementary colors across textured and non-textured surfaces for harmony.
Balance with Simplicity: Pair textured walls with minimalist decor to let the walls shine without creating visual clutter.
Play with Lighting: Proper lighting can beautifully highlight textures, so use spotlights or wall sconces to add depth and drama.
Note: The author may receive a commission from purchases made using links found in this article. “As an Amazon Associate, Ebay (EPN), Esty (Awin), and/or Zazzle Affiliate, I (we) earn from qualifying purchases.”
This review covers an easy DIY project to renovate old unremarkable furniture into something to grace our homes and fit with existing decor.
In our case we wanted a new dining table and chairs but the only ones we could find to fit our space and circular were very expensive. We did however find a lovely circular table and four chairs that were perfect for our needs and very comfortable at a very good price, but the issue was that they were a quite horrible orange pine colour.
I am not usually an advocate of painting wood. If it is beautiful oak, mahogony, rosewood or reclaimed wood I will not paint it.
However orange pine with a shiny finish is just not to us all that beautiful and did not fit in with the rest of our decor ideas for the dining room.
I am not deterred by a minor issue like this and we really liked the style and comfort of this dining set. So we bought the dining set and went about cleaning, sanding and painting.
Here I will tell you what we did with the chairs.
Step One Sanding Down Pine Chair
First it was important to sand down the wood. It had a shiny surface to it and I did not think even the best paint would go on well over such a shiny surface.
With some furniture paints they declare that you do not need to sand down first so it is always best to check the instructions and perhaps do a patch test to make sure if you need to sand or not.
So we sanded it with a fine sandpaper until all the shiny orange paint was no more!
It is important to do this step carefully and take your time as skimping on this preparation will affect the whole project.
I don't have a workshop or anywhere to do this kind of work so for me it was a case of clearing a room and laying down dust sheets and working on the floor. Of course a work table or ideally a workshop would be wonderful but this project is perfectly possible with none of this.
Step Two Cleaning The Chair
Next I cleaned the whole chair including the seat cushion and back.
The wood was cleaned with sugar soap and the chair with an upholstery cleaner. There is no real skill to this, all this took was time and following the cleaning instructions.
Then we left it all to dry.
Step Three Masking Tape
With a project like this it is important to use masking tape to mask off all the areas that you do not want to paint. I do find this step rather boring but it is necessary.
It is worth spending a little time over this as it is a lot more difficult to remove paint from where you do not want it than to simply mask it off beforehand and does make the painting process easier.
Step Four Painting The Wood.
After laying down sheets I set about painting the whole chair.
It needed to be done in two steps so that I could reach the whole wooden parts of the chair. So involved the chair standing up and laying down to reach it all.
As I had two chairs on the go at the same time this was possible to do without wasting time.
We chose a light grey colour. It did take two coats to cover the wood. I would always recommend two coats. A darker colour may have covered the wood more thoroughly with one coat but I always think two coats gives better coverage and longevity.
Furniture Paint.
We used Rust Oleum Satin Finish Furniture Paint. It says on the tin it is a superior satin silky finish in slate grey.
I found that this paint went on very well and smoothly. I found it a really good paint to use. It did not have an overpowering smell and did not give me a headache as many paints do. It went on well although was a little drippy, so it was essential to have sheets down. It is necessary to stir it well before starting to paint.
The clean up is so easy as it is water based so it is just a case of wiping off most of the excess paint then washing in water.
If I had a workspace I might have used a Rustoleum furniture spray paint which may have speeded things up. However I was doing this project in winter in our dining room so a spray paint would not have been a good idea in these circumstances.
Any good furniture paint can be used, just choose the finish, application method and colour you like. I tend to go for water based and low odour for ease of use in the home and clean up afterwards.
Due to the space and how intricate some of the work was I used a small paintbrush and I think this was a good idea so that there was more precision.
After the first coat the finish did not look all that good but I always expect this.
I left it to dry thoroughly then applied a second coat and this is where the magic happens as the pine disappeared and the beautiful slate grey colour saturated the wood. I an no expert but I think the finish, even in the more difficult intricate parts is pretty good.
The four chairs took me two days to do at a fairly relaxed pace with lots of coffee breaks! It is a straightforward project that anyone could do really. All it takes is time and patience and a few basic painting skills.
Note: The author may receive a commission from purchases made using links found in this article. “As an Amazon Associate, Ebay (EPN), Esty (Awin), and/or Zazzle Affiliate, I (we) earn from qualifying purchases.”
A cluttered linen closet can be a source of frustration, especially when
you're searching for that elusive missing pillowcase from a set of sheets or
the washcloth from a particular set of towels. Fear not! In this guide, I’ll
review an easy and efficient way to organize your linen closet using pop-up fabric storage bins labeled with index cards inside clear plastic pockets. Say
goodbye to the linen closet chaos and hello to a well-organized and visually
pleasing storage space for your sheets, towels, tablecloths, napkins, spare
blankets and pillows, out-of-season comforters, and holiday table runners.
It's time for spring cleaning!
I am not neat and well-organized by nature. However, I dislike living in a
cluttered environment, as does my husband. So, periodically, we tackle an area
of particular irritation to de-clutter and organize. Our most recent project
was our overstuffed and extremely messy linen closet.
Our easy linen closet makeover was a smashing success, so I put together a
step-by-step guide to decluttering and organizing a messy linen closet. (My
fellow Review This Reviews contributor Barbara also wrote a
linen closet organization guide
several years ago that you might want to check out.)
Photograph Your Messy Linen Closet Before You Begin Organizing
I encourage you to take before-and-after photos to document the
transformation. Our “before” closet was so bad that I didn’t photograph it and now I wish I had! The "before" photo you see above was taken in the middle of the process, after we had pulled everything out, sorted it into piles, discarded items we no longer need or use, and organized the linens we're keeping. It would have been far more impactful to show our real "before" linen closet next to our finished, organized "after" result, as well as a feel-good reminder of all we accomplished during this DIY home organization project.
Step 1: Assess, Sort, and Weed
Decluttering is the first step towards achieving an organized and functional
space. Before diving into the organization process, take a moment to assess
your linen closet's contents.
We pulled everything out of our closet, dumped them on our king-size bed, and
then sorted all our sheets, pillowcases, towels, blankets, tablecloths,
napkins, and other miscellaneous items into piles by category. Then came the
hard part: deciding what to let go of or store elsewhere (such as the rarely
used sheets for our sofa bed).
Set aside any worn-out, torn, stained, or mismatched linens, towels, or items
you no longer need. Be as ruthless as you can. Decide what to discard or
recycle and what to donate, then put those items into the trash, bags, or
boxes, as appropriate, labeling the containers for recycling or donation.
Step 2: Group, Arrange, and Label Your Remaining Linens
Next, put everything else back in the closet, grouping related items and
arranging them in whatever way you prefer to maximize shelf space and optimize
organization. Be sure to leave some shelf space open to accommodate future
purchases or gifts.
Tip: I suggest putting the linens you use most frequently on the most easily
accessible shelves and reserving the highest and lowest shelves for the items
you need to remove or put back less often ( such as comforters, extra
blankets, guest linens, and holiday tablecloths).
Using scrap paper, make a temporary label for each pile on the shelves (e.g.,
blue towels, pink towels, striped flannel sheets). Personalize these labels in
any way that makes sense to you (e.g., Mom’s Quaker lace tablecloth and
napkins). Then place these temporary labels on top of each pile until you have
your storage bins and labeling materials.
Our linen closet after we weeded out what we didn't need to keep. It's
organized, but still messy and the linens don't fit the space well.
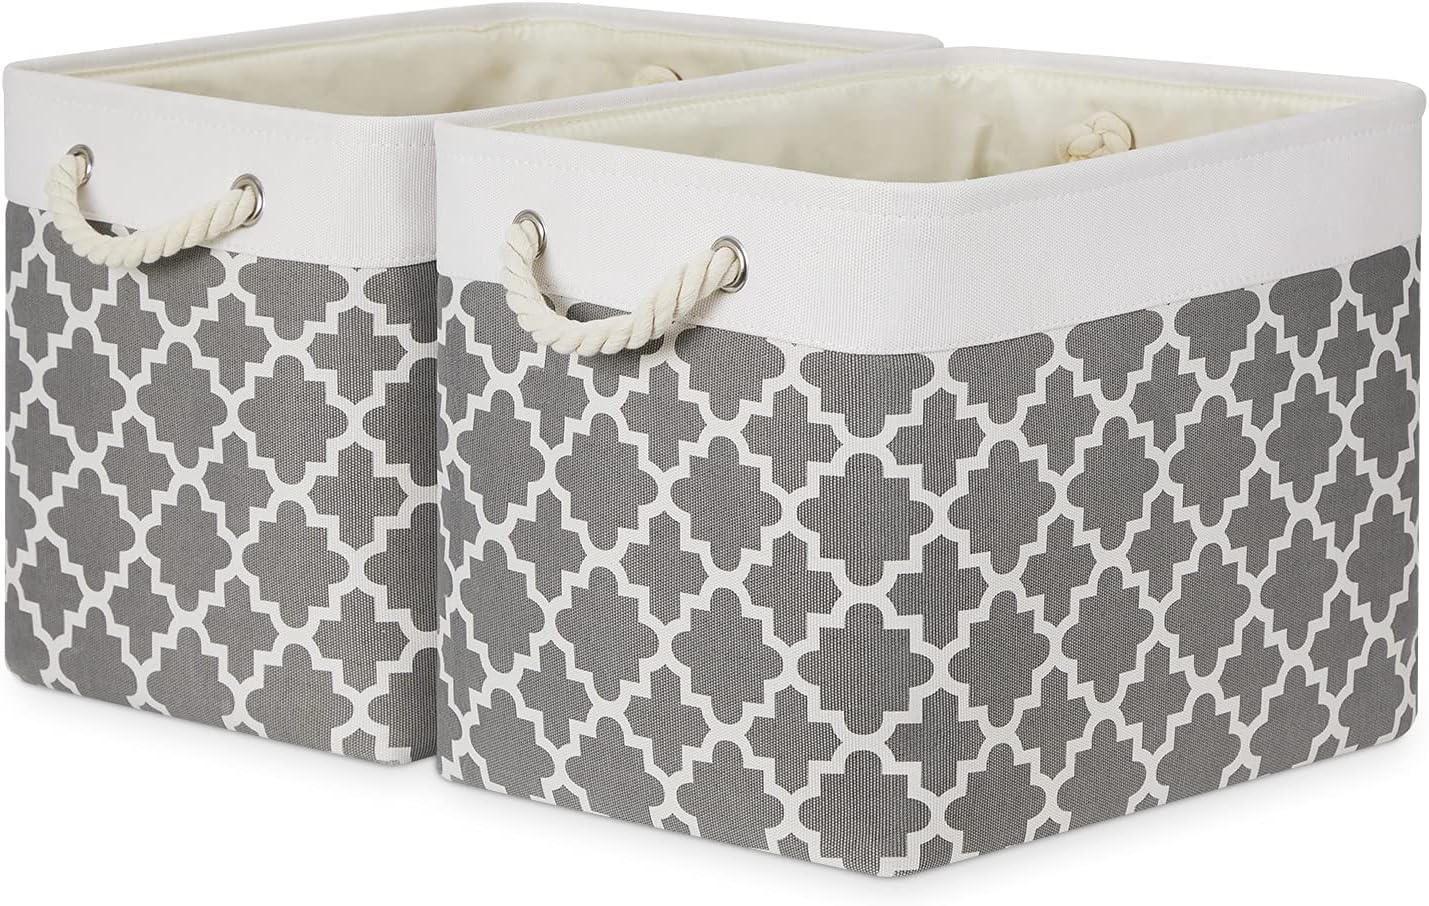
Step 3: Measure, Then Select Fabric Storage Bins or Baskets
Pop-up fabric storage bins or baskets are a game-changer for maximizing space and
bringing order to your closet both functionally and visually. These collapsible fabric bins make it easy to
group similar items and access them effortlessly. Choose appropriate size bins
to accommodate different types of linens, from large king-size sheet sets to
small dish towels.
Measure your piles of linens, the width of your linen closet shelves, and the
space between each shelf, then select a variety of coordinated bins in
different sizes to fit. This allows you to customize your storage solution
without investing in a custom closet makeover solution. The pop-up storage
bins we selected are inexpensive and the workmanship is not perfect, but the
price was right and they come in a wide range of sizes and shapes. It was also
important to us to have bins that fold down when not in use because we wanted
to keep some extras to allow for future expansion of our linen closet's
contents. However, if you don't mind spending more, you can find a wide array
of attractive storage bins to suit a variety of tastes and home decor styles.
If you have large, bulky items like comforters that won't fit inside even the
largest pop-up storage bins, you may want to put them in airtight vacuum
compression storage bags designed for this purpose, which will not only keep
these items clean but also compress them to fit more easily on your closet
shelves and save space.
Step 4: Unfold and Label the Bins
To make it easy to find what you need at a glance, you will want to label your
pop-up storage bins. We decided to use self-adhesive clear plastic 3” x 5”
pockets and index cards for labeling the fronts of our bins and ordered them
from Amazon along with our bins. We chose the 3”x5” size because they matched
the width of our smallest bins but were still large enough to accommodate
labels with several lines of text when needed.
When your bins, plastic pockets, and index cards arrive, unfold the bins and
press against the sides to prop them open. (The sides won’t stay completely
straight until you fill the bins.)
Attach a clear plastic pocket to the front of each bin. We ordered self-stick
plastic pockets but discovered that they didn’t adhere well to the fabric bins
over time, so you will want to stitch, glue, or rivet the pockets to the bins.
We've ordered a rivet tool and some rivets for attaching ours more securely.
We will use the rest of the self-adhesive pockets and index cards to label
storage cartons, where the adhesive will work perfectly.
Using a permanent marker and index cards, write a new, permanent label for
each pile of linens on your closet shelf to replace the temporary label.
This simple and effective labeling system allows for quick identification
without having to rummage through each bin, and the clear plastic pockets
protect the index card labels from becoming worn or dog-eared.
Step 5: Arrange Your Linens in the Labeled Bins
Take one pile of related linens and place it into the appropriately sized bin.
Insert the index card label into the clear plastic pocket and return it to the
closet shelf. Repeat with the remaining piles, bins, and labels.
This systematic approach not only keeps everything organized but also makes it
easier to find what you need when you need it.
Then take a photo of your newly neat and organized linen closet and savor the contrast vs. your "before" picture.
Our formerly crammed, messy linen closet is organized and
labeled, so everything is easy to find and accessible. Now
we just need to remove the old, frilly, decorative pink shelf edging we inherited!
Step 6: Maintain Regularly
To keep your linen closet organized and efficient, commit to regular
maintenance. Fortunately, this system makes it easy to maintain because, as my
grandmother used to say, there’s “a place for everything and everything in its
place.”
Periodically review the contents of each bin, refreshing, replacing, or
rearranging items as needed. This ongoing effort will prevent the return of
clutter and keep your linen closet in top-notch shape.
Messy Linen Closet Makeover Supplies
My husband chose a tailored storage bin style for this project, but the pretty baskets with the quatrefoil pattern would be a lovely, more feminine choice.
Transforming your linen closet into an organized storage space is a satisfying
and easily achievable DIY project. With the help of pop-up storage bins
labeled with index cards inside clear plastic pockets, you can create a system
that not only streamlines your storage but also adds visual appeal. Enjoy the
benefits of a tidy, accessible linen closet, where finding the perfect set of
sheets or towels or your favorite tablecloth and napkins is a breeze.
Happy organizing!
How to Organize Your Messy Linen Closet With Pop-up Storage Bins by Margaret Schindel
Read More
Decor Reviews by Our Review This Reviews Contributors
Read More
Product Reviews by Our Review This Reviews Contributors
Note: The author may receive a commission from purchases made using links found in this article. “As an Amazon Associate, Ebay (EPN), Esty (Awin), and/or Zazzle Affiliate, I (we) earn from qualifying purchases.”
Aquarius, the eleventh sign of the zodiac, symbolizes innovation, intellect, and independence. Those born between January 20 and February 18 are known for their unique perspectives, humanitarian values, and strong sense of individuality.
Let's explore Aquarius's distinctive traits and discover how they can infuse their personality into their living spaces.
Aquarius Traits:
Independent Thinkers: Aquarians are known for their independent and original thinking. They enjoy breaking free from tradition and exploring new ideas. Consider incorporating avant-garde artwork or unconventional furniture pieces into your home to reflect this trait.
Humanitarian Values: Aquarians are often deeply committed to social causes and humanitarian efforts. Displaying artwork or decorative items that reflect their passion for social justice can be a meaningful addition to their home decor.
Intellectual Stimulation: With a natural curiosity and a love for intellectual pursuits, Aquarians thrive in environments that stimulate their minds. Create a cozy reading nook with a collection of thought-provoking books, or adorn the walls with maps, charts, and diagrams that pique their interest.
Quirky Aesthetics: Aquarians appreciate the unusual and quirky. Infuse your home with unexpected elements, such as funky light fixtures, abstract sculptures, or vibrant patterns that showcase their eclectic taste.
Technological Savvy: Ruled by Uranus, the planet of innovation and technology, Aquarians often have a keen interest in modern gadgets. To appeal to their tech-savvy side, incorporate smart home devices, sleek electronics, or futuristic design elements.
Home Decor Tips for Aquarians:
Futuristic Furniture: Opt for furniture with clean lines, metallic finishes, and a modern aesthetic. Futuristic chairs, tables, or lighting fixtures can add a touch of innovation to your living space.
Eclectic Artwork: Select artwork that embraces unconventional themes, abstract concepts, or social commentary.
DIY Projects: Aquarians like to express their creativity through DIY projects. Make space for crafting, whether it's a dedicated art studio or a corner for experimenting with various DIY ideas.
Green Spaces: Aquarians appreciate nature and its connection to humanity. Incorporate indoor plants or a small garden area to bring the outdoors inside, promoting a sense of harmony and well-being.
Unique Lighting: Experiment with unique lighting fixtures that serve as both functional and artistic elements. Consider pendant lights, LED strips, or unconventional lamp designs to illuminate the space with a touch of individuality.
Decorating a home that resonates with an Aquarian's personality involves embracing their love for innovation, independence, and humanitarian values.
By incorporating these astrological decor tips, Aquarians can create a living space that reflects their unique traits and serves as a haven for creativity and intellectual exploration.
Note: The author may receive a commission from purchases made using links found in this article. “As an Amazon Associate, Ebay (EPN), Esty (Awin), and/or Zazzle Affiliate, I (we) earn from qualifying purchases.”
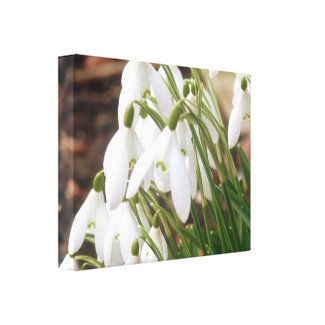
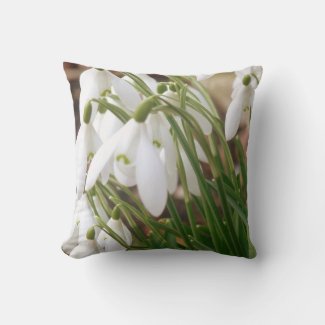
I adore Snowdrops. From the end of December I start eagerly searching for signs of snowdrop life. To see those tiny green shoots really lifts my heart and brings such joy. To me Snowdrops epitomise beauty, strength and overcoming adversity.
They are the first flowers to bloom in the year and are a symbol of hope and renewal after the long wet, cold winter.
Snowdrops appear so fragile and delicate yet they are so resilient. The exquisite white flowers are a beautiful sight I look forward to every year.
Snowdrops are a Spring flower and part of the amaryllis family. They are classed as a hardy perennial mostly flowering in January and February. They are small and close to the ground growing about 3 to 6 inches tall yet are perfectly capable of growing up through snow and ice.
There are many varieties of snowdrop each with their slightly different height and shape and size of flower. I enjoy making home decor items and greetings cards from photographs I take of snowdrops in my garden and the parks nearby each year.
Snowdrops are very easy to grow. They enjoy partial shade and moist soil. If they are happy they will grow into stunning drifts of white flowers and look amazing. Equally they look gorgeous in small or large pots.
Mostly I grow snowdrops as an outdoor plant but I have heard of people growing them indoors to use as table decoration and an alternative or addition to buying cut flowers in winter which sounds a great idea I may try.
Snowdrops are so delicate looking and beautiful that they make great subjects for home decor and you can buy many snowdrop related items. For example from cushions to hand painted glass or this lovely Glass Flower Snowdrop Glass handblown or snowdrop scented candles.
Snowdrops are a fleeting flower but by having them in home decor items you can have snowdrops all year round.
Being with white flowers and green stems they fit in with most home decor schemes and always look fresh, clean and appealing.
Snowdrops always leave me feeling joy and smiling perhaps more than any other flower.Perhaps it is their tenacity and resilience wrapped in such delicate beauty having come through winter with all its challenges ready to charm us all and bring happiness.
I would never be without them in my garden and in pots and in my home in one way or another.
Note: The author may receive a commission from purchases made using links found in this article. “As an Amazon Associate, Ebay (EPN), Esty (Awin), and/or Zazzle Affiliate, I (we) earn from qualifying purchases.”
One of my favorite gifts to give or receive is genuine wax flameless candles
with a lovely, flickering "flame," a timer, and a remote control that lets me
"light" them or "blow them out" from across the room at the touch of a button.
When flameless wax candles first came out, the quality of the "flame" from
most manufacturers was pretty poor. Fortunately, the technology has improved
and prices have come down a bit over the years. Now you can buy nice ones that
are suitable for both gift-giving and home decor at moderate as well as
premium prices.
Whether you buy a single flameless pillar candle, a pair of tapers, or a set
of votives, they're sure to add beauty and timeless elegance to your home and
be a gift that keeps on giving.
Flameless wax candles are elegant and safe to leave unattended. My
favorites also include a timer and remote control that let you "light"
and "blow them out" from across the room.
Why Choose Flameless Candles?
Here are some of the qualities that make flameless candles appealing for both
gifts and home decor, during the holidays and year-round.
Long-Lasting Beauty
These flameless candles let you enjoy the timeless beauty of genuine wax
candles that never burn down. We have used ours frequently for many years with
no end to our enjoyment in sight (unless we run out of batteries).
Flickering LED "Flame"
The flame on these LED flameless candles moves randomly to simulate the
flicker of an open flame on a traditional wax candle. Close-up, of course, no
one will mistake it for a real flame. However, from farther away, the "dancing
flame" effect can be quite realistic.
No Drips
Unlike traditional candles with wicks, the wax body of these flameless candles
remains at room temperature and won't melt or drip (unless you subject them to
excessive heat). A grouping of pillars or some tapers make a lovely
centerpiece that can't set your tablecloth on fire if they're accidentally
knocked over while passing a serving dish. You could even use them on a finely
finished antique wood table without fear of marring the surface.
No Smoke
Another advantage is that flameless candles are smoke-free. You can "burn" as
many of these beautiful candles as your heart desires without worrying about
setting off the smoke alarm! I love the look of candles everywhere, especially
during the holidays.
Candlelight That's Safe for the Whole Family
Since there isn't an open flame, these flameless candles can be left
unattended, unlike traditional wax candles. They're safe to leave on in your
windows during the holidays. They provide a romantic glow in the bedroom, with
no worries if you happen to fall asleep before turning them off.
They're also safe to use around children and pets.
Perfect for the Dark Winter Months
Here in New England, the winter months can be brutally cold and the sun sets quite early. We have flameless LED candles in nearly every room of our house, and during the winter we set them to turn on at dusk, so we never have to walk into a completely dark room. The LEDs draw very little power, so a set of batteries usually lasts us the whole winter and beyond.
Two of our Luminara flameless pillar candles with our set of three
color-changing flameless pillars
Luminara Flameless Candles: Perfect for Gifting
There are many brands of flameless candles, and the quality can vary
significantly. We've tried a few inexpensive brands and have mostly been
disappointed. The brand we count on for consistently high quality is Luminara.
Luminara makes top-of-the-line flameless candles made of hand-poured paraffin
wax. Most styles have a timer and a remote, and all are boxed for easy
gift-giving.
The company offers a wide range of styles, from everyday essentials to
specialty items like real birch flameless candles filled with paraffin wax
(gorgeous for country or rustic home decor) and Christmas-themed styles.
Here are some of my favorites.
This set of three Luminara melted edge wax pillar candles is one of the company's best
sellers. The graduated-height, 3-inch wide pillars are 4.5", 5.5" and 6.5"
tall, respectively.
The included remote control operates all three candles. Even if you split them up and place them in three different locations, you can control each one with the same remote, which is very convenient.
These are unscented (although Luminara does make some scented styles), so they're ideal for someone who is sensitive to scents, has allergies, or prefers to use other home fragrance products such as potpourri or sprays.
These also come in a choice of colors. I think the burgundy is very festive for the holidays and would be great as an accent color in a mostly neutral decor palette, while ivory or white are more subtle and very elegant any time of year.
We own this set of three pillars in ivory as well as a tall pillar in a
discontinued color (blue sage) that coordinates with our living room color
scheme.
Another choice that will grace your or your gift recipient's dining table for
years to come is this set of Luminara ivory flameless wax tapers.
Elegant wax tapers are a classic, timeless style for good reason. Classic elegance with the safety and convenience of a flameless "flame" is a win-win!
Measuring 1" wide by 9.75" high, these flameless tapers can be used in any standard taper candle holder. Even reheated leftovers can become a festive meal with these flickering beauties on the dining table.
Although these do not come with a remote control, they do have a timer function that allows them to turn on for 5 hours and then shut off automatically for 19 hours.
These
flameless taper candles come in classic ivory as well as other colors
for a more contemporary style.
As with all Luminara candles, they come boxed so they're easy to wrap for gift-giving.
Another of my favorite flameless candle styles is this hand-poured Luminara wax pillar wrapped in genuine birch bark.
Every time I see one in a store I am tempted to add one to our collection. We bought one in a taller size as a Christmas gift for my mother-in-law and she loves it. In fact, she later gave one as a gift to one of her friends!
This birch bark-covered flameless LED pillar candle is available in a selection of sizes including 3.5" x 4.5", 3.5" x 6.5", 4" x 5" and 4" x 7".
Just one of these is striking enough to make a statement in any room. Investing in a group of them in different sizes would make a real conversation-piece display!
The on/off switch on the bottom also has a timer setting.
Although this beautiful birch pillar doesn't come with a remote, it is compatible with Luminara's on/off remote, sold separately, which is well worth the extra money, in my opinion. We use our Luminara remotes all the time.
Color-Changing Flameless Candles
One of the best gifts I ever gave my husband was a set of three color-changing
wax flameless candles with a multi-function remote. I prefer white Christmas lights and he prefers colored
ones, and it was a big concession for him to go with white icicle lights along
our roof and on our Christmas tree. So, one year I decided to give him a form
of colored lights we both could enjoy: color-changing flameless candles.
These turned out to be an even bigger hit than I had hoped. I took a video of
ours to show the color-changing effect, which was hard to capture on video and
is MUCH prettier in person. (If you can't see the YouTube video below, you can
access it via this link to my
color-changing flameless candles video.)
In real life, the color changes are smooth and seamless, and the unsightly
flickering of the image caused by the low-resolution video doesn't exist. I
wish I could show just how beautiful these are in person!
The candles have an on/off switch and a remote control that allows you not
only to turn the candles on and off but also to choose from a wide range of
different colors or rotate through the colors, as shown in the video.
There is also a timer feature, which we use to automatically turn on the
candles in our bedroom at dusk and turn off either 4 or 8 hours later,
depending on the time of year (and how late dusk arrives).
The brand I purchased a couple of years ago is no longer available. However, I
found a similar set with a subtle, elegant, tone-on-tone damask pattern in
the wax shell that makes them even prettier, in my opinion.
Whether you're buying these for yourself or as a gift, make sure to also buy the appropriate batteries for your candles and, if applicable, the remote control.
The set of three Luminara pillar candles, the smaller Luminara birch pillars, and the Luminara tapers take AA batteries. The larger Luminara birch pillars take D batteries. The remote takes a CR2025 button battery.
The three candles in the set of color-changing pillars I featured have built-in rechargeable batteries.
Beauty, long life, safety, and convenience — just some of the reasons to treat yourself and those on your gift list to some genuine wax flameless candles!
Genuine Wax Flameless Candles — An Elegant Gift Everyone Will Love by Margaret Schindel
Read More
Gift Reviews by Our Review This Reviews Contributors
Read More
Product Reviews by Our Review This Reviews Contributors
Note: The author may receive a commission from purchases made using links found in this article. “As an Amazon Associate, Ebay (EPN), Esty (Awin), and/or Zazzle Affiliate, I (we) earn from qualifying purchases.”
The holiday season is upon us, and what better way to transform your home into a winter wonderland than with the magic of Christmas area rugs? These versatile and festive floor coverings are not just accessories; they're the secret ingredient to elevating the holiday ambiance in your home.
Why Decking the Floors Can Be Fun
Instant Cheerful Transformation:
Rolling out a Christmas area rug is like waving a wand and turning your home into a festive haven. The vibrant colors, playful patterns, and iconic holiday symbols instantly infuse a sense of joy and merriment into any space.
Warm and Cozy Atmosphere:
There's something inherently cozy about the holiday season; a Christmas area rug takes that coziness up a notch. The soft, plush textures underfoot create a warm and inviting atmosphere, making your home the perfect retreat from the winter chill.
Express Your Style:
Christmas area rugs come in various styles, from traditional designs with classic motifs like snowflakes and reindeer to modern, whimsical patterns. This allows you to express your unique style while keeping with the festive theme. Whether your taste is timeless or trendy, a holiday rug suits every preference.
Kid-Friendly Fun:
If you have little ones running around, a Christmas area rug can become the focal point for holiday activities. From playing board games to opening presents, the rug serves as a designated festive zone that adds extra excitement for the kids.
Easy Seasonal Decor:
Only some have the time or energy to transform their home into a winter wonderland. A Christmas area rug is a quick and easy way to inject holiday spirit into any room without elaborate decorations. It's a hassle-free option for those who want maximum impact with minimal effort.
Investing in a Christmas area rug can become a delightful annual tradition. Each year, as you unroll the rug and place it in its designated spot, it becomes a symbol of cherished memories and a reminder of the joyous holiday seasons.
Perfect for All Spaces:
Whether you're decorating the living room, bedroom, or kitchen, a Christmas area rug can seamlessly fit into any space. Choose a size and style that suits the room's aesthetic, and watch as the holiday magic unfolds.
Consider adding a festive flair to your home this holiday season with a Christmas area rug. These rugs enhance the visual appeal of your space and create a warm and inviting atmosphere that embodies the true spirit of the season.
So, why wait? Roll out the festive carpet and feature some Christmas art on the floor.
Note: The author may receive a commission from purchases made using links found in this article. “As an Amazon Associate, Ebay (EPN), Esty (Awin), and/or Zazzle Affiliate, I (we) earn from qualifying purchases.”
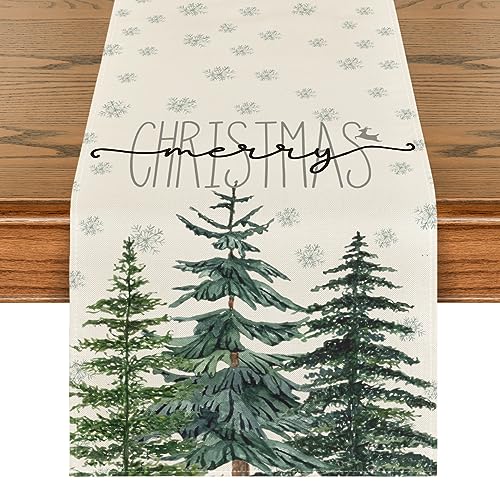
The holiday season is upon us, it's time to revamp your dining area with the perfect table runner for festive charm and elegance. A well-chosen table runner can instantly transform your dining area into a cozy and inviting space, setting the tone for many memories with friends and family.
Capture the spirit of the season with stunning holiday table runners to add a touch of magic to your holiday season.
Fran has a table runner in our house for every holiday and season. I especially love how she decorates our Thanksgiving and Christmas dining areas. She always finds the perfect centerpiece to add to our dining area table to highlight the festive table runner. Our dining area is right off of the kitchen and the first thing you see when you come in our kitchen door.
Holiday Table Runner Ideas for your Dining Area:
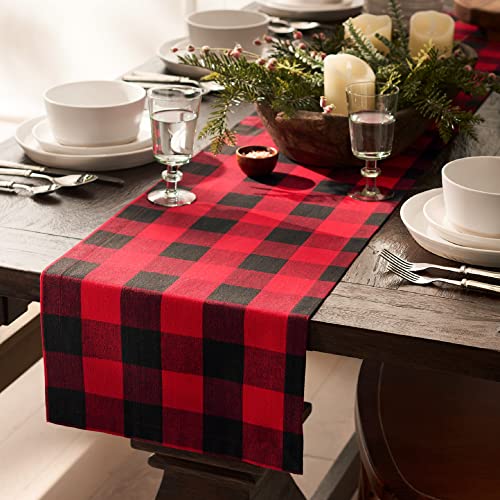
The Cassic Red and Green Plaid: Timeless and traditional, a red and green plaid table runner invites a rustic charm and warmth. For me, this traditional runner is a reminder of Christmas past.
Snowflakes and Icy Blues: Add a touch of winter to your table with delicate snowflakes and cool icy blue hues. this choice will bring a touch of frosty glamour to your dining table.
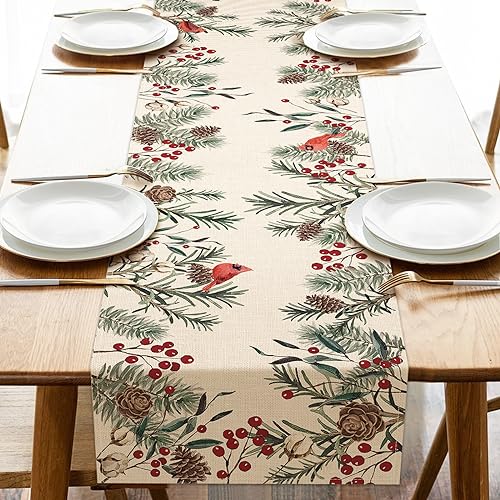
Festive Holley and Berries: Embrace the true spirit of the season with a festive Holley and Berries table runner. The vibrant colors and cheerful design will bring a dose of holiday cheer to your dining table.
Glittering Gold and Silver: Create a touch of sophistication and glamour in your dining area with the elegance of Gold and Silver.
Whimsical Reindeer and Sleighs: A delightful, whimsical table runner with playful reindeer and sleigh motifs. The playful and festive design will add a touch of a joyful and merry celebration to your dining table.
With the holiday season fast approaching, selecting the perfect table runner will set the stage for unforgettable celebrations. Whether you prefer classic Christmas themes or contemporary designs that capture the joy of the season, these holiday table runners offer a variety of options. I hope you can find one that fits your style.
Amazon has a fine selection of festive table runners for the holiday season:
Note: The author may receive a commission from purchases made using links found in this article. “As an Amazon Associate, Ebay (EPN), Esty (Awin), and/or Zazzle Affiliate, I (we) earn from qualifying purchases.”


.jpg "Top Tips for Choosing the Perfect Rug for Your Home Office")