Showing posts with label DIY project ideas. Show all posts

Tuesday, April 30, 2024

Reviewing Renovating Old Pine Furniture Project


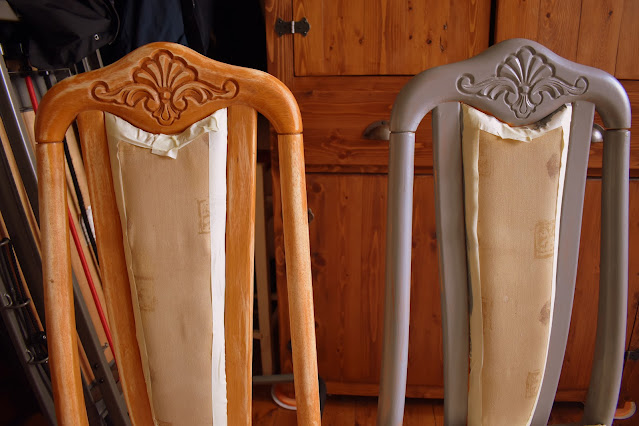
Two Pine chairs one sanded, one painted grey

This review covers an easy DIY project to renovate old unremarkable furniture into something to grace our homes and fit with existing decor. 

In our case we wanted a new dining table and chairs but the only ones we could find to fit our space and circular were very expensive. We did however find a lovely circular table and four chairs that were perfect for our needs and very comfortable at a very good price, but the issue was that they were a quite horrible orange pine colour.

I am not usually an advocate of painting wood. If it is beautiful oak, mahogony, rosewood or reclaimed wood I will not paint it. 

However orange pine with a shiny finish is just not to us all that beautiful and did not fit in with the rest of our decor ideas for the dining room. 

I am not deterred by a minor issue like this and we really liked the style and comfort of this dining set. So we bought the dining set and went about cleaning, sanding and painting. 

Here I will tell you what we did with the chairs. 


Step One Sanding Down Pine Chair

First it was important to sand down the wood. It had a shiny surface to it and I did not think even the best paint would go on well over such a shiny surface. 

With some furniture paints they declare that you do not need to sand down first so it is always best to  check the instructions and perhaps do a patch test to make sure if you need to sand or not. 

So we sanded it with a fine sandpaper until all the shiny orange paint was no more! 

It is important to do this step carefully and take your time as skimping on this preparation will affect the whole project.

I don't have a workshop or anywhere to do this kind of work so for me it was a case of clearing a room and laying down dust sheets and working on the floor. Of course a work table or ideally a workshop would be wonderful but this project is perfectly possible with none of this.  


Pine chair sanded and masked ready to paint


Step Two Cleaning The Chair

Next I cleaned the whole chair including the seat cushion and back.

The wood was cleaned with sugar soap and the chair with an upholstery cleaner. There is no real skill to this, all this took was time and following the cleaning instructions.

Then we left it all to dry.

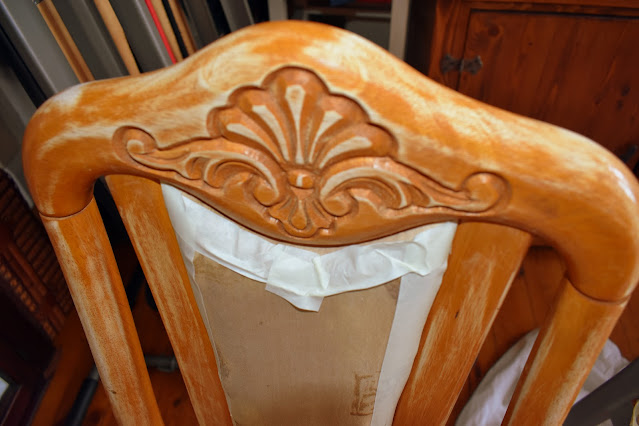
Close up of design on chair sanded


Step Three Masking Tape 

With a project like this it is important to use masking tape to mask off all the areas that you do not want to paint. I do find this step rather boring but it is necessary. 

It is worth spending a little time over this as it is a lot more difficult to remove paint from where you do not want it than to simply mask it off beforehand and does make the painting process easier. 


Step Four Painting The Wood

After laying down sheets I set about painting the whole chair. 

It needed to be done in two steps so that I could reach the whole wooden parts of the chair. So involved the chair standing up and laying down to reach it all. 

As I had two chairs on the go at the same time this was possible to do without wasting time. 

We chose a light grey colour. It did take two coats to cover the wood. I would always recommend two coats. A darker colour may have covered the wood more thoroughly with one coat but I always think two coats gives better coverage and longevity.


Two pine chairs one sanded and one painted grey


Furniture Paint. 

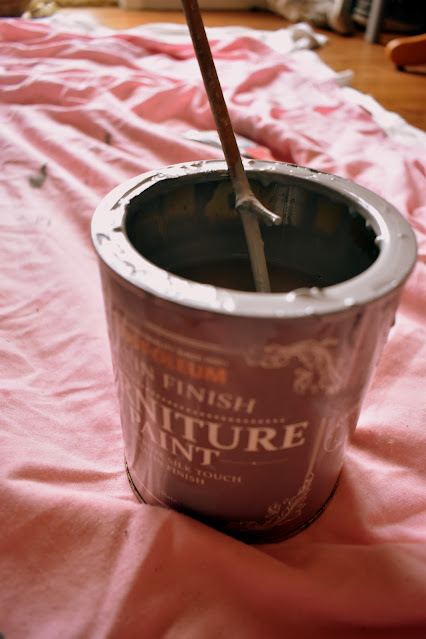
We used Rust Oleum Satin Finish Furniture Paint. It says on the tin it is a superior satin silky finish in slate grey.

I found that this paint went on very well and smoothly. I found it a really good paint to use.  It did not have an overpowering smell and did not give me a headache as many paints do. It went on well although was a little drippy, so it was essential to have sheets down. It is necessary to stir it well before starting to paint. 

The clean up is so easy as it is water based so it is just a case of wiping off most of the excess paint then washing in water. 

If I had a workspace I might have used a Rustoleum furniture spray paint which may have speeded things up. However I was doing this project in winter in our dining room so a spray paint would not have been a good idea in these circumstances. 

Any good furniture paint can be used, just choose the finish, application method and colour you like. I tend to go for water based and low odour for ease of use in the home and clean up afterwards. 


Tin of furniture paint


Due to the space and how intricate some of the work was I used a small paintbrush and I think this was a good idea so that there was more precision.

After the first coat the finish did not look all that good but I always expect this. 

I left it to dry thoroughly then applied a second coat and this is where the magic happens as the pine disappeared and the beautiful slate grey colour saturated the wood. I an no expert but I think the finish, even in the more difficult intricate parts is pretty good. 


Close up of painted chair


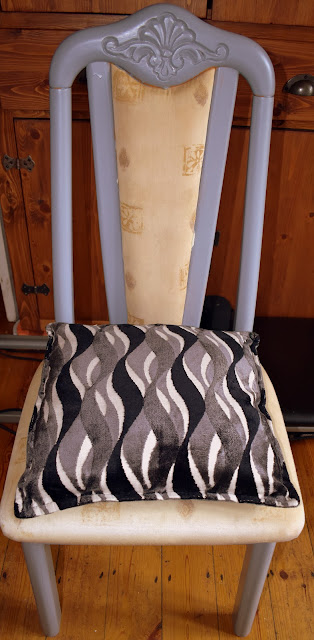
Finished Pine chair painted grey project


The four chairs took me two days to do at a fairly relaxed pace with lots of coffee breaks! It is a straightforward project that anyone could do really. All it takes is time and patience and a few basic painting skills. 


The Supplies You Need For This Furniture Project

Furniture Paint or Rustoleum paint 

Sandpaper 

A small paintbrush

Masking Tape

Old sheets, dust sheets or anything you have to protect the floor


We think it was a worthwhile project and we now have a lovely dining set at a fraction of the price. 

If we ever get fed up of the colour  or go for a different scheme, it will be very easy to change with a light sanding and a coat of new paint.


More Reviews


Reviewing Restoring A Metal Garden Swing Seat


More Reviews By Raintree Annie


Crafts & DIY Reviews By Contributors On Review This Reviews


Product Reviews By Contributors On Review This Reviews


Note: The author may receive a commission from purchases made using links found in this article. “As an Amazon Associate, Ebay (EPN) and/or Esty (Awin) Affiliate, I (we) earn from qualifying purchases.”


Sunday, August 14, 2022

Simple DIY Home Hacks

 I'm certainly not a professional or an expert on home improvement or repairs, but I have learned some things over the years. Here is a review of some simple DIY home hacks that I have used over the years.

Simple DIY Home Hacks

The estimated cost of minor home repairs is said to be about 1% of the cost of your home per year. So, as the value of your home increases so do your repair costs.

Some of these hacks may save you a little money and some may save some time. These are just some tips that I have used myself over the years.

DIY Home Hacks:

Easy plumbing hack
This one is an easy plumbing hack. It's late night and all the stores are closed, and suddenly you find a leak under your sink in the drain pipe. What do you do?

Since there is no water pressure involved in drain pipes, simply wrap some electrical tape tightly around the leak.

This will stop the leak temporarily until you can replace the broken drain pipe.


Clogged drain

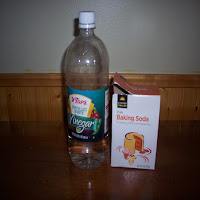
If you have a slow-running drain try some baking soda and white vinegar. Pour 1/2 cup of baking soda into the drain, have a stopper or washcloth handy. Then, pour 1/2 cup of white vinegar into the drain and quickly cover with the stopper or washcloth.

Wait about a minute and then flush with boiling or hot water. To keep my drains running free I do this about once a month. This really works for slow-running drains. If your sink is completely clogged you are going to need a drain cleaner or plunger.


Bees wax

Are you planning some interior painting? Painting around windows can be tedious work. Personally, I like to free-hand paint around windows. But, if you don't have a steady hand you can really make a mess on the windows, and create some extra work to remove the paint.

Applying masking tape takes some time, and is also a real pain to do. Try this, use a stick of Bees Wax and apply it to the window. Be careful not to get any wax on the wood that you're going to paint. Now, paint around the window, and after the paint dries wipe off the Bees Wax. The paint will not stick to the wax.


Denatured alcohol
Denatured Alcohol can be used for many things, such as cleaning glass, metal, and fuel for marine stoves.

This is another painting hack. If you are painting your walls and accidentally drip some onto the finished wood trim and you don't see it until it dries.

Denatured alcohol will remove latex paint without affecting the finish on the wood trim.

Just gently rub the paint spots with a rag wet with the alcohol.


One more hack that I have is removing old window glazing. This one applies only if you have old-style windows. The new windows today do not have window glazing. I don't have a photo because I haven't used this hack in years.

If you happen to have old windows, the glazing over time will dry out and crack.  It's not difficult to apply new glazing around the window, but removing the old glazing can be a pain.

To make this job easy use a heat gun or propane torch, the heat will soften the old glazing to make it easy to remove. A word of Caution: Be careful not to overheat, too much heat will crack the glass. After removing to old glaze, clean the area with a brush, and then brush on some linseed oil before applying the new glaze.

Find more Diy Tips on ReviewThis Here: ReviewThisCrafts.com

ReviewThisDecor.com


Note: The author may receive a commission from purchases made using links found in this article. “As an Amazon Associate, Ebay (EPN) and/or Esty (Awin) Affiliate, I (we) earn from qualifying purchases.”


Thursday, September 2, 2021

DIY Cable Spool Cat Scratching Post


DIY Cable Spool Cat Scratching Post
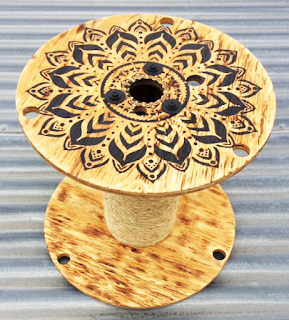
Stenciled Cable Spool

I'm that person who can't pass up an abandoned cable spool.  When I saw this little spool, I knew it wanted to go home with me.  So, I adopted it, spiffed it up, and gave it a new life.  Here's how to turn a cable spool into a cat scratching post or mini table for your porch or patio.  


recycled cable spool
Recycled Cable Spool

Step 1: Pick up a small spool anywhere wires or cables are used or sold.  I found this one at a big box home improvement store.


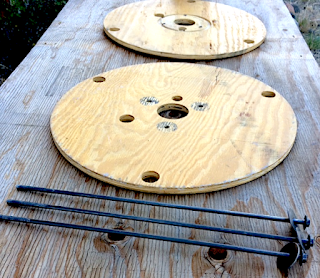
cable spool taken apart for refinishing
Spool Parts Ready for Prepping

Step 2: Separate the parts in preparation for sanding, painting, and finishing the wood.  All I had to do was unscrew the top bolts to release the three sections.


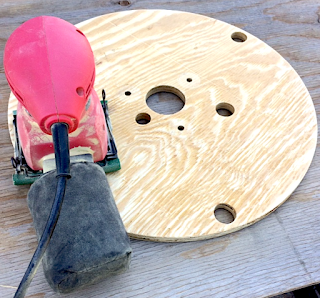
sanding a cable spool
Sanding the Spool

Step 3: Sand the spool's top and bottom wood sections.

Step 4: Decide how you want to treat the wood.  I chose to lightly torch the wood to accent the grain and give it nice warm tones without stain.


wood sealant
Sealing the Wood - Spar Urethane

Step 5: Seal the wood and cardboard spool parts with an indoor/outdoor Spar Urethane.  I used a spray application to make it quick and easy (and fast-drying).  


medallion stencil
Boho Medallion Stencil

Step 6: Decorate the spool top if desired.  I happened to have the perfect sized stencil (Boho Medallion) on hand for another project.  I chose to use a charcoal colored chalk spray paint that was a lovely balance to the natural wood (and a match with the metal spool bolts).  


sisal rope wrapped around a cable spool
Sisal Rope Wound Around Spool

Step 7: Reassemble the spool.  Wrap sisal rope around the cylinder.  It took a little bit more than 50-feet of 3/8" sisal.  


completed DIY Cable Spool Cat Scratching Post
Recycled Cable Spool (After)

This was a really enjoyable DIY project.  Though I imagine using this recycled spool as a scratching post for my rescue cats, I can also see using it as a small end table on my porch.  I'm picturing it as a coffee table situated next to my Adirondack chair, or as a sweet little piece of furniture for the catio I'm building.

Who says it has to have only one use?  How do you envision it?  I'd love to hear your ideas in the comments below.


Note: The author may receive a commission from purchases made using links found in this article. “As an Amazon Associate, Ebay (EPN) and/or Esty (Awin) Affiliate, I (we) earn from qualifying purchases.”


Most Recent Reviews on Review This Reviews


Search for Reviews by Subject, Author or Title

The Review This Reviews Contributors


SylvestermouseSylvestermouseDawn Rae BDawn Rae BMbgPhotoMbgPhotoBrite-IdeasBrite-IdeasWednesday ElfWednesday ElfOlivia MorrisOlivia MorrisTreasures by BrendaTreasures by BrendaThe Savvy AgeThe Savvy AgeMargaret SchindelMargaret SchindelRaintree AnnieRaintree AnnieLou16Lou16Sam MonacoSam MonacoTracey BoyerTracey BoyerCheryl Paton Cheryl PatonRenaissance WomanRenaissance WomanBarbRadBarbRadBev OwensBev OwensBuckHawkBuckHawkDecorating for EventsDecorating for EventsHeather426Heather426Coletta TeskeColetta TeskeMissMerFaeryMissMerFaeryMickie_GMickie_G


Review This Reviews is Dedicated to the Memory of Our Beloved Friend and Fellow Contributor

Susan DeppnerSusan Deppner

We may be apart, but
You Are Not Forgotten


“As an Amazon Associate, Ebay (EPN) and or Etsy (Awin) Affiliate, I (we) earn from purchases.” Disclosure Statement

X