Garden Photography Class
Class One
- Take the safe shot first and then fine tune.
- Slow down...take your time (this is one area where I need to listen).
- Find a subject that you want to photograph and then keep fine tuning to find the best shot.
- Get eye level with what you are photographing
- The higher the number of the f-stop (aperture) the smaller the opening and more of the photograph is in focus.
- Try using the Aperture mode on the camera where I set the f-stop and the shutter speed is set automatically. This is particularly good for still shots.
- Use a tripod most of the time---buy a good tripod. Use especially for closeups and low light conditions but it is good to use it most of the time. ( I really need to work on this one)
- Turn off camera to change lenses.
- Don't delete in the camera
- Work on getting closer and filling frame with subject.
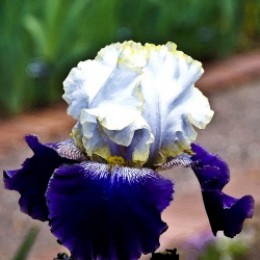
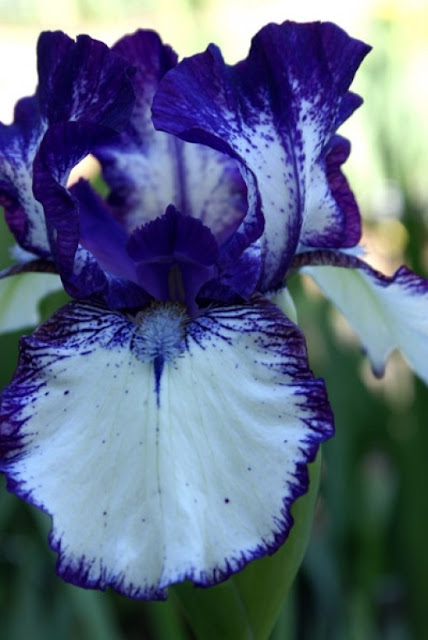
Purple and White Iris
Landscape Photography - class 2
Our second class was on landscape photography. It was a overcast day so we also got a lot of tips on photographing on overcast days. We were out in the garden about 30 minutes and it started to rain so we headed back to the classroom. Scott, the instructor is great on turning everything into a learning experience so we then got a lot of good tips for shooting on rainy days.During the short time we were out in the garden shooting I took the photo of the waterfall above using Scott's formula for making the water look "silky". The photo I shot was using a F18 aperture at 1/8th of a second. Here is the formula:
- Cloudy Day
- ISO100
- Tripod (a must)
- Polarizer filter (I don't have one yet...so I didn't use this)
- Aperture set between F16-F22
- Move things out of center...imagine a grid like a tic-tac-toe and place center of interest at one of the intersections.
- Rarely put horizon line in center of photo (reflections are an exception)
- On dreary day eliminate sky from picture (or minimize it if you can't eliminate)
- Frame your photo...use trees--leaves etc. to frame the picture and draw your eyes into the scene
- Curved lines bring interest to photo
- Avoid bright spots near the edges..they draw you out of picture
- Most images fail because they are too busy and do not have a point of focus
- Use more vertical shots
- Layers give more depth i.e. flowers in foreground, lake, mountain, sky ...use wide angle 17-35 and get close to foreground
- For landscapes focus about 1/3 of the way into the photo and use a F16 aperture.
- Polarizer filter is great for fall shots.
Practicing Photographic Techniques
Class 3
Session 4
In our fourth class we studied both water photography and close up photography.Garden Photography - class 5
When the last day of class came I was really sad to see it end. I enjoyed the people in the class and I feel that I really learned a lot. The instructor was great and I will definitely take one of his classes again. It turned out to be a very hot and sunny day, not really a good day to photograph. Like all of our classes the instructor used the weather circumstances to give us tips. He talked about the summer not really being the best time to photograph. Early morning and at dusk are the best times all year, but this is particularly true in the summer months. He suggested that you use mid day to work on your photos or to go to museums and view other photographers. There is so much to be learned but viewing the works of others.Here are some of the tips that I took away from todays session.
- Light will tell you what to photograph and how to photograph.
- Polarizer works well on sunny days.
- Tips to photograph fireworks--bulb setting--ISO 400--Aperture F11-F16 Tripod is a must.
- You need to know the rules..but don't be afraid to go outside the box and break the rules.
- Try to photograph underneath flowers...get on the ground
- Wearing a hat forces you to look down..also great to take off and block sun from lens.
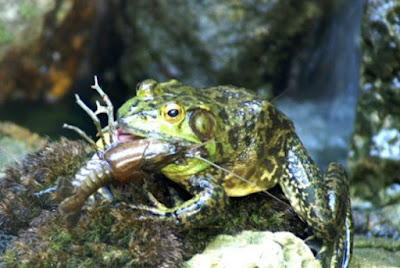
In the last class we visited the Chinese garden to photograph. The instructor took a few minutes with each of us individually and answered any questions we had. I had just gotten a new polarizing filter so he gave me hints on how to best use it. It works best when sun is coming in from the side. It mades skies and clouds pop. It is great for landscapes but not so good for water reflections. After my time with the instructor I was working on photographing a small waterfall. Someone said there was a statue of frog sitting on a rock at the bottom of the falls, but just when I was going to take the shot he jumped off into the water. For a second I was disappointed, but then he came up with a crawdad and I captured the photo above. Not a great shot, but a fun one and we all had a laugh about the "statue" catching the crawdad.
Books on Photography

Click to view on Amazon


So much great information with so many wonderful photography tips shared in this article. Right off the bat, I see 2 things I could easily do to improve my photos. Use the tripod I already have and take my time. I get in such a hurry to grab a shot quickly. Thank you for sharing your class experiences here with all of us. I can see I need to spend more time studying my own camera to figure out how to set it for the best shot too. As always, your photos are beautiful Mary Beth.
ReplyDeleteExcellent tips here. I'm going to remember some of these for next time. I was familiar with a few, however, I've picked up a couple more. There's some amazing scenery at my mom's place, and I'm always taking photos there so I'll implement some of your tips in the coming week. Thanks for this.
ReplyDeleteI only have a simple point and shoot digital camera, but I can see some good photography tips in this article already that I can use to improve my photos. Wonderful photos, as always, Mary Beth. Loved the blue iris.
ReplyDelete