Showing posts with label Garden Decor. Show all posts

Monday, March 13, 2023

QVC Mum Garden Sphere Review

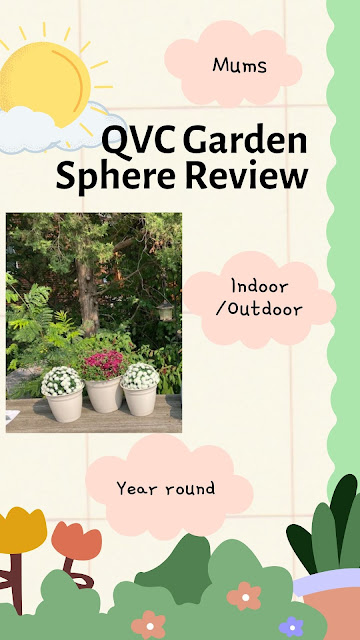
 QVC says garden sphere... I say Mum Balls! Last year I finally succumbed to the pressure (I say only in jest) of watching the garden shows on QVC and purchased the Mum Garden Sphere (aka as Mum Balls in this house).

mum garden spheres


Construction

The mums are well constructed. Each ball can either be used as is in a sphere or split apart to make two half balls. Instructions are included as to how to split the ball and once the proper opening is found, the ball splits easily. 

mum garden spheres package contents


Interior plastic hole/eye clasp are arranged around the ball and are simply unclasped to open up the ball. Easy!


frame for mum balls


Durability

So far the mum balls have lasted through summer, fall and winter with no problems except for a squirrel which seemed to find one of the mounds very interesting. 

Midwestern winters are long and I thought these mums could liven up the yard in the middle of winter which was mission accomplished. Snow in October and May is not unusual which makes for a very very short growing season and it is fun to have a bit of color throughout the year (even if the color is not natural!)

Do they Look Real?

From a distance yes. 

From across the deck yes, real enough!

Up close? No.

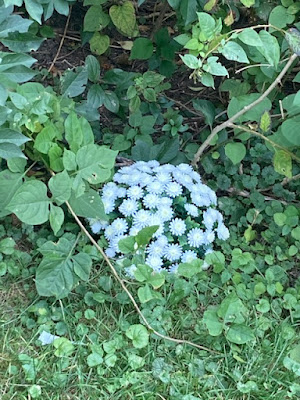
Of course the flowers look too perfect up close to be real. The color is on point for the the white mums, especially from a distance. I think these spheres fall into the of course they do not look like real mums, but I also don't believe that is the intent due to their sphere shape! Just something a little fun, little quirky and no maintenance.


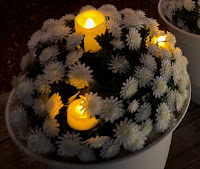
mum garden spheres with lights
After mum season, I did a little diy with tea lights which was a festive little twist for Fall fire pit season in the back yard.


Nothing of course matches real flowers! However, trading the convenience of flowers that require no maintenance is not a bad trade off either for those who love flowers, but not the labor of growing flowers.


Colors

Throughout the year different colors are offered from the traditional mum colors to garden spheres of mixed colors. I chose white the traditional white mum color with the intent of also using the mum balls at Christmas.

mum garden spheres or balls


Which I did and added lights and a few red bows. The mum now lighted Christmas balls looked very pretty with a covering of snow for the season.

Sizes

The mum spheres and other garden balls are offered in diameters from 10 inches to 21 inches! The spheres are usually sold in sets of 2 which if split can equal 4 mounds of flowers. I ordered the 10 inch set as a try and evaluate set. 

Price Point

One of the best ways to save  money is to look for the free shipping days on QVC. Another way is to look for "AS IS" items. The package of 2 AS IS spheres are offered at a 20-25 percent savings.

I plan on adding a few mum balls/garden spheres to the collection this year when free shipping and AS IS mums are offered which makes for a much more affordable price point.


Note: The author may receive a commission from purchases made using links found in this article. “As an Amazon Associate, Ebay (EPN) and/or Esty (Awin) Affiliate, I (we) earn from qualifying purchases.”


Tuesday, February 8, 2022

Metal Wind Spinners For The Garden Reviewed


Metal Wind Spinners
Metal Wind Spinners For The Garden Reviewed


I wanted to buy a wind spinner to place in our garden for some time. I have admired them in others people's gardens and a few months ago we bought two!


How Metal Wind Spinners Add To A Garden

I do like a wind spinner in the garden. In this review, I am covering Wind Spinners that stake into the ground. There are also those we can hang up. They are a joy all year round. In the winter they are a lovely sight when perhaps there is not so much interest in the garden and when the sun shines on a cold frosty day they really do look gorgeous

In a storm or even just when windy they do spin round and provide lots of movement for a sculpture. In Spring they seem to compliment the emerging bulbs and fresh green shoots and spin more gently in the breeze.

In summer they may be calmer and with perhaps less breeze a more static feature but beautiful and providing height and a lovely focal point. In autumn we have the breezes picking up and the wind spinners back in action shining out as the plants start to retreat. 

If a garden needs a sculpture or a little drama and movement or even just in winter when it may be a little lacking in interest a wind spinner can provide a little colour and drama to the space. 

Metal Wind Spinner spoons
Cup Or Spoons Metal Wind Spinner

If the garden is full of colour a natural bronze or silver wind spinner can calm and ground the space complimenting the flowers while they bloom and be a constant in the ever-changing bud to bloom to fading process. Or a fun colour Wind spinner can simply add to the riot of joy!

The weather can be dull, windy, rainy, snowy or bright or golden sunlight and a wind spinner or two can really shine out in the garden and give it a beautiful constant focal point. 

Metal Wind Spinners leaves
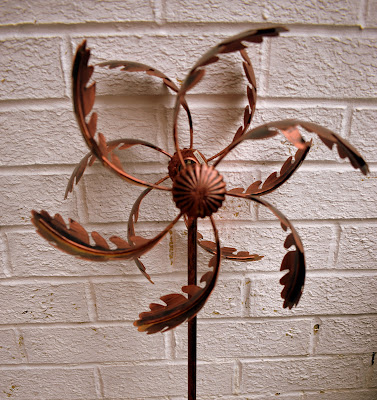
Leaf Metal Wind Spinner In The Breeze!

Ours are two bronze metal wind spinners. I wanted ones that are robust, long-lasting, beautiful and timeless.

I also wanted ones that really spin fast in the wind and have a reference to nature so a natural shape and feel to them. 

Ours have integral long stakes that you simply push into firm soil. I love the way the metal shines when it is sunny and gives a gorgeous bronze glow.

They certainly do spin well in the winds yet have not fallen over or become damaged even in a recent storm. 

Metal Wind Spinners stake
Metal Wind Spinner On Stake

Where To Site A Metal Wind Spinner

Keep them in a place clear from other vegetation. If they are too close to the other plants the plants can become tangled up in the spinner and that is not good for the plants or the wind spinner.

They do need to have a firm anchor in the ground. This can be into the soil itself or into pots  I have mine in pots on the patio and the stakes are firmly deep into the soil. You do need to test that they are firmly anchored and secure.

I also find watching our wind spinners very relaxing. A gentle breeze and they turn around slowly almost meditatively and in a storm they really spin round with energy! 

We have them in sight of our windows so even on a very windy cold or rainy day we can watch them in comfort. I think it is good if you can see them from a window so you can enjoy them all year round whatever the weather. 

Wind spinners take up little room and would be totally suitable for a large garden to a small patio area as long as they can be securely pushed into the ground.

 I have not noticed any particular noise from ours but some do emit a gentle sound when they spin. 
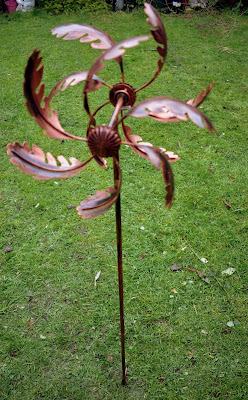
Leaf Metal Wind Spinners
Leaf Metal Wind Spinner On Long Stake

Wind Spinners And Wildlife.

Much as I wanted a wind spinner, I was a little concerned at first that our local wildlife might not like them and stay away from our patio. 

I had read that they can scare birds away and even that they can be useful as a benign deterrent if you want to keep birds off fruit or vegetables or freshly sown seed. 

However, I need not have worried as our garden birds took no notice of them at all! 

The sparrows still come in small flocks to pick grit from our wall, flying straight over one wind spinner, the blackbirds visit the patio for food in the pots happily kicking out the soil to look for food in even the pot I had spiked the wind spinner and nothing seems to mind in the slightest. We currently have small birds scoping out the bird boxes and sparrows noisily debating over who gets the best place in the eaves this year.

Even the neighbour's cat is not remotely afraid of the wind spinners as he calmly sat watching them while washing his fur the other day.   
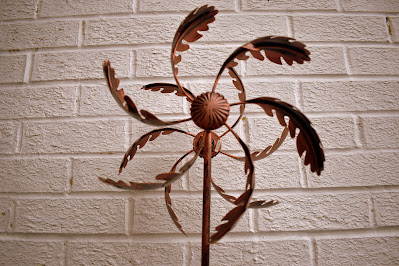
Bronze Metal Wind Spinner
Leaf Metal Wind Spinner In Bronze

However, I must remember that our garden birds are very used to us and to us moving things around on our patio. They have never been hurt or afraid. It is pretty much their garden, we just visit it from time to time! In fact, during the breeding season, we often get chittered and scolded for daring to be in their garden! They are wild birds but very confident around us. 

I do however keep the wind spinners away from the bird feeders and the birdbath and any known nesting sites in the shrubs just in case they find it distracting.

If you are concerned about scaring the birds but want a wind spinner simply place it in an area where either you know birds do not frequent much perhaps close to the house and monitor it. If you do have seeds, fruit or plants you want to protect from birds a wind spinner placed nearby may act as a deterrent but I can't promise it. Success with that may depend on how your birds view you and your garden! 

Spoon Metal Wind Spinners
Spoon Or Cup Metal Wind Spinner In Bronze

A Wide Choice Of Metal Wind Spinners

I think they make a beautiful gift for anyone who loves their garden and would like some added interest. Wind spinners are available in such a wide range of choices there is something for everyone. 

Ours are bronze look and one is a leaf shape and one is a spoon or cup shape.

 There are wind spinners of plain colours or many vibrant colours and everything in between. Many have gorgeous shapes and either beautiful colours or natural tones, all equally stunning.

 There is a wide range of sizes and prices from affordable to high-end. 


I would certainly buy more wind spinners for our garden and buy them as gifts. I love our bronze wind spinners and the next time we buy one it may be a cheerful brightly coloured one for fun. It was hard to choose just four for this selection but I have tried to show the variety available.  


More Gardening And Garden Product Reviews 

Gardening Articles On Review This Reviews

Diary Of A Wild Country Garden

Essential Wildlife Gardening Gifts

Raintree Earth Designs


Note: The author may receive a commission from purchases made using links found in this article. “As an Amazon Associate, Ebay (EPN) and/or Esty (Awin) Affiliate, I (we) earn from qualifying purchases.”


Tuesday, June 1, 2021

Reviewing Restoring A Metal Garden Swing Seat


restored metal garden swing

We bought a metal garden swing seat recently for a good price as it needed some work and the shop needed the space. 

The swing is all metal and would have originally been painted black. It is very sturdy and quite heavy. It took two strong guys to carry it into our garden. 

My husband and I love this garden seat and like a bit of a challenge, so we embarked on revamping it. 

I always think if the bones are good then most things can be restored to look beautiful and useful again. 


weather garden swing that needs restoration
Original State Of the Garden Swing Seat


From the minute it arrived in our garden albeit quite rusty and certainly neglected and in need of serious tender loving care,  we loved it and it felt like it had been there forever. I love the details of the leaves and flowers and the general shape of the seat.

It is super comfortable as well. The swing has a lovely action and it feels so relaxing to sit on it and gently rock back and forth. It belonged in our garden and we love it! 


Preparation Work For Restoring The Garden Swing. Using Wire Wool Brushes. 

They say that preparation is the most important part of any project and it is important to take your time doing this part. 

While I love to get to the exciting part of making it beautiful, I am happy to accept that this preparation element needs to be given care. 

First, we used wire wool brushes to get rid of any flaking rusty parts. Quite a lot of old rust and flaking damaged parts fell off at this stage! 

We chose quite slim brushes as there were many nooks and crannies to get into that a larger brush would not have been able to reach.

This part of the work was quite hard slow going as it is important to get rid of all the loose sections and make sure it was as clean as possible. 

I am very glad we chose to use brushes with long handles instead of steel wool bundles to hold by hand, as it would have been hard on our hands. Using the brushes our hands were protected and the brushes did a great job.  


Then we wiped down the whole seat with an antibacterial spray to clean it all up and remove any dust particles. We repeated this again before painting.

We initially thought we might have to get in a welder to mend some of the worst parts, especially on this armrest section, but wanted to try out epoxy resin first to see if that would work. 


damaged metal garden swing that needs repair
Damage On The Garden Swing Seat


Repairing The Damaged Metal Sections

The next step was to use epoxy resin sticks to repair some of the damaged areas. Using this is quite easy. Do wear gloves as your skin may react to the epoxy resin. 

You simply cut the wrapping and the tube and I took a small piece and rolled it up in my gloved hands until the two parts were mixed evenly then simply applied it to the metal gap I needed covering.

It reminded me of using plasticine as a child. However, it is advisable to wear gloves when handling epoxy resin and of course, keep away from children and pets. 


repairing a damaged metal swing
Epoxy Resin Use On The Garden Swing Seat


I found you do need to work fairly quickly as it does dry in about 10 minutes. So best to only take what you need from the tube. I would keep any unused in a sealed container to help prevent it from drying out.  

I then smoothed it down and allowed it to dry. It took only about an hour before it was cured but we left it overnight before painting.

I thought I would need to sand it down but actually, on this type of item, it looked just fine as it was. I had taken care to smooth it out as much as possible when applying through. On some projects, you would need to sand down first. 

This type of epoxy resin can be drilled and sanded. It can even be used underwater and is waterproof rather than just water-resistant. We wanted this level of protection as this garden swing seat is too heavy to move around a lot so will be out in all weather. 

We were very pleased with the result. Even on the worst damaged sections of the armrest, the resin had set well and firm and the damaged sections were stable again.


Painting The Garden Swing Seat With Hammerite Paint. 

Once the epoxy resin was set hard we decided to paint the whole swing seat black with Hammerite Direct To Rust Paint.

This paint says it gives up to 8 years of rust protection and can be painted directly onto rust, though I still think sanding down and filling any damaged sections is advisable. I do think that with an outdoor seat like this we will repaint every couple of years to keep it looking good.

It is a great paint for a quick job as it is a primer, undercoat and topcoat all in one. This is very useful for outdoor painting when you are trying to paint when it is not raining for a while! 

You must keep it away from any aquatic life as it could be very harmful to them. Please wear gloves when handling and painting as it can provoke an allergic reaction and it is flammable so be careful where you leave it. 

It is important to keep Hammerite Paint away from children and pets. We even stayed out in the garden to make sure none of the local wildlife went near it until dry! 

Hammerite do many different colours, including gold, copper, white and green but as I eventually want to grow plants and climbers all around this seat we decided on a simple black so that the flowers and greenery will show up against it. I also think that this white would also have looked very stylish.


We have not used Hammerite paint before but we were very happy with the way it went on. It was about the right consistency. It did drip a little if we had too much paint on the brush so we learned to carefully wipe off the excess on the tin then paint.

We found it worked well on the larger sections of the A-frame and the broader metal lengths. It was also quite easy to use on the quite intricate leaves, stems and flowers as long as we did not load the brush up too much.


flower and leaf design on the frame of a metal swing
Beautiful Painted Leaves And Flowers


The Hammerite paint dried to a smooth sheen. It is a slightly glossy look which is what we wanted, rather than the rougher hammered finish of the original Hammerite paint. The finish is of course completely down to personal preference. 

Here is the garden swing seat when we had just painted the main A-frame but not yet painted the seat. 

You can see the difference once painted it looks significantly smarter, the rust is no longer visible and the metal is more protected from the elements. 


painted garden swing
A-Frame Hammerite Painted Garden Swing Seat


I would advise using an old paintbrush that you are happy to throw away afterward as getting Hammerite out of a brush is a difficult task! 

Normally I am not an advocate of throwing things away but in this case, weighing it up, I feel that using the necessary non-environmentally friendly cleaner is probably worse than throwing away the brush. 

The brushes were certainly a mess after use and I think it would have taken a lot of work and product to get them clean enough to use on any other project. 

So we got off the worst of the paint then wrapped the brush in newspaper and took it to the skip for safe disposal. 


The Finished Restoration Of The Garden Swing Seat!

So was it worth all the work? Well, I would say yes absolutely!

We do not mind the work and got quite a lot of satisfaction from restoring a decaying piece of garden furniture into a once again beautiful and useful garden swing.

 After one coat of Hammerite paint we have achieved a good finish. We will do another coat of paint at some point but it has rained part of every day since so it can wait a while. 

Here is the finished product! 


restored metal garden swing
Finished Renovation Of Garden Swing Seat 


It may well have been easier to simply buy a brand new garden swing seat. However, that would have cost us hundreds more. 

This way we have learned new skills, saved a lovely garden seat and now we have a beautiful piece we love sitting on with a nice cup of coffee and are very proud to have in our garden. 

The next stage is to choose suitable plants to position around the garden swing and to beautify it further with plants. 

Then I need to make some cushions for the seat. Now I am not all that handy with sewing. However, once we replace our mattress and memory foam topper, I feel I can cut the old one to size and use it as a garden seat cushion with a simple removable cushion cover. 


Read More Craft and DIY Projects On Review This Reviews Here: Crafts & DIY 


Read More Gardening Reviews On Review This Reviews Here Gardening


Note: The author may receive a commission from purchases made using links found in this article. “As an Amazon Associate, Ebay (EPN) and/or Esty (Awin) Affiliate, I (we) earn from qualifying purchases.”


Saturday, May 8, 2021

Garden Gnomes Reviewed


A Garden Gnome

Definition of a Gnome: a legendary dwarfish creature supposed to guard the earth's treasures underground. 


Gnomes originally were thought to provide protection of buried treasure and minerals in the ground and were often placed at the entrance to mines.  Today they are used to watch over crops and livestock by placing them in the rafters of a barn or in the garden.  


Gnomes are also known as symbols of good luck.


History and Mythology of Gnomes


A row of  gnomes in a garden
Image Source: Pixabay


From the Latin word genomus, which means 'earth dweller' gnomes are mythological creatures and diminutive spirits in Renaissance magic and alchemy, They were first introduced by Paracelsus in the 16th century 


Gnomes live underground and legend states that they can easily move through the earth. Gnomes are always described as being small and wearing conical hats. Myths claim that gnomes are sensitive to sunlight and some legends remark that the light of the Sun will turn a gnome into stone. 


In the book Gnomes, illustrated by Rien Poortyliet and researched by Wil Juygen, gnomes are thought to be seven times stronger than humans and live to be around four hundred years old.


A gnome next to a tree
Pixabay
Gnomes are described as being 'short of stature', which, being a pint-sized person myself, is probably why I like them. :)  Perhaps there is a correlation between protecting the earth's treasures and being short!


Gnomes Today


For years, the gnome lost it's appeal, but Social Media and the sharing of photos on the web brought back their popularity. Today, people love to share pictures of gnomes visiting places around the world. The gnome is becoming a pop culture giant as the key figure in the sport of “gnome-spotting”. There is even a movie – the 2001 “Amelie”, and major advertising campaigns for Travelocity and Ace Hardware.


Where to Find Gnomes


Fairy Garden Gnomes
Fairy Garden Gnomes


Gnomes are available in many places, including Amazon and many garden centers, and come in a wide variety of styles and poses.  Holiday gnomes and whimsical poses are increasing in popularity.  Gnomes are favorites for backyard gardens and increasingly for Fairy Gardens


Handmade Gnomes


Many Etsy sellers have created gnomes in various mediums for your gardens and for miniature Fairy gardens. Gnomes are also popular on Garden Flags and as Yard Art. And, decorated in many styles and colors, gnomes are also becoming the 'in' thing for kitchen décor. 


Handmade garden gnome
Vintage Resin Outdoor Garden Gnome


This is a vintage resin outdoor garden gnome created by Joshua in a family-run business in Kettering, England.  This cute and colorful fairy garden gnome will spice up your garden.  Check it out in their Etsy Store called Darthomeltd.


Metal yard gnomes
Metal Yard Gnomes


Adorable spring yard gnomes!  Made of 14 gauge steel. 

Gnomes measure a total of 30 inches tall. The spikes that allow the gnomes to stand are 6 inches long which allow for 24 inches above ground level.

Created by Cody of Texas  for the Gillis Metal Works on Etsy. (Handmade metal art created by the owner himself!)


Lemon gnome for your kitchen - an indoor gnome
Kitchen Lemon Gnome

Gnomes can also be adorable indoor decor, as seen by this darling lemon gnome.  
This Lemon gnome will be the decoration of your kitchen or a great addition to your spring and summer decor. Lemon gnome measures 11.8 inches high. Adorable addition to your kitchen decor.  

Lemon gnome is handmade by Marina for her Etsy Store called the Magic Sewing Store.


Related Links:


Garden Gnomes article written by Wednesday Elf


Note: The author may receive a commission from purchases made using links found in this article. “As an Amazon Associate, Ebay (EPN) and/or Esty (Awin) Affiliate, I (we) earn from qualifying purchases.”


Monday, April 29, 2019

Reviewing the Basalt Birdbath by Stone Age Creations

My birdbath on a West Virginia ridge.
I have been eyeing these beautiful carved stone birdbaths for years. Only last week did I finally splurge on one. The Basalt stone bird bath by Stone Age Creations carried what I consider a hefty price tag but I think it is worth every penny.  This unique stone bath speaks to me, it is a perfect addition to my "yard", and it will be appreciated by the birds that visit me at The Shack for years to come.

Why Bird Baths are Important


Not only are bird baths wonderful lawn ornaments but they also provide water for the local birds. Birds need water; most birds drinking daily. And birds bathe in order to clean their feathers. Cornell Lab of Ornithology provides important information about proper upkeep of healthy bird baths and why birdbaths are useful. 

Birdbaths also attract a variety of birds to your yard. If you enjoy backyard bird watching and want to attract more birds, you'll love Mary Bath's gorgeous photographs and story about her own backyard birdbath. I always look forward to seeing her photography of her feathered visitors.

What is Basalt?


By looking at and touching the birdbaths at Sun Nursery (where I purchased my birdbath), I could guess that Basalt was some sort of stone. For the purpose of this article, I looked up more information.

Basalt - "the dark, dense igneous rock of a lava flow.... often displaying a columnar structure"  - dictionary.com 

Basalt is also described as
  • as heavy as granite, sometimes heavier
  • high in iron content
  • as durable as granite
  • aesthetically interesting due to the iron content
  • is a stone that has been used in architecture for centuries
  • in addition to landscaping and architecture, basalt is used as massage stones and as healing stones in jewelry
And an interesting bit of trivia is that some of the iconic "head" sculptures of Easter Island are carved from Basalt! I don't know very much about those Moai carvings but I have always thought they are made from beautiful stone. 


Easter Island Moai stone carvings
(photo credit: public domain courtesy of Aurbina)

A Basalt Birdbath at The Shack


I wanted this particular bird bath for several reasons. It is beautiful. The rustic stone exterior and super smooth interior portion of the dish is interesting in appearance and blends perfectly with the rugged ridge landscape.

It comes in two pieces. Each piece is still quite heavy, but the two pieces allowed me to haul it in the Jeep and carry it to it's spot under the apple tree.

My beautiful basalt birdbath
The bowl is quite shallow. During my next visit I am going to add a flat rock to the bowl - giving the smaller birds another spot to perch or use as a step. I really like that this bowl is flat-bottomed and Cornell Lab recommends shallow bird baths. 

The deer are into every single thing that is outside at The Shack. I am hoping that they are not able to knock this heavy birdbath over if they decide to help themselves. Also, the wind blows quite hard coming up and over that ridge. I am sure this bird bath will not blow over.

My land is at the top of the ridge. The terrain is rocky and dry. There is a creek somewhat nearby but it is at the bottom of the hill. I'm sure the birds will be appreciative of a convenient water source.

Related Link: 

During my last trip to The Shack, it rained a lot. So much so that I didn't get much done. I wasn't able to prepare a spot so the bath sits level. But I did have an opportunity to take a hike. If you want to see the photos from that hike, click here

I have wanted this bird bath since discovering Sun Nursery years ago. Sun Nursery has a HUGE selection of plants and staff that are both helpful and knowledgeable. If you are near the Maryland and DC areas, Sun Nursery is well worth a visit. 

Stone Age Creations makes some gorgeous items. I am partial to their birdbaths, benches, and boulder owls. If there is not a distributor of their items in  your area, you can find some of their items on Amazon. 


Note: The author may receive a commission from purchases made using links found in this article. “As an Amazon Associate, Ebay (EPN) and/or Esty (Awin) Affiliate, I (we) earn from qualifying purchases.”


Thursday, May 31, 2018

Vintage Lamp Bird Bath - DIY Tutorial and Review

vintage lamp repurposed as a bird bath

I was visiting my muse the other day, Pinterest, when I came upon the most delightful inspiration.  Have you seen the creative bird baths that are being made from vintage lamps?  I'm pretty sure I would never have thought of this fun, and ingenious, idea on my own.  As one who loves to give cast off items new life, this was the perfect project for me.  In case you also enjoy whimsical garden features, I am sharing my DIY process to prime your pump.

glass serving dish

First, I needed an old lamp and bird bath basin, so I took a little field trip to a couple of thrift stores.  Goodwill had exactly what I needed.  On my first shopping expedition, I found a glass serving dish that reminded me of a sunflower.  Amazingly, that is the exact vision I had for the theme of my creation.  Who knew an egg platter could be so lovely?

crystal or glass lamp

Next, I went on the hunt for the right lamp to complement my new bird bath dish, and to serve as its base.  Because thrift stores are always receiving new donations, I found the perfect lamp on my very next trip to the store.  The crystal, marble, and brass features, along with the size of the lamp, were just right in every way.  I couldn't wait to get home and put the finishing touches on my vintage bird bath.

lamp bulb holder

Step One: Unscrew the light socket and remove it from the top of the lamp.

lamp electrical cord

Step Two:  Clip the electrical cord and pull it out through the lamp base.  

sections of crystal lamp

Step Three:  I removed each individual section of the lamp and reassembled the pieces to better support the basin section of my bird bath.  I moved the brass leaf section to the top of the column and reversed it (turned it upside down) to serve as the support arms for my glass dish.  

brass holder on lamp

Step Four:  Though I had intended to glue the platter directly to the brass arms, I found that they weren't totally level, so I riveted a circular metal candle holder to the brass piece.  I spray painted the metal silver since it would show through the bottom of the water basin.  I wanted a natural looking reflection.

serving dish on lamp holder


gluing a glass plate to a lamp candle holder

Step Five:  I used E6000 glue to affix the glass dish to the candle holder.  I ran a bead of glue all along the circular rim on the bottom of the egg platter and carefully applied pressure for a minute or two after centering the dish on the metal plate.  Then, I let the glue cure for a couple of days.

e6000 glue

Step Six:  Since I don't want my glass bird bath to tip over and shatter, I ran a metal post up into the center column where the cord used to be housed.  I purchased an inexpensive plant hanger at the dollar store.  It has stakes to anchor the base of the lamp into the ground.  I measured the height of the lamp and then cut off the hook top of the planter stake.  For extra insurance, since the winds are often incredibly strong where I live, I drilled a hole through the center of a cement patio paver and inserted the metal rod through it before installing the rod inside the lamp.  Now my bird bath is very stable and far less likely to get knocked over by the wind or wild critters.  As a bonus, it now has a level platform on which to stand.  I'll be planting flowers around the paver to make it more attractive.

metal post


patio pavement square and metal post


metal post placed through patio pavement square


vintage lamp bird bath


Your steps may not be identical to mine, because every lamp is slightly different, but there are enough similarities to give you a sense of how to go about assembling your bird bath.  You may be able to find a lamp that already has a glass shade.  In that case, you won't need a separate glass dish.  I preferred knowing that my glass dish would not be toxic to birds and I didn't have to seal any holes that had been drilled through a lamp shade.  

I am very pleased with my unique bird bath.  It is so satisfying to take an unwanted item or two and turn them into a conversation piece.  More than that, I feel like I am showing a little love to the beautiful creatures who share my garden habitat.  It has been an especially dry season.  With the mountain creek dried up at the moment, it feels wonderful to provide a source of sustenance for the precious birds that fill my life with their sweet presence and songs.

Let me know if you decide to make your own bird bath or garden art with a vintage lamp.  I would love to see how you use your creative gifts.


Note: The author may receive a commission from purchases made using links found in this article. “As an Amazon Associate, Ebay (EPN) and/or Esty (Awin) Affiliate, I (we) earn from qualifying purchases.”


Most Recent Reviews on Review This Reviews


Search for Reviews by Subject, Author or Title

The Review This Reviews Contributors


SylvestermouseSylvestermouseDawn Rae BDawn Rae BMbgPhotoMbgPhotoBrite-IdeasBrite-IdeasWednesday ElfWednesday ElfOlivia MorrisOlivia MorrisTreasures by BrendaTreasures by BrendaThe Savvy AgeThe Savvy AgeMargaret SchindelMargaret SchindelRaintree AnnieRaintree AnnieLou16Lou16Sam MonacoSam MonacoTracey BoyerTracey BoyerRenaissance WomanRenaissance WomanBarbRadBarbRadBev OwensBev OwensBuckHawkBuckHawkDecorating for EventsDecorating for EventsHeather426Heather426Coletta TeskeColetta TeskeMissMerFaeryMissMerFaeryMickie_GMickie_G


Review This Reviews is Dedicated to the Memory of Our Beloved Friend and Fellow Contributor

Susan DeppnerSusan Deppner

We may be apart, but
You Are Not Forgotten


“As an Amazon Associate, Ebay (EPN) and or Etsy (Awin) Affiliate, I (we) earn from purchases.” Disclosure Statement

X