Showing posts with label tutorial. Show all posts

Thursday, August 5, 2021

Upcycled DIY End Table Pet Bed

Upcycled DIY End Table Pet Bed
Upcycled End Table Pet Bed

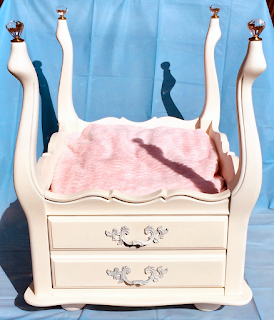
As a continuation of my DIY series on repurposed furniture projects, I present to you my latest pet bed creation.  These upcycled end table dog or cat beds are extremely popular with both fur babies and their pet parents.  I speak from direct experience.  My animals spend nearly all of their time in these beds.  

The four-poster pet bed featured here can be easily completed in a weekend.  Here's a quick rundown of the process I used to bring new life to a vintage end table.  

Supplies Needed: 

  1.  Vintage End Table
  2.  Sand Paper or Sanding Sponge
  3.  Paint (I used Rust-Oleum Chalked Spray Paint - Chiffon Cream)
  4.  Bun Feet (optional)
  5. Finials (I used crystal drawer knobs; lamp finials are another great option)
  6. Clear Coat Sealer (I used the Rust-Oeum Chalked Paint Matte Topcoat)
Tools Used:
  1. Screwdriver
  2. Hack Saw
  3. Sander
  4. Drill
  5. Pliers
  6. Brad Nailer

vintage end table
Vintage End Table (Before)

I started with a quick shopping trip to the Habitat for Humanity ReStore and the Goodwill Store.  This vintage end table was perfect for my project and easy on my budget (eight dollars).  It's nice to get a bargain while supporting a cause near and dear to my heart.

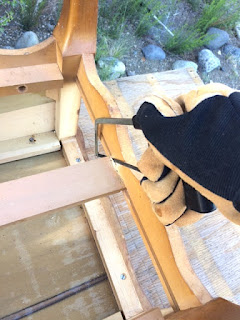
Step One: Flip table. Pull out drawer. Remove inner drawer supports to clear space for bed. I simply used a mini hack saw to cut the cross piece and then a screwdriver to remove the two side supports. 

upside down end table with drawers removed
End Table With Drawer Removed


cutting out the drawer base of a vintage end table
Cutting Out Drawer Brace


removing screws
Unscrewing Side Drawer Support


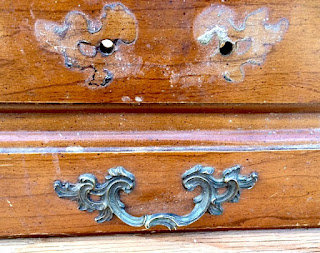
Step Two: Remove drawer pulls by unscrewing inside hardware.  Save parts for later.
removing handles
Removing Drawer Pulls

Step Three: Pull off the plastic leg disks used for leveling and protecting the floor.  Discard.

removing plastic leg disks
Removing Plastic Leg Disks

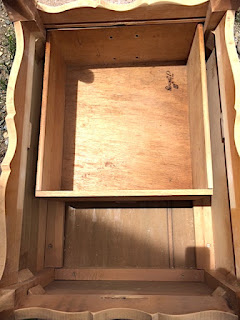
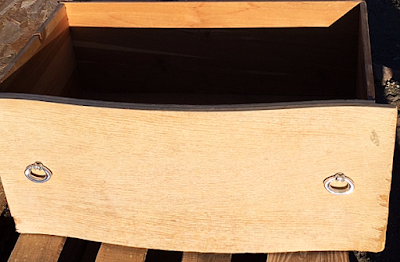
Step Four: Cut off the back part of the drawer and reinstall drawer front (I cut it with a hacksaw leaving an inch of the drawer's side and then used a brad nailer to affix it).  As you can see from the second photo, the drawer takes up room needed for the pet bed.  However, the drawer face is needed for the front side of the cabinet.  I considered using the drawer to make a little step up into the princess bed.  That would be a fun option if you have a tiny dog that could use a boost.


vintage end table prepared for refinishing
Drawer Front/Side After Cut-Off


end table drawer
Drawer Inside Table (Before)

Step Five: Install supports and false bottom for bedding area.  The wood pieces will provide enough depth to drill in the bolts for the bun feet (from the other side). The veneer of the end table top was too thin for the bolts and bolt inserts, hence the wood blocks covered by a sheet of masonite.

false bottom of vintage end table
Supports For False Bottom

masonite covering
Masonite Covering Bottom Supports

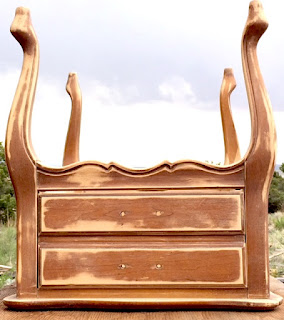
Step Six: Sand wood in preparation for two fresh coats of paint.
preparing and sanding a vintage end table
Paint Prep - Sanding

Step Seven: Prime and paint with two coats of Rust-Oleum Chiffon Cream chalked paint.
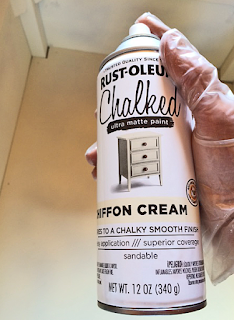
spray paint
Chiffon Cream Spray Paint

Step Eight: Seal the paint with a clear finish. I used the Rust-Oleum matte topcoat.
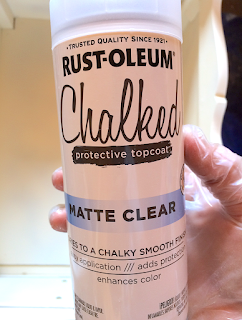
clear topcoat
Clear Topcoat Protective Finish

Step Nine
: Attach bun feet. This was done by drilling holes for the bolt inserts.
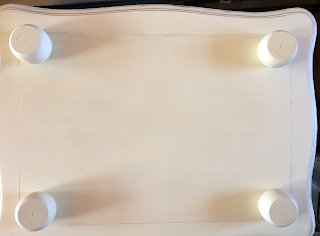
bun feet
Bun Feet Installed With Threaded Inserts

Step Ten: Screw in finials atop the legs.  I love the rainbows that wash over the bed when sunlight shines through the prisms.

crystal finials
Crystal Finials Installed

Step Eleven: Reattach the drawer pulls after painting them.  I used the same creamy chalk paint.

painted drawer pulls on painted end table
Painted Drawer Pulls Back In Place

Step Twelve: Select fabric and make a cozy bed cushion/pillow.  I used foam cushions and two fabric selections: one is a fleece damask pattern in pink and chocolate; one is a super soft ribbed pink chenille.  Which do you like best?  

fleece bed cushion
Damask Fleece Bed Cushion

chenille bed cushion
Pink Ribbed Chenille Bed Cushion

So there you have it.  Upcycling is a fun way to exercise your imagination while feeling great about saving an item from a premature demise.  Why send something to the landfill when it has plenty of life left in it?  

I like to think this old end table is pretty pleased to be looking better than ever and to be enfolding the life of a beloved pet.  There's nothing like being needed and valued.  

Interested in more pet bed demos?  Check out my DIY upcycled dresser drawer beds.  My cats adore them.

Stay tuned for upcoming DIY demo projects.  Up next is an antique door hall tree and a vintage metal suitcase coffee table (recent Habitat for Humanity ReStore finds that I could not resist).


Note: The author may receive a commission from purchases made using links found in this article. “As an Amazon Associate, Ebay (EPN) and/or Esty (Awin) Affiliate, I (we) earn from qualifying purchases.”


Thursday, May 20, 2021

DIY Cat Bed Fit for a Queen


cat in her drawer bed

The ruler of my household happens to be a cat of a certain age known as Miz Grizz.  She is The Queen, and as such, deserves royal treatment.  I noticed that Her Royal Highness is quite fond of the reimagined drawer beds I made for Gracie and Minnie (two Kingdom of Grizz subjects).  The time has come to honor Her Majesty with a cat bed fit for a queen.
open drawer

I still had a drawer left over from my first foray into creating upcycled pet beds, so I claimed it for this project.  As I looked around the house for additional inspiration, and potential supplies, a theme quickly presented itself.  One of the first items I found was a metal honeycomb that I decided to use as a stencil for the sides and back of the bed.  Now that I knew I was going with a queen bee motif, it was time to get started.  First, I removed the drawer's hardware.  Then, I sanded all of the surfaces to prep for painting (and filled holes).  

close up of drawer wood

Next, I primed everything with spray paint.  On the outside of the drawer, I used Rust-Oleum Chiffon Cream Chalked Paint.  The drawer's inside surfaces were painted with Rust-Oleum Metallic Gold.  Choosing to go with a metallic finish provided an unexpected, and very appealing, outcome.  How I love the way the underlying wood grain is highlighted by the shimmery play of light.

painted drawer exterior


metal honeycomb sheet

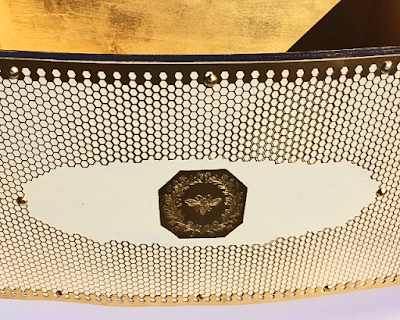
Following the application of the first coats of paint, I used the metal honeycomb sheet to overlay the creamy background with metallic hints of ongoing hive activity.  While working to evoke this effect, an additional idea came to mind.  If I modified the metal sheet for use on the front of the Queen's new bed, it could frame a name plate.

honeycomb sheet attached to wood as decor


That is when I began to envision another feature: an acid-etched brass bee emblem.  Though I had recently experimented with etching copper, I wasn't sure if the same method would work with other metals.  I discovered that the technique worked perfectly with brass.  My new etching became the centerpiece of The Queen's nameplate.

painted jars used as feet

In keeping with the bee theme, I used decorative jelly jars (think royal jelly) for the legs of the bed.  It was just a matter of painting the jars and then attaching the lids to the bottom of the drawer.

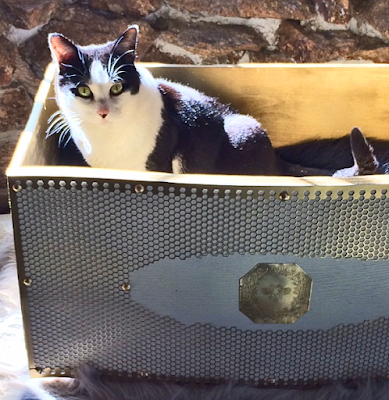
DIY Cat Bed Fit with cat inside

Finally, I added a luxurious faux fur mattress fit for a queen.  Miz Grizz works hard keeping everyone in line and has more than earned an extra measure of comfort.  I hope Her Majesty is pleased with my humble offering.  Though it is a small gift, it was made with great love.  She is the Queen of My Heart.

New Demo: Four-Poster Upcycled End Table Pet Bed


Note: The author may receive a commission from purchases made using links found in this article. “As an Amazon Associate, Ebay (EPN) and/or Esty (Awin) Affiliate, I (we) earn from qualifying purchases.”


Thursday, April 15, 2021

How to Etch Copper - DIY Review


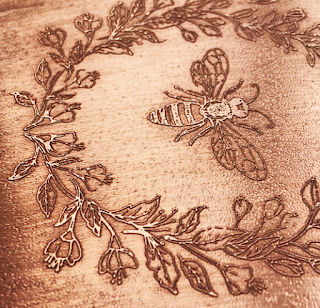
etched copper with bee design

Have you ever found yourself admiring a gorgeous piece of etched copper jewelry?  I know I have.  A few months back I decided I wanted to learn how to create my own custom copper gifts.  As a maker, I crave opportunities to pursue new avenues of artistic expression.  

After exploring various techniques for etching copper, I chose to try a method that appeared to be one of the very best for beginners.  Having just experienced a successful first experiment, I wanted to share the process for the benefit of other aspiring copper artisans.  Here's a list of the supplies you will need:

  1. Small sheet of copper (or copper blank).
  2. Ferric chloride (I used Radio Shack PCB Etchant Solution).
  3. Rubber stamp (a link to the bee stamp featured here).
  4. Ink pad (I prefer the StazOn Solvent Ink Pad).
  5. Black permanent marker.
  6. Clear shipping tape.
  7. Two small plastic containers.
  8. Water.
  9. Baking soda.
  10. Chemical-resistant gloves.
  11. Eye protection.
  12. Brillo pad.
  13. Fine steel wool.
piece of copper and steel wool

Step One
: Prep the copper.  It must be clear of fingerprints, tarnish, etc., to make a good etching.  I used fine steel wool to clean up my copper blank.  You will want to wear gloves during this step (to ensure you don't leave prints on the surface of the metal).


drawn stencil on copper

Step Two
: Select your design and transfer it to the copper (either freehand using a fine permanent marker, or with the use of a rubber stamp).  Allow adequate time for the ink to fully dry.

Step Three: Using a permanent marker, completely ink over the back of the copper blank (and the side edges).  Anything that is not protected with an ink resist will etch.  Once the ink has dried, overlay it with clear packing tape.  Then, tape a piece of styrofoam to the back side of the copper ( to help it float and to provide you with a handle for safely lifting the copper out of the etching acid).


etching solution

Step Four
: In a well ventilated area (outdoors is best), pour an inch or so of the ferric chloride solution into a shallow plastic container (wearing chemical protective gloves and eye protection).  Carefully set your copper (design side down) on the surface of the etching solution.  You want it to float on the surface.

Step Five: Depending on how pronounced you want your etched design to be, you will leave the copper in the etchant solution for anywhere from 30 minutes to an hour.  Gently stir the solution every 15 minutes.  I went the full hour for my etching and was really pleased with the result.

acid solution for etching copper

Step Six
: In a clean plastic container, mix warm water with two tablespoons of baking soda (I used about a cup and a half of water).  Wearing protective gear, carefully remove the copper from the acid solution and gently set it into the water bath.  It will start bubbling as the acid is neutralized by the baking soda.  This step takes less than five minutes.


etching copper

Step Seven
: Remove the copper from the soda bath and rinse with clean water.  When dry remove the packing tape from the back side.


remove ink residue from stenciled copper

Step Eight
: Using a Brillo pad, rub off the ink residue on both sides of the copper.  

Step Nine: Use fine steel wool to brighten up the copper and reduce minor scratches.

Step Ten: You may wish to apply an optional patina to the copper and/or a protective seal coat to keep the copper from tarnishing.  Some copper artisans like the darker antique look achieved using liver of sulphur.  

stenciled design on copper

As you can see, with the right supplies and just a few hours of effort, it is fairly easy to produce a very satisfying result.  I am pleased with this copper etching method and will most definitely take it to the next level with a more advanced project.

If this has stirred an urge to create something unique, you may be interested in my article about painting on copper with fire.  No matter what you decide to do, the important thing is to find your own outlet for creative expression.  There is so much beauty just waiting to be released into the universe.  Let the beauty of who you are be what you release into the world.


Note: The author may receive a commission from purchases made using links found in this article. “As an Amazon Associate, Ebay (EPN) and/or Esty (Awin) Affiliate, I (we) earn from qualifying purchases.”


Friday, February 22, 2019

DIY Upcycled Drawer Pet Bed

cat drawer day bed
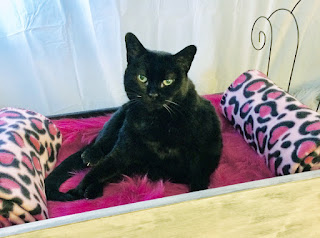
Grizzly was quick to call dibs on this new drawer daybed.
One of the ways I express love for my animals is by making them things.  I'm always on the lookout for fun DIY projects for my kittens and pups.  While cruising Pinterest for inspiration, I came across something I could not wait to try: making a cozy pet bed by upcycling a drawer.  At the time I didn't have any old drawers, but then, like it was meant to be, I came upon a dresser that someone had abandoned.  Just like that I had four oak drawers that needed to be saved from a premature trip to wherever unloved drawers go.  I'd like to share with you how I took those vintage discarded drawers and gave them a new purpose in life. This is a simple weekend project that anyone can enjoy.

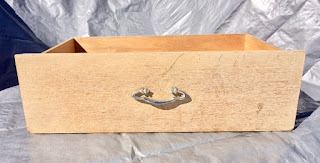
empty drawer

First, pick up a used drawer that will fit your pet.  You may find one at a garage sale or thrift store.  Since my pups are too big for a drawer, I'm making these beds for my kitties.   Given that they sleep most of the time—well, except for my wild child, Minnie—a custom bed is the gift they will use more than anything else.

painted drawer

Next, remove the hardware and sand the surfaces in preparation for your choice of finish.  At the moment, I'm in love with chalkboard paint, so I primed my drawer with it (Tip: Use the spray paint.  It goes on much smoother.).  Though a chalky soft black color may seem like an odd choice, I knew that I wanted to cover it with a white paint that would give it a stylish grunge look.  The nice thing about a dark primer is that it immediately enhanced the drawer's imperfections.

mini trellis and glass candle holders

Now it's time to use your imagination to come up with a unique twist on decorating your pet bed.  When I came upon this cute mini trellis at Dollar Tree, I knew exactly what I wanted to do.  It became the muse for a kitten daybed.  On the same shopping trip, I found these fluted glass candle holders.  They gave me the idea for an unusual set of legs for the daybed.  This is my MO as a maker: using things in unexpected ways.  Never one to be a copycat, I get my thrills from coming up with something really different.

mini trellis

Here's where sizing adjustments happen.  After determining the desired height of the daybed ends, I used my cordless Dremel with the cut-off wheel to shorten the trellis.  If you don't have a Dremel, you can use a hacksaw for this step.  I tried it both ways and the Dremel is definitely the easier and faster method.

drilling holes in drawer sides

Time to drill some holes to insert the trellis into the drawer's side panels.  I used a 1/8th inch bit to drill holes that are 3 1/2 inches deep.  This step required some care, as the wood panels are pretty narrow (about 1/4th inch wide).  I didn't want to accidentally drill through the side of the drawer.  By taking it slowly, I kept the holes where I wanted them to be.

white caulk

So, let's get back to those glass candle holder/wannabe legs I mentioned earlier.  After spray painting them with chalkboard paint, I used white chalk to highlight the fluted edges, creating a kind of pinstriping.  An important last step is to spray the containers with a clear matte sealer to keep the chalk from smearing or wearing off.

canning jar lid

At this point, I needed to screw lids for the jar legs onto the bottom of the drawer.  I replaced the candle holder insert with a regular mouth canning jar lid.  Because drawer bottoms are very thin, I bolstered the thickness by attaching strips of wood lath.  This ensured that the sharp points of the screws wouldn't poke through inside the drawer and pose a hazard to my kitten.  Once the lids were in place, it was just a matter of attaching the fluted legs.

cat drawer day bed

The final steps included creating a name plaque for my kitten and placing luxurious bedding inside the drawer.  I chose a silky faux fur rug for the mattress.  It will be easy to clean by just tossing it in the washer.  As for the pillows, I simply rolled up a comfy fleece blanket.  Easy peasy.

cat in cat drawer day bed

I was anxious to get up this morning to see who might be snuggled up in the drawer daybed.  Though I created the bed for Minnie Pearl, the kitten I rescued last August, I didn't think I would find her snoozing.  I haven't actually ever seen her sleep.  She is way too busy with her kitten shenanigans.  I was very happy to find my senior cat, Grizzly Girl (aka Miz Grizz), curled up in Minnie's place.

cat and mouse game

All throughout the day, my girls have been vying for a spot in the new bed.  Mission accomplished.  My heart is full.  I decided I better get a head start on converting another drawer.  While I was working on it this afternoon, Sugar Bear was "helping" me.

cat in cat drawer day bed

This bed has a cathedral theme.  I found a gothic garden fence for the headboard, which reminds me of stained glass windows, and experimented with an antique crackle finish for the front of the drawer.  I'm actually using plant hangers for the legs.  Go figure!  I invite you to stop back by for updates and additional photos, as I still have two more drawers to go (and two more lovely felines to feature).  Crazy cat lady?  Nah.  I'm still one cat short of crazy.


Note: The author may receive a commission from purchases made using links found in this article. “As an Amazon Associate, Ebay (EPN) and/or Esty (Awin) Affiliate, I (we) earn from qualifying purchases.”


Thursday, June 21, 2018

DIY Mercury Glass


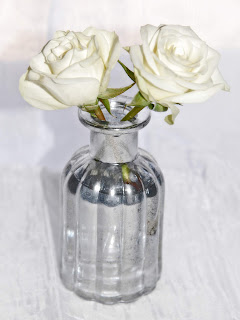
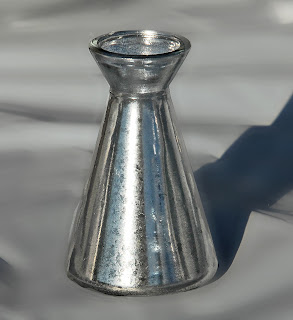
diy mercury glass vase
It's time for a DIY project for the true romantics out there.  Is there anything lovelier than fresh cut flowers in an antiqued mercury glass vase?  Perhaps the reason mercury glass is such a popular centerpiece at weddings is the nostalgic effect it has on us.  I absolutely love the understated beauty and elegance of silvered glass.  The look, and the effect, is way too wonderful to save only for special occasions.  

I invite you to follow along with me and transform your own gorgeous flower vessels.  It takes very little time and money to create the beautiful mercury glass effect presented here.  In less than an hour, you can be enjoying your own timeless centerpiece.  If you're like me, you'll get hooked and create any number of these mercury glass vases for yourself and for gifting to friends and family.  This is a gift you can be sure will be used and appreciated.


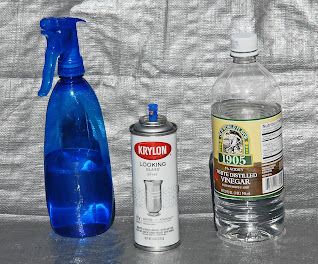
products needed for diy mercury glass
What You Will Need
* Glass vase
* White vinegar
* Water
* Misting pump bottle
* Paper towels

Optional
* Tarp or plastic drop cloth
* Wooden dowel rod
* Gloves

Steps 1-5
  1. Mix one cup of white vinegar with one cup of water.  Pour into misting bottle.
  2. Use a paper towel or soft cloth to wipe your glass clean.
  3. Protect work surfaces with a tarp, newspapers, or a drop cloth.  
  4. Test mister to ensure you will get a very fine spray.
  5. Shake up your spray paint for two minutes.
glass container vase

Step 6
Depending on the type of glass container you are painting, you may find it very helpful to use a dowel rod.  Supporting your vase with a dowel makes it easy to mist and spray all of the surfaces at the same time (without getting paint on your hands or fingerprints on your vase).  It also enables you to spray the bottom of the vase without waiting for the paint to dry on the sides of the container.

When I was painting the test tube vases, I used short dowel rods that I stood on end in an old piece of wood.  All I did was drill some holes in a two-by-four.  Then, I stacked each test tube on a dowel, leaving enough space in between to give me room to maneuver with the mister and spray paint.


spray painted

Steps 7-8
Spray a very fine mist of the vinegar water on your vase.  The key to success is to start with a very light coating of the mist.  If you get large, running droplets, go ahead and wipe it down with a paper towel and start again.

Immediately spray over the mist with a light coat of the Looking Glass spray paint.  You will repeat these steps two to three times, so it is important not to try to get all of the silvering done all at once.  Light layering is essential to getting the desired vintage look of mercury glass.


painting progress diy mercury glass

Step 9
Very gently dab all over the misted and painted surface of the glass with a clean and dry paper towel. You want to blot up all spots of water and any larger droplets of paint.  This step creates the aged look of the silvered glass.


diy mercury glass vase

Step 10
Repeat the misting, painting, and blotting process until you are happy with the final effect.  I repeated the process three times on the vases pictured in this tutorial.

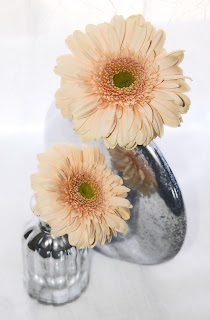
diy mercury glass vase with flowers

Step 11
Once the paint is dry, experiment with arranging your favorite flowers in your gorgeous mercury glass vases.  They look really nice in groupings of various sizes and shapes.

diy mercury glass holders with flowers
In this example, I placed three mercury glass test tubes in an antique bed spring.  The addition of a beveled mirror base created stability and an interesting reflective quality.  Peonies seemed just right for this type of vintage floral arrangement.


diy mercury glass vase with flowers

Mercury glass centerpieces don't have to be expensive to look like you spent big bucks at a floral shop.  Use the glass you already have at home.  It is so easy to upcycle any ordinary jar or cheap vase into something extraordinary.  There is something incredibly satisfying about giving a face-lift to a common, plain item.

We all hold the power of transformation in our hands.  Let's go create and share some beauty today.


Note: The author may receive a commission from purchases made using links found in this article. “As an Amazon Associate, Ebay (EPN) and/or Esty (Awin) Affiliate, I (we) earn from qualifying purchases.”


Most Recent Reviews on Review This Reviews


Search for Reviews by Subject, Author or Title

The Review This Reviews Contributors


SylvestermouseSylvestermouseDawn Rae BDawn Rae BMbgPhotoMbgPhotoBrite-IdeasBrite-IdeasWednesday ElfWednesday ElfOlivia MorrisOlivia MorrisTreasures by BrendaTreasures by BrendaThe Savvy AgeThe Savvy AgeMargaret SchindelMargaret SchindelRaintree AnnieRaintree AnnieLou16Lou16Sam MonacoSam MonacoTracey BoyerTracey BoyerCheryl Paton Cheryl PatonRenaissance WomanRenaissance WomanBarbRadBarbRadBev OwensBev OwensBuckHawkBuckHawkDecorating for EventsDecorating for EventsHeather426Heather426Coletta TeskeColetta TeskeMissMerFaeryMissMerFaeryMickie_GMickie_G


Review This Reviews is Dedicated to the Memory of Our Beloved Friend and Fellow Contributor

Susan DeppnerSusan Deppner

We may be apart, but
You Are Not Forgotten


“As an Amazon Associate, Ebay (EPN) and or Etsy (Awin) Affiliate, I (we) earn from purchases.” Disclosure Statement

X