 |
| Upcycled End Table Pet Bed |
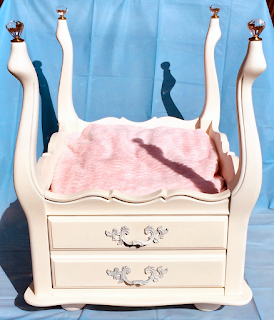
As a continuation of my DIY series on repurposed furniture projects, I present to you my latest pet bed creation. These upcycled end table dog or cat beds are extremely popular with both fur babies and their pet parents. I speak from direct experience. My animals spend nearly all of their time in these beds.
The four-poster pet bed featured here can be easily completed in a weekend. Here's a quick rundown of the process I used to bring new life to a vintage end table.
Supplies Needed:
- Vintage End Table
- Sand Paper or Sanding Sponge
- Paint (I used Rust-Oleum Chalked Spray Paint - Chiffon Cream)
- Bun Feet (optional)
- Finials (I used crystal drawer knobs; lamp finials are another great option)
- Clear Coat Sealer (I used the Rust-Oeum Chalked Paint Matte Topcoat)
- Screwdriver
- Hack Saw
- Sander
- Drill
- Pliers
- Brad Nailer
I started with a quick shopping trip to the Habitat for Humanity ReStore and the Goodwill Store. This vintage end table was perfect for my project and easy on my budget (eight dollars). It's nice to get a bargain while supporting a cause near and dear to my heart.
Step One: Flip table. Pull out drawer. Remove inner drawer supports to clear space for bed. I simply used a mini hack saw to cut the cross piece and then a screwdriver to remove the two side supports.
 |
| End Table With Drawer Removed |
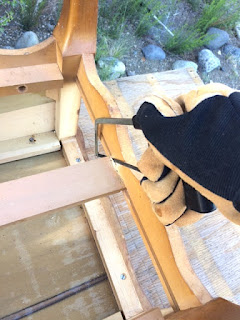 |
| Cutting Out Drawer Brace |
 |
| Unscrewing Side Drawer Support |
Step Two: Remove drawer pulls by unscrewing inside hardware. Save parts for later.
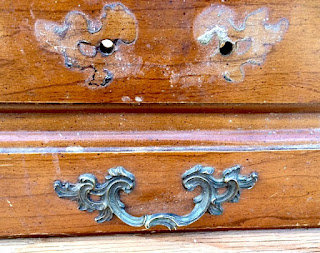 |
| Removing Drawer Pulls |
Step Three: Pull off the plastic leg disks used for leveling and protecting the floor. Discard.
 |
| Removing Plastic Leg Disks |
Step Four: Cut off the back part of the drawer and reinstall drawer front (I cut it with a hacksaw leaving an inch of the drawer's side and then used a brad nailer to affix it). As you can see from the second photo, the drawer takes up room needed for the pet bed. However, the drawer face is needed for the front side of the cabinet. I considered using the drawer to make a little step up into the princess bed. That would be a fun option if you have a tiny dog that could use a boost.
 |
| Drawer Front/Side After Cut-Off |
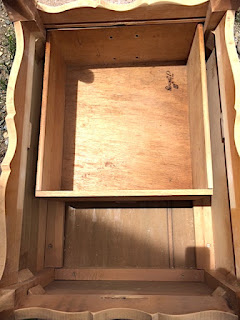 |
| Drawer Inside Table (Before) |
Step Five: Install supports and false bottom for bedding area. The wood pieces will provide enough depth to drill in the bolts for the bun feet (from the other side). The veneer of the end table top was too thin for the bolts and bolt inserts, hence the wood blocks covered by a sheet of masonite.
 |
| Supports For False Bottom |
 |
| Masonite Covering Bottom Supports |
Step Six: Sand wood in preparation for two fresh coats of paint.
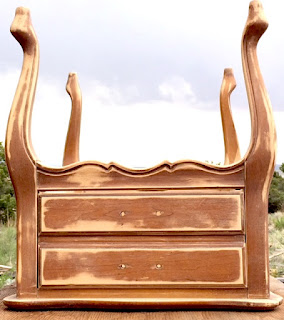 |
| Paint Prep - Sanding |
Step Seven: Prime and paint with two coats of Rust-Oleum Chiffon Cream chalked paint.
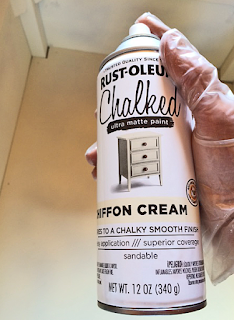 |
| Chiffon Cream Spray Paint |
Step Eight: Seal the paint with a clear finish. I used the Rust-Oleum matte topcoat.
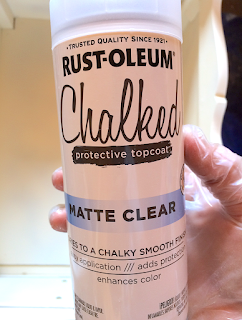 |
| Clear Topcoat Protective Finish |
Step Nine: Attach bun feet. This was done by drilling holes for the bolt inserts.
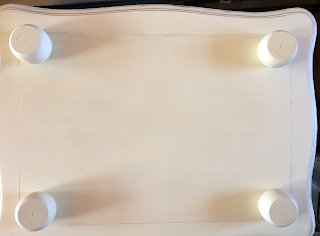 |
| Bun Feet Installed With Threaded Inserts |
Step Ten: Screw in finials atop the legs. I love the rainbows that wash over the bed when sunlight shines through the prisms.
 |
| Crystal Finials Installed |
Step Eleven: Reattach the drawer pulls after painting them. I used the same creamy chalk paint.
 |
| Painted Drawer Pulls Back In Place |
Step Twelve: Select fabric and make a cozy bed cushion/pillow. I used foam cushions and two fabric selections: one is a fleece damask pattern in pink and chocolate; one is a super soft ribbed pink chenille. Which do you like best?
 |
| Damask Fleece Bed Cushion |
 |
| Pink Ribbed Chenille Bed Cushion |
So there you have it. Upcycling is a fun way to exercise your imagination while feeling great about saving an item from a premature demise. Why send something to the landfill when it has plenty of life left in it?
I like to think this old end table is pretty pleased to be looking better than ever and to be enfolding the life of a beloved pet. There's nothing like being needed and valued.
Interested in more pet bed demos? Check out my DIY upcycled dresser drawer beds. My cats adore them.
Stay tuned for upcoming DIY demo projects. Up next is an antique door hall tree and a vintage metal suitcase coffee table (recent Habitat for Humanity ReStore finds that I could not resist).


