 |
| Upcycled End Table Pet Bed |
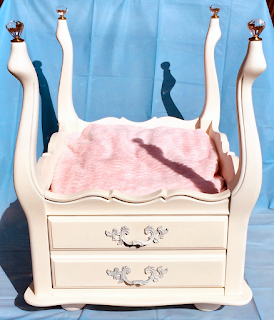
As a continuation of my DIY series on repurposed furniture projects, I present to you my latest pet bed creation. These upcycled end table dog or cat beds are extremely popular with both fur babies and their pet parents. I speak from direct experience. My animals spend nearly all of their time in these beds.
The four-poster pet bed featured here can be easily completed in a weekend. Here's a quick rundown of the process I used to bring new life to a vintage end table.
Supplies Needed:
- Vintage End Table
- Sand Paper or Sanding Sponge
- Paint (I used Rust-Oleum Chalked Spray Paint - Chiffon Cream)
- Bun Feet (optional)
- Finials (I used crystal drawer knobs; lamp finials are another great option)
- Clear Coat Sealer (I used the Rust-Oeum Chalked Paint Matte Topcoat)
- Screwdriver
- Hack Saw
- Sander
- Drill
- Pliers
- Brad Nailer
I started with a quick shopping trip to the Habitat for Humanity ReStore and the Goodwill Store. This vintage end table was perfect for my project and easy on my budget (eight dollars). It's nice to get a bargain while supporting a cause near and dear to my heart.
Step One: Flip table. Pull out drawer. Remove inner drawer supports to clear space for bed. I simply used a mini hack saw to cut the cross piece and then a screwdriver to remove the two side supports.
 |
| End Table With Drawer Removed |
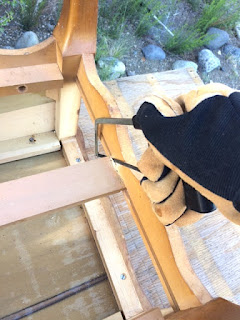 |
| Cutting Out Drawer Brace |
 |
| Unscrewing Side Drawer Support |
Step Two: Remove drawer pulls by unscrewing inside hardware. Save parts for later.
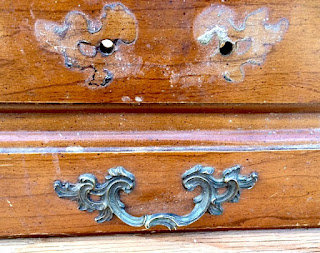 |
| Removing Drawer Pulls |
Step Three: Pull off the plastic leg disks used for leveling and protecting the floor. Discard.
 |
| Removing Plastic Leg Disks |
Step Four: Cut off the back part of the drawer and reinstall drawer front (I cut it with a hacksaw leaving an inch of the drawer's side and then used a brad nailer to affix it). As you can see from the second photo, the drawer takes up room needed for the pet bed. However, the drawer face is needed for the front side of the cabinet. I considered using the drawer to make a little step up into the princess bed. That would be a fun option if you have a tiny dog that could use a boost.
 |
| Drawer Front/Side After Cut-Off |
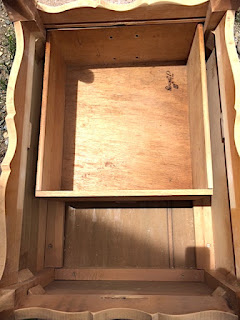 |
| Drawer Inside Table (Before) |
Step Five: Install supports and false bottom for bedding area. The wood pieces will provide enough depth to drill in the bolts for the bun feet (from the other side). The veneer of the end table top was too thin for the bolts and bolt inserts, hence the wood blocks covered by a sheet of masonite.
 |
| Supports For False Bottom |
 |
| Masonite Covering Bottom Supports |
Step Six: Sand wood in preparation for two fresh coats of paint.
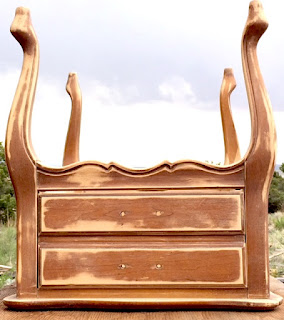 |
| Paint Prep - Sanding |
Step Seven: Prime and paint with two coats of Rust-Oleum Chiffon Cream chalked paint.
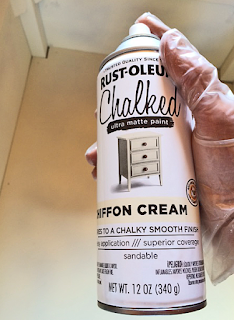 |
| Chiffon Cream Spray Paint |
Step Eight: Seal the paint with a clear finish. I used the Rust-Oleum matte topcoat.
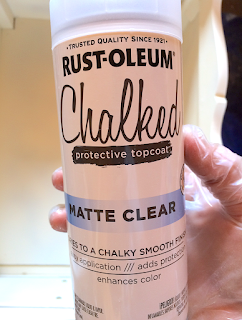 |
| Clear Topcoat Protective Finish |
Step Nine: Attach bun feet. This was done by drilling holes for the bolt inserts.
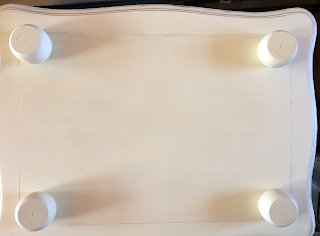 |
| Bun Feet Installed With Threaded Inserts |
Step Ten: Screw in finials atop the legs. I love the rainbows that wash over the bed when sunlight shines through the prisms.
 |
| Crystal Finials Installed |
Step Eleven: Reattach the drawer pulls after painting them. I used the same creamy chalk paint.
 |
| Painted Drawer Pulls Back In Place |
Step Twelve: Select fabric and make a cozy bed cushion/pillow. I used foam cushions and two fabric selections: one is a fleece damask pattern in pink and chocolate; one is a super soft ribbed pink chenille. Which do you like best?
 |
| Damask Fleece Bed Cushion |
 |
| Pink Ribbed Chenille Bed Cushion |
So there you have it. Upcycling is a fun way to exercise your imagination while feeling great about saving an item from a premature demise. Why send something to the landfill when it has plenty of life left in it?
I like to think this old end table is pretty pleased to be looking better than ever and to be enfolding the life of a beloved pet. There's nothing like being needed and valued.
Interested in more pet bed demos? Check out my DIY upcycled dresser drawer beds. My cats adore them.
Stay tuned for upcoming DIY demo projects. Up next is an antique door hall tree and a vintage metal suitcase coffee table (recent Habitat for Humanity ReStore finds that I could not resist).


Ah, Diana. The pets in your life benefit in such a comfy way with your clever DIY pet bed projects. And the benefits extend outward as you share your DIY expertise with us all. Well done, my dear.
ReplyDeleteThis is what happens when you marry your passions for animal rescue and DIY. I find myself compelled to design creature comforts. My animals seem to cheer me on as they eagerly await the completion of these custom beds.
DeleteHow interesting!!! You are so clever and I'm sure your wonderful pets love their new bed.
ReplyDeleteThank you. I just might sell this one and use the funds for supporting a worthy cause.
DeleteDiana, this is beautiful! In my next life, I want to come back as one of your pets. This is just so special and who doesn't love something like that for their favorite puppy or kitten. I love it and I'm sure that they will too!
ReplyDeleteYou don't even have to wait for your next life. We'll make you an honorary family member right now.
DeleteAnother excellent tutorial on repurposing old furniture into cat beds! I love this idea. Personally, I like the pink chenille fabric although I know the fleece would be very comfortable. Your kitties sure do have an awesome mom who is constantly thinking of ways to accommodate them.
ReplyDeleteIt's pretty hard to resist that super soft pink chenille fabric. Silky comfort, for sure. I don't think I can ever match the awesomeness of my fur babies. Still, I aspire to treat them to a life of peace and comfort. They deserve the best for loving me to the max.
DeleteDiana, your innovative, upcycled furniture pet bed projects are a win-win-win plus! Your purchase of used furniture from the Habitat for Humanity ReStore benefits the families in need whom this wonderful organization supports, and provides an affordable core for your projects. Your furbabies enjoy watching you design and build these fabulous pieces and testing them out. In some cases, as with your DIY upcycled dresser drawer cat beds, your feline family members get to make them their royal domains. In others, including possibly this new DIY upcycled end table pet bed, other pets get to enjoy them while you invest the proceeds to support a worthy cause near and dear to your heart. Either way, you have the joy of rescuing perfectly good pieces of furniture from a premature burial in a landfill and using your considerable creativity and DIY skills to give them a beautiful and useful new lease on life. You're such a special, beautiful, generous soul, my dear friend!
ReplyDeleteYou made me feel like I won an Olympic gold medal (or three). I do love any win-win-win endeavor. Whenever I'm in a Habitat ReStore, I find myself truly inspired to create something one-of-a-kind (useful and enjoyable). These projects bring me pleasure to make and to gift. Thank you for such lovely words of appreciation and affirmation.
DeleteSeriously creative! That bed is fit for a kitty queen or princess. I love the look of this DIY bed. Such a good use of extra furniture. Pet beds are becoming all the rage in DIY projects these days. I'm not really a DIY guru, but have had many ideas, looking at old furniture, at what would or could make a unique pet bed. Great job on this one!
ReplyDeleteI do think of it as a princess bed. There is something really satisfying and mentally stimulating about looking at a tired, old item and finding a way to make it beautiful in a new way. I think DIY pet beds are the in thing because people love their animals so much and because we all need an outlet for our creative energy at this time. I don't see this trend going away any time soon. I'm sure you have fabulous ideas given your many design talents.
DeleteOh Wow this pet bed is fantastic! I love the idea of unused furniture upcycled into something beautiful and useful. You are very talented.Thank you for the detailed instructions. This is a brilliant use for old furniture that may otherwise be discarded and is also helping out a charity. It looks very comfy and any pet would love it!
ReplyDeleteThank you! There are so many ways to repurpose ordinary household items. I find the process incredibly satisfying. Half the fun is the treasure hunt (seeking the item that will speak to one's creative urges). I know it when I see it... the piece of furniture that is crying out for renewal. It awakens the inner artist.
DeleteOh your pets are so lucky to have such an innovative human in their lives. What a wonderful idea, and quite easy DIY project to give your pets the comfort they need. Great idea!!
ReplyDeleteThanks, Sam. I feel I'm the lucky one. They comfort me in every way... every single day.
Delete