Showing posts with label Recipes. Show all posts

Sunday, February 9, 2020

Man's Birthday Cake - A Family Favorite Recipe

Man's Birthday Cake - An Easy Family Recipe
Passed Down from Generation to Generation

For the past several reviews I've shared family favorite recipes and today I'd like to share another.

Some people love to cook or bake, however, I'm not one of them. Don't get me wrong, I can cook; it's just that it's not my favorite thing to do. Because of that, I tend to stick with recipes I'm used to and that have been proven from generation to generation.

Most of us have favorite go-to recipes that we whip up when we need something quick. Here are my previous family baking favorites:
  1.  One-Bowl Chocolate Cake
  2.  Homemade Chocolate Icing
  3.  Easy Banana Loaf
In the chocolate cake recipe, you'll notice that the ingredients are very basic, but I point out which ingredient I believe makes the cake taste so good. Be sure to check it out.

A Man's Birthday Cake - What Is It?


Man's Birthday Cake is a raisin spice cake. I suspect the name of the cake was given generations ago because that's what we've always called it. The men in our family do like it, but so do the kids and women!

This recipe comes from my maternal grandmother's family, is a family favorite, and is simple to make.

What's Different About This Cake?


Like the banana loaf featured above, this recipe doesn't use milk. This raisin spice cake is made with raisin water instead.

Man's Birthday Cake Ingredients & Instructions


1 Cup of Raisins
2 Cups of Water, Keep the Water
1/2 Cup of Butter
1 Cup of Sugar
1 Egg
1 and 3/4 Cups of Flour
1 Teaspoon of Baking Soda
1/2 Teaspoon of Salt
1 Teaspoon of Cloves
1 Teaspoon of Allspice
1 Teaspoon of Cinnamon

Boil the raisins in two cups of water. Keep the water. (Note: Bring it to a boil and let it boil for five or six minutes).

Mix the butter, sugar, and egg in a medium-sized bowl. Once mixed, add the raisins and water. Give it a stir to blend it all together. It's ok if the water and raisins are hot.

In a separate bowl, mix the flour, baking soda, salt, cloves, allspice, and cinnamon. 

Then combine the two bowls of ingredients together. Stir until blended.

Place the cake mix into an ungreased baking dish (9 by 13). It will be a thin-looking batter and may seem like there's not much for such a large pan. However, when you use a pan this size, you can cut it into nice bite-sized squares for individual serving if you prefer.

You can use other sized pans of course.

Bake at 375 degrees for 20 to 40 minutes depending upon your oven. Check it after 20 minutes, if it's still not done, leave it for another 10 minutes. Keep doing that until it's fully baked. In my oven, it cooks in 20(ish) minutes.

When it cools I cut it up into squares and stack the squares in a covered cake dish for the family to grab and go. 

I rarely ice this cake, however, my grandmother used to top it with a cream cheese icing. Yum. If you decide to ice the cake, of course, you know you need to let the cake completely cool first.

By the way, without icing this is a delicious cake, when hot, with a bit of butter melting on it. Yum.

If you're making it as a birthday cake, you'll want to put the icing on it.


Note: The author may receive a commission from purchases made using links found in this article. “As an Amazon Associate, Ebay (EPN) and/or Esty (Awin) Affiliate, I (we) earn from qualifying purchases.”


Sunday, February 2, 2020

The Best One Bowl Chocolate Cake According to My Family

Easy One-Bowl-Chocolate Cake - a Family Recipe

My grandmother used this recipe, then mom, and now me. It has been handed down from generation to generation, and I suspect that trend to continue in our family.

My family always requests this chocolate cake. In fact, for birthday celebrations, store-bought cakes are not an option; this home-made cake is always preferred.

What Makes this Cake So Good?


It's not difficult to make a cake, and I'll bet the ingredients for this recipe are standard to most cakes. However, if I had to pull out one ingredient that makes this cake taste amazing, I'd say it's the Cocoa. 

I've always used Fry's Cocoa. I use it for our home-made chocolate icing as well. See below for a link to that recipe.

I've tried other baking Cocoa, but my family always says that 'the cake doesn't taste the same.' So I stick to Fry's Cocoa. Maybe they're just used to it? However, their friends also comment on how good the chocolate cake is - so yah, maybe it's the Cocoa?

You can get Fry's Cocoa in the USA; it's imported from Canada and is available here via Amazon. Canadians can visit Amazon's Canada site to order it, or head to the grocery store; it's easy to find.

Chocolate Cake Recipe Ingredients:

  • 1 and 1/2 Cups of White Sugar
  • 1/2 Cup of Cocoa (Fry's Cocoa if you have it - I pack it a bit to get a little more)
  • 1 and 3/4 Cups of White Flour
  • 1 and 1/2 Teaspoons of Baking Soda
  • 1 Teaspoon of Salt
  • 1/2 Cup of Softened Butter (not melted)
  • 1 and 1/2 Cups of Milk
  • 2 Eggs
  • 1 Teaspoon of Pure Vanilla Extract
Put everything in one bowl and lightly beat the ingredients until they're mixed together. Never over beat a cake. Once the ingredients are mixed and blended, that's good enough.

I bake this cake in a three-quart oblong glass baking dish or cake pan (9inches by 13inches).
How to Make the Best Home-Made Icing

You can use a non-stick spray if you like; however, I never use that. I'll rub the bottom and sides of the dish with butter, then lightly coat it with flour. To coat it with flour, put about a teaspoon of flour in the middle, then pick-up the cake dish and tilt it in all directions until the flour spreads very thinly over the bottom and sides. If there's too much flour, dump out the excess.

You can use different shaped cake pans as well. I've used two round ones before, then stacked them to make a round cake.

Bake the cake in a preheated 350-degree oven for 1/2 hour to 45 minutes depending upon your oven. Check it at the half-hour mark, then judge the length of time left at that point. With my oven, it's usually 40 minutes or so.

Let your cake cool, and then ice it with delicious home-made chocolate icing; here's the recipe. I've also linked the above photo to the Icing recipe. My grandmother taught me how to make it, so be sure to check it out; it also uses Fry's Cocoa. 


Note: The author may receive a commission from purchases made using links found in this article. “As an Amazon Associate, Ebay (EPN) and/or Esty (Awin) Affiliate, I (we) earn from qualifying purchases.”


Sunday, January 19, 2020

6 Ingredient Banana Loaf - Mix and Bake

6 Ingredient Banana Loaf
There are so many banana loaf recipes online that I'm hesitant to add another to the mix.

However, some people may appreciate this simple 6 ingredient recipe. It's easy to remember, and the items are what most people have in their cupboard.

This recipe has been my quick go-to solution for using up ripe bananas for over thirty years.

"This is a no egg, no milk recipe"

The Basic Ingredients:
  •  3 mashed ripe bananas
  •  1.5 (one and a half) cups of flour (I use white flour)
  •  1 cup of sugar
  •  2 tablespoons of butter (on the softer side but not melted)
  •  1 teaspoon of baking soda
  •  1 teaspoon of vanilla extract
For Chocolate Chip Banana Loaf, add a 1/2 to 3/4 cup (your choice) of chocolate chips.
For Banana Nut Loaf, add a 1/2 to 3/4 cup of your favorite chopped nuts.
For Cherry Banana Loaf, add a 1/2 to 3/4 cup of jarred cherries (only the cherries, not the liquid)

Directions:

Everything goes into one bowl. 

Mash the bananas, then add the other five ingredients. Mix it together. It's ok if the butter isn't completely dissolved. You can bake it as is, or go ahead and add any of the suggested items above, chocolate chips or nuts or cherries. 

Put the mixture in a non-stick loaf pan. Personally, I've never used a pan that's not non-stick, so if you plan to use one, spray it with non-stick cooking spray or rub a layer of butter on it.

Bake at 325 for approximately 1 hour or until it's fully cooked. With my oven, it will cook faster. I check it at about the half-hour point by giving it the touch test on top. When I think it's fully cooked, I'll put a knife down the middle, and if it pulls out clean, it's done.

Adjustments:

Over the years I've altered the recipe from time to time. I've used more bananas (four) and sometimes fewer bananas (two). Also, the size of the bananas can call for small adjustments. If the bananas are small, then I'll use four without adjusting the flour content.

When I use four large bananas, I tend to add a bit more flour. Generally, I go by the feel of the batter. 

When I feel the batter needs additional moisture, I'll add a bit more butter - a third heaping tablespoon.

Slicing Your Banana Loaf

I always cut-up my banana loaf, then display it in a cake dish. It's a visual thing and entices the gang to eat it. 

I've cut the loaf in two ways: 

1. Once it cools, you can cut it in horizontal one inch wide pieces like you see in a bakery, then display it in a pretty cake dish.

or,

2. Cut it in two-inch wide horizontal pieces, then cut it vertically down the middle giving the pieces a larger square look.

My family prefers the chocolate chip banana loaf - Here it is, cut in larger squares as described in point number two above.


Note: The author may receive a commission from purchases made using links found in this article. “As an Amazon Associate, Ebay (EPN) and/or Esty (Awin) Affiliate, I (we) earn from qualifying purchases.”


Saturday, January 18, 2020

Honey Walnut Drops – Cookie Recipe Review


A collage of cookies and the recipe
I have an old Church Cookbook from my mother-in-law's collection.  It's the kind many churches put out, especially in small towns, with recipes from church members handed down from one generation to the next. Many of you probably have something similar, acquired the same way.


Vintage church cookbook
While browsing through this Garden City (KS) Cookbook one day before the holidays, I found a new (to me) cookie recipe with two of my favorite ingredients ~ walnuts and coconut. I thought it would be fun to share it with you today. 


Honey Walnut Drops Recipe


Ingredients for Honey Walnut Drops Cookies
Ingredients:

1 c. sugar
1 c. honey
2/3 c. shortening
3 eggs
3 ¾ c. flour
1 tsp. Salt
1 c. commercial sour cream
1 c. chopped walnuts
¾ c. flaked coconut
1 tsp. Vanilla
1 tsp. soda

Directions:


Cream sugar,  honey, shortening and eggs. Mix flour (not sifted) with soda, salt. Add alternately with sour cream to creamed mixture. Stir in walnuts, coconut and vanilla.

Drop teaspoonfuls on greased cookie sheet.  Top each cookie with walnut half and coconut. 


A cookie sheet with baked cookies

Bake at 375 degrees for 10-12 minutes.

*Yield not given in this recipe, but I got about 6 dozen cookies from my batch. 

PS: I did not have any extra walnuts, so did not top the cookies with a one-half walnut. Lots of walnuts IN the cookies, though. 

AUTHOR'S NOTE: This cookie recipe was published in this Garden City cookbook in 1979, so no nutritional information is included of the kind you often find in today's recipes (such as calories, fat grams, carbs, etc.), in case you were wondering. :-). Considering the ingredients, I am sure there are a 'number' of calories in it, but, after all, it is a cookie! 

Old Joke:  Did you know that if you break a cookie in half before eating, all the calories 'fall out'? LOL. 

More About Cookies


Honey Walnut Drops Cookies on a plate


For more cookie recipes on this site, check out ReviewThisRecipes.com


In case you want a special day to celebrate baking cookies, December 18th is National Bake Cookies Day

Plus, October is known as National Cookie Month, giving you a whole month to enjoy cookies (as if we needed an excuse). :)


Related Posts


National Gingerbread Cookie DayNational Gingerbread Cookie Day

November 21st is National Gingerbread Cookie Day


Bake Cookies DayBake Cookies Day

Bake Cookies Day is December 18.


Review of Byrd's Famous CookiesReview of Byrd's Famous Cookies

The Byrd Cookie Company has been an established company in Savannah, Georgia since 1924


Autumn Eats - A Review of Seasonal Cookie CuttersAutumn Eats - A Review of Seasonal Cookie Cutters

Seasonal Cookies Cutters make holiday-related cookie shapes for holidays throughout the Autumn (Halloween, Thanksgiving, and Christmas).


+All images in this article were personally taken by Wednesday Elf

(c) Written by Wednesday Elf on 1/18/2020.


Note: The author may receive a commission from purchases made using links found in this article. “As an Amazon Associate, Ebay (EPN) and/or Esty (Awin) Affiliate, I (we) earn from qualifying purchases.”


Saturday, January 11, 2020

Did You Know That January is Hot Tea Month?

I thought I'd review our love of tea here on Review This Reviews and also share with you the teas I enjoy during my day.

Enjoying a cup of hot tea as January is hot tea month
The tea pictured is Arbonne's Detox Tea, click this link to purchase.

The authors on this site do seem to enjoy their hot tea and you can check out Cynthia's hot tea article to learn more about the different types of tea available.

I used to enjoy several mugs of black tea a day and an occasional green tea, but these days I enjoy herbal teas - which tea lovers will (correctly) say aren't actually teas, but herbal infusions.

Which teas do you prefer to drink?   I would love to know in the comments.

My Daily Teas - Whatever Month of the Year it is!


I start every day with a mug of Arbonne detox tea which I absolutely love.

If I'm meeting a friend during the day I will choose peppermint tea as my drink of choice as it's available at most cafes these days.

I used to have peppermint tea every afternoon, but these days I only drink it occasionally as January in Queensland, Australia (where I live) is pretty hot so I tend to drink a fizz stick instead.  Sometimes I do feel like a hot drink and I will switch between my usual peppermint or a Twining's Spearmint and Peppermint tea..

Other teas I may have are from Arbonne's holiday tea range (I'll probably enjoy them more in our winter months though).

At night I enjoy Twining's Chamomile, Honey & Vanilla tea.   You may have noticed that I am partial to Twining's teas, my husband even brought me a couple of their cold infuse teas to try, but this is hot tea month so we'll talk about them on another article.

More Tea Please!


Let's have a look at what some of the teas our other Review This contributors enjoy:

Cynthia reviews Aveda Comforting Tea which sounds absolutely delicious.
Barb enjoys Lifestyle Awareness teas and reviews a couple of them for us - Immunity Now & Serene Slumber.

Of course you also need to be able to make tea which brings us to Barb's Tea Kettle review.

I have written a review on gift ideas for tea lovers which enjoys some gorgeous tea pots and fun tea infusers, check that out here - Best Gifts for Tea Lovers.

So if you're not a tea drinker already, why not try a few different ones this January in honour of Hot Tea Month?   If you do (and I hope you do) then be sure to come back and let us know what ones you've enjoyed.

Of course there's one thing any cup of tea is good with and that's a great book!


Note: The author may receive a commission from purchases made using links found in this article. “As an Amazon Associate, Ebay (EPN) and/or Esty (Awin) Affiliate, I (we) earn from qualifying purchases.”


Wednesday, December 18, 2019

How to Prep and Store Organic Raspberries to Keep Them Fresh Longer

For the past year or more, I've been on a quest to find a way to prolong the time I can refrigerate fresh raspberries before they go bad. A few weeks ago, after extensive research and numerous failed experiments, I finally succeeded! In this review, I’ll share the preparation and storage method I developed that allows me to store fresh berries in the refrigerator successfully for days longer than any other method I tried.
The Secrets to Keeping Organic Raspberries Fresh Up to 2X Longer
The method I developed for prolonging the storage of ultra-perishable organic raspberries
was a labor of love that took more than a year of research and experimenting!

Organic Raspberries Are Extremely Perishable

Fresh berries are one of nature’s most delicious treats. Unfortunately, they don’t keep long in the refrigerator, especially the ones that you buy in a store rather than from a local farm stand. I try to buy mostly organic produce these days, and organic berries have even shorter lifespans than their conventionally grown counterparts. In fact, during the winter, many of the organic raspberries we get here in Boston are imported from Mexico, and after such a long journey, they rarely last more than a day, if that! That’s a waste of both food and money.

I adore organic raspberries and started eating them every week when I switched to a very low carb / keto lifestyle. That's when my search to find a way to prolong their edible life became a much higher priority.

My extensive online research produced lots of information and advice from reliable sources. Unfortunately, much of it was conflicting. Most sources advised not rinsing fresh raspberries until just before eating them. Some suggested soaking the berries in a vinegar and water solution immediately after buying them, then rinsing, drying and storing them. I remembered and looked up a 2015 article by my friend Grace who, after doing her own online research, developed a similar method for prepping and storing most types of produce that includes a 10-minute soak in a saltwater solution, followed by a 10-minute soak in a vinegar-water bath.

I tried them all. Many, many berries were sacrificed on the alter of my research! Unfortunately, none of the methods I tried succeeded in extending the storage life of my beloved organic raspberries. Nonetheless, I was determined to find a solution that would keep them going bad within a day or two of bringing them home.

Through Trial and Error, I Eventually Worked Out My Own Method for Storing Organic Raspberries Successfully for Several Extra Days

Undaunted (well, sort of), I started combining various aspects of some of the prior experiments. After each new experiment, I analyzed the results and tweaked the process for the next attempt. After a few more months, my stubbornness persistence finally paid off!

The prep work needs to start the minute the raspberries are brought home. After discarding any mushy ones, any remaining berries that have softened a bit are set aside to be eaten the same day. The rest get a brief saltwater bath, followed by a brief vinegar and water bath. The berries stay in each solutions for only 2-3 minutes, a much briefer soak than in any of the other methods I tested.

Next, they are rinsed, drained, and sorted further based on their firmness. Then they are set on a paper towel-covered cooling rack(s) for several hours to dry out thoroughly. As far as I know, mine is the first method to use this multi-hour drying time - an idea that turned out to be a game-changer in my experiments!

The storage method turned out to be as important as the prep process. Lining my storage container with two to three layers of paper towel was a step in the right direction, but not enough to slow down the berries' deterioration significantly.

The last piece of the puzzle fell into place when I stopped layering the berries between paper towels in a sealed storage container before refrigerating them. After another series of experiments and tweaks, eventually I was able to prolong the storage time by another 1-2 days by switching to a large, shallow storage container and storing the berries face down in a single layer, spaced apart so they didn't touch, and letting the lid rest on top of the container instead of sealing it.

Now My Organic Raspberries Remain Good for 5 or 6 Days!

Since I don't drive and I need to ask my husband to replenish my supply each week, my goal was to be able to have him buy me two 6-ounce containers of organic raspberries and keep them fresh for three to four days in the refrigerator. But once I started to make significant progress with my experiments, I raised my sights on a more ambitious goal.

Once I started experimenting with significantly longer drying times, my results improved dramatically! Obviously, how long fresh berries will keep depends on their condition when they are purchased. (Don't you hate not being able to see the berries at the bottom of the container, which are the most likely to be damaged or moldy, because they're hidden by the absorbent pad?)

After another month or two of trial-and-error, I finally achieved my new "stretch" goal: figuring out a way to prep and store three 6-oz. containers (18 ounces) of organic fresh raspberries so they stay fresh for 5 days. In fact, when I've been able to get a container of berries that are very fresh, firm, and unbruised, I've been able to prep them, store them in the refrigerator, and enjoy them for as long as 6 days!

A discovery like this is too good not to share. So, if you want to try my method for yourself, read on.

How to Prep and Store Organic Raspberries So They Stay Fresh Longer: Step-by-Step Instructions

Step 1: Gather your tools and supplies.

Supplies for prepping fresh raspberries for storage
Some of the supplies for prepping organic raspberries
to help them last up to 5 days (or even longer) in the refrigerator

Here's what you'll need:
  • Fresh organic raspberries (or any other type of berry, organic or conventionally grown)
  • A small bowl
  • A medium-to-large mixing bowl
  • A large slotted spoon
  • Water
  • Table salt or sea salt
  • A timer (after trying out many different brands and models, this accurate, easy-to-use, dual kitchen timer is definitely my favorite, thanks to the intuitive buttons, a large, easy-to-read display, and a ring loud enough to be heard from another room!)
  • Easy access to the kitchen sink (preferably with a sprayer-type faucet)
  • A roll of paper towels, preferably with closer perforation lines (like these Bounty Quick-Size Paper Towels) that let you tear off only the length you need
  • Shallow food storage containers with lids - one large and one medium sized
  • Optional: Paper clips
  • Optional: FreshPaper Food Saver Sheets
*Heinz All-Natural Distilled White Vinegar is one of the few white vinegars that aren't made with petroleum (yuck!). It's made from grain, which could be GMO, of course, but since it's a choice of that or a petroleum-based product, I'll stick with the former. Since I use a significant amount of it for prepping my raspberries, making my sugar-free pickling brine for my refrigerator pickles, and diluting it 50/50 with water to make a non-toxic kitchen surface cleaner/degreaser spray, I sometimes buy it in the large, 1.32-gallon economy size jug.

Step 2: Pick through the berries.

Carefully transfer them from their containers and spread them out in a single layer.

Pick through the berries, throwing out any that were damaged and setting aside any that need to be eaten that day rather than stored.

Then gently place the remaining berries in the small bowl.

Step 3: Soak them briefly in heavily salted water and rinse.

Fill the mixing bowl partway with enough water to just cover the berries. (You'll quickly learn eyeball the amount of water based on the volume of berries you're prepping.) Add about 3 tablespoons of table salt or sea salt and stir to dissolve.
Mixing the saltwater bath for the berries
Preparing the saltwater bath for the berries

Set the timer for 2 minutes, but don't start it yet. Adjust the "arms" of the colander so it rests on the edges of the sink. (Alternatively, place a traditional, small-holed colander over another mixing bowl, resting it on the lip of the bowl to elevate it for better drainage.)

Hold the bowl of raspberries just above the surface of the liquid in the mixing bowl, then tip them into the salty water. Start the timer.

Give them a brief, gentle stir so all sides of every berry come into contact with the saltwater solution, then stir them gently again after a minute.

As soon as the timer alarm goes off, use the large slotted spoon to lift the berries out of the water and place them into the over-the-sink colander so they are spread out over the entire surface of the colander. (Try to avoid piling the berries on top of each other, which can bruise the ones underneath.)

Run the cold water faucet and use the sprayer to quickly and gently rinse the berries in the colander. Leave them to drain while you empty and rinse the mixing bowl.

Gently rinsing the berries after the saltwater bath
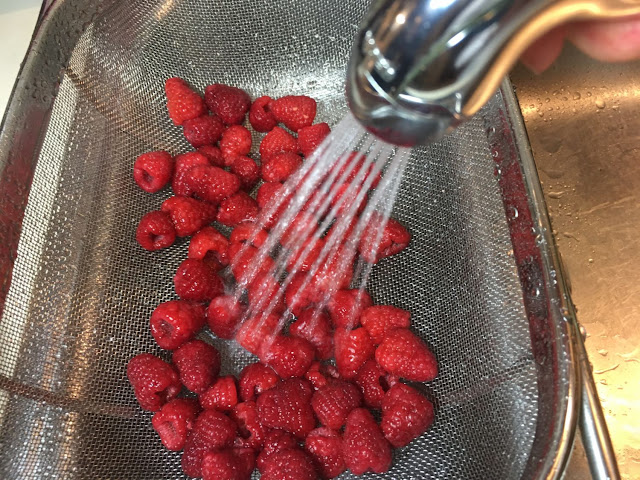
Keep the water pressure gentle to avoid bruising the berries!

Tip: The less you handle the berries and the more gently you treat them, the longer they'll keep!

Step 4: Repeat, using a vinegar and water solution this time.

Refill the mixing bowl to the same level as before, this time substituting a mixture of roughly 3 parts cold water to 1 part all-natural white vinegar. (As an example, to make 2 cups of the vinegar solution, you would mix 1-1/2 cups of water with 1/2 cup of all-natural white vinegar.)

Gently tip the rinsed and drained raspberries from the colander into the vinegar solution in the bowl, then give them a gentle swish, soak, rinse and drain as you did in Step 3.

Gently spread them out on a double thickness of paper towels to absorb more of the water, turning them so the holes face down so any remaining water inside the berries can drain.

Step 5: Sort the raspberries according to firmness and let them dry for at least 3-4 hours (even overnight, if necessary).

Line the gridded baking rack(s) with three layers of paper toweling. Transfer the berries to the racks, one at a time, keeping them face-down and spacing them slightly apart so they don't touch their neighbors. Sort the berries into two groups as you do this, placing the firmest berries to one side of the rack (or on a different rack) and the softer berries to the other side.

Spreading out the berries in a single layer without touching on several sheets of paper towel
Leave the raspberries on the rack until they are firm and the surface is very dry

Set the racks on the counter and set the timer for 1 hour. When it rings, use the lightest touch and the least amount of pressure possible to slowly and gently roll each berry onto its side and separate it from the paper towel, then return it to the rack. (If you don't do this, or if you wait too long, the berries can stick to the paper towel as they dry, making it difficult to remove them without rupturing the surface at the sticking point. Voice of experience here, lol!) After you roll and lift off each berry, check for any leaked juice stains and, if necessary, move it to another spot where the paper towel is clean and dry.

Leave the racks out on the counter for at least 3 to 4 hours, preferably longer, until the surface of the berries has dried out a bit and they feel firmer than they were prior to their brief saltwater and vinegar solution baths.

Letting the surface of the berries dry out enough before refrigerating them is key to extending their storage time. I've even left them out overnight a couple of times, when they hadn't firmed up sufficiently after 4 hours on the paper towel-topped racks.

Step 6: Prep the storage containers and refrigerate the berries.

Rasbperries in paper towel lined storage containers, in a single layer without touching each other
The raspberries in the measuring cup were set aside to eat that night.
The ones in the containers are prepped and ready to be stored in the fridge.

Line both food storage containers with a double or triple thickness of paper towel, folding it neatly at the corners so the bottom to create a paper "tray" that fits perfectly flush against the sides and bottom of the container's interior. Holding four corner folds in place with paperclips helps keep the bottom of this liner flat and the sides at a 90-degree angle, which prevents that berries placed along the edges from tipping over and rolling toward the center.

When the berries have dried out sufficiently on the surface and are firmer to the touch than when you brought them home, place the less firm berries into the medium-size container, face down and spaced slightly apart. Then repeat with the remaining berries and the larger container.

Place the filled containers in the refrigerator, then lay the lids lightly on top of them and slightly askew, keeping the berries exposed to a small amount of air during their cold storage to help maintain their firmness. For the same reason, don't place anything on top of the lids.

Raspberries in storage containers with lids askew
Prepped raspberries in food storage containers with their lids askew
so the air can continue to circulate throughout the cold storage period 

Note: Moisture is raspberries' sworn enemy. So, before I made my multi-hour surface drying and unsealed lid breakthrough discoveries, I used to place a FreshPaper Food Saver Sheet inside each storage container before sealing the lids. Although the packaging says they can be reused for up to 2 weeks before tossing them, I found that the FreshPaper sheets absorbed so much moisture inside the sealed containers that I had to take them out and let them dry every other day. Now, I use them only when I get a container of out-of-season berries that are too soft to firm up even after leaving them out to dry overnight (although in that situation, being able to store them successfully for more than a day or two is unlikely). If you'd like too try a package, I got mine as part of a Whole Foods Market grocery delivery via Prime Now, a local shopping service that's free for Amazon Prime members.

Step 7: Enjoy the Raspberries

When you're ready for some fresh berries, simply remove as many as you want from the container and dig in. No need to rinse them again - they're ready-to-eat!

Bowl of fresh organic raspberries after 6 days of refrigerator storage
Store-bought, organic raspberries - still tasty (and not mushy)
even after they were stored in the refrigerator for 6 days!

Before you return the uneaten berries to the fridge, check that they are still standing up and spaced apart inside the storage container, then place the lid lightly on top.

Remember to eat the berries in the medium-sized storage container first, before starting in on the large container last.

Future Experiments

Over time, I've been swapping more and more single-use, disposable paper and plastic products for more eco-friendly, reusable alternatives. So, while this method works remarkably well for me, I'm troubled by how many paper towels it requires.

I could (and eventually might) substitute a dedicated set of cloth dish towels for draining and drying out the berries and cutting some to size for lining the storage containers. But since our bathroom towel racks are filled with towels and we have nowhere else to hang hand-laundered items to dry, hand-washing a bunch of berry-stained towels once or twice a week isn't in the cards. I'd be concerned about throwing the berry-stained towels into the washing machine with a regular laundry load because the dried berry juice might tint the water pink and ruin everything else in the washer. Running the machine with just the towels would be a waste of water and electricity.

I tried drying the berries directly on cooling racks with a grid design, but the openings were too large and many of the berries fell through.

I'm still hoping to come up with a way to reduce or eliminate paper towels from my process. At some point, I want to buy a couple of largish sheets of food-grade, stainless steel mesh and fold the edges down to make a drying tray. If I can figure out the right mesh to let the raspberries dry out over a period of hours without sticking to the metal, that might be a good solution.


How to Prep and Store Organic Raspberries to Keep Them Fresh Longer reviewed by
Margaret Schindel


Note: The author may receive a commission from purchases made using links found in this article. “As an Amazon Associate, Ebay (EPN) and/or Esty (Awin) Affiliate, I (we) earn from qualifying purchases.”


Saturday, December 7, 2019

Bake Cookies Day, December 18 – Holiday Review

A variety of cookies for Bake Cookies Day
Bake Cookies Day (Source: Pixabay & Fotojet)
  'Tis the season for baking cookies, so how appropriate that Bake Cookies Day is held every December 18th right in the middle of the holiday season. 

The word 'cooky' or 'cookie' comes from the Dutch word “koekje”, meaning “little cake”. Cookies arrived in America along about the 17th century, although they may date back as far as 7th century Persia! Today they are a global phenomena, coming in more varieties, flavors and styles than you can possibly imagine.

The writers on Review This Reviews often write on the subject of food and have reviewed recipes for many varieties of cookies. It seems appropriate for Bake Cookies Day to share a few here. 


Cookie Varieties and Recipes on Review This Reviews


A collage of cookies
Cookie Recipe Reviews on ReviewThisReviews!


  • If you want to give a gift of cookies, but don't have time to bake your own, try out  Byrd's Famous Cookies reviewed by Wednesday Elf. They are delicious.


Other Cookie Days


A tray of cookies
Source: Pixabay

There are other dates throughout the year that celebrate 'cookies'. 


  • National Chocolate Cookie Days happens on August  15th.
  • National Homemade Cookies Day is October 1st.
  • National Gingerbread Cookie Day is November 11th.
  • National Cookie Day is December 4th. 


Summary


So, enjoy Bake Cookie Day December 18th, or any of the other fun cookie days all year long. And don't forget to leave a couple cookies out for Santa on Christmas Eve! 


A plate of Christmas cookies and a glass of milk for Santa on Christmas Eve
(Source: Pixabay)


Bake Cookies Day
December 18


Supplies for baking cookies can be found here on Amazon


(c) Wednesday Elf 12/7/2019


Note: The author may receive a commission from purchases made using links found in this article. “As an Amazon Associate, Ebay (EPN) and/or Esty (Awin) Affiliate, I (we) earn from qualifying purchases.”


Wednesday, November 20, 2019

Recipes & Food Reviewed on Review This Reviews!

Recipes and Food

Treasures from the Archives of Review This Reviews! 


The one thing we all have in common is that we all must eat to survive.   Beyond that one commonality, our choices greatly vary based on diet restrictions, ingredient availability, or simply on food preferences. 

Whether the focus is breakfast, lunch or dinner, we have reviewed food for every mealtime of the day.  Some of us prefer to start a meal with dessert, while others will mainly focus on protein, vegetables, fruit or fiber.  There is something here for everyone!

Since cookbooks are often a fabulous source of recipes, we frequently review cookbooks as well as individual recipes.

With over a dozen contributors, you are sure to find a new recipe, food, or cookbook recommendation reviewed on Review This Reviews that you will love.  We even have drinks! Enjoy our smoothie recipes, plus, our tea and coffee reviews.  

Small Appliances & More Reviewed

In addition to food itself, several of our contributors have tested and reviewed small appliances that help any cook prepare a delicious meal.  Rice makers, air fryers, Instant Pots, food dehydrators, and more small appliance reviews can be found in our Home Appliances section.  Why not make your life a little easier with the right appliance that takes some of the work out of cooking.

Presentation, cooking utensilsserving dishes and food storage are also reviewed here. We even have few hostess gift recommendations for those cooks who treat us with a special meal.


We may not eat together, but we can certainly enjoy the same delicious meal. 


A Review This Pinterest Board - Recipes Reviewed 


There are dozens of Recipes, Food, & Cookbooks
Reviewed by our Contributors!
The board below features 30 of our most recent reviews.


Click through to Pinterest to see all of the Recipes that have been Reviewed by Review This Reviews Contributors! 


Note: The author may receive a commission from purchases made using links found in this article. “As an Amazon Associate, Ebay (EPN) and/or Esty (Awin) Affiliate, I (we) earn from qualifying purchases.”


Monday, November 18, 2019

4 Ingredient Baby Lima Bean Soup

The best thing about cooler weather is making easy soups that basically cook themselves in a slow cooker. Today I am reviewing a new favorite; a super easy, four ingredient comfort soup.


A friend kept talking to me about one of his favorite comfort foods, lima bean and bacon soup. He told me how to make it. Initially, I didn't think it sounded at all tasty. But I tried it because, honestly, I'm lazy in the kitchen. And I don't have much time to cook. With my schedule the options are either easy recipes or fast food. 

I looked up Baby Lima Bean and Bacon recipes on the internet to make sure I hadn't misunderstood my friend. I hadn't. I made the soup and liked it so much that it is becoming a favorite.


4 Ingredient Baby Lima Bean and Bacon recipe


Ingredients:

  • 1 lb of your favorite bacon (I've used both turkey bacon and pork)
  • 1 medium sized onion
  • 2 (16 oz) bags of frozen baby lima beans
  • 1 (32 oz.) carton of chicken broth 


Cooking directions:

  1. Brown the bacon
  2. Saute the onions (until they are translucent)
  3. Place the bacon, onions, and frozen lima beans in a large slow cooker
  4. cover with chicken stock
  5. cook on high for 2 1/2 - 3 hours (or until the beans are tender)

Personal Preferences:

I use unsalted chicken broth to reduce sodium and add pepper to taste when I serve it. You can cook your beans at a slower setting and/or for a shorter period of time for al dente beans. As I mentioned previously, this works with a variety of bacon (including turkey bacon to avoid the pork) or the bacon can be substituted with smoked meats such as ham hocks or smoked turkey meats.

If I'm not feeling too lazy, I make cornbread to go with the meal. Otherwise, toast with butter is a wonderful and easy side.

Baby Lima Beans are Nutritious:

Apparently lima beans are not only delicious but are good for us. They contain dietary fiber, copper, folate, potassium, iron, magnesium, vitamin B1 and B6 among other nutrients.  


Note: The author may receive a commission from purchases made using links found in this article. “As an Amazon Associate, Ebay (EPN) and/or Esty (Awin) Affiliate, I (we) earn from qualifying purchases.”


Friday, November 8, 2019

Chocolate Covered Fruit DIY Recipes Reviewed

Fruit Trays Are Fabulous!

Chocolate Covered Fruit DIY Recipes Reviewed - Chocolate Fruit Tray
Fruit trays have been gracing event tables for many years. Whenever friends or family are planning a wedding shower, baby shower, tea, reception or party, I always volunteer to bring the fruit tray.

For decades, I have prepared Chocolate Covered Strawberries for my family. Purchasing chocolate covered strawberries from a candy store, can be very expensive. Making my own, is inexpensive and easy.

One day I was preparing a fruit tray for a gathering and I decided to take a side dish of chocolate covered strawberries as a special treat. I looked at the prepared fruit tray sitting next to the chocolate covered strawberries and I thought, "why not dip all of the fruit in chocolate?" That is how my chocolate covered fruit tray began. 

Over the next few days, I tested different fruits dipped in chocolate and allowed my family to be the judges. We have found that there are a lot of fruits that we love dipped or covered in chocolate.

This will probably be the first time you have seen some of these fruits covered or dipped in chocolate. After all, the day I prepared them, it was the first time I had seen most of them. 


Chocolate Dipped or Chocolate Covered Fruit Recipe


Preparation to cover any fruit in chocolate begins basically the same way.
  1. Wash and dry the fruit.
  2. Peel, if necessary.
  3. Melt the Chocolate

Some of these fruits have special instructions.

You may wish to visit the individual article for each one. Some articles have examples of large chunks fully covered in chocolate, as well as slices with dipped tips.


Virtually any fruit can be dipped or covered in chocolate. Let me know if you find one I haven't made or featured. I would love to try it!

Chocolate Fruit Tray Recipes

Make a Special Treat


Chocolate covered fruits are wonderful treats anytime.

Either one makes a great afternoon snack, a simple dessert or even a special treat for the lunch box.

Just select your favorite fruit, melt your chocolate and start dipping!


Dolci Microwavable Chocolate & Beautiful Serving Trays


 Dolci Frutta Chocolate Melting Wafers, 8 ounceCheck Price Dolci Frutta Party Kit with Chocolate and White ChocolateCheck Price Dolci Chocolate Wafer Melting, 8 ozCheck Price James Scott Crystal 3 Tier Rectangle ServerCheck Price


Check Out More Recipe Reviews at
ReviewThisRecipes.com


Chocolate Covered Fruit DIY Recipes Reviewed Written by:
House of Sylvestermouse


© 2009 Cynthia Sylvestermouse - This Article was originally published on a website that has closed.


Note: The author may receive a commission from purchases made using links found in this article. “As an Amazon Associate, Ebay (EPN) and/or Esty (Awin) Affiliate, I (we) earn from qualifying purchases.”


Most Recent Reviews on Review This Reviews


Search for Reviews by Subject, Author or Title

The Review This Reviews Contributors


SylvestermouseSylvestermouseDawn Rae BDawn Rae BMbgPhotoMbgPhotoBrite-IdeasBrite-IdeasWednesday ElfWednesday ElfOlivia MorrisOlivia MorrisTreasures by BrendaTreasures by BrendaThe Savvy AgeThe Savvy AgeMargaret SchindelMargaret SchindelRaintree AnnieRaintree AnnieLou16Lou16Sam MonacoSam MonacoTracey BoyerTracey BoyerRenaissance WomanRenaissance WomanBarbRadBarbRadBev OwensBev OwensBuckHawkBuckHawkDecorating for EventsDecorating for EventsHeather426Heather426Coletta TeskeColetta TeskeMissMerFaeryMissMerFaeryMickie_GMickie_G


Review This Reviews is Dedicated to the Memory of Our Beloved Friend and Fellow Contributor

Susan DeppnerSusan Deppner

We may be apart, but
You Are Not Forgotten


“As an Amazon Associate, Ebay (EPN) and or Etsy (Awin) Affiliate, I (we) earn from purchases.” Disclosure Statement

X