Showing posts with label Breakfast. Show all posts

Friday, April 5, 2024

Lemon Mini Muffin Cakes Recipe Reviewed

lemon mini muffins
A few weeks ago, my mom came to our home with a special treat for my family.  Lemon flavored anything is always my favorite.  These little mini muffin lemon cakes were fabulous!  

They were so good, I seriously could not make myself stop eating them.  I finally stuck them in the microwave so they would be "out of sight, out of mind".  However, the little mouse in me kept sneaking back for crumbs and tiny bites.

I don't have pictures of the making process because I was not with my mother when she baked them, but she did agree to let me share and review her recipe. Based on what she told me, this recipe is so easy, more pictures are not really needed.

They would be perfect for a party snack, dessert, breakfast, or perhaps all three if they can last all day in your home. Here, they only survived for one day before they were all gone. We had to guess at how many mini muffins this recipe made and decided it was approximately 48 mini muffins (2 batches when using the featured mini muffin pan below). If you should make them, please count them BEFORE you start eating or sharing them and return here to tell us how many muffins this recipe makes.


Delicious Lemon Mini Muffin Cakes & Glaze Recipe

    Mini Cakes Ingredients

  • 1 Box of Yellow Cake Mix
  • 3.4 oz box of Instant Lemon Pudding 
  • 4 Eggs
  • 3/4 Cup Vegetable Oil


    Glaze Ingredients 

  • 4 Cups sifted Powdered Sugar 
  • 1/3 Cup Lemon Juice   (Real Lemon can be used)
  • 3 Tablespoons Vegetable Oil
  • 3 Tablespoons Water
  • Grated Lemon Zest from 1 lemon, if desired


Directions

  1. Preheat the oven to 350
  2.  Spray mini muffin pan with non-stick spray
  3.  In a large bowl, combine all mini cake ingredients and mix (with mixer) for 2 minutes  
  4.  Spoon 1 Tablespoon of mix into each mini muffin cup
  5.  Bake for 12 minutes
  6.  In a medium bowl, mix together all of the glaze ingredients
  7.  Prepare a drip tray by lining a cookie tray with wax paper and place a wire rack on the tray
  8.  Turn the muffins out of the muffin pan
  9.  Dip each muffin in the glaze, covering mini muffin as much as possible
  10.  Place the dipped muffin on the prepared "drip" tray


Check Out More Recipe Reviews at
ReviewThisRecipes.com


Lemon Mini Muffin Cakes Recipe Reviewed Written by:
House of Sylvestermouse


© 2024 Cynthia Sylvestermouse


Note: The author may receive a commission from purchases made using links found in this article. “As an Amazon Associate, Ebay (EPN) and/or Esty (Awin) Affiliate, I (we) earn from qualifying purchases.”


Friday, July 28, 2023

Microwave Egg Poacher Makes Perfect Eggs for Egg Muffins

delicious egg muffins made with poached eggs and canadian bacon
I am delighted to be able to review and recommend the Nordic Ware 2 Cup Microwave Egg Poacher.  It exceeds initial expectations.

When my husband said he wanted to buy an egg poacher and make a copycat egg muffin like the popular fast food restaurant, I was willing to be his taste-tester.  He wanted something that would be fast and easy so we did a search for a microwavable egg poacher to start.  

I was concerned about how flimsy so many of them were, but when we came across the Nordic Ware poacher, the search was over.  I love Nordic Ware products.  

I had not previously used one of their microwave cookware pieces, but I have been using their shaped bakeware pans for decades so I know they are a reliable, trustworthy and well-made brand.  Their egg poacher is no exception!  

I am quite impressed with the sturdy cup design of the Nordic Ware Egg Poacher.  The hinges are my only concern, but only time and constant use will tell about them.  However, I'm not overly concerned since the price is low enough that replacing it after a few years should not be too difficult.


 Nordic Ware 64702 2 Cup Microwave Egg Poacher, WhiteCheck PriceHow to Make Poached Eggs with the Nordic Ware Egg Poacher

The poacher makes two poached eggs at one time.  

To make the poached eggs,  lightly butter each egg cup,  add an egg in each cup, break the yolk if desired, and add 1 teaspoon of water per egg.  

Snap the egg poacher shut and cook in the microwave for 80 seconds for firm, fully cooked eggs (microwave cooking time may vary).  Then, let them set and continue to steam cook for 30 seconds before opening the poacher. 

The cooked eggs easily slide out of the poacher cups.

I recommend handwashing the egg poacher to lengthen the life and maintain the quality of the microwavable dish.


Egg Muffin Recipe

My husband loves the Thomas English Muffins, so selecting the muffins was no problem for him.  He also purchased Canadian bacon and of course, eggs.  For my egg muffin, he added a slice of American cheese, but he prefers his without cheese.

He butters and toasts the muffins in the oven and heats the Canadian bacon in the microwave. 

Simply layer the cheese, the Canadian bacon, and the poached eggs in the muffin.  Add salt and pepper to season and you have created the perfect copycat egg muffin of the egg muffin served in your favorite fast food restaurant.


egg muffins made with poached eggs, canadian bacon and muffins


Read More Product Reviews On
ReviewThisProducts.com


House of Sylvestermouse


Note: The author may receive a commission from purchases made using links found in this article. “As an Amazon Associate, Ebay (EPN) and/or Esty (Awin) Affiliate, I (we) earn from qualifying purchases.”


Thursday, May 18, 2023

Oats Based Breakfast Ideas That Include Fruit & Vegetables

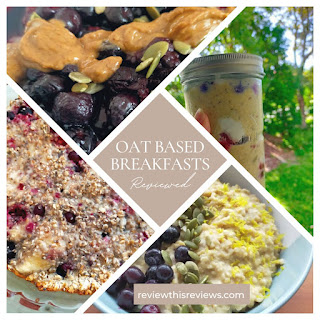
Images of oat based breakfasts like proats, overnight oats and oatmeal bake
Photos by Lou16, template by Canva

I absolutely love oats for breakfast, for years I had porridge every morning until I was introduced to proats.  I think proats is probably my favourite breakfast, although I've recently discovered an oatmeal bake which is absolutely amazing. 

Sometimes, in Queensland, it's too hot to eat proats so one of my alternative oat-based options is overnight oats.

I like to make sure I increase the nutritional content of these meals by adding a couple of servings of fruit and vegetables to them.  Starting the day with fruit and vegetables helps you to hit your daily target. Let's review how you can do that with each of these three meal ideas.

Proats with Cauliflower!

Yes, you heard correctly and if you're anything like me when you read that you probably thought cauliflower for breakfast - you're crazy! I actually really enjoy it though so let me take you through how I make it.

First of all, I've been enjoying proats for years using just oats and when I was told I could substitute the oats for cauliflower I was NOT going to do that, however, I did decide I would try adding a little bit of cauliflower to my oats and take it from there.

  • 2/3 cup oats
  • 1/3 cup frozen cauliflower rice
  • 2 scoops Arbonne protein powder (if you use a different brand then this may need to be adjusted, it's basically one serving)
  • 1 2/3 cup water (you can use milk of your own choice and also adapt the amount if you prefer your proats a different consistency)
  • 1 tsp nut butter (optional)

Add the oats and the cauliflower to a bowl next put the liquid and protein powder into a shaker and shake. This ensures you don't get lumps in your proats so please don't skip this step. 

Add the protein shake to the oats mixture and mix well.

Pop into the microwave for 2 mins, take out and stir well, then put back in for 1 minute.

If you're adding nut butter pop it in now and then stir really well before putting it in a bowl to serve. 

I top it with fruit and seeds ie cherries and pumpkin seeds or strawberries with sunflower and flaxseeds.

Now I wouldn't personally want to add more than a third of cauliflower to my oats and I will admit you can taste the cauliflower, but I actually don't mind the flavour I think it goes well together, especially for chocolate or mocha flavour oats. Vanilla oats don't disguise the cauliflower flavour nearly as well, in my opinion.

Overnight Oats

I love making my overnight oats, but most of my recipes only used to contain fruit and no vegetables, as I was scrolling Instagram one day I came across a carrot cake overnight oats recipe and had to give it a go. I didn't really like it to be honest, but I did love the idea of having carrots for my breakfast so I experimented and remembered that my husband's secret ingredient when he makes carrot cake is pineapple so...check out my carrot cake overnight oat recipe that I DO like.

  • 2/3 cup oats
  • 1 small carrot, grated
  • 1 tbsp chia seeds
  • a small handful of frozen pineapple
  • 2 scoops Arbonne vanilla protein powder
  • 2/3 cup DF milk (I like to use oat milk)
  • 1/3 cup coconut yogurt
  • 1 tbsp nut butter (I use almond)
  • dash of cinnamon

Topping

Yogurt & pumpkin seeds

Combine the oats, carrot, chia seeds, protein powder, cinnamon and pineapple together in a container and give a quick stir. Now add the milk and coconut yogurt and mix together really well. Place in the fridge overnight.

In the morning roughly spread your nut butter on the top and then add the yogurt or see below for the bonus recipe and use my protein-enhanced yogurt (this is what I prefer to use. Originally I tried using just one scoop of protein in the base layer and the other scoop in the yogurt layer, but one scoop in the base leaves it tasting a little bland it definitely needs the full 2 scoops).

Finally, sprinkle the pumpkin seeds on the top and enjoy!

Oatmeal Bake

There's no way I can think (just yet anyway) how to add any vegetables into this bake, but it does contain a couple of serves of fruit and it tastes delicious.  I find it super easy to prepare and pop into the oven as I do a few other jobs before it's time to eat. Here's the recipe, let me know if you try it:

  • 1 banana
  • 3/4 cup unsweetened plant milk
  • 1 cup oats
  • 1/2 tbsp baking powder
  • 1 tbsp chia seeds
  • 1/2 cup frozen berries

I make this all in the pie dish that I am going to cook it in so that there are fewer dishes to wash! So, after turning the oven on to preheat at 180C, mash the banana then add the oats, baking powder, chia seeds and plant milk. Stir it all together well before adding your frozen berries and mixing them in well (I've tried lots of different versions and prefer using mixed berries). 

When the oven has come up to temperature pop the oat mixture in for 20 minutes or until golden brown on top. Voila! It's finished and tastes delicious. You can eat it by itself or add a dollop of yogurt on the top - my personal favourite way is by adding some of my protein-enhanced yogurt (sometimes a few fresh berries on top as well).

Bonus Recipe

Well not really a bonus recipe, but here's how I make my protein-enhanced yogurt. I basically take a scoop of Arbonne's vanilla protein powder and a very generous dollop (or two) of coconut yogurt and mix them together. The result is a sweeter flavoured, protein-packed yogurt that is great on the bake above, or on top of pancakes or waffles. I have even mixed fresh berries through this and eaten it as a snack. 


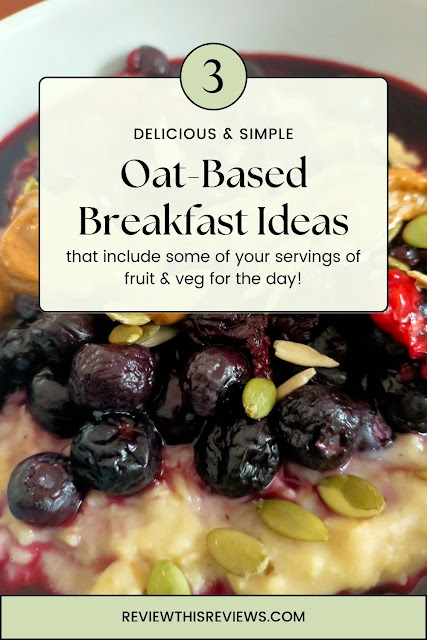
Image of a delicious bowl of proats, just one of the 3 oats based breakfast ideas mentioned
Photo by Lou16, Template by Canva


Note: The author may receive a commission from purchases made using links found in this article. “As an Amazon Associate, Ebay (EPN) and/or Esty (Awin) Affiliate, I (we) earn from qualifying purchases.”


Thursday, May 4, 2023

Egg-based Breakfast Ideas That Contain Fruit & Vegetables

Some egg-based breakfast ideas with vegetables
Created on Canva by Lou16

Eggs are a very popular breakfast option that is packed full of protein to make you feel full throughout the morning. There are ways in which you can pack an additional nutritional punch to your eggs, however, by adding some fruit and vegetables to them.  There are a number of different ways in which you can do that, let's review some of them.

Veggie and Egg Scramble

This is something that my husband regularly has.  He usually takes a little bacon, some bell peppers and spring onions and sautes them in the pan. Once they are softened he adds in some beaten eggs and scrambles them all together.

I will sometimes have this with bell peppers, spring onions, cherry tomatoes and roasted sweet potatoes.

Another variation on this is my spinach scrambled egg breakfast.  I always have cubes of frozen spinach in the freezer so I'll defrost a cube and add to a pan with some crushed garlic and saute before adding beaten eggs and scrambling together - I usually serve this with tomatoes and black beans which I cook as follows. I half or quarter some mixed cherry tomatoes and add to a pan to saute along with 1/3 tin of black beans (rinsed), fresh parsley if I have any and a sprinkle of smoked paprika.

Sweet Potato and Kale Hash with Fried Egg

Peel and dice a sweet potato and saute it in a pan with some olive oil. Once it's almost fully cooked, add in some chopped kale and continue to cook until the kale is wilted. Fry an egg and serve it on top of the hash.

Zucchini and Tomato Frittata

Thinly slice one zucchini and some cherry tomatoes and arrange them in a greased pie dish. Beat some eggs and pour them over the vegetables. Bake in oven at 350 degrees for 20-25 minutes or until the eggs are set.

Frittatas are a great way to use any leftover vegetables that you have, I've used baby spinach, bell peppers, broccoli and spring onions as just a few examples.

Breakfast Salad with Soft Boiled Eggs

There are a few different options for breakfast salads that you can check out, but here's just one for you using a soft-boiled egg or two.

Chop up some mixed greens, cucumber and strawberries and toss them together in a bowl. Soft-boil an egg (or two) and serve it on top of the salad.

Mushroom and Spinach Omelette

Saute some sliced mushrooms and spinach in a pan. Beat some eggs and pour them over the vegetables. Fold the omelette over and serve. 

Obviously there are lots of different flavour options when it comes to omelettes and lots of different vegetables you could add.

French Toast with Berries

I used to always have French Toast as a savoury option until the internet when I discovered people often had it with maple syrup and other toppings.

Take your bread and dip it into some beaten egg, fry on both sides until golden brown and serve with fresh berries and honey or maple syrup.

These are just a few ideas to get you started, but the possibilities are endless when it comes to incorporating fruits and vegetables into your egg-based breakfasts. Not only will you be getting a delicious and satisfying meal, but you'll also be fueling your body with important nutrients to start your day off right.

Some egg-based breakfast ideas that also contain fruit and veg
Pin Me :)


Note: The author may receive a commission from purchases made using links found in this article. “As an Amazon Associate, Ebay (EPN) and/or Esty (Awin) Affiliate, I (we) earn from qualifying purchases.”


Tuesday, May 2, 2023

Reviewing Why a Protein-Rich Breakfast is Important

Protein rich breakfast ideas like greek yogurt, eggs, breakfast parfaits etc
Image created by Lou16 using Canva templates


We all know that breakfast is the most important meal of the day (it was certainly a favourite saying of my mothers!), but did you know that having a protein-rich breakfast can provide several health benefits? 

Protein is an essential macronutrient that plays a crucial role in various physiological processes in the body. Consuming protein-rich foods at breakfast can help build and repair tissues, increase satiety, improve metabolism and regulate blood sugar levels.

Here are some of the benefits of having a protein-rich breakfast:

1.  Helps in Building and Repairing Tissues

Protein is made up of amino acids, which are the building blocks of the body's tissues. Eating a protein-rich breakfast can aid in repairing damaged tissues and building new ones. This is particularly important for people who engage in physical activities such as weightlifting and endurance training. Studies have shown that consumming protein-rich foods at breakfast can help improve muscle mass and strength.

2.  Increases Satiety

Eating protein-rich foods at breakfast can help you feel full for a longer time, which can prevent overeating and snacking later in the day. This can help in weight management and weight loss goals. A study published in the American Journal of Clinical Nutrition found that people who ate a high-protein breakfast consumed fewer calories throughout the day than those who ate a low-protein breakfast.

3.  Improves Metabolism

Protein has a higher thermic effect than carbohydrates and fats, which means that the body burns more calories by digesting protein-rich foods. This can help boost metabolism and increase calorie burn throughout the day. A study published in the Journal of American College of Nutrition found that consuming a high-protein breakfast can help improve metabolic rate and increase fat burning.

4.  Regulates Blood Sugar Levels 

Eating protein-rich foods at breakfast can help stabilize blood sugar levels, which can prevent energy crashes and sugar cravings later in the day. This is particularly important for people with type 2 diabetes or insulin resistance. A study published in the Journal of Nutrition found that consuming a high-protein breakfast can help improve insulin sensitivity and reduce blood sugar levels.

5.  Helps Alertness

Protein provides the amino acids your brain needs to function at its most optimal level.  When you eat a protein-rich breakfast it raises your brain's tyrosine levels. Increased tyrosine levels help your brain to produce neurotransmitters called norepinephrine and dopamine, which give you energy and make you feel awake and alert.

Some Examples of Protein-Rich Breakfasts

Try to aim for at least 20-30 grams of protein at breakfast to reap the benefits.  Examples of protein-rich breakfasts include:

To sum up, having a protein-rich breakfast can provide numerous health benefits and help you maintain a healthy lifestyle. Incorporating protein-rich foods into your breakfast routine can improve muscle mass and strength, increase satiety, improve metabolism and regulate blood sugar levels. So, the next time you're planning your breakfast, make sure to include some protein-rich foods!

More health tips can be found in my Facebook Group - Healthy Tips to Feel & Look Your Best.


Images of protein rich breakfast ideas
Image created in Canva by Lou16


Note: The author may receive a commission from purchases made using links found in this article. “As an Amazon Associate, Ebay (EPN) and/or Esty (Awin) Affiliate, I (we) earn from qualifying purchases.”


Monday, December 5, 2022

Reviewing Popover Recipes - Easy and Delicious Baked Treats

Once I was served warm popovers at a brunch I was obsessed. I had to have more. I had to be able to bake my own. These small baked treats are great with soups, stews, quiches, roasts, and so much more. They are surprisingly easy to throw together and throw into the oven. And they only require 6 ingredients: flour, eggs, salt, butter, milk, and eggs. There is a good chance you've heard of popovers. But just in case you haven't I want to make sure to spread the word.

photo: Fox Run Popover Pan

Earlier this year I was invited to a neighbors home for brunch. She served quiche and popovers. I had no idea what popovers were and when she shared what was on the menu I had a brief thought of "did she say PopTarts?".  It turns out that she did not say PopTarts. She was serving the most delicious quiche with these funny-looking biscuits called popovers. 

It is easiest for me to say that popovers are biscuits. They can be served in place of biscuits with breakfasts, roasts, soups, and stews. But for some reason, I want to call them a pastry. I don't know if baking experts would call them a pastry. But they are crispy on the outside while light and flaky on the inside. In fact, if you bake them on the shorter end of the recommended time, they are a bit like custard on the inside. 

The 6 Popover Ingredients

Popover recipes are all over the internet. They are basically equal (or almost equal) amounts of flour and milk. Added to 3 - 4 eggs, 2-3 tablespoons of butter, and a pinch of salt. The recipe I use is:

  • 1 c flour
  • 1 c milk
  • 3 eggs
  • 1/2 tsp salt
  • 2 Tbsp butter
Beat the ingredients until smooth. The batter is similar to pancake batter. You may think you've made a mistake and added too many wet ingredients. You haven't.

Martha Stewart uses 1 1/2 cup flour and 1 1/2 cup milk in her recipe. She also gives step-by-step instructions. Her recipe is here if you'd like to use that recipe. 

Popover Tips for Better Results


The same neighbor who served the popovers at the brunch also gave me a popovers pan. Popovers can be made in muffin tins but they do much better in a specific popover pan.

Spray just a small bit of cooking spray in the bottoms of the cups. 

Fill the popover pan cups only 1/2 full. They will rise and pop over the tops of the pans. If you are prone to overfill things, place the popover pan on a cookie sheet to catch any spillage. 

Hot oven. Popovers like 400 degrees or more. Some recipes call for a hotter over to begin with and lowering the temperature part way through. I don't mess with that. I do 400 degrees for 35-40 minutes. Remove the popovers from the pan as soon as they come out of the oven. 

The recipe I use makes almost 12 popovers. I tend to fill my popover cups slightly more than half. If I only filled them halfway the recipe would make 12 popovers. I also found that it makes it much easier to fill the cups using a glass measuring cup with a spout.

On the popover episode on America's Test Kitchen, they recommend bread flour and warming the milk and butter for better results.  I agree. When I remember to use bread flour and warm both the butter and milk (with the eggs at room temperature) I do have slightly better results. However, the recipe is forgiving. My neighbor sometimes uses almond milk and uses all purpose flour. I prefer whole milk and bread flour. 

Popovers are an excellent part of your daily menu and a wonderful item to serve to guests.


Note: The author may receive a commission from purchases made using links found in this article. “As an Amazon Associate, Ebay (EPN) and/or Esty (Awin) Affiliate, I (we) earn from qualifying purchases.”


Friday, October 28, 2022

Reviewing Homemade Instant Oatmeal

 homemade instant oatmeal in a bowl with a cup of coffee


I really like oatmeal for breakfast.  It is warm and filling and keeps you going till lunch or beyond.  Unfortunately, I rarely want to take the time to make it.  Boil the water, stir and stir, trying to figure out how much sweetner to put in, it is just a hassle for only one person. As a result, I used to buy instant oatmeal in the package; pricey but quick and easy was my reasoning until one day I took a look at the ingredients:

  • Whole Grain Rolled Oats
  • Sugar
  • Natural and Artificial Flavor
  • Salt
  • Calcium Carbonate
  • Guar Gum
  • Carmel Color
  • Niacinamide
  • Reduced Iron
  • Vitamin A
  • Palmitate
  • Pyridoxine
  • Hydrochloride
  • Riboflavin
  • Thiamin Amononitrate
  • Folic Acid

Hydrocloride?  Pyridoxine?  What is that?  Whatever it is I don't think it sounds very healthy.  I would prefer something that is a bit more good for you than store bought instant oats that are full of stuff I never heard of.  

So I decided to see if I could make my own instant oatmeal that would be convenient, quick and best of all not chocked full of additives and preservatives that are definitely not good for you!  I wanted to make a recipe that I could do in bulk and then split it up into individual servings, that was easy to store and would keep for at least a week.  

I sat down with a pencil and paper and did some thinking.  After coming up with a plan, I did some checking on the internet to see if the ingredients needed refrigeration and how long they would stay fresh.  When I had my formula (I actually did feel kind of like a mad scientist.....hehe) I made my first batch.


It took some experimentation but after a few tries, I finally came up with my favorite recipe for instant oatmeal:

Ingredients:

  • 4 cups oats
  • 1 teaspoon cinnamon
  • 1/4 teaspoon nutmeg
  • 2 tablespoons of brown sugar (can use Splenda Brown Sugar)
  • 1/2 cup raisins
  • 1/4 cup sliced almonds

Directions:

Mix these together in a bowl

Put 3/4 a cup into a small zipper bag


How to Cook:

Pour the contents of the baggie into a bowl or mug

Add 1 to 1 and 1/2 cups of skim milk and stir

Cover with a paper towel 

Microwave for about 3 minutes

Stir and let sit for a couple minutes


To keep from getting bored, sometimes I put other things in my oatmeal to give it different flavors like:

  • Pistachio nuts or any nuts you like, chopped
  • Coconut
  • Dried apricots, chopped
  • Dates, chopped
  • Dehydrated apples, chopped
  • Mini Chocolate or Peanut Butter Chips
Sometimes I put fresh fruit in my oatmeal, if I have any in the fridge, like strawberries or blueberries.  I have also been known to put maple syrup or honey in it instead of brown sugar. There are so many things you could put in your oats, it would take years to find them all.  Actually, its kind of fun to come up with different flavor combinations.  I have run across a few that were surprisingly delicious like:

  • chocolate chips and peanuts
  • sliced fresh bananas and coconut
  • dried cranberries and pecans
  • diced dehydrated apples and chopped walnuts

These zipper bags do not need to be refrigerated and they last a long time without spoiling.  They also make great jar gifts for friends that have the bad habit of skipping breakfast!      My homemade oatmeal is much healthier and cheaper than what you buy in a store and frankly much more yummy!  Try making some and see for yourself.

__________________________

Image Credits: 

https://www.flickr.com/photos/cogdog/3180105556/sizes/z/


Note: The author may receive a commission from purchases made using links found in this article. “As an Amazon Associate, Ebay (EPN) and/or Esty (Awin) Affiliate, I (we) earn from qualifying purchases.”


Friday, August 13, 2021

Delicious Blackberry Muffin Recipe Reviewed

Blackberry Muffin Recipe
Fresh blackberries are always an invitation to bake something delicious!  When I recently purchased some blackberries at our local farmer's market, I made Blackberry Muffins as soon as I got home.  Today, I am sharing my personal blackberry muffin recipe here so you, too, can enjoy this delicious treat. 

My recipe makes 18 muffins which seems like a lot at first glance. However, it didn't take my family long to devour these delicious muffins.  

For either of us, when we pair these muffins with coffee, we are in a breakfast feast heaven.  While I would normally say that the serving size is one muffin, in our home, the serving size is two or more muffins.  They really are that good!
 

The Muffin Batter & Muffin Tins 

This is a muffin recipe, not to be confused with cupcakes.  The muffin batter is thicker and won't pour like a cake batter.  I "spoon" my muffin batter into muffin tins.  I bake them in non-stick muffin tins, therefore paper liners are not required.  I do grease the non-stick tins with Crisco shortening and these muffins turn out easily.


My Blackberry Muffin Recipe

Prep Time Cook Time Ready In Yields
20 min. 20-25 min. 45 min. 18 servings

Ingredients 

    blackberry muffin recipe
  • 1¼ cups of sugar (plus extra for sprinkling)
  • 1/2 cup butter, softened  (extra for brushing tops)
  • 2 cups all-purpose flour
  • 2 teaspoons baking powder
  • 1/2 teaspoon salt
  • 2 large eggs
  • 1/2 cup milk
  • 2 cups fresh blackberries  
  •  

    Directions

    1. Preheat the oven to 375° 
    2. Grease non-stick muffin tins with Crisco shortening
    3. In a large mixing bowl, cream sugar and butter together.  Beat in one egg at a time (adding a total of 2 eggs)
    4. In a separate bowl, combine the flour, baking powder and salt
    5. Gradually mix flour mixture into butter mixture alternating with milk & beating well after each addition.  
    6. Fold in Blackberries (do not use the mixer & beaters here)
    7. Spoon batter into greased muffin tins, approximately 2/3 full in each muffin cup
    8. Sprinkle tops with sugar
    9. Bake at 375° for 20-25 minutes, until a toothpick inserted in the center comes out clean
    10. Using a small silicone pastry brush, brush muffins with melted butter as soon as they are out of the oven and put back in the oven for 2 minutes 
    11. Let Cool for 5 minutes, remove from muffin tins & serve


    Recommended Baking Essentials

     Wilton Non-Stick 6-Cup Standard Muffin Pan, Set of 2Check Price OXO Good Grips Silicone Basting & Pastry Brush - SmallCheck Price LILPARTNER Hand Mixer ElectricCheck Price Tovolo Stainless Steel Mixing (7.5 Quart)Check Price


    Or, Try a Blackberry Fruit Cobbler!

    Easy Blackberry Cobbler Recipe


    Check Out More Recipe Reviews at
    ReviewThisRecipes.com


    Delicious Blackberry Muffin Recipe Reviewed Written by:
    House of Sylvestermouse


    © 2021 Cynthia Sylvestermouse


    Note: The author may receive a commission from purchases made using links found in this article. “As an Amazon Associate, Ebay (EPN) and/or Esty (Awin) Affiliate, I (we) earn from qualifying purchases.”


Friday, March 26, 2021

Carrot Cake Cupcakes Recipe Reviewed

Carrot Cake Cupcakes Recipe
Carrot Cake Cupcakes are a delicious treat anytime!  

My mother recently made 2 dozen carrot cake cupcakes using the recipe below.  She was generous and thoughtful enough to share them with me and my household.  I was beyond thrilled to receive this gift. I understand the time commitment and work behind making a few dozen cupcakes. Therefore, I can really appreciate receiving a dozen homemade cupcakes.

Cupcakes are a personal favorite since they are made in single serving portions. That saves serving preparation and clean-up.  You can grab a cupcake, toss the paper liner, and eat it without needing to get out a plate or utensils. So fast & easy!

The carrot cake cupcakes are fabulous for breakfast, a special treat, or dessert.  For 3 days straight, I was able to enjoy a carrot cake cupcake with my coffee for breakfast.  I was rather sad when they were all gone.  But, I have the recipe!  And, I am willing to share it with you so you too can start your day with delicious carrot cake.


Carrot Cake Cupcakes Recipe - Yields 36 cupcakes

Cupcake Ingredients:

2 c. shredded julienne carrots
2 c. granulated sugar
1 c. canola oil
4 large eggs
1 (8-ounce) can crushed pineapple, drained
2 c. all-purpose flour
1 tsp baking powder
1 tsp baking soda
2 tsp ground cinnamon

Frosting Ingredients: 

1/2 c. unsalted butter (softened)
8 oz cream cheese (softened)
4 c. powdered sugar
2 tsp vanilla extract
3/4 c. chopped pecans

________________________________________ 


Instructions for Cupcakes

1. Grate carrots & chop pecans
2. Preheat oven to 350°
3. Line large cupcake pans with cupcake liners (3 pans of 12 each)
4. In a large mixing bowl, combine sugar, oil, and eggs. Beat until well-blended.
5. Add flour, baking soda, baking powder and cinnamon. Beat for about 2 to 3 minutes.
6. (Set aside your mixer) Stir in shredded carrots & pineapple.
7. Fill cupcake tins 3/4 full and bake for approximately 22 - 24 minutes (toothpick test)
8. Set cupcakes on cooking racks and allow to cool completely before frosting
9. While the cupcakes are cooling, set out the butter and cream cheese to soften (about 30 minutes)

Instructions for Frosting

1. Beat softened cream cheese and butter together until smooth.
2. Add vanilla and powdered sugar. Beat until well blended. (Approximately 4 minutes)
3. Stir in chopped pecans (or hold them to sprinkle on top of frosted cupcakes)
4. Frost the Cupcakes


Recipe Substitutions or Additions

I prefer pineapple, but Mom suggests substituting raisins if desired. You may also want to add 1 cup shredded coconut for a more authentic carrot cake consistency & taste.


Baking Notes

I have a double oven, one is a convection oven. My ovens allow me to bake 3 pans of cupcakes at one time. (2 in the convection oven & one in the lower regular oven). 

Mom has one regular oven. Therefore, she makes larger cupcakes divided across two pans, which she bakes separately. Her yield is 24 larger cupcakes that take slightly longer to bake (approximately 26 - 28 minutes). 

Because oven temperatures vary, the toothpick test is required to determine when they are completely baked.


What is the Toothpick Test?

Quickly stick a toothpick down into the center of a cupcake or cake and pull it right back out. If it comes out clean, the cake/cupcake is done. If it has batter on it, you need to bake a little longer. I usually test in 1 – 2 minute intervals. 


Cupcake Baking Needs

There are a few kitchen tools that allow us to bake cupcakes with ease, starting with a large cupcake baking pan & cupcake liners.  Cupcakes are also very hard to transport from place to place.  If you do plan to take them elsewhere, I highly recommend the carrier featured below.

 Wilton Non-Stick Bakeware Cupcake PanCheck Price Wilton Rainbow Bright Cupcake LinersCheck Price Snapware Snap 'N Stack Portable Storage CarrierCheck Price NORPRO Funnel Pitcher, 3.5-Cup, WhiteCheck Price


Just for Fun! Add Edible Carrot Toppers


Orange & Green Fondant

 Wilton Decorator Preferred Neon Fondant, 4-Pack Fondant IcingCheck Price Wilton Decorator Preferred Primary Colors  4-Pack Fondant IcingCheck Price


Check Out More Recipe Reviews at
ReviewThisRecipes.com


Carrot Cake Cupcakes Recipe Review Written by:
House of Sylvestermouse


© 2021 Cynthia Sylvestermouse


Note: The author may receive a commission from purchases made using links found in this article. “As an Amazon Associate, Ebay (EPN) and/or Esty (Awin) Affiliate, I (we) earn from qualifying purchases.”


Friday, February 12, 2021

Homemade Cinnamon Rolls Recipe and Review

These homemade cinnamon rolls are delicious! 


Cinnamon Roll Recipe
I wish I could say they are fast, but they do require time for raising.  I have not found a way to start the cinnamon rolls in advance and bake them later.  This is a recipe you will want to prepare and bake on the same day.  Therefore, you either need to serve them for brunch, or get up before sunrise to start the dough.  Either way, these cinnamon rolls are worth it!

It looks like a lot of instructions when you read the recipe below, but they are still fairly easy to make.  I simply give enough details that even the inexperienced baker will have success with the recipe. Please do not let the appearance of difficulty or length keep you from baking these divine cinnamon rolls.

I will warn you in advance, the recipe makes 12 cinnamon rolls, but most of us can only eat one.  They are that big and filling.


Homemade Cinnamon Rolls Recipe 

Dough Ingredients 

  • 2 ¼ teaspoons (1 pkg) active dry yeast 
  • sugar, flour and yeast
    3/4 Cup Warm Whole Milk
  • 1/2 Cup of Buttermilk  
  • 1 Cup Warm Water 
  • 2 Tablespoon Softened Butter 
  • 3 Tablespoons Sugar 
  • 1 ¼ teaspoons Salt 
  • 6 Cups All Purpose Flour (plus extra for flouring work surfaces)


Instant Coffee Packets

Filling Ingredients

  • 1/4 Cup Melted Butter 
  • 1 Cup Packed Light Brown Sugar 
  • 4 teaspoons Instant Coffee Granules – mashed with spoon to fine powder 
  • 2 teaspoons Ground Saigon Cinnamon 


Simple Icing Ingredients  (If prefered, click here to jump to cream cheese alternative icing recipe)

  • 1 ½ Cup Confectioner’s Sugar 
  • 2 Tablespoon Softened Butter 
  • 2 Tablespoon Whole Milk 
  • ½ teaspoons Vanilla Extract 


Set-up for Baking Success


Set out 1/4 Stick (4 Tablespoons) of Butter to Soften plus a little more to grease baking pan & bowl (should set out about 30 minutes before needed) 

Set out the mixing bowls & other supplies you will need.  I use the following:

  • Deep bowl for mixing (flour tends to blow when mixing, so use a deep bowl)
  • Large glass bowl for raising  
  • Hand Held Mixer
  • 13 x 9 Baking Pan 
  • Cutting board for kneading 
  • Clean the counter top for rolling out dough to 18" x 12" size  (Note:  I have a 18 x 12 glass microwave plate from an old microwave that is perfect for this.  If you can find one, it will save a lot of mess and clean-up time. Otherwise, I recommend the pastry mat with measurements featured below)

Preparation
  • Grease large glass bowl for raising
  • Flour Cutting Board for kneading
  • Warm Milk & Buttermilk in microwave (stir every 15 seconds to avoid burning)

cinnamon rolls recipe collage
Directions 

  1.  In a large, deep mixing bowl, dissolve yeast in warm water
  2. Add warm milk, warm buttermilk, sugar, softened butter, salt and 4 cups of flour.  Beat (mixer) on medium speed until smooth. 
  3. By hand, spoon or fork, Stir in remaining flour to form a soft dough (dough will still be sticky) 
  4. Turn onto a floured cutting board surface, knead 6-8 minutes. (Dough should be smooth and elastic.) 
  5. Place in a greased bowl, turning over once to grease top of the dough ball. 
  6. Cover and let rise in a warm place for 1 hour
  7. After the hour, Grease 13 x 9 baking pan
  8. Flour clean counter or rolling surface & rolling pin
  9. Melt 1/4 Cup Butter in microwave
  10. Combine Brown Sugar, Instant Coffee Granules and Cinnamon
  11. Punch Dough down, turn onto floured surface and roll out to 18" x 12" rectangle. 
  12. Brush with melted butter 
  13. Sprinkle brown sugar mixture over buttered dough to within ½” of edges.  Use all of the mixture
  14. Starting with long edge, Roll up Jelly-roll style and Pinch seam to seal 
  15. Cut into 12 slices 
  16. Place rolls, cut side up, in greased baking pan 
  17. Cover and let rise 30 minutes (will double again) 
  18. Preheat oven to 350 – Bake 25 – 28 minutes until golden brown
  19. In a small bowl, beat icing ingredients until smooth and spread over rolls 
  20. Serve your delicious homemade cinnamon rolls
homemade cinnamon rolls


Ingredients 
  • 2 ounces cream cheese, softened 
  • 7 Tablespoons butter, softened 
  • 2 Tablespoons milk
  • ½ teaspoon vanilla extract  
  • 1 ½ cups confectioners' sugar
  • ¼ teaspoon salt  
Instructions:  Beat softened cream cheese and butter together with an electric mixer in a large bowl until creamy. Mix in the milk and vanilla, then gradually mix in the confectioners sugar and salt until smooth.


There are a few things in this post that may cause questions or uncertainty. Therefore, I am featuring a deep mixing bowl that I recommend for mixing dough. It won't keep the flour from "blowing", but it will keep more of it contained in the bowl. Also, saigon cinnamon is not the average, everyday cinnamon most of us have on our spice rack. It is a bolder, stronger tasting cinnamon that really gives the cinnamon rolls the needed "kick" that sets them apart from others.


 Pyrex Prepware 4-Quart Rimmed Glass Mixing Bowl, ClearCheck Price Mccormick Gourmet Organic Ground Saigon CinnamonCheck Price SiliQueen Silicone Pastry Baking Mat with MeasurementsCheck Price OXO Good Grips Silicone Basting & Pastry Brush - SmallCheck Price


Check Out More Recipe Reviews at
ReviewThisRecipes.com


Homemade Cinnamon Rolls Recipe & Review Written by:
House of Sylvestermouse


© 2021 Cynthia Sylvestermouse


Note: The author may receive a commission from purchases made using links found in this article. “As an Amazon Associate, Ebay (EPN) and/or Esty (Awin) Affiliate, I (we) earn from qualifying purchases.”


Most Recent Reviews on Review This Reviews


Search for Reviews by Subject, Author or Title

The Review This Reviews Contributors


SylvestermouseSylvestermouseDawn Rae BDawn Rae BMbgPhotoMbgPhotoBrite-IdeasBrite-IdeasWednesday ElfWednesday ElfOlivia MorrisOlivia MorrisTreasures by BrendaTreasures by BrendaThe Savvy AgeThe Savvy AgeMargaret SchindelMargaret SchindelRaintree AnnieRaintree AnnieLou16Lou16Sam MonacoSam MonacoTracey BoyerTracey BoyerRenaissance WomanRenaissance WomanBarbRadBarbRadBev OwensBev OwensBuckHawkBuckHawkDecorating for EventsDecorating for EventsHeather426Heather426Coletta TeskeColetta TeskeMissMerFaeryMissMerFaeryMickie_GMickie_G


Review This Reviews is Dedicated to the Memory of Our Beloved Friend and Fellow Contributor

Susan DeppnerSusan Deppner

We may be apart, but
You Are Not Forgotten


“As an Amazon Associate, Ebay (EPN) and or Etsy (Awin) Affiliate, I (we) earn from purchases.” Disclosure Statement

X