Showing posts with label recipe review. Show all posts

Tuesday, September 24, 2024

A Review of Sock It To Me Cake


I was looking through recipes over the weekend and I saw a recipe that brought back some great memories from when I was a teenager.

Sock It To Me Cake

Back in the 70's, (yes, I was a teenager in the 70's!) Bundt cakes were a huge thing....you remember the round cakes with a hole in the middle? The pans were pretty funny looking:

Bundt Pan

Back then, my Mom used to make this really delicious Bundt cake that she called a "Sock It To Me Cake."  I used to laugh at the name, she said she got the recipe out of a magazine and decided to try it because my dad was a fan of cinnamon and nutmeg.  It quickly became one of my father's favorite desserts.

This cake doesn't have the consistency of most Bundt cakes.  It is more coarse and heavy, but still moist and soft.  It also had a different flavor than most cakes, the sour cream and brown sugar, along with the spices just makes it different.  It doesn't taste like any other cake I've ever had.  It also makes great coffee cake!

This cake is made from scratch, no cake mix here, and it has a lot of ingredients.  It is not inexpensive to make but the good news is, most of the ingredients are things you probably already have in your kitchen.  


Cake Ingredients

3 cups all-purpose flour

1/2 teaspoon baking soda

1/2 teaspoon salt

2 sticks unsalted butter, room temperature

2 cups sugar

6 large eggs

1 tablespoon vanilla extract

1 8-ounce container full fat sour cream

1 1/2 cup chopped, toasted pecans

3 tablespoons packed light or dark brown sugar

2 teaspoons ground cinnamon

1/2 teaspoon nutmeg


Glaze Ingredients

2 cups powdered sugar

3 tablespoons whole milk

2 tablespoons maple syrup


Instructions

1.  Preheat the oven to 325° F. 

2. Grease and flour a Bundt cake pan 

3. In a mixing bowl, combine the flour, baking soda and salt. Whisk to combine. 

4. Cream butter and sugar - to do this put your softened butter in the bowl of a stand mixer and beat on medium for one minute.  Slowly pour in the sugar and continue to beat for 6 to 7 minutes or until the combination is light and fluffy.

5. Add the eggs one at a time, beating well after each. Add the vanilla extract and continue to beat on medium until just combined.

6.  Reduce the speed to the lowest setting. Add the flour mixture, alternating with the sour cream, in three additions. Mix until just combined, DO NOT overmix.

7. Remove the bowl from the stand mixer, and pour half of the batter into the Bundt pan.

8. In a small bowl, combine 1 cup of the chopped pecans, the brown sugar, nutmeg and cinnamon. Stir to combine. Then, sprinkle the brown sugar and nuts evenly over the cake batter.

9. Pour the remaining cake batter over the nuts and brown sugar. Smooth the top.

10. Bake for 60-70 minutes, until a butter knife stuck deep into the center of the cake comes out clean.

11. Remove the cake from the oven and let cool for 10 minutes.

12. Use a butter knife or small spatula to go around the edges of the pan. Then, invert the pan so that the cake comes out. Let the cake cool to room temperature.

13. In a clean bowl whisk the powdered sugar, milk, and maple syrup until creamy. Drizzle the glaze over the cake before topping with the remaining ¼ cup chopped pecans. 

14. You can leave Sock It To Me Cake unrefrigerated on the counter for several days as long as it is in an air tight cake cover.  If you need to store it for more time, place in the refrigerator for up to a week, or in the freezer for up to six months.


This is what it looks like on the inside from putting the pecans and brown sugar in the middle.


This cake is pretty special to me, it always reminds me of my Mom, and eating with my family.  Those were happy times.  Why not try making this cake and creating some special times with your family?  It's also a great cake to take to holiday gatherings that will be coming up before you know it.  When they ask you why you made a Bundt cake.....just tell them it's "that 70's cake!"


Note: The author may receive a commission from purchases made using links found in this article. “As an Amazon Associate, Ebay (EPN) and/or Esty (Awin) Affiliate, I (we) earn from qualifying purchases.”


Saturday, April 20, 2024

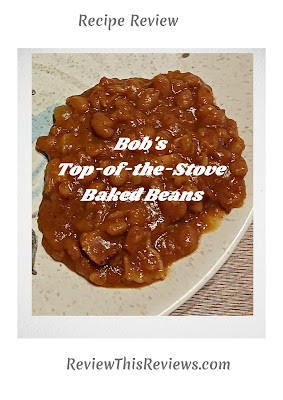
Reviewing Bob's Top-of-the-Stove Baked Beans Recipe

Image of a serving of baked beans on a plate
The original oven baked beans of our childhoods were always SO good; cooked with lots of bacon and sweet molasses. Only problem is, they take a long time to prepare and cook. 


As our children were growing up, we did a lot of camping, and cooked on a Coleman Stove and the camp's grill. We always enjoyed having baked beans with our grilled hamburgers and hot dogs. But, without an oven, and having a time constraint out in the campgrounds, oven baked beans was not an option. Therefore, my hubby, Bob, came up with his own version of camper baked beans, which he named Bob's Top-of-the-Stove baked beans.


After our children grew up, they began to make this recipe both in camp and at home. Quite quick to prepare and always tasty, it has become a standard favorite in our family. 


Bob's Top-of-the-Stove Baked Beans Recipe


Ingredients

A selection of ingredients for a baked bean recipe

Serves 4


1 can pork & beans (we usually use Van Camp's). 

Several slices of bacon*

½ to 1 diced onion*

Mustard to taste

Ketchup to taste

1 tablespoon dill pickle juice

Brown Sugar to taste

Salt & Pepper


Instructions:


Slicing and chopping bacon and onion

  • Cut up bacon slices into one or two inch squares. Chop the onion.


Sauteing bacon and onion

  • Begin by sauteing the bacon and onion together. When done to your preference, pour off excess bacon grease (leaving a small bit for flavor).


Baked Beans recipe cooking


  • Add the can of Pork & Beans. 


  • Add all the other ingredients.


  • Simmer for 15-20 minutes to heat through and blend all the ingredients. 


  • As the beans simmer, add more ketchup and/or brown sugar to your tasting preference. This is an extremely variable recipe, so exact amounts are not given in the ingredients. Personally, I prefer lots of ketchup and enough brown sugar for that 'sweet' taste. Taste and adjust amounts to your own satisfaction as the beans simmer.


NOTE: We always used a Corning Ware pan (as shown in the accompanying pictures), so everything can be cooked in one pan. Otherwise, you might wish to saute the bacon and onion in a frying pan, then add them and the other ingredients together in a sauce pan. 


*Explanation for the *starred items in the recipe: the number of bacon strips and the amount of onion used are negotiable! Personally, we like LOTS of bacon and plenty of onion. Adjust each to your own personal preference. 


Summary


Baked Beans

Bob's Top-of-the-Stove Baked Beans Recipe is easy & quick, and definitely delicious. And it's one of those recipes that works equally as well cooked on the stove-top in your kitchen or on a camp stove at a campsite. 


It is most definitely a favorite in our family.


*All images are the personal photos of (c) Wednesday Elf


*Bob's Top-of-the-Stove Baked Beans Recipe is brought to you by Wednesday Elf


Note: The author may receive a commission from purchases made using links found in this article. “As an Amazon Associate, Ebay (EPN) and/or Esty (Awin) Affiliate, I (we) earn from qualifying purchases.”


Saturday, September 2, 2023

Meatloaf Recipe from a Meal Pioneer

 Review of a locally famous take-home meatloaf.


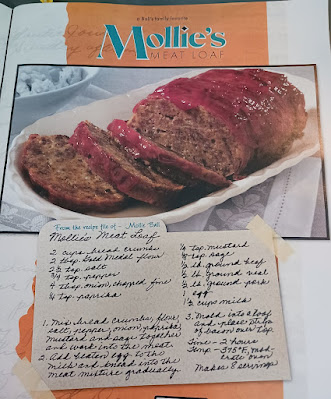
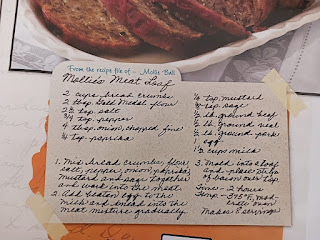
Image of a meatloaf and the recipe for it

Earlier I reviewed the family owned Hen House Supermarkets located in the Kansas City area. They are part of the Balls Food Stores begun one hundred years ago (1923) by Sidney & Mollie Ball. These markets have been family owned all this time, first by Sidney & Mollie, then by their son, and now by their grandson.


Reading the story of Mollie Ball, I discovered that she was no doubt a pioneer in the field of take-home “Grab n' Go” meals. 


When World War II began, many mothers and wives began working in defense plants and found it difficult to find time to make dinner for their families. Mollie said “no problem, we'll make take-home dinners for you.” Her take-home meatloaf, in particular, became famous throughout the neighborhood. 


Today it is easy to find 'ready-made' or frozen meals at the supermarkets, ready to cook for a quick dinner. Not so in the 1940s, but Mollie made it happen. She was a true pioneer when it came to 'take-home' meals. Mollie Ball was known for her generosity and for caring about the larger community. 


Her original recipe for Mollie's Meat Loaf is shared below with permission from the Ball Food Stores.


Mollie's Meat Loaf

Mollie's Meatloaf Recipe Ingredients:


2 cups bread crumbs

2 tbsp. Flour

1 ½ tsp. Salt

4 tbsp. onion, chopped fine

¼ tsp. Paprika

¼ tsp. Mustard

1/8 tsp. Sage

½ lb ground beef

½ lb ground veal

½ lb ground pork

1 egg

1 ½ cups milk


Mollie Ball's Meatloaf Instructions:


  1. Mix together the bread crumbs, flour, salt, pepper, onion, paprika, mustard and sage.  Work this into the meat.
  2. Add beaten egg to the milk and knead into the meat mixture gradually.
  3. Mold into a loaf and place strips of bacon over top.


Cook at 375 degrees F for 2 hours


Makes 8 servings. 


Summary


The Hen House Supermarket in Kansas City

The Hen House and other Balls Food Stores in Kansas City are well-known for their locally-sourced fruits, vegetables, bakery items and meats. Their website also has a selection of recipes for your cooking and eating pleasure. 


Happy Eating! 


*Mollie Ball's Meatloaf Recipe Review is written by Wednesday Elf


Note: The author may receive a commission from purchases made using links found in this article. “As an Amazon Associate, Ebay (EPN) and/or Esty (Awin) Affiliate, I (we) earn from qualifying purchases.”


Friday, February 24, 2023

Easy Lasagna Recipe

lasagna just out of the oven
This is the easiest lasagna recipe I have ever tried that yields a delicious lasagna that everyone loves. I am happy to review and share it with you today.

We have several family members who do not like pieces or chunks of tomato in any recipe. We also have family members who do not like cottage cheese and won't get within 10 feet of anything that is made with cottage cheese. Therefore traditional lasagna recipes are not something my family will eat.

Decades ago, I started trying to develop a lasagna recipe for my family and their preferences.  After a few trials, I finally came up with a recipe that works for us.  The ingredients are basic enough that anyone, including children, will enjoy eating this lasagna. I have served it to dozens (or more) of people over the years with nothing but praise.

Hope your family and friends love it too! 


My Easy Lasagna Recipe

  • 1 Jar of Paul Newman Marinara Sauce 
  • 1 1/2 lbs. Ground Chuck 
  • 1 Ricotta Cheese (15 oz) 
  • 1 Box Lasagna Noodles (8 - 10 noodles will be used)
  • 4 Cups Mozzarella Cheese - shredded 


Lasagna Recipe
Directions

  1. Brown ground chuck & drain grease off of the meat. Season meat to taste.  I use salt, pepper & chili powder
  2. Add Marinara sauce, cover with lid and simmer about 10 minutes 
  3. Cook lasagna noodles as instructed on the box & drain 
  4. In a 9 x 13 baking dish, spread just enough sauce to cover bottom of pan (this prevents sticking) 
  5. Put in a layer of noodles 
  6. Cover noodles with approximately 1/2 of the sauce 
  7. With a spoon, drop spoonfuls of Ricotta Cheese onto the sauce and spread carefully
  8. Sprinkle top evenly with 2 cups of Mozzarella Cheese 
  9. Repeat noodles, the rest of sauce, more Ricotta cheese and top with remaining mozzarella cheese. 
  10. Bake in the over on 325 for 30 min.


Note: For those of you who love tomato slices, feel free to add a layer of tomato slices. If you prefer cottage cheese, simply use it instead of the ricotta cheese.


For more of my tried and true family recipes, please visit Cooking for the Holidays 

I also contribute to our Recipes category right here on Review This Reviews alongside some really fabulous home cooks!  This is a category you will not want to miss. 


Easy Lasagna Recipe Written by:
House of Sylvestermouse


© 2023 Cynthia Sylvestermouse


Note: The author may receive a commission from purchases made using links found in this article. “As an Amazon Associate, Ebay (EPN) and/or Esty (Awin) Affiliate, I (we) earn from qualifying purchases.”


Friday, October 28, 2022

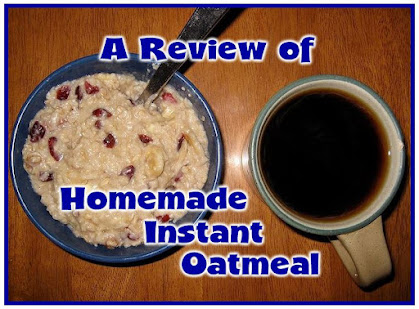
Reviewing Homemade Instant Oatmeal

 homemade instant oatmeal in a bowl with a cup of coffee


I really like oatmeal for breakfast.  It is warm and filling and keeps you going till lunch or beyond.  Unfortunately, I rarely want to take the time to make it.  Boil the water, stir and stir, trying to figure out how much sweetner to put in, it is just a hassle for only one person. As a result, I used to buy instant oatmeal in the package; pricey but quick and easy was my reasoning until one day I took a look at the ingredients:

  • Whole Grain Rolled Oats
  • Sugar
  • Natural and Artificial Flavor
  • Salt
  • Calcium Carbonate
  • Guar Gum
  • Carmel Color
  • Niacinamide
  • Reduced Iron
  • Vitamin A
  • Palmitate
  • Pyridoxine
  • Hydrochloride
  • Riboflavin
  • Thiamin Amononitrate
  • Folic Acid

Hydrocloride?  Pyridoxine?  What is that?  Whatever it is I don't think it sounds very healthy.  I would prefer something that is a bit more good for you than store bought instant oats that are full of stuff I never heard of.  

So I decided to see if I could make my own instant oatmeal that would be convenient, quick and best of all not chocked full of additives and preservatives that are definitely not good for you!  I wanted to make a recipe that I could do in bulk and then split it up into individual servings, that was easy to store and would keep for at least a week.  

I sat down with a pencil and paper and did some thinking.  After coming up with a plan, I did some checking on the internet to see if the ingredients needed refrigeration and how long they would stay fresh.  When I had my formula (I actually did feel kind of like a mad scientist.....hehe) I made my first batch.


It took some experimentation but after a few tries, I finally came up with my favorite recipe for instant oatmeal:

Ingredients:

  • 4 cups oats
  • 1 teaspoon cinnamon
  • 1/4 teaspoon nutmeg
  • 2 tablespoons of brown sugar (can use Splenda Brown Sugar)
  • 1/2 cup raisins
  • 1/4 cup sliced almonds

Directions:

Mix these together in a bowl

Put 3/4 a cup into a small zipper bag


How to Cook:

Pour the contents of the baggie into a bowl or mug

Add 1 to 1 and 1/2 cups of skim milk and stir

Cover with a paper towel 

Microwave for about 3 minutes

Stir and let sit for a couple minutes


To keep from getting bored, sometimes I put other things in my oatmeal to give it different flavors like:

  • Pistachio nuts or any nuts you like, chopped
  • Coconut
  • Dried apricots, chopped
  • Dates, chopped
  • Dehydrated apples, chopped
  • Mini Chocolate or Peanut Butter Chips
Sometimes I put fresh fruit in my oatmeal, if I have any in the fridge, like strawberries or blueberries.  I have also been known to put maple syrup or honey in it instead of brown sugar. There are so many things you could put in your oats, it would take years to find them all.  Actually, its kind of fun to come up with different flavor combinations.  I have run across a few that were surprisingly delicious like:

  • chocolate chips and peanuts
  • sliced fresh bananas and coconut
  • dried cranberries and pecans
  • diced dehydrated apples and chopped walnuts

These zipper bags do not need to be refrigerated and they last a long time without spoiling.  They also make great jar gifts for friends that have the bad habit of skipping breakfast!      My homemade oatmeal is much healthier and cheaper than what you buy in a store and frankly much more yummy!  Try making some and see for yourself.

__________________________

Image Credits: 

https://www.flickr.com/photos/cogdog/3180105556/sizes/z/


Note: The author may receive a commission from purchases made using links found in this article. “As an Amazon Associate, Ebay (EPN) and/or Esty (Awin) Affiliate, I (we) earn from qualifying purchases.”


Tuesday, August 30, 2022

A Review of Making Pickles Without Canning


homemade pickles without canning


If you have ever made pickles with a hot water bath canner, there is a good chance you ended up with rubbery, soggy pickles with no crunch.  I did!  I tried many different recipes and even tried adding an envelope of some stuff I bought that was supposed to keep your canned pickles crunchy. They were still awful.  I had pretty much given up and resigned myself to forever buying pickles from the grocery store which was a real shame since we grow our own wonderful cucumbers every summer.

One summer day about three years ago, I was talking to a friend of mine on the phone and lamenting about the sheer number of cucumbers I was getting from my garden when she asked me why I didn't make pickles.  I told her of my lack of success in pickle making and she told me about the cold pack pickles she makes every summer.  I was shocked!  I had never heard of making pickles cold, but I had to admit that it made sense, if you wanted them to stay crunchy.  I wrote down the recipe and immediately checked the cupboards to make sure I had all the ingredients, which I did!  

I could not believe how easy it was to make these pickles!  It did not take any special equipment, all I needed was a large bowl, a knife, a ladel and a jar.  It didn't even have to be a mason jar, any jar with a tight fiting lid would do.  I decided to use some large containers I had saved from some deli pickles I had bought for my husband.  That was another great thing about this recipe, you did not have to make 10 jars at a time and spend a whole day pickle making.  My friend's recipe made two jars at a time and took only a few minutes to make. I remember thinking to myself "this has got to be too good to be true!"

Here is what you need:

  • 6 to 8 medium or 8 to 10 small cucumbers 
  • 1 3/4 cups white vinegar 
  • 1 cup water
  • 1 cup chopped fresh dill weed or 3 to 4 tablespoons dried dill
  • 1/3 cup white sugar
  • 6 cloves garlic, chopped 
  • 1 1/2 tablespoons pickling salt
  • 1 1/2 tablespoons pickling spice 
  • 1/4 teaspoon red pepper flakes, or to taste  (optional)
  • 4 sprigs fresh dill weed or 1 teaspoon of dried

I was lucky, I had all this stuff left over from my prior pickle mishaps and I grow fresh dill in my garden, so I didn't have to go to the store, but if you do, you can get all these ingredients at any large grocery store.  If you don't grow your own cucumbers, just buy some at a produce market.

Making them is really easy, here's how:


Wash and cut up your cucumbers.  You can cut them as rounds or as spears, the shape is up to you.  

Mix the water, vinegar, chopped dill, sugar, garlic, salt, pickling spice, and red pepper flakes in an extra large bowl and stir till the sugar and salt dissolve.

Place the cucumbers in the bowl and stir gently.  Make sure all the cucumbers are fully immersed in the liquid.  Place the bowl on the counter and let it marinate for 2 hours, stirring occasionally.

Take your freshly washed jars and put a sprig of fresh dill in each or a pinch of dried dill, if you don't have fresh.

Ladel the cucumbers and pickling liquid evenly into the two jars and screw the lids on tightly.  Shake each jar and then place them in the refrigerator.

In ten days you will have delicious dill pickles, cold and crunchy.  If you have any left over juice, you can put it in a jar and keep it in the refrigerator till you have some cucumbers to add to it!


Note: The author may receive a commission from purchases made using links found in this article. “As an Amazon Associate, Ebay (EPN) and/or Esty (Awin) Affiliate, I (we) earn from qualifying purchases.”


Saturday, May 14, 2022

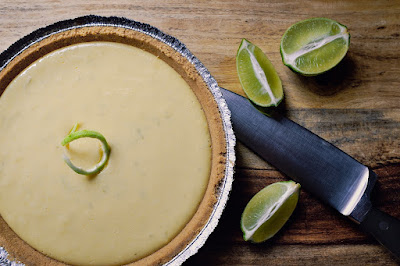
Key Lime Pie – Recipe Review

REAL Key Lime Pie. The way they make it in the Florida Keys from fresh Key Limes. The name comes from their association with the Florida Keys.


Image of Key Limes on a lime tree


Recipe


Main Ingredients: Pie shell, Key lime juice, egg yolks, sweetened condensed milk 


Start with your crust....


You can use a shortcrust pie shell, but usually Key Lime Pie is made using a graham cracker crust.

Key Lime Pie
Photo by Ariana Suárez on Unsplash

Mix together 16 crushed graham crackers with 3 tablespoons of sugar and one-fourth (1/4th) lb. of margarine or butter.  Press the mixture into a 9-inch pie plate. Bake crust in a 350 degree preheated oven for 15-20 minutes, or until lightly browned.  Let cool.


For the Pie Filling....


Take 4 large egg yolks and, using an electric mixer, beat egg yolks until thick.  To the eggs slowly add one 14 oz. can of sweetened condensed milk. Then, on low speed, slowly add one-half (½) cup of fresh Key lime juice (about 10-12 limes).


Pour the blended filling mix into the baked pie crust.  Bake again in a 350 degree oven for about 12 minutes.


Pie Topping....


Key Lime Pie dessert
Photo by Nathan Lemon on Unsplash


Never use meringue on a Key Lime Pie. If you desire a topping, use a dollop of 'real' whipped cream. Top the whipped cream with a cherry or a curl of Key Lime peel.


My First Key Lime Pie Story


We were living in south Florida on the Gulf Coast when we were first introduced to real Florida Key Lime Pie. I was working part-time for a landscape and lawn care service company. One day our crew was doing lawn care at a large estate when the owner asked if they would pick up a large bunch of limes that had fallen from her Key lime tree following a storm. They asked her what she wanted them to do with the limes and she told them to 'just take them'. So back to the office came the crew with a bunch of Key limes, and shared them around.


Naturally I had to use my share to make my very-first ever Key Lime Pie. I wasn't much of a cook at the time, but the recipe was easy to follow. Well, the pie turned out delicious, but somehow I expected the filling to be green ~ like the limes. I didn't realize that lime juice looks just like lemon juice, despite the dark green skin on the limes. Silly me. :) But, if you've ever had lime pie, you will notice a big difference in yummy taste when using real Key Limes! There really is no substitute! 


A ready to eat Key Lime Pie
Photo by Nathan Lemon on Unsplash


For More Recipe Reviews, 

click on ReviewThisReviews: Recipes


*Key Lime Pie Recipe reviewed by Wednesday Elf.


Note: The author may receive a commission from purchases made using links found in this article. “As an Amazon Associate, Ebay (EPN) and/or Esty (Awin) Affiliate, I (we) earn from qualifying purchases.”


Saturday, October 10, 2020

Dream Bars Cookie Recipe Review

Dream Bars Cookies


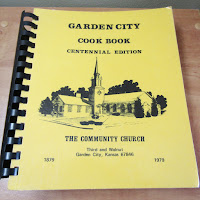
Garden City, KS vintage church cookbook
Once again from the pages of my 1979 Kansas church ladies cookbook comes a vintage cookie recipe. Something a bit different and unique using brown sugar, coconut and walnuts. A very tasty bar cookie that is 'grandson-tested and highly approved'. 


Dream Bars Recipe


Pictures of baking the crust to Dream Bars Cookies


Crust Ingredients:

½ c. butter
½ c. brown sugar
1 c. flour

Mix first 3 ingredients until  crumbly.  Press into an 8x8 inch pan.  Bake 12 minutes at 350 degrees. Cool.


Filling Ingredients:

2 eggs (beaten)
1 c. brown sugar
1 tsp. Baking soda
1 T. flour
1 c. moist coconut
1 c. chopped nutmeats
1 tsp. Vanilla

Instructions:

Filling:  Mix eggs, brown sugar, baking soda, flour and vanilla.  Stir nuts and coconut into mixture.  Spread over baked crust.  Bake 30 minutes or until set at 250 degrees.  When cool, cut into  bars.

Makes 24.


Summary:


With so many basic packaged cookies on the market, and the standard chocolate chip cookies and brownies most people bake, I think it is rather nice to occasionally try a different cookie recipe from long-ago. Most kids today have never tasted cookies from the pasts of grandmothers and great-grandmothers, so it becomes a special taste treat for them. At least my teenage grandson thinks so and he can hardly wait to try out my latest baking effort.  So far he has given each of my 'vintage' cookie recipes Five Stars! 

So, for a cookie recipe that is 'old' and different, give these Dream Bars cookies a try!


Dream Bars Cookie


For more cookie recipes, check out


*Dream Bars Cookie Recipe Review by (c) Wednesday Elf

Related Links:


For more vintage cookie recipes from long ago (1920s through the 1960s), check out this Vintage Baker cookbook I found on Amazon. A tasty variety of more than 50 recipes of desserts from the past, including cookies. 


The Vintage Baker Cookbook book cover


Note: The author may receive a commission from purchases made using links found in this article. “As an Amazon Associate, Ebay (EPN) and/or Esty (Awin) Affiliate, I (we) earn from qualifying purchases.”


Sunday, March 29, 2020

Easy Homemade Coleslaw Dressing - A Family Fave

Easy Homemade Coleslaw Recipe
Quarantine has me thinking more about food. Fortunately, after 10 months of Keto, I still have willpower!

Keto warriors forewarned: This Coleslaw recipe is not Keto. However, if you replace the sugar with Monk Fruit Sweetener, it would be. Yet, I haven't personally tried that. If I did, I would use less Monk Fruit sweetener than 1/3 of a cup. I'd try a heaping tablespoon for my first attempt.

As mentioned in my previous recipe review posts (featured below), although I can cook, it's not my favorite thing to do. For that reason, I'm drawn to simple recipes.

While whipping through my stained recipe book, I came across this straightforward homemade recipe for Coleslaw dressing to share with you.

Homemade Coleslaw Dressing Ingredients:

. 1/2 Cup of Vinegar
. 2/3 Cup of Olive Oil
. 1/3 Cup of Sugar
. 1/2 Teaspoon of Pepper
. Miracle Whip Salad Dressing

If needed, you can double this.

Instructions:

Put all the ingredients in a small pot on the stove and bring it to a boil (EXCEPT the MIRACLE WHIP). Pour the boiled ingredients over the prepared Coleslaw while it's hot. Put it in the fridge until you're ready to serve.

Once you're ready to serve it, mix in two heaping tablespoons of Miracle Whip Salad Dressing. I've added the dressing when the Coleslaw dish is warm, and when it's been cooled in the fridge.

Preparing the Coleslaw:

You can buy the packages of ready-made Coleslaw at the store, or shred a cabbage head and
other vegetables..

The Extra Ingredients that Make Coleslaw Taste Great:

Other than a delicious Coleslaw dressing, there are two ingredients I always add:

. Chopped Apple
. Chopped Onion

Add the chopped apple just before serving. Cut the apple into small bite-sized pieces and stir it in. I usually cut up two medium-sized apples for a medium-sized bowl of Coleslaw.

Add 1/2 of a large onion, chopped or shredded.

The apple combined with the onion and the homemade dressing gives the Coleslaw a delicious taste.

Store-Bought Coleslaw Dressing Alternative:

If you don't have the time to fuss over making homemade dressing, Kraft's Coleslaw Dressing is excellent. Make the Coleslaw as described above with apple and onion, then put in nearly a full regular sized bottle of Kraft Dressing. Base the amount you want on how creamy you prefer your slaw. Pour it in quarters.

Previous Simple Recipes from My Kitchen:
If you're looking for a simple, comforting meat dish to serve with this Coleslaw, check out the Roast Pan Steak recipe featured above, it's so good!

Stay safe, happy cooking.


Note: The author may receive a commission from purchases made using links found in this article. “As an Amazon Associate, Ebay (EPN) and/or Esty (Awin) Affiliate, I (we) earn from qualifying purchases.”


Most Recent Reviews on Review This Reviews


Search for Reviews by Subject, Author or Title

The Review This Reviews Contributors


SylvestermouseSylvestermouseDawn Rae BDawn Rae BMbgPhotoMbgPhotoBrite-IdeasBrite-IdeasWednesday ElfWednesday ElfOlivia MorrisOlivia MorrisTreasures by BrendaTreasures by BrendaThe Savvy AgeThe Savvy AgeMargaret SchindelMargaret SchindelRaintree AnnieRaintree AnnieLou16Lou16Sam MonacoSam MonacoTracey BoyerTracey BoyerCheryl Paton Cheryl PatonRenaissance WomanRenaissance WomanBarbRadBarbRadBev OwensBev OwensBuckHawkBuckHawkDecorating for EventsDecorating for EventsHeather426Heather426Coletta TeskeColetta TeskeMissMerFaeryMissMerFaeryMickie_GMickie_G


Review This Reviews is Dedicated to the Memory of Our Beloved Friend and Fellow Contributor

Susan DeppnerSusan Deppner

We may be apart, but
You Are Not Forgotten


“As an Amazon Associate, Ebay (EPN) and or Etsy (Awin) Affiliate, I (we) earn from purchases.” Disclosure Statement

X