Showing posts sorted by relevance for query food storage. Sort by date Show all posts

Friday, December 6, 2019

Rubbermaid Brilliance Food Storage Container Reviewed

Airtight, Leakproof, Microwavable & Freezer Safe Storage 

 Rubbermaid Brilliance Food Storage Container Reviewed
I recently purchased 3 Rubbermaid Food Storage Containers. I needed an airtight container for rolls & crescents so they would last longer. I selected the 9.6 cup size which was perfect for my needs. As it turns out, there are many more uses for these containers than just bread storage. 

During the recent holidays, I discovered these containers will hold liquid or dry food.  Since they are leak-proof due to their tight seal, they will even store leftover homemade soup.  Plus, they are microwavable when it is time to reheat the leftovers.  Therefore, there is no need to transfer leftovers from their storage container to heat.  Less clean-up is always appreciated.

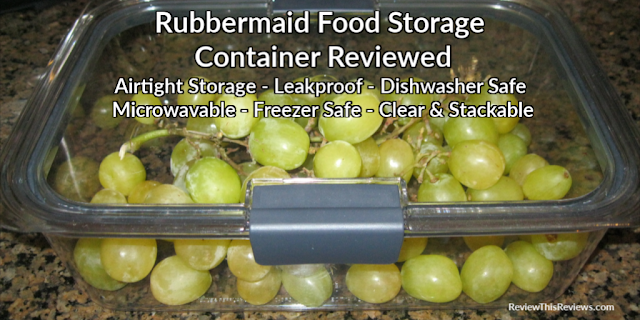
I love my faithful Tupperware, but sadly, if I can't see it, I am likely to forget it.  So much fruit is discarded simply because it is forgotten once it has been stored away.  Because these containers are transparent, it is easy to see at a glance what is stored in which container. 


 Rubbermaid Brillance Food Storage Container Reviewed


Rubbermaid Food Storage Containers


 Rubbermaid Brilliance Food Storage Container, Large, 9.6 Cup, Clear 1991158Check PriceNot only are they clear, airtight, leak-proof, microwavable and freezer safe, their flat design makes them stackable in the the refrigerator, freezer, or pantry.   

Since we don't have to worry about the spilling, transporting food from one location to another is easy.  Of course, if you are dropping off food, you might not get these nifty containers back. The recipient will be tempted to forget where they came from originally.

Now that I have had experience with the larger containers, I will definitely be buying the smaller single serve size as well.  That will make lunchtime so much easier! 

To use in the microwave, simply lift the locks for venting.  

The only possible negative that I have found with these containers is that they seal so tightly.  It takes more effort to remove the lids than it does with a snap lid.  But, after a few uses, I knew what to expect.  Now I grip the container with one hand and remove the lid with my other hand.  In my opinion, that is a simple inconvenience to enjoy the airtight storage.

Oh, and did I mention, the price is right!  No wonder they named these containers "Brilliance".


 Rubbermaid Brilliance Set of 7Check Price Rubbermaid Brilliance Set of 5 (3.2 Cup)Check Price Rubbermaid Brilliance Food Storage Container Set, 18-PieceCheck Price Rubbermaid Brilliance Food Storage Container, Small, 1.3 Cup, 2-PackCheck Price


Read More Product Reviews On
ReviewThisProducts.com


More Great Things for the Kitchen

Acrylic Cake PlateLightweight Acrylic Cake Plate with Dome Lid Reviewed
This lightweight acrylic domed cake plate is perfect from storage and display! Easily accommodates a two layer cake, cheesecake, or other baked goods

Appetizers on Ice Buffet Serving TraysAppetizers on Ice Buffet Serving Trays Review
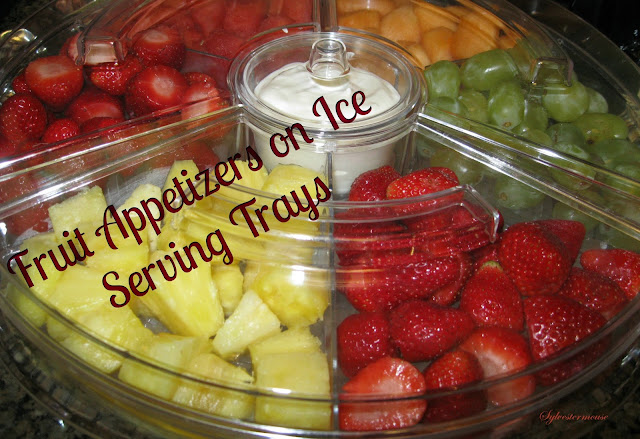
It is easy to keep appetizers, fruit, vegetables, cheese, etc. cold during parties when you use these ice buffet serving trays.

Vacuum Sealing JarsReviewing Vacuum Sealing Jars with a FoodSaver Machine
Reviewing vacuum sealing dry goods in jars. One solution to avoid inviting pantry moths into your kitchen as well keeping dry goods fresh longer.

Brown Sugar BearBrown Sugar Keeper Reviewed - I Love My Brown Sugar Bear!
Keep brown sugar soft or make hard brown sugar soft again with a brown sugar keeper. I chose a bear brown sugar keeper. See other shapes & styles too


House of Sylvestermouse


Note: The author may receive a commission from purchases made using links found in this article. “As an Amazon Associate, Ebay (EPN) and/or Esty (Awin) Affiliate, I (we) earn from qualifying purchases.”


Tuesday, March 20, 2018

Food Storage With Egg Holder Trays Reviewed

Convenient Food Storage Especially For Eggs

colored easter eggs
Need a place for your Easter Eggs?
With Easter rapidly approaching it might be time to think of food storage ideas that will accommodate those colored eggs you will have around after the "hunt" takes place. Eggs are not the easiest to store with their rolling tendencies. Know what I mean? 

One of the things that I like to do with those eggs that the kids find is to make deviled eggs with several of them. That requires a special kind of storage, too. I have a solution for those storage needs whether it is at Easter time or any time that you have hard boiled eggs or deviled eggs to store in the refrigerator. These little storage units are also useful for other types of foods but I particularly love them for storing my eggs.

Let's see what you think:

There are actually two layers for storing your eggs in! One layer sits comfortably on top of the other and then sit nicely on your refrigerator shelf. So, it acts as a space saver, too. That is really convenient when it is family dinner time and there is a lot of food to be stored.

What I love is that I have options. If I want to store hard boiled eggs to use later for egg salad or a different recipe these storage units work. I can also make my deviled eggs and store them until they are ready to be served. Either way the eggs are safely on the shelf and not taking up a whole lot of room in the fridge.

I've used this little two layered unit for transporting cupcakes too. It just comes in real handy when I have some taller foods that I don't want to get squished during transport. The other nice thing is that when I am not using these little containers in the refrigerator, they do not take up much room on my cabinet shelves.

I love my food storage containers with the egg trays and use them often. They make a great gift for a bridal shower or a house warming gift, too. How about you? Do you think you would use food storage with egg trays much?


Note: The author may receive a commission from purchases made using links found in this article. “As an Amazon Associate, Ebay (EPN) and/or Esty (Awin) Affiliate, I (we) earn from qualifying purchases.”


Thursday, December 3, 2020

How To Mouse Proof Your Home Reviewed

mouse in a pile of wood debris
Mouse by Raintree Annie
I am undoubtedly a nature lover. I admire wildlife and all creatures with whom we share this world. So it may seem strange and counter-intuitive to those people who know me that I am actively doing a program of mouse prevention.

However, I do feel that preventing mice from entering our homes in the first place is so much better than dealing with the consequences for humans and mice. 
 
My aim is to mouse proof our home without causing harm to any mice.  


Mice!

We are fairly relaxed about the wildlife in our patch to the point we actively encourage them. We have birds nesting in the eaves, grow flowers to attract pollinators, we carefully carry out various bees and spiders, enjoyed tree bees nesting in our extension and even shared the loft in our home with a wasps nest twice which was no problem.

Mice are also in my eyes adorable creatures, inquisitive and social. We know they live in our garden and our neighbours' gardens and most of the time outside we happily coexist.  However, due to my husband's health concerns there is the problem with wild mice potentially carrying diseases that are dangerous to him. I am also not willing to share our food with mice, so I am not wanting to share our indoor home with them. I do not like to kill any living creature so I would much rather prevent them from coming in and setting up home in the first place than having to resort to the less palatable options. 

I will only be covering mouse prevention here, not the merits or otherwise of the various methods to eradicate them.


What Do Mice Want? 

So how to mouse proof a home? The first thing is to understand what mice want from a home. They need food, warmth, water, safety and shelter, just like us. They also would like to be undisturbed and ideally not have anything to do with us. 

They are however superbly adapted to living alongside humans and many people will already have a small family of mice in their homes and be totally unaware of them. 

Mice are opportunistic and curious and where there is one mouse there is invariably two and then given the right conditions quickly a large family! They are very social creatures and breed rapidly under the right circumstances.

Autumn/Fall is often a key time for mice to seek warmth and shelter in our homes. They mean no harm, but our nice warm, safe homes are a great opportunity for them.

So if we do not wish to share our homes with mice, we must prevent them from entering our homes and make it inhospitable to them.


Identify Opportunities For Mice

First, walk around the outside of your property and see if you can spot any broken bricks or grates that could be entry points. Are there any holes in the fabric of your building? If so, block them up with a mouse-proof material such as a proprietary Mouse sealant, or a fine mesh. 

We found mesh ideal for covering air bricks while still allowing for essential airflow and also in other gaps. Sometimes we used mesh together with sealant on larger gaps.

If you look for a mesh that is designed for mouse proofing and that can be cut with scissors/clippers for domestic use that is usually best.

Do be careful when handling as in my experience the cut mesh can be sharp. It goes without saying to keep it well away from children.


We just cut the mesh to size wearing thick protective gloves and used it over our airbricks with an all-weather sealant. It was a bit fiddly but now looks fine and has done the job.

Next, do the same indoors. Pay close attention to obvious holes or gaps in floorboards, around plumbing pipes and in cupboards and again block these holes.

We found sealant to be easier to use on small gaps over larger areas. Do keep sealant away from children.

As a general rule if you can fit a pencil through a hole, then an average mouse can enter through the gap and it requires sealing. 


I Saw A Mouse!

If you see a mouse then you have a clear sign that they can enter your property. It may just be one mouse, but if you do not take action and your home is a good, safe place for them, there may soon be more.

Even if you do not see a mouse it is wise to regularly check for mouse droppings.

 If you have any suspicion that you are sharing your home with mice, doors should be shut at night to prevent mice from roaming around your home in all rooms. That way if you do see any signs of mice it is easier to target.

If you suspect a mouse put down some baby powder to track it. It won't hurt the mouse, but if it walks through the baby powder it will leave tracks, then you can see what is attracting it and where the entry and exit points are and can block them.

If you store excess treasures in the loft, garage or basement then make sure that is kept in strong sturdy containers that are mice resistant.

Ideally, eat at the table or if watching TV or a game use bowls to catch all the crumbs.  Hoover up regularly and thoroughly. Move large furniture now and again just to check there is no unseen activity there!


Mouse Resistant Food Storage

Food storage is key. All food apart from tins should be stored in closed cupboards preferably inside sturdy containers. There is a huge variety that can be bought made from strong thick plastic, pottery with lids and steel.

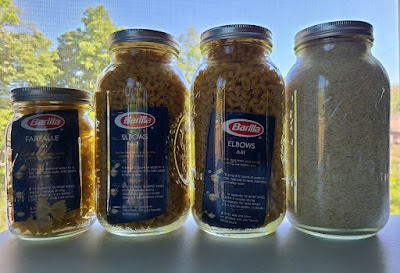
Here is an example of good food storage for flour, cereals, pasta and rice. These containers look good in a kitchen pantry or on shelves and hold quite a lot of food. It keeps food fresher and is a much better deterrent for mice than keeping the food in its original cardboard or paper containers. 


Pet food in particular needs to be stored in good strong mouse-proof containers. Often dog and cat food have a strong scent that is attractive to mice and they love to eat it. We avoid free-feeding pets and only keep pet food out for the time it takes pets to eat it or up to about half an hour. Then it is taken up and all food stored securely.

We also keep birdseed and fat balls in a very secure box to do our best to keep out pests and keep it dry. We do not store these types of boxes outside though but keep in a large cupboard inside. 

This type of food storage box is very useful for pet food and birdseed and also for storing seeds for the garden. 


In terms of everyday habits, it is not advisable to leave any human or pet food out especially at night. Keep all food in the fridge or freezer, or in mouse-proof strong containers. Tins are Ok in a normal cupboard but anything like rice, cereals and especially dog and cat food must be in enclosed containers.


Mouse Repelling Scents 

Some people say mice do not like strong smells though I cannot verify that. So if you would like to do that by all means put some peppermint or other strong fragrance into your cleaning fluids when you mop the floors. At worst it will make your house smell nice and at best it may help to deter some mice. Always check for any interactions with the cleaning fluid first though and obviously keep away from children.


Mouse Prevention Is Always The Best Course Of Action

One takeaway I will say is that preventing mice from entering your property is always preferable to dealing with an issue both for you and the mice. Mice do not have a vendetta against us, they are just trying to survive and prevention is far better than the cure.


Mice have just as much right to life as we do and form an important and integral part of the ecosystem. However, if we do not wish to share our homes and food with them, a few preventative measures can go a long way to protect humans and mice. 


Note: The author may receive a commission from purchases made using links found in this article. “As an Amazon Associate, Ebay (EPN) and/or Esty (Awin) Affiliate, I (we) earn from qualifying purchases.”


Wednesday, February 14, 2018

My Experience Using Freshware Food-to-Go Packs to Freeze Soup: A Review

Freshware Helped me Freeze Individual Mug-Size Soup Servings


After a recent bout with the flu, I realized I had not really prepared very well. Everyone knows how important chicken soup is in helping respiratory illnesses, but few people are up to making it from scratch after they get sick. I wasn't, either, and canned soup just isn't as good. If only I'd been able to pull individual servings out of my freezer that were just the right size for my soup mugs! But I couldn't, since there weren't any there. Since then I've stashed many soup servings in my freezer. Here's how.

My Experience Using Freshware Food-to-Go Packs to Freeze Soup: A Review


Fortunately I did have some frozen French onion soup I'd bought at Costco to get me though a couple of days of flu. Each portion was just right to heat in a soup mug. I decided to look for something that would help me freeze my own individual size portions, so I searched Amazon. I was actually looking for molds, but all I could come up with were muffin tins, and they weren't the size I wanted. I finally found these Freshware Food-To-Go Packs.

***

Freshware Food Storage Containers [36 Set] 16 oz Plastic Deli Containers with Lids, Slime, Soup, Meal Prep Containers | BPA Free | Stackable | Leakproof | Microwave/Dishwasher/Freezer SafeFreshware Food Storage Containers [36 Set] 16 oz Plastic Deli Containers with Lids, Slime, Soup, Meal Prep Containers | BPA Free | Stackable | Leakproof | Microwave/Dishwasher/Freezer SafeCheck Price

***

I finally decided on the 16-ounce size. As you can see above, I wanted a portion just right for my soup mugs. My mug holds 12 ounces comfortably with a bit of room at the top. If I pour 12 ounces of soup into the Freshwear container, there is room left for expansion at the top.

My Soup Story


When my Freshware Food-To-Go packs arrived from Amazon. I was anxious to try them out. I chose them because they are BPA Free, and I didn't want to put anything hot  into a plastic container that contained BPA. I also liked that they could go from my freezer into my microwave so that I could partially thaw the soup before pouring it into my mug. It can stand temperatures from -40°F to +250°F. I liked that I could pour it straight from my crockpot into the containers without waiting for the soup to  cool.

My Experience Using Freshware Food-to-Go Packs to Freeze Soup: A Review


This is my most recent batch of soup as it simmered in my crockpot. This time I made vegetable soup with just a bit of ground beef for added flavor. Here's how I made the soup you see here: I Made Soup Again Today.

I really like my crockpot. It's an older version of this one, and its shape makes it easier to cook many kinds of meat and poultry that are harder to cook in my round crockpots. I can also program it for specific cook times and temperatures, knowing it will switch to warm if the cook time finishes. I can't do that with my older crockpots.

***

Crock-Pot 6-Quart Countdown Programmable Oval Slow Cooker with Dipper, Stainless Steel, SCCPVC605-SCrock-Pot 6-Quart Countdown Programmable Oval Slow Cooker with Dipper, Stainless Steel, SCCPVC605-SCheck Price

***

Freezing Hot Foods in Freshware


I found the Freshware very easy to work with. It stacks neatly in the cupboard for easy storage. When I need to freeze soup or anything else in a mug-size portion, the containers are easy to fill and stack.

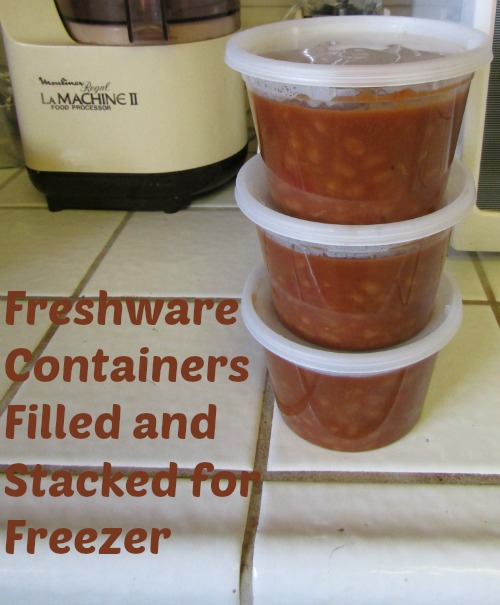
I usually make a crockpot full of soup or another dish. I put about six servings in a casserole dish to store in the refrigerator to cover about three meals for two during that first week after cooking. I freeze what's left in the Freshware containers. Here's how that looked when I froze some beans I had cooked.

Here the containers have been filled and I've put the lids on them. The foods were still hot when I filled the containers.

My Experience Using Freshware Food-to-Go Packs to Freeze Soup: A Review


Below I show them stacked.

My Experience Using Freshware Food-to-Go Packs to Freeze Soup: A Review


Notice how snugly the lids fit and how neatly they stack for storage in the freezer. Because the containers are clear, you can see exactly what's in them.

Thawing My Soup after Freezing in Freshware Containers


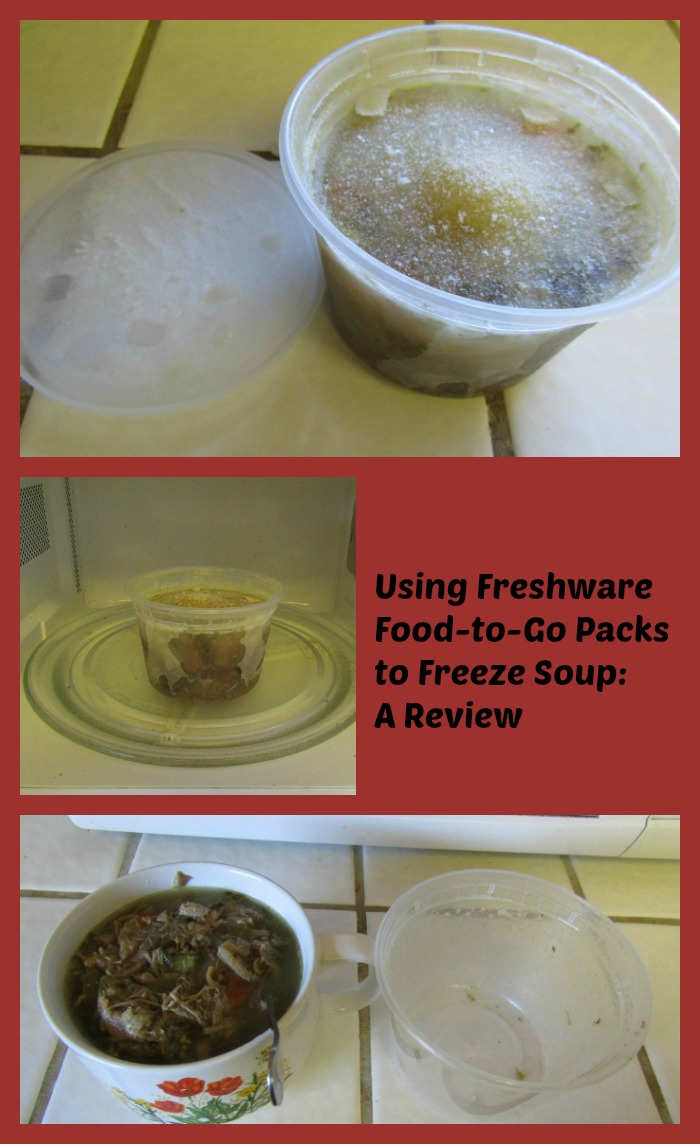
I had planned my container size for filling mugs that comfortably held 12-ounce portions of food, mostly liquid. You can see the beans I froze above, before they went into the freezer. Below you see the soup after it came out of the freezer. On top you see the soup still frozen after I removed the lid, which kept its shape well. You can also see that the soup had plenty of headroom for the liquid to expand.

My Experience Using Freshware Food-to-Go Packs to Freeze Soup: A Review

The middle photo shows the soup thawing in the microwave. I thawed it without the lid. When it was almost thawed, I transferred it into the mug, since I prefer handling a mug when the soup is hot. Had I wanted to take this to work as a hot lunch, I could have packed it frozen and heated it in the container at lunchtime and also eaten from the container.

Note: This week I cooked a large batch of lentils. I filled three Freshware containers to freeze and one to put in the fridge. I wanted to be able to easily add cooked lentils to soups and salad during rest of the week. When my husband was removing something else from the fridge, my lentil container fell out and fell on the floor from three feet up. The thin bottom of the container broke, but did not shatter. The top stayed on. I was able to safely remove the contents to a new container without adding any cracked plastic with the lentils. It was a very easy process.

Lunch is Ready


The soup is pretty hearty, with lots of protein and vegetables, so it doesn't need a lot to go with it. I toasted a slice of sourdough bread and peeled a tangerine because I love tangerines with anything savory. I can eat the toast on the side or dip it in the soup.

My Experience Using Freshware Food-to-Go Packs to Freeze Soup: A Review


What do you like with your soup?

Get Freshware Containers to Make Your Life Easier


As you can see, Freshware Food-To-Go Packs make preparing and freezing meals in single portions very easy. Cook a large batch of your favorite lunch, freeze what you want to store for later, and thaw at home or take frozen to work to heat there. The containers are able to be washed in a dishwasher. I didn't try this because my dishwasher isn't working anymore and I'm waiting to replace it. But the containers are easy enough to wash by hand. Why not pick up some Freshware containers today while you're thinking about it?


****


Note: The author may receive a commission from purchases made using links found in this article. “As an Amazon Associate, Ebay (EPN) and/or Esty (Awin) Affiliate, I (we) earn from qualifying purchases.”


Wednesday, October 21, 2020

My Favorite Hamama Microgreens Seed Quilt Accessories

Recently, I wrote about my successful experience with growing microgreens, using Hamama Seed Quilts. I thought it would be helpful to also review both the decorative accessories and most helpful extras I use and love for growing these delicious and extremely nutritious microgreens indoors, in the comfort of my living room.

Although the Hamama's bamboo grow tray frame, seed quilt label holder, and other decorative accessories are designed specifically for the company's innovative, patent-pending growing system, the other recommended products I'm reviewing here would be both useful and beneficial to anyone who enjoys gardening, cooking, or both!
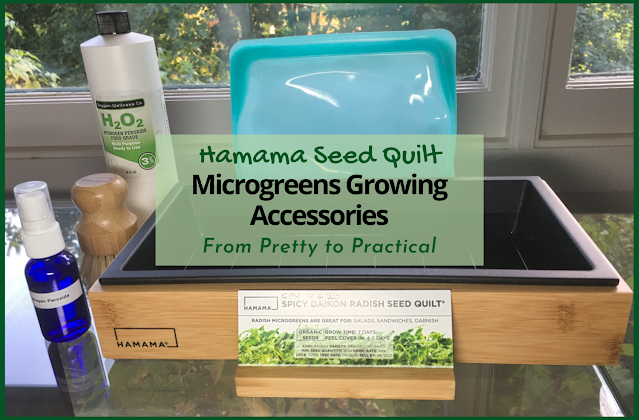
Hamama Seed Quilt Microgreens Growing Accessories
My favorite accessories and useful supplies for growing microgreens with Hamama's seed quilt growing system

Microgreens are a delicious, nutritious way to add essential vitamins, minerals and antioxidants to salads, sandwiches, and other dishes for those of us who try to live a healthy lifestyle. Since health was my primary motivation for losing nearly 60 pounds on a keto diet, my new healthier lifestyle focuses quite a bit on healthy eating, and especially on getting more nutrition from food and relying less on supplements, something that is especially important when following a ketogenic approach to eating.

My Favorite Hamama Microgreens Growing System Accessories and Helpful Supplies

As I shared in my previous post, the Hamama microgreens seed quilt growing system is so easy, even this “brown thumb” gardening amateur is successfully growing delicious, healthy, nutrient-dense microgreens throughout the year, even here in New England. Now that my husband and I are no longer are at the mercy of the unpredictable and often scant selection of packaged microgreens at our local stores, we use our fresh, home-grown microgreens for more than just garnishes. In fact, they make up half the dark, leafy greens in our large, nightly dinner salads!

Along with Hamama's seed quilts and grow trays, the core of their unique container gardening system, I've also purchased a few accessories and supplies that have made the process of growing my own fresh, nutritious kale, broccoli, clover, daikon radish, zesty salad mix, and other varieties of microgreens more enjoyable and convenient.

Hamama's Custom Growing System Accessories

Bamboo Grow Tray Frames and Seed Quilt Label Holders

Two side-by-side Hamama seed quilts with decorative bamboo grow tray frames and seed quilt label holders
I love the way the bamboo grow tray frames and seed quilt label holders dress up my microgreens growing setup by our living room windows

Since counter space in our small kitchen is at a premium, I grow my microgreens in our living room, which has a wall of floor-to-ceiling windows (although Hamama microgreens seed quilts don’t require a lot of light). So, I successfully harvested a few different varieties of microgreens using this unique growing system, I decided to spring for Hamama’s proprietary bamboo frames and seed quilt label holders. The bamboo frames fit either style of the company's grow tray. I started with Hamama's white ceramic tray. See how nice the bamboo frame looks with it?

Microgreens growing in white ceramic Hamama grow tray with bamboo frame
The white ceramic grow tray is thicker (and heavier) than the black plastic tray.

Not long after, I decided to switch to the black plastic grow trays, which weigh very little and are much easier to carry back and forth to the kitchen (on the other end of our house) for cleaning. Although I try to avoid buying plastic for disposable items, these trays are reusable, and I plan to be using them for the foreseeable future. The walls are much thinner, allowing a narrow margin around the seed quilt, so it's much easier to check the water level in relation to the coconut coir mat (and to add a bit more water, if it's evaporating faster than expected). The marked fill line is also thinner than on the white ceramic tray, so it's easier to gauge how much water to add for soaking the seed quilt.

Whether you prefer the black plastic or white ceramic grow tray, the simple, sleek and stylish bamboo frames make them much more attractive and blend well with any style of home décor. There is a Hamama logo in the lower left corner of one side of the frame. Usually, I'm not a fan of displaying brand names, especially on decorative items. But in this case, I think the logo has been done quite tastefully and doesn't detract from the look. However, it can easily be hidden by facing that side of the frame toward the window, if you prefer.
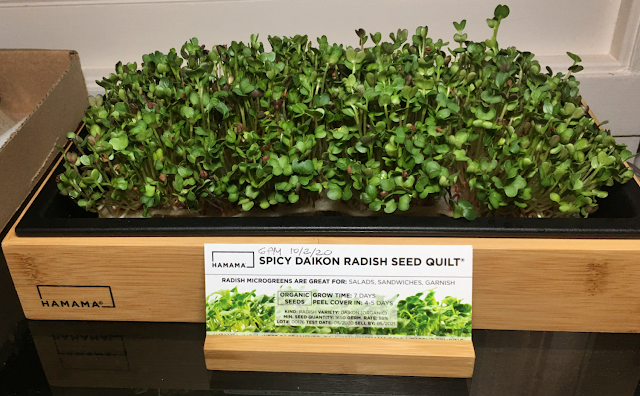
Hamama microgreens germinated seed quilt in tray with decorative bamboo grow tray frame and seed quilt label holder
The Hamama bamboo grow tray frames and matching seed quilt label holders give my microgreens growing setup a more attractive, "finished" look.

The matching bamboo label holders are great for displaying the coated cardstock labels that come with each seed quilt at an easy-to-read angle. These labels provide a useful reminder of which type of microgreens I’m currently growing, as well as the approximate number of days until the paper cover should be peeled, and the total number of days until harvest. Before I got these label holders, I used to tape the cardstock labels to the grow trays. The tape left a sticky residue and wasn’t very attractive. Now, my bamboo seed quilt label holders coordinate perfectly with my grow tray frames.

Each holder is a nicely finished, rectangular block of bamboo the exact length of a Hamama seed quilt label, with a thin slot for the label. Whenever you start a new seed quilt, simply slide the label that comes with it into the slot, which holds it upright and angled slightly back for easy reading. When you finish harvesting your microgreens crop, just remove and discard the label from the holder, so it’s ready for the label from your next seed quilt.

More Matching Bamboo Accessories

Hamama makes a matching seed quilt holder for storing your extra seed quilts, but since I don’t store mine out where people can see them, I didn’t need one. The company has just announced its brand new bamboo "grow shelf," a gorgeous self-standing, five-shelf, open shelving unit to current customers, who can preorder one now. I expect it to be added to the Shop section of the website soon, so everyone who wants will be able to order one.

Extra Hamama Grow Trays

Once I knew I was going to be using this unique microgreens growing system regularly, I ordered two additional grow trays. As of this writing, the price of two black grow trays is only four dollars more than the price of just one. And, since it’s essential to clean each grow tray thoroughly after harvesting one seed quilt and before starting another, it’s nice to have an extra tray so there’s a clean one standing by to start my next microgreens seed quilt as soon as I harvest the previous one. I can soak, scrub, and disinfect the used tray at my leisure (it’s also safe to clean in the top rack of the dishwasher).

Hamama Microgreens Harvesting Kit

The company offers a convenient set of three tools for harvesting the microgreens grown with their proprietary seed quilts and grow trays. The kit contains:

  • 1 reusable Stasher silicone bag (sandwich size)
  • 1 pair of scissors (with the Hamama logo)
  • 1 bamboo scrub brush with natural fiber bristles (for thoroughly scrubbing your grow tray)

It's a very useful kit, particularly if you prefer to harvest your microgreens by trimming them just above the top of the seed quilt, rather than pulling them out, roots and all. Alternatively, you can purchase a Stasher silicone food storage bag, a pair of sharp, stainless steel scissors, and a bamboo scrub brush with natural fiber bristles (or use equivalent items you may already own) to create your own customized microgreens harvesting kit.

Save Money on Your First Hamama Grow Kit, Seed Quilt, or Accessories Order!

Don't miss my Hamama shopping link and discount code at the end of this article to save 10%!

My Favorite, Practical Products for Growing, Harvesting and Storing Fresh Microgreens

Stasher Silicone Food Storage Bags

You don't have to grow microgreens to fall in love with these fabulous food storage and cooking bags

In August 2019, I wrote a review of my favorite silicone kitchen tools and accessories, including silicone food storage bag. But, after trying the Stasher silicone bag in my Hamama Harvesting Kit, I fell in love with it. I purchased three more in larger sizes, and I definitely plan to add more over time. Although they cost more than other silicone bags, they're totally worth the price!

These Stasher silicone bags are a cinch to open and close, unlike any other brand of silicone food storage bags I've tried. Yet, they're also airtight and watertight. Many people use them for sous-vide cooking, placing the sealed bag of raw food in a pot of boiling water. And since these bags are leakproof, They're also perfect for marinating meats, poultry, seafood, fish, or vegetables to infuse them with extra flavor.

Four Stasher silicone food storage bags
The Stasher silicone food storage bags I have purchased to date
Stasher Silicone Stand-Up Food Storage Bag

The Stasher bag that came with the Hamama Harvesting Kit is the sandwich size (7.5" x 7.5" x 1"), which has a 15 oz. capacity. (It's the smallest one in the photo of my current Stasher bag collection.) However, since I wrap my harvested microgreens loosely in a paper towel before placing them in the bag to store in my refrigerator, I find that I need a larger size if I want to harvest all (or most) of a seed quilt at one time.

The sizes I use to comfortably contain an entire crop of paper towel-wrapped microgreens from a Hamama seed quilt are the tall Stasher Silicone Reusable 1/2 Gallon Food Storage Bag (10.25” x 8.25” x 1.5” with a 64.2 oz. capacity), and the Stasher Silicone Reusable Stand-Up Food Storage Bag (7.75" x 7" x 3" with a 56 oz. capacity) that, true to its name, stands up on its own for easy filling and removal of the contents.

Dedicated Scissors

If you prefer to harvest your microgreens with scissors, it's a bad idea to use your general-use utility scissors that are also used to cut paper, crafting materials, etc. I highly recommend dedicating a pair of scissors exclusively to harvesting microgreens and herbs, and cleaning the blades scrupulously before each use. They don't need to be fancy kitchen shears, but they should be sharp and comfortable and have stainless steel blades. (Who wants specks of rust in their microgreens or herbs?)

If I were putting together my own harvesting kit, it would include the Fiskars 01-004761J Softgrip Scissors with 8-inch stainless steel blades (or something similar), which are backed by a lifetime warranty.

Bamboo and Natural Fiber Bristle Scrub Brush

It's important to clean Hamama grow trays very thoroughly before starting each seed quilt. Although the trays are top-rack dishwasher safe, the top rack or our modestly sized dishwasher is usually filled to capacity with glasses, cups, bowls, long-handled spatulas, cooking tongs, etc. So, I prefer to scrub my grow trays by hand.

It can be challenging to clean between the ridges inside the black grow trays, particularly at the corners and around the perimeter. That's why the Hamama Harvesting Kit includes the small, round, bamboo handled scrub brush with natural fiber bristles, which I find invaluable for this purpose.

When I looked for a similar brush, most of them had either synthetic bristles or components made of plastic or other non-biodegradable components. After considerable searching, I finally found a palm-sized, mildew-resistant round bamboo scrub brush with organic, natural fiber bristles, very similar to the one in the Hamama Harvesting Kit. As a bonus, it comes with soap dish that can also be used to store the scrub brush out on the counter, if desired (just make sure both the brush and the dish are completely dry first).

This versatile brush has medium-hard bristles that can also be used to clean even non-stick pots and pans, dishes, vegetables, and more.

3% Food Grade Hydrogen Peroxide and Fine Mist Spray Bottle

Only one of my Hamama seed quilts has ever developed mold, back when I was still a seed quilt "newbie." It was hot and humid in our living room, since we don't have central air conditioning and only turn on each room's A/C unit when we are actively using the room. I made the common rookie mistake of over-watering that one seed quilt, so that the paper covering was wet. When, unsurprisingly, about a third of the sections failed to germinate. I then compounded the problem by covering those water-logged sections with strips of newspaper for two days, after reading a troubleshooting tip for a different problem. (I did say I had a brown thumb!) Of course, when I pulled off the newspaper strips at the end of two days, there were signs of mold, and unfortunately, the seed quilt was unsalvageable at that point.

Before throwing away the moldy seed quilt, I took a couple of photos and shared them in the Hamama Friends group on Facebook and asked how I could prevent a recurrence. The answers were very instructive. One of the best recommendations I got was from a woman who recommended that spraying the surface of the water in the grow tray with food-grade 3% hydrogen peroxide before soaking future seed quilts. She also said she mists the leaves with it after peeling off the paper cover, and hasn't had any mold issues since she started doing that.

I immediately ordered a bottle of food grade 3% hydrogen peroxide. A while ago, I had purchased a dozen small, cobalt blue glass mister bottles. I filled one of them with the 3% hydrogen peroxide and labeled it (since the rest of my cobalt glass misters are also filled with clear liquids), and it now lives next to my Hamama grow trays to remind me to spritz the water before soaking each new seed quilt. And, like the helpful person who suggested I use the 3% hydrogen peroxide for this purpose, I haven't seen a speck of mold since I started following her excellent advice!

I find these pretty and practical cobalt blue glass spritzer bottles useful for many different purposes. They spray a very fine mist, which makes them ideal for evenly and lightly moistening metal clay with distilled water, since this material dries out very quickly when exposed to air while working with it. I keep another filled with isopropyl alcohol for sanitizing makeup brushes, tweezers, manicure implements, etc. in between full soap-and-water cleanings. I also find that they don't leak, so I'm considering keeping another bottle filled with a CDC-approved alcohol-based disinfectant in my purse for when I leave the house. The cobalt glass isn't just pretty; it also helps protect the contents against UV rays.

Save 10% on Your First Hamama Order!

If you haven't ordered directly from the Hamama website before, you can use my Hamama shopping link (or click on the image below), add the products you want to the shopping cart, then use the discount code SUPERGREENS during checkout to get 10% off your product total. And if you're lucky enough to have receive a Hamama grow kit as a gift, you can use this link and discount code to save 10% on the beautiful bamboo accessories made exclusively for the Hamama seed quilt and grow tray system.


hamama microgreens


My Favorite Hamama Microgreens Seed Quilt Accessories by Margaret Schindel

Posts About My Keto Diet Journey

My First Year on The Keto Diet

Preparing to Succeed on the Keto Diet, Part One

Preparing to Succeed on the Keto Diet, Part Two

Low Carb Muffins & Cupcakes: Treats to Enjoy on a Keto Diet

Low Carb Keto Chocolate Yogurt Granola Chip Pudding Recipe

Good Dee’s Keto Cookie Low Carb Baking Mix Review

Hamama Microgreens Growing Kit Review & Success Tips

My Favorite Hamama Microgreens Seed Quilt Accessories

Keto Cheddar Cheese Biscuits With Chives Recipe

The Ultimate Keto Hot Chocolate Recipe

The Best Low Carb Keto Gift Ideas: Keto Gift Guide

The Best Low Carb Keto Cinnamon Muffins

Wholesome Yum Keto Bread Mix and Yeast Bread Recipe

The Good Chocolate 100% Organic No Sugar Dark Chocolate Review

The Best Advice to Maintain Your Keto Diet Weight Loss

My New Irresistibly Delicious Keto Cheese Crackers Recipe

Luscious Low Carb Keto Triple Peppermint Cheesecake Brownies Recipe

Quick & Easy Livlo Blueberry Scones Keto Baking Mix Review

Snack Better With The Best Healthy Keto Cookie Dough Bites

The Best Quick and Easy Low Carb Keto Pizza Recipe

The Best Quick and Easy Low Carb Keto Shortcake Cupcakes Recipe

Comparing the Best Keto-Friendly Chocolate Hazelnut Spreads - No Added Sugars

The Best Low Carb Keto Sandwich and Burger Buns Mix

Blueberry Biscuit Scones — New, Easy, Low Carb Keto Recipe

The Best Keto Pizza Crust Mix With 0 Net Carbs

An Unusual, Delicious Strawberry Chocolate Tea With 0 Calories

Delicious Sugar-Free Keto Cookies That OREO Fans Will Love

Healthy Pistachio Cherry Chocolate Chip Marshmallow Cereal Treats Recipe

Easy, Decadent, High Protein, Sugar-Free Rocky Road Cottage Cheese Ice Cream

The Best Quick & Easy Low Carb Sausage and Ricotta Calzones

How to Make Refreshing Vanilla Italian Soda (With or Without Cream)


Reviews of the Keto Diet by Barbara C. (aka Brite-Ideas)

My Personal Keto Testimonial

How I Stayed Committed to the Ketogenic Way of Eating

Read More Reviews About Gifts by Our Review This Reviews Contributors

Read More Product Reviews by Our Review This Reviews Contributors

Read More Reviews About Health and Wellness by Our Review This Reviews Contributors


Note: The author may receive a commission from purchases made using links found in this article. “As an Amazon Associate, Ebay (EPN) and/or Esty (Awin) Affiliate, I (we) earn from qualifying purchases.”


Most Recent Reviews on Review This Reviews


Search for Reviews by Subject, Author or Title

The Review This Reviews Contributors


SylvestermouseSylvestermouseDawn Rae BDawn Rae BMbgPhotoMbgPhotoBrite-IdeasBrite-IdeasWednesday ElfWednesday ElfOlivia MorrisOlivia MorrisTreasures by BrendaTreasures by BrendaThe Savvy AgeThe Savvy AgeMargaret SchindelMargaret SchindelRaintree AnnieRaintree AnnieLou16Lou16Sam MonacoSam MonacoTracey BoyerTracey BoyerRenaissance WomanRenaissance WomanBarbRadBarbRadBev OwensBev OwensBuckHawkBuckHawkDecorating for EventsDecorating for EventsHeather426Heather426Coletta TeskeColetta TeskeMissMerFaeryMissMerFaeryMickie_GMickie_G


Review This Reviews is Dedicated to the Memory of Our Beloved Friend and Fellow Contributor

Susan DeppnerSusan Deppner

We may be apart, but
You Are Not Forgotten


“As an Amazon Associate, Ebay (EPN) and or Etsy (Awin) Affiliate, I (we) earn from purchases.” Disclosure Statement

X