Showing posts with label DIY. Show all posts

Monday, July 25, 2016

DeWalt Cordless 20V Drill Review for Beginners

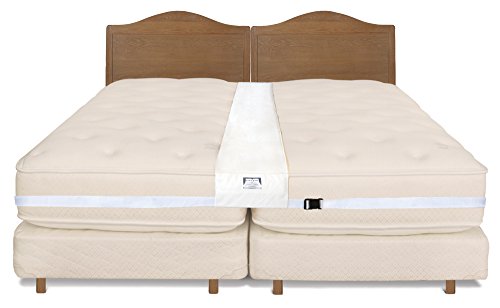
My compost bin frame in process
I do not have much DIY experience. I have zero woodworking experience.  I certainly have not used power tools as an adult - before now. It would seem that I am not the best candidate for writing a review about a cordless power tool. On the other hand, perhaps I am the best reviewer of tools for DIY beginners.  If you are anxious about your first power tool purchase, be confident that the DeWalt Cordless 20v Max Drill Driver Kit is an excellent choice.


Why I Needed to Purchase Tools


I have purchased a small piece of land with a very rustic hunting "cabin" in West Virginia - affectionately referred to as The Shack.  I plan to live up there at some point.  In the meantime, I want to learn to be as self-sufficient as possible.  Which includes learning to do more than unclog a toilet, replace light bulbs, and change locks on doors. I can paint and I have laid carpet successfully in very small rooms.  But that is the extent of my DIY ability.  But I want to do so much more.

My very first project was building a wooden trellis (with much help) and tearing it back down for transport. The plan was to install the trellis on my own.  So far, digging the holes in my yard has me stymied and that project is on hold.

My second project, which I have successfully finished, is a small wooden and wire compost bin.  I purchased the DeWalt Cordless 20v Drill for this project. I had dire misgivings about purchasing a cordless. And I made a beginner mistake that made me think my review of this item would be negative.  However, it ended up that this drill works GREAT. I found that once I fixed my mistake, this drill is reliable.  I am so glad I purchased it.


My Dad - The Roofer and Builder


My dad owned his own roofing and pole barn business.  He also built our barn.  I was young, but I helped with both building our barn and occasionally with his business during the summer.  I held boards, carried shingles, and pounded nails occasionally.  But I did not handle the power tools.

This feels like a million years ago. But I clearly remember the portable generator and the corded saws and tools.  Surely, I can build things now.  It's in my blood...it should come naturally, right? No. Not so much.


Shopping for Power Tools


How overwhelming, shopping for power tools when you have no experience.  I very much wanted to follow in my father's footsteps with the generator and the corded tools.  However, generators are expensive.  They also weigh a good bit.  Depending on which one I purchased, I wouldn't be able to haul it up in the back of my Jeep Wrangler.  I also noted that tools don't "feel" like they did all those years ago.  Due to being much lighter and made with more plastic components they feel cheap and chintzy.

I felt like I "gave in" and purchased a cordless drill. After much window shopping, I chose the DeWalt Cordless 20v Max Drill with the lithium ion battery. Although, at the time of purchase, I felt little to no confidence about a "power tool" that was battery operated.  I intentionally saved my receipt so I could return the drill after it failed.


My DeWalt Cordless 20v Max Drill and Driver 


My drill came with a bag, two batteries, the charger, and the drill.  I purchased a set of drill bits separately.  Once I was no longer hesitant, the drill worked great for pre-drilling holes and screwing in screws. It was powerful and I could easily adjust the speed. Changing bits was exceedingly easy.  The light feature was very helpful as I was working inside my shack with little natural light in the area I was working. The bag was perfect to make sure I had everything together in order to carry it back and forth between the apartment and The Shack.


DeWalt cordless 20v max drill and driver kit


Initially, I thought the fully charged batteries were going dead following just a few holes and screws. I was ready to return it - my biggest concern being realized. Then I realized that the light on the charger lights as though the battery is fully charged when you just lay the battery onto the charger - as I was doing.  However, and this is very important, the battery must click onto the charger in order to charge properly. I feel silly admitting that I hadn't known that but am sharing the information to make sure the next beginner understands that.

That one slight user error was the only thing that has given me pause about this wonderful cordless drill.  The price was great. The drill has plenty of oompf. Figuring out the settings was easy for even a rank beginning like me.

And with the help of my drill (and a DeWalt cordless 20v Max saw) I was able to successfully build my first item - a wooden and wire compost bin.  

For DIY beginners as well as those of you who understand the meaning of volts, RPMs, 3 speed transmission, ratcheting chuck, and carbide insert may be interested in this video provided by DeWalt.  


Note: The author may receive a commission from purchases made using links found in this article. “As an Amazon Associate, Ebay (EPN) and/or Esty (Awin) Affiliate, I (we) earn from qualifying purchases.”


Thursday, June 2, 2016

Printable Greeting Cards

These printable greeting cards are on high-resolution downloadable files that you can print at home. Easy DIY last-minute gift idea.
Look what I found. It's a fabulous source for printable greeting cards. These are cards on high-resolution downloadable files that you can print at home. Simply choose a design, place your order, grab the downloadable file, print, and the card is ready to be delivered or mailed. It's easy! Here's my review of this sanity-saving method of buying greeting cards at the last minute.

The procrastinator in me loves these cards. Why? Because I can choose, buy, print, and mail or hand deliver any of them quickly, within a matter of minutes. If you tend to put off shopping for special occasions until it's almost too late to be on time, bet you'll love the convenience, too!

Even if you're organized and always on time, there's much more to love about these cards. Since they're designed by artists from all over the world, it's easy to find something absolutely unique and the selection is huge. You're sure to find a style that you like for any occasion you can think of.


Note: The author may receive a commission from purchases made using links found in this article. 

Downloadable, Printable Inspirational Card ©JWGiftsandDecor on Etsy
Printable Inspirational Card ©JWGiftsandDecor on Etsy


Printable Father's Day Cards

Print it instantly! Father's Day printable greeting card from DecorartDesign
Father's Day Printable Card ©DecorartDesign on Etsy

Father's Day is always the third Sunday in June, but it has a way of sneaking up on me at the last minute. You, too? If you wait until the last minute to choose a card for dear ol' dad, it won't be too late. Take a look at this Father's Day card collection, find one you like, order, then print. Use the search box to narrow down the subject matter to something that perfectly suits your dad.

Cards for All Occasions & Every Holiday


It's always good to have a greeting card or two on hand for emergencies, but if you're like me your card box never seems to contain exactly what you're looking for when you need it. That's another reason I like the idea of being able to choose the perfect card and print it from the comfort of my computer.

For instance, look at this selection of printable get well cards. You'll also find some really unique printable birthday cards. I found a beautiful selection of scripture cards for all occasions, too. Recently I've been exploring printable Halloween cards. You may be surprised at the selection. I was!

Choose a couple of designs that you especially like, order the downloads, and you'll have them on the computer when you need them. Pay once then print as many copies (for personal use) as you like!

Cute printable all-occasion greeting card from MerryMailman on Etsy, includes envelope template
©MerryMailman on Etsy
Here's an idea for an all occasion card to keep on hand. This "What's up, buttercup" printable card download includes two designs, an envelope template, and you can color the card yourself if you choose. Or let the recipient color it. In fact, make a gift of it by including a set of colored pencils. How perfect for either an adult or a child! (I got this one for my mom, who really enjoys her adult coloring books.)

Next time you're at Walmart, Target, or your favorite office supply store, pick up an inexpensive package of card stock paper along with some pretty envelopes (or make your own envelope from a grocery bag!). Choose a few favorite printable card designs to have handy on your computer, and you'll be ready whenever the next card-giving occasion arises. You'll save both time and money and the recipient is sure to be pleased.


So, who will your first printable card recipient be?

~ Susan
See more of my reviews.


Posted by Susan Deppner

Susan Deppner

About the Author

Susan Deppner is a baby boomer, a cancer survivor, and a Southerner who believes in the Golden Rule. She enjoys writing about food, faith, and fitness; health, home, and holidays; people, places, pets, and patriotism, and more. Follow Susan on Twitter, Facebook, and Pinterest.


Note: The author may receive a commission from purchases made using links found in this article. “As an Amazon Associate, Ebay (EPN) and/or Esty (Awin) Affiliate, I (we) earn from qualifying purchases.”


Friday, September 4, 2015

How to Make a Recipe Binder Organizer

green marble design binder


Organize Your Favorite Recipes


I love having a recipe binder to organize my recipes!  By simply adding photo sheets to a binder, I can create my own recipe card binder with all my favorite recipes.  

In my recipe organizer, I can add, delete or move my recipes around for specific occasions or label the sections with tabs by courses.

The photo sheets will also protect my recipes from spills, smudges or tears.  My recipe binder organizer is my own personal cookbook of favorite recipes and meals.


My Recipe Card Binder


I personally selected the Green Marble Recipe Binder (shown above) and I left the text "My Favorite Recipes" on the cover even though it can be personalized with any text.  I also liked the font so this binder was perfect for me.

Zazzle Binders are designed for 8.5" x 11" sized paper or photo sheets.  Each binder has 4 pockets inside.

You can select the size of binder you desire.  I opted for the 2" spine binders simply because I have a lot of recipes that I wanted to add to my binder, but you could easily select several 1" binders and have a separate binder for appetizers, entrees, desserts, etc. 


My Photo Sheets


I personally selected two different types of photo sheets.  Each style of photo sheet fits neatly into the Zazzle 3-ring binders.

One set of photo sheets holds six 4"x 6" cards. (2 vertical and 1 horizontal) If you select this photo sheet, the recipe cards you place in the vertical pockets will need to be trimmed approx. 1/8" to fit.

The second set of photo sheets holds four 5" x 7" cards.  Obviously, there would be no need to trim your recipe cards for these pockets, but it holds 2 cards instead of three.

photo sheets inside the binder
photo sheets inside the binder with recipe card

Photo of Set I with Recipe Card

 20 (Twenty Pages) - BCW Pro 3-Pocket Page (4 X 6 Cards, Postcards or Photos)

recipe cards in photo sheets inside binder

Photo of Set II with Recipe Card

 (50) BCW 2-Pocket 5 x 7 5x7 Postcard Photo Binder Pages


Printed Recipe Cards 


The recipe cards you see featured in my binder are all available on Zazzle.com.   I love the printed recipe cards professionally printed by Zazzle.  I purchased several of my favorite recipe cards to add to my Recipe Binder.

recipe cards

zazzle banner


Note: The author may receive a commission from purchases made using links found in this article. “As an Amazon Associate, Ebay (EPN) and/or Esty (Awin) Affiliate, I (we) earn from qualifying purchases.”


Friday, July 10, 2015

Woolite Dry Cleaners Review - Dry Cleaning Clothes at Home

woolite dry clean at home For many years, I have been allergic to the dry cleaning chemicals that dry cleaners use to clean our clothes. Finding an easy alternative and being able to Dry Clean my own clothes at home, is truly fabulous and it is so very easy!

I have such a strong reaction to dry cleaners chemicals, that I simply stopped buying clothes that had to be dry cleaned. It just was not worth it no matter how beautiful the apparel was, or how much I really wanted something. Even the smell of dry cleaned clothes that someone else may be wearing, can cause me to get an extreme headache.

I am thrilled that I have discovered a way to dry clean my clothes at home and not get sick!  I have had so much success with this method, that I look for clothes to dry clean just so I can dance by my dryer.

Woolite Dry Cleaners Sheets


It may be seriously hard to believe, but dry cleaning your own clothes at home is as simple as throwing a piece of cloth in your dryer with your garment and turning on the dryer.

Materials:
  • Woolite Dry Cleaners Secret Sheets
Tools:
  • Dryer

Instructions:

1. Throw your garment in the dryer with a Woolite Dry Cleaning Sheet

Satin robe in dryer with a woolite dry cleaning sheet
Satin Cape in Dryer with Woolite Dry Sheet - Photo by Sylvestermouse


2. Turn you Dryer on Medium Heat for 20 minutes!

dryer control knob
Dryer Control Photo by Sylvestermouse


3. Remove your Garment from the Dryer.

It is now Ready to Wear!

Dr. Orpheus Cosplay Costume Cape made by Cynthia Sylvestermouse
Dry Cleaned Cape - Photo by Sylvestermouse


Additional Notes about Dry Cleaning this Particular Cape


I personally made this Dr. Orpheus Cosplay Costume Cape for my son for Halloween in 2013.   There is a large emblem on the back of the cape that I had to cut from satin fabric pieces.

The real beauty of the Woolite Sheets is that they did not fade or fray even the emblem.  It came out of the dryer clean and just as vibrantly beautiful as it was the day it was made.

Since I enjoy making specialty costumes, it is so very awesome to have a trustworthy method to dry clean them.  They are truly a lot more reliable than any dry cleaner and they don't leave strong chemical odor on the costumes or clothes.  They actually smell good!

Dr. Orpheus Cosplay Costume Cape made by Cynthia Sylvestermouse
Emblem on the Back of the Cape - Costume & Photo by Sylvestermouse


Woolite Dry Cleaning Sheet Tests and Review Conclusion


Since Woolite is a name I have trusted all of my life, I did not hesitate to try their dry cleaning sheets.  After all, Woolite is the product I have used for decades to wash my cold water delicate fabrics.  I am thrilled beyond belief to now be able to wear clothes that have to be dry cleaned.   I love satins, silks, velvets, etc. and I missed having them as part of my wardrobe. 

Due to my personal allergies, I do use the Fragrance Free, but there are scented sheets available.

Have you tried either of the Woolite Dry Cleaner's Secret Products?


Note: The author may receive a commission from purchases made using links found in this article. “As an Amazon Associate, Ebay (EPN) and/or Esty (Awin) Affiliate, I (we) earn from qualifying purchases.”


Sunday, April 19, 2015

Review of a Twin Bed King Connector

Turning Twin Beds into a King Size Bed is Easy and Affordable

This is a practical solution for a teen whose outgrown twin beds, or for a guest room where it's necessary to alternate between twin beds and a large single bed.

If you've ever pushed two twin beds together, you know exactly what the problem is; the gap in the middle.

Without a twin bed king converter, we've gotten around this problem by putting several toppers on the mattresses.

However, if you move around a lot when you sleep, the gap is still an issue. Movement slowly splits the twin beds apart.

So being the creative sort, I placed non-skid padding under the mattresses to prevent the mattresses from splitting apart. Although that was an affordable way to address the movement of the mattresses, it didn't solve the dip in the middle.

This is Where a Twin Bed Connector Comes In

The one featured below has straps that wrap around the twin beds. It keeps the beds together.

You may still feel a dip or gap, however, if you place a mattress cover and other toppers on before the sheet, it should be barely noticeable.

Overall this is an affordable solution to transitioning a kids room to a teens room. You can keep the twin beds and convert them into a king for the growing youngster.

Most teens want a bigger bed, and if their room is already furnished with twin beds, this is a viable solution. Best of all, you don't have to buy a king sized bed!

How to Make it Look Nice:

If the room you're making over isn't going to be switched back and forth between twin and king, then it's easy to dress up the bed so it looks like it's always been a king bed.

  • If you have two headboards and you're able to remove them, then you could either go with an improvised headboard attached to the wall that's the width of both mattresses, or elect to skip a headboard altogether and simply deck the bed out with many pillows.

  • If you opt for pillows as the backdrop, without a headboard, you can use a bolster at the head of the bed so the pillows don't appear to be resting directly on the wall. I've done this myself, and it looks really nice.

  • Use a king sized bed skirt. With one skirt going around both beds. Without the appearance of two headboards, nobody will notice the beds were once twin beds.

  • I can't stress enough how padding the mattress with various covers makes a difference; I've used a mattress cover as well as a thick foam mattress pad and it really gives the bed that one piece feel.

The Bed Sheets and the Bedding

Two twin beds, especially with extra padding on top, is a little bigger than a standard king size bed; not much bigger, but enough of an issue that you'll need over sized or deep pocket king sized bed sheets. We love Jersey Knit Bed Sheets because they're stretchable, and they'll work nicely to solve this problem. However, if you're not a fan of Jersey Knit Sheets, then be sure to get king sized bed sheets with deep pockets.


The Non-Slip Padding Mentioned Above 
Ultra Stop Non-Slip Indoor Rug Pad, Size: 4' x 6'Ultra Stop Non-Slip Indoor Rug Pad, Size: 4' x 6'
Above I talk about the non-slip padding I put between the box spring and mattress, well I actually used ones designed to hold area rugs in place.

For us they worked perfectly. This one measures 4 feet by 6 feet, so I just bought a couple for each twin bed, and positioned them on the box spring so as to cover a good portion. I would position them to go over the gap in the bed as well. The Grand Fitted Quilted Mattress Pad Cover Hypoallergenic (Stretches to 18The Grand Fitted Quilted Mattress Pad Cover Hypoallergenic (Stretches to 18

Mattress Pad Cover

Here's an example of a king sized mattress pad cover that you can put over the twin bed king connector and mattress.

This one has 20 inch deep pockets as well, so if you want to put a layer of foam underneath (for added comfort) you should have a enough room. I would say, if you had to choose between the non-slip pads above and this, choose this. It's the best way to pull the mattresses together after you've used the twin connector.


Note: The author may receive a commission from purchases made using links found in this article. “As an Amazon Associate, Ebay (EPN) and/or Esty (Awin) Affiliate, I (we) earn from qualifying purchases.”


Sunday, April 12, 2015

How to Prevent a Door from Hitting A Wall or Closet with a Door Stop Hinge

How to Prevent a Door from Hitting A Wall or Closet with a Door Stop Hinge
Door Stop Hinge
Do you have a mirrored closet door that needs to be protected from a door handle that hits it when opened? And, of course, being a mirrored closet, a regular doorstop won't work?
A Review of a Product that Solves the Problem!
After some research, I found the perfect door stop to use that literally takes minutes to install, doesn't require any drilling, and won't stand out as an eyesore.
Hinge Pin Door Stops are a terrific little gadget that simply slips into the top hinge pin of the door, causing the rubber protector to stop against the door frame and thus prevent the door or door handle from hitting the wall, closet door, or mirrored closet door beside it.
Several of the rooms in our home have mirrored closet doors that are close to the main entry door of the room itself. 
The main washroom in our home is an example; when you open the washroom door, the handle can crash into the mirrored closet door and potentially break the glass. 
The floor in our washroom is ceramic, so a floor-mounted door stop would be too much work to install, not to mention the awful thought of drilling into the ceramic!
How to Prevent a Door from Hitting A Wall or Closet with a Door Stop Hinge
The Hinge We Installed to Protect
Our Mirrored Closet Doors
So, after hunting for a solution, I came across the wonderful little gadget called a 'door stop hinge.' My husband literally put it on the door in five minutes.
We also used one for a door where the door would hit the wall before it would hit the door stop; for years, it bothered me that our door was getting marked up, and now, after repainting our door and placing a hinge pin door stop in the top Hinge...problem solved.


Note: The author may receive a commission from purchases made using links found in this article. “As an Amazon Associate, Ebay (EPN) and/or Esty (Awin) Affiliate, I (we) earn from qualifying purchases.”


Wednesday, December 3, 2014

Homemade Christmas Centerpiece Decoration Ideas

sugar cubes
When it comes to Christmas decorations, shop your favorite store or browse your favorite websites for inspiration. Here are a few festive homemade Christmas centerpiece decoration ideas using common holiday ornaments that are fun and easy.


The simple decoration above of Christmas tree globes setting in a dish is a combination of cold colors that brings brightness to the center of a table. And, it is so simple to put together. All you need is a pretty platter and a trio of decorative globes. Look for globes that are a color that compliments your holiday decor.

If you like this frozen holiday theme, you and your kids will have a fun time building igloos. Not the big blocks of packed snow igloos, but igloos made of sugar. Corinna Johnson shows us How to Make a Sugar Cube Igloo. She suggests using frosting to build the igloo so that you can use the sugar cubes in a dessert later.


The Christmas stocking isn't the only way to hide extra special presents. Make a centerpiece that is simply an arrangement of tiny wrapped packages, similar to the ribbon-wrapped boxes shown above, neatly nested in evergreens or holly. Wrap a tiny treat inside each box and pass out these miniature presents after dinner.

A pretty ribbon gives these tiny boxes an elegant touch.


It wouldn't be Christmas without poinsettias, evergreens, and reindeer. Glittered poinsettias fit in with any decor, the evergreens add an aromatic appeal, and reindeer statuary creates a unique touch.

Need ideas on how to arrange a menagerie of ornaments, the House of Sylvestermouse shows us How to Make a Christmas Sleigh Centerpiece that will add a touch of Santa Claus to your home.

I hope you enjoyed these homemade Christmas centerpiece decoration ideas.

Find more inspiration on Pinterest. 
This Victorian Christmas board is full of easy vintage crafts with a bit of Steampunk style.


Posted by Coletta Teske
Coletta Teske

About This Contributor

Coletta Teske writes reviews on books, business management, writing, crafting, cooking, and gardening. She is also an avid recycler and shares her tips on recycling. She delights in upcycling an old object, recycling or transforming discarded items into a new treasure.


Note: The author may receive a commission from purchases made using links found in this article. “As an Amazon Associate, Ebay (EPN) and/or Esty (Awin) Affiliate, I (we) earn from qualifying purchases.”


Wednesday, November 19, 2014

Sharing Thanks With Handmade Crafts for Thanksgiving

Thanksgiving is a time for expressing thankfulness for all of the good things we've received in our lives. Some families have traditions where they express their gratitude during dinner while other families may find it hard to share these feelings verbally. Sometimes it takes a little creativity to find just the right words and the right way to express those sentiments.


Here are four DIY handmade crafts for Thanksgiving that will make it easy for you to express your love and gratitude to your family and friends. These crafts are easy to make and most of the materials can be found in your recycle bin or backyard.

Hang Your Gratefulness on a Tree


Simply Vintage Girl designed The Thankful Tree, With Chalk using items found in her backyard. This tree is made from a broken branch that is used as the tree form. Small wooden discs are painted with chalkboard paint and suspended from the branches. Before your guests arrive, place a piece of chalk under the tree so that family and friends can write down those things for which they give thanks when the spirit moves them.

Stuff Your Thanks in a Turkey


I {Heart} Crafty Things created a Thankful Turkey Box Tutorial from an upcycled tissue box. This is an awesome craft for kids because it is so easy and downright adorable. The kids can explore their creativity and when the crafting fun is done, they can write their thanks on a slip of paper. During Thanksgiving dinner, have everyone take a turn at pulling a slip of paper out of the box and reading the words of thankfulness.

Set a Place Mat for Giving Thanks


Abby M. Interiors has 8 Ideas for Creating Your Thanksgiving Table that will show your gratefulness all through dinner. I especially like number 7 on her list. Make place mats out of upcycled paper bags or kraft paper and draw lines on the mats for guests to write down the good things in their life.

Spread a Garland of Thanksgiving


Carina Gardner shares her gratefulness with a Giving Thanks - Free Thankful Banner Download that makes it easy for family and friends to write their reasons to be thankful on a decorative garland strung near the dinner table. Use your own creative skills or download the free printout to make leaf shapes for the garland. Put the shapes in a jar with a pen and clothespins, find a convenient place to hang the garland string, and encourage your family to write their thanks on a leaf and pin it to the garland.

May the holiday season bring you comfort, joy, and good tidings.
Coletta


Posted by Coletta Teske
Coletta Teske

About This Contributor

Coletta Teske writes reviews on books, business management, writing, crafting, cooking, and gardening. She is also an avid recycler and shares her tips on recycling. She delights in upcycling an old object, recycling or transforming discarded items into a new treasure.


Note: The author may receive a commission from purchases made using links found in this article. “As an Amazon Associate, Ebay (EPN) and/or Esty (Awin) Affiliate, I (we) earn from qualifying purchases.”


Monday, October 13, 2014

Recommended Reading for Small Space Gardeners

I am so excited that I can barely contain myself.   I have found something that I have to share with you.  I have found a nifty little magazine called Urban Farm: Sustainable City Living.  I am especially happy to have found this issue as the nights grow cold and the leaves begin to change in the mid-Atlantic.  Summer and gardening have begun to draw to a close.

All You Need wooden sign
Some of you are aware that I am a country girl, living in an urban (suburban) setting.  A few of you
are also aware that I try to grow a vegetable garden on my balcony and in my kitchen garden.  I'm not very good at it, but I've done great with tomatoes for two years in a row, and am currently having a great time finding uses for my sweet mint, rosemary, and jalepeno peppers.  

Over the decades, I have purchased many gardening magazines and how-to books.  Mother Earth News has been one of my favorite magazines.  But many times, with those magazines and books, I have had to read the articles and imagine the day that I own my own home again so that I can follow through with the things I've learned.  After all, no matter how much I plan and scheme, I cannot devise a way to raise chickens in my third floor apartment.

Imagine my happiness when I found this magazine that is dedicated to  folks who live in limited space but want a more self-reliant lifestyle.  

I purchased the September/October 2014 issue of the Urban Farm.  Some of the titles include:

  • Framing Out the Cold (small cold frames)
  • Storage Wards (storing your harvest without a root cellar)
  • Behind the Scenes Inside the Hive
  • A Dry Idea (how to dry and preserve tomatoes)
  • Wild Gardens (a foraging garden with wild edibles)
  • Shared Spaces (the urban farm movement)

Photograph by Ken Scicluna
All of the articles have been informative and interesting. I was especially drawn to the small cold frames article.  While I dream of own my own larger greenhouse, such as the one Diana Wenzel shows us how to Do-It-Yourself in her article, I have to deal with my reality.  And my reality is that I have a 9' x 5' balcony and one good but small space at my kitchen window for gardening.  I also live in Maryland.  I have a longer growing season than I had when I lived in northern Indiana, but it's still not as long as I would like.

The article in Urban Farmer shows "farmers" like myself how to use cold frames to make microclimates to extend the growing season.  While I've known about cold frames for years, I always imagine the large hoop style that commercial nurseries use.  There is one photograph in the Urban Farm article that shows a small cold frame insulated in snow with a single light bulb for additional heat and light. The remainder of the article and photographs already have me imagining and planning for my own cold frame on my balcony.  Extending my growing season has just become my new reality.  You can bet good money that I'll be out there before the end of the week, starting some sort of mini-cold frame.

If you are a gardener, no matter the space available to you - acres or inches - I highly recommend that you check  out this nifty little magazine.  Either at the bookstore or at Urban Farm Online.


Written by Dawn Rae

Disclosure: In affiliation with AllPosters.com, Dawn Rae is a blogger and content writer who may earn compensation from the sale of AllPosters products.   I am in no way affiliated with Urban Farm magazine nor do I profit from it's sales.  


Note: The author may receive a commission from purchases made using links found in this article. “As an Amazon Associate, Ebay (EPN) and/or Esty (Awin) Affiliate, I (we) earn from qualifying purchases.”


Tuesday, July 1, 2014

Weapons of Mass DIY Destruction


demonstrating construction tools
Black Ops "Do or Di" - Anything is Possible
There are construction tools and then there are weapons of mass destruction.  We’re not talking nukes here.  Who needs nuclear fire power when one has a reciprocating saw that can pretty much destroy anything in its path? 

Yesterday, when I pulled that DEWALT saw out of its case, nothing seemed ordinary about my DIY mission.  Pulling the trigger on that bad boy transformed a seemingly mundane task into a black ops mission. 

Suddenly, I was able to rip through wood, metal, drywall—you name it—with ease.  The power at my fingertips made me invincible.  When put in a “Do or Di” DIY situation, this is the tool you want in your arsenal.
Check out my new product review, featuring current covert activities, then give Squidoo a try.  What is it that awakens your inner ninja?  Is there a product in your life that transforms you into a force to be reckoned with?  We want to read all about it.  

And now I am being called to duty.  There is a top-secret mission with my name on it. #TrySquidoo


Note: The author may receive a commission from purchases made using links found in this article. “As an Amazon Associate, Ebay (EPN) and/or Esty (Awin) Affiliate, I (we) earn from qualifying purchases.”


Friday, June 6, 2014

Garden Decor Project: Make a Mosaic Pot

handcrafted mosaic pot
Mosaic Pot by Mickie_G
A few summers ago, I made the mosaic pot you see to the left at a workshop sponsored by Aldridge Gardens in Hoover, Alabama.

Ever since I was a child, I have loved creating crafts that involved tile. I remember my mother taking me to the hobby shop every year just before our annual summer visit to my grandmother. My mom knew that if she let me pick out a craft kit, I would not get bored. More often than not, I chose a mosaic kit.

I still remember the 6" circular dish I made with prayerful hands in the middle. The kit came with enough 1/4 inch square tiles for me to play with the design if I did not want to make one just like the example on the box lid. I usually I ended up choosing a checkerboard pattern.  These mosaic craft kits filled my days with much happiness and gave my parents a vacation from entertaining me, I imagine. But enough reminiscing!

I won't go into how I made the mosaic pot shown in the images on this page, but I will share with you some things I did learn about tile covered pots:


  • Do not leave your mosaic pot outside during the winter months as the freezing temperatures will cause the pot to break and the mosaic pieces to fall off.
  • If you use broken dishes or crockery, it is best to use totally flat pieces if you use larger, broken bits.  It is easier to rub off the grout if there are no sharp points that are higher than your decorative shards. You can see in the photo below that I used some broken pieces from a plate. I should have trimmed the sharp points on the edges off. 
  • To break up dishes and crockery, put them between several sheets of newsprint before you break them up with a small hammer. 
  • If you want to preserve the pattern as it is on the dish, use duck tape on the back of the dish before you break it into pieces.
  • Try to fit the "tiles" close together as possible but still leave enough room for the grout. I think I left too much space so there is a lot of grout space. 
  • Wear a mask to mix up your dry grout and powdered mastic. This is a MUST!
  • Gloves for your hands are another must when rubbing in the grout. Surgical ones work best. 

Close up of my mosaic pot. 

mosaic craft 
I used glass globs and a broken dish. 
Can you see the buttons, too?


I am a "keeper" of useful things and a recycler of the broken and chipped, so I have a stockpile of broken dishes and pottery. However, I do not have the supplies like the grout and ceramic tile adhesive for making a mosaic piece.


Here is a video by "DIY Maven" that I discovered on YouTube that shows a very similar and easy process for making a mosaic flower pot.


There are several articles on Squidoo that might whet your appetite for making other types of mosaic crafts. Unfortunately, there are none about how to make a pot like mine. How To Mosaic: Art For Your Garden is a good introductory article to the craft of mosaics. 


If you like the idea of a "kit", I found several mosaic craft kits for children available on Amazon. Here are a few links for you: Kits for ages 14+kits for ages 14 or overkits for ages 8 to 13kits for age 8-13; Kits for ages 5-7 yearskits for ages 5-7; Kits for ages 2 to 4. Most of the kits for young children use foam pieces and no grout. That is a good thing.

Keep your hands busy, y'all!


Photos: Mickie_G - all rights reserved.


Note: The author may receive a commission from purchases made using links found in this article. “As an Amazon Associate, Ebay (EPN) and/or Esty (Awin) Affiliate, I (we) earn from qualifying purchases.”


Tuesday, June 3, 2014

Writing Down the Bones


room studs
Anatomy of my Future Playshop
There is something powerfully transformative about the act of creation.   I have always known that the opportunity to create is my greatest motivator.

Each day, as I stand within the skeleton of the twelve-by-twelve DIY studio I am building, I feel a sense of awe at what can be built with one’s own hands, mind, and will.

If you are a DIY or HGTV junkie like I am, perhaps you have heard talk of homes that have good bones.  In the world of construction, bones matter.

I find it astonishing that these thin sticks I nail together in the right configuration of joints and ribs are so incredibly strong.  There is elegance in the simplicity… an understated beauty.

When the time came, yesterday, to cover the bones, for the exoskeleton is an important part of the structural integrity, I took a few moments to appreciate that which I would not be able to see moving forward. 

Having thoughtfully selected each individual bone, and cared for it during the process of building an inner sanctum for nurturing creativity, this was a moment to savor and celebrate.

This morning, as I write this post, I think of Natalie Goldberg’s classic book, Writing Down the Bones.   Freeing the writer within is about bones just as building a life is about good bones.  Writing down the bones is about expressing essence.  In writing about the essentials of our lives, we experience the creation of the world over and over again. 

I encourage you to write down your bones.  Free the builder within by becoming an essential part of our Squidoo community.  I can’t wait to see what you create with your own hands.


Note: The author may receive a commission from purchases made using links found in this article. “As an Amazon Associate, Ebay (EPN) and/or Esty (Awin) Affiliate, I (we) earn from qualifying purchases.”


Monday, May 19, 2014

A Craft Project that eases my fear of Spray On Glue!

I have always been afraid to try aerosol adhesives! Yes, I am a chicken when it comes to paying good money for something that I have no idea how to use -- also, I have heard "glue everywhere!" horror stories from my friends who have tried using such products and I was definitely scared off. Even my own daughter tried using a  good name brand  spray adhesive for a design project when she was in college and told me in precise detail why she would never use a spray glue again. 


spray glue demonstation

(*Always follow manufactures's suggestions on the safe usage of their products! Click 3M: Tips and Techniques to read about how to use a spray on glue.)


Today, however, I am inspired to give spray on glue a try. "Why?" you are asking. Well, I recently read an article that gave me inspiration for a project that would put this sticky product to a good use.

retro style bulletin board made with spray glue


How I Made My Retro-Style Bulletin Board for My Craft Room  written by a Review This! contributor, decoratingforevents, showed me in excellent photographic detail how to create a bulletin board for my own home office. One tip I found especially helpful was to use "re-positionable" spray-on glue. That tip totally made good sense for someone like me who is very often a crafting klutz.


Lensmaster Decoratingforevents also found some very attractive retro-fabrics that took me back to the 50's and 60's. (Who would have ever predicted that the futuristic designs of that bygone era would EVER come back in fashion?) Another reason I like this bulletin board project: the author used a Glue Gun! As as a Glue Gun Slinger  that made me very happy, indeed.

Now, I am off to drool over the fabrics that decoratingforevents found on Amazon to see which one I can use to pull my "office" together with my own retro-style bulletin board. I just might purchase some spray adhesive, too.


Note: The author may receive a commission from purchases made using links found in this article. “As an Amazon Associate, Ebay (EPN) and/or Esty (Awin) Affiliate, I (we) earn from qualifying purchases.”


Most Recent Reviews on Review This Reviews


Search for Reviews by Subject, Author or Title

The Review This Reviews Contributors


SylvestermouseSylvestermouseDawn Rae BDawn Rae BMbgPhotoMbgPhotoBrite-IdeasBrite-IdeasWednesday ElfWednesday ElfOlivia MorrisOlivia MorrisTreasures by BrendaTreasures by BrendaThe Savvy AgeThe Savvy AgeMargaret SchindelMargaret SchindelRaintree AnnieRaintree AnnieLou16Lou16Sam MonacoSam MonacoTracey BoyerTracey BoyerRenaissance WomanRenaissance WomanBarbRadBarbRadBev OwensBev OwensBuckHawkBuckHawkDecorating for EventsDecorating for EventsHeather426Heather426Coletta TeskeColetta TeskeMissMerFaeryMissMerFaeryMickie_GMickie_G


Review This Reviews is Dedicated to the Memory of Our Beloved Friend and Fellow Contributor

Susan DeppnerSusan Deppner

We may be apart, but
You Are Not Forgotten


“As an Amazon Associate, Ebay (EPN) and or Etsy (Awin) Affiliate, I (we) earn from purchases.” Disclosure Statement

X