Showing posts with label Decor. Show all posts

Saturday, September 30, 2017

Harvest Time Home Decor Review


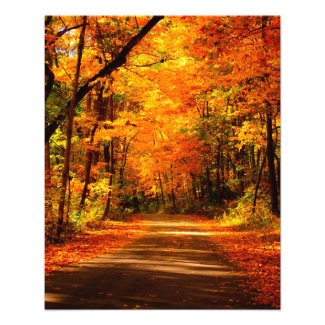
Harvest Time is a great time of year to decorate your home in Autumn colors that reflect the gorgeous changing leaves of Fall. It's also a time of holidays like Halloween and Thanksgiving that include the lovely harvest-related colors of orange, brown, yellow and red.

There are many beautiful items that show off the bounty of the harvest season. Among the most unique are those that are handmade by clever crafters or created by fabulous Indie-Artists in art and photography.

For a very unique touch to your Harvest-theme décor this Autumn, come look at some of these clever, and often one-of-a-kind, handmade items available on Etsy.... and elsewhere across the web.


*The beautiful Fall photograph in the introduction can be found on Zazzle. 
 

Harvest Time


Harvest Time is the time of year when crops are harvested, especially autumn.


A bin of pumpkins and gourds
Harvest Wall Decor

Pumpkin and Gourds ~ 
Autumn Fall Gourd Pumpkin Art Photo / Print by eball photography on Etsy.

Bring a bountiful Pumpkin Harvest into your kitchen or family room with this outstanding photo to frame and hang on the wall for a lovely Autumn décor.

*Photographed by Earl Ball of Delaware for his Etsy Shop.


Pumpkin Coasters

Pumpkin Beverage Coasters
Pumpkin Coasters on Etsy
Pumpkin design beverage coasters are perfect for home decor in the Harvest-time-Autumn-Fall season, or fun all year round for anyone who likes pumpkins.

This set of 4 drink coasters, each with a pumpkin design, measure 4 x 4 inches. They are created using plastic canvas and acrylic yarn in two shades of orange, plus brown and green on an off-white background. Perfect colors for your Harvest time decor.

Pumpkin design drink coasters also make an attractive and useful  hostess or housewarming gift. 


Pumpkin Patch People!


Pumpkin Patch People crochet pattern
Pumpkin Patch People Pattern - Amigurumi Dolls in Crochet

If you are a crochet crafter, you can create your own Pumpkin Patch for Harvest Time.  This set of cute crocheted pumpkin patch people is perfect for your Harvest Season décor. Decorate your table throughout the Fall, or use for a Halloween Party decor.


Created by Janine of Worchester, England, it is available as a pattern to create your own harvest décor. Pattern includes "Pumpkin Patch Pete and Polly" dolls, along with pumpkins, ghosts and a black cat. This pattern is just one of a selection of original and fun Amigurumi crochet patterns found in her Etsy Shop she calls mojimoji design.


Harvest Moon


Harvest Moon hanging over a fence-enclosed field
Harvest Moon. Source: Wikimedia Commons


Useful and Attractive Kitchen Decor for the Fall


Autumn Leaves Image
Autumn Leaves Cluster Embroidered Hand Towel
Embroidered towels with Autumn scenes  continue the Harvest Theme...

Beautifully embroidered Autumn designs on towels for the kitchen or bath set the scene for Harvest Time. Brilliant Autumn Leaves Cluster makes a perfect design for Fall.

This is the design of Embroidery Everywhere of Oakland, California. Visit all her lovely embroidery designs in her Etsy shop.


Harvest Time Refrigerator Magnet

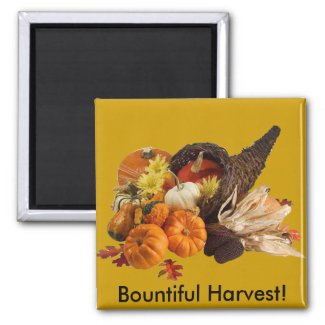
Even the magnets on your refrigerator can be changed for the Autumn Season. This 'Bountiful Harvest Cornucopia' magnet is from the Zazzle store of Sandy Mertens, who is SandyMertens and Sandyspider on HubPages! Sandy's designs are created using a variety of vintage and modern photos and drawings.


THANKSGIVING

Handmade Turkey Beverage Coasters
Harvest Time includes the Thanksgiving holiday. These handmade drink coasters with an attractive turkey design make a perfect accent for your Thanksgiving table. 

Lovely Autumn and Harvest time Seasonal Decor and a terrific hostess gift for a holiday dinner invitation.

The design is created on plastic canvas using acrylic yarn in harvest colors. The turkey design is done in tans and browns with a touch of orange for the beak and legs. Turkey sits on a pretty yellow background. 


These harvest colors coasters measure 4 x 4 inches and are available in the Etsy shop of Coastal Crochet & Crafts.


The Harvest Time Season is Special

Get in the spirit of the season with a variety of seasonal decor.  

For more Harvest-Time suggestions, check out these reviews by our Review This contributors.


© 2011 Wednesday-Elf. Updated for Review This Reviews on 8/30/2022


Note: The author may receive a commission from purchases made using links found in this article. “As an Amazon Associate, Ebay (EPN) and/or Esty (Awin) Affiliate, I (we) earn from qualifying purchases.”


Sunday, September 24, 2017

3 Charlie Brown Home Decor Ideas Because It's that Time of the Year

3 Charlie Brown Home Decor Ideas Because It's that Time of the Year
As we approach Halloween, these multi-generational classics return to us yearly: Charlie Brown Halloween, Thanksgiving, and Christmas.

If You're an avid Charlie Brown fan, Check out these Reviewed Creative Suggestions for Peanuts Home Decor.

Charlie Brown Crib Bedding Featured Here:

It's not easy to find Charlie Brown Crib Bedding; however, if you're willing to go the custom-made route, there's a lovely set available through an Etsy Seller.

This set includes five pieces: the quilt, a dust ruffle, bumper pads, a pillow, and a sheet. Of course, the items included can change, so it's best to contact the seller directly to confirm what's included and to request any additional pieces you may want.

Best of all, if you're into supporting products made in the USA, this seller is located in the US and ships within the US, to Canada, and to Australia. Be sure to check it out via the above link. The set is super cute!

Charlie Brown Christmas Village Here:

If you want to start a Christmas tradition, setting up a Christmas Village each year is a lovely trend that the whole family can enjoy.

For 25 years, we've included setting up a village as part of our holiday routine. It's a ton of fun for the kids when they're little and even when they're not so little. We go through the whole nine yards with fake Christmas snow, houses, accessories, people, and even trees for the snow.
Charlie Brown Halloween
Photo Via Pixabay

We place ours on the top of a mid-height cabinet so that it's out of the reach of little fingers.

To make each piece visible, place various height boxes (we use the boxes of some Christmas decorations) on the surface. Then, hide the boxes with the fake snow. Creating levels makes the village look outstanding from a distance and gives it more of a realistic feeling with hills and valleys.

Check out the Charlie Brown Christmas Village pieces at the above link. Collect them; it's a blast!

Peanuts Outdoor Halloween Décor Here:

Before the Peanuts Christmas Village goes up, collect various Peanuts Halloween pieces for the front yard. Make it a full-time fall and winter Peanut celebration. Put out the Halloween yard decorations, watch Charlie Brown's Halloween video, Thanksgiving, and finally, Charlie Brown's Christmas!

There's something about fall that brings the Peanuts Crew to life.

Check out the original choices for the yard featured at the above link. You'll find a creative wooden Peanuts gang billboard for the yard, custom-made by an Etsy seller. It's colorful and, most of all, unique!

Additional Creative Charlie Brown Home Décor Items on this Featured Pinterest Board:


Note: The author may receive a commission from purchases made using links found in this article. “As an Amazon Associate, Ebay (EPN) and/or Esty (Awin) Affiliate, I (we) earn from qualifying purchases.”


Sunday, September 17, 2017

5 Tips to Consider when Creating a Pink Themed Room in the Home

Photo via Pixabay
With the exception of a little girl's room, pink can be a tricky color to choose as a theme.

The problem with using pink in a room is doing it in a way that doesn't make it seem childlike (when that's not your intention).

Unless you're trying to recreate Barbie's Dream-House, review these five tips before adding pink to a room:

1. The Easiest Way to Include Pink is to add Accent Pieces in Pink

If you don't have your brave pants fully on, then try the leap into pink by adding pink pieces to compliment the space. Use things like throw pillows, blankets, lamps, side-tables, bean-bag chairs, flowers, ornaments and more to carry the pink-load.

2. Choose the Shade of Pink Based on the Mood you want for the Room

Blush (soft pink) makes a lovely neutral choice. It can work as a base just as light tans, whites, and greys do. Simply use a very soft shade of pink (even skin toned pink) on the walls, floors or ceiling. Use complimentary colors for the furniture, drapes, and other accessories. If you're going for a bold, aggressive or sexy look, then richer pinks are your choice. You'll see numerous examples of soft pink and deep pink rooms in the Pinterest Board below.

3. Pink Walls in a Main Room
Photo via Pixabay


Rich pink walls can also work in a Dining Room. Pink is actually an upbeat, calming and festive color so it makes sense to include it in a room where people gather. You can use hot pink or lighter shades, both work. Try bronze accents to create a balance and spread the visual load. If you choose a deep rich pink color, try softer grey tones for furniture and/or accessories to soften the impact. The trick is to create balance. With a softer pink on the walls, black dining room furniture works. Pink and black can look outstanding together.

4. Use Black, White, Leopard or Floral as Contrasts

Patterns look lovely against a pink backdrop. The challenge is mixing and matching them. For example, a pink tree branches wall decal can work in combination with black and white patterned items in the room. The trick is to mix pattern sizes. If the pattern on the wall is tight, and smaller in it's look, then a bold wider, less busy pattern is the better choice for the black/white mix. The sharpness of black again helps to distribute the visual load in the room.

5. Use Pink as a Backdrop on a Wall Unit

Whether it's a wall unit or a large shoe cabinet, paint the back of it in your choice shade of pink and choose a contrasting color to match the space for the rest of the furniture.


Note: The author may receive a commission from purchases made using links found in this article. “As an Amazon Associate, Ebay (EPN) and/or Esty (Awin) Affiliate, I (we) earn from qualifying purchases.”


Sunday, September 10, 2017

Basic Cupboard Storage Ideas to Consider When You're Doing a Kitchen Makeover

Photo Via Pixabay
Kitchen Renovations Begin in the Mind - If You've Ever Tackled a Kitchen Renovation You Know Exactly What that Means

Once the reno-bug bites us, our thoughts are consumed with trying to add all the things we've always wanted in our soon-to-be brand new kitchen.

Let's review a quick list of the basics to consider when you first start the project.

Break down your kitchen cupboards into categories, then search out the options for each.

See the Pinterest Photos below for Examples of Each.

DISHES (Plates, Cups, Mugs, Casseroles etc)
  1. A pull-out China cupboard. Check it out below in the Pinterest board! It looks very similar to the pullout shelves you see in a pantry cupboard, except the pullout shelves are designed to store your dishes.
  2. Large deep pull-out drawers that fit your plates, saucers and bowls.
  3. Open slots where your plates simply slide in and are revealed in the room, adding a decorative component.
POTS & PANS & COOKIE SHEETS
  1. Pull-out drawers are a standard solution, however there are various designs to decide upon. Check them out below in the Pinterest Board.
  2. A pull-out shelf in a cupboard where you can easily access your items. There are various styles of pull-out shelves to consider; some are metal with funky sorting slots, and others are simply open so you can organize them any way you choose.
  3. Keep them out in the open as a decorative feature by hanging them on a specially designed wall or above a center island.
  4. For all your cookie sheets and long narrow pans, add a section where you simply slide them into a cupboard for easy access. You'll see several ideas in the Pinterest Board below.
SMALL APPLIANCE STORAGE
  1. Create a small appliance storage cupboard in your kitchen, easily accessible from the counter. Include shelves that utilize the entire height of the kitchen cabinetry and fill the closing cupboard with your daily items; blender, coffee machine, vitamix, toaster, and all the other funky small kitchen appliances.
  2. Create a Coffee Serving Cupboard - They're so Cool! Take a look at some of the ones featured below in the Pinterest Board. Have all things coffee included in your coffee cupboard and simply close the cupboard for a clean finished look.
SPICE CABINETS
  1. Spice storage tends to come in two options, vertical and horizontal. Pull-out cupboards beside the stove tend to be the most popular choice, but you can also consider a pull-out drawer with slots for each spice to fit for easy label reading.
  2. Construct open shelves on the backsplash that hold all your spice needs. You'll see an example of several below.
  3. Create a narrow shelving system built onto the inside of a pantry door that holds all your spices. Again, you'll see an example in the Pinterest board below.
FOOD STORAGE
  1. When a full pantry isn't an option, try upside down wire racks installed on an angle inside your cupboards to hold your canned goods. You'll see an example of one below in the Pinterest board.
  2. Designate one section of cupboards from top to bottom with pull-out shelves to hold all your food items.
  3. Use the inside of a small pantry door to hold a good portion of your food items.
A Unique IDEA if Your Kitchen Space Allows:

If you've ever watched HGTV you may have already seen this: A Kitchen without upper kitchen cabinets.

The upper section of the kitchen simply features open shelves on the wall that highlight decorative useful items.

But where will all your 'stuff' go? In your huge walk-in pantry that's where!

Design a pantry (Butler's Pantry) that's almost like another small kitchen. Include a wine fridge, shelves for all your dishes, small appliances and food. Put the microwave in there too. Be sure to check out some of the Butler Pantrys featured below, they're awesome!


Note: The author may receive a commission from purchases made using links found in this article. “As an Amazon Associate, Ebay (EPN) and/or Esty (Awin) Affiliate, I (we) earn from qualifying purchases.”


Sunday, September 3, 2017

7 Creative Ways to Utilize the Space Under Your Staircase

Photo by Pixabay
When we're doing a re-design or trying to figure out how to add another useable space to our home, rarely do we think to use the open space under our staircase.

So long as there's a floor and wall area under your stairs and you're willing to tackle a re-do, you're only limited by your imagination.

Let's Review Seven Creative Ways to Use Your Staircase Space:

1.  A Pantry - What a Cool Idea

If you've always wanted a kitchen pantry but lacked the space to put one in, your staircase (upper or lower) can serve as the perfect place to store your kitchen goods. Be sure to scroll through the Pinterest board below to check out exactly what it could look like. Have the exterior match your walls, include a door, lighting and put multiple shelves around the space. Include a rolling tray for portability.

2. An Indoor Dog House - Check out the Gorgeous Design Ideas Below

Cut-out a doggy door to create a full fun dog house under the stairs. Finish the space off any way your heart desires. Add a large soft comfy bed for your fur baby, add lighting and decorate the outside wall with your doggy's name and other personal doggie decorating details. Leave it open for Fido or add a mini-doggie-barn-door as featured in one of the doggie stair case rooms below!

3. An Extra Sleeping Area - When Space is at a Max, Make more Space

When guests come to visit, a sleeping station under the staircase can serve as an alternative area for the kids to use when their room is being used by company. The kids will love to cozy-up in the cubbie under the stairs. Add lighting, book shelves, leave it open to the room or add a barn door to close the space off. Be sure to check out the artistic examples featured below in the Pinterest Board.

4. A Desk Working Area or Homework Station - Perfect for Under Lower Level Staircases

Of course you can create a desk station under an upstairs staircase as well. Depending upon the space you're working with, add a smaller desk with shelves above and below, or add a wrap around desk that includes a few chairs so that more than one person can use the space at the same time. Below you'll see several desk-stair design ideas.

5.  A Washroom - When Space is a Premium

When you need an extra washroom but have no idea how to fit it into your limited space, then be sure to assess whether it can be added under the stairs. Assuming plumbing isn't an issue, add a toilet, sink, flooring, trim, a door and décor and you now have another washroom. You'll see an example of washrooms under staircases below as well.

6. A Reading Nook - A Place to Quietly Read and Write

Include a comfy built-in couch with soft cushions, a throw blanket, shelves stacked with your favorite books, adjustable lighting and you're all set! You'll see several examples of just how cozy these areas can be featured in the Pinterest Board below.

7. Storage - There are Many Design Ideas for Extra Storage

Below you'll notice a number of different storage ideas for under the stairs. You can build just shelves, partial shelve or both shelves and drawers. You can finish the look with elegant trim, add doors, or make the storage drawers and shelves pull out for easier access.


Note: The author may receive a commission from purchases made using links found in this article. “As an Amazon Associate, Ebay (EPN) and/or Esty (Awin) Affiliate, I (we) earn from qualifying purchases.”


Sunday, August 27, 2017

Create a Tech Free Sanctuary in Your Home

Create a Tech Free Sanctuary in Your Home

Are You Digitally Exhausted?

Information overload may be the understatement of this century. We are an overwhelmed society, from the internet to social media to 24-7 texts, news flashes, and emails on our phones.

As we approach the end of this decade, people face this fact and look for viable solutions that enable them to disconnect for a time.

Only some people can take an off-the-grid holiday, and that's where controlling our own environment holds the power.

We can't change the outside world, but we CAN change our inside world.

This Fall Season, Go for More than Warm and Cozy in Your Home Décor - Create a Space that's Absolutely Disconnected and Tech Free

It's not easy to disconnect. According to Business Insider, as of 2016, 72% of the United States population uses a Smartphone. Globally, that number continues to grow.

With artificial intelligence soon to become the new norm and augmented reality already in use, there are few opportunities to disconnect at work and in our daily life activities.

For this reason, a dedicated 'calming space' in the home is more essential than it's ever been. The world won't stop just because we want it to, and the oft-repeated cliché, 'the only thing we can control is ourselves,' means more than ever.

The control we do have is in how we design our homes. Digital free spaces, or calming disconnected rooms, are becoming a design inclusion that more people are factoring into their décor.

Let's Review 5 Ways to Create a Calming Space:

1. Create a playroom that only offers free toys of any digital technology - Add books, popular retro games, play rugs featuring games and learning, dolls, astronomy, space, science, puzzles, wooden toys, and more. Decorate the space to reflect another time and give the room a theme like 'The Way Back When Room,'' Yesterday's Space,' or 'Back to the Future.' Make it fun and colorful so the kids can't wait to enter.

2. If you can't successfully turn a kid's room into a technology-free space, how about including a bed tent or enclosed canopy where the rule is only non-digital items are allowed. Tell the kids the space is for storytelling, fractured fairy-tale fun, and catching up on their day. To add interest, give it a name as well.

3. The most obvious room to convert into a calming space is the master suite. If you're disciplined enough to do this, enhance your design with soft, airy drapes, rugs, and bedding, use calming tones and color combinations, and don't forget the soothing scented candles.

If you can't make your master suite a tech-free space, use an extra bedroom if you have one. In fact, don't even include a clock in the designated tech-free room. Think of it as the 'timeless bedroom' - a time-free zone.

4. Create a sitting room or library that only allows soft music and reading. However, permit only vinyl records. No other devices are allowed. Put a fun bucket at the door that says people can only enter the space if they put their phone in it first. Make a sign that gives rules for entering this tech-free room.

5. Let the dinner table be the technology-free zone. Use fun games to ensure no phones are brought to the table. Make a rule; if someone sneaks a phone to the table, that person has to clear the table and do the dishes. If another person breaks the rule, they help. For every ten successful dinners without devices, create a family reward like a movie night or other prizes the family may enjoy.


Note: The author may receive a commission from purchases made using links found in this article. “As an Amazon Associate, Ebay (EPN) and/or Esty (Awin) Affiliate, I (we) earn from qualifying purchases.”


Sunday, August 20, 2017

How to Decorate a Long Narrow Living Room

Long Narrow Rooms
Photo via Pixabay


We see photos online of beautifully decorated long, narrow living rooms and think, 'Oh, that's easy to do,' until we're actually face to face with our own blank space to fill.

Long, narrow living rooms provide several challenges.

Here's a list of the Do's and Don'ts when it comes to planning the furniture layout for your skinny space:

Don't:  Don't jam all the furniture against the walls.

You're not alone in thinking that placing furniture against a wall will make a room seem larger. However, it's the opposite ... furniture jammed against the wall all around a long, narrow space will merely add to the 'bowling ball feel.'

DO: Pull furniture away from the wall on at least one side. For example, do you have a loveseat or couch that can be pulled away from the wall?

If your room's shape permits it, pull the sofa away from the wall by about a foot (or whatever distance your room allows) and place a long, narrow table behind it featuring tall lamps and a photo collage that goes to the ceiling. Pulling the furniture away from the wall and adding the decorative table can create a cozier, inviting sitting area.

If the room doesn't allow for any furniture to be pulled away from the wall, then place a rug in front of the couch and position the complimentary chairs perpendicular to the couch. That way, you still get the effect of a cozy sitting area.

******


Don't: Don't fill the room without thinking about the walkway through the space.

How will people get from one area to another? Without a clear flow, the room will appear balanced and clear.

DO: No matter how you position the furniture in your space, keep a clear path for people to walk from one part of the space to the other.

If you're wondering what a clear path means, design your layout so people don't have to zig and zag around things to get through the space.
******

Don't: Don't restrict yourself to using long regular sofas.

It's harder to create cozy seating arrangements when you do this. It's not impossible; it's more challenging as the sofa will take up more room.

DO: Perpendicular designs are a practical layout for long, narrow living rooms, so try two love seats facing each other.

Again, use an area rug as their foundation and create a cozy seating area. If you add a wall unit or cabinet to the wall perpendicular to the sofas, you'll achieve a tighter, more comfortable feel.

Another tip: in tiny spaces, use smaller-sized furniture with legs. The open bottoms help the room to feel that much more available.
******

Don't: Don't use just square boxy furniture and tables. This makes the space too linear.

DO: Add some round or oval accessories.

A round ottoman coffee table or round wooden table will help to break up that back alley look. Use round and oval shapes in other accessories, such as lampshades and vases.
******

Don't: Don't just think of space usage horizontally.

Keeping everything at average height on the walls can make a long, narrow living room feel closed in.

DO: Go vertical with your design.

What does that mean? Position draperies where the wall meets the ceiling and have them drape down to the floor.

Or add a tall wall unit that reaches the ceiling or gets close to it.

Or try a lovely wall photo collage that goes up to the ceiling.

A narrow room always looks best when the person entering has their eyes drawn upward. So don't be afraid of patterned, vertically striped drapes.
******


Most Important Tip:
Jennifer Taylor Home Lewis Collection Modern Bolster Hand Tufted Upholstered Accent Entryway Bench With 2 Detachable Bolster Pillows, NavyJennifer Taylor Home Lewis Collection Modern Bolster Hand Tufted Upholstered Accent Entryway Bench With 2 Detachable Bolster Pillows, Navy

Divide the space into two or three areas. Think about what your home needs and design your divided areas accordingly.

Do you need an office area? If so, put the seating area at one end and the office area at the other. You can divide the space in several ways, using area rugs or a small open-two-sided bookcase (that is manageable).

If an office or a dining area isn't possible, create two sitting areas using area rugs to define them.

If there aren't a lot of windows or natural light in the room, it's best to keep the two rugs the same, very close to the same ... or in the same color family, or complementary.

One very cool trick when creating two sitting areas in an open space is to position a chaise or bench chaise so that it's accessible to both sides. Because the piece opens on both sides, it allows for people sitting on the bench to face either seating area.

A Picture is Worth a Thousand Words. Below, You'll find a Growing Collection of Pins that Feature Long Narrow Living Room Designs, as well as Long Narrow Designs for Other Rooms in the Home:


Note: The author may receive a commission from purchases made using links found in this article. “As an Amazon Associate, Ebay (EPN) and/or Esty (Awin) Affiliate, I (we) earn from qualifying purchases.”


Sunday, August 13, 2017

How to Paint an Open Concept Room with High Ceilings

How to Paint An Open Concept Room With High Ceilings
 Photo Via Pixabay

Although high ceilings and open concept décor are what most people want today in a home, these spaces can be challenging to decorate.

Before adding color and scale to a space, open floor plans can make a room feel cold and cavernous.

Although it seems contrary to the point of the room, making the space cozy and comfy means scaling down its vastness.

Using Two Colors to Scale Down Tall Ceilings

Two colors on a tall wall create a natural break in height, allowing you to define the space around the color choice on the bottom. The top color can be used as an accent tone for additional pieces in the room.

The example in the above photo shows the two-color concept in action. The bottom section is a deep, rich sea blue color, with the top of the wall painted white. Although white seems like a non-color, it's used to contrast the white cabinet and other accessories, making it part of the intended feel.

But don't stop at two colors; add a third.
One Large Feature Wall Using Two Colors
Featuring a White Fireplace
Photo Via Pixabay

One of the general decorating rules is to work with three shades in the same color family as your base colors. The photo shows how stark just two colors can be. Introducing a third color automatically softens a space.

An Open Concept Wall that Spans Two Rooms

If you have a completely open space that spans two rooms, such as a living room into a dining room where the wall flows from one to the other, it's best to use one color for the entire wall.

The exception would be if you could divide the space using a textured wall feature between the two, like a brick or wood wall divider.

A Concept Room with One Tall Feature Wall

If you have one wall in your space that spans two storeys or is very tall and is visible from other areas, you can paint that entire wall a darker shade while painting another wall that abuts it a lighter shade in the same color family. Thus, the darker wall becomes your feature wall.

If you have windows or a fireplace on that wall with white trim, that's even better, as the darker color will pop even more. In fact, walls with windows and other light-colored architectural trim are ideal for darker-colored paint.

Other Decorating Tricks to Deal with Tall Walls Featured Below in the Collection of Photos:


Note: The author may receive a commission from purchases made using links found in this article. “As an Amazon Associate, Ebay (EPN) and/or Esty (Awin) Affiliate, I (we) earn from qualifying purchases.”


Sunday, July 30, 2017

How to Decorate a Room with Purple

Photo Via Pixabay
Last week we covered how to include the color Orange in home décor, so let's talk Purple this week

While orange in home décor is the most misunderstood, purple may be the most feared.

However, there's no need to be shaking in those boots.

Since there's various shades of purple ranging from very soft to royal bold, you can choose what works best for you. Also, don't think purple is just for bedrooms either, you'll be surprised just what you can do with a living room decked out in purple.

Still have doubts? Then, scroll to the bottom of this page to see the collection of rooms decorated in different shades of purple.

Before Decorating with Purple Make One of These Three Decisions:

1. You only want to add a little purple to your space
2. You want a more sophisticated look in your purple room
3. You want the room to have a deep rich look of purple

Let's Discuss How to Use Purple Based Upon Points 1,2, and 3

Just a Little Purple in Your Living Room:

Start by adding a touch of soft yellow. Why soft yellow? Because yellow is a complimentary color to purple and will help the small amounts of purple you add, to pop.

Add the yellow to a feature wall. Then add a lightly pattern neutral drape that contains both the yellow and purple. Keep your couch a neutral color, like white, then add two accent chairs in a medium toned purple (slightly darker).

Finish the space off by adding multiple pillows in a combination of the purples and yellow featured in the space. Mix the pillows up with solids and patterns.

A More Sophisticated Look Using Purple:
Photo Via Pixabay


Start by painting a feature wall in a lighter purple-grey shade.

You can paint more than one wall. If you're color-brave go ahead and paint the whole room in that color.

Next choose a couch in a solid charcoal grey color, and choose accent chairs that are closer to the lighter grey-purple you've painted the walls.

For your drapes, bring in a third neutral color like a light tan or beige.

Finally, end the look with pillow accessories but use darker shades of purple on a few solid color cushions and then choose patterns for the others that have both a mix of light purple-grey and tans.

A Deep Rich Braver Attack of Purple in Your Living Room:

So you're gutsy and ready to go all out purple. First choose a deep rich violet purple for a large feature wall. Or better yet, on a fireplace wall.

Next go with the same or similar rich purple that you chose for the wall for the couch. For the drapes continue with the bold theme by using a deep pink-purple.

For the accent chairs, you'll need a neutral tone, and believe it or not, a lovely burnt orange will work. Lastly, bring all the shades you've included in the room into various plain and patterned pillows.

Check Out This Collection of Rooms Decorated in Purple as Well as Purple Accessories


Note: The author may receive a commission from purchases made using links found in this article. “As an Amazon Associate, Ebay (EPN) and/or Esty (Awin) Affiliate, I (we) earn from qualifying purchases.”


Sunday, July 23, 2017

Understanding the Color Orange in Home Decor

Orange Home Décor Ideas & Accessories
Most love the color orange, however, think about it ... how many homes have you seen use the color orange in their decorating scheme?

Let's Review T
he Color Orange, and What it Evokes


The most misunderstood color in the paint deck is Orange.

When we think about orange what tends to come to mind is Food, Halloween, or Autumn. However the feeling that orange gives to a space may surprise you.

Orange, especially a child's room can encourage a warm, friendly, youthful, and socially inviting space. Don't hesitate to add orange accessories to the room, such as pillows, book shelves, a rug, drapes or go ahead and create a focal point and pop of color by painting one wall a bright and inviting orange hue.

Spaces and Ways to Include Orange

1. Since an outdoor space is meant to be socially inviting, cheerful and a positive space to gather,
orange makes an excellent choice when decorating a deck or patio.

2. If your room has a lot of light, adding orange can help to further brighten the room and even help to make the space seem larger. Pops of orange add positivity and energy.

3. Pair orange with a color on the opposite side of the spectrum such as a deep blue. Pairing these two colors together can lead you down the path of creating a Moroccan theme. By combining opposite colors you balance the space.

4. How about a tropical theme? If you're a brave decorator you can take an orange room to the beach by combining orange with hot pink and yellow. Since all of these colors are positioned close together on the color wheel, your space will have an analogous theme.

Try a couch in yellow, a loveseat with orange, yellow and pink stripes, and a solid dark pink chair! Lighten the space up with a pale multi colored small patterned floral rug and then go all out with one wall painted in deep orange. 

Characteristics Associated with Orange
  • Cheerful
  • Self Confident
  • Flamboyant 
  • Warm Hearted
  • Adventurous
  • Comical
  • Able to handle what life dishes out
  • Sociable
  • Enjoy being part of a group or team
For those who lived through the 1970's, you'll recall Orange being a popular color in home décor. My baby brothers room was decorated with orange and white furnishings and an orange shag rug! Cheerful, fun, inviting...yes, that was his space.

Orange is fun, put your brave on and go for it. 


Note: The author may receive a commission from purchases made using links found in this article. “As an Amazon Associate, Ebay (EPN) and/or Esty (Awin) Affiliate, I (we) earn from qualifying purchases.”


Sunday, July 16, 2017

Review of Home Decor Gift Ideas for Those Born Under the Sign of Cancer

We've all struggled over what gift to get that special someone.

People shopping for an astrology gift tend to choose personal items such as jewelry. That's perfectly fine, however, when you give a home décor astrology gift, you're giving something that's both personal and practical.

Understanding Cancerian traits will help you choose the right gift item. There are a number of ways to choose an astrology gift:
  • Understanding the sign's personality
  • Choosing a gift from the symbol of their sign
  • Choosing a gift from other factors of their sign such as color, element, the sign's planet, lucky numbers, lucky day or birthstone
If you have a Cancerian in your family, you already know they're very sensitive, sentimental, intuitive, and for the most part a homebody.

One of their most notable characteristics is their loyalty to those they love. They're committed to their obligations and can be counted on in a relationship to be there one hundred percent. Compassion and empathy for those who suffer is also a noble part of their personality. Their heart is big.

If you're close to a Cancerian, you may have discovered that they can also be quite vengeful, so try not to get on their bad side! That saying ... 'hurt people hurt people' can easily apply to astrological cancer!

Cancer Astrology Facts:
  • Birthday falls June 21st and July 22nd
  • Their Element is Water
  • Their Symbol is the Crab
  • Their Planet is the Moon
  • Their Birthstone is Ruby
  • Their Lucky Number is 2, 7, 11, 16, 20, 25
  • Their Colors are Blues, Whites and Pale Colors
  • Their Day of the Week is Monday
With the above Cancer Astrology Facts, You're Ready for Some Gift Ideas:
  • Bedding with the Crab symbol on it
  • A crab's and coral end table (that's different, you need to check it out)
  • Crab themed lamps or night lights
  • Gorgeous canvas art of the moon
  • Pillows in blue, white and other pale colors featuring the lucky numbers
  • A ruby colored area rug
  • A table-top waterfall


Note: The author may receive a commission from purchases made using links found in this article. “As an Amazon Associate, Ebay (EPN) and/or Esty (Awin) Affiliate, I (we) earn from qualifying purchases.”


Sunday, July 9, 2017

How to Create a Light and Airy Room with a Pop of Color

How to Create a Light and Airy Room with a Pop of Color


The Walls & Floors:

Choose light colors for the floors and walls for a light and airy room design.

The base of the room should be neutral. The very light grey/tan walls and the light hardwood floor provide the foundation to start. You don't have to choose the colors featured above; just remember that whatever you decide, they should be neutral.

The Furniture:

If the wall is further away from your couch, it's best to place an end table on each side of the couch.

By the way, you don't have to use end tables that are precisely the same; in fact, different tables on each side of the couch can look fantastic. Remember to create a common denominator between them, like the color, the material, or the lamps.

When the color of the couch is neutral, use accessories to add pops of color. If your wall color is a different neutral, just use a darker shade or darker for your couch and chairs. By staying in the neutral family with your furniture, you can use accessories and art as the basis for your true funky pop of color.

Wall Art:

In a neutral, airy space, wall art is where you choose the pop of color you want, and from there, you pull out one, two, or three colors to use as the room's accessory colors.

So go ahead and find the art you want to use for your light, airy room first. Once you have the art and know the neutral tones you want to work with, the rest is fun.

The Accessories:

Add texture with accessories. Even knick-knacks can have cloth textured items with pops of color that have been pulled from art and pillows.

Another subtle, yet not so subtle, accessory that contributes to the room's airy, calm feeling is the wooden word 'Happy' placed on the tray on the coffee table. The designer was smart - by choosing the word you want people to feel when they enter, you're encouraging them to feel the mood of your intended design. A light and airy room does make you feel happy!

Let's Summarize:
  1. Choose the neutral colors you want for the walls and flooring
  2. Choose the couch in a shade or two darker than the walls (but still light in color, of course)
  3. Select the Wall Art you want for the space - but choose ones with pops of color you want to pull out to use as your accessory colors (You could also choose the art first)
  4. Accessorize the space using the color you choose from the art, along with other neutrals
  5. Use a variety of textures when you select your accessories: cloth, wood, ceramic, glass,
  6. Finish off the room with a funky wooden word ornament that defines your space: words like happy, calming, peaceful, love, relax
The next time you decorate a room, put your funk on and try it.


Note: The author may receive a commission from purchases made using links found in this article. “As an Amazon Associate, Ebay (EPN) and/or Esty (Awin) Affiliate, I (we) earn from qualifying purchases.”


Sunday, July 2, 2017

How to Decorate a Small Space Using Color

How to Decorate a Small Space Using Color


Looking at a small space, we think, 'How will I get everything into it.'

If you've ever watched the TV show 'Tiny Homes,' you've seen how small spaces can be maximized and that, yes, it's totally possible to decorate a little room successfully and practically.

But What About Color in a Small Space?

You don't have to settle for bland colors because the room is small. You can make it funky and bright without shrinking its overall feel.

The Walls & Ceiling:

A good choice is a white-trimmed window to soften the darker wall. Also, having a light window on a darker background lets you introduce a pop of color using draperies. 

Yes, you can paint a ceiling a dark color and make it work. However, a dark ceiling can be challenging when a  room is small, and you're already putting darker colors on two walls.


The Wall Unit, Bed and Desk:

If the interior of a wall unit has dark shelves and a dark background, the room would feel and look more closed in. 

By putting color only on the front of the cabinet and leaving the rest white, you get storage and color without overpowering the space.

The primary reason a storage cabinet reaches the ceiling is the feeling of height it gives to the space, and storage of course. It gives a  sleek, streamlined appearance and lets you draw your eye upward, giving the illusion that the ceiling is high.

The Room's Accessories:

Other than the bedding, choose color. 

With solid-colored walls, floors, and bedding, the rug is a perfect place to feature funkiness. In fact, if you can find the rug first, you can draw colors from the carpet to determine the room's overall palette.

Use color in the lights, pillows,  drapes, bean bag chairs, photo frames, or a shelf or two as featured in the photo.

Texture - that's right, texture adds depth, even to a small room. Use texture in pillows, rugs, chair covers, and drapes. Without it, the room would feel stark. So go ahead and choose a bright textured rcarpet- you could even select a thicker shag rug.

Lastly, Your Color Palette:

That's easier than you think. If you're pulling colors from a rug, stay in the family of colors featured in that rug.

Another way to choose color is to select two colors, then allow the walls and floor to act as the neutral base, and always add a third and/or fourth color in the rest of the accessories. That helps to soften the feeling of the room. When you only select two primary colors, a space can feel more monochromatic and cold.

Don't let small spaces hold you back - let your funky side out.

Happy Decorating!


Note: The author may receive a commission from purchases made using links found in this article. “As an Amazon Associate, Ebay (EPN) and/or Esty (Awin) Affiliate, I (we) earn from qualifying purchases.”


Sunday, June 25, 2017

It's Easy to Combine Rustic and Modern Decor - A Decorating Review You Can Try

Add a Brick Wall to Warm Up a Contemporary Space
It's not an exaggeration to say young people today tend to prefer a cleaner, slick, modern décor theme.

In fact, if you've recently visited renovated or new homes currently for sale, you've probably noticed that Staged homes are geared toward a contemporary look.

What about People who Prefer the Combination of Two Types of Decorating Schemes? Tying a Little Old with a Lot of New?

Let's take a look at the above featured photo as a how-to guideline for combining rustic with modern.

The obvious focal point and the one that adds the rustic aspect to the space is the brick-wall treatment. The exposed brick contributes an old world tradition to an otherwise modern youthful space.

With exposed brick, you're essentially decorating one (or two) walls to add a cozy, warm, inviting feeling to the space.

Contemporary décor, void of softer tones, texture and color, can come across as cold and uninviting. Texture is especially critical when you want to add warmth. With walls and floors being the two largest most impactful parts of a room, put-your-brave-on and go for it - add texture.

But Exposed Brick is Too Hard to Do Right?

Wrong. Most people avoid it because they're not ready to hire a craftsman to install the brick. However, if you're wearing-your-brave, take that leap, do it! The professional install will only add
Dress-up Your Brick Wall with Canvas Art
and Creative Lighting
value (in most cases) to your home.

But guess what, you can DIY this project. That's right. Yes you can. Faux brick is something you can find and order online, and depending on the type of brick you choose, most go up with a peel and stick backing.

DIY faux brick walls are the easiest and least expensive way to add texture to your space. If you're too nervous to try a large wall, order just enough to do a small feature wall in your home. Once it's up, then decide if it's a look you're interested in pursuing further.

In terms of accents against an exposed brick wall, incorporate furniture with wood and rod iron. Rod iron in particular looks outstanding against exposed brick. Closely check the above photo and you'll see that the chairs have rod-iron legs on them.

Another point of interest in the above photo, is the mix of wood tones. Since the wood flooring, painted walls and kitchen area are completed in light colors within the same family and the exposed brick is in a darker shade in the tan/light brown family, the wood table set works perfectly.

So although you're looking at a space with white/grey/blonde wood floors and a darker wood table, it flows beautifully because the exposed brick wall ties the entire space together.

Give it a try!


Note: The author may receive a commission from purchases made using links found in this article. “As an Amazon Associate, Ebay (EPN) and/or Esty (Awin) Affiliate, I (we) earn from qualifying purchases.”


Sunday, June 4, 2017

3 Decorating Choices for a Love Themed Bedroom

All You Need is Love - A Bedroom Theme Based on What the Worlds Need Now

Well, these grand sentiments may be a little too big for bedroom décor, however, decorating because love is love, family is love, children mean love, or you love to inspire how to love, makes all the sense in the world.

From deciding upon a nursery theme to decorating a master bedroom, love works. Love fits all ages, all sizes, and all families and best of all, we never outgrow love. We can re-use and re-purpose all things love.

Love Rugs - The One Time You Can Walk all Over Love to Feel Good

The above handcrafted, stain resistant Love Rug is like love itself; it works for all ages. Whether you're decorating a child's room or planning to add loveable funk to your master bedroom, this four foot by six foot, one inch thick rug makes a creative addition.

For the nursery, put it front of the crib, for a grown-up space, add it to the side or end of the bed, in the middle of the room, or depending upon the size of the space, in front of a corner reading chair.

If this rug isn't just right, be sure to visit the link under the above Love-Rug photo to view a wider selection of colors, styles and designs.

Light Up the Room with Love - LED Love Signs


This particular Love Sign features 16 LED white lights and measures 20.8" by 9.25" by 1.56". It's a cordless accessory that operates with two AA batteries. It has an on off switch as well.

Place it in a bedroom above a dresser or over each bedroom side table as a form of ambient lighting. Better yet, for those who get up in the middle of the night to feed baby, it makes the ideal soft lighted guide.

When rocking baby, feeling tired, the word of love helps to remind us about what's important in life.

When you visit the link under the LED Love Sign photo, you'll find additional LED sign choices.

Wrap Love Around You in Bed with Love Themed Bedding


One of the easiest ways to bring a little love into the bedroom is by redoing your bedding set with one that features hearts, or roses, or words

Love Themed Bedding Here - Additional Designs As Well
Surprisingly, artistic bedding sets can be quite affordable making them an excellent choice for a seasonal or emotional re-do.

We tend to think our bedding has to remain the same, when in truth, purchasing various duvet sets allows us to interchange our room's décor without much added expense or fuss.

Use a love themed duvet set for your love themed bedroom and interchange it from time to time if hearts and roses get a little too much for constant use.

Changing up duvet sets simply means choosing colors and themes to match the fundamental design of the room. Find duvets that tie into your existing floors and walls and you'll be able to give your space hassle-free-pick-me-ups whenever you're in the mood for it.

Lead with love, it's the only road that takes us home - happy decorating.


Note: The author may receive a commission from purchases made using links found in this article. “As an Amazon Associate, Ebay (EPN) and/or Esty (Awin) Affiliate, I (we) earn from qualifying purchases.”


Most Recent Reviews on Review This Reviews


Search for Reviews by Subject, Author or Title

The Review This Reviews Contributors


SylvestermouseSylvestermouseDawn Rae BDawn Rae BMbgPhotoMbgPhotoBrite-IdeasBrite-IdeasWednesday ElfWednesday ElfOlivia MorrisOlivia MorrisTreasures by BrendaTreasures by BrendaThe Savvy AgeThe Savvy AgeMargaret SchindelMargaret SchindelRaintree AnnieRaintree AnnieLou16Lou16Sam MonacoSam MonacoTracey BoyerTracey BoyerRenaissance WomanRenaissance WomanBarbRadBarbRadBev OwensBev OwensBuckHawkBuckHawkDecorating for EventsDecorating for EventsHeather426Heather426Coletta TeskeColetta TeskeMissMerFaeryMissMerFaeryMickie_GMickie_G


Review This Reviews is Dedicated to the Memory of Our Beloved Friend and Fellow Contributor

Susan DeppnerSusan Deppner

We may be apart, but
You Are Not Forgotten


“As an Amazon Associate, Ebay (EPN) and or Etsy (Awin) Affiliate, I (we) earn from purchases.” Disclosure Statement

X