Showing posts with label kitchen essentials. Show all posts

Sunday, January 16, 2022

A Bread Box Review and Recommendation

A Five Star Review - Bread Box

I've needed a new bread box for a long time. I searched on amazon for at least three months before finally taking the plunge and making the purchase.

Features That Were Important to Me:

  1. I wanted a roll-top bread box
  2. It needed to have two shelves inside
  3. Each shelf had to be deep enough and high enough to hold several loaves of bread
  4. There had to be room between the cupboard and top of the bread box so I could place things on top if necessary
  5. I wanted to spend less than $100
  6. It had to look attractive
  7. It could be chrome or wood
  8. I preferred it be pre-assembled
  9. I didn't want a glass door (I figured the glass would eventually break)
  10. Bamboo wood was preferred
This Bread Box Met 9 out of the 10 Criteria Items:

Bamboo Bread Box


Which One of the 10 Criteria Items Did Not Get Met?

Unfortunately, I wasn't able to find one that met all of our needs that was pre-assembled. 

However, like most of my sons, my husband is very good at assembling products, so I knew I could safely forfeit this preference.

After reading the reviews, a few comments expressed their dissatisfaction with the assembly process. But I have to say, my husband had absolutely no problem putting it together, but as I mentioned, he's good at such things. 

If I had to personally assemble it, I would not have purchased any item that required putting it together --- only because I suck at that stuff! Fortunately, hubby handled that.

The Interior Has Two Shelves With Plenty of Room
Has Two Roomy Shelves

There is Plenty of Room On Top
There's Room to Place Items on Top

The Only Fix We Had To Make

When the roll-top door is closed (without care), it makes a loud noise. Since so many people live in our home, I knew I couldn't police that behavior, so we solved the problem by putting two tiny velcro tabs on the bottom. The tabs prevent the door from hitting the base, and it's much quieter.

We Placed Velcro Tabs to Reduce the Door Closing Noise

We Purchased the Bread Box From Amazon

We purchased it from Amazon.ca (Canada) at this link.

When typing this, I noticed that this specific bread box wasn't appearing on the USA site. But here's a link to a similar one (from what I could tell)... Both of them are the same size ... 15" by 9.8" by 14.2"

Five stars. Recommended.


Note: The author may receive a commission from purchases made using links found in this article. “As an Amazon Associate, Ebay (EPN) and/or Esty (Awin) Affiliate, I (we) earn from qualifying purchases.”


Wednesday, February 10, 2021

Open Jars Easily With Jar Heads Rubber Jar Opener Gripper Pads

I have always found opening jars with very tight lids to be a challenge, since I have fairly small hands and limited grip strength. Now that I'm over 65 and my hands are weaker, that task evolved from a challenge into a struggle, until I discovered Jar Heads rubber jar opener gripper pads. They make opening jars significantly easier for anyone, and are especially helpful for someone with small, weak, or arthritic hands. They're also thoughtful, practical gifts for seniors. 

Here is my product review of these terrific Jar Heads jar opener rubber grips, which have become kitchen essentials at our house.

Jar Heads non-slip textured rubber grip Jar Openers - Made in the USA from 100% post-consumer recycled tires

Finding the Best Jar Opener For People With Limited Grip Strength or Arthritis Can Be Hard

There are many types of jar opening tools and gadgets on the market. Many, if not most, claim to be good for seniors and people with weak hands or arthritis. Nearly all of them have mostly 5-star ratings and glowing reviews on Amazon. (It's really unfortunate that Amazon's customer ratings and reviews system seems to be easily "gamed," and isn't nearly as helpful in making purchasing decisions as it used to be.) So, despite having more experience than most with online product research and comparison shopping, I found that picking out a jar opener that had a high probability of living up to those claims was a bit like playing roulette. 

So, if you are looking for an extremely effective jar opener that not only would be a welcome addition to any kitchen, but could also be a blessing for someone with small or weak hands, arthritis, or limited grip strength, I hope to spare you considerable time and effort by summarizing the most popular types of jar openers available and sharing some of the products I purchased, or seriously considered, before I discovered the awesome Jar Heads rubber jar gripper pads that I have been using, and loving!

The Most Popular Types of Jar Openers and Rubber Jar Grips

Traditional Handheld Jar Openers

In my experience, most traditional jar openers and screw-top bottle openers are only moderately effective, and often quite frustrating. 

  • None of the ones without teeth that I've tried over the years, especially the strap wrench (AKA grip wrench or loop wrench) types, have worked well on very tightly sealed screw-top bottles or glass jars with metal lids.
  • I've found that, for the most part, jar openers with sharp, serrated teeth (like the older version of this OXO Good Grips Jar Opener I've owned for many years) can be more effective than the "toothless" models at breaking the vacuum seals on new, unopened glass food jars. Unfortunately, they often end up skidding around the rim of those stubborn, firmly stuck, tightly sealed metal lids, rather than biting into and gripping the metal securely as you twist the lid counterclockwise. Consequently, the teeth can score a deep, sharp-edged gash around the perimeter of the pugnacious jar lid, whether or not the jaws successfully break the seal and loosen the lid. Sometimes I have had to wrap the sides of those lids with flexible, nonwoven, self-adhesive bandage strips to protect our hands from the sharp, jagged-edged score lines around the rim when we subsequently open or close the jar.
  • All these types of handheld jar openers require not only grip strength in both hands (the one that holds the jar and the one that turns the lid), but also sufficient leverage to twist the jar and lid in opposite directions. 

Mounted, Under-Cabinet Jar Openers

Two of the issues with traditional handheld jar lid and screw-top bottle openers are weak grip strength and lack of leverage. A jar opener that is mounted securely to the underside of a cabinet above the kitchen counter(s) and has a V-shaped area with large, serrated metal teeth on one side of the "V," such as the popular and highly rated EZ Off Jar Opener, can help with both these issues, and also accommodate a wide range of bottle cap and jar lid diameters. It enables you to grip the jar more securely with both hands as you turn it counterclockwise, and holds the lid firmly in place as you twist the container.

When trying to open very tightly sealed jars, however, the large, serrated teeth could bite into the sides of the metal lids deeply enough to cut grooves or gouges with sharp, jagged metal edges.

Automatic Electric Jar Openers

Many women (especially those who have limited grip strength), seniors, and people who suffer from arthritis are fans of automatic electric jar openers, and find that these (theoretically) hands-free electric openers give them a greater sense of independence in their daily lives. They can be quite effective at opening straight-sided glass jars (ideally without rounded "shoulders" at the top) that have tightly sealed, hard-to-open, metal screw-top lids.

However, these kitchen gadgets are more expensive than most manual bottle or jar openers, and have some limitations that manual openers don't. 

  • These automated openers should not be used with plastic jars or on plastic lids. 
  • While it is possible to use this type of automatic opener with tapered glass jars, doing so requires placing a hand on top of the gadget and maintaining firm downward pressure to prevent the plastic arms from slipping. Obviously, that isn't optimal, particularly for someone with arthritic or weak hands.
  • If one of these electric jar openers malfunctions, or just slips off a glass jar with "sloping shoulders" (potentially knocking it over, and perhaps causing it to break), they don't turn themselves off automatically, which I consider a safety risk. 
  • This type of opener operates fairly slowly, and it is important to wait until the entire automated cycle is complete before removing both the gadget and the newly-loosened bottle or jar lid. For someone who either lacks patience or needs to prepare a meal in a hurry may find this wait frustrating, or even be tempted to try to stop or remove their automatic electric jar opener prematurely. If they remove it during the cycle, the opener will continue to operate until the cycle completes, and stopping it mid-cycle would require removing the batteries while it was still running, which would be dangerous. 
  • They are wider and bulkier than most other types of jar openers, and may not fit in a crowded kitchen tools drawer.  
  • Most run on two AA batteries, which will need to be replaced for as long as the product remains in use. 
Despite those limitations, these electric jar openers are a wonderful option for anyone who is physically unable to grip both a jar and its lid securely and twist it open with the aid of a handheld or under-cabinet jar opener or rubber gripper pads. As long as they can press the enormous button on the top of this tool to initiate the cycle, the process of opening a jar is fully automated and hands-free, except for jars that are tapered or have rounded "shoulders." (As I mentioned, opening those types of jars requires placing a hand on top of the device and holding it firmly in place throughout the entire automated cycle, to prevent it from slipping off the lid, which makes that a hands-on vs. a hands-free operation.)

Rubber Jar Openers AKA Rubber Jar Grips, Jar Opener Rubber Grips

I would never had considered buying a rubber jar opener, or even looked at the terrific Jar Heads rubber jar opener gripper pads, if my husband and I hadn't received one as a promotional gift from our favorite local barbecue restaurant many years ago, when we lived in Boston's Back Bay neighborhood. It was a large, pig-shaped cutout made from a thin, pink, textured rubber sheet, emblazoned on one side with the restaurant's whimsical logo and its address, phone number, and website in bold, black permanent ink. At the time, we thought it was a cute idea, but nearly threw it out. How could this flimsy piece of rubber sheet work better than a traditional jar opener with sharp, serrated, stainless steel jaws? 

Fortunately, we never got around to tossing it. One day, on a whim, I decided to give it a try. I was astonished at how much faster and easier I could open a brand new jam jar with an extremely tight lid by using this silly, pig-shaped, subtly textured rubber "rag" than with any of the traditional handheld jar openers I had owned over the years. When my husband came home from an errand, I was excited to show him how much more securely I was able to maintain a grip on a stubborn lid and twist it open successfully with Porky's help, compared to my usual struggles with hard-to-open jars. Seeing how well it worked for me piqued his curiosity, and he wanted to experience the difference  between using this thin, rubber jar opener pad and using our traditional model, with stainless steel jaws with large, sharp teeth on one of the sides. Even though my husband is very strong, has a powerful grip, and doesn't need the help of a jar opener most of the time, he also was impressed by Porky's performance. He also liked the idea of using this simple rubber jar gripper pad to help him subdue the occasional extra-defiant lid and break the vacuum seal without having to rely solely on brute force. 

It's ironic that this mildly amusing, but seemingly worthless piece of thin, floppy, lightly textured rubber sheet, which we had nearly thrown in the trash bin, turned out to be by far the most useful, memorable, and appreciated promotional item either of us has ever received from any business. In addition, my husband and I soon figured out that if we could get two of these rubber jar openers, using one in each hand would strengthen my grip on the jars as well as the lids and increase my leverage, so that I wouldn't need as much strength or have to use as much force to open even stubborn jars with tightly sealed lids. 

At the time, our crazy work schedules and pressing family health issues left us with neither the time or energy to pursue the possibility of acquiring a second Porky. Then, after several years of loyal service, poor Porky met his demise in the line of duty, when the thin rubber sheet tore as grappled with one recalcitrant jar lid too many. Since we were no longer living in the city, I decided to call the barbecue restaurant and ask whether they still had any of their old promotional jar opener rubber grips and, if so, whether they would let me purchase half a dozen (two for immediate use and four more as spares). That's how I learned, to my dismay, that the restaurant had closed the previous year.

It was it was time to begin the search for a worthy successor to our beloved porcine rubber jar opener. 

I looked high and low for something similar, but there wasn't much to choose from at the time. I purchased a pair of white, flower-shaped, jar opener rubber grip pads, currently sold as NORPRO 597 Non-Slip Rubber Jar Openers, so I could use one in each hand to help me hold the glass jar securely while I twisted the lid open. I also liked the wider, 5.5-inch diameter of this style, and the rubber was thicker and, presumably, more durable. Unfortunately, that thickness made the rubber much stiffer and less pliable, so it couldn't conform to the lid, and the surface was smooth and almost slick, all of which made it harder to get a good grip with these, despite the "non-slip" marketing claim, 

A few years later, I found two more possible contenders. One was a set of natural rubber jar openers with an open waffle pattern similar to foam shelf liner, which also had a wider, 6-inch diameter. And, since they came in a set of four, I would have one to hold the jar, one to grip the lid, and two extras for backup. However, I worried whether the soft foam material and open weave might make them less grippy or less durable than I needed (or both), and in reading through the customer reviews, I found several that mentioned those issues. 

The other contender, the Prepworks by Progressive Jar Grips Multi-Purpose Lid Openers, looked very promising. This set of three rubber jar openers includes one teal blue, square grip pad approximately 5" wide, made from thin, flexible, lightly textured rubber sheet that looks to be very similar in weight, thickness, and flexibility to that the jar opener we had; a somewhat smaller green round sheet made of a slightly thinner material, and a red, 2" wide, rubber grip shaped like a truncated cone for gripping bottle lids, and made thicker and, presumably, somewhat sturdier material. Unfortunately, as I read through the numerous reviews, many of the customers who gave this set 5-star ratings did so primarily because of the bottle opener. People seems much less enthusiastic about the two rubber jar openers, which some considered too flimsy and likely to tear.

Jar Heads Rubber Jar Opener Gripper Pads for the Win!

When I felt that my search for Porky's replacement had reached the point of diminishing return, I decided to stop looking for additional candidates and go with options I might have missed, order a set of Jar Heads rubber jar openers, and cross my fingers that they would actually live up to their claims. 

Lady Luck must have been smiling on me, since the first time I used my new Jar Heads rubber jar opener grippers, I knew at once that I had hit the product roulette jackpot with these well made, easy to use kitchen gadgets!

Row of five Jar Heads rubber jar opener gripper pads

Here are the main attributes, features, and benefits that led me to choose Jar Heads Rubber Jar Opener Grippers over the other rubber jar openers on my "short list" of contenders. 

Thin and Flexible Enough to Conform to Jars, Bottles, and Lids, Yet Tough Enough to Hold Up Under Pressure, and Over Time

  • Even though these jar opener pads are only about 1/16" thick, they're also sturdy and substantial.
  • Made from recycled rubber tires, which are designed to withstand much more abuse than twisting open bottle and jar lids! 
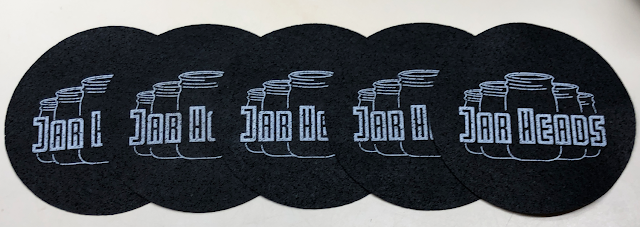
  • After 10 months of frequent use, and being squeezed into a drawer crammed with kitchen tools and kitchen gadgets in between uses, all five of our Jar Heads still look, feel and perform the same as they did when I first opened the package. 

Made From 100% Post-Consumer Recycled Tires

  • Uses sustainable, eco-friendly, recycled material and manufacturing practices.

Superior Grip Strength Lives up to "Non-Slip" and "Works Great for Weak Hands,...Seniors With Arthritis and Children" Claims 

  • While nearly every rubber jar opener product’s marketing makes these claims, few live up to them.
  • By contrast, Jar Heads take advantage of the powerful grip strength that has been engineered into the rubber tires from which these jar opener gripper pads are made, which also gives them exceptional durability

Jar Heads rubber jar opener gripper pads next to jar and bottle
Wide Enough to Grip Large Jars, Flexible Enough to Grip Small Bottles

  • The 5" diameter make these rubber discs are wide enough to grab onto even oversized pickle jars or  party-sizes pretzels sold in bulk at warehouse stores like Costco or Sam's Club.
  • They are also thin and flexible enough to grip a small, slender hot sauce bottle and its extremely small screw-on lid. 

Made in the USA

  • Buying products made in the USA supports American companies, workers, and their families.  

Sold in Sets of Five

  • That's enough to share, or use in pairs, and still have spares!

Strong, High-Quality Jar Openers for $2.50 Apiece

  • At the time this post was published, a 5-pack of Jar Heads was selling on Amazon for $12.50, with free shipping for Amazon Prime members. That works out to just $2.50 each for these excellent jar opener rubber grips! 
  • At that low price, you could give these out as stocking stuffers to everyone on your holiday gift list, or as small "just because I'm thinking of you" gifts any time of year.

30-Day, 100% Money-Back Satisfaction Guarantee

  • I respect and prefer to buy from companies that have enough confidence in the quality and performance of what they make or sell, and have a strong enough commitment to their customers to stand behind their products with a risk-free, 100% money-back satisfaction guarantee. 

    Jar Heads are sold by First Class Products of NY, which describes itself as a "Small Family Run Business founded in New York" on its Amazon Seller Profile Page, where you can contact them directly with a question or concern, and also read the overwhelmingly positive seller feedback from their Amazon customers. 

Screenshot of Amazon seller profile for Jar Heads
A screenshot of the seller's Amazon Seller Profile page 

Jar Heads Make Great Gifts for Seniors

Or Anyone With Small or Weak Hands or Limited Grip Strength

  • Gives them more confidence to open jars and bottles by reducing the legitimate fear of losing their grip on glass containers and knocking over or dropping them, potentially causing them to break into dangerous, sharp glass pieces and shards.
  • Reduces the frustration and embarrassment of needing to rely on someone else to take care of this routine task for them, and waiting for someone to be available to help.

A Helpful, Inexpensive Aid That Makes Anyone, Regardless of Their Grip Strength

  • Even people who have strong enough hands to loosen tight lids or break the vacuum seals on new, unopened bottles and jars will appreciate how much less effort it takes to open them with the help of these Jar Heads rubber grip pads.


Jar Heads Rubber Jar Opener Gripper Pads product review by Margaret Schindel

Read More of My Product Reviews

Read More Product Reviews by Our Review This Reviews Contributors


Note: The author may receive a commission from purchases made using links found in this article. “As an Amazon Associate, Ebay (EPN) and/or Esty (Awin) Affiliate, I (we) earn from qualifying purchases.”


Friday, February 5, 2021

Brown Sugar Keeper Reviewed - I Love My Brown Sugar Bear!

If you have ever had brown sugar harden in your pantry, you will understand the need for the brown sugar bear.

Brown Sugar Keeper
Not only is he adorable, but he keeps your brown sugar soft for months.  He can also be used to remove moisture from salt, spices, and other food products that are prone to go stale after the package is opened.  

Many years ago, I was given a brown sugar stone.  It looked like a flat terracotta disc or flat rock.  Not pretty, but it did the job.  I have no idea what happened to that disc.  I fear it got thrown away at some point when cleaning out my pantry. I may have looked at the date on my box of brown sugar and simply tossed it, not even thinking about the brown sugar keeper.  That seems like the most likely scenario since I haven't been able to find it anywhere.

When I opened my brown sugar a few weeks ago, I discovered it was hard as a brick.  That hardened box of brown sugar could easily be used as a weapon.  Since I have no need for a brown sugar weapon in my kitchen, I went in search of my brown sugar keeper.  That is when I discovered it was missing.  Such great sadness enveloped me until I thought of Amazon and how they might have a brown sugar keeper.  The website search began and I quickly found a variety of options.  Success!  But, now I was faced with another dilemma.  I had to choose a design.  After all, I don't really need a dozen different brown sugar keepers just because they are cute.

Choosing a design took me all of about 3 minutes. As soon as I saw the brown sugar bear, I knew the one (well, 2) that I needed.  I promptly ordered my bears and anxiously awaited their arrival.  The bear siblings arrived in perfect condition 3 days later.  

Isn't he just the cutest brown sugar keeper you ever saw!  His sister awaits her opportunity to come out and play.

Brown Sugar Keeper


How to Use a Brown Sugar Keeper

 Brown Sugar Bear Harold Import Co Original Sugar Saver and Softener, Terracotta, Set of 2Check PriceFor keeping your brown sugar soft, you simply soak the brown sugar keeper of your choice in water for 20 minutes.  Dry him off with a paper towel, and place him in your brown sugar.

For keeping moisture out of other spices or food items, you don't get him wet.  Place the dry keeper in the bag or container and let him absorb the moisture.

If your brown sugar is already hardened, like mine was, soak him and put him in the container (box or bag).  Within 24 hours, your brown sugar will be soft again.  He is a magical little bear! 

Well, they all work the same way, but you know I love my little bears.   


Brown Sugar Keeper


 Terra Cotta Brown Sugar Saver, Food-Safe Sugar Preserver for Long-Term UseCheck Price Brown Sugar Bear Light Brown Sugar Original Sugar Saver and Softener, SingleCheck Price Now Designs Terracotta Brown Sugar Saver, Hedgehog, 3 CountCheck Price JBK Owl Terra Cotta Brown Sugar SaverCheck Price


Read More Product Reviews On
ReviewThisProducts.com


House of Sylvestermouse


Note: The author may receive a commission from purchases made using links found in this article. “As an Amazon Associate, Ebay (EPN) and/or Esty (Awin) Affiliate, I (we) earn from qualifying purchases.”


Friday, November 27, 2020

Deluxe Spicy Shelf for Spice Organization in Kitchen Cabinets or Pantries Reviewed

Spice Organization
Two years ago, I added gripper clips to my cabinet pantry door for easy access to the spices I use most often. They are truly fabulous and convenient. However, I still had dozens of spices, seasonings, baking extracts, powders, etc. tucked away and often lost in the depths of my pantry.  

I've had a carousel tray on the top shelf of my pantry to at least keep the spices all together, but the small containers somehow managed to flip off the carousel and get lost.  Or worse, they would keep the carousel from turning and cause an avalanche of spice containers.  Of course, that always happened when I was cooking and trying to find something quickly.

My son often heard me complain about my pantry cabinet and spice organization.  This past Mother's Day, he surprised me with the Deluxe Spicy Shelf.  I was thrilled!  I had never seen one before, but the picture on the box looked totally awesome and perfect for my needs.  Then, I opened the box!  Yikes!!!  The number of pieces to assemble my new deluxe spicy shelf intimidated me immediately.  I set the gift aside to construct "later".  Even I didn't realize "later" meant 5 months later.


Assembling My Deluxe Spicy Shelf

Deluxe Spice Shelf
Knowing the holidays were fast approaching and I would soon be seeking out those least often used spices, I set aside an afternoon to assemble my much needed organizer shelf.  With no small amount of dread, I opened the box once again.

Imagine my utter shock that it took me less than 30 minutes to assemble the shelves, remove the content from my pantry, and set it all back in completely organized, easy to see and so much easier to find a specific item.  I was so giddy that is was all accomplished in so little time that I considered putting it all in alphabetical order.  I stayed my hand there though because I wanted the things I would need for Thanksgiving toward the front.  Extra, unopened spices went to the back, but I can easily see them!  

As you can see in the photo below, I even found a great use for my carousel.  It has been serving me for so long, I didn't have the heart to toss it.

Spice Shelf

Because my cabinet pantry is so deep, I set one shelf in front of the other, instead of stacking them.  As you can see, that is perfect for me.  My short spices now tower over the taller bottles.

Because I have a few economy size spice bottles, I set them just in front of my carousel.  They are very easy to lift out and grab what I need from behind them.  No more tearing the cabinet apart to find one small bottle.

Spicy Shelf Organizer


 Spicy Shelf Deluxe - Expandable Spice Rack and Stackable Cabinet & Pantry Organizer (1 Set of 2 shelves) - As seen on TV Deluxe (Spicy Shelf Organizer)Check Price


Read More Product Reviews On
ReviewThisProducts.com


House of Sylvestermouse


Note: The author may receive a commission from purchases made using links found in this article. “As an Amazon Associate, Ebay (EPN) and/or Esty (Awin) Affiliate, I (we) earn from qualifying purchases.”


Wednesday, July 4, 2018

Review of Cuisinart Aura Tea Kettle

Why I Bought the Cuisinart Aura Tea Kettle


I am absent-minded. I make a lot of tea. As I start each day I put the water on to boil for my morning pot of tea.  Then I go to my office to check my email or Twitter. I always mean to take my digital timer with me, but even when I remember to take it, I sometimes forget to set it.

My old stainless steel tea kettle had no whistle. You can probably guess what happened. Yes! I forgot all about the water. Hubby wasn't home. A couple of hours later I finally went to the kitchen to get something, but it was too late. The kettle was not only dry, but the bottom was black inside and out. I knew the pot was beyond hope.

I should have learned after letting the kettle burn dry a couple of other times that I should not leave the kitchen when the kettle is on. I was able to salvage the pot before because it was dry but not yet black. This time I knew I needed a new tea kettle -- one with a loud whistle.

Review of Cuisinart Aura Tea Kettle
Unpacking my Cuisinart Aura Tea Kettle


I Order the Cuisinart CTK-S17MR Aura Kettle


Before I ordered the Aura Tea Kettle, I read so many reviews of stainless steel tea kettles my head was swimming. Not a one of them had all five-star ratings. But this one had a four-star rating out of over a hundred reviews, and as I looked before I started writing today there were 151 reviews.

Cuisinart CTK-S17MR Aura 2-Quart Teakettle, Make 2-Quarts of Boiling Water in this Classic Tea Kettle, Metallic RedCuisinart CTK-S17MR Aura 2-Quart Teakettle, Make 2-Quarts of Boiling Water in this Classic Tea Kettle, Metallic RedCheck Price


I needed a kettle that would heat at least two quarts quickly. It had to be heavy enough to take a bit of abuse. I had to be able to fill it  easily from the reverse osmosis faucet. The handle had to stay cool when the kettle was hot. The top had to be easy to remove and the kettle had to work on my glass-top electric stove.

In addition, I wanted the tea kettle to look happy in my kitchen and be reasonably priced.This model comes in many colors, and I picked the red tea kettle because it looked best in my kitchen. Most important, of course, the tea kettle had to have a whistle loud enough to hear from my computer room.


Review of Cuisinart Aura Tea Kettle


Directions for Using the Aura Tea Kettle

After unpacking my new tea kettle, I read the directions and followed them.
  • Wash with warm soapy water and rinse before first use.
  • Don't fill past the fill line. 
  • Use a medium high setting on the stove.
  • After the kettle reaches a full boil, let it sit for 20 seconds before pouring.

Review of Cuisinart Aura Tea Kettle
Getting My New Tea Kettle Ready to Use

My Review

I have now had my tea kettle for six months. The finish is still shiny. There is no sign of rust on the inside or outside. No plastic has melted from the handle or spout lid. I have followed the directions to use only medium high heat, so I have used a seven setting on my stove instead of the highest setting that I used with my old kettle. I have found that a full kettle heats in about ten minutes. I'm wondering if those who gave this tea kettle bad reviews followed the directions.

The one thing I would change would be to put the fill line where it is visible from the inside of the kettle when I'm filling it. It's under the spout on the outside. I now know where that line would be if it were on the inside, and I've had no problems. I just think it would be more convenient to have the fill line on the inside under the spout instead of on the outside.

The whistle is very loud, but I can still get distracted if I'm on the computer. For this reason I also take a portable timer set for ten minutes with me into my computer room. When the timer goes off or the whistle screams at me, I head back to the kitchen. I let the boiling water sit for 20 seconds, as per directions,  and then pour it into a large teapot. After it steeps for five minutes I'm ready for that first cup of morning tea.

I highly recommend this tea kettle. The timer also helps keep me focused. When I'm concentrating on writing I can forget almost anything unless it's ringing on my desk a foot from my ears. If I step away from my desk, I will hear the whistle from wherever I go and head for the kitchen.

If you need a new tea kettle or want to get one as a gift, I believe you should consider this one. And while you're at it, get the timer, too. You will find lots of uses for it since you can set it for hours, minutes, and seconds.


Note: The author may receive a commission from purchases made using links found in this article. “As an Amazon Associate, Ebay (EPN) and/or Esty (Awin) Affiliate, I (we) earn from qualifying purchases.”


Friday, May 4, 2018

Cabinet Door Spice Gripper Clips Strips Reviewed

Cabinet Door Spice Gripper Clips Strips Reviewed
Sometimes the simplest things are truly the best solutions! 

I have spent months trying to find a spice rack for my kitchen that would be pretty and convenient.   I looked at shelves, counter-top carousels, cabinet shelf risers and more.   I even considered converting one of my kitchen drawers into a spice holder.  But none of those ideas were the solutions I really wanted.

In our previous home, I had a gorgeous spice cabinet that I absolutely loved.  However, when we moved into our current house, that rack was too tall to hang on the wall between my cabinets and counter.  While I welcomed the taller kitchen cabinets, I really did hate to say goodbye to my lovely spice rack, but life moved on.  

At that time, I settled for an ugly, plastic carousel that would fit in my panty which was meant to be a temporary solution.  Now, nearly 20 years later, I am still using that carousel, except over the years it has been shoved further and further back into the pantry so I don't have to look at it every time I open the pantry door.  The spices I used most often sat on the front of the pantry shelf for easy access, but when I needed something behind them, it was a major pain to move everything around. 

This past Thanksgiving highlighted how desperately I needed a different spice storage solution.  With at least 4 cooks in my kitchen, too much of my own time was spent searching for the spices we needed back on the old carousel.  If anyone else tried to find a spice, they inevitably knocked jars off the spinning carousel.  

Truly, enough was enough!   And, so the search begin.  You can see my solution pictured on the right.


Pantry Door Spice Holder Installation


Pantry Cabinet Door Spice Rack Glipper Clips Strips
I resolved my problem with a set of Spice Gripper Clip Strips.  These strips were extremely easy to put up.  I cleaned the door with the alcohol pad that was included, removed the back tape protector strip and pressed my new gripper clips in place.  I did not use the included screws.  They were not necessary.   

My new spice holders are lightweight and plastic which means they will probably break eventually with daily use, but they are so inexpensive that I am not sweating that eventuality.  The convenience of having my spices hung on the pantry door is well worth any downside in the future.

Viola', instant spice rack inside my panty door and extremely convenient! 

I will be the very first to tell you how shocked I am that I love, I mean absolutely love my new spice gripper clips.  I should have done this decades ago.


Pantry Door Spice Holders Description


 SimpleHouseware 30 Spice Gripper Clips Strips Cabinet Holder - 6 Strips, Holds 30 JarsCheck PriceThe gripper clip strips have 5 clips per strip.  However, you can separate them into shorter strips if so desired.  The 5 clip strips are perfect for my pantry door, so I didn't need to shorten them.  

I was originally concerned that the space used when the door closed would be basically the same if the spices were still sitting on the shelf.  But, I was amazed to see that less than an inch of space is required to remain bare on the shelf in the front to accommodate the hanging spices.  Fabulous!  Not only do I have new convenient spice holders, but they are also space-savers.  Even better!!!

The strip package is a combination of white hangers and black hangers.  I used both.  Mixing them does not bother me even though I thought it would.  Perhaps, I am just grateful to have a spice holder solution. 

The only negative that I have found is that I will be required to replace each spice with the size spice jar on each clip once I use it the first time.  Since the hangers are plastic, they won't spring back to a smaller size once they are stretched out to hold a wide bottle.  Again, I can live with that.  After all, there are no nail or screw holes in my pantry door and I prefer that mild downside over holes in my cabinet door.


Read More Product Reviews On
ReviewThisProducts.com


Additional Kitchen Organization Suggestions and Reviews on Review This!
 
Kitchen OrganizationOrganizing Your Kitchen Cupboards - Where to Start?
Get organized in your pantry - let me show you how I overcame a couple of the problem areas in my kitchen cupboard.

Wall Decor 3 Ways to Add Color to Your Wall Without Painting
Check out these three creative ways to add color to your walls without having to paint. The metal spice racks are particularly stylish. They fit with virtually any décor style; modern, rustic, country, contemporary, and traditional.

Kitchen Cupboard Storage Ideas Basic Cupboard Storage Ideas to Consider When You're Doing a Kitchen Makeover
Planning a kitchen re-do? Check out these basic cupboard storage design ideas first.... 


House of Sylvestermouse


Note: The author may receive a commission from purchases made using links found in this article. “As an Amazon Associate, Ebay (EPN) and/or Esty (Awin) Affiliate, I (we) earn from qualifying purchases.”


Saturday, January 13, 2018

Easily Increase Your Vegetable Intake with a Spiralizer

how to make zucchini noodles with a vegetable spiralizer
Image by Lou of Lou's Designs
If you're looking to increase your vegetable intake or reduce some of the heavy carbs like pasta from your diet then a spiralizer could be the answer.  Let me review why I think you'll adore having a vegetable spiralizer - I personally love mine, I don't know why I didn't get one sooner.

At the time of writing this I'm doing the Arbonne 30 Day Plan to Healthy Living and Beyond and basically that means that (for this month at least) I can't eat pasta, I can eat zucchini however ... enter zoodles! 

I have been meaning to try and made zoodles aka zucchini noodles for ages which is the whole reason I purchased my vegetable spiralizer.

Making the zucchini noodles was so easy and I'm now seeing lots of other recipes using other vegetables in place of pasta.  What a cool way of getting your child to eat more vegetables than to make their spaghetti bolognaise with zoodles?

So my vegetable spiralizer came with three different blades like the Paderno World Cuisine one below, but you can also get them with 7 blades, Amazon's best selling vegetable spiralizer comes with 7 blades and is the second one featured.


The actual one that I have doesn't seem to be available online which is why I've given you two alternatives.  Now I've only used the blade to made noodles so I'd just get the 3 blade one personally, but...

They were super easy to make you simply placed the zucchini (or vegetable of choice) on the spiky guard, making sure that the other end is in the middle of the round thing that is going to basically core your zucchini so that it looks like a very weird toadstool after the noodles are all made.

The next step is to simply turn the handle, however if that is all you do you won't get very long noodles, you'll just get little curls (they don't say that in the instructions).  What you need to do is as you're turning the handle you need to also be applying a gentle pressure inwards (towards the vegetable) then it will work beautifully.

It is super quick and I simply popped the zoodles into boiling water for a few minutes - basically treating them like fresh pasta noodles.  I've since been told of other ways of cooking them that involve almost sauteing them in coconut oil, but I haven't tried that (and probably won't).

how to make zucchini noodles so that your kids want to eat their vegetables
Image by Louanne Cox, Arbonne Independent Consultant

I would recommend starting with zucchini as it's quite a bland vegetable which makes it ideal to replace spaghetti.  I would also recommend a pinch of salt in the water when cooking it, I didn't do this the first time and it was much better when I did do it.

You can use sweet potato, carrot, parsnips and who knows what other vegetable, just use your imagination.

I will be trying out sweet potato next as I think that will go really well with a number of dishes I enjoy.

Have you ever tired zoodles or thought about making them?  If so then why wait, just do it as Nike would say!

Let me know in the comments if you've tried any other vegetables as I'd love to hear how they went.


Note: The author may receive a commission from purchases made using links found in this article. “As an Amazon Associate, Ebay (EPN) and/or Esty (Awin) Affiliate, I (we) earn from qualifying purchases.”


Sunday, September 10, 2017

Basic Cupboard Storage Ideas to Consider When You're Doing a Kitchen Makeover

Photo Via Pixabay
Kitchen Renovations Begin in the Mind - If You've Ever Tackled a Kitchen Renovation You Know Exactly What that Means

Once the reno-bug bites us, our thoughts are consumed with trying to add all the things we've always wanted in our soon-to-be brand new kitchen.

Let's review a quick list of the basics to consider when you first start the project.

Break down your kitchen cupboards into categories, then search out the options for each.

See the Pinterest Photos below for Examples of Each.

DISHES (Plates, Cups, Mugs, Casseroles etc)
  1. A pull-out China cupboard. Check it out below in the Pinterest board! It looks very similar to the pullout shelves you see in a pantry cupboard, except the pullout shelves are designed to store your dishes.
  2. Large deep pull-out drawers that fit your plates, saucers and bowls.
  3. Open slots where your plates simply slide in and are revealed in the room, adding a decorative component.
POTS & PANS & COOKIE SHEETS
  1. Pull-out drawers are a standard solution, however there are various designs to decide upon. Check them out below in the Pinterest Board.
  2. A pull-out shelf in a cupboard where you can easily access your items. There are various styles of pull-out shelves to consider; some are metal with funky sorting slots, and others are simply open so you can organize them any way you choose.
  3. Keep them out in the open as a decorative feature by hanging them on a specially designed wall or above a center island.
  4. For all your cookie sheets and long narrow pans, add a section where you simply slide them into a cupboard for easy access. You'll see several ideas in the Pinterest Board below.
SMALL APPLIANCE STORAGE
  1. Create a small appliance storage cupboard in your kitchen, easily accessible from the counter. Include shelves that utilize the entire height of the kitchen cabinetry and fill the closing cupboard with your daily items; blender, coffee machine, vitamix, toaster, and all the other funky small kitchen appliances.
  2. Create a Coffee Serving Cupboard - They're so Cool! Take a look at some of the ones featured below in the Pinterest Board. Have all things coffee included in your coffee cupboard and simply close the cupboard for a clean finished look.
SPICE CABINETS
  1. Spice storage tends to come in two options, vertical and horizontal. Pull-out cupboards beside the stove tend to be the most popular choice, but you can also consider a pull-out drawer with slots for each spice to fit for easy label reading.
  2. Construct open shelves on the backsplash that hold all your spice needs. You'll see an example of several below.
  3. Create a narrow shelving system built onto the inside of a pantry door that holds all your spices. Again, you'll see an example in the Pinterest board below.
FOOD STORAGE
  1. When a full pantry isn't an option, try upside down wire racks installed on an angle inside your cupboards to hold your canned goods. You'll see an example of one below in the Pinterest board.
  2. Designate one section of cupboards from top to bottom with pull-out shelves to hold all your food items.
  3. Use the inside of a small pantry door to hold a good portion of your food items.
A Unique IDEA if Your Kitchen Space Allows:

If you've ever watched HGTV you may have already seen this: A Kitchen without upper kitchen cabinets.

The upper section of the kitchen simply features open shelves on the wall that highlight decorative useful items.

But where will all your 'stuff' go? In your huge walk-in pantry that's where!

Design a pantry (Butler's Pantry) that's almost like another small kitchen. Include a wine fridge, shelves for all your dishes, small appliances and food. Put the microwave in there too. Be sure to check out some of the Butler Pantrys featured below, they're awesome!


Note: The author may receive a commission from purchases made using links found in this article. “As an Amazon Associate, Ebay (EPN) and/or Esty (Awin) Affiliate, I (we) earn from qualifying purchases.”


Most Recent Reviews on Review This Reviews


Search for Reviews by Subject, Author or Title

The Review This Reviews Contributors


SylvestermouseSylvestermouseDawn Rae BDawn Rae BMbgPhotoMbgPhotoBrite-IdeasBrite-IdeasWednesday ElfWednesday ElfOlivia MorrisOlivia MorrisTreasures by BrendaTreasures by BrendaThe Savvy AgeThe Savvy AgeMargaret SchindelMargaret SchindelRaintree AnnieRaintree AnnieLou16Lou16Sam MonacoSam MonacoTracey BoyerTracey BoyerRenaissance WomanRenaissance WomanBarbRadBarbRadBev OwensBev OwensBuckHawkBuckHawkDecorating for EventsDecorating for EventsHeather426Heather426Coletta TeskeColetta TeskeMissMerFaeryMissMerFaeryMickie_GMickie_G


Review This Reviews is Dedicated to the Memory of Our Beloved Friend and Fellow Contributor

Susan DeppnerSusan Deppner

We may be apart, but
You Are Not Forgotten


“As an Amazon Associate, Ebay (EPN) and or Etsy (Awin) Affiliate, I (we) earn from purchases.” Disclosure Statement

X