Showing posts with label Recipes. Show all posts

Tuesday, October 18, 2022

Reviewing Baking Irish Soda Bread With A Twist.


Irish Soda Bread

Soda bread is bread but made without yeast and there is no need to wait for it to rise or have resting periods. So it is a very quick and easy delicious bread to make. 

You can find the basic recipe in many places online but I wanted to tell you about the things I do to make it a little extra special.

I first made Irish Soda bread with my Mum and have continued t make it throughout my life. It is a bread I really like and it is easy and fun to make. 


What You Need To Bake Soda Bread

Weighing scales

A large mixing bowl

A normal eating knife

A teaspoon

A clean clear surface 

A measuring jug 


Irish Soda Bread


Basic Ingredients To Bake Soda Bread

Wholemeal strong flour 500g

2 teaspoons of sea salt or ordinary salt if you don't have sea salt

1 teaspoon of bicarbonate of soda

400ml of milk. Whole milk is recommended but I have found you can use whole milk or semi-skimmed and I also use Almond milk. 

1 lemon or about 4-5 teaspoons of lemon juice if you don't have a lemon to squeeze

2 teaspoons of honey - I have found you can omit this if you don't like or cannot have honey.


Irish Soda Bread cooling

 Baking Method

  • Pre Heat oven to gas mark 6 or 200C/180C fan
  • Mix together in a large bowl the flour, bicarb of soda and salt.
  • This is also the time to add any other optional dry ingredients
  • Mix the milk and lemon juice together in a jug then wait one minute and it turns into buttermilk. Add the honey at this stage if you wish.
  • Pour the milk mixture into the bowl and stir gently ideally using a knife, not your hands, so the dry ingredients and the milk mixture come together in a sticky dough. 
  • Handle the dough as little as possible. This bread is much better the less we handle it. 
  • Take the dough which will feel quite sticky and place it onto a floured surface. I use the same wholemeal flour.  Quickly shape it into a round or oval shape covering all sides with the flour. 
  • The dough should then be placed on a floured baking tray and make a cross on the top with the knife. Then put it straight into the pre heated oven. You do not need to allow any time for rising with this bread recipe, in fact the sooner you get it in the oven at this point the better. 
  • It will need about 40 minutes in the oven. However, we have found in a fan oven it needs a little less. So I generally check it halfway through.
  • After baking leave it to cool on a wire rack. Or eat it warm. 


Additional Ingredients To Make Soda Bread Special

I have experimented with quite a few ingredients and these are my favourites. All of these should be added to the dry flour mix before adding the milk.

If you add a lot more dry ingredients you will need to increase the amount of milk mix accordingly, so that it is not too dry. 


Rosemary Herb


Rosemary- we have lots of rosemary in the garden so I just cut some fresh green tender growth beforehand and wash it then chop it very finely and add it to the mix. It smells amazing and is lovely in this recipe.

I am thinking you could add any herbs you like to this recipe. I have wondered what it would be like with lavender or chives. 


Cinnamon- We both love cinnamon and so add it to this recipe. It smells and tastes gorgeous and an added bonus is the whole house is beautifully scented of cinnamon! 

I would also like to try ginger when I am making more of a bread-cake mix. 


Oats. We just use normal breakfast porridge oats and add about a cupful to the recipe. If you do this you will find you need to increase the amount of milk accordingly or it will be too dry. 

Adding oats gives the bread more body and makes it more into a very tasty and filling healthy cake.  

Fruit. I have tried a lot of different fruits and I think the most successful are dried good quality raisins and cherries either fresh or frozen -ones defrosted beforehand. You could add whatever are your favorite fruits. 


If you are making more of a soda bread - cake you can also sprinkle with icing sugar or decorate the top to your individual taste after baking. This makes it unique and individual for occasions like Halloween or Christmas bread. 

Now you can add all these additional ingredients but it is probably best to exercise some restraint and add one or two extra and see how you like it. 

You can eat it with butter, margarine, cream or jam or it tastes just lovely on its own. We often have the simple bread recipe mix with no extra ingredients with a stew or with chilli. When we add the extra ingredients we like to eat it warm on its own. 


I prefer this soda bread mix warm but If it does cool completely and we want it warm we find it is perfectly fine to warm up again with 5 minutes in the oven without burning or losing its quality. 

I like making this bread as it is very quick, easy and satisfying to make. You can adapt the recipe to suit you, and it can be vegetarian and diabetic-friendly.

I am honestly not sure how long it should last as a loaf is always gone in a maximum of two days here! I imagine perhaps three or four days stored properly would be about right. 

This soda bread is wonderful as a supper snack, with the main meal and also, especially if you add oats as breakfast.


I like baking but I do not get much time these days so this quick recipe is great for me. I am sure the true chefs and avid bakers amongst you can make this even more delicious! 

The whole task takes about an hour and most of that is the oven doing the cooking so maybe 15-20 minutes or less of preparation time so is easy bread making.

We find it is especially lovely to eat home made soda bread warm on an autumn or winter's day and often it does not last long enough to completely cool on the rack!


Find More Recipes 

More Great Recipe Reviews from Contributors on Review This Reviews


Note: The author may receive a commission from purchases made using links found in this article. “As an Amazon Associate, Ebay (EPN) and/or Esty (Awin) Affiliate, I (we) earn from qualifying purchases.”


Sunday, October 9, 2022

Happy Canadian Thanksgiving! Here's My Mom's Stuffing Recipe

moms stuffing recipe

For those who don't know, it's Canadian Thanksgiving this weekend.

Growing up, early October was always a time when we planned to be together as a family.

For me, heading to my mom and dad's house with the kids was a wonderful weekend: Time with my brothers and their families, as well as a great time with mom and dad.

Since mom and dad are both passed on now (I still can't believe I'm typing that!) I miss and treasure those memories to the core of my being.

I must say, I'm looking forward to dinner tomorrow with the kids. Unfortunately, it won't be with all the kids, as I have seven (4 sons, 2 stepsons, and a stepdaughter). I only use the word "Step" to respect their mom. My stepkids have been a part of my life for 40 years - I consider them my kids, but I hold back on that declaration out of respect for their mom. Being a mom myself, I understand that 'feeling.' - the feeling of being 'the mom.'

Anyway, I digress!

So in honor of Canadian Thanksgiving, I wanted to share my mother's turkey stuffing recipe. It has long since been my recipe; I just made it today for our Thanksgiving dinner tomorrow.

My Mother's Turkey Stuffing Recipe:

Ingredients for My Mom's Stuffing Recipe:

  • Celery
  • Onion
  • Stuffing Bread OR
  • Regular Bread Cut-Up with Spices
  • Spices if adding on your own: Sage, Poultry Seasoning,
  • Sausage (I use breakfast sausage)
  • 3 Tablespoons of Rice (Basically a handful)
How to Prepare Mom's Stuffing:

1) In a bowl, add cut the bread up into chewable cubes (sometimes you can get stuffing bread already cut up)

2) If you don't have cut-up stuffing bread and need to make your own stuffing bread, here's what to do:
  • In a large mixing bowl, cut bread (any bread that is your favorite, although heavier bread is better) into cubes
  • Add Sage - be liberal with the Sage - I add about two or so tablespoons, depending on how big the turkey is and how much stuffing there is
  • Add Poultry Seasoning - probably about 2 tablespoons
3) Fry the sausage separately - I buy breakfast sausage - and, after cooked, cut the breakfast sausage into bite-sized pieces

4) In a Frying Pan, in Butter:
  • Fry one chopped onion
  • Add one entire stock of celery (chopped into bite-sized pieces)
5) Add the celery/onion fried mixture and the cut-up sausages to the bread/sage/poultry seasoning bread mixture

6) Add the rice to the bread mixture

Mix it all together until it sticks together nicely. 

It should look 'wet' and be compacted together.

By the way, what's the secret ingredient to stuffing that makes it stuffing - it's the Sage! But that's been a flavor I've been used to my entire life when it comes to stuffing!

If you've never added Sage, give it a try - by the way, that's ground sage! You can find it in the spice aisle of your local grocer.

NOTE:

I prepare this the night before, put it in a ziplock bag, keep it in the fridge, then stuff the turkey in the morning <---- Mom taught me that trick too.

My number three son, Joshua, loves this recipe as much as I do, and that alone makes me so happy! Thank you, Joshie, for being a kindred stuffing lover!

Happy Thanksgiving to all - These times haven't been easy, so it's essential to live in the moment and enjoy spending time with the ones you love.


Note: The author may receive a commission from purchases made using links found in this article. “As an Amazon Associate, Ebay (EPN) and/or Esty (Awin) Affiliate, I (we) earn from qualifying purchases.”


Monday, October 3, 2022

Salt Potatoes a Tasty Side Dish

 These easy-to-make salt potatoes are a perfect side dish to compliment any meal, and your family and friends will love them.

Salt Potatoes a Tasty Side Dish

Salt potatoes are a regional side dish that originated in Syracuse New York. The potatoes used for salt potatoes are, first harvested small young potatoes.

As the potatoes cook, the salt forms a crust on the outside, while the inside is soft and creamy. I garnished my salt potatoes with fresh parsley and chives and served them with melted butter to pour over the soft creamy inside.

I honestly have never heard of salt potatoes before. I was telling a friend that I was going to smoke a turkey breast over the weekend and he suggested making salt potatoes as the side dish.

Salt Potatoes

We have lived in Western New York for 33 years and I have never seen these in the grocery store until now. Apparently, you can buy salt potatoes in a kit. So, look in your local grocery store to see if you can find Salt Potatoes in a kit.

If you can't find a kit, you can use young small white potatoes and one cup of salt to six cups of water.

How to make Salt Potatoes:

5 lbs. small white potatoes (Washed)

1 cup salt

6 cups water

1/2 cup melted butter

Fresh parsley (Chopped)

Fresh Chives (Chopped)

Directions:

  1. Bring the water and salt to a boil until all of the salt has dissolved.
  2. Add the potatoes and boil for 25 to 30 minutes until the potatoes are soft and tender.
  3. Drain the water, pour over the melted butter and garnish with parsley and chives. Serve with more melted butter.
Needless to say that these salt potatoes were a big hit with the whole family. They made a perfect side dish for my Hickory Smoked Turkey Breast.

Here is the link to my:

Find more recipes on Review This here:


Note: The author may receive a commission from purchases made using links found in this article. “As an Amazon Associate, Ebay (EPN) and/or Esty (Awin) Affiliate, I (we) earn from qualifying purchases.”


Tuesday, September 27, 2022

Air Fryer Apple Hand Pies

 Air Fryer Apple Hand Pies are so easy to make, and make the perfect after-school or anytime snack for your family. My review will show you just how easy these are to make.

Air Fryer Apple Hand Pies
Air Fryer Apple Hand Pies - Reviewed

The weather is starting to cool off, and that always puts me in the mood for apple pie. Instead of making a whole apple pie, I decided on making these easy hand pies in my air fryer.

I bought the 9-inch pie crust ready-made and a can of apple pie filling. If you would like to make your own pie crust and apple pie filling See my recipe here: Sam's Apple Pie.

Apple Hand Pie Ingredients:

  • 2 pie crusts (9-inch)
  • 1 can apple pie filling (I used a 21oz. can of Duncan Hines Comstock Apple Pie Filling) 
  • 1 egg beaten
  • Water to wet the edges
  • White sugar to sprinkle over top

Apple Hand Pies Air Fryer

I cut out 5-inch circles from the pie crust. I didn't have a 5-inch cookie cutter so I used a small bowl that measured 5-inches across.

I got three circles out of each pie crust, and after rolling out the remaining dough I got three more for a total of 9 hand pies.

Place one tablespoon of pie filling in the middle of each cutout, wet the edge with water, fold over and crimp with a fork.

Hand Pies

I brushed each hand pie with the beaten egg mixture and poked a fork through in three places to help release the steam. Then I sprinkled the tops of each with white sugar.

Air Fry Apple Pies

I started my Ninja Air Fryer and set it to Air Crisp. Set the temperature to 350 degrees and the time to 8 minutes. I could only fit four at a time in the basket of my air fryer, you don't want them to touch. Times and Temperatures may vary with different air fryers.

Cooling Apple Hand Pies

I set them on a rack to cool for at least 10 minutes. Serve with ice cream, or as you see in the intro photo I served some with caramel sauce. 

My grandsons were visiting so needless to say that these didn't last very long. The best thing about these is that they are so easy to make with an air fryer.

Don't have an air fryer? No problem preheat your oven to 350 degrees and bake for 20 to 25 minutes until they are golden brown.

The Ninja Foodi Grill is so much more than just an air fryer, read my review here:


Note: The author may receive a commission from purchases made using links found in this article. “As an Amazon Associate, Ebay (EPN) and/or Esty (Awin) Affiliate, I (we) earn from qualifying purchases.”


Friday, September 2, 2022

Recipe for a Graham Cracker Crust Without a Food Processor

graham cracker crust recipe
It has been brought to my attention that most cheesecake recipes online, and in many cookbooks, instruct readers to use a food processor to make the graham cracker crust.  Not everyone owns a food processor, therefore today I want to review and share how I crush graham crackers for my cheesecakes without a food processor.  I will also share my graham cracker crust recipe.

I don't own a food processor, but even if I did, I doubt I would get one out, mess it up, and then wash it simply to make a cheesecake graham cracker crust.  My way, the old fashion way, is so much easier!

You only need a gallon size Ziploc bag and a rolling pin. 


crush graham crackers for graham cracker crust
How to Crush Graham Crackers for a Graham Cracker Crust

It is very simple to crush graham crackers to make a pie or cheesecake crust.  

Simply place 15 graham cracker sheets* in the gallon size Ziploc bag, zip the bag closed leaving about a half inch open. The half inch opening keeps the bag from busting when crushing the graham crackers.  

Then, roll a rolling pin over the closed Ziploc bag to crush the graham crackers inside the bag.

When the graham crackers are fully crushed, pour them into a large mixing bowl, and throw away the Ziploc bag.

Now, isn't that much easier than washing the food processor bowl, lid & blade! 


     *Graham Cracker sheets consist of 4 or more small rectangle or square pieces joined by a scored line. The sheet is the full, unbroken graham cracker. 

full graham cracker sheets
Full Graham Cracker Sheet (Honey Maid brand shown)

Graham Cracker Crust Recipe

    graham cracker crust
  • 2 Cups Crushed Graham Crackers  (15 graham cracker sheets)
  • 2 Tablespoons Sugar
  • 2/3 Cup Melted Butter  (11 Tablespoons) 

Combine all ingredient in a large bowl and mix well with a spatula or spoon. 

Press graham cracker crust in a glass pie plate or springform pan.

Fill with cheesecake or pie filling and bake according to specific recipe.

making a graham cracker crust

homemade cheesecake


Check Out More Recipe Reviews at
ReviewThisRecipes.com


Recipe for a Graham Cracker Crust Without a Food Processor Written by:
House of Sylvestermouse


© 2022 Cynthia Sylvestermouse


Note: The author may receive a commission from purchases made using links found in this article. “As an Amazon Associate, Ebay (EPN) and/or Esty (Awin) Affiliate, I (we) earn from qualifying purchases.”


Tuesday, August 30, 2022

A Review of Making Pickles Without Canning


homemade pickles without canning


If you have ever made pickles with a hot water bath canner, there is a good chance you ended up with rubbery, soggy pickles with no crunch.  I did!  I tried many different recipes and even tried adding an envelope of some stuff I bought that was supposed to keep your canned pickles crunchy. They were still awful.  I had pretty much given up and resigned myself to forever buying pickles from the grocery store which was a real shame since we grow our own wonderful cucumbers every summer.

One summer day about three years ago, I was talking to a friend of mine on the phone and lamenting about the sheer number of cucumbers I was getting from my garden when she asked me why I didn't make pickles.  I told her of my lack of success in pickle making and she told me about the cold pack pickles she makes every summer.  I was shocked!  I had never heard of making pickles cold, but I had to admit that it made sense, if you wanted them to stay crunchy.  I wrote down the recipe and immediately checked the cupboards to make sure I had all the ingredients, which I did!  

I could not believe how easy it was to make these pickles!  It did not take any special equipment, all I needed was a large bowl, a knife, a ladel and a jar.  It didn't even have to be a mason jar, any jar with a tight fiting lid would do.  I decided to use some large containers I had saved from some deli pickles I had bought for my husband.  That was another great thing about this recipe, you did not have to make 10 jars at a time and spend a whole day pickle making.  My friend's recipe made two jars at a time and took only a few minutes to make. I remember thinking to myself "this has got to be too good to be true!"

Here is what you need:

  • 6 to 8 medium or 8 to 10 small cucumbers 
  • 1 3/4 cups white vinegar 
  • 1 cup water
  • 1 cup chopped fresh dill weed or 3 to 4 tablespoons dried dill
  • 1/3 cup white sugar
  • 6 cloves garlic, chopped 
  • 1 1/2 tablespoons pickling salt
  • 1 1/2 tablespoons pickling spice 
  • 1/4 teaspoon red pepper flakes, or to taste  (optional)
  • 4 sprigs fresh dill weed or 1 teaspoon of dried

I was lucky, I had all this stuff left over from my prior pickle mishaps and I grow fresh dill in my garden, so I didn't have to go to the store, but if you do, you can get all these ingredients at any large grocery store.  If you don't grow your own cucumbers, just buy some at a produce market.

Making them is really easy, here's how:


Wash and cut up your cucumbers.  You can cut them as rounds or as spears, the shape is up to you.  

Mix the water, vinegar, chopped dill, sugar, garlic, salt, pickling spice, and red pepper flakes in an extra large bowl and stir till the sugar and salt dissolve.

Place the cucumbers in the bowl and stir gently.  Make sure all the cucumbers are fully immersed in the liquid.  Place the bowl on the counter and let it marinate for 2 hours, stirring occasionally.

Take your freshly washed jars and put a sprig of fresh dill in each or a pinch of dried dill, if you don't have fresh.

Ladel the cucumbers and pickling liquid evenly into the two jars and screw the lids on tightly.  Shake each jar and then place them in the refrigerator.

In ten days you will have delicious dill pickles, cold and crunchy.  If you have any left over juice, you can put it in a jar and keep it in the refrigerator till you have some cucumbers to add to it!


Note: The author may receive a commission from purchases made using links found in this article. “As an Amazon Associate, Ebay (EPN) and/or Esty (Awin) Affiliate, I (we) earn from qualifying purchases.”


Wednesday, August 3, 2022

Blueberry Biscuit Scones — An Easy, Low Carb Keto Recipe

Recently I decided to bake a batch of low carb blueberry scones using my favorite mix, the Livlo Blueberry Scones Keto Baking Mix I reviewed in December. It was nearly bedtime and I was tired and not paying close enough attention, and just after I incorporated the small cubes of butter into the Livlo Baking Mix with my pastry blender, I realized that I had added an entire stick of butter (1/2 cup) rather than the half stick (1/4 cup) that was called for. This low carb keto baking recipe is the result of that happy accident, after I turned this "lemon" situation into "lemonade."

Although I didn't have a second package of the blueberry scones mix in the pantry, I did find a bag of Livlo Biscuits Keto Baking Mix, which calls for the same added ingredients in the same quantities and the same baking instructions. By adding it to the bowl with the scones mix and butter cubes, then adding four eggs instead of two and stirring in a cup of fresh blueberries, I not only salvaged the situation but invented a new low carb, keto baking treat.

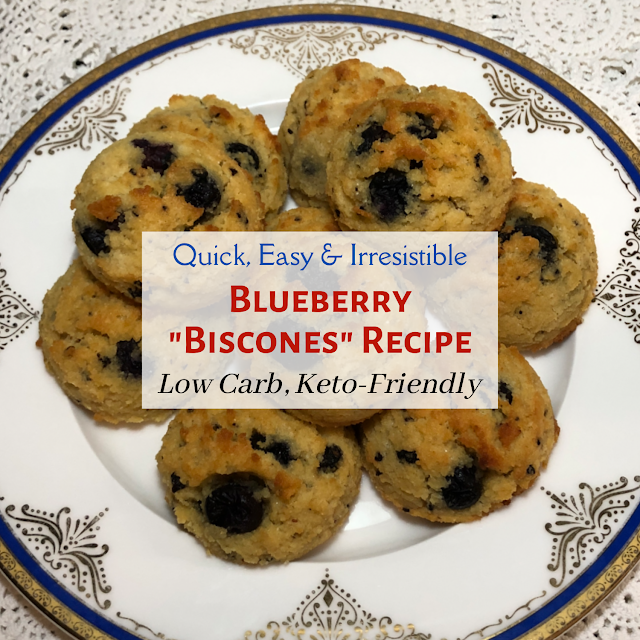
My husband devoured two as soon as they came out of the oven and dubbed this biscuits and blueberry scones hybrid "biscones." His tongue-in-cheek quip has become their official name in this household.

I promptly ordered more of both Livlo keto baking mixes so I could make another batch of blueberry "biscones" last night. Although the texture is different from either drop biscuits or blueberry scones made with wheat flour, these tender, tasty treats are delicious. 

Anyone who follows a low carb or keto diet will love the macros for these delightful baked goods. Each blueberry biscuit scone has just 184 calories, 2.6g of net carbs, 3.6g of fiber, 17g of fat and 5.6g of protein. 

This recipe makes 20 yummy blueberry "biscones," enough to share with others. They don't have to be watching their calories or carbs to enjoy them! 

Quick & Easy Blueberry "Biscones" Recipe Low Carb Keto-Friendly

Recommended Tools and Equipment for Making Low Carb, Keto-Friendly Blueberry "Biscones"

In addition to basic baking tools and equipment like baking sheets, cooling racks and a measuring cup, here are some of the other items you will need to make this recipe, including my personal product recommendations.

Silicone Baking Mats or Unbleached Baking Parchment Paper

You will need either silicone baking mats or unbleached parchment paper to line your baking sheets to keep the biscones from sticking. (I often use a silicone baking mat topped with a sheet of parchment to help keep my baking trays clean.) The Katbite Silicone Nonstick Baking Mat Set of 3 is inexpensive, works well and is a great value. In addition to two 11 5/8" x 16 1/2" mats for lining half sheet pans, it also comes with a bonus 11 1/2" x 8 1/2" mat for lining a quarter sheet pan, which I use in one of my toaster oven baking trays. As of this recipe's publication date, the price for all three mats is less than $15 on Amazon with free Prime delivery. 

I use unbleached baking parchment and love the convenience of flat, pre-cut sheets. Before I discovered them, I used to hate trying to wrestle with the stubborn, curling edges of the sheets torn from a roll! I can recommend the Baker's Signature Precut Non-Stick & Unbleached Parchment Paper Baking Sheets which come in a variety of shapes and sizes.

Large Mixing Bowl

Since you will be making two batches of baking mix batter or dough in one bowl (one each of the Livlo keto blueberry scones mix and one of the Livlo keto biscuits mix) and adding an extra cup of fresh blueberries, you'll need to use a large mixing bowl. Whenever I'm mixing a batter or dough by hand, I prefer using the appropriate size bowl from my OXO Good Grips 3-Piece Stainless Steel Mixing Bowl Set, which includes 1.5-quart, 3-quart and 5-quart bowls, rather than the bowl from my KitchenAid electric stand mixer. The round interior bottoms of the OXO bowls make it easy to stir and scrape ingredients cleanly, and the non-skid exterior bottoms prevent the bowls from sliding even when they are tilted at an angle. For this recipe, the 5-quart bowl is the perfect size. 

Silicone Spoon Spatula (AKA "Spoonula")

One of my favorite silicone cooking and baking spatulas is the GIR Premium Silicone Ultimate Spoonula, Ultimate 11 inch, a combination silicone spatula and spoon with a deep, spoon-like "bowl" and a thin, flexible edge that scrapes up every last bit of dough or batter easily. I love my pretty teal GIR "spoonula," but it also comes in other colors and sizes.

Pastry Blender AKA Pastry Cutter

I started baking when I was a kid and was taught to make biscuits by "cutting in" the butter into the dry ingredients with two knives, using a scissor-like motion. It was only later in my years as a baking enthusiast that I discovered the joy of using a pastry blender, also called a pastry cutter. It makes quick work of cutting the chunks of very cold butter into small, "petite pea-sized" bits while coating them in the flour mixture and distributing them evenly throughout the dry ingredients. 

Two years ago, I bought a new pastry blender that works much, much better than any other I have used. The Spring Chef Dough Blender Large Pastry Cutter is a heavy-duty, professional grade pastry blender with sharp yet thick, sturdy blades and a comfortable, wide, soft-grip handle. It comes in a choice of 3" and 4" sizes (I bought the larger, 4" model) and a range of grip colors. I recommend it highly to anyone who makes biscuit dough, pie crusts, etc., by hand rather than in a food processor.

Spring-Action 4-Tablespoon Stainless Steel Scoop

I have a collection of trigger or spring-action stainless steel scoops that I use constantly for baking and cooking, for everything from portioning cookie dough and cupcake batter to making evenly sized meatballs. Most of mine are made by Norpro, which are excellent quality, very durable and easy and comfortable to use and measure accurately.

By trial and error, I found that my Norpro 56mm 4-Tablespoon Stainless Steel Scoop is the perfect size for dividing the blueberry biscuit scones batter evenly into 20 nicely shaped mounds. Being able to easily make all the biscones the same diameter, height and volumes helps ensure that they bake evenly at the same time. It's also helpful if you are tracking the calories, carbohydrates, and other nutrition metrics of the food you consume.

Low Carb Keto Blueberry Biscuit Scones Recipe (AKA "Biscones")

Baked blueberry "biscones" on plate on lace tablecloth
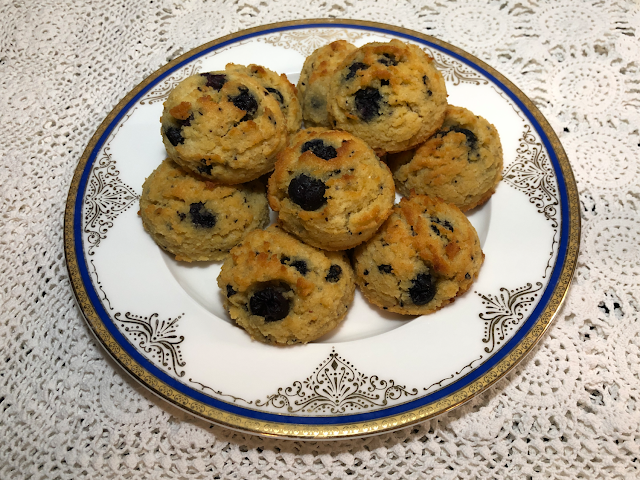
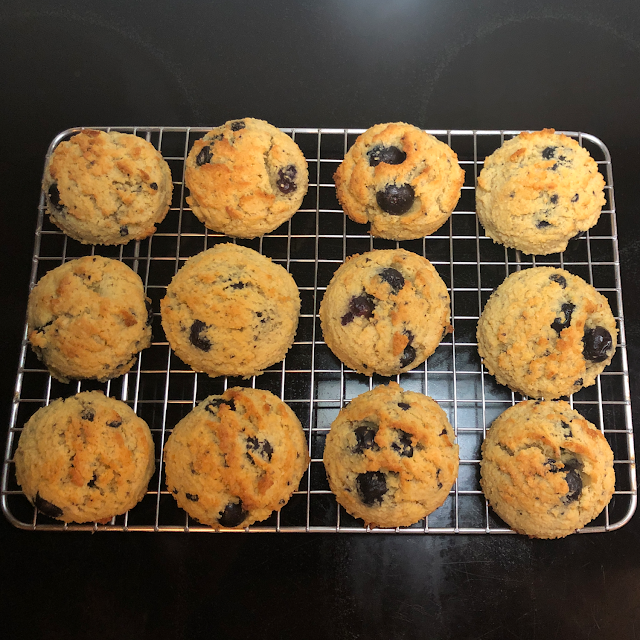
These 10 fragrant, freshly baked low carb, keto blueberry biscuit scones are just half the recipe's yield; the other 10 have been frozen to enjoy in the future.

These keto-friendly, low carb blueberry "biscones" are quick and easy to make, thanks to two delicious Livlo Keto Baking Mixes with clean, wholesome ingredients. Just add cold butter, eggs and fresh blueberries!

Servings

20

Ingredients

Instructions

Ingredients for Low Carb Keto Blueberry Biscuit Scones Recipe
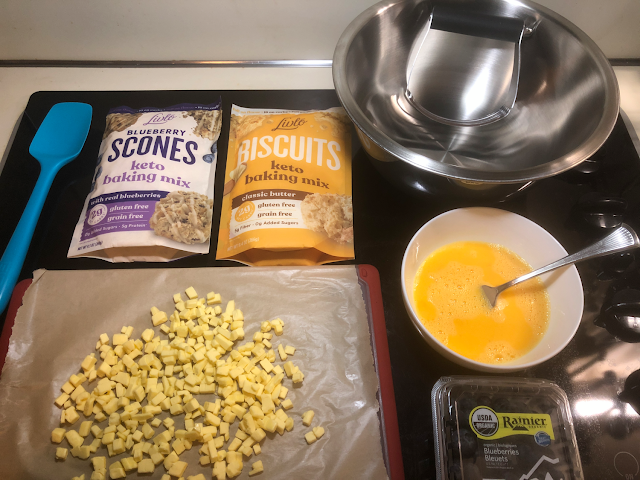
Setting out and preparing the ingredients makes everything go even quicker.

  1. Preheat the oven to 350 ℉. Line two full-size baking sheets (or four smaller baking trays, if baking in a countertop oven) with silicone nonstick baking mats or unbleached baking parchment sheets. Cut the butter into 1/4" cubes, beat the eggs lightly and rinse and dry the fresh blueberries.
Cutting the butter cubes into the dry baking mixes with a pastry blender
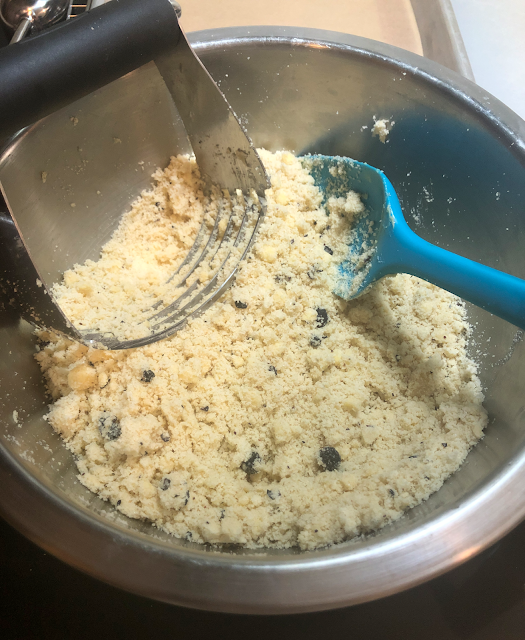
My large, sturdy pastry blender makes cutting in the butter cubes a snap!

  1. Empty both the bags of keto baking mix into a large mixing bowl. Stir the cold butter cubes into the dry ingredients with a silicone spoon spatula (spoonula), then use a pastry blender to "cut in" the butter into smaller pieces and distribute them evenly throughout, scraping the sides and bottom of the bowl and the blades of the pastry blender as needed.
Biscones dough in mixing bowl after adding beaten eggs
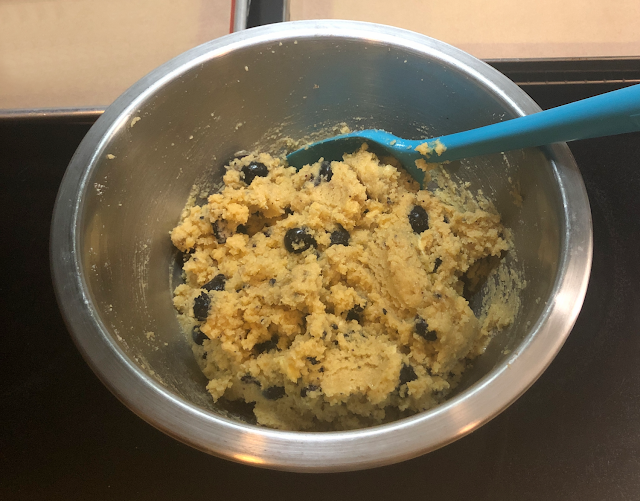
Stirring in the lightly beaten eggs creates a stiff batter or dough.

  1. Stir in the beaten eggs with the silicone spoon spatula to form a thick batter or dough, scraping the bottom and sides of the bowl.
Biscones dough after adding fresh blueberries
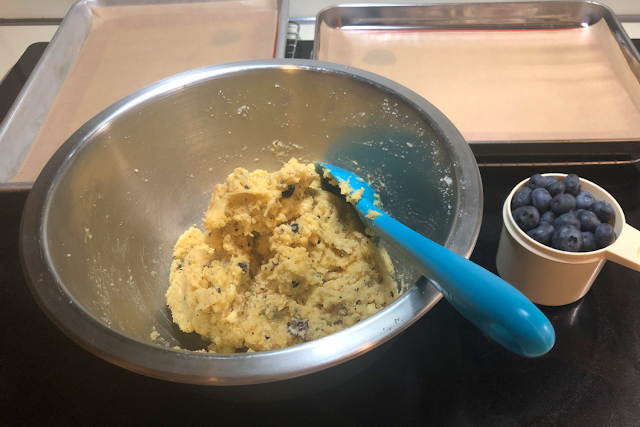
Adding fresh blueberries ensures that every bite is filled with juicy, flavorful berries!

  1. Stir in the fresh blueberries until evenly distributed.
Mounds of raw keto blueberry biscuit scones dough on lined baking sheets
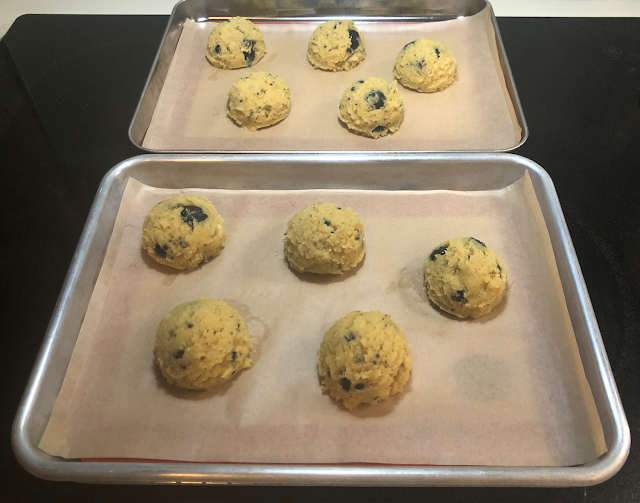
A 4-tablespoon scoop makes it easy to portion the dough into uniformly sized and shaped mounds.

  1. Use the 4-tablespoon stainless steel scoop to portion the dough evenly into 20 mounds on the lined baking sheets or trays.
  1. Bake until the tops of the blueberry biscones are golden, approximately 15 minutes. Do not overbake!
Baked blueberry "biscones" (biscuit scones) on cooling rack
Make sure to let them cool on the baking sheets for a few minutes before transferring the biscones directly to the cooling rack.

  1. Transfer the baking sheets to cooling racks and let the biscuit scones cool for a few minutes before removing them from the pans. (Lifting them off the baking sheet while still hot makes them prone to crumbling.)

Nutrition Facts

The following was calculated by entering the nutrition data for each of the ingredients into a "custom recipe" in the Carb Manager app. 

Amount Per Serving (1 blueberry "biscone" (1/20 recipe))

Calories

184

Total Fat

17g

  Sat. Fat

  0.5g

  Trans Fat

  0g

Cholesterol

0mg

Sodium

5.1mg

Total Carbohydrate

9.2g

  Dietary Fiber

  3.6g

  Total Sugars

  1.5g

    Added Sugars

    0g

  Sugar Alcohols (Erythritol)

  3g

Protein

5.6g

Net Carbs
9.2g total carbs-3.6g dietary fiber-3g sugar alcohols = 2.6 net carbs

2.6g net carbs


Recipe Notes

These blueberry biscones are delicious as is, but even better if you split, butter and lightly toast them or drizzle them with a bit of glaze (the instructions for making a glaze are on the Livlo Blueberry Scones Keto Baking Mix package).

They're great for breakfast, brunch, dessert, or as a low carb snack with a cup of tea or coffee or a glass of cold nut milk or other low-carb, plant-based milk.

Since this recipe makes 20 biscuit scones, I like to freeze some of them to enjoy at a later date.

Blueberry Biscuit Scones — New, Easy, Low Carb Keto Recipe by Margaret Schindel

Posts About My Keto Diet Journey

My First Year on The Keto Diet

Preparing to Succeed on the Keto Diet, Part One

Preparing to Succeed on the Keto Diet, Part Two

Low Carb Muffins & Cupcakes: Treats to Enjoy on a Keto Diet

Low Carb Keto Chocolate Yogurt Granola Chip Pudding Recipe

Good Dee’s Keto Cookie Low Carb Baking Mix Review

Hamama Microgreens Growing Kit Review & Success Tips

My Favorite Hamama Microgreens Seed Quilt Accessories

Keto Cheddar Cheese Biscuits With Chives Recipe

The Ultimate Keto Hot Chocolate Recipe

The Best Low Carb Keto Gift Ideas: Keto Gift Guide

The Best Low Carb Keto Cinnamon Muffins

Wholesome Yum Keto Bread Mix and Yeast Bread Recipe

The Good Chocolate 100% Organic No Sugar Dark Chocolate Review

The Best Advice to Maintain Your Keto Diet Weight Loss

My New Irresistibly Delicious Keto Cheese Crackers Recipe

Luscious Low Carb Keto Triple Peppermint Cheesecake Brownies Recipe

Quick & Easy Livlo Blueberry Scones Keto Baking Mix Review

Snack Better With The Best Healthy Keto Cookie Dough Bites

The Best Quick and Easy Low Carb Keto Pizza Recipe

The Best Quick and Easy Low Carb Keto Shortcake Cupcakes Recipe

Comparing the Best Keto-Friendly Chocolate Hazelnut Spreads - No Added Sugars

The Best Low Carb Keto Sandwich and Burger Buns Mix

Blueberry Biscuit Scones — New, Easy, Low Carb Keto Recipe

The Best Keto Pizza Crust Mix With 0 Net Carbs

An Unusual, Delicious Strawberry Chocolate Tea With 0 Calories

Delicious Sugar-Free Keto Cookies That OREO Fans Will Love

Healthy Pistachio Cherry Chocolate Chip Marshmallow Cereal Treats Recipe

Easy, Decadent, High Protein, Sugar-Free Rocky Road Cottage Cheese Ice Cream

The Best Quick & Easy Low Carb Sausage and Ricotta Calzones

How to Make Refreshing Vanilla Italian Soda (With or Without Cream)


Reviews of the Keto Diet by Barbara C. (aka Brite-Ideas)

My Personal Keto Testimonial

How I Stayed Committed to the Ketogenic Way of Eating

Read More Recipes by Our Review This Reviews Contributors

Read More Product Reviews by Our Review This Reviews Contributors

Read More Reviews About Health and Wellness by Our Review This Reviews Contributors


Note: The author may receive a commission from purchases made using links found in this article. “As an Amazon Associate, Ebay (EPN) and/or Esty (Awin) Affiliate, I (we) earn from qualifying purchases.”


Most Recent Reviews on Review This Reviews


Search for Reviews by Subject, Author or Title

The Review This Reviews Contributors


SylvestermouseSylvestermouseDawn Rae BDawn Rae BMbgPhotoMbgPhotoBrite-IdeasBrite-IdeasWednesday ElfWednesday ElfOlivia MorrisOlivia MorrisTreasures by BrendaTreasures by BrendaThe Savvy AgeThe Savvy AgeMargaret SchindelMargaret SchindelRaintree AnnieRaintree AnnieLou16Lou16Sam MonacoSam MonacoTracey BoyerTracey BoyerRenaissance WomanRenaissance WomanBarbRadBarbRadBev OwensBev OwensBuckHawkBuckHawkDecorating for EventsDecorating for EventsHeather426Heather426Coletta TeskeColetta TeskeMissMerFaeryMissMerFaeryMickie_GMickie_G


Review This Reviews is Dedicated to the Memory of Our Beloved Friend and Fellow Contributor

Susan DeppnerSusan Deppner

We may be apart, but
You Are Not Forgotten


“As an Amazon Associate, Ebay (EPN) and or Etsy (Awin) Affiliate, I (we) earn from purchases.” Disclosure Statement

X