Showing posts with label recipe. Show all posts

Monday, September 9, 2024

Fresh Banana Peppers with Bread Stuffing

 This banana pepper recipe review is an excellent way to use your garden harvest of fresh banana peppers. If you don't have a garden you can buy fresh banana peppers at your local farmers market, or grocery store.

This recipe is how my mother made these delicious stuffed garden peppers and brings back so many fond memories. These peppers stuffed with savory bread stuffing are a perfect choice for a meatless meal on your menu.

Fresh Banana Peppers with Bread Stuffing

Banana Peppers with Bread Stuffing Recipe:


Ingredients:

10 to 12 large sweet banana peppers
12 cups unseasoned bread cubes or 1-1/2 loaf of Italian bread cut into cubes
4 large eggs beaten
2 celery stalks, finely chopped
2 cloves garlic, minced
1 small onion, finely chopped
1/2 cup vegetable or chicken broth
1/4 cup fresh parsley, chopped
1 teaspoon dried oregano
1 teaspoon fresh or dried basil
1/4 cup grated parmesan cheese
1/2 cup seasoned breadcrumbs
Salt and pepper to taste

Instructions:
  1. If you're using Italian bread, cut it into cubes and spread them on a cookie sheet. Bake at 275 degrees for about 10 minutes.
  2. In a large bowl mix all the ingredients with the bread cubes. Mix well until the stuffing forms. If it seems too wet add some more bread cubes or breadcrumbs.
  3. Cut off the top of the peppers, carefully wash, and clean out the insides.
  4. Spoon the stuffing inside the peppers 
  5. Place in a greased glass baking dish. We used our 15 x 10 glass baking dish.
  6. Bake at 375 degrees for 45 to 55 minutes until the peppers are done. The peppers should be soft and you will see a wrinkle in them.
Serve these stuffed peppers as a side dish, or appetizer, or if you're like me make them a meal.


Note: The author may receive a commission from purchases made using links found in this article. “As an Amazon Associate, Ebay (EPN) and/or Esty (Awin) Affiliate, I (we) earn from qualifying purchases.”


Thursday, January 4, 2024

Crispy Air Fryer Tater Tots

 Air fryer tater tots are quick and easy snacks or the perfect side to any meal. These tater tots come out of the air fryer so crispy on the outside and soft and tender on the inside.

Crispy Air Fryer Tater Tots
Crispy Air Fryer Tater Tots - Reviewed

Tater tots are just one of those foods that are loved by kids and adults alike. Our grandson Tyler loves his tater tots made in the air fryer. It is so easy to make tater tots in the air fryer from frozen to the table in about 10 to 15 minutes.

How to make tater tots in the air fryer:

The air fryer is the quickest way to make the crispiest tater tots right from the freezer.

  1. First, set your air fryer to air crisp and the temperature to 400 degrees. The high temperature is important for crispy tater tots. Set the timer for 12 minutes.
  2. I place the frozen tater tots in a one-gallon plastic storage bag. Add one tablespoon of olive oil and toss them around. You can also use a cooking spray if you like.
  3. Place the frozen tater tots in the air fryer basket and lightly season with salt. Cook for 6 minutes then open and toss them around in the basket. This is important so they don't stick together. Cook for the remaining 6 minutes. 
  4. Place them in a bowl and serve plain or with your favorite dipping sauce.
We like to have some different dipping sauces, such as ketchup, ranch, or barbecue sauce. My favorite is the barbecue sauce but when our granddaughters are visiting, the ranch is their favorite.

More seasoning suggestions for tater tots:

  • Smoked Paprika
  • Italian Seasoning
  • Taco Seasoning
  • Montreal Steak Seasoning
  • Old Bay Seasoning
These are just some ideas for different seasonings. You can season your tater tots with whatever you like. The amounts depend on your taste but usually, one tablespoon per basket in the air fryer is enough.

We use our Ninja Foodi Grill to air fry. The Ninja is a combination indoor grill and air fryer. We have had our Ninja for several years and just love it. Any air fryer will work just as well.

For more recipe ideas on ReviewThis Click Below:

ReviewThisRecipes.com


Note: The author may receive a commission from purchases made using links found in this article. “As an Amazon Associate, Ebay (EPN) and/or Esty (Awin) Affiliate, I (we) earn from qualifying purchases.”


Thursday, October 5, 2023

Extra Crispy Chicken Tenders

 These extra-crispy chicken tenders are so crispy on the outside and so tender and juicy on the inside. These are the perfect lunch, dinner or snack your family will love. What a great after-school snack for the kids.

Extra Crispy Chicken Tenders
Extra Crispy Chicken Tenders - Reviewed

With the busy schedules of everybody in the family, we have at least one meal together every week. A couple of weeks ago Fran made these delicious chicken tenders for dinner along with a salad. Everybody loved these chicken tenders, they were gone in no time at all. 

These are so easy to make in the oven, deep fryer, or in your air fryer. We used our air fryer, it's the healthier choice, and it's much faster. We used our Ninja Foodi Grill which is a combination grill and air fryer.

Extra Crispy Chicken Tenders - Ingredients

1 or 2 pounds of chicken strips

1 cup seasoned panko bread crumbs or 1 package extra crispy Shake N Bake

2 eggs beaten

Salt and Pepper to taste

Barbeque sauce or Ranch dressing for dipping

Beat the two eggs in a shallow bowl. Dip each chicken tender in the egg and then, coat the tenders with the bread crumbs. 

For the air fryer, spray the air fryer basket with cooking spray. Set the temperature to 400 degrees. Place the chicken tenders in the air fry basket at least 2 inches apart. If you overcrowd the basket, they won't be crispy. Cook the chicken tenders for 5 to 6 minutes per side until they are golden brown.

For the oven, Place the coated chicken tenders on a cookie sheet lined with tin foil. The tin foil will make it easy to clean up. Bake at 400 degrees for 30 minutes.

Make sure the internal temperature of the chicken reaches at least 165 degrees. I use my Thermo-Pro TP-18 instant-read thermometer. It's a good idea to have an instant-read thermometer handy for all of your cooking needs. 

Another thing that makes these so easy is that, you can buy the chicken tenders packaged and ready to cook at your local grocery store.

These chicken tenders are the perfect weeknight meal for the whole family. We enjoyed every single one of them.

By the way, the photo could have been better but everyone was sitting around the table waiting for me to take the picture.

Find more recipes on ReviewThis here:

ReviewThisRecipes.com


Note: The author may receive a commission from purchases made using links found in this article. “As an Amazon Associate, Ebay (EPN) and/or Esty (Awin) Affiliate, I (we) earn from qualifying purchases.”


Thursday, September 7, 2023

Oven Baked Zucchini Sticks

 These oven-baked zucchini sticks are a great way to use the abundance of your zucchini crop. They make a perfect appetizer for any meal, or just have them as a snack.

Oven Baked Zucchini Sticks

These zucchini sticks or fries are so crispy on the outside and tender on the inside. Bobby and his girlfriend Abby made dinner the other night. They made these delicious zucchini sticks as an appetizer.

If you don't have a garden, just pick up a couple of medium-sized zucchini at the grocery store or your local farmers market. With a few more ingredients that most of us already have in the pantry, you'll be on your way to making this easy and tasty appetizer. 

Baked zucchini fries

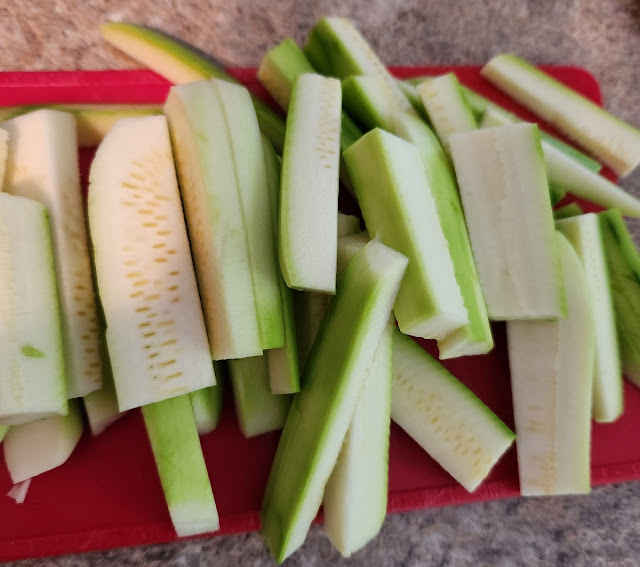
First, peel and cut the zucchini in half. Then, slice them like french fries, about 3 to 4 inches long. This part was my job, Bobby and Abby did the rest.

Prepare zucchini fries

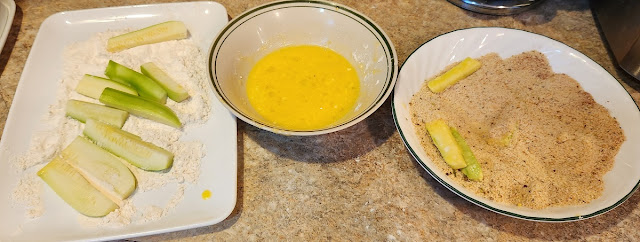
They set up a dredging station with flour, a beaten egg, and seasoned bread crumbs. First, the flour, then dip them into the egg, and then the bread crumbs. 

Baked Zucchini Sticks Ingredients:

2 medium size zucchini peeled and cut

1 teaspoon olive oil

1/2 cup all-purpose flour

1 large egg beaten

1 cup Panko Breadcrumbs

1 teaspoon paprika

1 tablespoon parmesan cheese

Salt and Pepper to your taste

Directions:

  1. Preheat oven to 425 degrees
  2. Peel and cut the zucchini into 3 to 4-inch pieces.
  3. In a flat dish add the flour, salt, and pepper.
  4. Beat the egg in a small bowl and mix with olive oil.
  5. In a flat dish mix the breadcrumbs, paprika, and parmesan cheese.
  6. Prepare a cookie sheet lined with parchment paper.
  7. Dip the cut zucchini into the flour, egg, and breadcrumbs and place on the prepared cookie sheet. Place them at least 2 inches apart.
  8. Bake for 20 to 25 minutes until they are golden brown.
Serve right out of the oven with your favorite pizza sauce or ranch dressing for a tasty appetizer or snack.

For more recipes on Review This Click Here:


Note: The author may receive a commission from purchases made using links found in this article. “As an Amazon Associate, Ebay (EPN) and/or Esty (Awin) Affiliate, I (we) earn from qualifying purchases.”


Friday, June 23, 2023

Air Fryer Fried Dough

 Easy to make air fryer fried dough reviewed.

Air Fryer Fried Dough

You will find this sweet treat at your local County Fair or Church Bazaars. They go by many different names, fried dough, doughboys, or elephant ears. Whenever we visit a local fair the first thing I look for is the fried dough. Fried bread dough with sugar or sugar and cinnamon all over it.

These little sweet treats are just as easy to make at home with your air fryer. Over the weekend, I picked up some fresh dough at our local grocery store to make some pizza. I had some dough left over, but it wasn't enough to make another whole pizza so I decided to use my air fryer to make these little sweet treats.

How to make Air Fryer Fried Dough:

  1. Take a small portion of bread dough in your hand and begin to shape it into a 4 to 5 - inch disc. not too thick.
  2. Set them on a cookie sheet and lightly coat both sides with oil.
  3. Spray the air fryer basket with cooking spray or you can lightly brush it with oil.
  4. Preheat your air fryer to 350 degrees and set the timer to 9 minutes.
  5. Set them in the basket and turn them over after 5 minutes.
  6. While they are cooking melt about 1/2 stick of butter.
  7. Put 1/2 cup of white sugar in a flat dish. You can add cinnamon and mix it together if you like sugar and cinnamon.
  8. When they finish cooking brush with the butter and coat with the sugar mixture.
Make sure you flatten them before adding to the air fryer, as you can see from the picture I made mine a little too thick. They puffed up so much that I considered filling them with strawberry jam but didn't enough on hand. I had room for four at a time in my air fryer basket, I ate one one them before I took the picture. 

If you don't have an air fryer it's just as easy to make these on the stovetop. Check out my recipe here for County Fair Fried Dough.

We love our air fryer, we have a Ninja Foodi Grill and we use it all the time. It's a real time saver for quick indoor grilling or air frying. Check out my review here: Ninja Foodi Grill Review.

For my County Fair Fried Dough recipe on the stovetop, I use my cast iron skillet.


Ninja Foodi 5-in-1 Indoor Grill with Integrated Smart Probe, 3.9 L (4 qt.) Air FryerNinja Foodi 5-in-1 Indoor Grill with Integrated Smart Probe, 3.9 L (4 qt.) Air FryerCheck the PriceLodge LCC3 Cast Iron Combo Cooker, Pre-Seasoned, 10.25Lodge LCC3 Cast Iron Combo Cooker, Pre-Seasoned, 10.25Check the Price


For more recipes on Review This click here:


Note: The author may receive a commission from purchases made using links found in this article. “As an Amazon Associate, Ebay (EPN) and/or Esty (Awin) Affiliate, I (we) earn from qualifying purchases.”


Tuesday, April 11, 2023

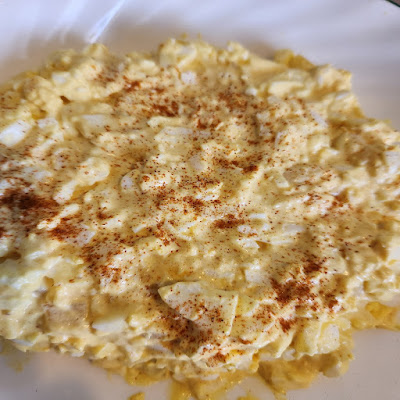
Simple Egg Salad Recipe


Simple egg salad recipe
Simple Egg Salad Recipe - Reviewed
Are you looking for a simple and delicious egg salad recipe? If so, then you have come to the right place.

I'm going to show you how I make my simple egg salad, using only a few ingredients.

This egg salad is so creamy and delicious. It's perfect for your classic egg salad sandwich, or enjoy it on your favorite crackers as a snack.

First, you need to hard-boil your eggs. You can do this by placing them in boiling water for 10 minutes. I don't like to boil my eggs because sometimes the eggs tend to crack while boiling.


Steamed Hard Boiled Eggs

I like to steam my eggs by placing about 2 inches of water in a double boiler. Bring the water to a boil. Place the eggs in the top pan, cover them, and steam them for 12 minutes. You'll get perfect hard-boiled eggs every time.

Cooling hard boiled eggs

After the eggs are steamed, I place them back in the pot with cold water and ice. Leave them for about ten to fifteen minutes. This cooling down period makes them so easy to peel.

Simple Egg Salad Ingredients:

6 hard-boiled or steamed eggs
1/4 cup chopped onions
1/4 cup mayonnaise
1 tablespoon yellow mustard
1/2 teaspoon paprika
Salt and Pepper to taste

I separate the yolks from the whites and mash the yolks with a fork. Then, chop up the whites into small pieces. In a bowl combine the yolks and whites, add the mayonnaise, onions, and mustard, and mix until the egg salad is nice and creamy. 

Perfect Egg Salad

Garnish with the paprika, add salt and pepper to taste, and enjoy this nice creamy egg salad. Some variations if you like a little more flavor and texture to your egg salad, try adding some chopped pickles, parsley, or celery. You can also experiment with different types of mustard, such as Dijon, or whole grain.

What a perfect way to use up those beautiful dyed Easter Eggs. 

Here are two more recipes to make good use of your dyed Easter Eggs from my friend Cynthia:


To make your hard-boiled eggs by steaming them you will need a double boiler.

Farberware Classic Stainless Series 2-Quart Covered Double BoilerFarberware Classic Stainless Series 2-Quart Covered Double BoilerCheck the Price


Click here for more great recipes on Review This:


Note: The author may receive a commission from purchases made using links found in this article. “As an Amazon Associate, Ebay (EPN) and/or Esty (Awin) Affiliate, I (we) earn from qualifying purchases.”


Sunday, October 9, 2022

Happy Canadian Thanksgiving! Here's My Mom's Stuffing Recipe

moms stuffing recipe

For those who don't know, it's Canadian Thanksgiving this weekend.

Growing up, early October was always a time when we planned to be together as a family.

For me, heading to my mom and dad's house with the kids was a wonderful weekend: Time with my brothers and their families, as well as a great time with mom and dad.

Since mom and dad are both passed on now (I still can't believe I'm typing that!) I miss and treasure those memories to the core of my being.

I must say, I'm looking forward to dinner tomorrow with the kids. Unfortunately, it won't be with all the kids, as I have seven (4 sons, 2 stepsons, and a stepdaughter). I only use the word "Step" to respect their mom. My stepkids have been a part of my life for 40 years - I consider them my kids, but I hold back on that declaration out of respect for their mom. Being a mom myself, I understand that 'feeling.' - the feeling of being 'the mom.'

Anyway, I digress!

So in honor of Canadian Thanksgiving, I wanted to share my mother's turkey stuffing recipe. It has long since been my recipe; I just made it today for our Thanksgiving dinner tomorrow.

My Mother's Turkey Stuffing Recipe:

Ingredients for My Mom's Stuffing Recipe:

  • Celery
  • Onion
  • Stuffing Bread OR
  • Regular Bread Cut-Up with Spices
  • Spices if adding on your own: Sage, Poultry Seasoning,
  • Sausage (I use breakfast sausage)
  • 3 Tablespoons of Rice (Basically a handful)
How to Prepare Mom's Stuffing:

1) In a bowl, add cut the bread up into chewable cubes (sometimes you can get stuffing bread already cut up)

2) If you don't have cut-up stuffing bread and need to make your own stuffing bread, here's what to do:
  • In a large mixing bowl, cut bread (any bread that is your favorite, although heavier bread is better) into cubes
  • Add Sage - be liberal with the Sage - I add about two or so tablespoons, depending on how big the turkey is and how much stuffing there is
  • Add Poultry Seasoning - probably about 2 tablespoons
3) Fry the sausage separately - I buy breakfast sausage - and, after cooked, cut the breakfast sausage into bite-sized pieces

4) In a Frying Pan, in Butter:
  • Fry one chopped onion
  • Add one entire stock of celery (chopped into bite-sized pieces)
5) Add the celery/onion fried mixture and the cut-up sausages to the bread/sage/poultry seasoning bread mixture

6) Add the rice to the bread mixture

Mix it all together until it sticks together nicely. 

It should look 'wet' and be compacted together.

By the way, what's the secret ingredient to stuffing that makes it stuffing - it's the Sage! But that's been a flavor I've been used to my entire life when it comes to stuffing!

If you've never added Sage, give it a try - by the way, that's ground sage! You can find it in the spice aisle of your local grocer.

NOTE:

I prepare this the night before, put it in a ziplock bag, keep it in the fridge, then stuff the turkey in the morning <---- Mom taught me that trick too.

My number three son, Joshua, loves this recipe as much as I do, and that alone makes me so happy! Thank you, Joshie, for being a kindred stuffing lover!

Happy Thanksgiving to all - These times haven't been easy, so it's essential to live in the moment and enjoy spending time with the ones you love.


Note: The author may receive a commission from purchases made using links found in this article. “As an Amazon Associate, Ebay (EPN) and/or Esty (Awin) Affiliate, I (we) earn from qualifying purchases.”


Tuesday, October 19, 2021

Make Fresh Basil Pesto


Make Fresh Basil Pesto
Fresh homemade basil pesto reviewed

It’s easy to grow your own herbs. Every year in the spring, Fran buys fresh basil plants, we re-pot these plants and set them out on our deck.

We enjoy fresh basil all season long and into the fall. The plants just keep reproducing. This basil pesto is so easy to make and can be enjoyed in many ways.

Basil pesto is perfect tossed over pasta, spread on crackers or toast, try adding some to your favorite salad. Try it on Garlic bread or a baked potato. 

I’ve even made pesto pizza you can find my recipe here for Fresh Tomato and Pesto Pizza.

Our grandson Bobby loves to cook, and especially with fresh ingredients. This fresh basil pesto is one of his favorites to make. Bobby makes this basil pesto in about 10 minutes. So, it’s easy to have a meal on the table in less than 30 minutes.

Basil Pesto Ingredients:

2 cups fresh basil leaves

1/4 cup pine nuts

1/2 cup fresh grated Romano or Parmesan Cheese

1/2 cup extra virgin olive oil

4 cloves fresh garlic (We love our garlic so, you can cut this in half if you like)

1/8 teaspoon red pepper flakes (can be omitted)

1/4 teaspoon salt

1/4 teaspoon ground pepper

1 tablespoon lemon juice

Directions:

Add the basil leaves and pine nuts into the bowl of a food processor. Pulse the food processor several times to chop and mix.

Add the garlic, cheese, and lemon juice and pulse several more times

Place the lid on the food processor turn it on and pour the olive oil in a steady stream.

Stop and scrape the sides with a spatula and turn it on again for about 10 seconds.

Add salt and pepper to taste. If you use the red pepper flakes add them now and pulse a few more times to mix it all in.

We served our basil pesto over fresh Fettuccine that we made with our Emeril Lagasse Pasta and Beyond machine.

Read my review here: Emeril Lagasse Pasta and BeyondReviewed.

Basil Pesto

Our basil pesto with homemade fettuccine was on the table in 30 minutes or less for a delightful family meal.

We used our Ninja Food Processor to make this pesto. Any food processor or blender will work. If you don’t have a basil plant, you can buy fresh basil at your local grocery store and have this basil pesto at any time. 

It's easy to freeze the pesto to enjoy anytime on crackers or toast. Pour the pesto into ice cube trays and place them in the freezer. After the pesto freezes place the cubes in a freezer bag.


Note: The author may receive a commission from purchases made using links found in this article. “As an Amazon Associate, Ebay (EPN) and/or Esty (Awin) Affiliate, I (we) earn from qualifying purchases.”

Saturday, August 28, 2021

Review of National Marshmallow Toasting Day


Toasting marshmallows over a campfire


This is the perfect holiday to top off a summer vacation.  It is held each year on August 30, so enjoy an end-of-summer vacation by taking a camping trip or having a backyard bonfire (perhaps around your fire pit or outdoor fireplace) and toast marshmallows.   


The marshmallow is a type of confectionery made from sugar, water, and gelatin (whipped to a solid, but soft, consistency) then coated with corn starch. It is used as a filling in baking.  It is also molded into shapes. You can buy marshmallows by the bag or make your own with this recipe here on the Food Network.


Marshmallow Treat


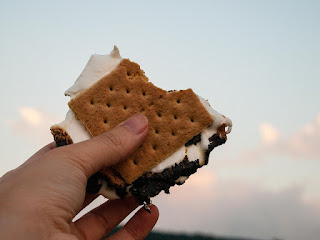
The most popular way to eat a marshmallow is in a S'mores!  Nothing better than a night around a campfire, singing songs, enjoying the outdoors, and topping it off with this sweet treat.


S'mores Recipe:


Having a S'mores
Source: Pixabay


Ingredients:


Chocolate candy bar

Honey Graham Crackers

Marshmallows


Instructions:


Break off a square of Graham cracker

Add a piece of Chocolate.

Toast a big marshmallow over the campfire.

Add the hot marshmallow.

Top it with another graham Cracker.

Eat , savor and enjoy!


Note: For wintertime or anytime you cannot go camping, you can make S'mores in the microwave. Just put them together and pop them into the microwave on high for 15 to 20 seconds.


Recipe Credit: Holiday Insights dot com. 


More Fun Ways to Eat Marshmallows


Hot Chocolate with marshmallows
Source: Pixabay

Top off a cup of hot chocolate on a cold winter day.


Marshmallow filling in candy
Source: Pixabay


Savor marshmallow filling in a yummy candy


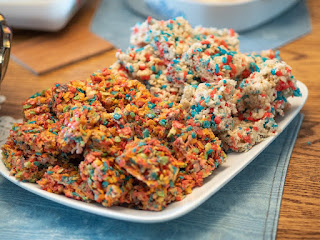
A plate of Rice Krispies treats made with marshmallows
Source: Pixabay


Mix up a batch of marshmallow Rice Krispie treats. 


A gingerbread house made using marshmallows
Source: Pixabay


Decorate a gingerbread house using marshmallows for the snow.


Marshmallow 'peeps' for Easter
Source: Pixabay


A favorite as a marshmallow 'peep' in an Easter Basket


Party Time


Indoor electric marshmallow S'mores maker
Available on Amazon

And for a S'mores party, what could be more perfect than this indoor Electric Stainless Steel S'mores Maker with 4 Lazy Susan Compartment Trays for Graham Crackers, Chocolate, Marshmallows and 4 Roasting Forks. Made by Nostalgia, it has an electric flameless heater to toast your marshmallows to perfection. Perfect for parties and family gatherings.


Toasted Marshmallow Day
August 30


For More Holiday Reviews


*Holiday review of Toasted Marshmallow Day written by Wednesday Elf


Note: The author may receive a commission from purchases made using links found in this article. “As an Amazon Associate, Ebay (EPN) and/or Esty (Awin) Affiliate, I (we) earn from qualifying purchases.”

Wednesday, April 29, 2020

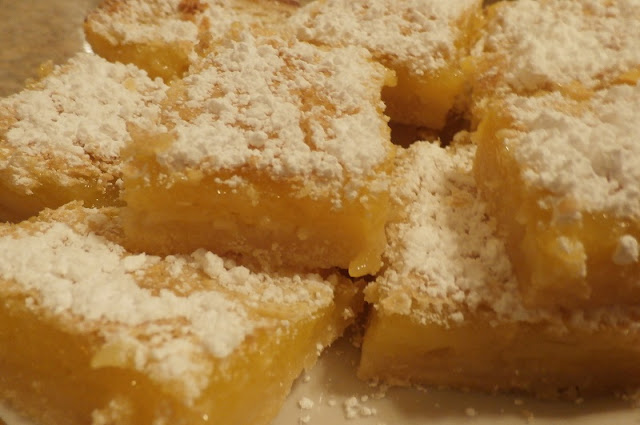
Fresh Lemon Hand Pies

Fresh Lemon Hand Pies


My mother made the best ever lemon meringue pie, it's one of my all-time favorites. Every time she made it I was like, "is it cool enough to cut yet mom".

Anyone else in the house was lucky enough to get a slice with me around. Today I'm reviewing how easy it is to enjoy that lemony taste that brings back some wonderful childhood memories.

Hand pies are so easy to make with store-bought pie crust and lemon filling, or any fruit filling for that matter. This perfect snack or dessert could be ready in 40 minutes or less.

Every year my cousin sends me these giant lemons for his backyard in Arizona. This weekend I decided to make homemade fresh lemon hand pies. The first thing that I did was make the lemon filling.

Homemade Lemon Curd

Lemon curd is really so easy to make. I made this and refrigerated it overnight, but you can make this and let cool for a couple of hours and use it for whatever your making.

Lemon curd is so versatile it can be used for cakes, cupcakes, donuts, or spread it on top of a scone of crackers.

Fresh Lemon Hand Pies Ingredients (Lemon Curd)

1 cup of sugar
1/2 cup fresh lemon juice (4 to 5 lemons)
zest of 2 lemons
5 large egg yolks
1/2 cup salted butter (Cold)

Instructions
  1. You will need a double boiler for this, add some water and bring it to a boil.
  2.  Whisk together the sugar and egg yolks, continue to stir.
  3. Add the zest of the lemons and the lemon juice. Continue to stir the mixture for about 10 minutes, it will begin to thicken.
  4.  After 10 minutes remove the mixture from the heat, and add the butter one tablespoon at a time.
  5. Continue stirring, the mixture will become nice and thick. Once all the butter is melted into the mixture pour it into a bowl and let it cool for 2 to 3 hours before using it.
Pie crust ingredients

2-2/3 cups all-purpose flour
1/2 teaspoon salt
1 cup Crisco (Cold)
6 to 8 tablespoons of Ice Water

  1. Cut the Crisco into smaller pieces
  2. Add flour and Crisco into a mixing bowl
  3. Mix until Crisco begins to fold into the flour
  4. Add ice-cold water one tablespoon at a time 
  5. Mix until a ball of dough forms
Divide the pie crust into two equal parts wrap each with plastic wrap and refrigerate for about a half-hour. I used my KitchenAid Stand Mixer to make the pie crust.

Making Lemon Hand Pies

Now, it's time to assemble and bake these little sweet treats. I rolled each ball of the pie crust out to about a 10-inch circle between two sheets of parchment paper.

Tip: Lay the parchment paper or wax paper on a kitchen towel. This prevents it from moving all over the counter while rolling.

Cut the crust with a 4-inch cookie cutter, place a tablespoon of the lemon curd in the middle. Then, fold them over and pinch the edges together. Press a fork around the edges to seal.

Hand Pies


Poke the middle of each hand pie with a fork. I made 12 hand pies, six out of each half of the crust. You will have to re-roll some of the crust to get the other 2 out of each half.

Baked Lemon Hand Pies

Now you will need two egg whites and a couple tablespoons of sugar. Beat the egg whites in a small bowl.

 Brush the hand pies with the beaten egg whites and sprinkle the sugar over the top. Or you could skip the sugar and dust them with powdered sugar right out of the oven.

Bake on a cookie sheet lined with parchment paper at 350 degrees for about 18 minutes. Set them on a rack to cool and enjoy.

You might enjoy some of my other fresh lemon recipes


Note: The author may receive a commission from purchases made using links found in this article. “As an Amazon Associate, Ebay (EPN) and/or Esty (Awin) Affiliate, I (we) earn from qualifying purchases.”


Saturday, March 30, 2019

Review of Stouffer's Escalloped Chicken and Noodles

Collage of Stouffer's Escalloped Chicken and Noodles

I remember being introduced to Stouffer's Frozen Foods as a teenager in the 1950s when my Uncle Pete went to work for them in Cleveland (the home base of the company).  Frozen foods were fairly new to us at the time and my parents found them to be very handy for quick dinners after working all day.

I found the Stouffer's meals delicious and, as a result, I have been a fan of them ever since. I have tried a large variety of frozen dinners over the years, but none as good as Stouffer's. 


My very favorite is Stouffer's Escalloped Chicken and Noodles, a hearty combination of white meat chicken, egg noodles, mushrooms, celery, carrots and peas in a creamy sauce


Old-Fashioned Home-Cooked Escalloped Chicken Recipe


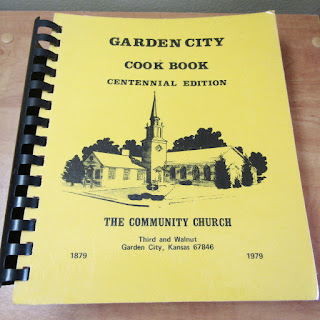
Church cookbook
(c) Elf
An old-fashioned 'from-scratch' recipe for Escalloped Chicken comes from the Garden City Cookbook (Centennial Edition) published in 1979 by The Community Church

My in-laws lived in Garden City, Kansas and this cookbook was compiled by church members to celebrate the 100 year anniversary of the first church in Garden City and dedicated to all of the brave pioneers who in 1879 organized the First Congregational Church in town. First published in 1908 and revised and re-published in 1930, this cookbook is the 1979 edition.

The recipes contained in this Garden City Cookbook were favorites of current church members, many of which were passed down from generation to generation. 


Aunt Alta's Escalloped Chicken


Escalloped chicken and noodles
INGREDIENTS:

1 can mushrooms
1 (4-5 lb.) stewing hen or large fryer
Salt
Celery Salt
Paprika
2 c. fine cracker crumbs
1 recipe of white sauce

WHITE SAUCE:

4 T. chicken fat or butter or oleo
3 heaping T. flour
Broth from chicken and juice from mushrooms
1 c. milk or cream

INSTRUCTIONS:

Boil and then simmer hen until tender and done.  Take meat from the bone and cut in small pieces about ¾-inch long. 

Make medium white sauce.  Put layer of cracker crumbs in flat pan and then a layer of chicken and mushrooms. Season to taste with salt, red pepper and celery salt. Pour almost half the sauce over this and make another layer of each. Pour remaining sauce over this and sprinkle cracker crumbs on top and a little paprika. Bake 450◦ for 30 to 60 minutes, depending on the depth of the pan.

*Author's Note: This 'from-scratch' Escalloped Chicken recipe does not call for noodles, but I imagine noodles could be added or even served on the side or spoon the dish over cooked  noodles.  If you choose to use cream instead of milk, you will find that the dish is very rich. Yum.

Additional Notes:


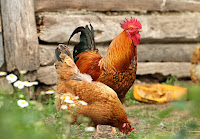
Chickens in the farmyard
Source: Pixabay
This long-ago 'from-scratch recipe is a bit amusing to read, especially the parts about the 'chicken fat' and referring to the chicken as a 'stewing hen'. These are terms we don't use much today. Garden City, Kansas, back in the day, was primarily a farm-based small town in western Kansas, so I can imagine many of the 'stewing hens' were raised by the farmers for their own use. If you were to ask today's 'kids' about where chickens come from, they'd no doubt say “the grocery store” (unless they are farm kids). 


Summary


If you want to make your own homemade escalloped chicken, try the old-fashioned recipe I've featured in this article.  

Or try the one I found online on the Go, Go, Go Gourmet blog for a homemade recipe that duplicates the Stouffer's dish called Stouffers Copycat Escalloped Chicken and Noodles.

When you want the same as a quick, and delicious, dish, use Stouffer's  Escalloped Chicken and Noodles.

For quick, yet tasty, dishes with a wide variety of choices, give Stouffer's Frozen Meals a try.


Happy Eating


For more food recipes, check out:


Review & Recipe by (c) Wednesday Elf 3/23/2019


Note: The author may receive a commission from purchases made using links found in this article. “As an Amazon Associate, Ebay (EPN) and/or Esty (Awin) Affiliate, I (we) earn from qualifying purchases.”


Most Recent Reviews on Review This Reviews


Search for Reviews by Subject, Author or Title

The Review This Reviews Contributors


SylvestermouseSylvestermouseDawn Rae BDawn Rae BMbgPhotoMbgPhotoBrite-IdeasBrite-IdeasWednesday ElfWednesday ElfOlivia MorrisOlivia MorrisTreasures by BrendaTreasures by BrendaThe Savvy AgeThe Savvy AgeMargaret SchindelMargaret SchindelRaintree AnnieRaintree AnnieLou16Lou16Sam MonacoSam MonacoTracey BoyerTracey BoyerCheryl Paton Cheryl PatonRenaissance WomanRenaissance WomanBarbRadBarbRadBev OwensBev OwensBuckHawkBuckHawkDecorating for EventsDecorating for EventsHeather426Heather426Coletta TeskeColetta TeskeMissMerFaeryMissMerFaeryMickie_GMickie_G


Review This Reviews is Dedicated to the Memory of Our Beloved Friend and Fellow Contributor

Susan DeppnerSusan Deppner

We may be apart, but
You Are Not Forgotten


“As an Amazon Associate, Ebay (EPN) and or Etsy (Awin) Affiliate, I (we) earn from purchases.” Disclosure Statement

X