Showing posts with label Product Reviews. Show all posts

Monday, June 27, 2022

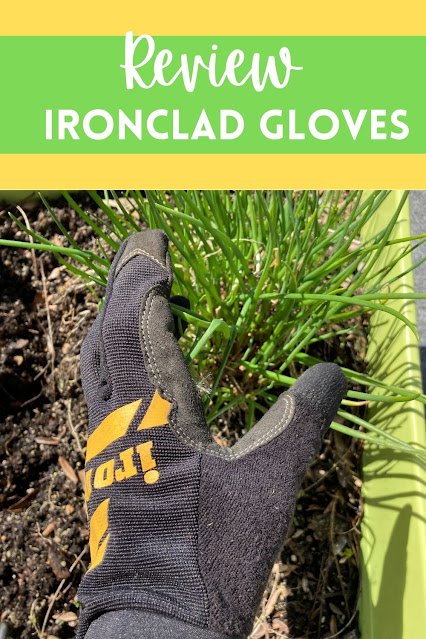
Favorite Utility Gloves Review: Ironclad Gloves

One of my absolute favorite finds for working around the home, lawn or garden are my Ironclad Utility Gloves. When I needed to replace my garden gloves last year I visited my local Ace Hardware store and found these fabulous gloves in the garden/utility glove section.

ironclad gloves


It is pretty rare to pair fabulous with gloves so this is probably an indication of how happy I am to have found these gloves! They have become a go to staple for work around the house, garage, lawn and garden. So versatile, so comfy, affordable and practical.

Comfort And Fit

The Ironclad Gloves are sized which I think make ALL the difference for a comfortable fit. No more swimming in garden gloves. True to fit. The gloves have velcro straps around the wrist to ensure a solid fit and keep out all those stray yard clippings and dirt from gardening.

Washable

Yes! The gloves are washable! I used these gloves for gardening with wet spring mud and the gloves washed beautifully. But the gloves must be hung dry!

Nimble

One of the best features of these gloves is the nimble feel for using with power tools, rakes and shovels. Particularly with power tools that require you to hold down a button while pressing another button to operate the tool. The gloves allow you to easily and comfortably operate small buttons or levers on power tools. 

Strength & Durability

So strong, so durable yet so lightweight. The Ironclad gloves are first and foremost  utility gloves that I happen to also use in the garden. If you have any type of plants with thorns, prickers or sharp edges these gloves work wonderfully.

Recommendation

I highly recommend the Ironclad Gloves for the home and yard. You will not be disappointed in the quality and versatility of these gloves. 

Where To Find Locally

My first stop to shop local is always my local Ace Hardware. This is where I originally found the gloves and their recommendation was spot on.

Ace Hardware Reviews

Ace Hardware Review by Wednesday Elf

My Favorite Local Ace Hardware by The Savvy Age


Note: The author may receive a commission from purchases made using links found in this article. “As an Amazon Associate, Ebay (EPN) and/or Esty (Awin) Affiliate, I (we) earn from qualifying purchases.”


Wednesday, June 22, 2022

The Best Quick & Easy Low Carb Keto Shortcake Cupcakes Recipe

In the heat of summer, most of us enjoy eating lighter desserts featuring sweet, fresh summer fruit and would rather spend as little time as possible cooking or baking in a hot kitchen. Some of us also may be trying to get or stay slim to look our best in lightweight, more revealing summer clothing. 

In this review, I'm sharing my yummy, quick & easy low carb keto shortcake cupcakes recipe, which can be whipped up fast thanks to a keto baking mix, is bursting with sweet, ripe berries and topped with a luscious sugar-free buttercream frosting.

Quick & Easy Low Carb Mixed-Berry Shortcake Cupcakes - Keto-Friendly, Sugar-Free, Gluten-Free, Nut-Free

A Fun Cupcake Twist on Traditional Biscuit-Based Berry Shortcake

I have made delicious keto-friendly strawberry shortcake with biscuits from a low carb baking mix topped with fresh whipped cream and berries. However, since there are only two of us in our household, that means whipping just a few tablespoons of heavy cream and assembling two shortcakes after dinner every time I want to serve them.

Recently, I got the idea to try making shortcake cupcakes, substituting cupcakes for the biscuits and low carb buttercream frosting for the whipped cream, which would let me assemble and refrigerate them in advance. While I'm making dinner, I can just take out two of the refrigerated shortcake cupcakes and set them on the counter so they will be at room temperature when we are ready for dessert.

A Delicious, Quick & Easy, Sugar-Free, Gluten-Free, Nut-Free* Summer Dessert

The cake portion of these cupcakes is made with Scotty's Everyday Keto Cupcake & Cake Mix. This healthy, sugar-free, gluten-free and nut-free boxed keto cupcake mix is a real time-saver that minimizes time in a hot kitchen during the summer months.

The baked cupcakes are paired with juicy, fresh berries, keto berry jam and a super simple sugar-free buttercream that takes just a few minutes.

Scotty's Keto Cupcake Mix + Low Carb Buttercream Frosting + Sugar-Free Berry Jam + Fresh Berries = The Best Quick & Easy Low Carb Keto Shortcake Cupcakes

*Important food allergy note: Although Scotty's Everyday baking mixes are made with no nut flours, their website does not state that their mixes are made in a nut-free processing facility. It is important to contact the company to find out that information if you are thinking about serving these treats to anyone who has a severe nut allergy.

low carb keto shortcake cupcakes batter in silicone muffin pan liners
Just add melted butter, eggs, water and vanilla extract to Scotty's Everyday Keto Cupcake & Cake Mix for the base of these quick & easy low carb shortcake cupcakes, then split, fill, frost and decorate them with sugar-free jam, keto buttercream frosting and fresh berries.

Scotty's Everyday Keto Cupcake & Cake Mix Makes an Ideal Biscuit Alternative for This Low Carb Shortcake Cupcakes Recipe

I have used several keto baking mixes from Scotty's Everyday and like them a lot. Scotty's Everyday Keto Cupcake & Cake Mix is sweetened very lightly, and the baked cupcakes taste a bit like the drop biscuits I sometimes make for shortcake. They are also less crumbly than traditional cupcakes using sugar and wheat flour, which makes them perfect for this recipe.

In addition to the biscuit-like flavor and sturdy structure, each cupcake prepared according to the directions on the Scotty's Everyday Keto Cupcake & Cake Mix package have several other benefits:

  • 0 net carbs (22g total carbs - 14g dietary fiber - 8g erythritol = 0 net carbs)
  • No added sugars
  • Sweetened with erythritol and monk fruit extract
  • 14g dietary fiber
  • 90 calories

This sugar-free, gluten-free, nut-free, low carb keto baking mix is also a cinch to prepare. Just add melted butter, eggs, water and vanilla extract. My product review rating for Scotty's Everyday Keto Cupcake & Cake Mix is 5 stars!

My Favorite Keto Buttercream Frosting Recipes

The Best Quick & Easy Low Carb Keto Shortcake Cupcakes Recipe needs a fast, simple frosting to live up to its name. I recommend the Keto Buttercream Frosting Recipe from Wholesome Yum, which has 205 calories, 16.4g of fat and 0g net carbs per serving (3 tablespoons).

If you want to significantly cut the calories and fat and are willing to spend a bit more time and effort, I highly recommend the luscious Sugar-Free Swiss Meringue Buttercream Frosting recipe from All Day I Dream About Food, which lends itself beautifully to piping and tastes out of this world. A 1/4-cup serving (4 tablespoons) has only 109 calories, 10.7g of fat and and almost zero (0.1g) net carbs.

Use Your Favorite Keto Friendly Berries

Berries are the only fruits low enough in carbohydrates to fit a ketogenic diet. The berries with the fewest net carbs are raspberries, blackberries and strawberries. Blueberries have more than twice the net carbs and half the dietary fiber of raspberries or blackberries, but are still low enough in carbs for you to enjoy a few on one of these keto shortcake cupcakes.

For the keto shortcake cupcakes I photographed for this post, I used fresh raspberries and blueberries. I also added a taste of strawberries by pairing my favorite sugar-free strawberry jam with the buttercream frosting for the filling.

cupcakes being split, filled, frosted and decorated
ChocZero Keto Strawberry Jam is delicious, spreads easily and, like the buttercream frosting, helps hold the fresh rasbperries and blueberries in place while reassembling the filled shortcake cupcakes.

The Best Low Carb Keto Strawberry Jam

I have tried several brands and flavors of sugar-free jams. Most were fairly disappointing. Some were sweetened with artificial sweeteners, which I try to avoid for health reasons. Some were too thin and loose or had big chunks of berries that made them hard to spread in a thin layer.

ChocZero is one of my favorite brands of low carb and keto-friendly products. Recently, they launched a keto strawberry jam, which I ordered immediately. Based on my experience with other sugar-free jam products, I was only cautiously optimistic. (I didn't want to get my hopes up only to be disappointed again.)

I was pleasantly surprised by the new ChocZero Keto Strawberry Jam. It has a thick, "jammy" consistency, spreads easily in as thick or thin a layer as you wish, is sweetened with monk fruit, has no added sugars, and has a delicious flavor from real strawberries. Each serving (1 tablespoon) provides a whopping 10g of dietary fiber and has just 15 calories and 1 net carb.

Unlike the other low carb, sugar-free jams and preserves I have tried, ChocZero Keto Strawberry Jam is also sticky enough to help keep the raspberries, blackberries, strawberries or blueberries in place when sandwiching them between the halves of the split shortcake cupcakes.

Five filled, frosted and decorated low carb keto shortcake cupcakes
Don't these keto-friendly shortcake cupcakes filled with jam, frosting and fresh berries look yummy, despite my messy piping of my melting buttercream? They're one of the best keto desserts to make for summer holiday gatherings including the 4th of July (especially if you use red and blue berries!).

How to Make the Best Quick & Easy Low Carb Keto Shortcake Cupcakes

Recommended Kitchen Tools and Supplies for This Recipe

  • Silicone Muffin or Cupcake Liners
    The Scotty's Everyday Keto Cupcake & Cake Mix package instructions say to "Line one 12-cup standard muffin tin" without specifying the type of cupcake liners to use, I highly recommend Pantry Elements Silicone Baking Muffin Cups. They are made from BPA-, PVC- and phthalate-free, food grade platinum silicone and sturdy enough to use on their own on top of a flat baking sheet, if desired, or you can use them as liners for cupcake or muffin tins. They also come in a clear, reusable screw-top container for storage, which keeps them clean and dust-free and lets you enjoy the rainbow of bright, happy colors even when these nonstick silicone baking cups are not in use. I have used mine frequently for several years for both muffins and cupcakes and can attest to their high quality and durability.

  • Stainless Steel Scoop With Trigger or Spring Action Handle
    I have a large assortment of these stainless steel scoops in different sizes and found that my Norpro 50mm stainless steel scoop (3 Tablespoons) was a bit too small and my Norpro 56mm stainless steel scoop (4 Tablespoons) was a bit too large. You can use a rounded 3 Tablespoon scoop of cupcake batter or, if you make a lot of cupcakes or muffins, you might want to get the Solula 18/8 Stainless Steel Ice Cream Cupcake Muffin Scoop (3.4 Tablespoons), which is just the right size and capacity to portion out nicely rounded scoops of batter into standard size muffin or cupcake pans.

  • Cake Decorating Set or Piping Bags With Decorating Tips
    These low carb keto shortcake cupcakes will be just as delicious if you use a small offset spatula to spread the frosting on the tops, but piping the buttercream into decorative swirls makes for a more festive presentation. As you can see in the photos, I had a hard time piping the frosting onto my cupcakes, partly because I'm decades out of practice and partly because my kitchen was so hot that the buttercream quickly softened too much. Even so, I like the look of the buttercream swirls, messy though they turned out! If you are new to cake decorating and would like to give it a try, I recommend starting with a small, inexpensive, basic set, such as the Wilton Beginning Buttercream 20-Piece Cake Decorating Kit to see whether you enjoy using a piping bag and decorative tips.

Ingredients

For the Cupcakes:

  • 1 package Scotty's Everyday Keto Cupcake & Cake Mix
  • 1 Tablespoon melted butter or ghee (clarified butter)
  • 3 large eggs
  • 1/3 cup water
  • 1 Tablespoon vanilla extract
  • Optional but recommended: Avocado oil, clarified butter or coconut oil for greasing the cupcake liners

For the Keto Buttercream Frosting (Wholesome Yum recipe):

  • 1 1/2 cups unsalted butter, room temperature (Wholesome Yum's recipe recommends Danish Creamery European Style Unsalted Butter, which isn't available where I live; I use Kerrygold Unsalted Butter, a high-quality Irish butter made from the milk of grass-fed cows that are free of growth hormones)
  • 1 cup Wholesome Yum Besti Keto Monk Fruit Sweetener With Allulose 1:1 Natural Powdered Sugar Replacement
  • 1 teaspoon vanilla extract
  • 1/8 tsp fine sea salt
  • 1 Tablespoon heavy cream (approximately)

For the Filling:

Instructions

  1. Preheat the oven to 350 ℉ / 180 ℃. Line a standard 12-cup muffin tin with paper, foil or silicone cupcake liners or place 12 sturdy silicone baking cups on a baking sheet. Although not specified on the cupcake mix package directions, I recommend greasing the liners lightly with a thin film of avocado oil, clarified butter or coconut oil.
  2. Prepare the Scotty's Everyday Keto Cupcake & Cake Mix batter according to the package directions. Use a trigger or spring action scoop to portion the batter evenly among the 12 lined muffin tin wells or silicone baking cups, using approximately 3.5 tablespoons of batter for each cupcake.
  3. Bake for 20–22 minutes, just until they test done according to the standard "toothpick test" (i.e., insert a clean, dry toothpick into to center of one of the cupcakes and pull it back out; if it remains clean and dry, the baked goods are done). Do not overbake! Cool them on a baking rack for 20 minutes, then remove the cupcakes from the muffin pan or silicone baking cups.
  4. While the cupcakes are cooling, prepare the buttercream according to the Keto Buttercream Frosting Recipe on the Wholesome Yum website.
  5. Rinse the berries and lay them on two thicknesses of paper towel to dry. Set aside the best looking ones to decorate the tops of the cakes.
  6. Slice the cooled keto shorctcake cupcakes in half horizontally and turn the halves cut side up. Spread a layer of ChocZero Keto Strawberry Jam on one half and a thin layer of the prepared buttercream frosting on the other half. Arrange the berries on the bottom half of the cupcake and cover them with the top half.
  7. Frost the tops of the cupcakes with the remaining buttercream frosting. You can either spread it on with an offset spatula or put it into a piping bag fitted with a star tip (or your favorite cake decorating tip) and piping it on in swirls or rosettes. Top each frosted shortcake cupcake with one of the reserved fresh berries.
  8. Serve on dessert plates with knives and forks, like traditional berry shortcakes. (These towering, berry-filled cupcakes are too tall to bite into directly!)

A Perfect 4th of July Dessert

Make these shortcakes with fresh raspberries (or sliced or diced strawberries) and blueberries for a festive red, white and blue 4th of July dessert that everyone at your holiday gathering can enjoy, even if they are on a gluten-free, sugar-free, nut-free, low carb or ketogenic diet.

The Best Quick & Easy Low Carb Keto Shortcake Cupcakes Recipe by Margaret Schindel

Posts About My Keto Diet Journey

My First Year on The Keto Diet

Preparing to Succeed on the Keto Diet, Part One

Preparing to Succeed on the Keto Diet, Part Two

Low Carb Muffins & Cupcakes: Treats to Enjoy on a Keto Diet

Low Carb Keto Chocolate Yogurt Granola Chip Pudding Recipe

Good Dee’s Keto Cookie Low Carb Baking Mix Review

Hamama Microgreens Growing Kit Review & Success Tips

My Favorite Hamama Microgreens Seed Quilt Accessories

Keto Cheddar Cheese Biscuits With Chives Recipe

The Ultimate Keto Hot Chocolate Recipe

The Best Low Carb Keto Gift Ideas: Keto Gift Guide

The Best Low Carb Keto Cinnamon Muffins

Wholesome Yum Keto Bread Mix and Yeast Bread Recipe

The Good Chocolate 100% Organic No Sugar Dark Chocolate Review

The Best Advice to Maintain Your Keto Diet Weight Loss

My New Irresistibly Delicious Keto Cheese Crackers Recipe

Luscious Low Carb Keto Triple Peppermint Cheesecake Brownies Recipe

Quick & Easy Livlo Blueberry Scones Keto Baking Mix Review

Snack Better With The Best Healthy Keto Cookie Dough Bites

The Best Quick and Easy Low Carb Keto Pizza Recipe

The Best Quick and Easy Low Carb Keto Shortcake Cupcakes Recipe

Comparing the Best Keto-Friendly Chocolate Hazelnut Spreads - No Added Sugars

The Best Low Carb Keto Sandwich and Burger Buns Mix

Blueberry Biscuit Scones — New, Easy, Low Carb Keto Recipe

The Best Keto Pizza Crust Mix With 0 Net Carbs

An Unusual, Delicious Strawberry Chocolate Tea With 0 Calories

Delicious Sugar-Free Keto Cookies That OREO Fans Will Love

Healthy Pistachio Cherry Chocolate Chip Marshmallow Cereal Treats Recipe

Easy, Decadent, High Protein, Sugar-Free Rocky Road Cottage Cheese Ice Cream

The Best Quick & Easy Low Carb Sausage and Ricotta Calzones

How to Make Refreshing Vanilla Italian Soda (With or Without Cream)


Reviews of the Keto Diet by Barbara C. (aka Brite-Ideas)

My Personal Keto Testimonial

How I Stayed Committed to the Ketogenic Way of Eating

Read More Recipe Reviews by Our Review This Reviews Contributors

Read More Product Reviews by Our Review This Reviews Contributors

Read More Reviews About Health and Wellness by Our Review This Reviews Contributors


Note: The author may receive a commission from purchases made using links found in this article. “As an Amazon Associate, Ebay (EPN) and/or Esty (Awin) Affiliate, I (we) earn from qualifying purchases.”


Tuesday, June 21, 2022

Hatley Children's Rainwear Review

Hatley makes quality, fun children's rainwear. Learn more here!


Time to invest in some practical, fun and environmentally friendly children's rainwear? Hatley has what you are looking for.  If you have seen Hatley's products before, you know just how great they are. If you haven't, you are in for a pleasant surprise! 

Wait until you see the raincoats, rain boots and umbrellas that are produced in child-friendly themes that are constantly evolving but that include or have included apples, flowers and butterflies, horses, dogs, unicorns and rainbows, pirates, dinosaurs, aliens, polka dots, stars, and hearts. I also love the quintessentially Canadian themes featuring iconic symbols like bears, moose and camping. Your son, daughter or grandchild will love them all.

Sizing availability of individual pieces varies but in general you will find rain wear suitable for infants, toddlers and little girls and boys. Umbrellas are not sized but rather simply rated safe for children. Common sense says that they are not appropriate for toddlers. In some cases, there are even adult-sized pieces available.

You are probably careful about what you feed your family and what toys you give your children to play with but have you considered what is in their clothing? For years Hatley has been making quality, comfortable 100 percent cotton clothing. 

Hatley adopted a strong sense of social responsibility early on and this practice extends to their rain gear. Their practices ensure that clothing and gift items are produced in an environmentally conscious manner and with materials that are proven to be safe.  

As a socially responsible company, they:

💦 Use non-toxic, azo-free dyes for apparel.

💦 Use only non-chlorinated bleach.

💦 Use closed loop dyers which means that waste water from dyeing garments does not pollute the water table.

💦 Use organic cotton, natural fibers and alternative sustainable fibers wherever they are able to.

💦 Are PVC free.

💦 Use compostable, biodegradable non-toxic Mater-Bi bags for shipping to the store.

This care means that Hatley children's items are safe choices for your family. To boot, pardon the pun, the raingear is a ton of fun!
Hatley makes quality, fun children's rainwear. Learn more here!


Visit the Hatley store on Amazon by clicking right here. You'll find a wonderful assortment of rainboots, raincoats and umbrellas for children as well as a lot of other quality, themed children's wear.

See you
under your umbrella!
Brenda

MORE READING


Note: The author may receive a commission from purchases made using links found in this article. “As an Amazon Associate, Ebay (EPN) and/or Esty (Awin) Affiliate, I (we) earn from qualifying purchases.”


Monday, June 20, 2022

Reviewing YouCut Video Editor for Android

I have been using YouCut Video Editor on my Android smartphone since late 2020. I hadn't thought about how much I enjoy YouCut until I had received a few comments lately about how much time I must spend editing. I really don't spend any time editing. Living in a remote area it make take hours for a brief video to upload but it often takes less than 5 minutes to create that video because YouCut is so easy to use. And best of all, YouCut is FREE.  


About YouCut

YouCut is a video editing program for Android phones. It can be found in your Play Store app. Once you've download it, the icon can be found on your phone screen. I do not believe that there is a version available for laptop operating systems. The last time I checked in a web search, you can pull up sites with titles such as "YouCut for your PC" but they are offering "alternative" video editing programs - not YouCut.

Why YouCut Has Been an Excellent Option for Me

There are many reasons YouCut has been a fantastic tool for me. I learned about YouCut from Ann's Tiny Life and Homestead youtube channel when she shared this tutorial. I didn't give it any more thought until I wanted to post photos in a slide show on YouTube. But Youtube had eliminated that option at that time. So I went back to Ann's tutorial, learned about YouCut, and successfully posted my first video; which included photos in a slide show.

These are a few of the many reasons I enjoy using YouCut:

Price - It's FREE!

Accessible via my Phone - which means the app, my photos, and my raw video clips are all in the same place. Which also means all of that is portable and with me at all times (except the days I forget my phone and head to work!). Prior to 2020, I took all my blogging photos with my beloved Sony camera. But using a camera meant moving the memory card from the camera to the laptop in order to edit and use those photos. With YouCut and my phone, I eliminate that step when sharing editing and sharing videos. (Unfortunately, my Sony currently needs repaired, so I don't have that option even if I wanted it.)

No Laptop or Desktop required - Taking the photos and videos, editing them, saving them, and uploading them is all done via my phone.  I do manage my Youtube channel from my laptop because it is easier to view than on my phone screen. But I don't have to have anything other than my phone for the videos.

Flexibility - I can use photos or videos in order to make a video. I upload to YouTube but after you save your video, you are given options to upload to a variety of platforms: YouTube, Instagram, Facebook, Messenger, e-mail, WhatsApp, Signal, Twitter, and "other" (which takes me to the options and apps in my phone).  

Easy to Use - I am not going to make a tutorial to show how the program works. I'm not the best person for that job. However, I recommend that you watch Ann's tutorial or one of the many others that can be found. All of the editing tools that I use already seemed familiar. 

Free Effects - YouCut offers many effects and editing tools; many that I don't even use. But I do use adding text, adding transitions between photos or clips, and I have added their free music on occasion. All of those things have been extremely easy to figure out and to use. And the best part is that the "undo" button is available. If I make a mistake, I can immediately put things back the way they were. 


the app is very easy to navigate - beginning with the start screen


adding, moving, and editing text is easy


Why Take Time to Create Videos?

There are many, many reasons to create videos.  I began making videos in order to share my personal journey (preparing to move from an urban apartment to my land, documenting my house build progress, and to keep my friends and family up-to-date on the progress).  I have continued making videos for those reasons (now that I've moved) but also to encourage others to chase their dreams. One woman saw me on social media and said that I motivated her to make the leap. She now is living her dream in a beautiful house, on a gorgeous chunk of rural land. I have made a choice to try to share more about what I'm doing because it might encourage others to act on their dreams and plans. I am a firm believer of "if I can, you can."

Some reasons others may make videos are:

  • Keep in touch with family and friends
  • A way to journal or document your life
  • Teach others what you know - share your skills
  • Show your handmade or store items - things you are offering for sale
  • Make money - many people are monetized and make money with videos
  • Review items - if a photo is worth 1,000 words imagine what videos are worth
  • Inspire others 
  • Share experiences
  • People love to watch videos
I have found only one minor issue with using YouCut and my phone as my video-making and -editing device. Videos save to my phone before they upload to the platform (for me that is YouTube). This is great as you don't lose your videos. However, it quickly fills up storage space on your phone. Most people probably already know how to move their files from their phone to some other storage area but it took me a bit to learn how to do that. It is such a minor issue for people who are technologically savvy... but when my phone stopped working correctly because I couldn't figure out how to do it, I was frustrated. I have since learned how to prevent that problem by transferring the videos to other storage more frequently.

One final thought, posting yourself on social media does come with some risk. So be careful with personal information and be aware that there are some strange folks out there. Otherwise, there can be many benefits from making and sharing videos. And YouCut has been a very quick and easy way for me to do that. 

Related Link:

My YouTube channel is about my puttering around my land (now that I've moved from the apartment to my home). My dream was to get moved to my land, prepare for retirement, and putter around learning how to raise my own food. Do not feel obliged to look - my goal is not to be a "YouTuber". But if you are interested in an older lady who is figuring out how to raise things, build things, and who is looking forward to retirement someday... feel free to visit me at Dawn Rae B. If I am making progress toward my dreams, you can too. 


Note: The author may receive a commission from purchases made using links found in this article. “As an Amazon Associate, Ebay (EPN) and/or Esty (Awin) Affiliate, I (we) earn from qualifying purchases.”


Sunday, June 19, 2022

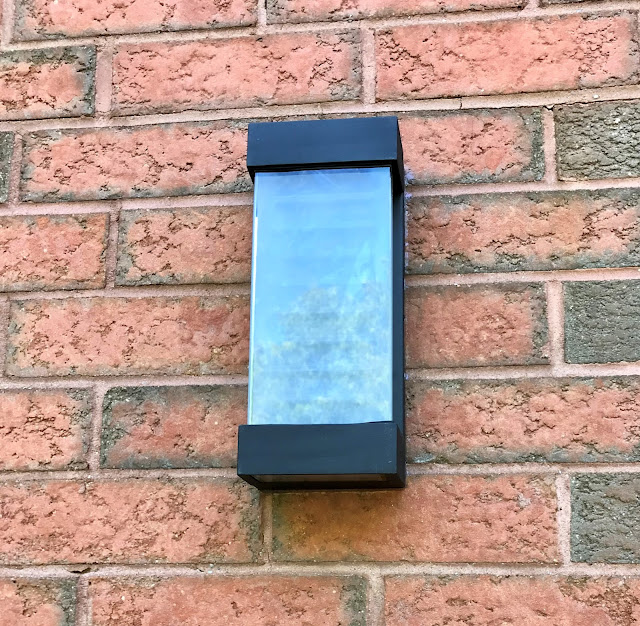
LED Integrated Outdoor Wall Lights Have Numerous Benefits - Check it Out

Integrated LED Outdoor Wall Lights
Review of an Integrated LED Outdoor Wall Light

We needed a new outdoor wall light for our backyard. 

Like most people, I did my research.

I researched standard outdoor wall lights that use lightbulbs and tripped on integrated LED wall lights.

What is an LED Integrated Wall Light? A Point Form Summary 

  • It doesn't use light bulbs.
  • The wall light has built-in LEDs.
  • The one we purchased says the LEDs will last 15,000 hours, or generally 7 years, based upon having the light on about 3 hours a day. 
  • After 7 years is up, I'm honestly not sure what has to be done to replace the LEDs, but we rarely have the light on, so I'm sure it will last much longer.
  • It costs next to nothing in terms of electricity usage.
  • There are many designs to choose from.
  • You can get LED outdoor wall lights from multiple stores, including Amazon.
  • We purchased ours from Home Depot - I wanted to see it in person before purchasing.
  • And yes, it's bright!
Integrated LED Wall Mount Light
Integrated LED Flush Mount Wall Light


Things to Consider Before Purchasing an LED Integrated Wall Light:
  • Check the size of the opening of your existing outdoor wall light. I purchased one from Amazon but had to return it because the base that mounts to the house didn't entirely cover the current opening.
  • Our base needed a minimum of 5 inches wide.
  • Do you want one that comes out further, or do you need one that's relatively flush to the wall? 
  • Ours needed to be fairly flush because it was beside a patio door, and we didn't want the taller people in our family worried about banging into it when turning right outside the patio door.
  • Check the distance out from the wall base to the light to ensure it meets your requirements.
  • Do you want the light to point upwards or downwards?
  • Where does the light shine from? The top? The bottom? The front? Or all of these locations. The one we selected radiates light in all these directions.
  • Most LED lights indicate the type of light it emits, from "warm tones" to "cool tones." We selected one that was more on the warm side of brightness.
The Integrated LED Flush Mount Wall Light Lightens the Entire Patio!

As mentioned above, you can get these lights at multiple stores, but I did notice that after purchasing our light from Home Depot, there were less expensive choices on Amazon. Be sure to shop it before buying.

Here's a closer look at the one we selected - We love it; it's bright
The light shines out of the bottom, the top, and the entire front face


Note: The author may receive a commission from purchases made using links found in this article. “As an Amazon Associate, Ebay (EPN) and/or Esty (Awin) Affiliate, I (we) earn from qualifying purchases.”


Monday, June 13, 2022

Windaze Pressure Power Washer Review

 Spring and summer in the Northern United Stated is go time for all outdoor projects! And there seems to be no end to the "To Do" list. Last year I garden sat for a neighbor and loved the hose attachment which allowed you to water a garden 100 feet away from the house without having to leave the patio.

spray from a power washer


The neighbor highly recommended the wand attachment to the garden hose which doubles as a watering tool, power washer and window washing accessory. Need to wash the wheels of your car? Wash the windows and doors of the house? Water your plants? This is a very versatile hose attachment.

Power

The Windaze is very powerful and the spray can be adapted easily to match your watering needs. Gentle spray for delicate plants or newly planted areas to stronger spray for well established areas.

windaze pressure power washer

If using for the home or on the home the spray can be adjusted to match the job. I have used the Windaze to clean off  decks, garage floors, power wash pavers as well as for the lawn and garden.

Reach

Very powerful and the reach of the water is incredible. I can water the far back of the yard and now be standing at the house with the water spigot. Those with older homes (some call vintage, some may call well, old) might notice the actual water spigot are few and far between and the locations are in relation to the infrastructure. This means the spigots on many homes are not located near the actual garden!

The Windaze gives you the reach without much effort to water the far reaches of the lawn or garden without having to drag hoses out or hook up connector hoses due to distance from the spigot.

Lightweight

I like the added power but without adding weight to a hose. Traditional green hoses can be very heavy especially when you need to use long hoses and have to move the hoses around the lawn. The windaze is very light and so light in fact I forgot I had attached it to the hose.

Hanging plants are no problem to water with the Windaze. So easy for summer drought watering!

Recommendation

The Windaze promises as delivers. The price point works to add this handy watering accessory to your toolbox for power washing, home cleaning and gardening.


Note: The author may receive a commission from purchases made using links found in this article. “As an Amazon Associate, Ebay (EPN) and/or Esty (Awin) Affiliate, I (we) earn from qualifying purchases.”


Sunday, June 12, 2022

A Tree Stump Vase - Great for Outdoor Decor

A Tree Stump Vase


Unfortunately, we recently had to have our gorgeous English Oak tree cut down. We've had the tree since 1994, so needless to say, it was a difficult decision.

After an Arborist confirmed it was dead, we had to call a Tree Service company to safely perform the sad removal.

We were given a choice to have the tree stump ground down or left standing.

We decided to keep the tree stump and decorate it with flowers.

Why Did We Choose A Tree Stump Vase?

We wanted to feature flowers on top, and since we weren't digging a cavern directly in the stump, we needed to safely secure a weather-resistant outdoor vase to the top.

We talked about a metal vase and a plain plastic vase; however, neither seemed safely practical.
The tree stump is located between two driveways; thus, we needed something lightweight yet durable should it ever break loose after we secured it to the stump and gawd-forbid damage our cars!
Here's a peek at the tree stump vase secured to the stump:


This tree stump vase is painted with weather-resistant UV paint to prevent fading and weathering. It's also designed to insulate plants from extreme heat or cold.

The one we purchased measures 10.5 inches in diameter and 9 inches high. They do come in other sizes. We verified the diameter of the tree stump beforehand. Also, we didn't want anything that stood too tall.


Here's another look at the tree stump with the flowers lifted.

We choose a tree stump vase primarily because it's lightweight, blends with the existing stump, and looks good without flowers. 

In the fall, we'll change the flowers, and come winter, we'll come up with something creative to fill the tree stump vase.

The finished look with the Tree Stump Vase filled with flowers

We selected flowers that trail over the stump. They still need to do some growing.


Note: The author may receive a commission from purchases made using links found in this article. “As an Amazon Associate, Ebay (EPN) and/or Esty (Awin) Affiliate, I (we) earn from qualifying purchases.”


Friday, June 10, 2022

Portable DVD Player Review

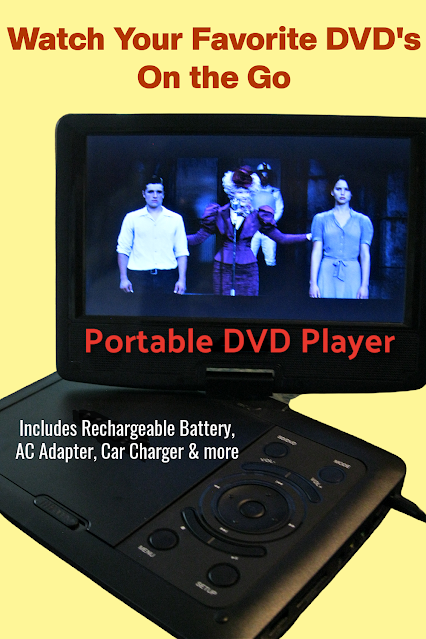
Portable DVD Player
A few years ago, I purchased a portable DVD player that I can use anywhere in my home, riding in a car, take with me on vacations, or even in my own backyard.  I love my DVD collection and I am happy that the movies I most enjoy are available on DVD so I can watch them whenever or wherever I wish without a television.  

I selected a 9" screen simply because I wanted the player to be small enough to carry, but have a large enough screen to really be able to see the movie.  I also wanted to be able to set it on a countertop or desk without it requiring a lot of space.  I like to be able to have a familiar movie playing when I am doing boring paperwork or data entry. Having the portable DVD player allows me to use my laptop and watch a movie on the separate DVD player that has it's own screen.

With streaming so popular these days, we tend to forget how valuable and convenient DVD's are because we can play them anytime without a subscription. Current day laptops are rarely available with built-in DVD players which may play a part in why we don't grab DVD's as often. 

I got used to being able to play my movies on DVD on my laptop. It allowed me to watch a movie that the rest of my family might not wish to hear or see. Since I can plug in headphones, everyone around me can do whatever they wish, watch something else, or even listen to music without disrupting each other.  Personally, I think it is a mistake to eliminate the DVD players from laptops, but the manufacturers didn't ask my opinion.  However, I did not carry my laptop around just so I could watch DVD's, so even with a laptop that has a DVD player, the lightweight portable DVD player is quite useful.


Selecting a Portable DVD Player

 WONNIE 12.5 inch Portable DVD PlayerThere are a few factors that should be considered before you buy a portable DVD player.  The following are specifications I considered and options I wanted included.

  1. Screen Size
  2. Weight
  3. Swivel Screen
  4. Built-in Rechargeable Battery
  5. AC Adapter
  6. Car Charger Included
  7. Headrest Mount Holder for Car if desired
  8. Built-in Speakers
  9. Earphone Jack
  10. Plays DVD or CD (for audiobooks or music) 
  11. USB Port
  12. SD card reader if desired
  13. Remote Control
  14. Region Free
  15. Cost  (I paid less than $60 for mine) 
  16. Color

My player also has a power-off resume button which I love.  If I need to turn off the DVD player for a while, it will resume playing the DVD at the point in the movie where it stopped. This was something I didn't consider before my purchase, but was most grateful it included when I started using the player.

Sadly, the portable DVD player I purchased is no longer being manufactured, but there are several comparable players available.  The player shown above on the right is the most comparable to mine at a reasonable price. It is slightly larger.


 12" Portable DVD Player with 5-Hour Rechargeable Battery, 10.1" HD Swivel Display Screen, Support CD/DVD/SD Card/USB, Car Headrest Case, Car Charger, Last MemoryCheck Price ieGeek 11.5" Portable DVD Player with SD Card/USB Port, 5 Hour Rechargeable Battery, 9.5" Eye-Protective Screen, Support AV-in/Out, Region Free - PurpleCheck Price MYDASH 12.5" Portable DVD Player, Car DVD Player for Kids with 10.5" HD Swivel Screen, 5 Hrs Rechargeable Battery, Support CD/DVD/SD Card/USB, Car Headrest Mount Case, Car Charger, Region Free, BlackCheck Price SUNPIN 11" Portable DVD Player for Car and Kids with 9.5 inch HD Swivel Screen, 5 Hour Rechargeable Battery, Dual Earphone Jack, Supports SD Card/USB/CD/DVD, with Extra Headrest Mount CaseCheck Price


Read More Electronics Reviews On
ReviewThisReviews.com


House of Sylvestermouse


Note: The author may receive a commission from purchases made using links found in this article. “As an Amazon Associate, Ebay (EPN) and/or Esty (Awin) Affiliate, I (we) earn from qualifying purchases.”


Wednesday, June 8, 2022

The Best Powerful Lightweight Stick Blender With Versatile Attachments

A stick blender, also called an immersion blender, is great for puréeing soups and sauces. Using a lightweight stick blender with a whisk attachment can be a lot more comfortable to use than a traditional hand mixer for mixing batters or whipping heavy cream. Several months ago, after the plastic housing and whip attachment on my 1980s-era Braun MR72 MultiPractic deluxe hand held blender with variable speed control eventually cracked, I did a lot of online research before choosing a new stick blender.

Müeller Ultra-Stick 3-in-1 Hand Blender
The Müeller Multi-Purpose Ultra-Stick Hand Blender (model MU-HB-02) is one of my most used kitchen tools. It is also one of the best kitchen gifts and can replace several small appliances!
Ultimately, I purchased a Müeller Multi-Purpose Ultra-Stick Hand Blender (model MU-HB-02) with three versatile attachments: an immersion blender, a wire whisk and frother. Today I'll share my review of this excellent, powerful, lightweight stick blender.

The Müeller Multi-Purpose Ultra-Stick Hand Blender Is Surprisingly Powerful

Having used the Braun MR72 MultiPractic stick blender and whisk attachment for several decades gave me a much better idea of which features were important to me when choosing my next model of one of these small appliances. After narrowing down my top contenders for a new immersion blender, the powerful 500W motor on the Müeller Multi-Purpose Ultra-Stick Hand Blender (model MU-HB-02) weighed heavily in its favor, since the 150W motor on my old Braun made it underpowered for my needs.

When using any immersion blender, it's important to hold the blades above the bottom of the pot, pan or other container and control the tool as the suction created by the blade and its housing try to force the shaft downward. The first time I used the blending shaft attachment on my new Müeller hand blender, I could feel how much more power it has compared to my old Braun model!
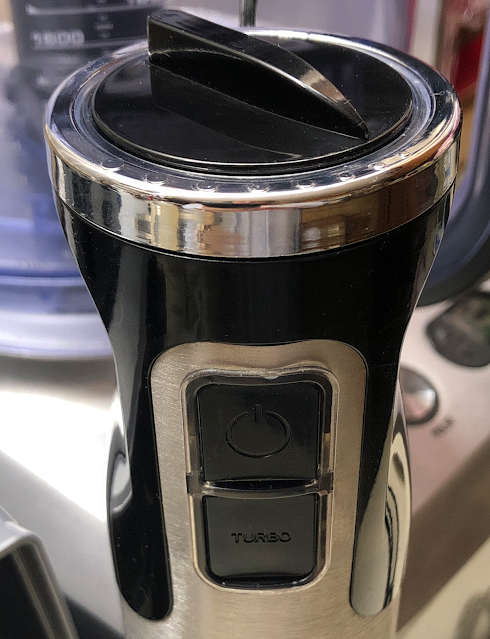
Müeller Multi-Purpose Ultra-Stick Hand Blender speed control dial, power button and turbo button
The slim, contoured, ergonomic shape is easy for even a small hand like mine to hold comfortably. The speed control knob turns continuously, and the power and turbo buttons require just a thumb press.

Variable Speed Control Knob, One-Touch On/Off Button and Turbo Button Let You Control That Power Easily

My old model had a variable-speed control dial, but it had only 6 speeds. That, in combination with the 150W motor, provided a very limited range of speeds. By contrast, the Müeller Multi-Purpose Ultra-Stick Hand Blender (model MU-HB-02) offers a choice of 9 speeds, thanks to multiple power and speed controls that give you more control over its powerful 500W motor.

The top of the motor body housing is the speed control knob. On the side near the top are two stacked buttons: The power button and the turbo button.

Speed Control Knob: After inserting the desired attachment—immersion blender, whisk or frother—into the motor body housing, plug the hand blender into the wall outlet. Then, the speed control dial clockwise to increase the speed or counter-clockwise to decrease the speed.

Power Button: Press your thumb on the one-touch on/off power button to turn on the motor and continue to depress it as you blend, whisk or froth your food or beverage. Release the button to turn off the hand blender. The company advises not to hold the Power button down for longer than 50 seconds at a time. However, I have not found that to be a limitation, since the 500W motor provides enough power to complete most tasks I have tried in less than 50 seconds!

Turbo Button: The Turbo button lets you kick things up a gear when you need to, whether you are puréeing cooked vegetables or whipping egg whites or heavy cream. Just slide your thumb down from the Power button to the Turbo button (directly underneath it) and press it for a quick burst of increased power.

Müeller Multi-Purpose Ultra-Stick Hand Blender (model MU-HB-02) with attachments and instruction manual
The Müeller Multi-Purpose Ultra-Stick Hand Blender (model MU-HB-02) with the immersion blending shaft attached, along with the gear box, whisk and frother attachments and simple instruction manual

Immersion Blending Shaft, Whisk and Frother Attachments Are All Extremely Useful

Blending Shaft: Attach this to the motor to use the Müeller Multi-Purpose Ultra-Stick Hand Blender as an immersion blender. Its extremely sharp, stainless steel S-shaped blade lets you blend shakes or smoothies and purée soups, sauces or baby food.

Whisk Attachment: I use this lightweight stick blender with the whisk attachment several nights a week to make fresh whipped cream to serve with berries, ice cream, or another dessert. The difference in taste between store-bought whipped cream in a pressurized can and freshly whipped, lightly sweetened heavy cream with a splash of vanilla is significant. And with my new Müeller stick blender and wire whisk attachment, I can whip up a small batch of whipped cream, just enough for my husband and me, in just seconds!

I just pour a few tablespoons of heavy whipping cream into a 2-cup Pyrex glass liquid measuring cup, add my sweetener of choice and some pure vanilla extract, then insert my hand blender with the whisk attachment and move the whisk in circles, holding it slightly above the bottom of the measuring cup. I start on the slowest speed for 5 or 10 seconds to avoid splattering, then dial the speed up and finish whipping the cream to the desired consistency. After spooning the topping over our dessert, I just pull out the which attachment and wash it and the measuring cup. Easy peasy!

The powerful motor of this hand blender also means I can use it to beat egg whites or mix cake, cupcake or other thin to medium batters, rather than pulling out my large, heavy KitchenAid stand mixer (which I now reserve for mixing thicker, heavier batters and doughs).

Frother Attachment: My husband and I drink Bulletproof coffee (hot coffee whipped with clarified butter and MCT oil to a creamy, foam-topped consistency) in the morning. It has several valuable benefits, as I've discussed in my product review of The Best Affordable Programmable Large- and Small-Batch Coffee Maker. We had already purchased a cordless milk frother for this purpose, but it devours batteries and is underpowered, which is even more noticeable as the two AA batteries run down.

The frother attachment to our new Müeller Multi-Purpose Ultra-Stick Hand Blender is a significant improvement in terms of power (110V vs. 3V), and we no longer are chewing through AA batteries.

Close-up of extremely sharp stainless steel blending shaft blade
The stainless steel blending shaft has an extremely sharp blade. Fortunately, it's also dishwasher safe!

Easy to Assemble and Disassemble

The plastic whip attachment for my old Braun hand blender was a pain in the neck to attach and detach from the motor housing. Fortunately, assembling and disassembling my new Müeller Multi-Purpose Ultra-Stick Hand Blender (model MU-HB-02) with different attachments is a breeze!

Make sure the motor body is unplugged before attaching or detaching anything to or from it.

To attach the immersion blending shaft, insert it into the motor body and turn it counterclockwise so it snaps into the housing (you will hear a click).

To connect the whisk attachment or milk frother, first insert the shaft of the attachment into the gearbox. Then, insert the gearbox into the motor body and turn it counterclockwise so it snaps into the housing (you will hear a click).

To remove the immersion blending shaft, whisk or frother after using, simply reverse the process: Turn the blending shaft or gearbox clockwise and pull gently to detach it from the motor body housing, then gently pull out the whisk or frother attachment from the gearbox, if applicable.

Quick and Easy Clean-Up With Dishwasher-Safe Attachments

The motor body housing and gearbox should never be immersed in water, but can be cleaned easily just by wiping with a sponge or damp cloth.

The blending shaft, whisk and frother attachments can be hand washed in warm soapy water or put in the dishwasher for easy clean-up.
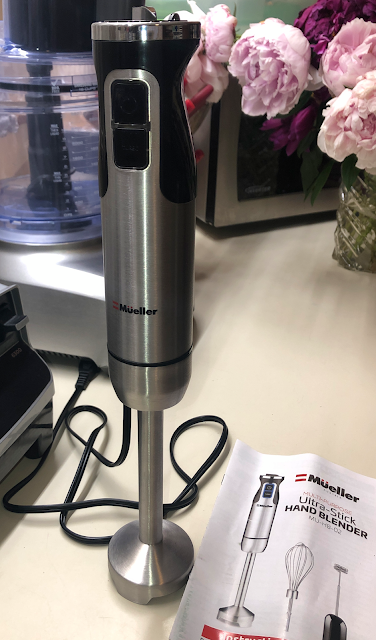
Müeller Multi-Purpose Ultra-Stick Hand Blender assembled with blending shaft as an immersion blender
Connect the stainless steel blending shaft to the motor housing for a powerful immersion blender

Lightweight, Slim and Comfortable to Use

The Müeller Multi-Purpose Ultra-Stick Hand Blender model MU-HB-02 weighs only approximately 1.9 pounds. It is lightweight, slim and has an ergonomic grip that is comfortable even for small hands like mine.

It is also 12.6 inches tall, so if I'm puréeing hot soup in a stockpot or Dutch oven, for example, my hand stays comfortably elevated above the heat.

Surprisingly Affordable and an Excellent Value

I could have spent more money on an immersion blender with whisk and other attachments that had features this one lacks, such as a speed dial that be operated with the dominant hand while the power is on. However, the quality/price/performance ratio on this Müeller Multi-Purpose Ultra-Stick Hand Blender is quite impressive and it does everything I need it to at an extremely affordable price—less than $35 at the time of publication.

Since this stick blender with the whisk attachment is made mostly of stainless steel (unlike many others), takes the place of frother and a hand mixer (and is much more comfortable to use), can stand in for a regular blender or food processor in many cases and does a better job than either of those for blending small amounts of ingredients, it's really a terrific value. The America's Test Kitchen expert testers also recommended this immersion blender on the Cook's Illustrated website.

Don’t Use the Immersion Blending Shaft in Nonstick Cookware

The only other feature I could wish for would be a removable pan guard for the immersion blending shaft's blade housing, like the one on the KitchenAid KHBV53BM Variable Speed Corded Hand Blender, that wouldn't scratch nonstick cookware. However, the pan guard appears to be plastic, and I wouldn't feel comfortable using a plastic attachment inside a hot pan or pot of food that's directly on the heat anyway. In addition, that KitchenAid model has only 180W of power, doesn't come with a whisk or frother attachment, and the removable immersion blending arm isn't dishwasher-safe.

If I need to purée a soup or sauce, it's easy enough to use a stainless steel pot or to transfer the contents of a nonstick pot to a stainless steel bowl for immersion blending and then return the puréed mixture to the pot. This minor inconvenience is well worth it to have all the advantages and versatility of the Müeller Multi-Purpose Ultra-Stick Hand Blender, especially given its affordable price.

An Affordable and Versatile Small Kitchen Appliance Any Home Cook Would Love

Müeller Multi-Purpose Ultra-Stick Hand Blender (model MU-HB-02)
Click image to order the
Müeller Multi-Purpose Ultra-Stick Hand Blender
(model MU-HB-02) 
on Amazon

This is one of those kitchen tools that you don't realize you needed until you have one. In fact, since I don't do a lot of immersion blending, when my old Braun stick blender with plastic parts cracked, I thought about not replacing it. But I really loved being able to whip up a small batch of fresh whipped cream or whip just one or two egg whites without having to drag out my heavy KitchenAid stand mixer, which is what prompted me to take a look at getting another hand blender with a whisk attachment. Finding a lightweight, stainless steel model with a much more powerful motor at an affordable price made the decision very easy.

The fact that this stick blender also has a milk frother attachment was a nice bonus that many gift recipients would appreciate, since lattes, cappucinos and other frothy drinks have become so popular. And, of course, anyone who drinks Bulletproof coffee would definitely love such a powerful frother.

I find myself using this versatile stick blender nearly every day, sometimes multiple times a day, for frothing coffee, making fresh whipped cream, or puréeing a sauce or gravy to get the lumps out quickly and easily. I'll bet someone you know would get a lot of use out of this Müeller Multi-Purpose Ultra-Stick Hand Blender, too.


The Best Powerful, Lightweight Stick Blender With Versatile Attachments by Margaret Schindel


Read More Product Reviews by Our Review This Reviews Contributors

Read More Kitchen Reviews by Our Review This Reviews Contributors

Read More Gifts Reviews by Our Review This Reviews Contributors


Note: The author may receive a commission from purchases made using links found in this article. “As an Amazon Associate, Ebay (EPN) and/or Esty (Awin) Affiliate, I (we) earn from qualifying purchases.”


Most Recent Reviews on Review This Reviews


Search for Reviews by Subject, Author or Title

The Review This Reviews Contributors


SylvestermouseSylvestermouseDawn Rae BDawn Rae BMbgPhotoMbgPhotoBrite-IdeasBrite-IdeasWednesday ElfWednesday ElfOlivia MorrisOlivia MorrisTreasures by BrendaTreasures by BrendaThe Savvy AgeThe Savvy AgeMargaret SchindelMargaret SchindelRaintree AnnieRaintree AnnieLou16Lou16Sam MonacoSam MonacoTracey BoyerTracey BoyerRenaissance WomanRenaissance WomanBarbRadBarbRadBev OwensBev OwensBuckHawkBuckHawkDecorating for EventsDecorating for EventsHeather426Heather426Coletta TeskeColetta TeskeMissMerFaeryMissMerFaeryMickie_GMickie_G


Review This Reviews is Dedicated to the Memory of Our Beloved Friend and Fellow Contributor

Susan DeppnerSusan Deppner

We may be apart, but
You Are Not Forgotten


“As an Amazon Associate, Ebay (EPN) and or Etsy (Awin) Affiliate, I (we) earn from purchases.” Disclosure Statement

X