Showing posts with label Recipes. Show all posts

Thursday, October 5, 2023

Extra Crispy Chicken Tenders

 These extra-crispy chicken tenders are so crispy on the outside and so tender and juicy on the inside. These are the perfect lunch, dinner or snack your family will love. What a great after-school snack for the kids.

Extra Crispy Chicken Tenders
Extra Crispy Chicken Tenders - Reviewed

With the busy schedules of everybody in the family, we have at least one meal together every week. A couple of weeks ago Fran made these delicious chicken tenders for dinner along with a salad. Everybody loved these chicken tenders, they were gone in no time at all. 

These are so easy to make in the oven, deep fryer, or in your air fryer. We used our air fryer, it's the healthier choice, and it's much faster. We used our Ninja Foodi Grill which is a combination grill and air fryer.

Extra Crispy Chicken Tenders - Ingredients

1 or 2 pounds of chicken strips

1 cup seasoned panko bread crumbs or 1 package extra crispy Shake N Bake

2 eggs beaten

Salt and Pepper to taste

Barbeque sauce or Ranch dressing for dipping

Beat the two eggs in a shallow bowl. Dip each chicken tender in the egg and then, coat the tenders with the bread crumbs. 

For the air fryer, spray the air fryer basket with cooking spray. Set the temperature to 400 degrees. Place the chicken tenders in the air fry basket at least 2 inches apart. If you overcrowd the basket, they won't be crispy. Cook the chicken tenders for 5 to 6 minutes per side until they are golden brown.

For the oven, Place the coated chicken tenders on a cookie sheet lined with tin foil. The tin foil will make it easy to clean up. Bake at 400 degrees for 30 minutes.

Make sure the internal temperature of the chicken reaches at least 165 degrees. I use my Thermo-Pro TP-18 instant-read thermometer. It's a good idea to have an instant-read thermometer handy for all of your cooking needs. 

Another thing that makes these so easy is that, you can buy the chicken tenders packaged and ready to cook at your local grocery store.

These chicken tenders are the perfect weeknight meal for the whole family. We enjoyed every single one of them.

By the way, the photo could have been better but everyone was sitting around the table waiting for me to take the picture.

Find more recipes on ReviewThis here:

ReviewThisRecipes.com


Note: The author may receive a commission from purchases made using links found in this article. “As an Amazon Associate, Ebay (EPN) and/or Esty (Awin) Affiliate, I (we) earn from qualifying purchases.”


Wednesday, September 27, 2023

Quick, Easy & Delicious Cheddar Corn Dog Muffins — Low Carb Recipe

I posted a photo of these quick & easy Cheddar Corn Dog Muffins on social media recently and many people commented asking me for the recipe. So, by popular demand, I'm sharing and reviewing my quick and easy recipe for these mouthwatering, keto-friendly, low carb Cheddar Corn Dog Muffins. 

My husband loved these so much he couldn't wait for me to make them again!

Cheddar cheese corn dog muffins

I wanted a quick and easy recipe for weeknights, so I used Good Dee's Corn Free Bread Mix, which is excellent and has clean, wholesome, healthy ingredients.

However, you could easily make this recipe with your favorite low carb or conventional cornbread or corn muffin recipe instead of the prepared Good Dee's Corn Free Bread Mix, if you prefer. You can also substitute another favorite shredded cheese for the cheddar. See Recipe Variations, below, for more information and variations.

Enjoy!

Recommended Tools and Equipment

I like to use reusable silicone baking cups AKA muffin tin liners lightly sprayed with avocado or olive oil for these cheddar corn dog muffins. Baked goods are released from these cups very easily, and they help keep leftover muffins or cupcakes fresher during storage. These silicone liners are also very easy to clean, especially if you spray them lightly with oil before adding the batter.

The silicone liners I use for this recipe (I have two types) are the GIR: Get It Right Premium Silicone Cupcake Liners Reusable Non-stick Baking Cups, which have a slightly larger capacity than my heavy-duty standard silicone baking cups and also have helpful tabs for lifting muffins or cupcakes in or out of the pan without accidentally touching or marring the tops. The set I have is in the Strawberry Swirl colorway (shades of red, pink, and pale gray), but they also come in a pretty Frosty Mint colorway (shades of dark and pale blue and green).

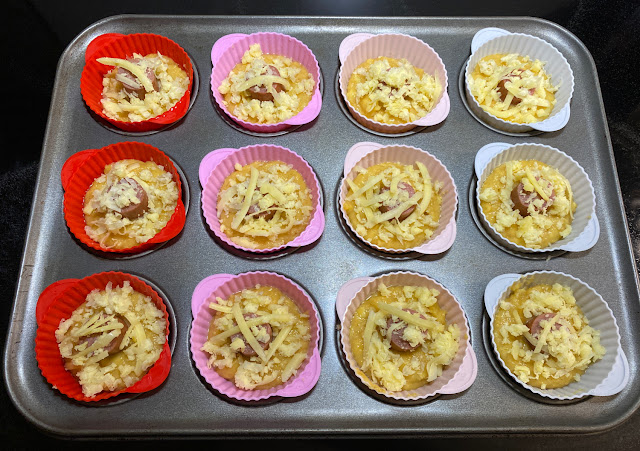
muffin batter in silicone baking liners
The handy tabs on the large GIR silicone baking cups make it easy to lift the filled liners in and out of the muffin pan.

I prefer to use these silicone baking cups as liners in a nonstick muffin pan, which helps distribute the heat evenly and helps keep the muffins shaped nicely, while the nonstick pan finish helps prevent any stray bits of batter or cheese from sticking. Chicago Metallic is an excellent brand; I have a couple of specialty (jumbo and mini) muffin pans from them and they're great. Since my standard nonstick cupcake pans are getting a bit long in the tooth, when it's time to replace them I'll be buying the Chicago Metallic Commercial II Non-Stick 12-Cup Muffin Pan.

I use a three-tablespoon scoop to measure out the batter, using one rounded scoop of batter for each muffin cup. I have a set of Norpro stainless steel measuring scoops that I love and use all the time, and the 50MM (3 Tablespoons) Norpro Stainless Steel Scoop is perfect for this recipe.

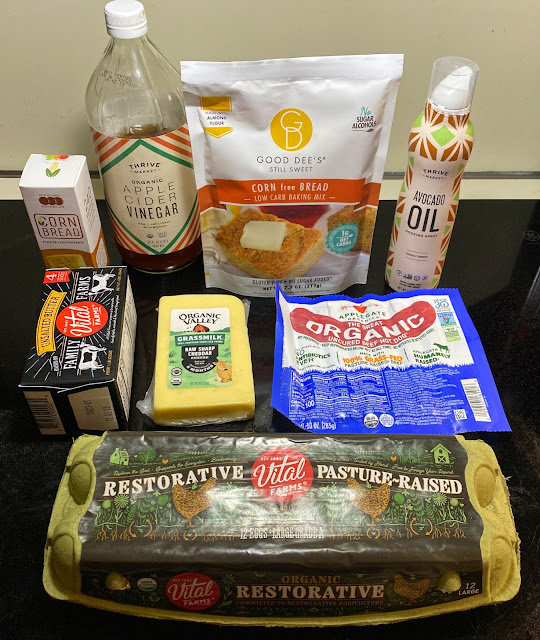
Ingredients for low carb cheddar corn dog muffins
I use Good Dee's Corn Free Bread Mix along with eggs, butter, apple cider vinegar, cornbread flavoring, cheddar cheese, hot dogs, and avocado oil spray in this recipe, but you can also substitute other ingredients (see Recipe Variations). 

Cheddar Corn Dog Muffins Recipe

Low carb cheddar corn dog muffins

Prep Time: 10 minutes

Cook Time: 18 minutes

Total Time: 28 minutes

Servings: 12 (one muffin per serving)

Ingredients

For the Cheddar Corn Dog Muffins: For the optional dipping sauce:

Instructions

  1. Preheat oven to 325 F. Lightly grease 12 silicone muffin cup liners and place in a muffin tin.
  2. In a mixing bowl, whisk together the eggs, melted butter, vinegar, and cornbread flavoring or sweet corn extract. Stir in the Good Dee’s Corn Free Bread Mix until well combined.
  3. Reserve 4 Tablespoons (1/2 cup) of the grated cheese and mix the remaining cheese into the batter.
  4. Divide the batter evenly among the greased muffin tin liners.
  5. Slice each hot dog into four sections. Place one section on end in the center of each batter-filled muffin cup, then sprinkle each muffin with 1 teaspoon of the reserved shredded cheddar cheese.
  6. Bake until lightly golden, approximately 18 minutes. Do not overbake or the muffins will be dry.
  7. Allow to cool in the pan for 15 minutes, then remove the silicone muffin cup liners and serve, with or without optional dipping sauce.

Optional dipping sauce:

Mix the sugar-free ketchup (Primal Kitchen), sugar-free raspberry jam (ChocZero) and Dijon mustard. Serve 1.25 teaspoons of dipping sauce with each cheddar corn dog muffin.

Nutrition Facts

Serving size: one Cheddar Corn Dog Muffin (without optional dipping sauce)

Calories: 189

Fat: 16.3 g

    Sat. Fat: 5 g

    Cholesterol: 70.3 mg

Total Carbs: 6.3 g

    Net Carbs: 1.3 g

    Fiber: 5 g

    Sugars: 0 g

        Added Sugars: 0 g

    Sugar Alcohols: 0 g

Protein: 8.6 g

Recipe Variations

  • If you want some hot dog in every bite, consider dicing the hot dogs and mixing them into the batter instead of inserting 1/4 hot dog into the center of each muffin.
  • If you're not a fan of cheddar, consider substituting another cheese such as shredded Swiss, provolone, or gouda.
  • If you want to make this low carb cheddar corn dog muffins recipe entirely from scratch instead of using a mix, try the Keto Corn Dog Bites recipe from All Day I Dream About Food but mix in the shredded cheddar before scooping the batter and add the shredded cheese topping before baking.
  • Alternatively, you could substitute a conventional corn muffin mix or recipe for the corn dog batter if you aren't watching your carbs.
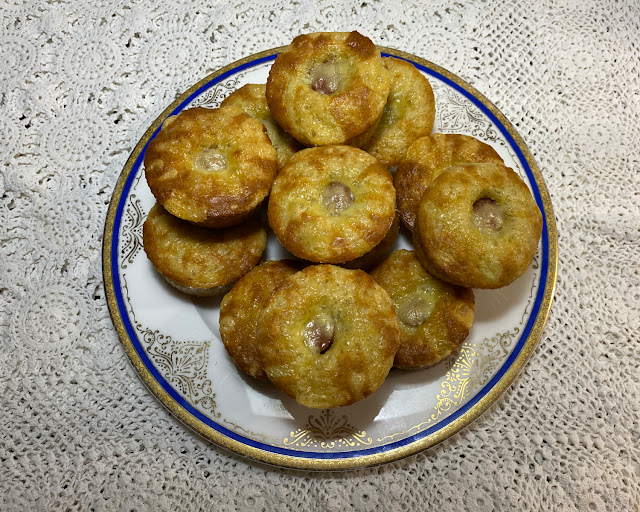
Plate of freshly baked low carb cheddar corn dog muffins
Cheddar corn dog muffins, fresh from the oven!

Quick, Easy & Delicious Cheddar Corn Dog Muffins — Low Carb Recipe by Margaret Schindel


Posts About My Keto Diet Journey

My First Year on The Keto Diet

Preparing to Succeed on the Keto Diet, Part One

Preparing to Succeed on the Keto Diet, Part Two

Low Carb Muffins & Cupcakes: Treats to Enjoy on a Keto Diet

Low Carb Keto Chocolate Yogurt Granola Chip Pudding Recipe

Good Dee’s Keto Cookie Low Carb Baking Mix Review

Hamama Microgreens Growing Kit Review & Success Tips

My Favorite Hamama Microgreens Seed Quilt Accessories

Keto Cheddar Cheese Biscuits With Chives Recipe

The Ultimate Keto Hot Chocolate Recipe

The Best Low Carb Keto Gift Ideas: Keto Gift Guide

The Best Low Carb Keto Cinnamon Muffins

Wholesome Yum Keto Bread Mix and Yeast Bread Recipe

The Good Chocolate 100% Organic No Sugar Dark Chocolate Review

The Best Advice to Maintain Your Keto Diet Weight Loss

My New Irresistibly Delicious Keto Cheese Crackers Recipe

Luscious Low Carb Keto Triple Peppermint Cheesecake Brownies Recipe

Quick & Easy Livlo Blueberry Scones Keto Baking Mix Review

Snack Better With The Best Healthy Keto Cookie Dough Bites

The Best Quick and Easy Low Carb Keto Pizza Recipe

The Best Quick and Easy Low Carb Keto Shortcake Cupcakes Recipe

Comparing the Best Keto-Friendly Chocolate Hazelnut Spreads - No Added Sugars

The Best Low Carb Keto Sandwich and Burger Buns Mix

Blueberry Biscuit Scones — New, Easy, Low Carb Keto Recipe

The Best Keto Pizza Crust Mix With 0 Net Carbs

An Unusual, Delicious Strawberry Chocolate Tea With 0 Calories

Delicious Sugar-Free Keto Cookies That OREO Fans Will Love

Healthy Pistachio Cherry Chocolate Chip Marshmallow Cereal Treats Recipe

Easy, Decadent, High Protein, Sugar-Free Rocky Road Cottage Cheese Ice Cream

The Best Quick & Easy Low Carb Sausage and Ricotta Calzones

How to Make Refreshing Vanilla Italian Soda (With or Without Cream)

Quick, Easy & Delicious Cheddar Corn Dog Muffins — Low Carb Recipe


Reviews of the Keto Diet by Barbara C. (aka Brite-Ideas)

My Personal Keto Testimonial

How I Stayed Committed to the Ketogenic Way of Eating


Read More Recipe Reviews by Our Review This Reviews Contributors

Read More Food Reviews by Our Review This Reviews Contributors

Read More Reviews About Health and Wellness by Our Review This Reviews Contributors


Note: The author may receive a commission from purchases made using links found in this article. “As an Amazon Associate, Ebay (EPN) and/or Esty (Awin) Affiliate, I (we) earn from qualifying purchases.”


Thursday, September 7, 2023

Oven Baked Zucchini Sticks

 These oven-baked zucchini sticks are a great way to use the abundance of your zucchini crop. They make a perfect appetizer for any meal, or just have them as a snack.

Oven Baked Zucchini Sticks

These zucchini sticks or fries are so crispy on the outside and tender on the inside. Bobby and his girlfriend Abby made dinner the other night. They made these delicious zucchini sticks as an appetizer.

If you don't have a garden, just pick up a couple of medium-sized zucchini at the grocery store or your local farmers market. With a few more ingredients that most of us already have in the pantry, you'll be on your way to making this easy and tasty appetizer. 

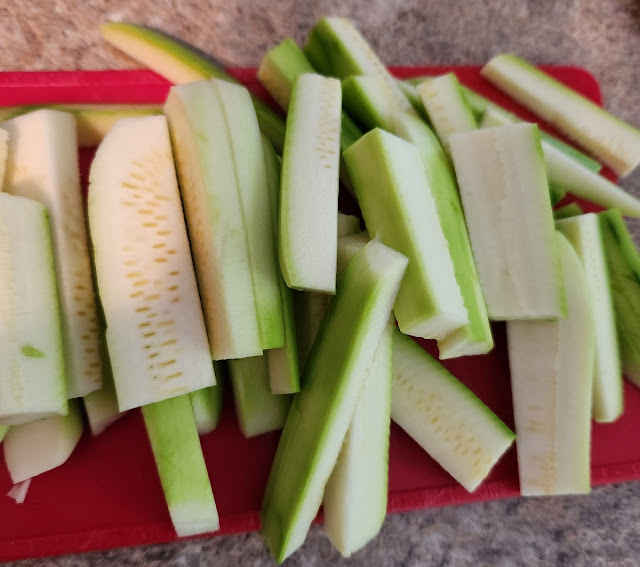
Baked zucchini fries

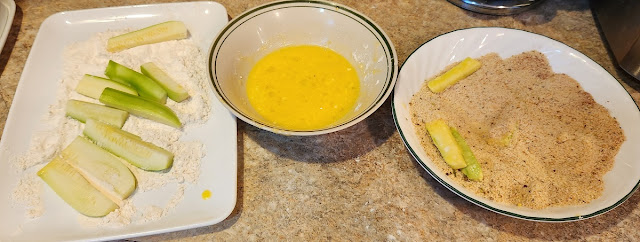
First, peel and cut the zucchini in half. Then, slice them like french fries, about 3 to 4 inches long. This part was my job, Bobby and Abby did the rest.

Prepare zucchini fries

They set up a dredging station with flour, a beaten egg, and seasoned bread crumbs. First, the flour, then dip them into the egg, and then the bread crumbs. 

Baked Zucchini Sticks Ingredients:

2 medium size zucchini peeled and cut

1 teaspoon olive oil

1/2 cup all-purpose flour

1 large egg beaten

1 cup Panko Breadcrumbs

1 teaspoon paprika

1 tablespoon parmesan cheese

Salt and Pepper to your taste

Directions:

  1. Preheat oven to 425 degrees
  2. Peel and cut the zucchini into 3 to 4-inch pieces.
  3. In a flat dish add the flour, salt, and pepper.
  4. Beat the egg in a small bowl and mix with olive oil.
  5. In a flat dish mix the breadcrumbs, paprika, and parmesan cheese.
  6. Prepare a cookie sheet lined with parchment paper.
  7. Dip the cut zucchini into the flour, egg, and breadcrumbs and place on the prepared cookie sheet. Place them at least 2 inches apart.
  8. Bake for 20 to 25 minutes until they are golden brown.
Serve right out of the oven with your favorite pizza sauce or ranch dressing for a tasty appetizer or snack.

For more recipes on Review This Click Here:


Note: The author may receive a commission from purchases made using links found in this article. “As an Amazon Associate, Ebay (EPN) and/or Esty (Awin) Affiliate, I (we) earn from qualifying purchases.”


Saturday, September 2, 2023

Meatloaf Recipe from a Meal Pioneer

 Review of a locally famous take-home meatloaf.


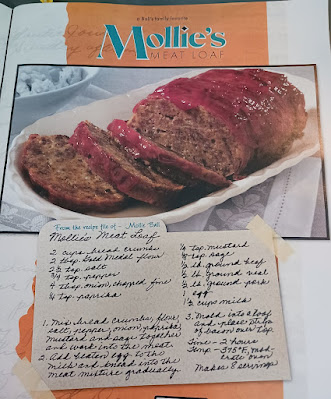
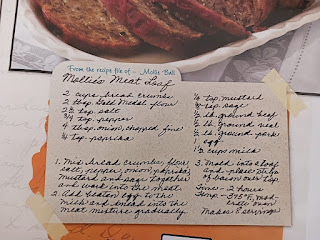
Image of a meatloaf and the recipe for it

Earlier I reviewed the family owned Hen House Supermarkets located in the Kansas City area. They are part of the Balls Food Stores begun one hundred years ago (1923) by Sidney & Mollie Ball. These markets have been family owned all this time, first by Sidney & Mollie, then by their son, and now by their grandson.


Reading the story of Mollie Ball, I discovered that she was no doubt a pioneer in the field of take-home “Grab n' Go” meals. 


When World War II began, many mothers and wives began working in defense plants and found it difficult to find time to make dinner for their families. Mollie said “no problem, we'll make take-home dinners for you.” Her take-home meatloaf, in particular, became famous throughout the neighborhood. 


Today it is easy to find 'ready-made' or frozen meals at the supermarkets, ready to cook for a quick dinner. Not so in the 1940s, but Mollie made it happen. She was a true pioneer when it came to 'take-home' meals. Mollie Ball was known for her generosity and for caring about the larger community. 


Her original recipe for Mollie's Meat Loaf is shared below with permission from the Ball Food Stores.


Mollie's Meat Loaf

Mollie's Meatloaf Recipe Ingredients:


2 cups bread crumbs

2 tbsp. Flour

1 ½ tsp. Salt

4 tbsp. onion, chopped fine

¼ tsp. Paprika

¼ tsp. Mustard

1/8 tsp. Sage

½ lb ground beef

½ lb ground veal

½ lb ground pork

1 egg

1 ½ cups milk


Mollie Ball's Meatloaf Instructions:


  1. Mix together the bread crumbs, flour, salt, pepper, onion, paprika, mustard and sage.  Work this into the meat.
  2. Add beaten egg to the milk and knead into the meat mixture gradually.
  3. Mold into a loaf and place strips of bacon over top.


Cook at 375 degrees F for 2 hours


Makes 8 servings. 


Summary


The Hen House Supermarket in Kansas City

The Hen House and other Balls Food Stores in Kansas City are well-known for their locally-sourced fruits, vegetables, bakery items and meats. Their website also has a selection of recipes for your cooking and eating pleasure. 


Happy Eating! 


*Mollie Ball's Meatloaf Recipe Review is written by Wednesday Elf


Note: The author may receive a commission from purchases made using links found in this article. “As an Amazon Associate, Ebay (EPN) and/or Esty (Awin) Affiliate, I (we) earn from qualifying purchases.”


Wednesday, August 9, 2023

Chocolate Covered Grapes Recipe Review

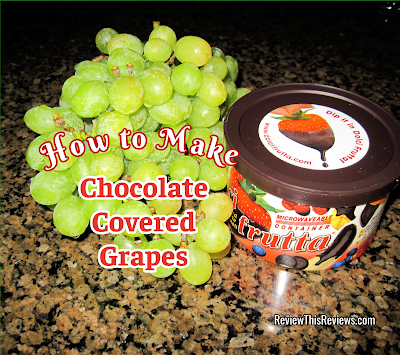
grapes and chocolate to make chocolate dipped and covered grapes
Chocolate Covered Grapes are Fun to Make and Delicious to Eat

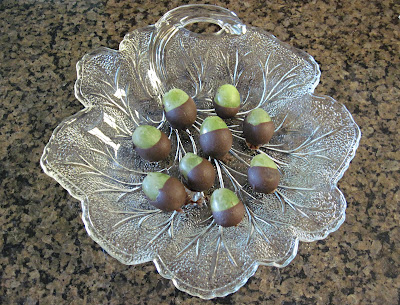
Preparing Chocolate Covered or Dipped Grapes is fast and easy. They make a delicious appetizer, dessert or snack. Of course, when you enjoy them as much as I do, they might just make a meal.

Seedless Grapes are one of my favorite fruits and I love chocolate, so it only makes sense that I would combine the two and create Chocolate Covered Grapes.

I discovered Saco Dolci Frutta at the grocery store when I was making fruit selections to create a fruit platter for a party.  The Saco Dolci Frutta was stocked below the fresh fruits.  When I spotted the chocolate, I thought it would be fun to add covered or dipped chocolate to the tray.  It ended up being a big hit!  After the first trial, I started making chocolate fruit for every party.

In this article, I give instructions with photos so you can create this tasty treat for yourself and your family.


Chocolate Dipped Grapes

Supplies and Ingredients for Chocolate Dipped Grapes

  • Fresh Seedless Grapes
  • Chocolate for Melting ~ I prefer Saco Dolci Frutta featured below.
  • Wax Paper

Easy Directions for Chocolate Covered Grapes

Dolci Frutta Hard Chocolate ShellCheck Price

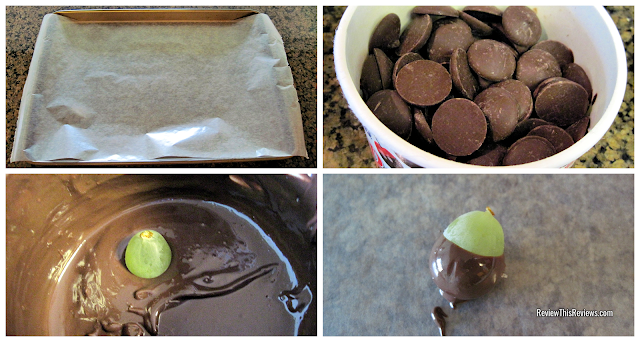
Step 1: Cover a cookie sheet with wax paper ~ The cookie sheet will make it easier to move your Chocolate Covered Grapes.

Step 2: Wash and Dry Your Grapes

Step 3: Melt Your Chocolate ~ If you use Saco Dolci Frutta, you can melt the chocolate in the microwave in their package container. Melt the chocolate in the microwave for 2 minutes on medium and stir the chocolate until it is completely melted. Other chocolates will need to be melted in a double boiler or a microwavable dish.

Step 4: Dip the Grapes in the chocolate

Step 5: Set on wax paper to cool

Step 6: When you have dipped all of your grapes in chocolate, serve or eat.


Best if not refrigerated


Step by Step photos for making chocolate dipped grapes


More Chocolate or Dipped Fruit for Your Platter


Check Out More Recipe Reviews at
ReviewThisRecipes.com


This recipe article was originally published by me in 2009 on a different site that no longer exists. Unless otherwise noted with the individual photo, all Photos are mine and should not be used without written permission.  © 2009 Cynthia Sylvestermouse

Chocolate Covered Grapes Recipe Review Written by:
House of Sylvestermouse


© 2023 Cynthia Sylvestermouse


Note: The author may receive a commission from purchases made using links found in this article. “As an Amazon Associate, Ebay (EPN) and/or Esty (Awin) Affiliate, I (we) earn from qualifying purchases.”


Friday, August 4, 2023

Review of a Microwave Omelet Maker That Makes Perfect Omelets

Making Omelets in the Nordic Ware Omelet Maker
I recently reviewed the Nordic Ware Microwave Egg Poacher which we loved so much that I immediately ordered two Nordic Ware Omelet Makers.  

I would be the first to admit that I am not really crazy about breakfast.  I don't wake up hungry.  It is usually lunchtime before I start to feel the desire to eat anything.  However, my husband loves breakfast and traditional breakfast food.  As often as not, he will either eat breakfast with Merlin or I will sit at the table with him and nibble on toast with coffee.  

The egg muffins we made with the egg poacher were so delicious that I decided breakfast might be something I could enjoy, especially since they are so easy to make.  The promise of a homemade omelet was enticing.  Omelets are something I usually only eat when we travel. Some of the hotels were we have stayed had chefs that made them to order and I always enjoyed them, but never really got into making them at home. Now, with the Nordic Ware Omelet Maker, that has changed and we can have easy to make homemade omelets with ingredients that we individually prefer.

Breakfast, here I come! 


How to Make Omelets with the Nordic Ware Omelet Maker

It is fun to assemble an omelet made with ingredients you love.  I prefer adding ham and cheese to mine, while my husband adds vegetables to his.  Since we each have our own omelet maker, we assemble them separately while spending time together in the kitchen.  

My first attempt to make a ham and cheese omelet turned out to be the best omelet I have ever eaten.  By following the instructions that came with the omelet maker, my eggs were perfectly cooked and the cheese was completely melted.  I used 2 eggs for my omelet.

My husband added ham, mini sweet peppers and fresh parsley to his omelet. He used 4 eggs to make his omelet, therefore his took a few minutes longer to cook.  He also buttered his omelet pan before he started.  I did not butter mine and I could not tell a difference when sliding the cooked omelets from the pans.  However, as the pans age and go through many washes, butter may be necessary.

Here are the Cooking Instructions

 Nordic Ware Microwave Omelet Pan Cooker, Set of 2Check Price
  • Lightly beat 2-4 eggs and 2 Tbsp of water or milk - We beat our eggs in a measuring cup and we both opted for milk. 
  • Pour mixture into omelet pan, dividing equally between the 2 sides - The measuring cup made equal division easy! 
  • Place open pan in microwave and cook for 1 to 2 minutes - I cooked my 2 eggs for 1 minute and my husband cooked his 4 eggs for 2 minutes  
  • Remove the omelet maker from the microwave and stir the eggs from the outside to inside - the center was still liquid and the edges were firmly cooked so the firm section was blended with the liquid section.
  • Place desired toppings on each half - we also seasoned our eggs with salt and pepper
  • Cook until eggs are set; 60-90 seconds - I cooked my 2 eggs for 60 seconds & my husbands 4 egg omelet had to be cooked approximately 2 minutes
  • Remove from the microwave and fold pan in half so the 2 side form the whole omelet.  
  • Open the pan and gently slide your cooked omelet onto the serving plate.


cooked omelets - one made with 2 eggs & one made with 4 eggs

These microwave pans are dishwasher safe on the top rack and I did initially wash ours in the dishwasher.  However, in the future, I will most often hand wash them to ensure a longer life.  Being able to put them in the dishwasher does make them more convenient to use!


If you like cookware that makes cooking easier, you may also like these related reviews.


Read More Product Reviews On
ReviewThisProducts.com


House of Sylvestermouse


Note: The author may receive a commission from purchases made using links found in this article. “As an Amazon Associate, Ebay (EPN) and/or Esty (Awin) Affiliate, I (we) earn from qualifying purchases.”


Wednesday, August 2, 2023

How to Make Refreshing Vanilla Italian Soda (With or Without Cream)

Couldn't you go for a chilly, refreshing, nonalcoholic beverage to help keep you cool and hydrated during the dog days of summer (or any time)? This quick and easy Italian vanilla soda recipe reminds me of the lovely, lightly sparkling cold drinks we enjoyed many years ago during our honeymoon in Italy. It can be made with regular or sugar-free vanilla syrup and with or without a splash of heavy cream (Italian Vanilla Cream Soda) and takes less than a minute to prepare. The sugar-free version of this recipe is also low carb and keto friendly.

This post includes not only the Italian Vanilla Soda recipe, including the Italian Vanilla Cream Soda variation, but also a product review of the delicious ChocZero sugar-free vanilla syrup I prefer to use when preparing this delightful cold drink recipe.

Homemade Vanilla Italian Soda Regular or Sugar-Free
This delicious Italian soda is light, refreshing, and can be made with regular or sugar-free vanilla syrup and with or without a splash of heavy cream.

Choosing Your Ingredients

Vanilla Syrup Options

You can make this delightful cold drink with a conventional commercial vanilla syrup, such as Torani Puremade Vanilla Syrup, DaVinci Gourmet Classic Vanilla Syrup or Monin Vanilla Premium Gourmet Syrup, if you aren't avoiding sugar.

Sugar-free vanilla flavoring syrups are also an option, and the one I prefer. While there are several widely available brands of sugar-free flavoring syrups on the market, most include questionable ingredients that can be detrimental to your health. For example, Jordan's Skinny Syrups vanilla syrup contains cellulose gum, sucralose and acesulfame potassium; Starbucks Sugar-Free Vanilla Syrup contains maltodextrin, cellulose gum and sucralose; and Torani Sugar-Free Vanilla Syrup contains acesulfame potassium and sucralose.

That's why I love using the new ChocZero Sugar-Free Vanilla Syrup. See my product review just after the recipe to find out why it's far superior to the other options on the market.

Italian Sparkling Mineral Water

When my order of the new ChocZero sugar-free vanilla syrup arrived, the first thing I did was to add it to some club soda, since I had some in the fridge.

It was tasty, but definitely not similar to the lovely cold drinks we remembered from our trip to Italy. Also, my husband isn't crazy about most carbonated beverages (or, at least, about his body's reaction to them) and he had asked me to suggest non-carbonated, sugar-free cold drinks he could enjoy during the summer other than lemonade.

So, thinking about the Italian sodas we had enjoyed during our honeymoon, which were far less carbonated than conventional sodas, I decided to try to recreate one by mixing the ChocZero Vanilla Syrup into some chilled Italian sparkling mineral water. What a difference! My husband loved it and didn't have a bad reaction to it, as he does to conventional carbonated drinks. Success!

You can use any genuine Italian sparkling mineral water, such as S. Pellegrino Sparkling Natural Mineral Water or Whole Foods Market Italian Sparkling Mineral Water for the authentic Italian flavor and carbonation level.

Optional Cream

I find this cold drink much more refreshing during the summer without the optional addition of a splash of heavy cream, but I enjoy the added richness of the cream during the colder months. Try this recipe both ways and see which way you prefer. With the addition of the cream, this drink is often called an Italian Vanilla Cream Soda.

Extra-Tall Pilsner Glasses for Serving

During the hot weather, it's important to stay hydrated. This Italian vanilla soda recipe is a delicious way to get in extra water! So, I like to make a large, 16-ounce serving and serve it in an extra-tall Pilsner glass.

I find that the curved shape and narrower bottom of these Pilsner glasses make it much easier to hold a very tall drink much more comfortably and securely versus tall, large-capacity cooler drinking glasses with straight sides.

Our glasses were purchased many years ago and are no longer available, but these attractive Libbey Giant Wheat Beer Glasses with a 23-ounce capacity are very similar to ours and have enough room to add ice to your beverage, if desired.


Vanilla Italian Soda Recipe

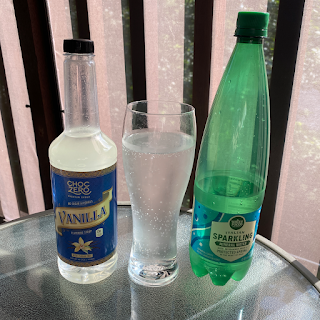
Italian Vanilla Soda with bottles of ChocZero vanilla syrup and Italian sparkling mineral water

Prep Time: 1 minute

Total Time: 1 minute

Servings: 1 serving

Ingredients

16 ounces Italian sparkling mineral water, thoroughly chilled

3–4 tablespoons regular or sugar-free vanilla syrup for flavoring beverages, such as ChocZero Vanilla Syrup

3–4 tablespoons heavy cream, chilled (optional, for Vanilla Italian Cream Soda)

Instructions

  1. To make Vanilla Italian Soda, pour the chilled Italian sparkling mineral water into an extra-tall Pilsner glass or cooler glass. Stir in the vanilla syrup to taste.
  2. To make the Vanilla Italian Cream Soda variation, follow the instructions for Italian Vanilla Soda, then pour the heavy cream over the prepared soda. You can stir in the cream or just leave it at the top, whichever you prefer.

Enjoy!

ChocZero Sugar-Free Vanilla Syrup Product Review
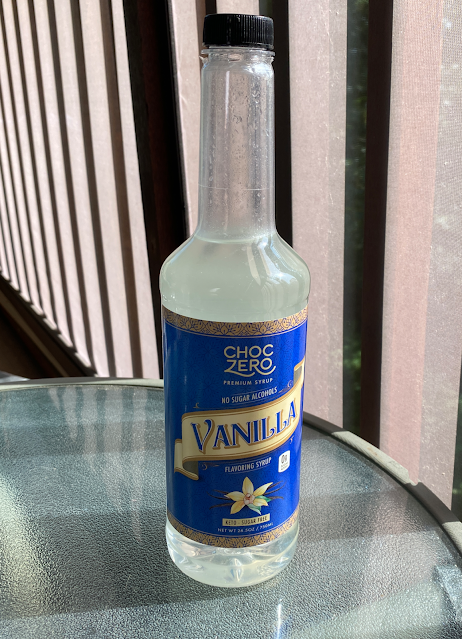
Bottle of ChocZero Sugar-Free Vanilla Syrup
ChocZero Vanilla Flavoring Syrup is sugar-free, contains no sugar alcohols or artificial sweeteners, blends easily into cold or hot drinks, and tastes delicious!

ChocZero sugar-free vanilla syrup is made by one of my favorite brands of yummy keto-friendly, low carb products with no added sugars. Their vanilla syrup is sweetened with monk fruit, which doesnt spike blood sugar levels, instead of artificial sweeteners and contains 8 grams of functional fiber per two-tablespoon serving (great for gut health).

It also isn't thickened, so it mixes instantly and effortlessly into cold drinks as well as hot beverages. (It's a delicious addition to hot or iced coffee or hot cocoa.)

I love having a healthy alternative to the big-name sugar-free vanilla syrups with questionable ingredients!

How to Make Refreshing Vanilla Italian Soda (With or Without Cream) by Margaret Schindel


Posts About My Keto Diet Journey

My First Year on The Keto Diet

Preparing to Succeed on the Keto Diet, Part One

Preparing to Succeed on the Keto Diet, Part Two

Low Carb Muffins & Cupcakes: Treats to Enjoy on a Keto Diet

Low Carb Keto Chocolate Yogurt Granola Chip Pudding Recipe

Good Dee’s Keto Cookie Low Carb Baking Mix Review

Hamama Microgreens Growing Kit Review & Success Tips

My Favorite Hamama Microgreens Seed Quilt Accessories

Keto Cheddar Cheese Biscuits With Chives Recipe

The Ultimate Keto Hot Chocolate Recipe

The Best Low Carb Keto Gift Ideas: Keto Gift Guide

The Best Low Carb Keto Cinnamon Muffins

Wholesome Yum Keto Bread Mix and Yeast Bread Recipe

The Good Chocolate 100% Organic No Sugar Dark Chocolate Review

The Best Advice to Maintain Your Keto Diet Weight Loss

My New Irresistibly Delicious Keto Cheese Crackers Recipe

Luscious Low Carb Keto Triple Peppermint Cheesecake Brownies Recipe

Quick & Easy Livlo Blueberry Scones Keto Baking Mix Review

Snack Better With The Best Healthy Keto Cookie Dough Bites

The Best Quick and Easy Low Carb Keto Pizza Recipe

The Best Quick and Easy Low Carb Keto Shortcake Cupcakes Recipe

Comparing the Best Keto-Friendly Chocolate Hazelnut Spreads - No Added Sugars

The Best Low Carb Keto Sandwich and Burger Buns Mix

Blueberry Biscuit Scones — New, Easy, Low Carb Keto Recipe

The Best Keto Pizza Crust Mix With 0 Net Carbs

An Unusual, Delicious Strawberry Chocolate Tea With 0 Calories

Delicious Sugar-Free Keto Cookies That OREO Fans Will Love

Healthy Pistachio Cherry Chocolate Chip Marshmallow Cereal Treats Recipe

Easy, Decadent, High Protein, Sugar-Free Rocky Road Cottage Cheese Ice Cream

The Best Quick & Easy Low Carb Sausage and Ricotta Calzones

How to Make Refreshing Vanilla Italian Soda (With or Without Cream)


Reviews of the Keto Diet by Barbara C. (aka Brite-Ideas)

My Personal Keto Testimonial

How I Stayed Committed to the Ketogenic Way of Eating


Read More Recipe Reviews by Our Review This Reviews Contributors

Read More Food Reviews by Our Review This Reviews Contributors

Read More Product Reviews by Our Review This Reviews Contributors

Read More Reviews About Health and Wellness by Our Review This Reviews Contributors


Note: The author may receive a commission from purchases made using links found in this article. “As an Amazon Associate, Ebay (EPN) and/or Esty (Awin) Affiliate, I (we) earn from qualifying purchases.”


Most Recent Reviews on Review This Reviews


Search for Reviews by Subject, Author or Title

The Review This Reviews Contributors


SylvestermouseSylvestermouseDawn Rae BDawn Rae BMbgPhotoMbgPhotoBrite-IdeasBrite-IdeasWednesday ElfWednesday ElfOlivia MorrisOlivia MorrisTreasures by BrendaTreasures by BrendaThe Savvy AgeThe Savvy AgeMargaret SchindelMargaret SchindelRaintree AnnieRaintree AnnieLou16Lou16Sam MonacoSam MonacoTracey BoyerTracey BoyerCheryl Paton Cheryl PatonRenaissance WomanRenaissance WomanBarbRadBarbRadBev OwensBev OwensBuckHawkBuckHawkDecorating for EventsDecorating for EventsHeather426Heather426Coletta TeskeColetta TeskeMissMerFaeryMissMerFaeryMickie_GMickie_G


Review This Reviews is Dedicated to the Memory of Our Beloved Friend and Fellow Contributor

Susan DeppnerSusan Deppner

We may be apart, but
You Are Not Forgotten


“As an Amazon Associate, Ebay (EPN) and or Etsy (Awin) Affiliate, I (we) earn from purchases.” Disclosure Statement

X