Showing posts with label DIY. Show all posts

Friday, July 10, 2015

Woolite Dry Cleaners Review - Dry Cleaning Clothes at Home

woolite dry clean at home For many years, I have been allergic to the dry cleaning chemicals that dry cleaners use to clean our clothes. Finding an easy alternative and being able to Dry Clean my own clothes at home, is truly fabulous and it is so very easy!

I have such a strong reaction to dry cleaners chemicals, that I simply stopped buying clothes that had to be dry cleaned. It just was not worth it no matter how beautiful the apparel was, or how much I really wanted something. Even the smell of dry cleaned clothes that someone else may be wearing, can cause me to get an extreme headache.

I am thrilled that I have discovered a way to dry clean my clothes at home and not get sick!  I have had so much success with this method, that I look for clothes to dry clean just so I can dance by my dryer.

Woolite Dry Cleaners Sheets


It may be seriously hard to believe, but dry cleaning your own clothes at home is as simple as throwing a piece of cloth in your dryer with your garment and turning on the dryer.

Materials:
  • Woolite Dry Cleaners Secret Sheets
Tools:
  • Dryer

Instructions:

1. Throw your garment in the dryer with a Woolite Dry Cleaning Sheet

Satin robe in dryer with a woolite dry cleaning sheet
Satin Cape in Dryer with Woolite Dry Sheet - Photo by Sylvestermouse


2. Turn you Dryer on Medium Heat for 20 minutes!

dryer control knob
Dryer Control Photo by Sylvestermouse


3. Remove your Garment from the Dryer.

It is now Ready to Wear!

Dr. Orpheus Cosplay Costume Cape made by Cynthia Sylvestermouse
Dry Cleaned Cape - Photo by Sylvestermouse


Additional Notes about Dry Cleaning this Particular Cape


I personally made this Dr. Orpheus Cosplay Costume Cape for my son for Halloween in 2013.   There is a large emblem on the back of the cape that I had to cut from satin fabric pieces.

The real beauty of the Woolite Sheets is that they did not fade or fray even the emblem.  It came out of the dryer clean and just as vibrantly beautiful as it was the day it was made.

Since I enjoy making specialty costumes, it is so very awesome to have a trustworthy method to dry clean them.  They are truly a lot more reliable than any dry cleaner and they don't leave strong chemical odor on the costumes or clothes.  They actually smell good!

Dr. Orpheus Cosplay Costume Cape made by Cynthia Sylvestermouse
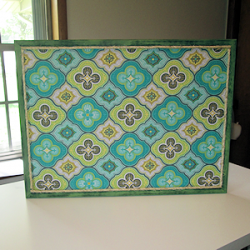
Emblem on the Back of the Cape - Costume & Photo by Sylvestermouse


Woolite Dry Cleaning Sheet Tests and Review Conclusion


Since Woolite is a name I have trusted all of my life, I did not hesitate to try their dry cleaning sheets.  After all, Woolite is the product I have used for decades to wash my cold water delicate fabrics.  I am thrilled beyond belief to now be able to wear clothes that have to be dry cleaned.   I love satins, silks, velvets, etc. and I missed having them as part of my wardrobe. 

Due to my personal allergies, I do use the Fragrance Free, but there are scented sheets available.

Have you tried either of the Woolite Dry Cleaner's Secret Products?


Note: The author may receive a commission from purchases made using links found in this article. “As an Amazon Associate, Ebay (EPN) and/or Esty (Awin) Affiliate, I (we) earn from qualifying purchases.”


Sunday, April 19, 2015

Review of a Twin Bed King Connector

Turning Twin Beds into a King Size Bed is Easy and Affordable

This is a practical solution for a teen whose outgrown twin beds, or for a guest room where it's necessary to alternate between twin beds and a large single bed.

If you've ever pushed two twin beds together, you know exactly what the problem is; the gap in the middle.

Without a twin bed king converter, we've gotten around this problem by putting several toppers on the mattresses.

However, if you move around a lot when you sleep, the gap is still an issue. Movement slowly splits the twin beds apart.

So being the creative sort, I placed non-skid padding under the mattresses to prevent the mattresses from splitting apart. Although that was an affordable way to address the movement of the mattresses, it didn't solve the dip in the middle.

This is Where a Twin Bed Connector Comes In

The one featured below has straps that wrap around the twin beds. It keeps the beds together.

You may still feel a dip or gap, however, if you place a mattress cover and other toppers on before the sheet, it should be barely noticeable.

Overall this is an affordable solution to transitioning a kids room to a teens room. You can keep the twin beds and convert them into a king for the growing youngster.

Most teens want a bigger bed, and if their room is already furnished with twin beds, this is a viable solution. Best of all, you don't have to buy a king sized bed!

How to Make it Look Nice:

If the room you're making over isn't going to be switched back and forth between twin and king, then it's easy to dress up the bed so it looks like it's always been a king bed.

  • If you have two headboards and you're able to remove them, then you could either go with an improvised headboard attached to the wall that's the width of both mattresses, or elect to skip a headboard altogether and simply deck the bed out with many pillows.

  • If you opt for pillows as the backdrop, without a headboard, you can use a bolster at the head of the bed so the pillows don't appear to be resting directly on the wall. I've done this myself, and it looks really nice.

  • Use a king sized bed skirt. With one skirt going around both beds. Without the appearance of two headboards, nobody will notice the beds were once twin beds.

  • I can't stress enough how padding the mattress with various covers makes a difference; I've used a mattress cover as well as a thick foam mattress pad and it really gives the bed that one piece feel.

The Bed Sheets and the Bedding

Two twin beds, especially with extra padding on top, is a little bigger than a standard king size bed; not much bigger, but enough of an issue that you'll need over sized or deep pocket king sized bed sheets. We love Jersey Knit Bed Sheets because they're stretchable, and they'll work nicely to solve this problem. However, if you're not a fan of Jersey Knit Sheets, then be sure to get king sized bed sheets with deep pockets.


The Non-Slip Padding Mentioned Above 
Ultra Stop Non-Slip Indoor Rug Pad, Size: 4' x 6'Ultra Stop Non-Slip Indoor Rug Pad, Size: 4' x 6'
Above I talk about the non-slip padding I put between the box spring and mattress, well I actually used ones designed to hold area rugs in place.

For us they worked perfectly. This one measures 4 feet by 6 feet, so I just bought a couple for each twin bed, and positioned them on the box spring so as to cover a good portion. I would position them to go over the gap in the bed as well. The Grand Fitted Quilted Mattress Pad Cover Hypoallergenic (Stretches to 18The Grand Fitted Quilted Mattress Pad Cover Hypoallergenic (Stretches to 18

Mattress Pad Cover

Here's an example of a king sized mattress pad cover that you can put over the twin bed king connector and mattress.

This one has 20 inch deep pockets as well, so if you want to put a layer of foam underneath (for added comfort) you should have a enough room. I would say, if you had to choose between the non-slip pads above and this, choose this. It's the best way to pull the mattresses together after you've used the twin connector.


Note: The author may receive a commission from purchases made using links found in this article. “As an Amazon Associate, Ebay (EPN) and/or Esty (Awin) Affiliate, I (we) earn from qualifying purchases.”


Sunday, April 12, 2015

How to Prevent a Door from Hitting A Wall or Closet with a Door Stop Hinge

How to Prevent a Door from Hitting A Wall or Closet with a Door Stop Hinge
Door Stop Hinge
Do you have a mirrored closet door that needs to be protected from a door handle that hits it when opened? And, of course, being a mirrored closet, a regular doorstop won't work?
A Review of a Product that Solves the Problem!
After some research, I found the perfect door stop to use that literally takes minutes to install, doesn't require any drilling, and won't stand out as an eyesore.
Hinge Pin Door Stops are a terrific little gadget that simply slips into the top hinge pin of the door, causing the rubber protector to stop against the door frame and thus prevent the door or door handle from hitting the wall, closet door, or mirrored closet door beside it.
Several of the rooms in our home have mirrored closet doors that are close to the main entry door of the room itself. 
The main washroom in our home is an example; when you open the washroom door, the handle can crash into the mirrored closet door and potentially break the glass. 
The floor in our washroom is ceramic, so a floor-mounted door stop would be too much work to install, not to mention the awful thought of drilling into the ceramic!
How to Prevent a Door from Hitting A Wall or Closet with a Door Stop Hinge
The Hinge We Installed to Protect
Our Mirrored Closet Doors
So, after hunting for a solution, I came across the wonderful little gadget called a 'door stop hinge.' My husband literally put it on the door in five minutes.
We also used one for a door where the door would hit the wall before it would hit the door stop; for years, it bothered me that our door was getting marked up, and now, after repainting our door and placing a hinge pin door stop in the top Hinge...problem solved.


Note: The author may receive a commission from purchases made using links found in this article. “As an Amazon Associate, Ebay (EPN) and/or Esty (Awin) Affiliate, I (we) earn from qualifying purchases.”


Wednesday, December 3, 2014

Homemade Christmas Centerpiece Decoration Ideas

sugar cubes
When it comes to Christmas decorations, shop your favorite store or browse your favorite websites for inspiration. Here are a few festive homemade Christmas centerpiece decoration ideas using common holiday ornaments that are fun and easy.


The simple decoration above of Christmas tree globes setting in a dish is a combination of cold colors that brings brightness to the center of a table. And, it is so simple to put together. All you need is a pretty platter and a trio of decorative globes. Look for globes that are a color that compliments your holiday decor.

If you like this frozen holiday theme, you and your kids will have a fun time building igloos. Not the big blocks of packed snow igloos, but igloos made of sugar. Corinna Johnson shows us How to Make a Sugar Cube Igloo. She suggests using frosting to build the igloo so that you can use the sugar cubes in a dessert later.


The Christmas stocking isn't the only way to hide extra special presents. Make a centerpiece that is simply an arrangement of tiny wrapped packages, similar to the ribbon-wrapped boxes shown above, neatly nested in evergreens or holly. Wrap a tiny treat inside each box and pass out these miniature presents after dinner.

A pretty ribbon gives these tiny boxes an elegant touch.


It wouldn't be Christmas without poinsettias, evergreens, and reindeer. Glittered poinsettias fit in with any decor, the evergreens add an aromatic appeal, and reindeer statuary creates a unique touch.

Need ideas on how to arrange a menagerie of ornaments, the House of Sylvestermouse shows us How to Make a Christmas Sleigh Centerpiece that will add a touch of Santa Claus to your home.

I hope you enjoyed these homemade Christmas centerpiece decoration ideas.

Find more inspiration on Pinterest. 
This Victorian Christmas board is full of easy vintage crafts with a bit of Steampunk style.


Posted by Coletta Teske
Coletta Teske

About This Contributor

Coletta Teske writes reviews on books, business management, writing, crafting, cooking, and gardening. She is also an avid recycler and shares her tips on recycling. She delights in upcycling an old object, recycling or transforming discarded items into a new treasure.


Note: The author may receive a commission from purchases made using links found in this article. “As an Amazon Associate, Ebay (EPN) and/or Esty (Awin) Affiliate, I (we) earn from qualifying purchases.”


Wednesday, November 19, 2014

Sharing Thanks With Handmade Crafts for Thanksgiving

Thanksgiving is a time for expressing thankfulness for all of the good things we've received in our lives. Some families have traditions where they express their gratitude during dinner while other families may find it hard to share these feelings verbally. Sometimes it takes a little creativity to find just the right words and the right way to express those sentiments.


Here are four DIY handmade crafts for Thanksgiving that will make it easy for you to express your love and gratitude to your family and friends. These crafts are easy to make and most of the materials can be found in your recycle bin or backyard.

Hang Your Gratefulness on a Tree


Simply Vintage Girl designed The Thankful Tree, With Chalk using items found in her backyard. This tree is made from a broken branch that is used as the tree form. Small wooden discs are painted with chalkboard paint and suspended from the branches. Before your guests arrive, place a piece of chalk under the tree so that family and friends can write down those things for which they give thanks when the spirit moves them.

Stuff Your Thanks in a Turkey


I {Heart} Crafty Things created a Thankful Turkey Box Tutorial from an upcycled tissue box. This is an awesome craft for kids because it is so easy and downright adorable. The kids can explore their creativity and when the crafting fun is done, they can write their thanks on a slip of paper. During Thanksgiving dinner, have everyone take a turn at pulling a slip of paper out of the box and reading the words of thankfulness.

Set a Place Mat for Giving Thanks


Abby M. Interiors has 8 Ideas for Creating Your Thanksgiving Table that will show your gratefulness all through dinner. I especially like number 7 on her list. Make place mats out of upcycled paper bags or kraft paper and draw lines on the mats for guests to write down the good things in their life.

Spread a Garland of Thanksgiving


Carina Gardner shares her gratefulness with a Giving Thanks - Free Thankful Banner Download that makes it easy for family and friends to write their reasons to be thankful on a decorative garland strung near the dinner table. Use your own creative skills or download the free printout to make leaf shapes for the garland. Put the shapes in a jar with a pen and clothespins, find a convenient place to hang the garland string, and encourage your family to write their thanks on a leaf and pin it to the garland.

May the holiday season bring you comfort, joy, and good tidings.
Coletta


Posted by Coletta Teske
Coletta Teske

About This Contributor

Coletta Teske writes reviews on books, business management, writing, crafting, cooking, and gardening. She is also an avid recycler and shares her tips on recycling. She delights in upcycling an old object, recycling or transforming discarded items into a new treasure.


Note: The author may receive a commission from purchases made using links found in this article. “As an Amazon Associate, Ebay (EPN) and/or Esty (Awin) Affiliate, I (we) earn from qualifying purchases.”


Monday, October 13, 2014

Recommended Reading for Small Space Gardeners

I am so excited that I can barely contain myself.   I have found something that I have to share with you.  I have found a nifty little magazine called Urban Farm: Sustainable City Living.  I am especially happy to have found this issue as the nights grow cold and the leaves begin to change in the mid-Atlantic.  Summer and gardening have begun to draw to a close.

All You Need wooden sign
Some of you are aware that I am a country girl, living in an urban (suburban) setting.  A few of you
are also aware that I try to grow a vegetable garden on my balcony and in my kitchen garden.  I'm not very good at it, but I've done great with tomatoes for two years in a row, and am currently having a great time finding uses for my sweet mint, rosemary, and jalepeno peppers.  

Over the decades, I have purchased many gardening magazines and how-to books.  Mother Earth News has been one of my favorite magazines.  But many times, with those magazines and books, I have had to read the articles and imagine the day that I own my own home again so that I can follow through with the things I've learned.  After all, no matter how much I plan and scheme, I cannot devise a way to raise chickens in my third floor apartment.

Imagine my happiness when I found this magazine that is dedicated to  folks who live in limited space but want a more self-reliant lifestyle.  

I purchased the September/October 2014 issue of the Urban Farm.  Some of the titles include:

  • Framing Out the Cold (small cold frames)
  • Storage Wards (storing your harvest without a root cellar)
  • Behind the Scenes Inside the Hive
  • A Dry Idea (how to dry and preserve tomatoes)
  • Wild Gardens (a foraging garden with wild edibles)
  • Shared Spaces (the urban farm movement)

Photograph by Ken Scicluna
All of the articles have been informative and interesting. I was especially drawn to the small cold frames article.  While I dream of own my own larger greenhouse, such as the one Diana Wenzel shows us how to Do-It-Yourself in her article, I have to deal with my reality.  And my reality is that I have a 9' x 5' balcony and one good but small space at my kitchen window for gardening.  I also live in Maryland.  I have a longer growing season than I had when I lived in northern Indiana, but it's still not as long as I would like.

The article in Urban Farmer shows "farmers" like myself how to use cold frames to make microclimates to extend the growing season.  While I've known about cold frames for years, I always imagine the large hoop style that commercial nurseries use.  There is one photograph in the Urban Farm article that shows a small cold frame insulated in snow with a single light bulb for additional heat and light. The remainder of the article and photographs already have me imagining and planning for my own cold frame on my balcony.  Extending my growing season has just become my new reality.  You can bet good money that I'll be out there before the end of the week, starting some sort of mini-cold frame.

If you are a gardener, no matter the space available to you - acres or inches - I highly recommend that you check  out this nifty little magazine.  Either at the bookstore or at Urban Farm Online.


Written by Dawn Rae

Disclosure: In affiliation with AllPosters.com, Dawn Rae is a blogger and content writer who may earn compensation from the sale of AllPosters products.   I am in no way affiliated with Urban Farm magazine nor do I profit from it's sales.  


Note: The author may receive a commission from purchases made using links found in this article. “As an Amazon Associate, Ebay (EPN) and/or Esty (Awin) Affiliate, I (we) earn from qualifying purchases.”


Tuesday, July 1, 2014

Weapons of Mass DIY Destruction


demonstrating construction tools
Black Ops "Do or Di" - Anything is Possible
There are construction tools and then there are weapons of mass destruction.  We’re not talking nukes here.  Who needs nuclear fire power when one has a reciprocating saw that can pretty much destroy anything in its path? 

Yesterday, when I pulled that DEWALT saw out of its case, nothing seemed ordinary about my DIY mission.  Pulling the trigger on that bad boy transformed a seemingly mundane task into a black ops mission. 

Suddenly, I was able to rip through wood, metal, drywall—you name it—with ease.  The power at my fingertips made me invincible.  When put in a “Do or Di” DIY situation, this is the tool you want in your arsenal.
Check out my new product review, featuring current covert activities, then give Squidoo a try.  What is it that awakens your inner ninja?  Is there a product in your life that transforms you into a force to be reckoned with?  We want to read all about it.  

And now I am being called to duty.  There is a top-secret mission with my name on it. #TrySquidoo


Note: The author may receive a commission from purchases made using links found in this article. “As an Amazon Associate, Ebay (EPN) and/or Esty (Awin) Affiliate, I (we) earn from qualifying purchases.”


Friday, June 6, 2014

Garden Decor Project: Make a Mosaic Pot

handcrafted mosaic pot
Mosaic Pot by Mickie_G
A few summers ago, I made the mosaic pot you see to the left at a workshop sponsored by Aldridge Gardens in Hoover, Alabama.

Ever since I was a child, I have loved creating crafts that involved tile. I remember my mother taking me to the hobby shop every year just before our annual summer visit to my grandmother. My mom knew that if she let me pick out a craft kit, I would not get bored. More often than not, I chose a mosaic kit.

I still remember the 6" circular dish I made with prayerful hands in the middle. The kit came with enough 1/4 inch square tiles for me to play with the design if I did not want to make one just like the example on the box lid. I usually I ended up choosing a checkerboard pattern.  These mosaic craft kits filled my days with much happiness and gave my parents a vacation from entertaining me, I imagine. But enough reminiscing!

I won't go into how I made the mosaic pot shown in the images on this page, but I will share with you some things I did learn about tile covered pots:


  • Do not leave your mosaic pot outside during the winter months as the freezing temperatures will cause the pot to break and the mosaic pieces to fall off.
  • If you use broken dishes or crockery, it is best to use totally flat pieces if you use larger, broken bits.  It is easier to rub off the grout if there are no sharp points that are higher than your decorative shards. You can see in the photo below that I used some broken pieces from a plate. I should have trimmed the sharp points on the edges off. 
  • To break up dishes and crockery, put them between several sheets of newsprint before you break them up with a small hammer. 
  • If you want to preserve the pattern as it is on the dish, use duck tape on the back of the dish before you break it into pieces.
  • Try to fit the "tiles" close together as possible but still leave enough room for the grout. I think I left too much space so there is a lot of grout space. 
  • Wear a mask to mix up your dry grout and powdered mastic. This is a MUST!
  • Gloves for your hands are another must when rubbing in the grout. Surgical ones work best. 

Close up of my mosaic pot. 

mosaic craft 
I used glass globs and a broken dish. 
Can you see the buttons, too?


I am a "keeper" of useful things and a recycler of the broken and chipped, so I have a stockpile of broken dishes and pottery. However, I do not have the supplies like the grout and ceramic tile adhesive for making a mosaic piece.


Here is a video by "DIY Maven" that I discovered on YouTube that shows a very similar and easy process for making a mosaic flower pot.


There are several articles on Squidoo that might whet your appetite for making other types of mosaic crafts. Unfortunately, there are none about how to make a pot like mine. How To Mosaic: Art For Your Garden is a good introductory article to the craft of mosaics. 


If you like the idea of a "kit", I found several mosaic craft kits for children available on Amazon. Here are a few links for you: Kits for ages 14+kits for ages 14 or overkits for ages 8 to 13kits for age 8-13; Kits for ages 5-7 yearskits for ages 5-7; Kits for ages 2 to 4. Most of the kits for young children use foam pieces and no grout. That is a good thing.

Keep your hands busy, y'all!


Photos: Mickie_G - all rights reserved.


Note: The author may receive a commission from purchases made using links found in this article. “As an Amazon Associate, Ebay (EPN) and/or Esty (Awin) Affiliate, I (we) earn from qualifying purchases.”


Tuesday, June 3, 2014

Writing Down the Bones


room studs
Anatomy of my Future Playshop
There is something powerfully transformative about the act of creation.   I have always known that the opportunity to create is my greatest motivator.

Each day, as I stand within the skeleton of the twelve-by-twelve DIY studio I am building, I feel a sense of awe at what can be built with one’s own hands, mind, and will.

If you are a DIY or HGTV junkie like I am, perhaps you have heard talk of homes that have good bones.  In the world of construction, bones matter.

I find it astonishing that these thin sticks I nail together in the right configuration of joints and ribs are so incredibly strong.  There is elegance in the simplicity… an understated beauty.

When the time came, yesterday, to cover the bones, for the exoskeleton is an important part of the structural integrity, I took a few moments to appreciate that which I would not be able to see moving forward. 

Having thoughtfully selected each individual bone, and cared for it during the process of building an inner sanctum for nurturing creativity, this was a moment to savor and celebrate.

This morning, as I write this post, I think of Natalie Goldberg’s classic book, Writing Down the Bones.   Freeing the writer within is about bones just as building a life is about good bones.  Writing down the bones is about expressing essence.  In writing about the essentials of our lives, we experience the creation of the world over and over again. 

I encourage you to write down your bones.  Free the builder within by becoming an essential part of our Squidoo community.  I can’t wait to see what you create with your own hands.


Note: The author may receive a commission from purchases made using links found in this article. “As an Amazon Associate, Ebay (EPN) and/or Esty (Awin) Affiliate, I (we) earn from qualifying purchases.”


Monday, May 19, 2014

A Craft Project that eases my fear of Spray On Glue!

I have always been afraid to try aerosol adhesives! Yes, I am a chicken when it comes to paying good money for something that I have no idea how to use -- also, I have heard "glue everywhere!" horror stories from my friends who have tried using such products and I was definitely scared off. Even my own daughter tried using a  good name brand  spray adhesive for a design project when she was in college and told me in precise detail why she would never use a spray glue again. 


spray glue demonstation

(*Always follow manufactures's suggestions on the safe usage of their products! Click 3M: Tips and Techniques to read about how to use a spray on glue.)


Today, however, I am inspired to give spray on glue a try. "Why?" you are asking. Well, I recently read an article that gave me inspiration for a project that would put this sticky product to a good use.

retro style bulletin board made with spray glue


How I Made My Retro-Style Bulletin Board for My Craft Room  written by a Review This! contributor, decoratingforevents, showed me in excellent photographic detail how to create a bulletin board for my own home office. One tip I found especially helpful was to use "re-positionable" spray-on glue. That tip totally made good sense for someone like me who is very often a crafting klutz.


Lensmaster Decoratingforevents also found some very attractive retro-fabrics that took me back to the 50's and 60's. (Who would have ever predicted that the futuristic designs of that bygone era would EVER come back in fashion?) Another reason I like this bulletin board project: the author used a Glue Gun! As as a Glue Gun Slinger  that made me very happy, indeed.

Now, I am off to drool over the fabrics that decoratingforevents found on Amazon to see which one I can use to pull my "office" together with my own retro-style bulletin board. I just might purchase some spray adhesive, too.


Note: The author may receive a commission from purchases made using links found in this article. “As an Amazon Associate, Ebay (EPN) and/or Esty (Awin) Affiliate, I (we) earn from qualifying purchases.”


Tuesday, May 13, 2014

Mod Podge can make miracles happen!

craft idea modpodge
A Dictionary Lamp--just needs some trim!
A few years ago I got the "make over" bug and decided to re-do an old lampshade (that is a link to my DIY page, btw).  I used what I had on hand and you can see the result in the photo to the left. Yes, I did rip up an old dictionary! Do not hate me, because the book was already headed to the recycle bin. Those of you who know me will confirm that I never destroy a book that is still in good shape. I then decoupaged the pages from that torn up book onto the lamp using watered down craft glue. This recycled lampshade project turned out pretty good. 


While I was the The Glue Gun Slinger Contributor on the now defunct website, Squidoo, I  discovered that I could have used ModPodge (by Plaid) for the project instead of that diluted glue! Using a glue + water mixture was successful for me at the time, however. As it turns out, lots of people use a homemade version of ModPodge just as I did on my lampshade project. Tracy Boyer wrote and article and shared a recipe for this economical adhesive mixture for those of us who don't want to guess at proportions.  The Tracy suggests 2 parts glue to 1 part water.

Sometimes using a name brand commercial product will produce consistently good looking results. I have to admit that my own decoupage medium did not look as good after it dried as some other projects that I have seen at craft fairs and such. 


Now, I need to haul out the glue gun and put some trim on that dictionary themed lampshade. Who knows, I just might give it a fresh coat of ModPodge! Stay tuned for the results!


Note: The author may receive a commission from purchases made using links found in this article. “As an Amazon Associate, Ebay (EPN) and/or Esty (Awin) Affiliate, I (we) earn from qualifying purchases.”


Tuesday, April 22, 2014

Mailboxology


decorative painted mailbox
Photo Credit: ©Renaissance Woman (aka Bird Legs)
What gives a home instant curb appeal?  For me, it’s always the little touches: a willow garden arbor; watching hummingbirds blissing out on red geraniums in window boxes; that classic rocker calling my name on the porch.

When I think first impressions, I always recall a teacher of mine who had the kind of front yard that made you want to stop and linger.  Her brand of curb appeal started less than six inches from the street.  It was always about the mailbox.  People went out of their way to see her latest creation.  I know because I was one of them... her mailbox groupies. 

Today, as I finished revitalizing a seriously sorry looking mailbox at the end of my country lane, I realized I was paying homage to that most extraordinary individual who taught me the true meaning of painting on a whole different kind of canvas.  I only wish it hadn’t taken me so many years to do something about the forlorn sight that greeted every visitor to my home. 

When does a mailbox become more than a mailbox?  It ceases to be a standard 6-inch x 18-inch receptacle when it becomes a means of celebrating life, personal expression, and the essence of home.  Thank you, my friend, for teaching me to see the potential in everything.  If there were such a thing as human curb appeal, its name and definition would be Carolyn.

Though my first mailbox renovation isn’t on a par with her works of art, I think she would be pleased that I went all out to create something whimsical.  Carolyn, more than anyone, understood that whimsy is good for the soul.  I hope my new mailbox makes someone, maybe you, smile on the inside. 

What kind of whimsy might you express today? 


Note: The author may receive a commission from purchases made using links found in this article. “As an Amazon Associate, Ebay (EPN) and/or Esty (Awin) Affiliate, I (we) earn from qualifying purchases.”


Tuesday, April 8, 2014

Tile in a Snap


tiled home entry
SnapStone Floating Tile
Seven years ago I bought a new home that was about 70 percent complete.  Part of the 30 percent that remained to be finished included flooring in two bedrooms, the upstairs loft, a half bath, pantry, laundry room, and stairwell.  To make the house immediately livable, I put in some flooring that was trendy at the time.  I figured if a product passed the Divine Design test of my HGTV guru, Candice Olson, it was certainly more than worthy of installation in my home.

I’m still happy with most of the flooring I installed, but I have since rescued a dog.  Anyone who has cared for larger dogs knows they can be hard on flooring.  The area that has taken a beating is the stairwell landing where Toby likes to hang out by a picture window that gives him a place to keep an eye on what’s happening in our world.  I need to install a tougher material that can take heavy traffic.

Having decided on tile, since my animals love to soak up the sun in front of that window, I have been researching DIY options.  How I love to come across web pages that show an innovative home improvement product in action.  There are many websites pushing products, but few that are exceptional when it comes to demonstrating an actual installation.  I appreciate a how-to presentation that is honest in sharing what went right as well as lessons learned.

Here’s one of the best Squidoo lenses I found.  KateHon demos a fabulous floating tile flooring option while sharing before and after photos of a bathroom renovation.  I can see myself installing this tile floor in my home.  How about you?

Have you published a home improvement product review?  If so, stop by and let me know.  I hope to feature your work.  You can find me at Home Renovation Central and "Do or Di DIY."


Note: The author may receive a commission from purchases made using links found in this article. “As an Amazon Associate, Ebay (EPN) and/or Esty (Awin) Affiliate, I (we) earn from qualifying purchases.”


Tuesday, April 1, 2014

Operation Sunbeam


solar oven
Solar Oven (Photo Credit)
When I was growing up, I wanted to be a spy.  How I loved all those top-secret codes and 007 spy gadgets.  Of course, one of my favorite TV shows was Mission Impossible.

Today, my mission, which I have chosen to accept, is far different from those Jim was offered over the course of the series.  Though the overall operation has changed, there are still zeros in my aspirations.  These days I am working on zero waste and zero emissions—perhaps the Ground Zero of those seeking the ultimate green lifestyle.  Just imagine how our world would be different if everyone accepted that mission.

I recently wrote a review of a book, Cooking Green, about how we might each reduce our cookprints (our kitchen’s carbon footprint).  In that book, author Kate Heyhoe compared our ovens to Humvees because of their horrible waste of energy.  She really got me thinking about how I might create greater efficiencies with my cooking.

Kate mentioned that the closest we can get to zero emissions when baking is to use a solar oven.  That thought has been bouncing around in my brain for several days now.  Intrigued with the thought of building and using my own solar oven, I have been a woman on a mission. 

First, I gathered up resources for learning more about solar cooking.  A topic search of web pages led me to many excellent resources.  I’ve since checked out solar cookery guides and cookbooks from my library and have conducted a number of Internet searches.  These combined resources have only increased my enthusiasm for making my cooking as green as possible. 

Curious?  Your mission, which I hope you will accept, is to take a minute or two to explore the potential for tapping into the greatest underutilized power source on the planet (sunshine).  I encourage you to think about the possibilities by visiting How to Make and Use a Solar Oven.  Don't delay.  This link may self-destruct in 30 seconds.


Note: The author may receive a commission from purchases made using links found in this article. “As an Amazon Associate, Ebay (EPN) and/or Esty (Awin) Affiliate, I (we) earn from qualifying purchases.”


Tuesday, March 25, 2014

Beetle Mania

tree stumps or log ends
Permission via Creative Commons -
Photo by Tuchodi
There's something you should know about me.  I'm a locabore (not to be confused with loco or boring).  Are you wondering why you've never heard this term before?  It's because I just made it up.  I do that a lot.

Perhaps you have heard of a locavore—a person dedicated to eating local foods whenever possible.  So what in the world is a locabore?  It’s a person who makes a commitment to using local beetle kill wood for a wide variety of construction projects.  The “loca” is for local and the “bore” is for the beetle activity that leads to a tree’s untimely death.  It’s a growing problem in my state (Colorado) and beyond.

I have been reading about green remodeling practices.  One of the important things we can do when building or remodeling is to use reclaimed wood.  When lumber is harvested nearby, the ecological impact is reduced significantly.  There is no need to transport the wood cross-country (which eliminates a much larger carbon footprint). 

Because dead trees are already dry and seasoned, there is no need to burn fossil fuels for the kilns that would normally be required to lower the moisture content of freshly cut living trees.  And, by using dead trees, we can lower the dependence on harvesting trees that are better left in the forest doing their best to keep our environment healthy.

This weekend, as I was purchasing supplies for a couple of ongoing home renovation projects, I found beetle kill pine boards on sale.  That made my choice very easy.  When I build with local woods, the advantages go well beyond financial and ecological gain.  Things that grow here look good in my home.  They are a natural fit.  You would expect to see native woods like aspen, pine, and fir inside a house that is surrounded by those kinds of forests.  There is a harmony that is both seen and felt.

Even if you live in an urban area, there are always sources of reclaimed timber and other architectural elements.  A source to consider is your local Habitat for Humanity Restore.  They stock recycled construction materials.  Always think “re” first as you aim for greener living and building (reclaimed, recycled, repurposed).

Let's learn how to be good to the place we call home.  We only get one chance at this.  Unless we want to be dead standing, it's "Do or Di" time.  


Note: The author may receive a commission from purchases made using links found in this article. “As an Amazon Associate, Ebay (EPN) and/or Esty (Awin) Affiliate, I (we) earn from qualifying purchases.”


Tuesday, March 11, 2014

Uniquely Brilliant

ostrich egg carvings
Photo Credit: Ostrich Egg Carvings
This morning I have several things on the brain that might seem unrelated at first glance:  Seth Godin, orchids, Dremel tools, dentures, "peticures," and egg carvings.  You just never know what you’re going to find here when I start writing at 2:30 a.m.  I enjoy being surprised by the things percolating in my brain at this hour.

So what is the connection?  The interwoven thread is that of being indispensable and uniquely brilliant.  I am, of course, thinking about Seth Godin’s book about linchpins.  One of the things Seth asks us is if we are indispensable.  I had always hoped to be seen in that way but in reality, when I first read his book, I had not yet experienced an organization that didn’t constantly remind my colleagues and I that we could be easily dispensed of and replaced. 

What makes you or I indispensable, or, in the definition of a human linchpin, essential?  We learn by reading Seth’s book that it is our unique brilliance.  And, our unique brilliance has to do with the artistry of our hearts and souls.  We become indispensable when we turn each day into a work of art. 

That explains where the title of this post and Seth Godin come into play.  You may still be wondering how I’m going to work in the orchid, false teeth, peticure, carving, and Dremel angles.  This has to do with the artistry, unique brilliance, and essence of those who make Squidoo such an incredibly creative unworkplace.

Unworkplace?  That’s right.  Squidoo is not typical in any way.  In this creative community, each writer is constantly encouraged to pour his or her indispensability into each interaction (with others and with stories).  So what is the work in an unworkplace?  It’s emotion, and passion, and delight.  It is being the work of art that we already are in essence.

That brings us to the rest of the story, as Paul Harvey would say.  A while back, I issued a challenge for creative souls to share reviews of their favorite Dremel tools.  In my “Do or Di” DIY world, the Dremel is indispensable.  It is uniquely brilliant.  It’s the one tool I would never want to be without.  I haven’t found anything that my Dremel cannot do.  It is a linchpin.

While visiting Dremel reviews on Squidoo, I have been continually amazed and delighted by the ingenious ways in which my fellow writers use their Dremel tools and accessories.  Please take a few moments to celebrate with me the unique brilliance of those who have demonstrated there are no limits to what two linchpins (human and Dremel) can accomplish in concert with one another.  

Denise McGill saves the day with her Dremel dentistry brilliance.  While Nathanville upcycles a plastic tumbler into an orchid pot using his Dremel.  Then there are the amazing egg carvings presented by Craft-E-Mom.

After checking out their artistry, might you join us as the newest member of our Squidoo Linchpin Collective?  We’d love to have the opportunity to appreciate the indispensable artistry and unique brilliance of you.


Note: The author may receive a commission from purchases made using links found in this article. “As an Amazon Associate, Ebay (EPN) and/or Esty (Awin) Affiliate, I (we) earn from qualifying purchases.”


Most Recent Reviews on Review This Reviews


Search for Reviews by Subject, Author or Title

The Review This Reviews Contributors


SylvestermouseSylvestermouseDawn Rae BDawn Rae BMbgPhotoMbgPhotoBrite-IdeasBrite-IdeasWednesday ElfWednesday ElfOlivia MorrisOlivia MorrisTreasures by BrendaTreasures by BrendaThe Savvy AgeThe Savvy AgeMargaret SchindelMargaret SchindelRaintree AnnieRaintree AnnieLou16Lou16Sam MonacoSam MonacoTracey BoyerTracey BoyerRenaissance WomanRenaissance WomanBarbRadBarbRadBev OwensBev OwensBuckHawkBuckHawkDecorating for EventsDecorating for EventsHeather426Heather426Coletta TeskeColetta TeskeMissMerFaeryMissMerFaeryMickie_GMickie_G


Review This Reviews is Dedicated to the Memory of Our Beloved Friend and Fellow Contributor

Susan DeppnerSusan Deppner

We may be apart, but
You Are Not Forgotten


“As an Amazon Associate, Ebay (EPN) and or Etsy (Awin) Affiliate, I (we) earn from purchases.” Disclosure Statement

X