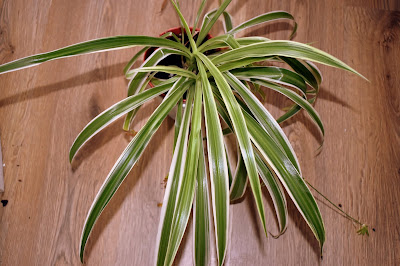
Saturday, February 13, 2021

Review of Itasca Boots for Women


Itasca Women's Tahoe Suede Winter Boot
Itasca Women's Winter Boots
I moved from Coastal Georgia, which has mild winters with almost never any snow, to the Quad Cities area of Iowa. The reason for the move: to be near family. The result: the need for snow boots for the winter months.


After finding myself in snowy Iowa, I began to check out a variety of snow boots.  I shopped for everything from the over-the-shoe style (like the galoshes-type I remember wearing in my youth, growing up in New York State winters) to fleece-lined 'shoe' boots. The boot I chose is the Itasca Women's Tahoe Suede Winter Shoe Boot.


The Itasca Tahoe Suede Winter Boot for Women


A picture of my personally owned Itasca winter boots
My warm Itasca Winter Boots (c) Elf

The Itasca Tahoe boot has a durable suede upper over a waterproof TPR shell.  The plush boa collar is warm and attractive and has the added benefit of keeping the snow from getting inside your boots. 


The inside has a Thermolite insulation, which is nice and warm.  And the traction rubber outsole does a dandy job of giving you traction walking on snow and ice. 


The front zip opening makes taking boots on and off really easy, especially handy for stepping out of the boots on a mat inside the door without getting your socks wet. 


Sizing


The boots I purchased were sized a bit different than I am used to when buying shoes.  What I considered my normal shoe size were a little too small in boot size. And the next size up was just a tiny bit too large. I have compensated for that by wearing a pair of the warm fuzzy socks I wear around the house on really cold days over my regular socks inside the boots. Those socks fill in the extra space so that my boots now fit perfect without any slippage. 


Summing Up My New Winter Boots


Wintertime in Iowa and my Itasca winter boots
Wintertime in Iowa (c) Elf

Shoveling snow in my Iowa winters has now been made a little more palatable, if not particularly pleasurable, due to boots that keep me from slipping or falling. And keep my feet warm as well. 


Related Links:

Review of the Itasca Tahoe Suede Winter Boot for Women written by (c) Wednesday Elf.


Note: The author may receive a commission from purchases made using links found in this article. “As an Amazon Associate, Ebay (EPN) and/or Esty (Awin) Affiliate, I (we) earn from qualifying purchases.”


Friday, February 12, 2021

Homemade Cinnamon Rolls Recipe and Review

These homemade cinnamon rolls are delicious! 


Cinnamon Roll Recipe
I wish I could say they are fast, but they do require time for raising.  I have not found a way to start the cinnamon rolls in advance and bake them later.  This is a recipe you will want to prepare and bake on the same day.  Therefore, you either need to serve them for brunch, or get up before sunrise to start the dough.  Either way, these cinnamon rolls are worth it!

It looks like a lot of instructions when you read the recipe below, but they are still fairly easy to make.  I simply give enough details that even the inexperienced baker will have success with the recipe. Please do not let the appearance of difficulty or length keep you from baking these divine cinnamon rolls.

I will warn you in advance, the recipe makes 12 cinnamon rolls, but most of us can only eat one.  They are that big and filling.


Homemade Cinnamon Rolls Recipe 

Dough Ingredients 

  • 2 ¼ teaspoons (1 pkg) active dry yeast 
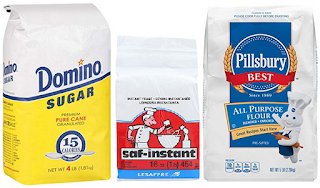
  • sugar, flour and yeast
    3/4 Cup Warm Whole Milk
  • 1/2 Cup of Buttermilk  
  • 1 Cup Warm Water 
  • 2 Tablespoon Softened Butter 
  • 3 Tablespoons Sugar 
  • 1 ¼ teaspoons Salt 
  • 6 Cups All Purpose Flour (plus extra for flouring work surfaces)


Instant Coffee Packets

Filling Ingredients

  • 1/4 Cup Melted Butter 
  • 1 Cup Packed Light Brown Sugar 
  • 4 teaspoons Instant Coffee Granules – mashed with spoon to fine powder 
  • 2 teaspoons Ground Saigon Cinnamon 


Simple Icing Ingredients  (If prefered, click here to jump to cream cheese alternative icing recipe)

  • 1 ½ Cup Confectioner’s Sugar 
  • 2 Tablespoon Softened Butter 
  • 2 Tablespoon Whole Milk 
  • ½ teaspoons Vanilla Extract 


Set-up for Baking Success


Set out 1/4 Stick (4 Tablespoons) of Butter to Soften plus a little more to grease baking pan & bowl (should set out about 30 minutes before needed) 

Set out the mixing bowls & other supplies you will need.  I use the following:

  • Deep bowl for mixing (flour tends to blow when mixing, so use a deep bowl)
  • Large glass bowl for raising  
  • Hand Held Mixer
  • 13 x 9 Baking Pan 
  • Cutting board for kneading 
  • Clean the counter top for rolling out dough to 18" x 12" size  (Note:  I have a 18 x 12 glass microwave plate from an old microwave that is perfect for this.  If you can find one, it will save a lot of mess and clean-up time. Otherwise, I recommend the pastry mat with measurements featured below)

Preparation
  • Grease large glass bowl for raising
  • Flour Cutting Board for kneading
  • Warm Milk & Buttermilk in microwave (stir every 15 seconds to avoid burning)

cinnamon rolls recipe collage
Directions 

  1.  In a large, deep mixing bowl, dissolve yeast in warm water
  2. Add warm milk, warm buttermilk, sugar, softened butter, salt and 4 cups of flour.  Beat (mixer) on medium speed until smooth. 
  3. By hand, spoon or fork, Stir in remaining flour to form a soft dough (dough will still be sticky) 
  4. Turn onto a floured cutting board surface, knead 6-8 minutes. (Dough should be smooth and elastic.) 
  5. Place in a greased bowl, turning over once to grease top of the dough ball. 
  6. Cover and let rise in a warm place for 1 hour
  7. After the hour, Grease 13 x 9 baking pan
  8. Flour clean counter or rolling surface & rolling pin
  9. Melt 1/4 Cup Butter in microwave
  10. Combine Brown Sugar, Instant Coffee Granules and Cinnamon
  11. Punch Dough down, turn onto floured surface and roll out to 18" x 12" rectangle. 
  12. Brush with melted butter 
  13. Sprinkle brown sugar mixture over buttered dough to within ½” of edges.  Use all of the mixture
  14. Starting with long edge, Roll up Jelly-roll style and Pinch seam to seal 
  15. Cut into 12 slices 
  16. Place rolls, cut side up, in greased baking pan 
  17. Cover and let rise 30 minutes (will double again) 
  18. Preheat oven to 350 – Bake 25 – 28 minutes until golden brown
  19. In a small bowl, beat icing ingredients until smooth and spread over rolls 
  20. Serve your delicious homemade cinnamon rolls
homemade cinnamon rolls


Ingredients 
  • 2 ounces cream cheese, softened 
  • 7 Tablespoons butter, softened 
  • 2 Tablespoons milk
  • ½ teaspoon vanilla extract  
  • 1 ½ cups confectioners' sugar
  • ¼ teaspoon salt  
Instructions:  Beat softened cream cheese and butter together with an electric mixer in a large bowl until creamy. Mix in the milk and vanilla, then gradually mix in the confectioners sugar and salt until smooth.


There are a few things in this post that may cause questions or uncertainty. Therefore, I am featuring a deep mixing bowl that I recommend for mixing dough. It won't keep the flour from "blowing", but it will keep more of it contained in the bowl. Also, saigon cinnamon is not the average, everyday cinnamon most of us have on our spice rack. It is a bolder, stronger tasting cinnamon that really gives the cinnamon rolls the needed "kick" that sets them apart from others.


 Pyrex Prepware 4-Quart Rimmed Glass Mixing Bowl, ClearCheck Price Mccormick Gourmet Organic Ground Saigon CinnamonCheck Price SiliQueen Silicone Pastry Baking Mat with MeasurementsCheck Price OXO Good Grips Silicone Basting & Pastry Brush - SmallCheck Price


Check Out More Recipe Reviews at
ReviewThisRecipes.com


Homemade Cinnamon Rolls Recipe & Review Written by:
House of Sylvestermouse


© 2021 Cynthia Sylvestermouse


Note: The author may receive a commission from purchases made using links found in this article. “As an Amazon Associate, Ebay (EPN) and/or Esty (Awin) Affiliate, I (we) earn from qualifying purchases.”


Thursday, February 11, 2021

Review of Historical Novel....West with Giraffes

giraffe in Tanzania
Photograph my sister Julie took while in Tanzania


West with Giraffes is one of the best books I've read in a long time and I have read some books I've really enjoyed lately.  But you know how some books just resonate with you, well that is how West with Giraffes was with me.  I usually read before I go to bed for about 1/2 hour.  With this book, I would wake up in the morning thinking about the book and of course I had to make time to read more during the day.
 

Setting

The book is based on the true story of two Giraffes that are waylaid during a hurricane and end up on the docks in New York City.  They are met by two unlikely characters who end up driving them all the way to the San Diego Zoo.  The time frame is during the Great Depression and we learn some of the history of the era along the cross country drive.  It is based on the amazing story when two giraffes make headlines when they travel cross country.


Characters

The characters in the book are so real you feel as if you know them personally.  

The Old Man-  During most of the book Riley is called the Old Man.  He is the one who met the giraffes at the  dock in New York.  He works for the San Diego Zoo and he is tasked with meeting the giraffes and taking them to San Diego.  We get  to know him gradually as he makes his way across country with Woody.

Woody is a 17 year old orphan from Texas.  When his family is wiped out during the dust bowl tragedy he makes his way to New York City where he ends up on the dock when the giraffes land.  He hears they are headed to "Californy" and makes it his goal to somehow follow them there.  Woody's full name is Woodrow Wilson Nickel and during the long trip cross country we find that he is as endearing as his name.

Red is a young photographer with a secret who is determined to be published in Life magazine and claim her fame with her story about the giraffes.

The giraffes themselves really show their different personalities and become a wonderful part of the book.  All of the main characters are drawn in by a love of the beautiful animals.  They call the giraffes Boy and Girl.  Girl had been injured during the hurricane and they all had to stop often to treat her hurt leg.  She is the more aggressive of the two giraffes.  Boy is shy and more approachable.

This is a book that I would highly recommend.


Note: The author may receive a commission from purchases made using links found in this article. “As an Amazon Associate, Ebay (EPN) and/or Esty (Awin) Affiliate, I (we) earn from qualifying purchases.”


Wednesday, February 10, 2021

Open Jars Easily With Jar Heads Rubber Jar Opener Gripper Pads

I have always found opening jars with very tight lids to be a challenge, since I have fairly small hands and limited grip strength. Now that I'm over 65 and my hands are weaker, that task evolved from a challenge into a struggle, until I discovered Jar Heads rubber jar opener gripper pads. They make opening jars significantly easier for anyone, and are especially helpful for someone with small, weak, or arthritic hands. They're also thoughtful, practical gifts for seniors. 

Here is my product review of these terrific Jar Heads jar opener rubber grips, which have become kitchen essentials at our house.

Jar Heads non-slip textured rubber grip Jar Openers - Made in the USA from 100% post-consumer recycled tires

Finding the Best Jar Opener For People With Limited Grip Strength or Arthritis Can Be Hard

There are many types of jar opening tools and gadgets on the market. Many, if not most, claim to be good for seniors and people with weak hands or arthritis. Nearly all of them have mostly 5-star ratings and glowing reviews on Amazon. (It's really unfortunate that Amazon's customer ratings and reviews system seems to be easily "gamed," and isn't nearly as helpful in making purchasing decisions as it used to be.) So, despite having more experience than most with online product research and comparison shopping, I found that picking out a jar opener that had a high probability of living up to those claims was a bit like playing roulette. 

So, if you are looking for an extremely effective jar opener that not only would be a welcome addition to any kitchen, but could also be a blessing for someone with small or weak hands, arthritis, or limited grip strength, I hope to spare you considerable time and effort by summarizing the most popular types of jar openers available and sharing some of the products I purchased, or seriously considered, before I discovered the awesome Jar Heads rubber jar gripper pads that I have been using, and loving!

The Most Popular Types of Jar Openers and Rubber Jar Grips

Traditional Handheld Jar Openers

In my experience, most traditional jar openers and screw-top bottle openers are only moderately effective, and often quite frustrating. 

  • None of the ones without teeth that I've tried over the years, especially the strap wrench (AKA grip wrench or loop wrench) types, have worked well on very tightly sealed screw-top bottles or glass jars with metal lids.
  • I've found that, for the most part, jar openers with sharp, serrated teeth (like the older version of this OXO Good Grips Jar Opener I've owned for many years) can be more effective than the "toothless" models at breaking the vacuum seals on new, unopened glass food jars. Unfortunately, they often end up skidding around the rim of those stubborn, firmly stuck, tightly sealed metal lids, rather than biting into and gripping the metal securely as you twist the lid counterclockwise. Consequently, the teeth can score a deep, sharp-edged gash around the perimeter of the pugnacious jar lid, whether or not the jaws successfully break the seal and loosen the lid. Sometimes I have had to wrap the sides of those lids with flexible, nonwoven, self-adhesive bandage strips to protect our hands from the sharp, jagged-edged score lines around the rim when we subsequently open or close the jar.
  • All these types of handheld jar openers require not only grip strength in both hands (the one that holds the jar and the one that turns the lid), but also sufficient leverage to twist the jar and lid in opposite directions. 

Mounted, Under-Cabinet Jar Openers

Two of the issues with traditional handheld jar lid and screw-top bottle openers are weak grip strength and lack of leverage. A jar opener that is mounted securely to the underside of a cabinet above the kitchen counter(s) and has a V-shaped area with large, serrated metal teeth on one side of the "V," such as the popular and highly rated EZ Off Jar Opener, can help with both these issues, and also accommodate a wide range of bottle cap and jar lid diameters. It enables you to grip the jar more securely with both hands as you turn it counterclockwise, and holds the lid firmly in place as you twist the container.

When trying to open very tightly sealed jars, however, the large, serrated teeth could bite into the sides of the metal lids deeply enough to cut grooves or gouges with sharp, jagged metal edges.

Automatic Electric Jar Openers

Many women (especially those who have limited grip strength), seniors, and people who suffer from arthritis are fans of automatic electric jar openers, and find that these (theoretically) hands-free electric openers give them a greater sense of independence in their daily lives. They can be quite effective at opening straight-sided glass jars (ideally without rounded "shoulders" at the top) that have tightly sealed, hard-to-open, metal screw-top lids.

However, these kitchen gadgets are more expensive than most manual bottle or jar openers, and have some limitations that manual openers don't. 

  • These automated openers should not be used with plastic jars or on plastic lids. 
  • While it is possible to use this type of automatic opener with tapered glass jars, doing so requires placing a hand on top of the gadget and maintaining firm downward pressure to prevent the plastic arms from slipping. Obviously, that isn't optimal, particularly for someone with arthritic or weak hands.
  • If one of these electric jar openers malfunctions, or just slips off a glass jar with "sloping shoulders" (potentially knocking it over, and perhaps causing it to break), they don't turn themselves off automatically, which I consider a safety risk. 
  • This type of opener operates fairly slowly, and it is important to wait until the entire automated cycle is complete before removing both the gadget and the newly-loosened bottle or jar lid. For someone who either lacks patience or needs to prepare a meal in a hurry may find this wait frustrating, or even be tempted to try to stop or remove their automatic electric jar opener prematurely. If they remove it during the cycle, the opener will continue to operate until the cycle completes, and stopping it mid-cycle would require removing the batteries while it was still running, which would be dangerous. 
  • They are wider and bulkier than most other types of jar openers, and may not fit in a crowded kitchen tools drawer.  
  • Most run on two AA batteries, which will need to be replaced for as long as the product remains in use. 
Despite those limitations, these electric jar openers are a wonderful option for anyone who is physically unable to grip both a jar and its lid securely and twist it open with the aid of a handheld or under-cabinet jar opener or rubber gripper pads. As long as they can press the enormous button on the top of this tool to initiate the cycle, the process of opening a jar is fully automated and hands-free, except for jars that are tapered or have rounded "shoulders." (As I mentioned, opening those types of jars requires placing a hand on top of the device and holding it firmly in place throughout the entire automated cycle, to prevent it from slipping off the lid, which makes that a hands-on vs. a hands-free operation.)

Rubber Jar Openers AKA Rubber Jar Grips, Jar Opener Rubber Grips

I would never had considered buying a rubber jar opener, or even looked at the terrific Jar Heads rubber jar opener gripper pads, if my husband and I hadn't received one as a promotional gift from our favorite local barbecue restaurant many years ago, when we lived in Boston's Back Bay neighborhood. It was a large, pig-shaped cutout made from a thin, pink, textured rubber sheet, emblazoned on one side with the restaurant's whimsical logo and its address, phone number, and website in bold, black permanent ink. At the time, we thought it was a cute idea, but nearly threw it out. How could this flimsy piece of rubber sheet work better than a traditional jar opener with sharp, serrated, stainless steel jaws? 

Fortunately, we never got around to tossing it. One day, on a whim, I decided to give it a try. I was astonished at how much faster and easier I could open a brand new jam jar with an extremely tight lid by using this silly, pig-shaped, subtly textured rubber "rag" than with any of the traditional handheld jar openers I had owned over the years. When my husband came home from an errand, I was excited to show him how much more securely I was able to maintain a grip on a stubborn lid and twist it open successfully with Porky's help, compared to my usual struggles with hard-to-open jars. Seeing how well it worked for me piqued his curiosity, and he wanted to experience the difference  between using this thin, rubber jar opener pad and using our traditional model, with stainless steel jaws with large, sharp teeth on one of the sides. Even though my husband is very strong, has a powerful grip, and doesn't need the help of a jar opener most of the time, he also was impressed by Porky's performance. He also liked the idea of using this simple rubber jar gripper pad to help him subdue the occasional extra-defiant lid and break the vacuum seal without having to rely solely on brute force. 

It's ironic that this mildly amusing, but seemingly worthless piece of thin, floppy, lightly textured rubber sheet, which we had nearly thrown in the trash bin, turned out to be by far the most useful, memorable, and appreciated promotional item either of us has ever received from any business. In addition, my husband and I soon figured out that if we could get two of these rubber jar openers, using one in each hand would strengthen my grip on the jars as well as the lids and increase my leverage, so that I wouldn't need as much strength or have to use as much force to open even stubborn jars with tightly sealed lids. 

At the time, our crazy work schedules and pressing family health issues left us with neither the time or energy to pursue the possibility of acquiring a second Porky. Then, after several years of loyal service, poor Porky met his demise in the line of duty, when the thin rubber sheet tore as grappled with one recalcitrant jar lid too many. Since we were no longer living in the city, I decided to call the barbecue restaurant and ask whether they still had any of their old promotional jar opener rubber grips and, if so, whether they would let me purchase half a dozen (two for immediate use and four more as spares). That's how I learned, to my dismay, that the restaurant had closed the previous year.

It was it was time to begin the search for a worthy successor to our beloved porcine rubber jar opener. 

I looked high and low for something similar, but there wasn't much to choose from at the time. I purchased a pair of white, flower-shaped, jar opener rubber grip pads, currently sold as NORPRO 597 Non-Slip Rubber Jar Openers, so I could use one in each hand to help me hold the glass jar securely while I twisted the lid open. I also liked the wider, 5.5-inch diameter of this style, and the rubber was thicker and, presumably, more durable. Unfortunately, that thickness made the rubber much stiffer and less pliable, so it couldn't conform to the lid, and the surface was smooth and almost slick, all of which made it harder to get a good grip with these, despite the "non-slip" marketing claim, 

A few years later, I found two more possible contenders. One was a set of natural rubber jar openers with an open waffle pattern similar to foam shelf liner, which also had a wider, 6-inch diameter. And, since they came in a set of four, I would have one to hold the jar, one to grip the lid, and two extras for backup. However, I worried whether the soft foam material and open weave might make them less grippy or less durable than I needed (or both), and in reading through the customer reviews, I found several that mentioned those issues. 

The other contender, the Prepworks by Progressive Jar Grips Multi-Purpose Lid Openers, looked very promising. This set of three rubber jar openers includes one teal blue, square grip pad approximately 5" wide, made from thin, flexible, lightly textured rubber sheet that looks to be very similar in weight, thickness, and flexibility to that the jar opener we had; a somewhat smaller green round sheet made of a slightly thinner material, and a red, 2" wide, rubber grip shaped like a truncated cone for gripping bottle lids, and made thicker and, presumably, somewhat sturdier material. Unfortunately, as I read through the numerous reviews, many of the customers who gave this set 5-star ratings did so primarily because of the bottle opener. People seems much less enthusiastic about the two rubber jar openers, which some considered too flimsy and likely to tear.

Jar Heads Rubber Jar Opener Gripper Pads for the Win!

When I felt that my search for Porky's replacement had reached the point of diminishing return, I decided to stop looking for additional candidates and go with options I might have missed, order a set of Jar Heads rubber jar openers, and cross my fingers that they would actually live up to their claims. 

Lady Luck must have been smiling on me, since the first time I used my new Jar Heads rubber jar opener grippers, I knew at once that I had hit the product roulette jackpot with these well made, easy to use kitchen gadgets!
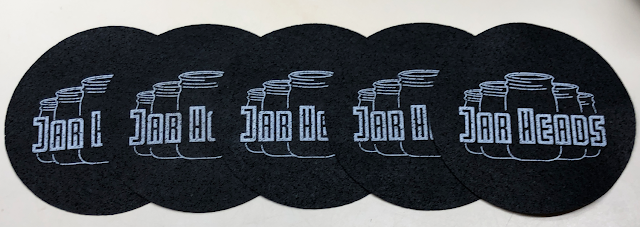
Row of five Jar Heads rubber jar opener gripper pads

Here are the main attributes, features, and benefits that led me to choose Jar Heads Rubber Jar Opener Grippers over the other rubber jar openers on my "short list" of contenders. 

Thin and Flexible Enough to Conform to Jars, Bottles, and Lids, Yet Tough Enough to Hold Up Under Pressure, and Over Time

  • Even though these jar opener pads are only about 1/16" thick, they're also sturdy and substantial.
  • Made from recycled rubber tires, which are designed to withstand much more abuse than twisting open bottle and jar lids! 
  • After 10 months of frequent use, and being squeezed into a drawer crammed with kitchen tools and kitchen gadgets in between uses, all five of our Jar Heads still look, feel and perform the same as they did when I first opened the package. 

Made From 100% Post-Consumer Recycled Tires

  • Uses sustainable, eco-friendly, recycled material and manufacturing practices.

Superior Grip Strength Lives up to "Non-Slip" and "Works Great for Weak Hands,...Seniors With Arthritis and Children" Claims 

  • While nearly every rubber jar opener product’s marketing makes these claims, few live up to them.
  • By contrast, Jar Heads take advantage of the powerful grip strength that has been engineered into the rubber tires from which these jar opener gripper pads are made, which also gives them exceptional durability

Jar Heads rubber jar opener gripper pads next to jar and bottle
Wide Enough to Grip Large Jars, Flexible Enough to Grip Small Bottles

  • The 5" diameter make these rubber discs are wide enough to grab onto even oversized pickle jars or  party-sizes pretzels sold in bulk at warehouse stores like Costco or Sam's Club.
  • They are also thin and flexible enough to grip a small, slender hot sauce bottle and its extremely small screw-on lid. 

Made in the USA

  • Buying products made in the USA supports American companies, workers, and their families.  

Sold in Sets of Five

  • That's enough to share, or use in pairs, and still have spares!

Strong, High-Quality Jar Openers for $2.50 Apiece

  • At the time this post was published, a 5-pack of Jar Heads was selling on Amazon for $12.50, with free shipping for Amazon Prime members. That works out to just $2.50 each for these excellent jar opener rubber grips! 
  • At that low price, you could give these out as stocking stuffers to everyone on your holiday gift list, or as small "just because I'm thinking of you" gifts any time of year.

30-Day, 100% Money-Back Satisfaction Guarantee

  • I respect and prefer to buy from companies that have enough confidence in the quality and performance of what they make or sell, and have a strong enough commitment to their customers to stand behind their products with a risk-free, 100% money-back satisfaction guarantee. 

    Jar Heads are sold by First Class Products of NY, which describes itself as a "Small Family Run Business founded in New York" on its Amazon Seller Profile Page, where you can contact them directly with a question or concern, and also read the overwhelmingly positive seller feedback from their Amazon customers. 
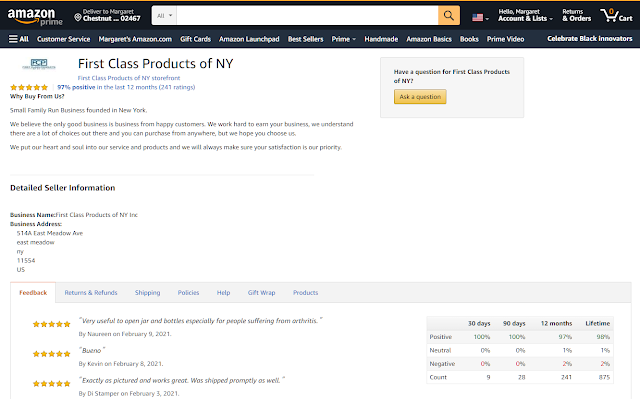
Screenshot of Amazon seller profile for Jar Heads
A screenshot of the seller's Amazon Seller Profile page 

Jar Heads Make Great Gifts for Seniors

Or Anyone With Small or Weak Hands or Limited Grip Strength

  • Gives them more confidence to open jars and bottles by reducing the legitimate fear of losing their grip on glass containers and knocking over or dropping them, potentially causing them to break into dangerous, sharp glass pieces and shards.
  • Reduces the frustration and embarrassment of needing to rely on someone else to take care of this routine task for them, and waiting for someone to be available to help.

A Helpful, Inexpensive Aid That Makes Anyone, Regardless of Their Grip Strength

  • Even people who have strong enough hands to loosen tight lids or break the vacuum seals on new, unopened bottles and jars will appreciate how much less effort it takes to open them with the help of these Jar Heads rubber grip pads.


Jar Heads Rubber Jar Opener Gripper Pads product review by Margaret Schindel

Read More of My Product Reviews

Read More Product Reviews by Our Review This Reviews Contributors


Note: The author may receive a commission from purchases made using links found in this article. “As an Amazon Associate, Ebay (EPN) and/or Esty (Awin) Affiliate, I (we) earn from qualifying purchases.”
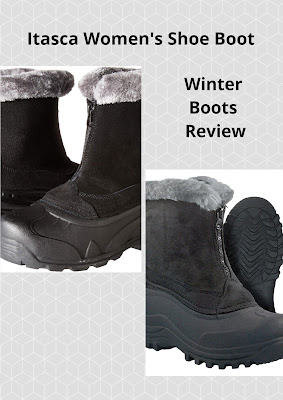

Tuesday, February 9, 2021

Ninja Foodi Grill Review


Ninja Foodi Grill Review

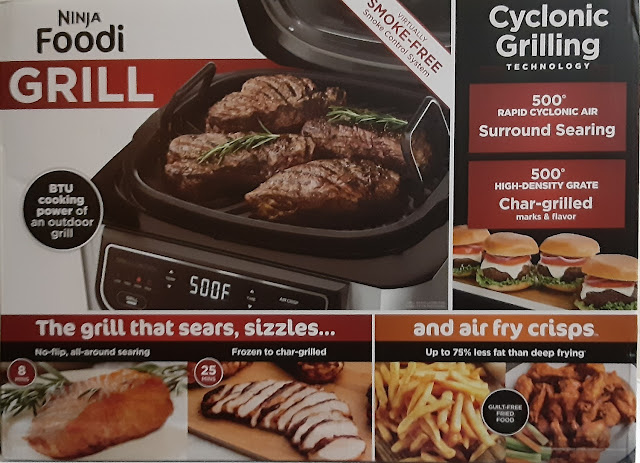
Our daughter got this Ninja Foodi Grill as a Christmas gift and I just have to tell you how amazing this kitchen gadget really is.

Fran and I are both retired but we both work part-time jobs. On the days that we work, we don't always prepare a meal for when we get home. 

With the Ninja Foodi Grill, we have a nice hot meal in 30 minutes or less. You can grill, air fry, bake, roast, and dehydrate with the Foodi Grill. Take foods from frozen to grilled juicy perfection in 30 minutes or less.

Ninja Foodi Grill Features and Settings:

Grill Control, Low, Medium, High, and Max

Time Setting button in minutes

Air Crisp Setting

Dehydrate Setting

Roast and Bake Settings

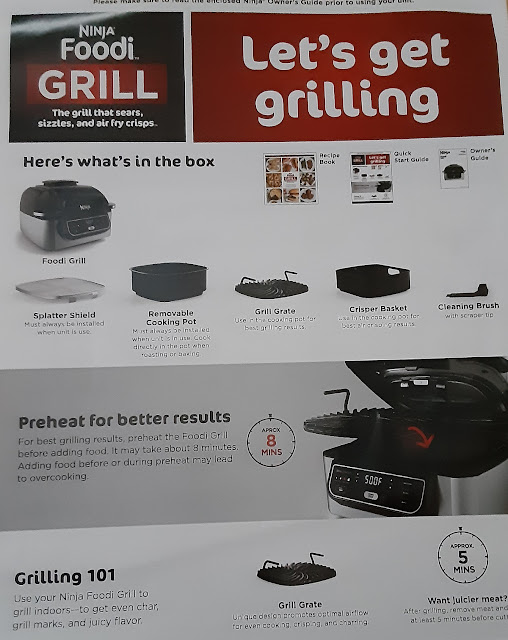
Ninja Foodi Grill accessories

Above is a photo of everything in the Ninja Foodi Grill box:

Recipe Book
Quick Start Guide
Owner's Guide
Foodi Grill
Splatter Shield
Removeable Cooking Pot
Grill Grate
Crisper Basket
Cleaning Brush

The recipe book has 15 great recipes for you to try. There are also charts for grilling, air frying, and frozen food. The charts give you the amount of food, preparation tips, Cooking temperatures, and recommended cooking times. 

Sausage and Grilled Peppers

We made these Sausage and Pepper Grinders, the recipe is on page 26 of the included recipe book. 

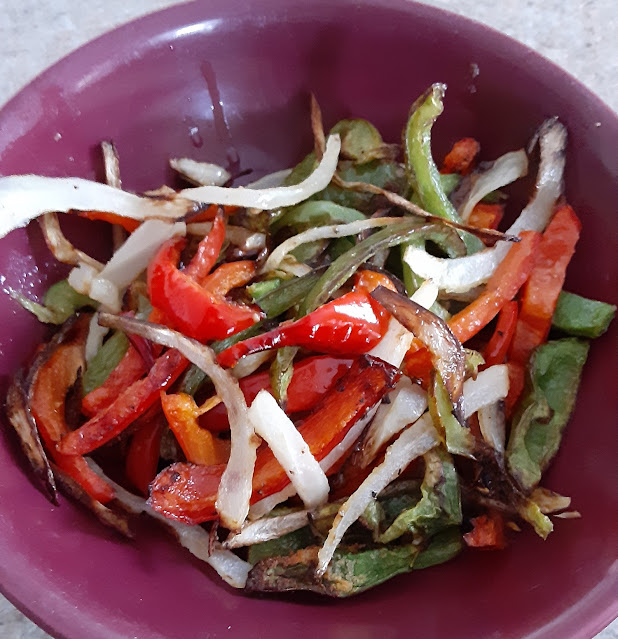
Grilled peppers and onions

First, Fran cut 2 bell peppers and one onion and tossed them in a plastic bag with 2 tablespoons of canola oil. 

Then, insert the grill grate and close the hood. Select Grill, set the temperature to low, and set the time to 28 minutes. Then, select start/stop to begin preheating. The unit will beep to indicate that's time to add the food, I love this feature it really takes the guesswork out of preheating. 

Add the peppers and onions on top of the grill grate and close the hood. The timer will begin to count down. Grill the peppers and onions for 12 minutes, when the timer counts down to 16 minutes lift the hood, place them in a bowl and cover with tin foil for later.

Grilled Sausage

Add the sausage and close the hood, the timer will begin to count down again. We cooked the sausage for 7 minutes per side for a total of 14 minutes. The recipe cooks the sausage for 6 minutes per side but I added 2 minutes at the beginning of the process knowing that I wanted my sausage cooked a little more.

Lift the hood and remove the sausage. There will be 2 minutes left on the timer, add your sausage rolls on the grill top and close the hood for the last 2 minutes. Now you'll have nice toasty rolls for your sandwich. These sausage grinders were delicious, I went a little overboard and ate 2 of them myself.

I like the fact you can cook your whole meal by setting one time. We've also made shrimp and fish fillets in the air crisper from frozen to perfection.

Last week I made a couple of ribeye steaks. I brushed them with canola oil, seasoned them, and grilled them for 6 minutes per side, they were a perfect medium-rare. Let's say someone in the family likes their steak cooked medium, all you have to do is leave one steak on the grill and add another minute or two.

So far this has been a great addition to our kitchen gadgets. We've been having a lot of fun experimenting with different foods and time settings.

By the way, the splatter screen, removable cooking pot, grill grate, and crisper basket are really easy to clean.

Find more Product Reviews Here: ReviewThisProductReviews.com

Ninja Foodi 5-in-1 4-qt. Air Fryer, Roast, Bake, Dehydrate Indoor Electric Grill (AG301), 10inch x 10inch, Black and Silver (Renewed)Ninja Foodi 5-in-1 4-qt. Air Fryer, Roast, Bake, Dehydrate Indoor Electric Grill (AG301), 10inch x 10inch, Black and Silver (Renewed)Check the Price


Find more Recipes Here: ReviewThisRecipes.com


Note: The author may receive a commission from purchases made using links found in this article. “As an Amazon Associate, Ebay (EPN) and/or Esty (Awin) Affiliate, I (we) earn from qualifying purchases.”


Monday, February 8, 2021

USPS Informed Delivery Reviewed

 Ever wonder what the mail will bring? Are you trying to track a lost package or envelope? Try the Informed Delivery Service offered for free by the United States Postal Service. Incoming mail and packages are scanned by the USPS and the images are delivered to you everyday via email.

USPS Informed Delivery


Email Delivery

Every morning around 8:00 a.m. I receive an email with the scanned images of incoming mail. Incoming envelopes and some direct mail flyers are scanned, larger junk mail is not included.

I have found the service to be very accurate as to what is actually delivered and of course shout out to a wonderful mailman we are lucky to have.

USPS Informed Delivery


Packages

The service also tracks any incoming packages. This has been very helpful when trying to track a package ordered online, but the package is mailed via two delivery services. I have found this to be happening more and more frequently where one major delivery service hands off the package to the local USPS for delivery.

When you track the delivery route at times it has been difficult to determine when/if the package is being delivered and by which service.

USPS Informed Delivery

How To Sign Up?

A few clicks of the mouse will bring you to the sign up page for Informed Delivery Service.

Click here to view the sign up instructions.

The service is free. An USPS account is not needed. If you already have an online account with the USPS you can sign in and then navigate to the instructions if desired.

Looking For A Specific Piece Of Mail?

This service is wonderful if you have an important piece of mail you are expecting or if unfortunately a piece of mail is expected, but has not arrived.

A Handy Dandy Companion

The Guard Your ID Stamp is a handy dandy companion to the USPS Informed Delivery service along with your paper shredder to protect your personal information.

Review of the Guard Your ID Stamp is available here.


Note: The author may receive a commission from purchases made using links found in this article. “As an Amazon Associate, Ebay (EPN) and/or Esty (Awin) Affiliate, I (we) earn from qualifying purchases.”


Sunday, February 7, 2021

Review of Blackout Window Panel Drapes - Highly Recommended

A Review of Room Darkening Drapes - Yes. Recommended.

 Let me start this review by getting right to the point; I highly recommend these blackout drapes.

My son selected them for his recently re-vamped bedroom.  Actually, I suggested them (based on reviews and price), and he said "what-ev." Lol. Boys ... I've raised four of them, so I can safely say they are men of few words. However, few words or not, he loves these drapes.

The Nicetown Blackout Window Panels do exactly what they advertise they do - they blackout the light. 

These Drapes Completely Block the Morning Sun

My son's room faces east, so it gets the full morning sun. Certainly, that's a lovely feature when you're awake, not so much when you're trying to sleep.

In the morning, while he was still sleeping, I opened his door expecting to see some sunlight, and to my surprise, there was zero light in the room.

Honestly, I was shocked. I expected there to be some faded light peeking through, but nope, nothing. His room was night-time dark in the morning.

He said, and I quote, "it was so dark, I had to check my clock and was shocked that it was noon." He enjoyed his morning sleep-in. 

Closed Room Darkening Drapes in My Son's Room

How Many Panels Do You Need for a Window

I'm a bit fussy about having too little drape for a window.

My son's window, from outside frame to outside frame, both width, and height, measures 51 inches by 51 inches. However, from the top of the curtain rod to the bottom of the window, the measurement is 54 inches long. 

The choices in size widths are 29, 42, and 70. The length choices are 18, 36, 45, 54, 63, 72, 84, and 90 inches. 

To ensure proper window coverage, we purchased two sets of the 42 by 63-inch drapes. Thus we have four panels; two panels on each side.

We decided on the slightly longer measurement of 63 inches versus the 54-inch length for fear that the 54-inch drape would be slightly short, and allow the light to peek through.

To completely block the light, make sure the drape seams (where each drape meets) are pulled so that you can't see the window at all. Otherwise, the morning light might peek through.

The finished look of the drapes - open - two sets of drapes


Affordability? Absolutely

We were able to cover this window for under $75 (Canadian). The curtain rod was already installed; just the drapes had to be replaced.

How Many Colors Do These Drapes Come In?

Lots. Lots of colors. When I last checked, there were about 20 colors to choose from.

Would We Rebuy These Drapes?

Yes. In fact, my first granddaughter is due to arrive in August, and we're planning on choosing a set for her room. They're ideal for a nursery since they completely block the morning and day light. 


Check out the bedding we selected for his room here. The bedding is also good value for the money.


Note: The author may receive a commission from purchases made using links found in this article. “As an Amazon Associate, Ebay (EPN) and/or Esty (Awin) Affiliate, I (we) earn from qualifying purchases.”


Saturday, February 6, 2021

The Spider Plant As A Houseplant Reviewed


Spider Plant houseplant with baby spider plants
Spider Plant With Spiderlings

I have grown up with spider plants or Chlorophytum in the house for as long as I can remember. My Mum always had at least six spider plants in the house all with a myriad of little baby spider plants hanging from the parent in glorious abundance. 

My Mum was a true master of caring for houseplants so that they grew healthy and abundant. All I knew as a child was that they were pretty and indestructible! 


Spider Plants In Our Home

Now I have six spider plants in our home, one in the bathroom, one in the living room, one in the bedroom, two in the dining room/study and one in the kitchen! I could have many more and probably will over time. In the meantime, I give away the little baby spiderettes potted up as gifts.

All mine are variegated, though you can buy all green ones as well. Four of mine are young plants taken from the parent so they do not have any offspring yet. I think they really brighten up a room!

Two are more mature and have beautiful little spider plants or spiderettes hanging down from the main plant. You may need to wait a while for the plant to mature enough to have offspring and a little patience will reward. Once you have a mature spider plant you will always have more! 


spider plant houseplant sitting on bookshelves
Mature Spider Plant With Many Spiderlings!

Where To Site Spider Plants.

As when I was a child these plants remain pretty indestructible! Ideally, they like well-drained soil and light but not too sunny position. They do prefer a slightly cooler environment, so I never place a spider plant in direct sunlight on a sunny windowsill or directly above a radiator.

In winter with the central heating on it can be a little more difficult to keep them cool, but as long as they are not directly on top of the radiator or heat source they seem to cope. They are the easiest and most forgiving plants I have ever looked after. 

If any of the leaves go brown I just gently pull them out and if the tip of the leaves only goes brown I just snip off with a pair of scissors. 


spider plant sitting on ledge in front of window
Young Spider Plant 

Watering And Feeding Spider Plants

They do need watering well but also like to dry out between waterings. I have a tendency to overwater but this can lead to soggy roots and make them very sick.

If this happens I have found the best thing to do is to take the plant out of the pot, allow it to dry out a little, then repot in fresh dry soil, then water normally, meaning lightly. All mine recovered this way but you do need to catch it early or the plant will be sick.  

The best thing is not to overwater in the first place and always let the soil dry so it is just slightly moist in between waterings. 

The opposite issue is if they get too dry. If this happens you will see them visibly droop and the leaves will start to go yellow and then brown.

This is easily remedied by giving them a light watering over several days. It may also be advisable to mist them now and again if you know the atmosphere in your home is dry.

If they get to this stage of drought, it is better in my experience not to give them a big drink all at once as it seems to overwhelm them a bit, rather just a small drink to begin.

Then simply pull or trim off any dried leaves and the spider plant will look good as new.  You will soon see them perk up again! 

So with normal care, they respond to watering only when necessary, allowing any excess to drain off and then leaving it until the top of the soil feels dry before we water again. 

We can feed spider plants but they do not need it very often. Mine get a feed perhaps once or twice a month, only in the growing season of spring and summer when I remember and they are fine with that. Any general houseplant feed will do in either liquid or granular form. I give them a far weaker solution than is recommended on the bottle as too much feeding can result in browning of the leaf tips. There is no need to feed in Autumn and Winter. 

I only repot when the original pot has become obviously overcrowded. You will either be able to see the roots on the surface or bursting out of the bottom of the pot, or it will be so congested it becomes tricky to water them.  Then it's time to just pot on into the next size pot into compost that will drain well. This should only be necessary every two to three years.


How To Propagate Spiderettes!

I do love the name Spiderettes! Usually in spring when daylight hours increase they start out as tiny white flowers on the parent plant and then develop into a fascinating mini spider plant attached to the parent with a long stem. They can remain like this as they grow bigger for a long time and do look beautiful. 

However, I have found it best to propagate at least some of them before they get too large or too many of them and drag the parent plant down. The one in the first photograph now has a lot of young and really needs some spiderettes propagating this Spring. 

Propagation is so easy. Simply prepare a pot with well-drained soil and without detaching the spiderette from the parent, lower the spiderette roots into the soil, cover and keep watered. Once you see growth and roots developing well, you can snip the long cord from the parent. You can make so many new spider plants by this method! 

Alternatively, if when still attached to the parent, there are already good strong roots visible on the spiderette, you can snip it from the parent plant and pot on by itself. 

When spider plants are very young they have a more upright habit but as they mature they tend to hang down and so I like to place them on a bookshelf, cupboard or shelf so that they and their spiderettes can show off to their full glory.  

They also look great placed in lovely natural macrame baskets that can be hung in the house. This can make them look even more special. 

I like the white macrame baskets which make them stand out and pick up on the white variegation of the long leaves. This is a lovely selection of macrame baskets to suit many hanging houseplants and spider plants would love them. 


If you don't like macrame then a hanging pot like these  La Jolie Muse Planters in a speckled white colour is lovely to pick up on the white stripes in the spider plant leaves and will look modern and beautiful.

They are lightweight enough made of recyclable plastic and stone powder to hang with a beautiful spider plant inside. These planters come with drainage holes and a water reservoir to ensure that the plants get what they need. 


Spider Plants Are Good For Us! 

Spider plants are well known to be a cleanser of the air inside our homes.  It is a great idea to have one in every room. Our homes have more pollutants and chemicals than are good for us from everyday cleaning products to our technology.

Many of us do not open windows and ventilate homes enough especially when it is cold in winter and central heating can dry out the air. 

I especially like to have a spider plant in the bedroom and also in any room where we use technology. They are perfect for a home office.

Houseplants are fantastic at absorbing carbon dioxide and giving out oxygen and some are very good at cleansing the air. Spider plants have been shown in tests by NASA to be able to clean formaldehyde for the air. Tests were conducted under sealed conditions and those tests showed that one plant per 100 square feet would be required.

However, in the less controlled and much more changeable environment of our homes, this may be a bit different. I think if we have a spider plant per room it can do no harm and only help towards a healthier environment for us.   

Spider Plants are a great house plant gift for anyone starting out in their new home or for a student going to University. They cope admirably with conditions that are not quite optimal for them and can amazingly survive a degree of neglect. 


spider plant with baby spider plants
 Young Spider Plant With A Small Spiderling


They are one of the few plants I do not worry about when I go on a two week holiday and ours were all perfectly fine when we went away for a month once. 

I just watered them well in the weeks beforehand and left them in a shady spot.

If you would like pretty, low maintenance, evergreen and interesting all-year-round houseplant that is healthy for us and looks especially good where it can cascade down from a high surface, or in a hanging basket, then spider plants are well worth considering. 


More House Plant Reviews

Reviewing Caring For The Stunning Polka Dot Begonia House Plant


Note: The author may receive a commission from purchases made using links found in this article. “As an Amazon Associate, Ebay (EPN) and/or Esty (Awin) Affiliate, I (we) earn from qualifying purchases.”


Most Recent Reviews on Review This Reviews


Search for Reviews by Subject, Author or Title

The Review This Reviews Contributors


SylvestermouseSylvestermouseDawn Rae BDawn Rae BMbgPhotoMbgPhotoBrite-IdeasBrite-IdeasWednesday ElfWednesday ElfOlivia MorrisOlivia MorrisTreasures by BrendaTreasures by BrendaThe Savvy AgeThe Savvy AgeMargaret SchindelMargaret SchindelRaintree AnnieRaintree AnnieLou16Lou16Sam MonacoSam MonacoTracey BoyerTracey BoyerRenaissance WomanRenaissance WomanBarbRadBarbRadBev OwensBev OwensBuckHawkBuckHawkDecorating for EventsDecorating for EventsHeather426Heather426Coletta TeskeColetta TeskeMissMerFaeryMissMerFaeryMickie_GMickie_G


Review This Reviews is Dedicated to the Memory of Our Beloved Friend and Fellow Contributor

Susan DeppnerSusan Deppner

We may be apart, but
You Are Not Forgotten


“As an Amazon Associate, Ebay (EPN) and or Etsy (Awin) Affiliate, I (we) earn from purchases.” Disclosure Statement

X