Friday, August 24, 2018

Iron Man Marvel Movie Review

Iron Man Marvel Movie Review
You may wonder why I am reviewing the movie Iron Man today.  After all, it was originally released over a decade ago.  

There are two reasons why I have opted to review Iron Man.  One, because we have a generation of kids who are now old enough to be interested in the Marvel Avengers, but were not old enough in the beginning to watch the movies in order as they were released.
  
Second, Iron Man sets the foundation for all of the following Avengers movies.  Every Marvel fan, old or young, needs to see the movie Iron Man.  I believe we all have a much greater appreciation for Tony Stark and his leadership role in all of the Marvel Avengers movies when we know the background.


Iron Man Movie Review


 Iron Man (Single-Disc Edition)Check PriceIron Man was the first Marvel Avengers movie.  It was released in 2008 and starred Robert Downey, Jr. in the leading role.  Downey, Jr. is still playing Iron Man aka Tony Stark today in the Avengers movies.  That alone, makes this movie remarkable. 

Tony Stark is a genius.  In the movie, he graduated summa cum laude* from MIT at the age of 17.    When he was 21, he assumed ownership of Stark Industries, a weapons developing company founded by his deceased father.

Tony is kidnapped by terrorists in enemy occupied territory after demonstrating a new weapon to US military troops.  They insist he build the new weapon for them, promising he will be released upon its completion.  Tony doesn't believe they will ever release him and neither does his assistant and fellow prisoner, Yinsen.  

Tony designs the first Iron Man suit out of necessity and together, he and Yinsen build it.  After 3 months of being held prisoner and forced to work, Tony and Yinsen put their plan into action, but it is only with great sacrifice that Stark survives to return to the US.  Upon his return, he is determined that Stark Industries will never again build weapons of destruction.  However, the company CEO, Obadiah Stane, does not agree with Tony.  Stane is equally determined to make sure they continue building the weapons, even more powerful than before.

The battle between Stark and Stane is tremendous, but there are a lot of surprising reasons why it became so hostile.  You will want to watch this movie!  

Even if you have already seen the more current Avenger movies, take a few hours to step back into the past and grab an Iron Man dvd.  You won't be sorry! 


Avengers Movies


On interesting note:  Even though Captain America was the first avenger, the Marvel Avengers movies started with Iron Man.

By the way, The Incredible Hulk was the second Avenger movie.  It was released a month later in 2008.  However, it was 2 years later before Iron Man 2 was released in 2010.  And, 3 years before Thor was released in 2011.   Captain America was also released in 2011.

All of these movies are fabulous on their own, but together, they are magnificent!

In Release Order: Start with Iron Man (featured above) --- If You Don't Want to Buy All of the DVDs, it is often less expensive to rent them on Amazon Prime


 The Incredible HulkCheck Price Iron Man 2 (Single-Disc Edition)Check Price ThorCheck Price Captain America: The First AvengerCheck Price


Avengers Movies Order to Watch

1)  Iron Man (2008)
2)  The Incredible Hulk (2008)
3)  Iron Man 2 (2010)
4)  Thor (2011)
5)  Captain America: The First Avenger (2011)
6)  Marvel The Avenger's (2012)
7)  Iron Man 3 (2013)
8)  Thor: The Dark World (2013)
9)  Captain America: The Winter Soldier (2014)
10) Guardians of the Galaxy (2014)
11) Avenger's: Age of Ultron (2014)
12) Ant-Man (2015)
13) Dr. Strange (2016)
14) Captain America: Civil War (2016)
15) Guardians of the Galaxy Vol 2 (2017)
16) Spider-Man: Homecoming (2017)
17) Thor: Ragnarok (2017)
18) Black Panther (2018)
19) Avengers: Infinity War (2018)
20) Ant-Man and The Wasp (2018)
21) Captain Marvel
21) Avengers: Endgame


MORE MARVEL MOVIE REVIEWS
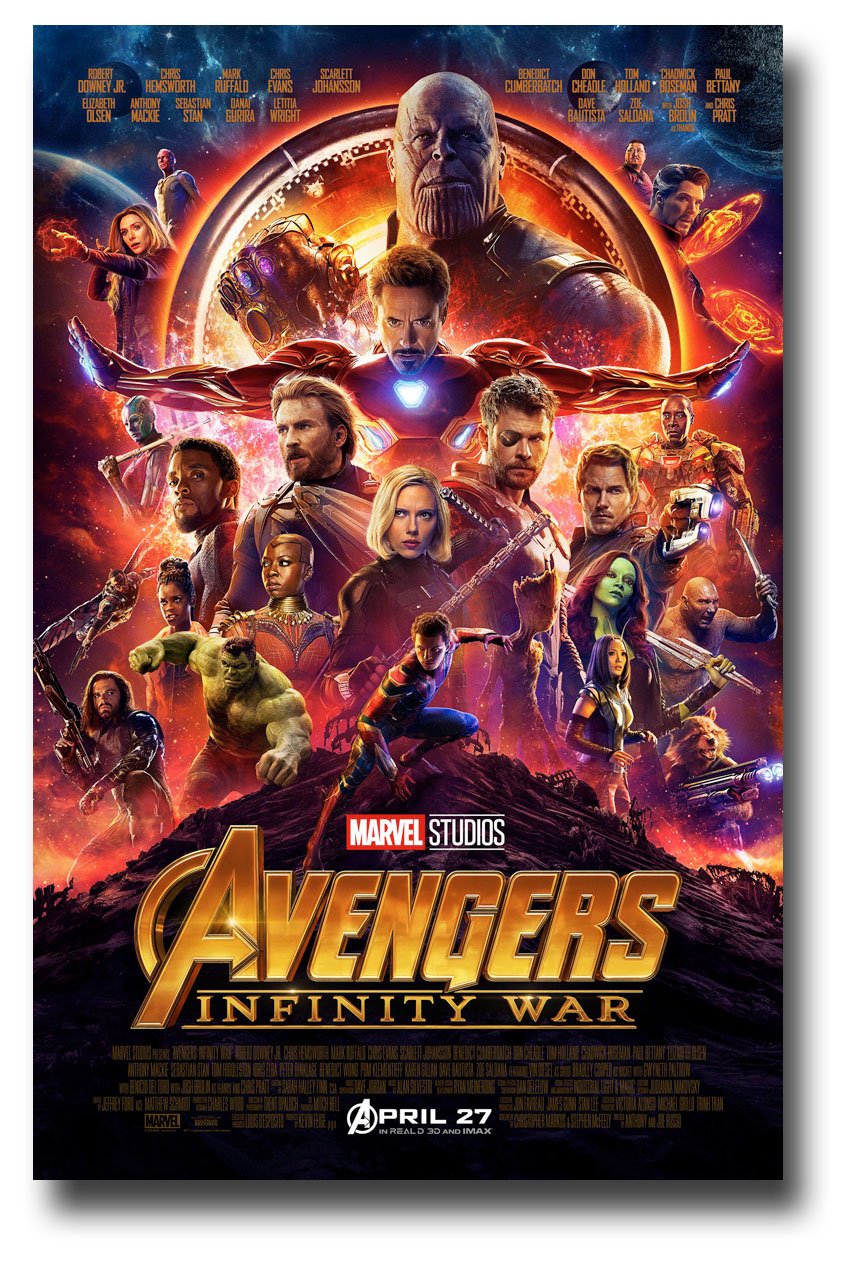
Marvel fans love Avengers: Infinity War!  All of our favorite Avengers, plus the Guardians of the Galaxy join the battle to save the world from evil domination and genocide by Thanos. Expect some very shocking and even upsetting deaths in this movie. Real Mavel fans will need Kleenex!


The movie Doctor Strange is based on the Marvel comics character. A fabulous fantasy fiction movie that is quite accurate with the depiction.



Guardians of the Galaxy is a truly fabulous Marvel movie that I would recommend for anyone! The movie is a mix of sci-fi, great animation, engaging stories, & witty dialog.


Ant-Man Movie ReviewAnt-Man Movie Review
Dr. Pym (Ant-Man suit inventor) & his daughter, Hope, train Scott Lang to work with ants and to become Ant-Man in preparation to "defeat" Darren Cross and his Yellowjacket invention.
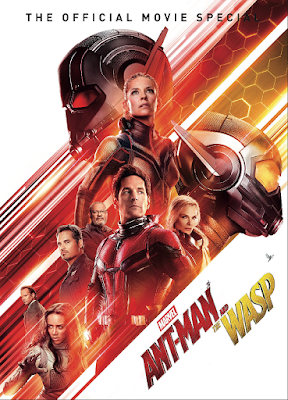


Ant-Man & The Wasp Movie ReviewAnt-Man & The Wasp Movie Review
Paul Rudd (Ant-Man), Michael Douglas (Dr. Hank Pym), and Evangeline Lilly (The Wasp / Dr. Pym's daughter), join together in battle. However, this time it is against a very unexpected mysterious foe, while also having to elude the FBI.


*In reality, there are no honors at MIT for graduating with a high GPA 


House of Sylvestermouse


Note: The author may receive a commission from purchases made using links found in this article. “As an Amazon Associate, Ebay (EPN), Esty (Awin), and/or Zazzle Affiliate, I (we) earn from qualifying purchases.”


Thursday, August 23, 2018

Reviewing Lighthouses in Erie Pennsylvania

Erie Land Lighthouse photo by mbgphoto
Erie Land Lighthouse
My husband and I were traveling north on Hwy 90 on our way from St. Louis to New Hampshire.  Hwy 90 is a great way for us to travel to the east coast with lots of places to stop near the Great Lakes and lots of lighthouses to visit.  On this visit we stopped for the night in Erie Pennsylvania and were able to visit three lighthouses.  I had stopped at the visitor center when entering Pennsylvania and picked up a brochure on Lake Erie Lights.  In this brochure I found directions to the lighthouses and the facts about the lighthouses that I refer to in this post.

Erie Land Lighthouse

Erie Land lighthouse was built in 1818 and was the first lighthouse on the Great Lakes.  The lighthouse sits high on the bluff at the end of Lighthouse street.  The first lighthouse was built of wood but after forty years it was replaced by one made of brick.  This one only lasted for nine years when it began to sink.  The present lighthouse is made of sandstone with a brick lining and was built in 1867.  It was decommissioned in 1898 because the beacon on Presque Isle was better able to warn mariners. In 2003 the lighthouse was restored for visitors who are welcome to walk the grounds.  I saw beautiful views of Presque Bay from the grounds and was also able to see the North Pier light from the bluff.
Erie Land Lighthouse photo by mbgphoto

old boat on lighthouse grounds photo by mbgphoto
Old boat on lighthouse grounds

Presque Isle Lighthouse

Presque Isle Lighthouse photo by mbgphoto

When we arrived in Erie we first took a drive to Presque Isle state park.  This beautiful state park is home to two of Erie's lighthouses.  In the photo above you see Presque Isle lighthouse which is located on the north shore.  From 1873-1944 this lighthouse was home to nine lighthouse keepers and their families.  This lighthouse which is 57 feet high has 78 steps to the lantern.  The lighthouse was just closing for the evening when I got there but I was able to walk the grounds and take photographs.

North Pier Light

North Pier Lighthouse photo by mbgphoto
North Pier light as seen from across the bay


North Pier Lighthouse photo by mbgphotohouseboats near North Pier Lighthouse photo by mbgphoto
The North Pier light is located at the east end of the channel that leads into Presque Bay.  It was originally built in 1830 but was replaced in 1855 when it was destroyed by a sailing vessel impact.  Over the years it was moved several times as the peninsula grew and extended into the channel.  It has been in it's current location since 1840 and continues today to be used as an aid to navigation.  I was able to walk out to the light and take several photos of the lighthouse.  The second photo shows some interesting house boats that were in a lake on the road to see the lighthouse.

Stop by Lighthouse Musings for more photos on these lighthouses. 

Zazzle Products from my Photos


Note: The author may receive a commission from purchases made using links found in this article. “As an Amazon Associate, Ebay (EPN), Esty (Awin), and/or Zazzle Affiliate, I (we) earn from qualifying purchases.”


Wednesday, August 22, 2018

How to Encourage Curiosity in Children

Is there a budding scientist in your family?  Let's Review some ways to encourage children's curiosity in the world around them.

In our family we try as hard as possible to enkindle a sense of curiosity in our children and grandchildren.  You just never know what exposing them to something they have never thought about might accomplish.  

My other half is a retired Medical Technologist and his fascination with microscopes started when he was about 10 years old.  Swamp water never looked so interesting as it did under the lights and lenses of a simple, yet very good beginner microscope.  

How many of you have seen what a blade of grass looks like under a microscope?  

picture is taken from Nikon's Small World contest
This picture is taken from Nikon's Small World 2011 Photomicrography Contest.  Dr. Donna Stoltz, University of Pittsburgh


Now that our grandchildren are that age, he has revisited his love for seeing what the naked eyes can't.  He bought himself a new microscope and some slide sets that he plans to introduce to our granddaughters and grandsons.  We do get to spend some time with them when Mom and Dad are out of town.  It's the perfect opportunity to broaden their horizons and spend some quality time with them too.  

 Omano Juniorscope Microscope for Kids – Microscope Kit for Kids 8+ for Science Microscope Experiments – Kids Microscope Kit That Encourage STEM Exploration – Beginner Microscope for Kids 8 and Up.Check Price


There are endless things that children can put under the lens and get a real up close look.  Flower petals, pollens, cat or dog hairs, these are all things that children can see under the microscope.  The amazing thing is that what they see through the lens is nothing at all like what they see with the naked eye.  It takes "seeing" something to a whole new level.  

Children are endlessly fascinated by the things around them and sometimes if you catch them at a point where they are looking for something different, you just might trigger the button for them to learn more and see differently.  


 48PCS Kids Plastic Prepared Slides for Microscope of Animals Insects Plants Flowers Sample Specimens for Basic Biological Science Education #81053Check Price

The future of our planet will be in the hands of our children, and we will need some of those children to take an interest in seeing the world from the Macro and the Micro phases.  Maybe one of them will be your child or grandchild. 


Note: The author may receive a commission from purchases made using links found in this article. “As an Amazon Associate, Ebay (EPN), Esty (Awin), and/or Zazzle Affiliate, I (we) earn from qualifying purchases.”


Tuesday, August 21, 2018

Water Globe Kit For Kids Reviewed

Encourage Creativity In Children

water globe fountain
A different sort of water globe
I will be giving my youngest granddaughter a water globe kit for her next birthday. As I write this, her birthday is less than two weeks away and this Grandma is prepared with some fun and creative gifts. 

She loves to be creative and enjoys doing all sorts of crafts even though she will only turn 7 next month. I look for things that will challenge her skills and allow her to create things that she will enjoy when they are completed. A water globe kit checks off several items on my list of criteria when searching for crafts for her to work on. 

I love the idea that while creating these little water globes she will be required to use some critical thinking along with problem solving. She will need to decide whether she wants to create the suggested scenes with the clay or if she wants to really be creative and come up with her own designs to encapsulate in the globe. There are four colors of clay to make the scene with, which causes her to figure out how to combine colors to get other colors. She will have plastic tools to assist her in her creations along with molding figures with her fingers and hands. I think she will spend hours creating something unique and fun. 

The kit includes three globes to create under the sea scenes. Since she just returned from a vacation in Maine and discovered that she loves lobster, I bet she makes a lobster for one of the scenes. The kit suggests a seahorse, octopus and mermaid but she will use her own imagination and come up with something very clever.

I am pretty excited to see what she does with this wonderful kit. Who knows, she might even make one globe for Grandma to have. I am certain that she and her Mommy will enjoy working on them together. That is the wonderful thing about a kit like this from Creativity for Kids, it can be enjoyed by kids from 6 to 96. This wonderful company has been making innovative and safe products for children since 1976 helping them develop skills that will follow them throughout their lives while having fun in the process. 


Note: The author may receive a commission from purchases made using links found in this article. “As an Amazon Associate, Ebay (EPN), Esty (Awin), and/or Zazzle Affiliate, I (we) earn from qualifying purchases.”


Monday, August 20, 2018

Easy Snack - Ham Rolls on Celery

Healthy and delicious ham rolls on celery.
I haven't been eating as healthily as I should and I can feel it. This weekend I made a concerted effort to cut back on sugars, carbs, and caffeine. As a result, I ended up making this delicious, healthy, and EASY snack - ham rolls on celery sticks. I have always liked ham and cream cheese rolls, but this new twist on a favorite recipe was extra delicious and satisfied those cravings. 


4 Ingredient - Ham Rolls on Celery


This spicy, creamy snack is super easy to assemble and my version consisted of only 4 ingredients: celery, ham, cream cheese and sriracha

Ingredients:

  • 2 sticks of celery
  • 4 slices of ham 
  • cream cheese
  • sriracha


Assembly:

  1. spread cream cheese on a ham slice.
  2. roll the ham, jelly roll style
  3. wash the celery sticks, trimming the ends then cutting each remaining stick into 1/2. 
  4. place a couple of drops of sriracha in the celery stick 
  5. place the ham and cream cheese roll in the celery stick - on top of the sriracha 

add sriracha to your taste

I am not a nutritionist so I cannot instruct you on what includes healthy eating for you. But I do know with certainty, that overdoing it on carbs, sugars, and caffeine causes me problems. This snack helped me avoid the snacks that I wanted to avoid this weekend. And ended the cravings I was having for the sweets. 


Recipe Inspiration


My inspiration came from those cream cheese and ham rolls many of us have enjoyed at parties and celebrations. 

The Kraft version of the recipe is here. The Kraft version uses chives for the flavor kick, cuts the rolls into smaller sections, and places the pinwheel sections on crackers.


Ham Pinwheels recipe by Kraft

There are other variations of pinwheels, including rolling a pickle in the ham wrap with the cream cheese. I like the pickle version too and may pick up some pickle spears to give it a try on the celery sticks. 


Note: The author may receive a commission from purchases made using links found in this article. “As an Amazon Associate, Ebay (EPN), Esty (Awin), and/or Zazzle Affiliate, I (we) earn from qualifying purchases.”


Sunday, August 19, 2018

How to Make the Best Chocolate Icing

Review By Funkthishouse.com
Photos: Via Pixabay
My parents moved away from their home town in Manitoba, Canada when I was about five years old. We lived in many places throughout our country, but no matter where we lived, my dad would fly his mother out (our Memere) for visits. Oh wait a minute! She would take the train, she was terrified of flying!

I sure hope Memere knew how much I loved it when she would visit.

On one visit, while sitting in the kitchen doing homework, Memere had just finished making a cake. She was about to make the icing, when I decided I had to know how she made such delicious chocolate icing. So being an inquisitive 15 year old, I stood beside her while she explained her secrets.

"What this recipe is about, isn't the ingredients, it's in the mixing, texture and general understanding of what to add and not to add to get the best chocolate icing."

Lets start with the ingredients - They're fairly standard and well known:
Added Note: 

Below 'Sylvestermouse Cynthia' asked what Icing Sugar was. In Canada we (most everyone I know) call Powdered Sugar, 'Icing Sugar'. The only brand I use is Redpath Icing Sugar.

Turns out, Redpath Sugar is a Canadian Company as well. According to it's website it's been a part of Canadian kitchens since 1854.

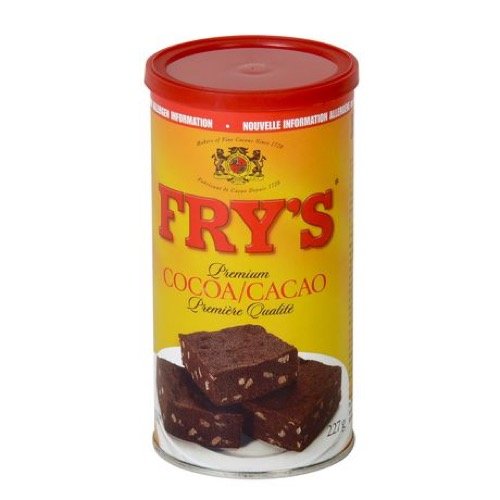
Being Canadian I admit I should have known that, however in my defense Redpath Sugar and Fry's Cocoa have been a part of my family's kitchen since before I was born. That's a long time ago!

Redpath Sugar carries many sugar products, including Icing Sugar. You can find Redpath Icing Sugar at Amazon.ca (not .com), and of course, learn about their products via their website.

What makes chocolate icing awesome:

To no surprise, Memere never measured any ingredients, and to this day, neither do I. 

I learned to make chocolate icing just the way she taught me; by understanding how to get the right texture.

Here's the most important tip from my Memere:
When you need to thin out the icing, do it by adding more softened butter, not more milk
She explained this further: "Because adding too much milk will quickly make the icing mixture too runny, then to fix it you'll have to add more icing sugar to recover the texture from liquid mud to icing. So to avoid this, add more butter first, not more milk"

Putting the Ingredients Together:

Although I never measure, I'll try to put some measurements to the above ingredients
  • In a deeper mixing bowl, put in about two cups of icing sugar
  • Add about half a cup of Fry's Cocoa (add more for a richer chocolate taste)
  • Butter .. hmmm.. I can't give you a measurement - maybe start with 1/4 cup of softened butter, that's 'softened', not melted, not runny, not too soft either. Ensure it maintains it's thick butter texture.
  • Add a teaspoon of pure Vanilla Extract
  • Add a teaspoon of milk, or two teaspoons if the icing is too thick to mix
  • How to know when you've nailed it - For me, I like it when the Icing is spreadable but can hold swirl peaks on the cake, in other words, not too hard, not too soft, just right. 
With a hand-mixer, mix the ingredients together. It won't be the right texture for spreading yet.

This is where the Grandma touch comes in:

If your mixture is too thin and runny, add more Icing Sugar to correct the texture. Keep mixing it with the hand mixer. If you've had to add more icing sugar, you'll need more Cocoa so add a couple of tablespoons at a time. More icing sugar dilutes the chocolate, that's the reason for adding more cocoa.

However, it's more likely the texture will be too thick.

To thin out the texture, add another heaping tablespoon of butter, a couple of drops of milk, a half teaspoon at the most! Then stop completely with adding milk.

At this point, it should be getting to the right texture. If it happens to become too runny again, then add more icing sugar. Sorry I can't give you a measurement for that, just add a tablespoon at a time.

However if it's too THICK, then keep adding softened butter, one tablespoon at a time.

Thanks to Memere, I've never used store bought icing. I always make it from scratch.

If I had to choose the key ingredient (other than butter) it would be Fry's Cocoa. That's also the cocoa we use to make the chocolate cake recipe passed down from my grandmother on my mother's side.

My kids have grown up on our homemade chocolate cake and homemade icing thanks to our grandmas on both sides - and it's the only birthday cake they want. Store bought is a no-no.

Added Tip: You CANNOT put icing on a cake until the cake is COMPLETELY cooled. I'll usually put the cake in the fridge to fully cool it off if time is an issue.

Happy Baking!


Note: The author may receive a commission from purchases made using links found in this article. “As an Amazon Associate, Ebay (EPN), Esty (Awin), and/or Zazzle Affiliate, I (we) earn from qualifying purchases.”


Saturday, August 18, 2018

DesignEvo: Free Logo Maker Reviewed

Need a logo in minutes? DesignEvo is a free online logo maker which gives users the ability to make a logo in minutes; whether a novice or graphics professional DesignEvo provides the online software to make, create and design a logo quickly and easily.

Easy As 1-2-3


DesignEvo promises that a logo can be made in minutes and what is promised is delivered. I actually timed the making of this logo with a DesignEvo template. I used my lifestyle website and tagline to explore designing a new logo.


How To Use DesignEvo


I launched the free logo maker, scrolled down to my chosen category (Letter), scrolled through the options, entered the website name (or Company Name),  tagline and voila! Total creation time including download and social share =  2.5 minutes.
Savvy Age Logo
After creating the logo I quickly modified a few parts of the design. I tweeked the size,  modified the dot icons, changed the background color and then proceeded to download the logo and the required social share.

The requirement for a FREE logo to download for your use is very simple; a social share is required prior to downloading and credit on your website or blog. After downloading you will find a zip file with the logo as a jpg, png and a readme file with the share requirements.


What You See Is What You Get

The design interface is very user friendly and intuitive. Once the logo is created a Preview is available to see your logo on business cards, letterhead or media products.

This is a very nice program for novices to instantly create a logo by using the provided templates; for those with more advanced graphic skills the online software has the features to further customize the logo.


Customize Your Free Logo

Your logo can be easily customized with the color, font and transparency options. If you have the HEX colors for your company then the color of your logo can be changed with a few clicks of the mouse. The interface is clean, self explanatory and easy to navigate; if help is needed video tutorials and FAQ's are available under Support.


Who Is DesignEvo?

The About page of DesignEvo gives insight into the evolution of DesignEvo. Pearl Mountain developed Fotojet, a free online collage maker and is also the creator of DesignEvo. The logo maker is free or users have the option to purchase advanced features for a one time annual fee. Logo features such as resolution, copyright, vector files are restricted to the paid version.


Recommendation

I enjoyed the ease of using DesignEvo, the user friendly interface and the instantaneous results of a ready to use logo within minutes.  Colors, fonts, icons and graphics are just a click away to personalize your logo to your brand or create a brand new logo with a customizable template.


Note: The author may receive a commission from purchases made using links found in this article. “As an Amazon Associate, Ebay (EPN), Esty (Awin), and/or Zazzle Affiliate, I (we) earn from qualifying purchases.”


Friday, August 17, 2018

Wimaha Automatic Soap Dispenser for Your Home Reviewed

 Wimaha Automatic Soap Dispenser for Your Home Reviewed
I recently visited my daughter and son-in-law in their new home.  They have automatic soap dispensers in both bathrooms and two touchless soap dispensers in their kitchen.  The second soap dispenser in their kitchen is for dishwashing liquid, which is actually really convenient.  

Previously, the only time I had ever used a touchless soap dispenser was in restaurant restrooms.  I have always thought they were wonderful.  After all, do we really want to touch  the exact spot others have touched after they have used the restroom?  In spite of the fact that I logically realize I would be washing away all germs when I wash my own hands, it always seemed a little gross to me.   Anytime I see automatic soap dispensers in public places, I am thrilled.  In my opinion, they are only topped by the automatic faucets.  I truly love not having to touch anything in restrooms!  Now that I think about it, automatic restroom doors would be fabulous.

After being introduced to them, I want a Wimaha automatic soap dispenser for each bathroom in my own home and two for the kitchen!  


The Wimaha Automatic Touchless Soap Dispenser


Wimaha Automatic Sensor Soap Dispenser
My daughter chose the Wimaha automatic soap dispenser for their home.  I did giggle a little when I first saw it.  The sleek modern design of the dispenser reminded me of something from a Star Wars movie.  

It was pretty cool to simply place my hand under the dispensing nozzle and have soap automatically come out without having to touch anything.  The built-in sensor worked beautifully and knew exactly when to release a moderate amount of liquid soap.  My son-in-law told me he had it set for minimum soap, which was the perfect amount for washing hands.  Therefore, the dispenser also keeps us from wasting soap by not pumping too much onto our hands.

The Wimaha touchless soap dispenser works with four AAA batteries, so there are no ugly electrical cords in the way or that need to be hidden.  The batteries are not included.

I can hardly wait for my own Wimaha automatic soap dispensers to arrive!


Read More Product Reviews On
ReviewThisProducts.com


House of Sylvestermouse


Note: The author may receive a commission from purchases made using links found in this article. “As an Amazon Associate, Ebay (EPN), Esty (Awin), and/or Zazzle Affiliate, I (we) earn from qualifying purchases.”


The Review This Reviews Contributors


SylvestermouseSylvestermouseDawn Rae BDawn Rae BMbgPhotoMbgPhotoBrite-IdeasBrite-IdeasWednesday ElfWednesday ElfOlivia MorrisOlivia MorrisTreasures by BrendaTreasures by BrendaThe Savvy AgeThe Savvy AgeMargaret SchindelMargaret SchindelRaintree AnnieRaintree AnnieLou16Lou16Sam MonacoSam MonacoTracey BoyerTracey BoyerCheryl Paton Cheryl PatonRenaissance WomanRenaissance WomanBarbRadBarbRadBev OwensBev OwensBuckHawkBuckHawkDecorating for EventsDecorating for EventsHeather426Heather426Coletta TeskeColetta TeskeMissMerFaeryMissMerFaeryMickie_GMickie_G


Review This Reviews is Dedicated to the Memory of Our Beloved Friend and Fellow Contributor

Susan DeppnerSusan Deppner

We may be apart, but
You Are Not Forgotten


“As an Amazon Associate, Ebay (EPN) and or Etsy (Awin) Affiliate, I (we) earn from purchases.” Disclosure Statement

X