Trimming my Juniper bushes is the first thing I do in my backyard in early spring and it is the last thing I do before winter. Thanks to my small, yet sharp, Black & Decker Hedge Trimmer, the trimming part is easy. However, the cleanup used to be back-breaking and take hours. I dreaded the job as the work days approached. So many times I had to tell myself just get out there and get it done! Then one year I had an epiphany that made that job so much easier and faster.
I started laying out disposable drop clothes under the bushes. That way, as I trim, all of the debris and clippings fall directly on the drop cloth. When I am finished, I simply roll up the drop cloths and throw them away.
Now, instead of taking 2 or 3 days, wearing myself out and having to take Advil for my back pain, I can finish the entire job in about 4 hours.
Over the last few years, I have found that the lighter weight drop cloths are not a good choice. They tear, which defeats the purpose of using them.
The plastic drop cloths I prefer are heavy duty, 1 MIL, 9" x 12". Since I only use them one time and throw them away, this size and thickness are very easy to handle without being too thin to handle the weight of bush trimming.
I buy them in packages of 2 or 3. I use 3 drop cloths to surround the large bushes I have to trim and I lay them all out before I start trimming. That way, I don't end up trimming in an area of the bush that doesn't have the plastic underneath it to catch the clippings.
When I have finished trimming the entire bush, I fold the length side of each plastic drop cloth over the middle, covering all of the trimmings. Then, starting at one end, roll it up, put it in a big durable Contractor's trash bag, and throw it away.
Buying plastic drop cloths is a very inexpensive way to make a hard job much easier. Plus, I can enjoy my freshly trimmed bushes a lot sooner and call it a job well done.
Note: The author may receive a commission from purchases made using links found in this article. “As an Amazon Associate, Ebay (EPN) and/or Esty (Awin) Affiliate, I (we) earn from qualifying purchases.”
Each spring I am reminded that there are a few things I really hate about
the arrival of warmer weather. The main one is ticks. I
absolutely abhor ticks!
I have always lived in the beautiful state of Tennessee. There is
so much to love here. We have the benefit of experiencing all four
seasons, we can grow beautiful flowers, trees and plants, plus we have a
wide range of terrain that includes hills, mountains, woods and farm
land. Unfortunately, ticks love our state too.
We enjoy walking in the woods, on trails, and exploring the world around
us. We always take our dog with us and ticks love our dog as much as
they love our state. Those mean critters hop on him with evil
intentions, but he has a Frontline of defense that leaves them wishing
they had chosen a different host.
I remember well the first time we armed our first dog with Frontline.
After a day of frolicking in the woods with our daughter, he laid down on
the entry tile to sleep. When he awoke, a pile of dead ticks were
surrounding him. Ah, the perfect tick!
Since that day, all of our dogs have been protected by Frontline Plus,
which also kills fleas.
How & When to Treat a Dog with Frontline Flea & Tick Drops
FRONTLINE Plus Flea and Tick Treatment for Dogs (Extra Large Dog, 89-132 Pounds, 6 Doses)Check PriceWhen to treat you pets may vary by location. I suspect some lower
southern states need to treat their pets year round. In Tennessee,
we grab the Frontline as soon as the first warm day arrives. That is
usually in late February or early March. Since ticks go dormant
during the winter (days with temperatures of under 32°), our dogs get a
break from the medicine between October and March. After that, the
drops are applied once a month to keep them protected.
The word "drops" implies that there isn't much liquid applied, but that
really isn't an accurate description. The vials contain the amount
of medicine required based on the pets weight. For our Labrador
retriever, his vials contain about a teaspoon of medicine.
The vial applicators are plastic and are vial shaped with a neck so you
are able to apply the liquid all on one spot of skin between a dogs
shoulder blades. You must separate his fur and apply the medicine to
his skin (it is absorbed through the skin).
Once dry, the Frontline is waterproof and will continue to protect your
swimming pups.
A few words of caution:
Wear disposable gloves when treating your pet with Frontline
Do not touch the liquid yourself. I found this out the hard way.
I get a severe sore throat if I accidentally touch the spot, even if I
wash my hands quickly.
Avoid petting the animal in the application area until it is completely
dry (experience tells me that is about a day)
We apply it at bedtime which allows 8hrs before we are likely to
accidentally touch the application spot
Do Not apply Frontline to young puppies less than 8 weeks old according
to the package, but I recommend consulting your vet for the appropriate
age recommendation. We have never used it on a puppy less than a year
old.
Don't let other animals lick the treated spot
Do Not apply more often than once a month
Now, you may wonder, with all of these cautions, is it really worth it.
Easy answer, yes! Ticks carry diseases that could not only kill
your pet, but would also kill you should the tick or its offspring prefer
you to the dog.
I've read the numbers of people who die annually from tick transmitted
diseases. They seem low when reading, especially if you weigh that
number against how many people hike regularly. However, I have personally
known someone who died of Rocky Mountain Spotted Fever and it no longer
seems as rare as one might think if you just read the statistics.
Having grown up in the south, I know ticks are common. Dogs and cats can't
check themselves for ticks. Unless a human just happens to pet them when the
tick is embedded and recognize the nasty "lump", a tick can live on a dog
for weeks, months or even years based on the tick species and gender. One of
the last things a pet owner wants is a tick infestation.
As with any medication, check with your pet's doctor before using
Frontline. If the vet doesn't mention tick prevention to you, you
now know to ask them.
Note: The author may receive a commission from purchases made using links found in this article. “As an Amazon Associate, Ebay (EPN) and/or Esty (Awin) Affiliate, I (we) earn from qualifying purchases.”
Carrot Cake Cupcakes are a delicious treat anytime!
My mother recently made 2 dozen carrot cake cupcakes using the recipe
below. She was generous and thoughtful enough to share them with me
and my household. I was beyond thrilled to receive this gift. I
understand the time commitment and work behind making a few dozen cupcakes.
Therefore, I can really appreciate receiving a dozen homemade
cupcakes.
Cupcakes are a personal favorite since they are made in single serving
portions. That saves serving preparation and clean-up. You can grab a
cupcake, toss the paper liner, and eat it without needing to get out a plate
or utensils. So fast & easy!
The carrot cake cupcakes are fabulous for breakfast, a special treat, or
dessert. For 3 days straight, I was able to enjoy a carrot cake
cupcake with my coffee for breakfast. I was rather sad when they were
all gone. But, I have the recipe! And, I am willing to share it
with you so you too can start your day with delicious carrot cake.
Carrot Cake Cupcakes Recipe -
Yields 36 cupcakes
Cupcake Ingredients:
2 c. shredded julienne carrots
2 c. granulated sugar
1 c. canola oil
4 large eggs
1 (8-ounce) can crushed pineapple, drained
2 c. all-purpose flour
1 tsp baking powder
1 tsp baking soda
2 tsp ground cinnamon
Frosting Ingredients:
1/2 c. unsalted butter (softened)
8 oz cream cheese (softened)
4 c. powdered sugar
2 tsp vanilla extract
3/4 c. chopped pecans
________________________________________
Instructions for Cupcakes
1. Grate carrots & chop pecans
2. Preheat oven to 350°
3. Line large cupcake pans with cupcake liners (3 pans of 12 each)
4. In a large mixing bowl, combine sugar, oil, and eggs. Beat until
well-blended.
5. Add flour, baking soda, baking powder and cinnamon. Beat for about 2 to 3
minutes.
6. (Set aside your mixer) Stir in shredded carrots & pineapple.
7. Fill cupcake tins 3/4 full and bake for approximately 22 - 24 minutes
(toothpick test)
8. Set cupcakes on cooking racks and allow to cool completely before
frosting
9. While the cupcakes are cooling, set out the butter and cream cheese to
soften (about 30 minutes) Instructions for Frosting
1. Beat softened cream cheese and butter together until smooth.
2. Add vanilla and powdered sugar. Beat until well blended. (Approximately 4
minutes)
3. Stir in chopped pecans (or hold them to sprinkle on top of frosted
cupcakes)
4. Frost the Cupcakes
Recipe Substitutions or Additions
I prefer pineapple, but Mom suggests substituting raisins if desired. You
may also want to add 1 cup shredded coconut for a more authentic carrot cake
consistency & taste.
Baking Notes
I have a double oven, one is a convection oven. My ovens allow me to bake 3
pans of cupcakes at one time. (2 in the convection oven & one in the
lower regular oven).
Mom has one regular oven. Therefore, she makes larger cupcakes divided
across two pans, which she bakes separately. Her yield is 24 larger cupcakes
that take slightly longer to bake (approximately 26 - 28
minutes).
Because oven temperatures vary, the toothpick test is required to determine
when they are completely baked.
What is the Toothpick Test?
Quickly stick a toothpick down into the center of a cupcake or cake and pull
it right back out. If it comes out clean, the cake/cupcake is done. If it
has batter on it, you need to bake a little longer. I usually test in 1 – 2
minute intervals.
Cupcake Baking Needs
There are a few kitchen tools that allow us to bake cupcakes with ease,
starting with a large cupcake baking pan & cupcake liners.
Cupcakes are also very hard to transport from place to place. If you
do plan to take them elsewhere, I highly recommend the carrier featured
below.
Note: The author may receive a commission from purchases made using links found in this article. “As an Amazon Associate, Ebay (EPN) and/or Esty (Awin) Affiliate, I (we) earn from qualifying purchases.”
If your garage freezer doesn't stay cold enough for frozen food, you may
need a refrigerator garage kit.
We found out the hard way this past winter, that when the temperature
outside gets cold, the freezer in our refrigerator/freezer located in our garage,
stopped maintaining a freezing temperature. All of our frozen food thawed
out and had to be thrown away. This may seem baffling, but the newer
refrigerator models have a different type of temperature control than our trustworthy
"never die" refrigerators and freezers from bygone days.
In spite of appearance, there is only one thermostat in a
refrigerator-freezer. It is located in the refrigerator. The
temperature control slider in your freezer is not a thermostat. It
will not turn on the compressor motor. Therefore, everything is controlled
by the temperature of the refrigerator.When it is cold, the refrigerator
stays cool enough that the compressor motor doesn't cycle on, which means
the freezer stops freezing and frozen food thaws. (For a thorough description, view the video featured below)
New, power saving technology drives a dagger into the heart of reliable durability
once again! Therefore, we must take counter measures to bring life
back into our everyday needed appliances. I need my garage freezer every day!
The Refrigerator Garage Kit
After doing a bit of research, we found a garage kit for our refrigerator
freezer. We were fortunate that the kit will work in our Frigidaire refrigerator. It is my understanding, the kit doesn't work in all models, so be sure you check for your model before you purchase a garage kit. There may be a different garage kit made specifically for your refrigerator model.
Be sure to remove all of the glass shelves in the refrigerator before you start the installation. Plus, unplug the refrigerator.
Installing the refrigerator garage kit isn't hard, but it may seem intimidating at first glance. I have featured the video below to take the angst out of the installation. You will find tons of helpful tips and instruction in this video. This is a must watch video before you start the refrigerator garage kit installation.
What You Need to Install a Refrigerator Garage Kit
In addition to the actual garage kit, the guy in the video shared a few tool tips that make this job easier. The "secret" tool that he used in the video is a telescoping magnetic grabber. Even if you don't plan to install a refrigerator garage kit, that tool is a tool we all need in our tool box. You will also need light once the fridge is unplugged. My personal favorite tool suggestion was the magnetic dish for holding the screws! I might need 3 or 4 of those. They would be handy in the garage, kitchen, and in my craft room.
Note: The author may receive a commission from purchases made using links found in this article. “As an Amazon Associate, Ebay (EPN) and/or Esty (Awin) Affiliate, I (we) earn from qualifying purchases.”
I recently started reading the Cornwall Novels by Sarah E Ladd and thus far,
I have really enjoyed all of them. The stories begin in Cornwall, England, 1811, which is a fabulous setting for historical fiction.
The first book, "The Governess of Penwythe", is an excellent foundation for the series. Delia Greythorne is the governess of five children, but she is more than just a governess. She is the one constant in the children's lives. When both of their parents die, they must leave their home and everything they are familiar with, to live with their uncle who they hardly know and do not trust. Unfortunately, returning to Cornwall is the one thing Delia never wanted. Her very life hangs in the balance.
The Governess of Penwythe Hall Book 1 Synopsis
The Governess of Penwythe Hall (The Cornwall Novels)The opening scenes in this book are in Cornwall (1808) and Cordelia (Delia) Greythorne is leaving her home. Recently widowed, her husband's family not only blames her for his death, but believes she knows more than she is telling. Her mother-in-law follows her to the carriage and hurls final insults at Delia. The Greythorne family has many secrets, all of which Delia knows, and that makes her a threat to them. They want her gone and perhaps would kill her if she didn't have valuable information they needed.
Delia starts a new life as governess to the Twethewey family in Easten Park, Yorkshire which is just far enough away from Cornwall for Delia to feel safe.
Randall Twethewey is a wealthy widower with 5 children. When he is
seriously injured in a horseback riding accident, he has a new will
written. Originally, his children were supposed to go live with his
sister-in-law, Beatrice, but he worried that her husband would run through the
children's inheritance. With death pending, he decided to make his
estranged brother, Jac, the children's guardian. He also met with the children's tutor, Hugh Simon, and governess to pay them to stay with his children so they would have the two adults they depended upon and trusted so much with them throughout the transition into a new home with an almost unknown guardian.
While not as wealthy as his brother, Jac Twethewey owns Penwythe Hall, which was actually the reason for the breach between brothers. As the oldest brother, Randall expected to inherent Penwythe Hall, but their benefactor left it to Jac instead. Randall believed Jac had cheated him out of his proper inheritance. Once you get to know Jac, you know he didn't cheat anyone out of anything. Their Uncle Angrove simply believed Jac would be a better overseer of Penwythe Hall and left it to him.
Life as they knew it was about to change for everyone. None of them would remain untouched by the necessary move, including their unsuspecting Uncle Jac who had no way of knowing of his brother's death prior to the children's arrival at Penwythe Hall.
However, in Cornwall, their governess was most at risk.
Once You Have Read the First Book in this Series, You Will Want More!
Note: The author may receive a commission from purchases made using links found in this article. “As an Amazon Associate, Ebay (EPN) and/or Esty (Awin) Affiliate, I (we) earn from qualifying purchases.”
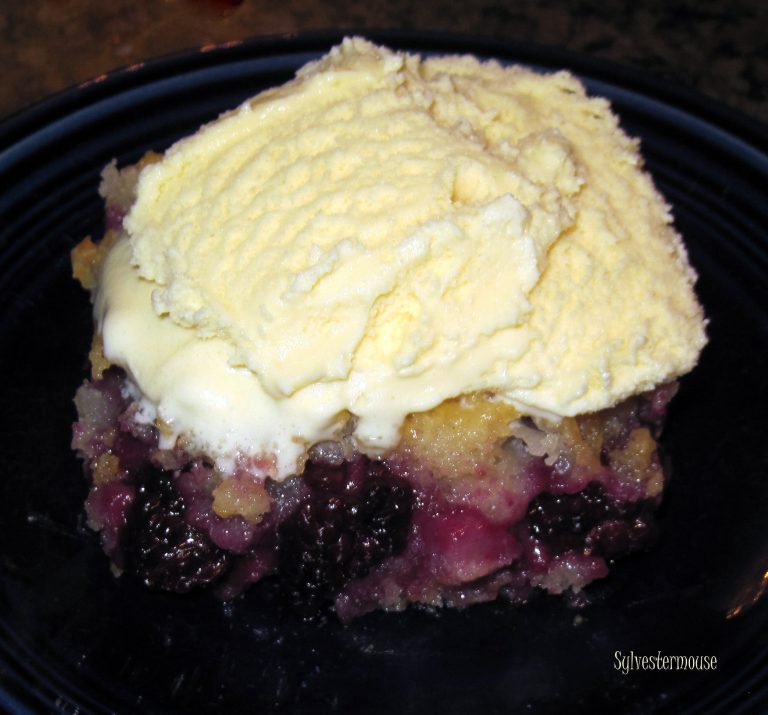
One of my favorite desserts is a fresh baked cobbler. Fortunately for me, my mother taught me how to make a very easy cobbler when I was a child.
Over the years, I have made several types of fruit cobbler. Peach cobbler is my personal favorite (you will find my peach cobbler recipe by clicking here), but my husband's favorite is an apple cobbler.
When my mother-in-law sent us a huge box of apples for Christmas, one of the first things I made was an apple cobbler. Between my husband and son, that apple cobbler disappeared almost before I remembered to take pictures.
This is a very easy and delicious cobbler recipe. You can use just about any fruit with the basic batter recipe.
Apple Cobbler Recipe
Prep Time
Cook Time
Ready In
Yields
20 min.
55 min.
75 min.
12-16 servings
Ingredients
2 cups of sugar
2 cups milk
2 cups self-rising flour
8 Tablespoons butter, melted
5 or 6 Honeycrisp Apples - pealed & sliced (each apple should be sliced into 16 pieces)
In a separate bowl, combine the sugar, milk, and flour. Stir to batter consistency
Pour batter mixture over the melted butter (do not stir)
Add
Apples in a single layer, spread evenly in the batter (do not stir -
push apples slices down to make sure they get covered with batter. They
will pop back up, but they need batter on top)
Bake for 55 - 65 min. until golden brown (varies due to pan & oven)
Note: You can half this recipe and cook it in an 8" pan for 45 min. This is a great way to use only 3 apples!
Note: The author may receive a commission from purchases made using links found in this article. “As an Amazon Associate, Ebay (EPN) and/or Esty (Awin) Affiliate, I (we) earn from qualifying purchases.”
Years ago I learned the secret to getting some relief from migraine headaches by using rice filled cold compresses directly on my forehead. Used behind my neck, it will often relieve the nausea that accompanies migraines.
I made cold rice compresses with kitchen towels for myself and to give as gifts for Christmas over 25 years ago. I simply made the kitchen towels into "bags" by sewing the sides and ends together and filling them with a package of rice. I used mine for decades. However, I recently purchased eye pillows on Etsy filled with rice to replace my threadbare towel rice packs.
The rice packs can also be heated in the microwave for 15 - 20 seconds to apply to aching muscles or sore shoulders. I made one towel rice pack for heating.
Rice will mold around the area of your body which helps distribute the heat or cold. In both cases, the rice "weights" the pack and holds it in place, unless you move.
While the cold packs will not cure a migraine, they do bring some relief while waiting on medication to work its magic. The cold rice packs are absolute miracles themselves on their effectiveness to relieve nausea.
Eye Pillow Face Rice Pack on Etsy
I love these extra-large eye pillows! Because these eye pillows cover forehead and checks, they effectively shut out light, which is also imperative to migraine sufferers.
I keep my eye pillows in my freezer at all times. Therefore, they are immediately ready when needed.
You can opt to have your eye pillows scented. I chose "Scent: none" because fragrance of any kind will increase the pain of my migraines.
I purchased two eye pillows. That way, when the first one starts to warm to room temperature, I can grab the second one from the freezer when returning the first to re-chill.
My migraines normally last for hours but the pain lessens after the first hour or so once my medicine kicks in. Unfortunately, some other family members suffer with them for days. Granted, mine were much longer lasting when I worked full time and couldn't immediately grab a cold press and medicine. I have vivid memories of coming home from work in great pain and sticking my head in the freezer for relief. It really is easier to lay down with a cold rice filled eye pillow than to stand with your head in the freezer.
Note: The author may receive a commission from purchases made using links found in this article. “As an Amazon Associate, Ebay (EPN) and/or Esty (Awin) Affiliate, I (we) earn from qualifying purchases.”
While hiking at Fort Pillow State Historic Park a few weeks ago, I realized that I really needed a camera harness that would take the weight of my camera off my neck and redistribute the weight across my back instead.
I carry a Nikon D3100, which came with the standard 18-55mm zoom lens. However, when I am hiking in the woods, I prefer my 55-300mm zoom lens, which is heavier. The longer lens is required for capturing close-up images of birds in the trees, animals in the distance, or points of interest in the woods. Normally the weight doesn't bother me at all. However, on a 2 mile trail hike up and down hills, I've found that I do notice the weight. After our hike at Fort Pillow, I found myself rubbing the ache from my neck and shoulders. Therefore, it was past the time to find a camera harness.
As soon as I got home that day, I went in search of a
camera harness and found this awesome harness. Upon arrival, I put it on
my camera, adjusted the straps and prepared for my next hiking
adventure.
As you can see in the photo, I opted to leave my neck strap attached to my camera. It is the strap I will use in my everyday life. Since the harness has quick release buckles, it is very easy to leave off and quickly reattach for hiking.
Excellent Features of the USA Gear Camera Strap Harness
USA GEAR DSLR Camera Strap Chest Harness with Quick Release BucklesCheck PriceThe camera strap harness that I selected is available in multiple colors and patterns. It features a small pocket on each strap. The pockets are a suitable size for batteries or SD cards. The pockets alone would make this harness an excellent choice. I always carry a spare battery when hiking. The pockets have Velcro closure which makes them easy to open quickly, even when wearing gloves, but are otherwise securely closed.
As I mentioned in the introduction, the harness has quick release buttons so the harness can be used during specific activities like hiking, but not a permanent attachment when it is not needed. These buttons are also helpful if you need to raise the camera above your head to get a certain shot.
This camera harness is very inexpensive too. If you wish to buy several in order to color coordinate with apparel, you could certainly do that.
Very easy to use! Slips on exactly like backpack arm straps.
Note: The author may receive a commission from purchases made using links found in this article. “As an Amazon Associate, Ebay (EPN) and/or Esty (Awin) Affiliate, I (we) earn from qualifying purchases.”
I wish I could say they are fast, but they do require time for raising. I have not found a way to start the cinnamon rolls in advance and bake them later. This is a recipe you will want to prepare and bake on the same day. Therefore, you either need to serve them for brunch, or get up before sunrise to start the dough. Either way, these cinnamon rolls are worth it!
It looks like a lot of instructions when you read the recipe below, but they are still fairly easy to make. I simply give enough details that even the inexperienced baker will have success with the recipe. Please do not let the appearance of difficulty or length keep you from baking these divine cinnamon rolls.
I will warn you in advance, the recipe makes 12 cinnamon rolls, but most of us can only eat one. They are that big and filling.
Set out 1/4 Stick (4 Tablespoons) of Butter to Soften plus a little more to grease baking pan & bowl (should set out about 30 minutes before needed)
Set out the mixing bowls & other supplies you will need. I use the following:
Deep bowl for mixing (flour tends to blow when mixing, so use a deep bowl)
Large glass bowl for raising
Hand Held Mixer
13 x 9 Baking Pan
Cutting board for kneading
Clean the counter top for rolling out dough to 18" x 12" size (Note: I have a 18 x 12 glass microwave plate from an old microwave that is perfect for this. If you can find one, it will save a lot of mess and clean-up time. Otherwise, I recommend the pastry mat with measurements featured below)
Preparation
Grease large glass bowl for raising
Flour Cutting Board
for kneading
Warm Milk & Buttermilk in microwave (stir every 15 seconds to
avoid burning)
Directions
In a large, deep mixing bowl, dissolve yeast in warm water
Add warm milk, warm buttermilk, sugar, softened butter, salt and 4 cups of flour. Beat (mixer) on medium speed until smooth.
By hand, spoon or fork, Stir in remaining flour to form a soft dough (dough will still be sticky)
Turn onto a floured cutting board surface, knead 6-8 minutes. (Dough should be smooth and elastic.)
Place in a greased bowl, turning over once to grease top of the dough ball.
Cover and let rise in a warm place for 1 hour
After the hour, Grease 13 x 9 baking pan
Flour clean counter or rolling surface & rolling pin
Melt 1/4 Cup Butter in microwave
Combine Brown Sugar, Instant Coffee Granules and Cinnamon
Punch Dough down, turn onto floured surface and roll out to 18" x 12" rectangle.
Brush with melted butter
Sprinkle brown sugar mixture over buttered dough to within ½” of edges. Use all of the mixture
Starting with long edge, Roll up Jelly-roll style and Pinch seam to seal
Cut into 12 slices
Place rolls, cut side up, in greased baking pan
Cover and let rise 30 minutes (will double again)
Preheat oven to 350 – Bake 25 – 28 minutes until golden brown
In a small bowl, beat icing ingredients until smooth and spread over rolls
Instructions:
Beat softened cream cheese and butter together with an electric mixer in a large bowl until creamy. Mix in the milk and vanilla, then gradually mix in the confectioners sugar and salt until smooth.
There are a few things in this post that may cause questions or uncertainty. Therefore, I am featuring a deep mixing bowl that I recommend for mixing dough. It won't keep the flour from "blowing", but it will keep more of it contained in the bowl. Also, saigon cinnamon is not the average, everyday cinnamon most of us have on our spice rack. It is a bolder, stronger tasting cinnamon that really gives the cinnamon rolls the needed "kick" that sets them apart from others.
Note: The author may receive a commission from purchases made using links found in this article. “As an Amazon Associate, Ebay (EPN) and/or Esty (Awin) Affiliate, I (we) earn from qualifying purchases.”