Showing posts with label Product Reviews. Show all posts

Saturday, June 16, 2018

Reviewing BeWell Superfood Greens by Arbonne

Reviewing BeWell Superfood Greens by Arbonne
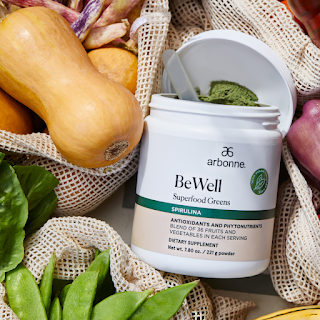
BeWell Superfood Greens
We all know that we need to eat lots of veggies, most of our moms would tell us to eat up our greens when we were growing up and I know I used to challenge my daughter to eat a rainbow every day when she was younger (I made sure to let her know M&Ms did NOT count!).  Sometimes it is hard to get as many serves of fruit and vegetables as we should have into our daily lives though.

It can't just be a problem for me can it?  I didn't use to have any veggies with my breakfast until I discovered green smoothies, which meant I had to up my game come lunchtime.  Dinner has always been easy to fit lots of vegetables into and fruit can be consumed as a snack, but I would still have days when I came up short on my 5 serves of veg and 2 of fruit.

Next, I heard that instead of 7 a day we should be eating 10 a day and I must admit my first reaction was to throw my hands up in the air and give up!

Now some readers will know that I embarked on a healthy weight loss journey in December 2017 and this has been successful in both weight loss and health benefits - I have so much more energy it's like I've rediscovered my inner spark!  My journey uses Arbonne's 30 Days to Healthy Living and Beyond plan and it was through this plan that I was introduced to the BeWell Superfood Greens (or Greens Balance as it used to be called).

So, What exactly are BeWell Superfood Greens?


The BeWell Superfood Greens is a deep green powder that reminded me (in color and smell) of spirulina when I first saw it.  This is hardly a surprise when you look at the ingredients and see that it contains this nutrient-dense alga along with wheat and barley grass and an array of different fruits and vegetables.

In just one scoop of this powder you really can say you're eating a rainbow!  A few of the fruit and vegetables that are in this powder are kale, broccoli, pomegranate, tomato, pumpkin, mango, blueberry and purple sweet potato.   As well as containing all the nutrients different colored fruit and veg provide, this powder also contains a powerful prebiotic fibre to help support a healthy digestive system.
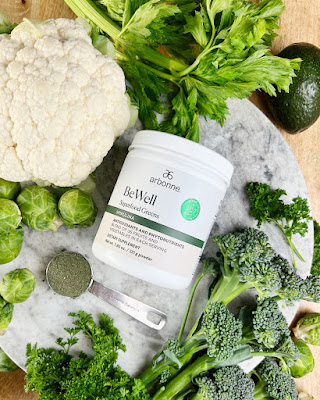
BeWell Superfood Greens

How Do I Use BeWell Superfood Greens?

As it's in powder form this makes it very easy to use, some people mix it in a little water and drink it like a shot of wheatgrass.  When I first saw and smelt the Greens Balance (as it was originally called) I thought people were crazy taking it this way so I did the following ...

I like to add a scoop into my breakfast smoothie, when I add cacao powder or a handful of berries I find that I can't even taste the greens balance, yet I'm getting all of that goodness.

I usually only have one scoop a day, but when my family (and a number of work colleagues) were sick with a flu virus earlier this year I actually added a scoop to my lunchtime shake as well.  I'm not a doctor or nutritionist, but I always believe that a good immune system requires good nutrition which is why I did this.   It may just be a coincidence, but I never got the virus despite being surrounded by all the germs!

After I had been adding it to my shakes for several months I did try it as a shot and I quite liked it that way, until I discovered something called the Green Ogre Drink and now that's the way I like to take my shot of Superfood Greens every day!

You can also add the Superfood Greens to dishes when cooking to increase the vegetable content, I haven't personally tried this, but it sounds like a great idea.

Does It Really Help Though?


"It sounds good, but how do I know if it's doing anything for me?"  This is often a problem when you're doing lots of things to improve your health and you're not sure which ones are really necessary, but I will NOT be giving up my greens balance ......

I am feeling a lot healthier this year and my energy levels are fantastic, my immune system is awesome, my hormones are balanced, my rheumatoid arthritis is not only under control, but I wake up to no pain or stiffness at all.   Let's just say that what I'm doing is working really well.   Of course everyone is different and you should always contact a medical professional. 

A few weeks ago I actually ran out of my BeWell Superfood Greens (I thought I had another tub, but didn't), my order was delayed and I went 1 day with only half a scoop and 3 days with no greens.   Now I didn't think much of it until I got home from work on the 2nd day of not having any and I was really tired.   When I said to my husband how shattered I felt his first response was have you eaten enough?  I had eaten plenty, but that's when I realized that what was missing was the greens balance.

I am not letting the tub get too low before re-ordering again!

Do I Need BeWell Superfood Greens if I Have a Good Diet?


I think I have a good diet, I have at least half a plate of vegetables with my main meal every night, lunches have been a problem in the past, but the past couple of years they have usually included either a salad or a vegetable soup (depending on the season).  Breakfast would often be my downfall, in the summer I would have some fruit and occasionally some veg included, but in winter when I used to have porridge there wouldn't be any fruit or veg. 

I still feel I need greens balance.   Only you know how much you eat, but I personally don't think you can ever have too much good nutrition.  I seriously am now considering it to be as important as my health insurance.

Where to Get BeWell Superfood Greens?


You will need to purchase your Superfood Greens online through any of the links I've provided, but if you want to contact me via my facebook page (Louanne Cox Business) then I can let you know how to get 20% off the standard retail price   Well worth looking into if you're planning on taking this every day.

How Long Does the Tub of Greens Last?


At one scoop a day a tub of greens balance will last you 30 days.


Have More Questions?


If you want to know the full list of ingredients or have any questions that I haven't covered here then go straight to the website - here - and look at the product sheet.  Alternatively, comment below or message me privately (via my facebook page or instagram).

Another Fun Way to Increase Vegetables in Your Diet


If you're not a fan of adding a nutritional supplement to your diet then you have to get creative with ways of increasing your veggie count and one way I do this is by using a spiralizer ...
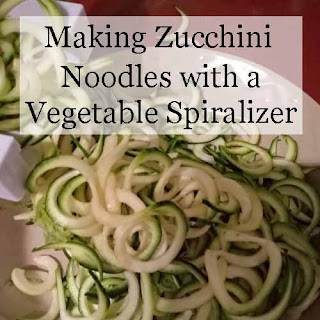
easily increase your vegetable intake with a spiralizerEasily Increase Your Vegetable Intake with a Spiralizer
A fun way to increase the vegetable content of your meal is to turn vegetables into noodles. This is really easy to do with a spiralizer.


Note: The author may receive a commission from purchases made using links found in this article. “As an Amazon Associate, Ebay (EPN) and/or Esty (Awin) Affiliate, I (we) earn from qualifying purchases.”


Wednesday, June 13, 2018

Incredibly Easy Ways to Increase Your Level of Fitness

So we are already heading into the second half of 2018 and if better fitness was one of your goals, Let's Review how to do this easily!


Today many jobs have us sitting on our behinds for long periods of time.  Even hobbies that we enjoy can make us less active than we should be.  Most health experts agree that this is not the best thing for our bodies.  So let's review how to make it easier to remember to get up and move!  If we don't use it, we will lose it!  

Being sedentary for short periods of time is fine, everyone needs to relax for a little while.  What our bodies need more,  is to move.  There is evidence that if we sit around too much our health declines.  Not just our physical health, but our mental health as well.  

We need a certain amount of activity in our daily lives, that means moving every day.  Whether you take a walk at lunch time or go to a yoga class after work, maybe go for a swim at the recreation center or a bike ride when you get home, these are all ways to become more active and healthier.

senior activities collage
All of these activities will help you become more active!  Find one that you really like!

I must confess, that I had fallen into the very sedentary group for far too long.  It wasn't easy to get motivated to move! Then I was faced with some serious health issues, the choice became one of necessity.  I can get very caught up in the internet, browsing websites, reading blogs and writing my own blogs.  All of these things are sedentary activities.  I used to have a timer that I would set every hour and when the timer went off, it was time to get up and go for a 10 minute walk.  Well that worked for a little while, but then I forgot to set the timer and forgot to set it again and again.  All my best intentions went out the window and the kitchen timer went back into the kitchen.

I moved to an apartment so that stairs were no longer an issue for me (bad knees, bad ankles and bad hips).  One of the most important aspects of moving was to find a place that had a swimming pool that I could use year round.  Where I live that means an indoor pool.  Well, we found the ideal place and call it home now.  The promise was that I would use the pool daily (exercise is easier in water) to help my movements become more routine.  To that end, I found my ideal exercise tool and it can be yours too!

It's called a FITBIT!    There are several different styles of Fitbits and this one is a great one for just about anyone!  The style is very understated and can be worn with just about anything.


Now why in heaven's name would you need a FITBIT? 

FitBits or Activity trackers are an amazing tool that everyone can use regardless of age, sex or lifestyle.  Whether you are an athlete already or whether you have decided to become more active this tool will help you!.

It is a multi-tool for your wrist.  It is a watch that will keep you on time for all your appointments,  It is a heart rate monitor that let's you know how hard your heart is working.  It can monitor your sleep patterns.
It will track all day activities like walking, stair climbing and a total of all your active minutes.  You can receive calls, messages, and other notifications depending on your own personal set up. Many of these digital trackers have these features and more.  

I personally like my fitbit very much, it is connected to my computer and I can look over my weekly activities and adjust as need be.  It has helped me to keep moving every hour for at least 10 minutes.  If I don't walk in a certain period, at 10 minutes before the hour is over, I will get a buzzing vibration on my wrist with the message, You need to walk 110 more steps this hour.  Well believe it or not, I don't ignore this alarm.  I get up and I do those steps.  At the end of the day I know that I have walked a minimum of 5000 steps.    That is the minimum amount of daily activity that is recommended by almost all doctors.

fitbit activity scoresdisplay
Screen Shot of my FitBit activity.
Once you purchase a FitBit (I'm not sure about the other brands) there is even an online group that you can join for added support and friendship.  

FitBit would make a great Father's Day gift, or a wonderful birthday gift for anyone you love.  If you love them, you want them to stay healthy!  This is one tool that will help along the way.

** I am not a doctor.  Before embarking on a fitness routine check with your medical practitioner.  No advice given here is meant to be medical advice for anyone. 
Always check with your own doctor first.**


Note: The author may receive a commission from purchases made using links found in this article. “As an Amazon Associate, Ebay (EPN) and/or Esty (Awin) Affiliate, I (we) earn from qualifying purchases.”


Tuesday, June 12, 2018

July 4th Ladies Tank Top Reviewed

Apparel For July 4th Celebration

united states flag
To Celebrate Our Nation's Birthday
Ladies are you looking for a new tank top to wear for your July 4th celebration this year? I would like to review an option for you today.

Chances are whether you plan to attend a local parade, a picnic, cookout or the fireworks display the temperature will be warm. A tank top offers a perfect option for the weather and the celebration you plan to attend.

Actually, the option that I am going to show you will work beyond the July 4th holiday. It can be worn any time during the warm months of the year to show your patriotism or just as a really cool top.


american flag replica tank top
4th of July Tank Top

The great thing about this tank top for ladies is that it is quite casual and can be worn with your favorite shorts, pair of jeans or even slacks. I particularly like that it is extra long and could even be worn as a cover-up for the pool or beach. So, there is a lot of versatility for this particular choice for your celebration of our nation's birthday.

I also noticed that if you do not like this particular design you have the option to choose a different pattern. One has mostly stars on a blue background while the other is sort of a reverse of the design above. There is also a great selection of sizes available for this tank top.

So, how about it? Have you thought about what you will be wearing for the July 4th celebration that is just around the corner?


Note: The author may receive a commission from purchases made using links found in this article. “As an Amazon Associate, Ebay (EPN) and/or Esty (Awin) Affiliate, I (we) earn from qualifying purchases.”


Friday, June 8, 2018

Best Way to Line Kitchen Cabinets and Drawers - Con-Tact Brand Paper

Best Way to Line Kitchen Cabinets and Drawers Reviewed
Cabinet & Drawers I Covered in My Daughters New Home
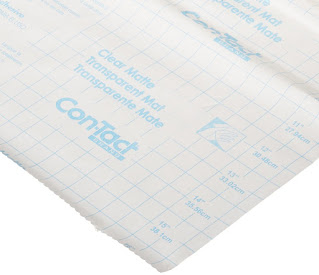
Con-Tact® Brand Creative Covering Adhesive Shelf Liner in White Marble
When you buy an older home or rent an apartment, the inside of your cabinets can be like new by simply lining them with Adhesive Contact Paper. 

Our daughter has moved at least a dozen times since she graduated from high school.  First to dorm rooms each year, then to various apartments throughout her grad school years, and most recently due to job changes.  I'm not very helpful with moving boxes and furniture, therefore my job on moving day is to line the cabinets throughout the house with Contact Paper.  It's a great way to ensure that dishes, towels, and clothes will be placed on a clean surface. 

As we all know, apartments and dorm rooms frequently have annual occupant changes.  As a result, apartment kitchen and bathroom cabinets, as well as closet shelves, can be in varying states of cleanliness and condition.  Shelves can even have cracks or splinters in them that will ruin clothes.   Kitchen cabinets can have all kinds of stains or even unidentifiable gunk on them that require gloves and a face mask before you want to get close to them, much less, store your dishes or glassware on.   Contact Paper is a lifesaver, literally, in rental dwellings or when you buy a previously owned house.


How to Lay Contact Paper


Con-Tact Paper lining a shelf
Like anything we do to improve our homes, there are a few tricks to laying Contact Paper if you want it to look nice in addition to being clean.  First and foremost, measure then cut.  There are lines on the back of Contact Paper that guide for a pretty straight cut.  I intentionally over-cut the sides by 1/4", then trim it.

I always lay the straight edge at the front of the cabinet, which means the cut edges will be on the sides and back.  I trim those edges with a boxer cutter.

How to Lay Contact Paper in Cabinets


In cabinets, I start peeling the backing off in the front, pressing down the adhesive side to the shelf, and work from front to back, slowly removing the paper backing a little at a time.  After the backing is completely off, I smooth down the entire surface (again from front to back) with my hands.  If a small bubble is in the paper, I use a straight pin to pop the bubble, release the air, and smooth it out.


How to Lay Contact Paper in Drawers


Adhesive Contact Paper for lining shelves, drawers, cabinets & More
For drawers, I start at the front and work my way to the back.  Even if the drawers are removable, it is easier to get it laid flat and straight by starting at the front.  Also, you really want a prettier edge on the front that will show.  Some bottoms of cabinets or drawers are warped and it is impossible to get perfection. 


How to Lay Contact Paper on Shelves


For long removable shelves, the process is the same except I start on one end and work to the other end.  That is easier since the widest area is from side to side.

For a very small shelf, like a linen closet, I remove the backing completely and carefully lay the Contact Paper in place, then smooth it down with my hands.

If you are covering an extremely warped bottom or shelf, it may be necessary to cut the Contact Paper with a box cutter in an area that won't show or get a lot of wear and tear to force it to lay flat.  


How to Lay Contact Paper in Deep Cabinets


In all cases, I try to work with one main piece.  However, deep bottom kitchen cabinets will require two lengths of the paper in order to cover them.  I start with the piece that is cut for the back of the cabinet. Then, lay the front piece with the back edge of the front piece overlapping the front edge of the back piece.  That will help prevent the back piece of Contact Paper from coming up when you slide around products later or push them toward the back.


Benefits of Contact Paper


  • Adheres to a just about Any Surface
  • Gives a Clean, Non-Toxic Surface to Cabinets & Shelves
  • Wipes Clean with a Damp Cloth
  • 100% Vinyl
  • Easily Removable  (so you won't lose your rental deposit)
  • Thick Paper Surface that Won't easily Rip or Tear during normal use
  • Lasts for Years (even decades, if desired)
  • Comes in a Variety of Designs & Colors, including clear


How Much Contact Paper is Needed


Con-Tact Paper
Probably the hardest thing to determine is how many rolls you will need to cover an area.  I recommend buying more than you think you will need and returning unopened rolls.  

The last kitchen cabinets I covered for our daughter required 5 rolls of 18" x 20" Con-Tact Paper to cover all of the shelves and cabinet bottoms.   


Regardless of the store or seller, be sure you buy only Con-Tact Paper Brand for lining cabinets & shelves.


Examples of Designs Available


Check Out More Home Decor Reviews at
ReviewThisDecor.com

House of Sylvestermouse


Note: The author may receive a commission from purchases made using links found in this article. “As an Amazon Associate, Ebay (EPN) and/or Esty (Awin) Affiliate, I (we) earn from qualifying purchases.”


Thursday, June 7, 2018

Modern Masters Metal Effects Paint Review

copper weather vane
If you were to offer me something bright, shiny, and new, or, on the other hand, something with the rich patina of age, I would choose the luster of an item that shows signs of life every time.  The best example I can give is that of a copper weather vane.  I have always loved the verdigris patina of weathered copper.  So, when I discovered Modern Masters Metal Effects paints, I just knew I had to explore the possibilities of being able to speed up a process that normally takes place over many years.

I was given a custom-made folk art weather vane many years ago.  Because of the loveliness of the wood grain, and because I didn't want to risk ruining what was a very meaningful gift, I'd been reluctant to paint or stain the weather vane with ordinary finishes.  Until I found the right product, I decided to leave my special art piece unfinished.

When I recently came across some online videos of how Modern Masters paints and patina activators had completely transformed normal household items (like vases, frames, furniture, garden statues, and planters), I knew the day had come to give my weather vane the finish it deserved and had waited for all this time.  I stopped by Hobby Lobby to pick up the Modern Masters copper paint and green patina kit and got started right away.

painting a weather vane
My first experiment with patina application.
You can finish a small project in a couple of days.  First, you apply two coats of their uniquely formulated primer.  Once those coats have dried, you then apply the first coat of your metal effects paint.  For the second application of copper paint, you work quickly to spray on the patina activator while the paint is still wet.  Then the really fascinating process begins.  Over the course of a few minutes, you will begin to see evidence of oxidation taking place.  The green patina begins to appear and will become more visible over the next several hours.  Your painted item will become more and more lovely with time.  The patina continues to evolve just as it would if you left copper outside to weather naturally.

patina brushed copper weather vane
Patina brushed in the direction of the grain.
Though I followed the directions, and spritzed on the patina activator as instructed, my first results were not what I wanted.  The verdigris patina was too speckled for my taste.  I decided to brush on a new coat of copper paint and begin again.  That is the beauty of this process:  you can redo until you are satisfied.  It doesn't take long to figure out what works best given the vision you have for a piece.  I found that lightly brushing the wet patina solution in the direction of the wood grain produced the best results.  It created a sense of movement and freedom that honors the true spirit of this horse.

I have been asked about whether or not the metal effects paint must be sealed.  The copper and bronze finishes are self-protective (no topcoat needed).  You are encouraged to seal the iron paint with rust patina.  There is a Modern Masters product specifically made for that purpose.  It is called Permacoat X-Treme Sealer.

The wonder of this product is that it works on so many different materials (wood, metal, plastic, stone, paper, etc.).  You have the choice of copper, bronze, and iron metal effects, along with green, blue, or rust patina activators.  I have purchased all three kits and have more projects currently in progress.  At the moment, I am restoring two vintage portholes recovered from ships.  They are getting the bronze treatment just as soon as I finish removing all of the salt, rust, paint, and caulk from their surfaces.  I will post photos throughout that process.

My other ongoing project involves the iron paint with rust activator.  I am refinishing some reclaimed doors I purchased from the Habitat for Humanity ReStore.  Those doors are going in the She Shed I built a while back.  I'll keep you posted with the results of that experiment as I determine which direction I'm heading with that design.  I'm thinking I might try a mixed media approach or play with some stencils when activating the patina.  And, of course, it won't stop at that.  I've been going through my jewelry box with the thought of giving some items a new look.  Check out my Pinterest Modern Masters Metal Effects board for inspiration.

As you can probably tell, I am totally sold on Modern Masters Metal Effects paints.  I highly recommend this creative medium.  You can purchase the product in kits or individually.  The paints and patina solutions come in a number of different quantities, making it easy and affordable to customize based on the size of your project.  Go have some fun with your own metal effects adventure in patina painting!  You will be amazed.


Note: The author may receive a commission from purchases made using links found in this article. “As an Amazon Associate, Ebay (EPN) and/or Esty (Awin) Affiliate, I (we) earn from qualifying purchases.”


Monday, June 4, 2018

Reviewing Kindle Paperwhite E-Reader

Reading on the balcony with my new Kindle.
I received my new Kindle Paperwhite e-reader nearly two weeks ago and I'm loving it! I was very hesitant to upgrade as I don't like change and often have trouble figuring out new electronic devices. I started researching current e-reader options as my original Kindle (a Kindle Keyboard, remember those?) was starting to have some serious malfunctions after all these years. I felt forced to shop for a new e-reader before my old one just stopped working. I have to say that so far I'm very excited about my purchase. My new Kindle is awesome! I like it so much that I wanted to share my thoughts with you.

New 6" Kindle Paperwhite E-Reader 


My new Kindle has a 6" touchscreen. It is slightly smaller than my first Kindle, and easier to pack in a small bag or purse.

This Kindle has built-in lights - no need to buy a separate, external light.

My new Kindle is advertised as having a resolution of 300 ppi. Now, that doesn't mean a single thing to me except that it is easy to see that compared to my original e-reader, the images are GREAT.

I had briefly considered purchasing a Kindle Fire so that I could also read magazines and have color photos. But I'm really glad that I stuck with the Paperwhite for two main reasons: 
My eyes. I am already familiar with how easy Paperwhite technology is on my eyes in general, in the dark while camping, and there is no screen glare when outside during the day. Computer screens strain my eyes. The Paperwhite does not.
Awesome battery. I require the long-lasting battery life of the Kindle Paperwhite. I want to read everywhere I go. That includes camping at The Shack, hiking, and waiting for appointments. There's nothing worse then reaching for an electronic device with a dead battery.

The Kindle I chose:


There are only two things that I'm concerned about so far. Both have to do with the touch screen:
No Buttons. I miss the buttons on my Kindle Keyboard that turned the pages. However, I'm becoming accustomed to turning the pages by tapping the side of the screen. But so far, I still wish for those buttons to turn the pages.
Oops! What Language is That?!  When I unboxed my Kindle I plugged it in to charge and I put it in the cover I bought. During that process, I touched the touchscreen and voila, all of my display turned to a different language! I had the hardest time trying to find anything in the online owner's manual that helped me to visually find the language settings so that I could change it back to English. Finally, with a video review and a lot of guesswork, I was able to make the language change I needed. I think the online owners manual should have more visual aids to go along with the written instructions.

The awesome cover I chose:


My Love Affair with E-Readers


I was aghast when e-readers were first introduced. Who in their right might would want to replace their beloved books with an electronic device?! Oh the horror. You wouldn't be able to read your books outside, or while camping, or while at the beach. What a terrible invention.

Then my son surprised me with a Kindle (3rd generation I think).  I bought a lighted, leather cover to protect it and to help me read it while camping. And I fell in love. I replaced my hoard of books with a single small item. And I found that even at the beach, I just place my Kindle in a gallon sized baggie and it is protected from the sand. Much better than soggy, gritty books after a day at the beach!

The only thing I didn't like about that first Kindle was the images didn't translate very well. Books with maps or drawings didn't always show up well. Or were too small to be read.

I think Kindle e-readers are awesome. They allow me to read anywhere and anytime. I always have my entire library with me. And I'm sure there are plenty of functions that I am not even aware of that others would enjoy. If you've considered buying a new Kindle Paperwhite, I encourage you to do it. I think you'll be glad you did.


Postscript:

Each and every time I've considered updating my Kindle, I've thought of Susan Deppner. She was a Review This contributor and a friend to many. I thought of her as the best Kindle advisor there was. I did refer back to the Kindle Reviews she had written for guidance. 

Susan, you may be gone from this earth, but you are not forgotten. I know you'd be as excited about my purchase as I am.


Note: The author may receive a commission from purchases made using links found in this article. “As an Amazon Associate, Ebay (EPN) and/or Esty (Awin) Affiliate, I (we) earn from qualifying purchases.”


Sunday, June 3, 2018

An Easy Tip to Help Keep the Trees on Your Property Healthy - A Personal Review

Our Backyard Trees - Kept Healthy with this Easy Tip
About ten years ago, while visiting a client, I had to know how in the world they were able to get the massive trees on their property to stay so healthy and look so beautiful.

He pointed to the neighbors trees across the street and said, 'when we first purchased this house, these trees looked just like those'. And 'Those' weren't very nice at all. 

I asked him, 'what did you do?'

Here's the tip he passed along to me, and we've been using it ever since for the trees in our yard.

He said, every spring and fall, we put Evergreen Fertilizer Spikes around all of our trees.

'That's it?' I asked.

He was adamant, 'yep, just put them in and forget it'.

'How long before you saw results?' 

He said it was by next year that the trees had a new life.

Our Home Has so Many Trees, I Had to Try This Product

When we purchased our home over 20 years ago we hand planted over 50 Cedar Trees in our
A Closer Look at the Health of Our Trees
from Implementing this One Tip
backyard, and in the front yard put a Blue Spruce, a Birch Tree and an English Oak Tree, along with shrubs.

As the years went on I noticed that the cedar trees in the backyard were looking a little rough, and knowing that sparse Cedar Trees aren't attractive, an immediate solution was in order.

For some reason my mind believed that caring for trees would be complicated. Wow, was I wrong!

I highly recommend using Fertilizer Spikes to care for your trees. Our experience has been fantastic.

Not being a tree expert in any way shape or form, I simply had to trust that this product would do the job.

You can find Fertilizer Spikes at just about any hardware store or The Home Depot or of course, online. 

I'm not fussy on any particular brand. The only thing I look for, for our trees, are spikes that say 'Evergreen'. There are various fertilizer spikes for different types of trees and shrubs. Just pick the ones you need based on your trees/shrubs.

This year I added another fertilizer spike to the mix, one that was for both Evergreens and Flowering Shrubs.

How Do You Put Fertilizer Spikes in the Ground?

Easy peasy lemon squeezy. That's how :)

The ones I buy come twelve in a pack, with two plastic tops to use to hammer them in the ground.

It's like making Elephant Pudding (tee hee, an old elephant joke) - simply follow the directions on the package.

I use three boxes, that's 36 spikes for the backyard, and this year I used 30 spikes for the front yard. Some of the front yard spikes were for flowering shrubs.

Also, they say to use the spikes for spring and fall and I've only ever put them in the ground in the spring. However, I think this year I'll put them in the ground again in the fall.

I've put some of the product choices below, but as mentioned above, I'm not dedicated to a particular brand. Each year I just grab whatever is on the shelf at the local hardware store. I have used both brands featured below, and both were fine. I don't have a preference.


Note: The author may receive a commission from purchases made using links found in this article. “As an Amazon Associate, Ebay (EPN) and/or Esty (Awin) Affiliate, I (we) earn from qualifying purchases.”


Friday, June 1, 2018

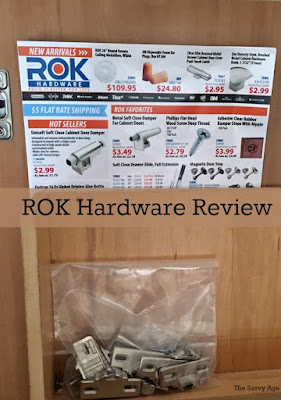
Review: ROK Hardware

It started innocently enough … but don’t all DIY projects start out with the best of intentions until you hit the DIY speedbump. Years ago the kitchen cabinets were refaced with new hinges and hardware and all was well. All was well for about 12 years until the first evil click sound occurred when the cabinet was opened. The “click sound” was in conjunction with an itty bitty little black dowel from the interior of the hinge which would break and fly to the floor. The cabinet would then not open as easily or as wide as designed.  So occasionally part of the hinge would need to be replaced. No problem.
Shop with ease at ROK Hardware for all your hardware needs. Great selection, great prices and great customer service!

The DIY Speedbump


The speedbump occurred when the company discontinued the style of the original hinge and replaced the beloved model with a new model.  Aesthetically  the hinges look the same and function the same, but through the years the “little black thingy” that broke off from the hinges became a known issue on the internet.

A known issue because the search was on for the original model. First, the hinges were still available from brick and mortar hardware specialty stores, but as those supplies diminished the internet became the place to find the hinges.

ROK Hardware To The Rescue

I found ROK Hardware while searching for a supply of the hinges to replace the remaining cabinet hinges in bulk. Clearly the lifespan of the remaining hinges with the “little black thingy” was at an end and I need a supply of hinges to complete the cabinet DIY. As you can see I ran into a little speedbump with the hinges and needed a few hinge plates (which is why the pantry door is NOT on the cabinet.)

ROK Hardware offers a huge selection of hardware at low prices and great customer service.

Why I Recommend Rok Hardware

  • Huge selection – Cabinets, Hardware, Home, Kitchen, Bath, Furniture Hardware, Tools
  • Easy to Search Inventory
  • Easy to Use Shopping Cart and Website
  • Very Quick Delivery
  • Low Prices Compared To Manufacturer Cost
  • Brand Name Merchandise
  • Can use with Amazon Prime membership for fast and free shipping

I have become a huge fan of ROK Hardware whose tagline is Build It Better For Less. I love a company that delivers as promised! If you are seeking a hard to find part or replacement part bookmark ROK Hardware to comparison shop and I doubt you will be disappointed by the selection, price or shipping speed.


Note: The author may receive a commission from purchases made using links found in this article. “As an Amazon Associate, Ebay (EPN) and/or Esty (Awin) Affiliate, I (we) earn from qualifying purchases.”


Wednesday, May 30, 2018

Unique and Beautiful Watering Options for your Gardens

There are two reasons for this REVIEW TODAY! 

1. According to the Calendar of Days,  it is "Water a Plant Day" 

2.  Summer seems to be off to a fine start and I know my garden is in need of a daily drink!

Gardens are a place to rest and relax, to get your hands just a little dirty and to find something beautiful to enjoy!  Some of us have large gardens and others may have a small garden, but one thing is certain, everybody enjoys to see flowers blooming!  The garden doesn't have to do too much to make a weary soul smile. The hardiest of flowers can be enjoyed by everyone.  There is no need to be intimidated by thoughts of exotic plants (unless you want to be).  A pot full of marigolds is a beautiful sight.

Since the time of Adam and Eve, we have nurtured gardens and tried to bring some of them under our control.  With trying to control their growth, we also need to control their watering and feeding.  You can't have one without the other.


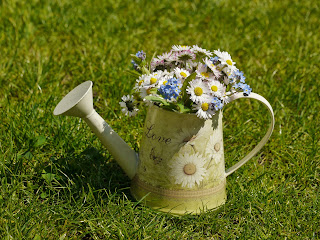
watering cans with flowers painted on the sides

Water a plant day brings up some interesting points about watering options for our gardens.  Let's for right now focus on watering cans and manual ways to keep our plants from dying of thirst!  I will leave drip irrigation methods to gardeners who really need that kind of extended watering options.  (Leave me a comment and I'll gladly discuss this with you!)

Water can be heavy, so when you are deciding on a watering can for your needs remember that you will need to carry it!  To that end, I will suggest that a watering can should hold around 2 gallons of water.  Any more than this and the weight becomes difficult to handle.  With my arthritis, I would not want to carry more than this personally.  It's also a good size when it comes to adding fertilizers to enhance the blooming of your flowers.

Now I'm going to show you one that gets a 5 Star rating and tell you why it's a good choice.

This watering can holds 2 Gallons so it's the perfect size. It has a fairly large opening to fill it and also to add any fertilizers. It is made of a light weight resin material that can be left out in the great outdoors without any problems.  It has a nozzle that makes the water fall like a shower on your plants.  The only down side to this watering can is that the nozzle is NOT removable.  This watering can is practical, but not very pretty.  If you are looking for function, this watering can will do the trick quite nicely and it's very affordable.


Now if you are looking for a watering can that does the job, but looks pretty too, there are many more options.  You can find watering cans that your children or grandchildren would love to use.  Any gardener that loves their hobby, loves to share that hobby with their loved ones too!  These watering cans would make playing and working in the garden a really fun time! Check out these lovely options in watering cans and see if one doesn't make you smile too!

Little hands would enjoy the animals that could help them, help you! This is just a little sample of the many watering cans that you can get. I just happen to love the colors and the shapes of these ones. The child in me has never really grown up!

Now here are a few practical things to remember when using a watering can to give your plants a drink.  Plants don't like to be watered with ice cold water, especially on really hot days.  It is a shock to their tender roots.  Fill your watering can and let it stand outdoors for an hour or so before subjecting your plants/planters to their daily drink.  Water your plants early in the morning rather than at high noon.  The plants will be able to drink more and be able to cope with the midday sun easier when they are well hydrated.  If you are using the watering cans to water your planters, you might also look at a schedule for fertilizing these planters.  Check out the labels and directions for your favorite types of fertilizers and use them accordingly.

girl and dog

A closing bit of advice, when you are watering your plants, talk to them too!  Plants do respond by growing much better when they are coddled!  Ask any gardener and they will agree that Watering, Talking, Primping and Pruning will do wonders for anything you are trying to grow!


Note: The author may receive a commission from purchases made using links found in this article. “As an Amazon Associate, Ebay (EPN) and/or Esty (Awin) Affiliate, I (we) earn from qualifying purchases.”


Tuesday, May 29, 2018

Soothe XP Eye Drops Reviewed

When Your Eyes Are Dry Or Irritated

irritated eyes
Irritated Eyes image from Pixabay.com
Bausch + Lomb has eye drops that will soothe your dry or irritated eyes that I would like to review for you today. Soothe XP has given my tired old eyes some relief. 

I began to experience what is commonly referred to as dry eye. When I would wake in the morning, it almost felt like my eyelid was scratching my eyeball when I first opened my eyes. I started to notice that my eyes always looked red and irritated and I found myself blinking more during the day. 

An advertisement came on the television for Soothe XP and I took notice. As they described the wearing away of the protective coating as we age, I thought that it sounded a lot like what I was experiencing. So, I decided to try these eye drops to see if I found any improvement. I figured it wouldn't hurt me and it was much less expensive than a trip to the doctor. 


After using these eye drops the first time, I felt some relief. Using them for a few days in a row, my eyes feel so much better. In the past, I had tried eye drops of a different nature and found them to almost irritate my eyes further. Not so with the Soothe XP. The liquid felt cool and refreshing in my eyes. There was no burning sensation like others that I had tried.

The label says that you may experience a little blurriness after the application but I did not find that to be true. Of course, we are not all the same so your experience might be different.

So, if you are experiencing dry eyes or tear loss from the aging process or your environment, I highly recommend giving Sooth XP by Bausch + Lomb a try. I think you will see an improvement like I have. 


Note: The author may receive a commission from purchases made using links found in this article. “As an Amazon Associate, Ebay (EPN) and/or Esty (Awin) Affiliate, I (we) earn from qualifying purchases.”


Thursday, May 17, 2018

DIY Mason Jar Bird Feeder - Tutorial and Product Review

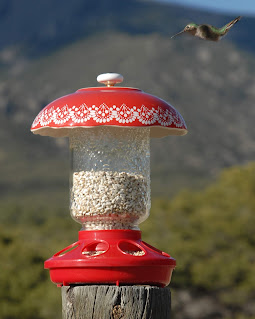
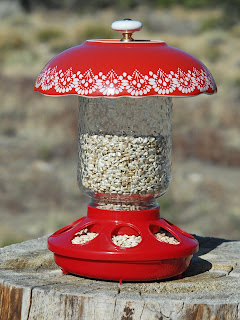
diy mason jar bird feeder and hummingbird
One of my favorite things in all the world is to spend time observing and photographing wild birds.  Most avid bird-watchers and photographers know that providing food is one way to ensure a steady stream of visitors and photo moments.  For some time now, I have wanted to make a new feeder for the birds that bring me such great pleasure.

Right away I knew that a mason jar bird feeder would be perfect for my country home.  Who doesn't love the charm of the ever-popular mason jar?  I thought I would share this project and a few tips for those out there who might also enjoy treating their feathered friends.  It is likely you already have most of what is needed for this easy do-it-yourself craft.  Let's get started.


Supplies Needed

  1. A regular mouth canning jar.
  2. A chick feeder base.
  3. A bowl or plate for the canopy over the jar.
  4. E6000 glue (or another super strength clear adhesive).
  5. Birdseed.
  6. Chain or picture wire (plant or basket hanger).
  7. Optional: Decorative knob.
dish for diy mason jar bird feeder
Step One:  Acquire a regular mouth canning jar and proportionately sized dish for its canopy.  You can find inexpensive mason jars at thrift stores, any of the dollar stores, craft stores, etc.  Though I already had some canning jars at home, I fell in love with The Pioneer Woman's embossed Betsy mason jars.  In addition to being especially lovely, the jars are 32 ounces, which means you won't have to fill your bird feeder as often as with smaller containers.

chick feeder base
Step Two:  Buy a screw-on chick feeder base that fits a regular mouth mason jar.  Most feed stores will have them, or you can purchase one online.  I get mine locally from either Tractor Supply Company or Big-R.  Typically, I pay $2.99-$3.99, depending on whether I buy a plastic or a galvanized metal feeder.  There are usually a few colors from which to choose.  My store has red, green, yellow, purple, and the galvanized silver feeders.


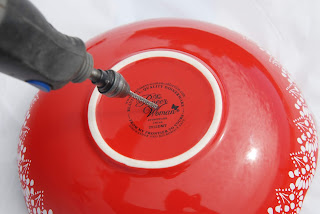
drilling a hole in a dish
Step Three:  Determine if you are going to hang your feeder or place it on a post.  If you plan to hang your bird feeder, you may wish to use a decorative knob on the canopy (to provide an anchor point for a chain or hanging wire).  The ceramic knob I chose couldn't be glued on, so I used my Dremel and a tile bit to drill a hole in the center of my canopy dish.  The bit worked perfectly and created a very neat little hole for the screw that holds the knob in place.  Tip:  Keep the surface wet and go slow while you are drilling.  Angle the bit slightly.


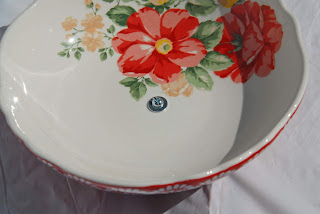
dish with screw through it
Step Four:  Insert a screw and use two washers (one for the interior screw and one for the exterior knob) to protect the bowl's surface.  I used a 3/4-inch long machine screw (#8) that fit the thickness of the bowl and the knob threads.  Tip:  Be careful not to over-tighten the screw.  You wouldn't want to crack that beautiful bowl (part of the vintage floral pasta bowl set by The Pioneer Woman).  *You can skip steps three and four if you choose a scalloped edge bowl and hook your plant hanger chains between the rounded curves.


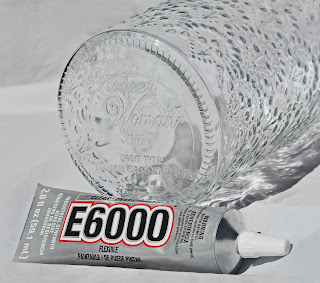
mason jar and e6000 glue
Step Five:  Apply E6000 glue on the bottom rim of the mason jar (around the entire rim).  Follow the instructions on the glue label to ensure the best adhesion results.


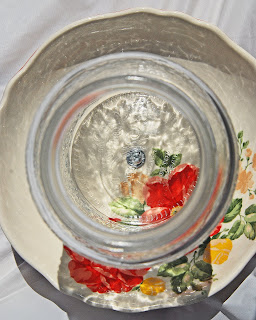
glass jar attached to dish
Step Six:  Center bottom of mason jar inside canopy bowl and apply gentle pressure while the glue is bonding.  Set aside for the glue to cure.  Depending on the temperature and weather conditions, curing time can take 1-2 days.  It's important not to rush this step.

*In this photo, you are looking down inside the open mouth of the jar.  You can see how it is centered over the screw for the canopy knob.  Tip: Use a flathead screw so the jar rim can sit flush on the bowl.


diy mason jar bird feeder
Step Seven:  After the glue is fully cured, fill mason jar with birdseed.  I used safflower seed.  Supposedly, squirrels won't bother a feeder with this kind of seed.  It is also said to keep bully birds from hogging all of the seed.  Safflower seed attracts the kind of birds I am hoping to feed.  I plan to hang my feeder, but decided to wait one extra day to ensure the glue is totally cured.

Because my hummingbirds are attracted to red feeders, I am thoughtfully considering the best location for this bird feeder.  You can see from the introductory photo on this page that the first bird to check out my new feeder was a hummer.

I love how my DIY mason jar bird feeder project turned out (so much so that I am making more than one feeder).  In addition to the Betsy mason jars, the dishes I purchased for the canopies are a part of The Pioneer Woman Collection.  The pattern on the red bowl matches the embossed pattern on the glass jar.  I bought everything at Walmart.

Now I'm excited to see who shows up at the feeder today. 


Note: The author may receive a commission from purchases made using links found in this article. “As an Amazon Associate, Ebay (EPN) and/or Esty (Awin) Affiliate, I (we) earn from qualifying purchases.”


Most Recent Reviews on Review This Reviews


Search for Reviews by Subject, Author or Title

The Review This Reviews Contributors


SylvestermouseSylvestermouseDawn Rae BDawn Rae BMbgPhotoMbgPhotoBrite-IdeasBrite-IdeasWednesday ElfWednesday ElfOlivia MorrisOlivia MorrisTreasures by BrendaTreasures by BrendaThe Savvy AgeThe Savvy AgeMargaret SchindelMargaret SchindelRaintree AnnieRaintree AnnieLou16Lou16Sam MonacoSam MonacoTracey BoyerTracey BoyerRenaissance WomanRenaissance WomanBarbRadBarbRadBev OwensBev OwensBuckHawkBuckHawkDecorating for EventsDecorating for EventsHeather426Heather426Coletta TeskeColetta TeskeMissMerFaeryMissMerFaeryMickie_GMickie_G


Review This Reviews is Dedicated to the Memory of Our Beloved Friend and Fellow Contributor

Susan DeppnerSusan Deppner

We may be apart, but
You Are Not Forgotten


“As an Amazon Associate, Ebay (EPN) and or Etsy (Awin) Affiliate, I (we) earn from purchases.” Disclosure Statement

X