Showing posts with label Recipes. Show all posts

Sunday, April 12, 2020

An Original Easy Homemade Pumpkin Loaf Recipe Tweaked From A Banana Loaf Recipe

An Original Easy Homemade Pumpkin Loaf Recipe Tweaked From A Banana Loaf Recipe
Modified a Banana Loaf Recipe to Make a Pumpkin Loaf


Quarantine is bringing out the creative baker in me. Not really, but I'm trying.

The Boys Ate All The Bananas. The Hunger Games.

I wanted to make a Banana Loaf using my favorite personal recipe. However, the boys ate all the bananas. Guess what? There are no bananas at the grocery store! Really ... bananas? I've seen the flour aisle cleaned out, but missing bananas was a first.

The Boys Ate All The Apple Pie. Hunger Games the Sequel.

Apple Pie was planned for our Easter Sunday dinner, but guess what? The boys ate all the pie.

So I opened the cupboard to see how to modify my Banana Loaf recipe and found a can of Pumpkin Pie Filling - not expired, thank goodness.

My Revamped Banana Loaf Recipe Turned Into a Yummy Pumpkin Loaf Recipe

I've never made a Pumpkin Loaf, but how hard could it be right? Lol.

After searching online for a Pumpkin Loaf recipe, I decided I didn't like any of them - too complicated.

My Banana Loaf recipe is six freaking ingredients, all in one bowl! Easy peasy. Thus, I began experimenting to modify my favorite recipe to make my first Pumpkin Loaf.

The biggest challenge was determining how much Pumpkin Pie Filling to replace three medium to large bananas in a banana loaf.

After googling around, I determined that one-half plus a heaping tablespoon of a 540ml can of Pumpkin Pie Filling should work. Actually, I had no idea - it was a cross-your-fingers-and-toes guess.

The original banana loaf recipe is here.

My Pumpkin Loaf Recipe - Modified:

. 1/2 CAN plus 1 heaping Tablespoon of Pumpkin Pie Filling (Full can be 540ml, which is 2.28 Cups - so use about 1 and 1/8 Cups of Pumpkin Pie Filling)
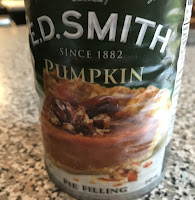
Pumpkin Pie Filling
Here's the Pumpkin Pie Filling
I used - Any kind should do

. 1 and 1/2 Cups of Flour

. 1 Cup of White Sugar

. 1 Teaspoon of Baking Soda

. 3 Heaping Tablespoons of Softened Butter (not melted)

. 1 Teaspoon of Vanilla Extract

For flavor, in the same bowl, I added:

. 1 Teaspoon of Ground Cinnamon
. 1 Teaspoon of Ground Cloves
. 1/4 Teaspoon of Allspice
. 1/4 Teaspoon of Nutmeg

Mix everything in one bowl. Put it in a regular-sized Loaf Pan. Bake in the oven at 325 degrees for 45 to 60 minutes, depending on your oven. Check it after 30 minutes (or before that if your oven is on steroids or something).

Since this was a trial variation of one of my recipes, I didn't add anything like raisins or nuts. However, it turned out beautifully, so I'll add raisins next time. I plan to boil the raisins in water to soften them first.

This plain pumpkin loaf is delicious with butter, cream cheese, jam, or peanut butter.

Barbara's Homemade Banana Loaf
Homemade Pumpkin Loaf by Barbara


Note: The author may receive a commission from purchases made using links found in this article. “As an Amazon Associate, Ebay (EPN) and/or Esty (Awin) Affiliate, I (we) earn from qualifying purchases.”


Saturday, April 11, 2020

National Pecan Day Review

A selection of pecan dishes
National Pecan Day - April 14
 National Pecan Day is a Food Holiday celebrated each year on April 14.  The pecan is a  member of the hickory family and is native to central and southern United States.  Pecans make great snacks eaten on their own, but they also make terrific garnishes to other foods such as desserts, salads or the main meal. 

"Pecan” is an Algonquian word, meaning a nut requiring a stone to crack. 

The pecan tree is the only nut tree native to North America.  These trees grow best in central and southern United States. Georgia, in particular, is known for it's Pecans. 

Here are two of my favorite recipes using pecans – Pecan Pie  and Sugar Coated Pecans. Either recipe ~ or both ~ would be a great way to celebrate National Pecan Day! 


Pecan Pie


Pecan Pie


Directions for Pie Crust:


Mix 3 cups flour and 1/2 tsp. salt in a bowl. Add 3/4 cup vegetable shortening and 3/4 cup salted butter. Work the butter into the flour using a dough cutter until the mixture resembles tiny pebbles.
    Add one egg, 5 tablespoons cold water and mix until just combined. 

    *This recipe makes enough for two pie crusts.

    Directions for the Filling:

    1. Mix one cup sugar, 3 tablespoons brown sugar, 1/2 teaspoon salt, one cup corn syrup, 1/3 cup melted  butter, 1 teaspoon vanilla and 3 whole eggs (beaten) together. 
    2. Roll out one dough half to fit your pie pan. Pour one cup of chopped pecans in the bottom of the unbaked pie shell. Pour the syrup mixture over the top. Cover the top and crust with foil.
    3. Bake the pie for 30 minutes in a preheated oven at 350 degrees. Remove the foil, and then continue baking for 20 minutes, being careful not to burn the crust or pecans.
    4.  The pie should be set and not jiggly when you remove it from the oven. If it seems to shake a lot, recover with foil and bake longer, or until set. The required baking time varies from 50-75 minutes. 
    5. Cool for several hours or overnight. Serve in thin slivers.

    Sugar Coated Pecans


    Sugar Coated Pecans


    "These sweet pecans are wonderful snacks for any occasion."

    Ingredients:


    • 1 cup white sugar
    • 3/4 teaspoon salt
    • 1/2 teaspoon ground cinnamon


    Directions:


    1. Preheat oven to 250 degrees F (120 degrees C). Grease one baking sheet.
    2. In a mixing bowl, whip together the egg white and water until frothy. In a separate bowl, mix together sugar, salt, and cinnamon.
    3. Add pecans to egg whites, stir to coat the nuts evenly. Remove the nuts, and toss them in the sugar mixture until coated. Spread the nuts out on the prepared baking sheet.
    4. Bake at 250 degrees F (120 degrees C) for 1 hour. Stir every 15 minutes.


    More Pecan Treats


    In addition to sugar coated pecans, another absolutely delicious pecan sweet treat is pralines.  The best I've ever had are handmade at River Street Sweets candy shop in Savannah, Georgia. 


    Other Pecan Day celebrations include:


    • Pecan Day – March 25
    • National Pecan Day – April 14
    • National Pecan Month – April


    So, pick a day …. or a month … and enjoy this nutritious and tasty nut called the Pecan.

    Related Articles:


    Pralines at River Street Sweets in Savannah, Georgia
    Praline - Source: Pixabay


    National Pecan Day written by (c) Wednesday Elf on 4/11/2020


    Note: The author may receive a commission from purchases made using links found in this article. “As an Amazon Associate, Ebay (EPN) and/or Esty (Awin) Affiliate, I (we) earn from qualifying purchases.”


    Sunday, March 29, 2020

    Easy Homemade Coleslaw Dressing - A Family Fave

    Easy Homemade Coleslaw Recipe
    Quarantine has me thinking more about food. Fortunately, after 10 months of Keto, I still have willpower!

    Keto warriors forewarned: This Coleslaw recipe is not Keto. However, if you replace the sugar with Monk Fruit Sweetener, it would be. Yet, I haven't personally tried that. If I did, I would use less Monk Fruit sweetener than 1/3 of a cup. I'd try a heaping tablespoon for my first attempt.

    As mentioned in my previous recipe review posts (featured below), although I can cook, it's not my favorite thing to do. For that reason, I'm drawn to simple recipes.

    While whipping through my stained recipe book, I came across this straightforward homemade recipe for Coleslaw dressing to share with you.

    Homemade Coleslaw Dressing Ingredients:

    . 1/2 Cup of Vinegar
    . 2/3 Cup of Olive Oil
    . 1/3 Cup of Sugar
    . 1/2 Teaspoon of Pepper
    . Miracle Whip Salad Dressing

    If needed, you can double this.

    Instructions:

    Put all the ingredients in a small pot on the stove and bring it to a boil (EXCEPT the MIRACLE WHIP). Pour the boiled ingredients over the prepared Coleslaw while it's hot. Put it in the fridge until you're ready to serve.

    Once you're ready to serve it, mix in two heaping tablespoons of Miracle Whip Salad Dressing. I've added the dressing when the Coleslaw dish is warm, and when it's been cooled in the fridge.

    Preparing the Coleslaw:

    You can buy the packages of ready-made Coleslaw at the store, or shred a cabbage head and
    other vegetables..

    The Extra Ingredients that Make Coleslaw Taste Great:

    Other than a delicious Coleslaw dressing, there are two ingredients I always add:

    . Chopped Apple
    . Chopped Onion

    Add the chopped apple just before serving. Cut the apple into small bite-sized pieces and stir it in. I usually cut up two medium-sized apples for a medium-sized bowl of Coleslaw.

    Add 1/2 of a large onion, chopped or shredded.

    The apple combined with the onion and the homemade dressing gives the Coleslaw a delicious taste.

    Store-Bought Coleslaw Dressing Alternative:

    If you don't have the time to fuss over making homemade dressing, Kraft's Coleslaw Dressing is excellent. Make the Coleslaw as described above with apple and onion, then put in nearly a full regular sized bottle of Kraft Dressing. Base the amount you want on how creamy you prefer your slaw. Pour it in quarters.

    Previous Simple Recipes from My Kitchen:
    If you're looking for a simple, comforting meat dish to serve with this Coleslaw, check out the Roast Pan Steak recipe featured above, it's so good!

    Stay safe, happy cooking.


    Note: The author may receive a commission from purchases made using links found in this article. “As an Amazon Associate, Ebay (EPN) and/or Esty (Awin) Affiliate, I (we) earn from qualifying purchases.”


    Saturday, March 28, 2020

    Fresh Baked Bread from Frozen Bread Dough Review

    Fresh Baked Bread from Frozen Bread Dough

    To save on trips to the grocery store for something as basic as a loaf of bread, it is handy to have a package of frozen bread dough on hand. You can purchase frozen bread dough in packages with multiple loaves (I currently have one with five loaves in it) and always have it handy whenever bread is needed or you cannot get out to shop.  In addition, you will have the taste of fresh baked bread after enjoying the delicious aroma of your bread baking. 

    Making bread from scratch is a fun cooking project for many, but for a quick way to enjoy fresh baked bread, this frozen bread dough is a delightfully delicious product.


    Basic Instructions on Package:


    Regular Method – 5 to 8 hours


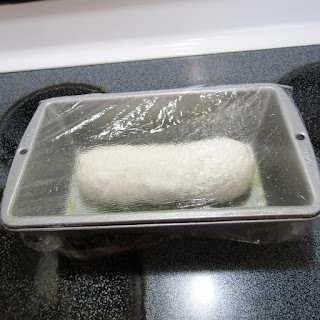
    Frozen bread dough set out to rise


    1. Coat a loaf pan with non-stick cooking spray. Place frozen dough in pan, and cover with plastic wrap coated with cooking spray to keep it from sticking to dough while rising.
    2. Let dough rise for 4 to 7 hours, until dough is 1” above pan. Actual time depends on the temperature of your kitchen. Carefully remove the plastic wrap.
    3. Preheat the oven to 350F. Bake bread 20-25 minutes, until golden brown.
    4. Remove bread from pan at once and place on a wire rack to cool. Brush the top with melted butter or margarine, if desired. Place bread on its side for easier slicing.


    Refrigerator Method – 8 to 16 hours


    1. Coat a loaf pan with non-stick cooking spray. Place frozen dough in pan, and cover with plastic wrap coated with cooking spray to keep it from sticking to dough while rising.
    2. Place frozen dough in your refrigerator 6 to 12 hours before using. Dough will not rise, but will be thawed and ready to use. Set dough out to rise for 2 to 3 hours, until dough is 1” above pan. Actual time depends on the temperature of your kitchen. Carefully remove the plastic wrap.


    Preheat the oven to 350°F. Bake bread 20-25 minutes, until golden brown.


    Fresh loaf of baked bread from frozen bread dough


    Remove bread from pan at once and place on a wire rack to cool. 


    Fresh loaf of baked bread from frozen bread dough


    Brush the top with melted butter or margarine, if desired. Place bread on its side for easier slicing.


    *Recommended pan: 8 1/2” x 4 1/2” x 2 1/2” (1lb. loaf pan) 


    More Bread Recipes on ReviewThisReviews


    Slicing fresh baked bread baked from frozen bread dough

    Written on 3/28/2020 by (c) Wednesday Elf

    *All images are the property of (c) Wednesday Elf


    Note: The author may receive a commission from purchases made using links found in this article. “As an Amazon Associate, Ebay (EPN) and/or Esty (Awin) Affiliate, I (we) earn from qualifying purchases.”


    Tuesday, March 3, 2020

    Easy Loaded Potato Soup Recipe Reviewed

    A Quick Way To Make Potato Soup

    I would like to share an easy loaded potato soup recipe with you today. My review of this recipe will show you how to make a great tasting soup in a very short time span. Interested? Follow me down the page for the ingredients and instructions. 

    potato soup
    Russet Potatoes for a great soup
    image courtesy of pixabay.com

    In order to prepare this soup recipe you will need an Insta-pot or any other popular brand of pressure style cooker on the market. Depending on the make you use my directions might be different on your cooker but I think you can figure out how to do it with the features available on your model.

    Recipe for Loaded Potato Soup


    Ingredients:
    1 Tbs butter
    1 Shallot minced
    3 cloves garlic
    3 cups chicken broth
    1 can cream of chicken soup
    8 Russet potatoes peeled and diced
    1 1/2 tsp salt
    Black pepper
    1 Tbs flour
    1 cup milk
    2 cups shredded cheddar cheese
    Bacon bits and cheese for garnish

    Preparation:
    Add butter to your pot and melt on the saute setting. Add shallot to melted butter cooking for 4 minutes. Now, add the garlic and cook for an additional minute. 

    Add the chicken broth, cream of chicken soup, salt and pepper and the diced potatoes. Stir the contents well. Place your lid securely on your pot and pressure cook for 10 minutes. Do a Quick Release after the 10 minutes are up.

    Remove the lid. In a separate container stir the milk and flour together. Add this mixture to the soup in the pot. Cook on the saute setting for 5 minutes. Stir in the cheese until it is melted. 

    Your soup is ready to serve! Garnish with bacon bits and shredded cheese and enjoy!


    Make this recipe and many others with an Insta-pot


    I can't believe how much I use my pressure cooker for meals. One of our favorites is this Loaded Potato Soup recipe but I make all sorts of things in it. It is amazing how little time most recipes take. If you don't have one, you should consider getting one for yourself. I'm pretty sure you will not regret adding it to your kitchen as a handy tool for preparing really good food. Below is the model that I own.

    Insta-pot Ultra


    Note: The author may receive a commission from purchases made using links found in this article. “As an Amazon Associate, Ebay (EPN) and/or Esty (Awin) Affiliate, I (we) earn from qualifying purchases.”


    Monday, March 2, 2020

    Easy Meal Recipes: Fish Tacos

    I am always looking for easy week night meals that are easy and inexpensive. Thanks to a suggestion from my son, I made these easy and delicious fish tacos. I want to pass this meal idea on to you.


    Easy and delicious Fish Tacos with Avocado Cream Sauce


    My youngest son regularly sends photos of the beautiful and delicious meals he prepares for his family. One recent evening, in response to his mouth-watering food photo, I responded something like: 


    " I'm stopping for frozen fish sticks. Yay."

    He responded that I should make fish tacos. That sounded way too difficult after a hard day at work and an irritating commute home on the beltway. Fortunately, he sent a link for avocado cream sauce. That did it. I stopped for the frozen fish sticks and the 5 ingredients that I didn't have in my kitchen already. And I made easy and delicious fish tacos. I am so glad I did.


    Avocado Cream Sauce


    The link he sent was the Avocado Cream Sauce recipe by Barefeet in the Kitchen. Along with the recipe on the page there are links for many recipes using the avocado cream sauce. But my taste buds were firmly set on fish tacos.


    Avocado Cream Sauce shopping list


    I did not use a blender to prepare my sauce. I was too tired to drag out a blender, wash it, and put it away. So I used a potato masher and mashed the avocados, adding the other ingredients while mashing. I liked the slightly chunky texture and I think it turned out great. But if you prefer a smoother sauce, make sure to use a blender as directed in the original recipe.


    Cheap and Easy Weeknight Fish Tacos


    Of course, these fish tacos would be even more delicious with fresh fish in place of the frozen fish fillets. However, whether you are cooking for yourself or for the family after a hectic day of work/school/activities, frozen fish fillets make this an easy meal.

    Meal Ingredients:

    • small flour tortillas - approximately 6" size
    • frozen fish fillets - prepared per package instructions
    • half head of cabbage - shredded
    • Avocado Cream Sauce - prepared per the recipe instructions
    Directions:
    1. Bake fish per the package instructions
    2. While the fish bakes, make the sauce using the avocados, sour cream, fresh garlic, lime juice, salt and pepper. Set that aside in the refrigerator.
    3. Cut the cabbage into small strips
    4. Allow the fish to cool slightly before assembling the tacos. Then assemble by placing a bed of cabbage onto a tortilla, a fish fillet on the cabbage, and a spoonful of avocado cream sauce on top of the fish.
    Enjoy!

    This recipe was a wonderful change of pace from my normal easy/cheap meal line up. The avocado and lime added a fresh summery flavor in the middle of our mild but dreary winter. The fish, avocado, and cabbage was definitely a healthier alternative to most fast food drive-thru meals. 

    Related Link:

    After looking more closely at the Barefeet in the Kitchen site I learned that the author is Mary Younkin. She has published recipe books that look right up my alley! Ms. Younkin caught my attention with the philosophy of "cooking from scratch as simply as possible".


    Note: The author may receive a commission from purchases made using links found in this article. “As an Amazon Associate, Ebay (EPN) and/or Esty (Awin) Affiliate, I (we) earn from qualifying purchases.”


    Sunday, March 1, 2020

    Roast Pan Steak - Another Family Favorite - It's So Good!

    Roast Pan Steak - A Family Fave
    I'm anxious to share this favorite family recipe with you. Since I've spent approximately the last four Sunday's posting our family faves, why not add another one?

    Roast Pan Steak is a recipe passed along to me from my mom. I'm sure it came from her mother, my grandmother, and her mother before that.

    This recipe is simple, just the way I like them.
    Your house will smell amazing with this cooking in the oven!
    I remember one particular time when we had visitors, I had this dish cooking in the oven. Our visitors kept repeating over and over how amazing the food smelled.

    Roast Pan Steak Ingredients and Cooking Instructions:
    • Steak (cut into bite-sized cubes) - 1 large steak  If you add another steak, double the sauce; 3 steaks, triple it and so on.
    Sauce for the One Large Steak:
    • 1 Cup of Ketchup or BBQ Sauce (I prefer Ketchup)
    • 1/3 Cup of Vinegar
    • 1/2 Cup of Water
    • 1/2 of a Large Onion Chopped - Use more if you like
    • 1 Tablespoon of Brown Sugar
    • 1 Tablespoon of Mustard
    • 1 Tablespoon of Worcestershire Sauce
    Brown the cut-up steak in a frying pan. Once browned, remove it from the steak pan and put it in an oven roast pan.

    Put the water in the steak pan with the steak drippings and steak juice. Mix it up nicely to get all that flavor into the water. Then mix all the other ingredients listed above (water already used) in a bowl and pour it into the frying pan.

    Next, take that finished sauce that's in your frying pan, and pour it over the steak that's in the oven roast pan. Cook it in the oven for about 3 hours at 300 degrees (low and slow). It should fall apart. Each bite should be tender.

    You can cook it with or without the lid, just watch if it's drying out. It should remain relatively saucy. Generally, I cook halfway through the time without the lid and just eyeball it from there.

    If it seems a bit dry (which has never happened to me), add a bit of watered-down Ketchup (1/2 cup), pour it over, stir and put it back in the oven with the lid on.

    NOTES
    •  As mentioned above, you can double or triple the sauce
    • You can use stewing beef, but it's way better with steak!
    • The amount of steak versus sauce is up to you - If you like it saucier, use less steak and more sauce. Or use lots of steak and lots of sauce. 
    • If you're serving a lot of people, I would use more sauce and more steak.

    From Our Kitchen - A Collection of Sunday Shares


    Don't hesitate to give Roast Pan Steak a try, it tastes and smells incredible. Serve it with a salad, veggies, and oven-baked or mashed potatoes.


    Note: The author may receive a commission from purchases made using links found in this article. “As an Amazon Associate, Ebay (EPN) and/or Esty (Awin) Affiliate, I (we) earn from qualifying purchases.”

    Sunday, February 23, 2020

    Family Favorite Pancake Recipe

    A Family Favorite Pancake Recipe - Easy and Delicious
    Here I go again. Another weekly review post about a recipe.

    If you've seen my last few Sunday posts you've already heard me express how I'm shocking myself with all these recipe shares. Like I already said, it's not because I can't cook, it's just not my favorite thing to do.

    I may be possessed by a Chef or something? Yah, like I'm a chef; not.

    Today I'm sharing our family recipe for Pancakes. It's another easy recipe.

    But wait, one of my fellow writers, Lou16, just wrote about her best pancake recipes! Oh no. I don't want to step on toes so be sure to check out her article. She provides several fantastic and unique recipe ideas. I'll have to try them.

    How Many Ingredients Are in This Family Pancake Recipe?

    There are 8 ingredients. This recipe, like most pancake recipes, is made by mixing everything together in one bowl.

    What Makes this Pancake Recipe the Best One in the Entire World According to My Family - Tongue in Cheek :)

    It's not just my family who love these pancakes; it's friends and visitors as well.

    My mother passed this recipe along to me decades ago, and I can pretty much make it with my eyes closed. However, I did tweak the recipe and added one more ingredient.

    That one ingredient addition is "Vanilla Extract".

    For this basic pancake recipe, this small addition gives it that extra punch. Top your pancakes with strawberries and whip cream and it pretty much tastes like 'pancake cake'.

    How to Make This Simple Recipe
    • 1 Cup of Flour
    • 3 Teaspoons of Baking Powder
    • 2 Tablespoons of Sugar (Optional)
    • 3/4 Teaspoon of Salt (Optional)
    • 1 Egg
    • 1 Cup of Milk
    • 2 Tablespoons of Melted Butter
    • 1 Teaspoon of Pure Vanilla Extract
    You can double or triple this recipe as well.

    Mix everything together in one bowl. Don't over mix. Once all the ingredients are blended together, let the batter sit for 10 minutes. 

    Cook it on a greased grill. I use butter, but normally only need the butter for the first batch.

    Most of you who make pancakes already know this basic tip: When you put a pancake on the grill, you only flip it once and flip it over when you see the batter bubbling through the top.

    Additional Family Recipes Previously Shared:
    So there it is again, another peek into our kitchen.


    Note: The author may receive a commission from purchases made using links found in this article. “As an Amazon Associate, Ebay (EPN) and/or Esty (Awin) Affiliate, I (we) earn from qualifying purchases.”


    Saturday, February 22, 2020

    Reviewing Pancake Recipes

    Pancake Day isn't very far away and I can remember as a child being very excited when this date came around.   As an adult I don't get quite as excited, want to know why?

    Decadent Protein Pancake stack layered with yogurt and berries
    Protein pancakes - photo by Lou16


    I grew up in the UK and the only time I remember ever eating pancakes was on Shrove Tuesday - everyone seemed to eat pancakes then!  Mum would make what I now think of as crepes and we would squirt on lemon juice (definitely not fresh in those days but in a little plastic bottle!) and sprinkle on sugar.   We would then proceed to roll them up and eat them - quicker than my poor mum could make them!

    I should mention that this was for our dinner, it was unthinkable for us to have pancakes for breakfast!

    Fast forward a few decades and with the take over of the world by McDonalds and their hotcakes along with the internet where recipes for American style pancakes were easy to find and I do enjoy pancakes throughout the year and for breakfast!

    The drawback to pancakes whenever I want is that I no longer feel that excitement for Pancake Day when it comes around!

    The Best Hotcakes My Husband Ever Made


    Not long after we brought our first home in New Zealand the fast food giant, McDonalds opened up just down the road.   My husband popped down to get me hotcakes for breakfast one Sunday and then for the next couple of years that was my Sunday breakfast!

    We moved to Australia over twenty years ago and he has cooked hotcakes a few times using a couple of different pancake mixes from the supermarket (similar to the Stonewall one Cynthia reviewed).   About five years ago I brought him the cookbook Relaxed Cooking with Curtis Stone and in this book my mum and I were about to feast on some delicious hotcakes.

    If you don't have time to grab the book then I've found the link to the recipe and a video (you will not regret making these!) on the foodnetwork for you - https://www.foodnetwork.com/recipes/hotcakes-with-delicious-blueberry-compote-recipe-2041480


    The Best Hotcakes I Make Are Healthy Ones!


    I have in the last couple of years discovered a few different pancakes and my favorite are protein pancakes like the ones featured in the photo at the top of the page.   These pancakes are simply delicious, healthy and I get to eat them as one of my meals when I'd doing the 30 days to healthy living and beyond plan.

    Chocolate Protein Pancakes You NEED To Make!

    Ingredients

    1 scoop Arbonne chocolate protein powder 
    1/2 tbsp raw cacao powder
    1/2 tsp baking powder
    125 ml unsweetened almond milk (I prefer to use either the Vitasoy or the So Good brand)
    1 tbsp coconut flour
    2 eggs

    Directions

    Simply mix all of the ingredients together well and then let stand for 10 minutes.   Letting it stand is very important, I can't remember why I was told that but I've also done this and my hotcakes have turned out really well so why risk it?

    Make sure you have a hot pan, I usually use coconut oil to cook them in, but that's not essential I know some people use rice bran oil or a butter and oil mix.  I use a ladle to put my mixture into the pan and I do them the size of a Macca's hotcake, I also only cook one pancake at a time.
    When there are quite a few bubbles showing on the top of the mixture it's time to turn the pancake over and cook the other side.

    Serve with your usual toppings.   I usually take a scoop of Arbonne's vanilla protein powder and mix it with coconut yogurt to a thick cream consistency and layer them with that and whatever fresh berries I have.   It's like eating cake, but it's healthy for you!

    Healthy Pancake Recipes for Children


    I really don't think there was any nutritional value in the pancakes I had as a child, but the chocolate protein pancakes above would certainly fill a child up with some good quality protein without them realizing it.

    Another idea for them is Hulk Pancakes!   You could call these Shrek Pancakes or Monster Pancakes depending on what they like.   These are basically protein pancakes with a serve of fruit and veg ....

    1 scoop Arbonne vanilla protein powder
    1/2 tbsp (which is about 1/2 a scoop) Arbonne's Super Greens 
    1/2 tsp baking powder
    125 ml milk of choice (I'd use almond milk personally)
    1 tbsp coconut flour
    2 eggs

    Mix all of the ingredients together and then allow to sit for 10 minutes before cooking in a hot pan.

    You could also try these Green Smoothie Pancakes which include spinach and bananas.

    Banana Pancakes are often a hit when it comes to healthier pancake choices.

    Here are two other healthy pancake recipes which I haven't tried yet, but are on my to-eat list.

    White Bean Pancakes
    Linseed & Walnut Pancakes

    Will you be eating pancakes on Shrove Tuesday?


    Note: The author may receive a commission from purchases made using links found in this article. “As an Amazon Associate, Ebay (EPN) and/or Esty (Awin) Affiliate, I (we) earn from qualifying purchases.”


    Sunday, February 16, 2020

    White Cake with Coconut Topping - Another Family Favorite

    White Cake with Baked Coconut Topping - A Family Fave

    I don't know what's with me lately, but here I am again this week talking about another recipe my family loves.

    As I mentioned in the other recipe articles, of course, I can cook, it's just not my favorite thing to do. What the heck, I'll keep the recipe sharing going until this phase wears off.

    Here's this Sunday's recipe for y'all: It's the most amazing simple white cake evah!

    Much like the simplicity of my previously shared recipes, this one only has six ingredients, and it's so good! It has a topping as well, so the total ingredients are actually nine. You've done the math, so I guess you've figured out that the topping has three.

    We actually don't have a name for this recipe, we just call it 'White Cake with Coconut Topping.'

    Cake Ingredients:

    • 2 Eggs
    • 1 Cup of White Sugar
    • 1 Cup of Flour
    • 1 Teaspoon Baking Powder
    • 1/2 Cup of Milk
    • 1/4 Cup of crushed Walnuts (optional)
    (Did you notice these ingredients are similar to making pancakes?)

    Mix all the ingredients together, but don't put the walnuts in, they go on top. Don't over mix. Just get everything nicely blended. Pour the ingredients into an ungreased 8.1" square baking dish (2 quart). Sprinkle the top of the batter with the crushed walnuts. Bake the cake for approximately 25 minutes at 350 degrees. However, check it at 20 minutes.

    The Topping

    •  6 Tablespoons of Butter
    • 10 Tablespoons of Brown Sugar
    • 4 Tablespoons of Cream or Canned Milk
    Melt all ingredients in a pot on low heat. Once melted, add 1 Cup of baking coconut (the coconut you buy in the baking section of a grocery store).

    Finishing the Cake


    I usually poke about ten or so tiny holes into the cake using a toothpick. Pour the topping over the cake. Put the cake back in the oven under the broiler until the coconut on top turns into a nice golden color. It doesn't take long, watch it the whole time, don't walk away!

    This is one of my favorite cakes. When my mother makes this cake, I cannot resist it. Although, yes I have resisted it for 10 months since I've been on Keto. Before my commitment to the Keto way of eating, I was all over this cake! I'll have to find a way to make this one Keto friendly.

    Previous Family Recipes


    Here are those other recipes I was speaking about:


    Note: The author may receive a commission from purchases made using links found in this article. “As an Amazon Associate, Ebay (EPN) and/or Esty (Awin) Affiliate, I (we) earn from qualifying purchases.”


    Saturday, February 15, 2020

    Site Review ~ Dinner, then Dessert, a Recipe Website

    A cookbook on a table
    Source:  Pixabay & Fotojet

    The other night I decided I wanted to fix Egg Foo Young for my dinner, as I had some leftover ham to put in it.  I almost always order Egg Foo Young at a Chinese restaurant, as it is my favorite. Since one doesn't often 'eat out', I sometimes fix restaurant favorites at home.  

    I have made Egg Foo Young often over the years, but, while good, it just never tasted the same as my favorite at a Chinese restaurant or Chinese Take-out. And I never knew why. So I decided to look online for a new recipe to see if I could duplicate my favorite. Much to my surprise, I discovered that I have been 'cooking' my version incorrectly.  I would beat the eggs and add the ingredients (vegetables, and  sometimes meat or seafood) and cook it all at once like an omelet.  Aha ~ THAT was my mistake.  I discovered you cook individual helpings like a pancake! 

    When I did a Google search for a new Egg Foo Young recipe, I accidentally came across a recipe blog called Dinner, then Dessert, and I am SO glad I did.  The author is a trained professional cook who worked as a Private Chef for 10 years, and all the recipes on her site are her own. Not only are her recipes delicious, but her presentation is attractive and easy to follow and her writing is delightful. Her name is Sabrina Snyder. 


    Meet Sabrina Snyder


    Author Sabrina Snyder
    Sabrina Snyder, Professional Chef
    Author of Dinner, then Dessert
    Sabrina Snyder is a professionally trained personal and private chef of over 10 years. 

    She started Dinner, then Dessert as a business in her office as a lunch service for her coworkers who admired her lunches, before going to culinary school and becoming a full time personal chef and private chef. 

    As a personal chef Sabrina would cook a family's entire week of dinners one day a week, including all grocery shopping, cooking and cleaning up, and leave them with instructions on reheating each meal.

    As a private chef, she cooked for private parties in family homes in the evenings.

    Sabrina enjoyed this lifestyle for 10 years, until her life and kids became her priority and  she stepped away from other people's kitchens to stay in her own kitchen.

    In  2015, Dinner, then Dessert became an online recipe website where Sabrina began posting recipes she had shared with clients over the years. 

    In addition, she still has private chef clients she cooks for.  Sabrina treasures her distinction of being a trained professional  chef. 


    Sabrina's Egg Foo Young Recipe


    Egg Foo Young on a plate of rice
    Sabrina Snyder's Egg Foo Young Recipe
    Sabrina's Photo from Dinner, then Dessert

    Egg Foo Young is a Chinese egg omelet dish made with  vegetables with an easy gravy topping. I share her recipe here:

    Course: Main Dish
    Cuisine: Chinese

    Prep Time: 5 minutes
    Cook Time: 10 minutes
    Total  Time: 15 minutes

    Ingredients:

    8 eggs
    ½ onion, chopped
    ½ cut carrots (chopped and steamed)
    ¼ cup green peas
    ½ cut green bell pepper, chopped
    ¼ cup bean sprouts, cut in half
    ½ cup mushrooms
    1 tablespoon light soy sauce
    3 tablespoons sesame oil, divided

    Instructions:


    1. Add the eggs, onion, mushrooms, bell pepper,  bean sprouts and soy sauce together in a bowl and whisk to combine.
    2. In a large skillet, heat 1 teaspoon sesame oil at a time for each pancake you cook on medium heat.
    3. Add about 1/3 cup of mixture per pancake and cook for 3-4 minutes on the first side and 1-2 minutes on the second side.


    Egg Foo Young Gravy

    1 cup chicken stock
    2 tablespoons light soy sauce
    1 tablespoon dry sherry
    1 tablespoon cornstarch

    Add everything to a small sauce pan and whisk well before the liquid heats up.  Cook and whisk until thickened. 


    Recipe Notes from Sabrina about this Egg Foo Young Dish:


    Egg Foo Young is sort of the classic leftovers meal made into a restaurant favorite. At our local Chinese restaurant the classic egg version of the dish comes out with a different assortment of ingredients mixed in almost every time we go.
    I’ve asked our favorite waiter (who puts up with our circus of a family) why the fillings change and he explained to me that Egg Foo Young is a leftovers recipe and that when they have more or less of certain vegetables they just adjust the filling to what they have.


    My Recipe Notes:


    A collage of my version of Egg Foo Young from Sabrina's Dinner, then Dessert site
    Cooking my version of Egg Foo Young
    from Sabrina's Dinner, then Dessert site
    Photos by Wednesday Elf, using a Fotojet collage

    Following what Sabrina learned  about this Egg Foo Young recipe filling being adjusted, I made my recent version using only fresh mushrooms, diced onions and ham diced up from a leftover ham slice. I briefly sauteed the ham, onions and mushrooms in butter prior to adding them to the egg mixture.

    I used only 3 eggs and cooked my pancakes one at a time in a small pan, as I was only making enough for myself. I chose NOT to make the gravy, as I like my Egg Foo Young plain. 

    I then served the Egg Foo Young pancakes on rice. The  image below is of my result. YUM!


    My egg foo young dinner
    My Egg Foo Young Dinner

    PS: In addition to learning the proper way to COOK this dish as pancakes, I think the other secret to getting homemade Egg Foo Young to taste more like a Chinese restaurant version is using sesame oil to cook it in. 


    Site Review Summary


    Having now discovered this delightful online recipe website by Sabrina Snyder, I will be visiting Dinner, then Dessert frequently to try out several of her other delicious-looking recipes  from her Main Dish, Desserts, Appetizers and Slow Cooker lists. Her 'Easy Chicken Parmesan' recipe is already calling my name! 

    Quick Link:

    Dinner, then Dessert Recipe Website

    For more Chinese Takeout dishes to  fix at home, check out this cookbook:


    (c) Dinner, then Dessert Website Review by Wednesday Elf, written on 2/15/2020


    Note: The author may receive a commission from purchases made using links found in this article. “As an Amazon Associate, Ebay (EPN) and/or Esty (Awin) Affiliate, I (we) earn from qualifying purchases.”


    Most Recent Reviews on Review This Reviews


    Search for Reviews by Subject, Author or Title

    The Review This Reviews Contributors


    SylvestermouseSylvestermouseDawn Rae BDawn Rae BMbgPhotoMbgPhotoBrite-IdeasBrite-IdeasWednesday ElfWednesday ElfOlivia MorrisOlivia MorrisTreasures by BrendaTreasures by BrendaThe Savvy AgeThe Savvy AgeMargaret SchindelMargaret SchindelRaintree AnnieRaintree AnnieLou16Lou16Sam MonacoSam MonacoTracey BoyerTracey BoyerRenaissance WomanRenaissance WomanBarbRadBarbRadBev OwensBev OwensBuckHawkBuckHawkDecorating for EventsDecorating for EventsHeather426Heather426Coletta TeskeColetta TeskeMissMerFaeryMissMerFaeryMickie_GMickie_G


    Review This Reviews is Dedicated to the Memory of Our Beloved Friend and Fellow Contributor

    Susan DeppnerSusan Deppner

    We may be apart, but
    You Are Not Forgotten


    “As an Amazon Associate, Ebay (EPN) and or Etsy (Awin) Affiliate, I (we) earn from purchases.” Disclosure Statement

    X