Friday, March 15, 2024

Peonies are Lovely Spring & Summer Flowers that are Easy to Grow

peony flower
I planted my peony 25 years ago.  It continues to give me the gift of gorgeous blooms year after year.

Peonies are perennials, which is why they continue to produce lovely flowers each year.  They do well in a variety of soils.  I happen to have a clay soil and as you can see, my peony is perfectly content with her environment.  

It may surprise you to know that the large peony bush is actually a tuber that is planted in the fall.  I've never had to move my peony for extreme cold or ice.  She retreats underground before winter, but pops right back up in spring.  It is mid-march here now and I am already seeing her shoots as she prepares to fully awaken.  I don't expect to see actual blooms until late April, but my peony takes center stage when she is ready.

If you are interested in planting a peony like mine (shown on the right), she is a Sarah Barnhardt peony.  I ordered her from Breck's Nursery, which is still in business.  I prefer them because they ship at the right time for planting in your zone.  That is something I always appreciate about that nursery!  I can make an order in spring or summer (when I see a flower blooming) and then the nursery sends me the bulb or tuber at the correct planting time.  That makes gardening so much easier!  They keep up with the calendar for me.  Because bulbs & tubers require very little time to plant, it has never been inconvenient for me to plant them within a day or two of arrival.

peony shoots
First Peony Shoots in Spring - 3/12/24


First Full Bloom in 2024 - (4/16/24)
Peony Bush
Peony Bush on 4/16/24


Planting Peonies

Because the peony is a tuber, it is extremely easy to plant.  The hardest part for me is determining which side is up.  Don't laugh!  I have actually spent more time inspecting a tuber, looking for the eyes, then it takes to actually plant it.


We get a moderate to high amount of wind in our area, so I elected to plant our peony in front of our south-facing fence and on the east side of the house.  The fence and house provide protection from winds which blow from west to east during a storm.

  • peony
    Late spring, early summer blooming 
  • Fall planting 
  • Plant in an area that stays well drained 
  • Full sun to partial shade
  • Dig a wider hole than necessary to loosen the dirt around it to allow the roots to grow 
  • Mix *bulb food into the soil (purchased along with the peony)
  • 1 1/2 - 2 inches deep (the pink bud eyes should be at that depth)
  • When winter arrives and the plant dies back, cut to just above ground level
  • It usually takes 2 or 3 years before a peony blooms, but they are worth the wait
*Bulb food:  I use Breck's Food for Bulbs & Perennials OR Osmocote when planting


Peony Blooms
peony bloom

The peony blooms are impressively large.  That is my husbands hand holding the flower up for me to photograph.  You can see how big the flower is compared to a mans hand.
 
I often cut them and bring them inside so I can enjoy seeing the lovely bloom throughout my day.  
 
When our children were in grade school, they loved taking a few peony blooms to their teachers.  A single peony flower is as lovely as a dozen roses, in my opinion, and I do love roses.
 
peony photo by Sylvestermouse


Read More Gardening Reviews On
ReviewThisGardening.com


House of Sylvestermouse


Note: The author may receive a commission from purchases made using links found in this article. “As an Amazon Associate, Ebay (EPN), Esty (Awin), and/or Zazzle Affiliate, I (we) earn from qualifying purchases.”


Thursday, March 14, 2024

Book Review -The Beach House

The Beach House

 I enjoy reading many different types of books.  There are times I get stuck on reading mysteries one after another and other times I'll read several historical fiction books in a row.  After going on my reading binges, I find myself longing for something light, that will take me away to a beautiful place.  

Rachel Hanna is the perfect author to satisfy my need for a book to take me away to a beautiful place with an interesting story.  I would categorize her books as light romances, but they also include some valuable life lessons along the way. 

The Beach House is the first book in the South Carolina sunset series.  You can find the book on Amazon at The Beach House.

A Look at the Main Characters

  • Julie--the main character has been married for 20 years and her two daughters are both out on their own.  Julie is looking forward to moving to her dream house on the beach.  The house has been sold and they are ready to embrace on their new life, when her husband comes home from a business trip and announces he wants a divorce.
  • Michael--the ex-husband (i.e. the Jerk) who has been living a second life when he goes on his trips and now not only has a fiance but a young son.
  • Dawson- the contractor that Julie hires to renovate the house she has purchased, sight unseen, in the small island of Seagrove off the South Carolina coast.
  • Dixie--the eccentric book store owner who befriends Julie.
  • SuAnn--Julie's bossy mother.
  • Janine--Julie's sister who she has not seen in many years.
  • Willam--Dixie's estranged son who she has not seen in 10 years.  William appears at the end of Book 1.

Books in the Series

I was so enchanted with The Beach House that as soon as I finished, I downloaded the second book in the series.  The Beach House has a definite beginning, middle, and end so it could be read alone but I'm sure once you read it you will want to read more of the series.  For the rest of the series, it is recommended that you read them in order as the characters are further developed with each new book.  Here are the books in the South Carolina Sunset series in order.
  1. The Beach House
  2. Sunsets and Second Chances
  3. Fireflies & Family Ties
  4. The Inn at Seagrove
  5. The Wedding at Seagrove
  6. A Seagrove Christmas
  7. Lighthouse Cove
  8. Beneath the Willow Tree
  9. Matts & Magnolias
  10. Chasing Sunset
I hope you enjoy this series.  I find it is a wonderful book to curl up with in a comfortable chair and escape for a few hours.


Note: The author may receive a commission from purchases made using links found in this article. “As an Amazon Associate, Ebay (EPN), Esty (Awin), and/or Zazzle Affiliate, I (we) earn from qualifying purchases.”


Wednesday, March 13, 2024

How to Organize Your Messy Linen Closet With Pop-up Storage Bins

A cluttered linen closet can be a source of frustration, especially when you're searching for that elusive missing pillowcase from a set of sheets or the washcloth from a particular set of towels. Fear not! In this guide, I’ll review an easy and efficient way to organize your linen closet using pop-up fabric storage bins labeled with index cards inside clear plastic pockets. Say goodbye to the linen closet chaos and hello to a well-organized and visually pleasing storage space for your sheets, towels, tablecloths, napkins, spare blankets and pillows, out-of-season comforters, and holiday table runners.

It's time for spring cleaning!

Easy linen closet makeover

I am not neat and well-organized by nature. However, I dislike living in a cluttered environment, as does my husband. So, periodically, we tackle an area of particular irritation to de-clutter and organize. Our most recent project was our overstuffed and extremely messy linen closet.

Our easy linen closet makeover was a smashing success, so I put together a step-by-step guide to decluttering and organizing a messy linen closet. (My fellow Review This Reviews contributor Barbara also wrote a linen closet organization guide several years ago that you might want to check out.)

Photograph Your Messy Linen Closet Before You Begin Organizing

I encourage you to take before-and-after photos to document the transformation. Our “before” closet was so bad that I didn’t photograph it and now I wish I had! The "before" photo you see above was taken in the middle of the process, after we had pulled everything out, sorted it into piles, discarded items we no longer need or use, and organized the linens we're keeping. It would have been far more impactful to show our real "before" linen closet next to our finished, organized "after" result, as well as a feel-good reminder of all we accomplished during this DIY home organization project.

Step 1: Assess, Sort, and Weed

Decluttering is the first step towards achieving an organized and functional space. Before diving into the organization process, take a moment to assess your linen closet's contents.

We pulled everything out of our closet, dumped them on our king-size bed, and then sorted all our sheets, pillowcases, towels, blankets, tablecloths, napkins, and other miscellaneous items into piles by category. Then came the hard part: deciding what to let go of or store elsewhere (such as the rarely used sheets for our sofa bed).

Set aside any worn-out, torn, stained, or mismatched linens, towels, or items you no longer need. Be as ruthless as you can. Decide what to discard or recycle and what to donate, then put those items into the trash, bags, or boxes, as appropriate, labeling the containers for recycling or donation.

Step 2: Group, Arrange, and Label Your Remaining Linens

Next, put everything else back in the closet, grouping related items and arranging them in whatever way you prefer to maximize shelf space and optimize organization. Be sure to leave some shelf space open to accommodate future purchases or gifts.

Tip: I suggest putting the linens you use most frequently on the most easily accessible shelves and reserving the highest and lowest shelves for the items you need to remove or put back less often ( such as comforters, extra blankets, guest linens, and holiday tablecloths).

Using scrap paper, make a temporary label for each pile on the shelves (e.g., blue towels, pink towels, striped flannel sheets). Personalize these labels in any way that makes sense to you (e.g., Mom’s Quaker lace tablecloth and napkins). Then place these temporary labels on top of each pile until you have your storage bins and labeling materials.

Messy linen closet without storage bins or labels
Our linen closet after we weeded out what we didn't need to keep.
It's organized, but still messy and the linens don't fit the space well.

Step 3: Measure, Then Select Fabric Storage Bins or Baskets

Pop-up fabric storage bins or baskets are a game-changer for maximizing space and bringing order to your closet both functionally and visually. These collapsible fabric bins make it easy to group similar items and access them effortlessly. Choose appropriate size bins to accommodate different types of linens, from large king-size sheet sets to small dish towels.

Measure your piles of linens, the width of your linen closet shelves, and the space between each shelf, then select a variety of coordinated bins in different sizes to fit. This allows you to customize your storage solution without investing in a custom closet makeover solution. The pop-up storage bins we selected are inexpensive and the workmanship is not perfect, but the price was right and they come in a wide range of sizes and shapes. It was also important to us to have bins that fold down when not in use because we wanted to keep some extras to allow for future expansion of our linen closet's contents. However, if you don't mind spending more, you can find a wide array of attractive storage bins to suit a variety of tastes and home decor styles.

If you have large, bulky items like comforters that won't fit inside even the largest pop-up storage bins, you may want to put them in airtight vacuum compression storage bags designed for this purpose, which will not only keep these items clean but also compress them to fit more easily on your closet shelves and save space.

Step 4: Unfold and Label the Bins

To make it easy to find what you need at a glance, you will want to label your pop-up storage bins. We decided to use self-adhesive clear plastic 3” x 5” pockets and index cards for labeling the fronts of our bins and ordered them from Amazon along with our bins. We chose the 3”x5” size because they matched the width of our smallest bins but were still large enough to accommodate labels with several lines of text when needed.

When your bins, plastic pockets, and index cards arrive, unfold the bins and press against the sides to prop them open. (The sides won’t stay completely straight until you fill the bins.)

Attach a clear plastic pocket to the front of each bin. We ordered self-stick plastic pockets but discovered that they didn’t adhere well to the fabric bins over time, so you will want to stitch, glue, or rivet the pockets to the bins. We've ordered a rivet tool and some rivets for attaching ours more securely. We will use the rest of the self-adhesive pockets and index cards to label storage cartons, where the adhesive will work perfectly. 

Using a permanent marker and index cards, write a new, permanent label for each pile of linens on your closet shelf to replace the temporary label.

This simple and effective labeling system allows for quick identification without having to rummage through each bin, and the clear plastic pockets protect the index card labels from becoming worn or dog-eared.

Step 5: Arrange Your Linens in the Labeled Bins

Take one pile of related linens and place it into the appropriately sized bin. Insert the index card label into the clear plastic pocket and return it to the closet shelf. Repeat with the remaining piles, bins, and labels.

This systematic approach not only keeps everything organized but also makes it easier to find what you need when you need it.

Then take a photo of your newly neat and organized linen closet and savor the contrast vs. your "before" picture.

Organized linen closet with labeled storage bins
Our formerly crammed, messy linen closet is organized and labeled,
so everything is easy to find and accessible. Now we just need to
remove the old, frilly, decorative pink shelf edging we inherited!

Step 6: Maintain Regularly

To keep your linen closet organized and efficient, commit to regular maintenance. Fortunately, this system makes it easy to maintain because, as my grandmother used to say, there’s “a place for everything and everything in its place.”

Periodically review the contents of each bin, refreshing, replacing, or rearranging items as needed. This ongoing effort will prevent the return of clutter and keep your linen closet in top-notch shape.

Messy Linen Closet Makeover Supplies

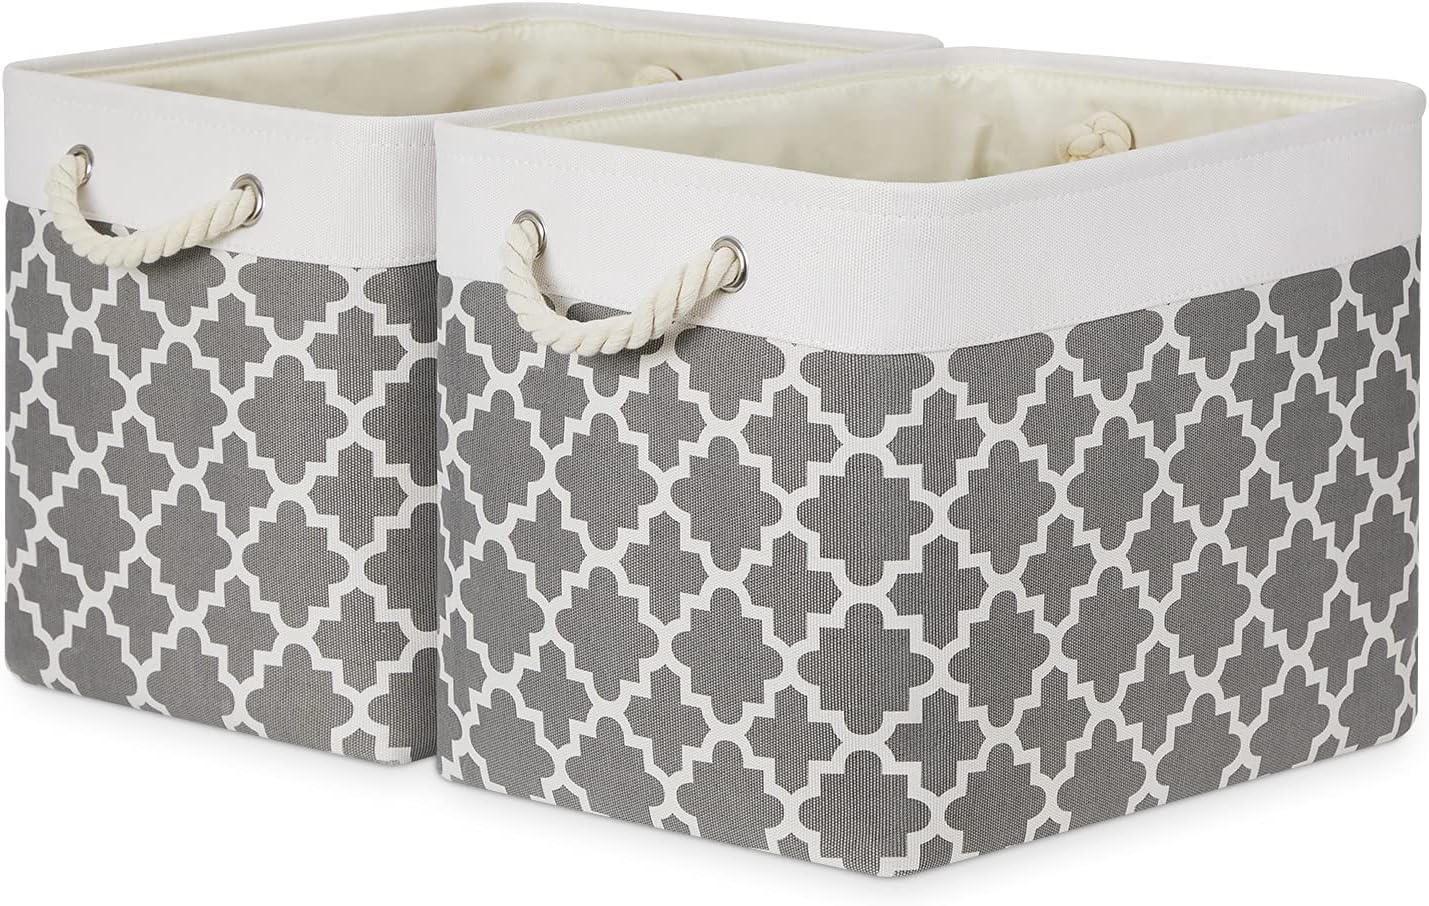
My husband chose a tailored storage bin style for this project, but the pretty baskets with the quatrefoil pattern would be a lovely, more feminine choice.

Enjoy Using Your Neat, Organized Linen Closet!

Transforming your linen closet into an organized storage space is a satisfying and easily achievable DIY project. With the help of pop-up storage bins labeled with index cards inside clear plastic pockets, you can create a system that not only streamlines your storage but also adds visual appeal. Enjoy the benefits of a tidy, accessible linen closet, where finding the perfect set of sheets or towels or your favorite tablecloth and napkins is a breeze.

Happy organizing!


How to Organize Your Messy Linen Closet With Pop-up Storage Bins by Margaret Schindel

Read More Decor Reviews by Our Review This Reviews Contributors

Read More Home Decor Reviews by Our Review This Reviews Contributors

Read More Product Reviews by Our Review This Reviews Contributors


Note: The author may receive a commission from purchases made using links found in this article. “As an Amazon Associate, Ebay (EPN), Esty (Awin), and/or Zazzle Affiliate, I (we) earn from qualifying purchases.”


Tuesday, March 12, 2024

A Review of Color Oops - Fix Hair Coloring Disasters


color oops


Got A Hair Coloring Disaster? Too Dark? Green? Poor Color Choice ?

Don't Panic! What you've done, can be undone.....use Color Oops! 

Most hair coloring mistakes can be fixed. Many times you can return your hair to its natural color, as long as you haven't used bleach. If you have used bleach, your hair's natural color has been stripped away, leaving you with hair that is varying shades of light blonde or white. Your original color is gone, and it cannot be brought back. In that circumstance, the best you can do is to follow advice on how to lose the offending color you ended up with, and then dye your hair a color that is close to what your natural color was.

However, if you just made a mistake with hair dye, no bleach involved, there is a good chance that your hair can be restored with Color Oops.


color oops


Hair Coloring Disasters Come In Many Forms Like:

Honest Mistake - the color on the bottle is NOT what you ended up with, for whatever reason.

Going Goth - You decided that you wanted to go goth with jet black hair. Now you look like Morticia Addams.

Your Green is Nothing to Envy - You have over processed your hair and now Kermit the Frog wants your number.

Better Dead than Red - You thought your blonde hair would look cute if it was red. Now you look like Carrot Top.

Being Blue has New Meaning - You decided it would be cool to have blue hair....or pink, or teal or even multicolor. Now you look like a unicorn vomited on your head.

Most are repairable as long as you didn't use bleach.


How Does Color Oops Remove Color Without Bleach?

Color Oops has no bleach or ammonia, but it does have aloe vera and soy protein that will help condition and restructure  your hair while removing the color.  The question is HOW does it remove the color without the damaging your hair?  I found the answer to be kind of like magic.....but of course, it isn't.  

Hair has several layers and the peroxide in hair dye opens these layers up so the color molecules can penetrate.  Your hair may look dark on the outside but the peroxide has lightened the inside layers of your hair, permanently, so Color Oops will not take you back to your natural color. You will end up with lighter hair than your natural shade. Color Oops gets rid of color by reopening the layers of your hair and shrinking the color molecules, so they simply fall off when you wash and rinse.  

Honey, I shrunk the molecules!

Regardless of how strange it sounds, it works!

I have been coloring my hair auburn for years.  Frankly I was just sick and tired of dealing with it.  Any shade of red hair dye fades really quickly.  To keep it vibrant you need to reapply every 4 to 6 weeks, but then as your hair grows, the bottom where it is colored over and over gets darker and darker and the new growth at the top is much lighter.  After a while it can look quite ombre.

So I decided I needed a change, but how to get rid of the red?  And what then?  I was in a real quandary, so I decided to check out hair styles and colors on You Tube.  I saw some really lovely videos on people with naturally gray hair and I considered it.  You Tube is where I saw a video on a product called Color Oops.  I was impressed with what I saw in the vid, so I went to the store and bought some.  I decided on Extra Conditioning because my hair can use all the conditioning it can get.  I still had not decided on the final color, but I decided to go for it anyway.

After I applied Color Oops, my hair looked rather unusual.  It was kind of multicolored......some light red, light brown, dark brown and of course, gray.  It was not a look that I was thrilled with which I understand is not uncommon.  There is a good chance that anyone that uses this product will not like the hair color they end up with.

The answer is simple, just recolor your hair.  Color Oops does not do any damage to your hair, so you are safe to recolor it quickly.  I waited two days, but that was more for my scalp, which was kind of tender.  I decided to go blonde because it is easy to maintain when you have a lot of gray, but I was wondering how blonde it would actually come out without bleach.  I loved the way it came out!  I was surprised that it did come out such a light blonde considering it really was more auburn than any color, pre-Oops.  I always wanted to be a blonde, but I never wanted to have to bleach my hair and maintain it.  Now I have pretty blonde hair and I only have to reapply the color about every 3 months, when it starts looking more gray than blonde!

Below is a video showing how to use Color Oops (she chose to use Extra Strength) and the results.


I was delighted with the results I got from Color Oops.  It was quick and easy to use, did not damage my hair and left me free to dye it the color I wanted.  I could not ask for a better or easier way of fixing my color problem, unless of course I could use magic!

color oops

Color Oops Extra Conditioning


Note: The author may receive a commission from purchases made using links found in this article. “As an Amazon Associate, Ebay (EPN), Esty (Awin), and/or Zazzle Affiliate, I (we) earn from qualifying purchases.”


Monday, March 11, 2024

Hallmark Movie Review As Luck Would Have It

Celebrate St. Paddy's Day with this Hallmark's As Luck Would Have It filmed in Ireland with stars Joanna Swisher and Allen Leech in this delighful movie. Downton Abbey fans will immediately recognize Leech aka as Tom Branson, a beloved Downton Abbey character.

Hallmark fans will enjoy the traditional storyline which is enhanced by the chemistry between the lead actors and authentic Irish scenery. Filmed In Kilabbey, Ireland and Howth Castle and add in the Cliffs of Mohr and viewers will not be disappointed.

Hallmark movie banner

The storyline is not new (and that is OK! for a movie which works so well) as an American is dispatched to turn the Irish family castle into a hotel. The struggle to keep the castle and town financially afloat is the why and the heart behind the castle is the why the behind saving the castle and town!

With names such as Brennan, Seamus, Fiana, Siobhan, and Maebh the authenticity shines through of the supporting cast. The Hallmark chemistry hits the bullseye with Joanna and Allen, the supporting characters and the scenery is so beautiful - let's call the scenery a major supporting character too!

Of course love is in the air as the main characters work as opposities and then join forces to save the family hotel as only Hallmark can...

Deer Park Hotel

Ever want to stay at a Hallmark movie castle? This castle may be your chance. In August 2023 plans have been approved to construct a hotel on the Howth property. The current Deep Park will be demolished to build a destination hotel with all the amenties. The project's estimated completion is 2025 to welcome guests.

Howth Castle Cookery School

Who knew cooking classes are held at the infamous Howth Castle 18th Century Georgian kitchen! Professional chefs provide hands on instruction for foodies of all levels in the cooking shcool which has operated since 2008 in the castle.

Recommendation

Highly recommend As Luck Would Have It! Ireland fans and Hallmark romcom fans will not be disappointed and in fact, this is a movie which left many viewers asking, "When is the sequel?"


Note: The author may receive a commission from purchases made using links found in this article. “As an Amazon Associate, Ebay (EPN), Esty (Awin), and/or Zazzle Affiliate, I (we) earn from qualifying purchases.”


Sunday, March 10, 2024

Two Weeks Notice: A Rom-Com Delight That's Worth the Watch

Two Weeks Notice: A Rom-Com Delight That's Worth the Watch

Sandra Bullock takes center stage as the lovably quirky Lucy Kelson. From her passionate activism to navigating the unpredictable waters of being reluctant legal counsel for billionaire George Wade, Bullock's performance is a masterclass in charm and comedic brilliance. 

Lucy's story is not just about accepting a legal position that is the antithesis of her beliefs but a delightful exploration of self-discovery and unexpected love.

Hugh Grant's "George Wade": A Billionaire Trying to Find Himself

Hugh Grant's portrayal of George Wade is delightful. But pretty much everything Hugh Grant acts in is top-drawer. 

As the charming billionaire with a knack for self-centered mischief, Grant effortlessly brings out the humor and heart in his character. 

Wade's playboy persona takes a backseat as the story unfolds, revealing a surprisingly endearing side that adds depth to the romantic comedy dynamic.

Romance and Laughter Unleashed: The Perfect Blend

"Two Weeks Notice" masters the art of balancing romance and comedy. The banter between Lucy and George is a joy to watch, creating a dynamic that keeps audiences hooked from start to finish. For me personally, the best part of the movie is the script's banter. 

The witty script, coupled with the charismatic performances of the lead actors, makes for a movie that doesn't just entertain but leaves you with a warm, fuzzy feeling that lingers.

Supporting Cast Shines Bright

Alicia Witt, Robert Klein, Dana Ivey, and a stellar supporting cast elevate the film's humor and charm. Each character adds a unique flavor to the mix, contributing to the overall hilarity and heartwarming moments. 

The ensemble cast's chemistry creates a delightful synergy that enhances the film's appeal.

New York City: The Perfect Backdrop for Love and Laughter

The bustling streets of New York City serve as the picturesque backdrop for Lucy and George's romantic escapades. 

The city's energy and charm amplify the film's modern-day fairy tale vibe, adding an extra layer of romance to an already captivating story.

Enjoy a Cozy Night In with "Two Weeks Notice"

In romantic comedies, "Two Weeks Notice" is a timeless classic. Sandra Bullock and Hugh Grant's on-screen chemistry, witty script, and a touch of romance create a cinematic experience perfect for a cozy night in. 

So, grab your popcorn, settle in, and let Lucy and George whisk you away on a happiness-filled journey—you're in for a delightful treat!

I've seen this movie ten times or more, and I'm watching it again now.

You can find it on Amazon Prime.


Note: The author may receive a commission from purchases made using links found in this article. “As an Amazon Associate, Ebay (EPN), Esty (Awin), and/or Zazzle Affiliate, I (we) earn from qualifying purchases.”


Saturday, March 9, 2024

The Head That Wears the Crown by Mariah Stewart – Book Review


From South Philly to Fairy-Tale Castle


A Princess wearing a crown


Mariah Stewart's writing career has included more than 45 books in six different series, plus several stand-alone titles. Most of her novels are in the Women's Fiction/Contemporary Romance genre, plus her FBI series of Romantic Suspense stories (my favorite series). 


I own most of her series books. Recently, I found her latest non-series novel published in  2023 ~ The Head That Wears The Crown.


What little girl doesn't dream of growing up to be a Princess and live in a castle? 

What if it came true?


Synopsis


Annie (Annaliese) Gilberti is an ordinary divorced mother of two teenagers, living in South Philadelphia.  She works a nine-to-five job, takes care of her kids, socializes with her friends and her two sisters; in other words, living a life similar to many others.


Suddenly, what was just another average day, reveals a shocking discovery that turns her world upside down. Annie learns that her late grandmother was the exiled ruler of a small European country, and she is next in line to wear the crown and restore the monarchy. 


The country, Saint Gilbert, is a tiny little land located between Switzerland, France & Italy. It was invaded first by the Germans, then taken over by the Russians. After many years, the land is finally free and the monarchy reestablished; hence, the next-in-line ruler was searched out and found to be the oldest granddaughter – Annie Gilberti. 


After a week-long trip to St. Gilbert to find out what this was all about, Annie commits to moving there. She does so with her two children and her two sisters. Annie then becomes European Royalty ~ Her Royal Highness, Grand Duchess Annaliese Jacqueline Terese of the Grand Duchy of Saint Gilbert. The family moves into the ancestral home, Castle Blanc (a  beautiful white castle with many rooms) and are looked after by the castle staff and guarded by the castle guard. The Castle Guard Captain – Maximilien Belleme (very handsome and dashing, of course) – makes sure the family is always looked after. 


The country is beautiful and the villagers friendly. But the country needs to be brought into the modern age and Annie has never been one to walk away from a challenge. She is determined to be worthy of the crown and the throne that has been offered and take her rightful place as the Grand Duchess of Saint Gilbert and carry on her grandmother's legacy. 


Summary


The Head That Wears The Crown is a delightful contemporary romance story I thoroughly enjoyed. I recommend it to all fans of author Mariah Stewart and those who enjoy sweet, romantic, stories. 


Links to More Reviewed Books by Mariah Stewart:


For More Book Reviews, Click on
ReviewThisBooks.com


*Book Review by Wednesday Elf


Note: The author may receive a commission from purchases made using links found in this article. “As an Amazon Associate, Ebay (EPN), Esty (Awin), and/or Zazzle Affiliate, I (we) earn from qualifying purchases.”


Friday, March 8, 2024

How to Bake a Delicious Turkey Breast Reviewed

Baked Turkey Breast
I've been baking whole turkeys for many years, but I don't remember ever baking just a turkey breast until recently. 

My husband loves turkey.  I bake them a few times each year during the holidays, but even with our large family gathered for the holidays, there is still turkey meat left over.  This thrills my husband because he makes turkey sandwiches with the leftovers for a few days after I bake a whole turkey for a family dinner. 

The problem has always been that once New Year's has passed, it would normally be 11 months before a turkey would grace our dinner table again.  When our local grocery store had frozen turkey breasts on sale, I decided to bake just the breast for my husband to make our beloved sandwiches.  

What a great decision!


How to Bake a Turkey Breast

Baking a delicious turkey breast is easy!  I decided to bake the turkey breast exactly the same way I bake a whole turkey.  My mother taught me decades ago how to bake a tender turkey in a Reynold's oven bag.  

Year after year, diners praise my turkey for being tender, moist and delicious.  I have never minded sharing my secret for baking a delicious turkey and now I will share how I used the same method to bake a fabulous turkey breast.

Be sure to thaw the turkey breast in the refrigerator for 2 or 3 days before you want to cook it. Because turkey packaging tends to leak, you will want to put a tray under it and/or put it in a disposable grocery bag to keep from making a mess in the refrigerator.


supplies to bake a turkey breast

Supplies 

  • Thawed Turkey Breast 
  • Reynolds Oven Bag (Turkey Size) 
  • 1 Tbsp Flour 
  • 1/4 Cup of Butter (softened) 
  • Pepper 
  • Deep Roasting Pan

  Instructions 

Step 1:  Preheat the Oven to 350° 

Step 2:  Toss 1 Tbsp flour inside the Reynolds Oven Bag

Step 3:  Hold the mouth of the bag closed and shake the bag to cover sides & top with flour

Step 4:  Put the floured bag in a 2″ deep, heavy duty roasting pan with it opened wide to make it easy to insert the turkey breast later

Step 5:  Wash the turkey completely, inside and out and remove any ice packets inside the turkey

Step 6:  Pat dry the outside of the turkey with paper towels 

Step 7:  Carefully place the turkey inside the floured bag, leaving the bag open wide

Step 8:  Rub the entire outside of the turkey with *softened butter

Step 9:  Cut the remaining butter into pieces and place the pats on top and inside of the turkey breast.

Step 10:  Pepper the outside of the turkey

Step 11:  Close and secure the bag with a nylon tie that is included with the Reynolds Oven Bags

Step 12:  Cut six 1/2″ slits in the top of the bag to allow steam to escape while cooking

Step 13:  Tuck the ends of the bag inside the roasting pan

Step 14:  Place the pan in the oven. Be sure to allow plenty of room for the bag to expand during cooking without touching the sides, racks, heating elements, etc. of the oven. 

Step 15:  Bake according to chart in the Reynolds Oven bag. An 8 lb. turkey breast will take 2 1/2 - 3 hrs 


*Softened butter - You can leave the butter on the counter for an hour before you need it or you can microwave it on defrost for 15 - 20 seconds to soften it  


Process in Pictures

turkey breast preparationWashed, Dried, Buttered, Peppered, Prepared & Ready to Close Bag

turkey breast in the bagIn the Bag, Bag Tie Secure,  & All Bag Sides Tucked Inside Pan

turkey breast in the ovenIn the Oven - Back, Sides & Top Clear


Baked Turkey Breast
Baked & Out of the Oven

At this point, you will need to let the turkey breast cool for 15 - 30 minutes.  Then, remove it from the bag, carve & serve.

According to my husband, there has never been a more delicious baked turkey breast!


My Preferred Supplies Are Available on Amazon


Check Out More Recipe Reviews at
ReviewThisRecipes.com


How to Bake a Delicious Turkey Breast Reviewed Written by:
House of Sylvestermouse


© 2024 Cynthia Sylvestermouse


Note: The author may receive a commission from purchases made using links found in this article. “As an Amazon Associate, Ebay (EPN), Esty (Awin), and/or Zazzle Affiliate, I (we) earn from qualifying purchases.”


Thursday, March 7, 2024

Savory Spinach Ball Appetizers

 If you looking for an easy and healthy appetizer to serve at your next gathering, look no further than these easy spinach ball appetizers. These bite-sized delights are packed with nutrients and bursting with flavor. Whether hosting a party or craving a tasty snack, these spinach balls are the perfect choice.

Savory Spinach Ball Appetizers
Spinach Ball Appetizers - Reviewed

This is one of those recipes we had packed away and had not made for some time. This past Holiday season, Fran was going through some old recipes and found our spinach ball recipe.

We both thought wow we haven't made these in a long time. So, we decided to make them and we're so glad we did. 

Spinach Ball Ingredients:

  • 2 cups( 2-10 boxes) frozen chopped spinach
  • 3 large eggs
  • 2 cups seasoned bread crumbs
  • 1/2 cup grated Parmesan Cheese
  • 1/2 teaspoon garlic powder
  • 1/2 cup melted butter
  • 1/2 teaspoon thyme
  • 1/2 teaspoon salt
  • 1/4 teaspoon black pepper
Instructions:

  1. Thaw and pat dry the spinach.
  2. In a large mixing bowl, combine all ingredients and mix well.
  3. Scoop out portions of the mixture and roll into bite-sized balls.
  4. Place them on a greased cookie sheet or lined with parchment paper.
  5. Bake at 375 degrees for 15 to 20 minutes until they are golden brown and firm to the touch.
  6. Cool for a few minutes before serving.
These spinach balls are a great way to incorporate healthy greens into your diet without sacrificing flavor. Spinach balls are a perfect appetizer for any party or just as a snack. 

If we have any leftovers we freeze them. You can take them out of the freezer and pop them in the oven to warm them up for a snack. I like them plain, but you can experiment with different dipping sauces if you like.

For more recipes on Review This click here:

ReviewThisRecipes.com


Note: The author may receive a commission from purchases made using links found in this article. “As an Amazon Associate, Ebay (EPN), Esty (Awin), and/or Zazzle Affiliate, I (we) earn from qualifying purchases.”


Most Recent Reviews on Review This Reviews


Search for Reviews by Subject, Author or Title

The Review This Reviews Contributors


SylvestermouseSylvestermouseDawn Rae BDawn Rae BMbgPhotoMbgPhotoBrite-IdeasBrite-IdeasWednesday ElfWednesday ElfOlivia MorrisOlivia MorrisTreasures by BrendaTreasures by BrendaThe Savvy AgeThe Savvy AgeMargaret SchindelMargaret SchindelRaintree AnnieRaintree AnnieLou16Lou16Sam MonacoSam MonacoTracey BoyerTracey BoyerCheryl Paton Cheryl PatonRenaissance WomanRenaissance WomanBarbRadBarbRadBev OwensBev OwensBuckHawkBuckHawkDecorating for EventsDecorating for EventsHeather426Heather426Coletta TeskeColetta TeskeMissMerFaeryMissMerFaeryMickie_GMickie_G


Review This Reviews is Dedicated to the Memory of Our Beloved Friend and Fellow Contributor

Susan DeppnerSusan Deppner

We may be apart, but
You Are Not Forgotten


“As an Amazon Associate, Ebay (EPN) and or Etsy (Awin) Affiliate, I (we) earn from purchases.” Disclosure Statement

X