Showing posts with label Writing Tips. Show all posts

Monday, August 17, 2020

Writing: Website, Blogging, & Book Publish Tips Reviewed on Review This Reviews!

writing reviews collage

Treasures from the Archives of Review This Reviews! 


Every writer needs a little help at times. Whether you are writing online, or writing a book, there are moments when you are stumped or don't know how to do something.

Starting a new blog or website can be a daunting task.  Self-publishing a book is equally, if not more so, challenging.

Writers want to focus on writing.  We don't want to get bogged down with the "mechanics" behind it all.  However, there are necessary elements that are requirements of any art form.  Writing is no exception.

Don't let those irritants, or your lack of platform or software  knowledge, end your dreams and ambitions because you give up due to exasperating chores.  

Several of our contributors have taken the time to write easy to follow tutorials and writing tip reviews.  We have all benefited from experienced writers who are willing to share the secrets of the trade.  Well, they feel like secrets because information is elusive.


Writing: Blogging Tips


Many companies self-promote with blogs.  Even if they own a website, they have a blog writer to keep the website current and relevant in the search engine's "eyes".   

There are thousands of individuals who work from home as promotion affiliates.  In fact, all of the contributors of Review This Reviews are promotion affiliates.  Several of us work on multiple websites.  This makes us uniquely qualified to help other writers who are seeking help.

Blogger, aka Blogspot, and Wordpress are the most commonly used online writing software.  They each require a writer to jump in and learn through experience.  Once a writer gets past the basics of writing with online software, they want to know how to do things they see on other sites.  Therefore, we publish how-to articles for specific tasks such as using link jumps in an article that allows your reader to "jump" to a specific section of an article.  

If you wish to have your Blogger blog use a custom domain name instead of a blogspot domain name, we have an article that shows you how to set that up.

You can check out our Blogging Tips & Tutorials by clicking here!  Plus, if you see something on our site that you wish to do on your own site, simply ask us.  If we don't already have a published tutorial, we will try to write one.


Writing: Book Publishing Tips & Tutorials


A few of our contributors self-publish their own books.  Barbara Tremblay Cipak (Brite-Ideas) has written several in-depth and informative reviews on writing and publishing your own book.

If your dream is to be an Indie Writer (an author who self-publishes), than Barbara will be your best friend!  She shares writing tips and publishing recommendations based on her own experience.  You get the benefit of her publishing pains!

Book Self-publishing help can be found by clicking here.


Writing: Website Reviews


Our contributors have reviewed websites that are available to help online writers create beautiful promotion images, banners, & introduction images.  These image websites are essential, especially when preparing images for multiple social media sites.  Most of these sites offer a free version.

If you are a promotion affiliate, Easy Product Displays (linked here) is a website that helps you search and set up a beautiful display of items from Amazon, Zazzle, and ShareASale.  This is a tremendous help if you don't like writing your own html code, but want an attractive display of products.  


You will find dozens writing articles on Review This Reviews to help you create the blog, website, or published book you desire.  


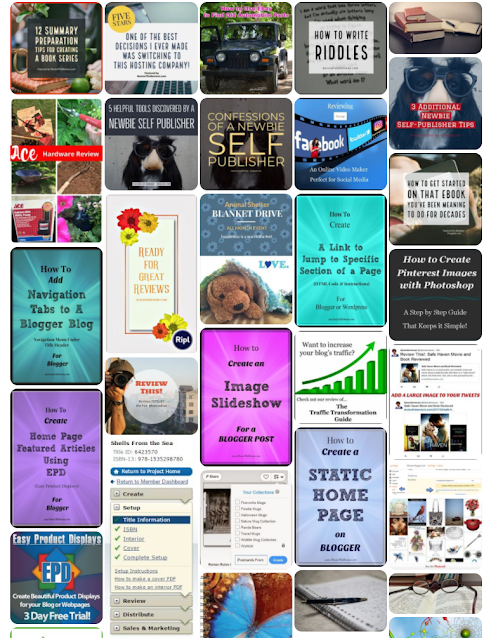
A Review This Reviews Pinterest Board - Writing


The board below features 30 of our most recent reviews.


Note: The author may receive a commission from purchases made using links found in this article. “As an Amazon Associate, Ebay (EPN) and/or Esty (Awin) Affiliate, I (we) earn from qualifying purchases.”


Sunday, November 3, 2019

3 More Tips from a Newbie Self-Publisher

3 More Tips From a Newbie Self Publisher
3 Additional Newbie Self-Publisher Tips
From a Fellow Newbie's Experience

In the previous few articles, I reviewed my newbie experiences with self-publishing. Since I've published my third book and still have some hair left, there's more to share.

Again, I'm not a publishing guru; I'm just sharing tips as I go through the process.

If you've published paperbacks, you understand that your book can be uploaded in digital format as an eBook.

I started in reverse. My first book was an eBook. After publishing an eBook, I learned to publish paperbacks.

However, once I mastered (yeah, right) the ability to publish a paperback, I changed the order in which I publish books:

  •  My books are written for Paperback publishing first
  •  Then, that same book is uploaded as an eBook

I prefer doing paperback books first. The physical copy is more detailed and takes more care in its design.

When doing an eBook, you upload your completed book document to KindleCreate. Again, read this article for a little bit about KindleCreate and eBook preparation.

Three Tips to Pass Along: 

1. Kindle Create - What I Learned the Hard Way with the Third Book

If your manuscript/book document has anything in List Format, for example, 1, 2, 3, etc., when you upload it to KindleCreate, KindleCreate doesn't let you modify Lists. You have to have it exactly as you want before uploading or not using a list format. 

My book had 160 items in List Format. To get around the lists for the eBook version, I typed the numbers in brackets and put them above the typed item. I didn't use the auto-format of 1.2.3. in the toolbar. However, beware; even if you type 1. versus using the word processing numbering format in the toolbar, you still won't be able to modify that list in KindleCreate.

Oh, and the same goes for Tables in KindleCreate: They can't be modified once uploaded to KindleCreate.

Maybe KindleCreate will change these restrictions down the road?

2. Get Your Amazon Author Page Completed

Read the general instructions on the Amazon help page here to get started. It's easy to understand.

I decided to wait until I completed three books before doing my Author page. However, there's no need to wait. If you only have one book, go for it.

The Author page has five key elements:

  •  Upload your photo or any photo(s) you prefer for the page
  •  Add your books to the page (easy, automatic process)|
  •  Write a Bio on yourself - Take some time to do this (see the tip below)
  •  Upload any videos you have that relate to you or your books
  •  Add an RSS feed from your blog, Pinterest, or another place that connects to your Business


Regarding the Amazon Bio, take advantage of this article; it's filled with excellent tips. It provides guidance on how your Bio should sound and what you should say. You can follow me on my newly created author pageIf you prefer a video tutorial on how to complete an Author Page, this one is helpful:


3. The Size of Your Book as it Relates to the Book's Spine

I have yet to use a professional graphic artist to create covers. For now, Amazon's Cover Creator is still my go-to tool. What I learned from this third book is that size matters. If you want your book to have written details on the Spine, you must ensure it's approximately 100 pages. This last book was less, about 65 pages, and thus couldn't have the title on the Spine. 

I'll keep most of my books to at least 100 pages to avoid this. You don't have to if you don't want to; it's up to you.

Here are my article tips to date:


Here's my completed third book, and yep, I'm working on the fourth.


Note: The author may receive a commission from purchases made using links found in this article. “As an Amazon Associate, Ebay (EPN) and/or Esty (Awin) Affiliate, I (we) earn from qualifying purchases.”


Sunday, October 18, 2015

Sayings to Write in a Get Well Card

Funny Sayings to Write in Cards
One of my personal 'crazy skills' is the ability to quickly create lists of 'sayings' - Yes It's a bit strange
If we were face to face and you gave me a 'Topic' and 5 minutes to come up with 20 quote-sayings about it, I would most likely be able to get it done. In fact, here's an entire section I've created on original sayings you use to write in cards.
So onto today's challenge:
Review a List of Things to Say in a Get Well Card
Finding just the right thing to say in a get well card can be challenging, so I've put together a collection of things to say according to the emotion you want to convey: humor, sarcasm, or inspirational. You'll find things like, 'If you're really sick, I'm sorry, if you're faking it, you're my hero!'
Yes it's always easy to get a card that has something written inside of it, and then just sign your name, however even if you select a pre-written card, it's makes for a lovely personal touch to add some words in your own handwriting.
Humorous Get Well Sayings you Can Choose from:
  1. Getting well is hard work, being well is harder work - so milk it!
  2. Don't be a baby when you're sick, I heard you do that when you're well !
  3. The world found out you were sick today, and the whole planet was given the day off !
  4. I was so upset to hear you were sick today, that I held a party in your honor (too bad you were sick)
  5. When you're sick, I'm sick - because I have to do your job!
  6. You need to get better fast, I can't take the pressure!
  7. You don't look sick, you don't sound sick, those Acting Classes are paying off
  8. You're probably the best looking sick person I've ever seen in my life
  9. You look better sick than I do well !
  10. Natural healing - it isn't fun is it
  11. So you thought getting sick would keep me away from you, well you thought wrong there pumpkin
  12. Here take these two Heal-Me Pills - possible side affects; your nose will fall off, your ears will turn green, your house may get termites, you could wake up with four flat tires on your car, and your eyeballs could end up on the side table when you're sleeping - other than that, you should feel better by 6am (OH! and you're dog might hate you)
  13. If being sick is some sort of a grand plot to get the attention of everyone at work, well congratulations you little genius it's working! In fact I think you've received a raise and a promotion while you've been off!
  14. As long as you're sick, I was wondering can I borrow $1000 bucks to buy you the best present ever!
  15. Did you get sick to just give us all a break ... well we all got together to thank you and to say that you would be happy to know that NOTHING is getting done while your sick!
  16. Don't worry, nobody is stealing your glory while you're sick, 'cause everyone refuses to do your job! (apparently your job makes people sick)
Inspirational Things You Can Say In a Card to Someone's Who Isn't Well:

If someone you know is quite ill, often times it's hard to know what to say when you want to say something nice. So below you'll find some ideas. Feel free to use them as is, or simply as an idea to expand upon with your own words.
  1. You deserve a medal for perseverance and fortitude; the way you've handled this illness is an inspiration to all of us and we're very lucky to be in your life
  2. You always carry yourself with dignity and grace no matter what challenges come your way
  3. We want you to know that you can count on us to be there for you because you've always been there for everyone else
  4. Time takes a hold of our heart and with a gentle squeeze it reminds us why we're here - to love deeply, and to live with purpose
  5. We've all signed a petition and asked God to help you through your illness because we all love you and need you here with us
  6. When we face a severe challenge, we are given an opportunity to re-evaluate ourselves, but everyone agrees you're the only exception to the rule - you've lived with honor and are a rare bird; a triple A person in every aspect of life
  7. Good health is a gift you deserve more than anyone we know
  8. When you're at your best, all of us are at our best - you're an amazing inspiration to us all
Sarcastic Funny Things to Put in a Card for Someone Who's Not Well and Appreciates a Laugh
  1. So you decided to get sick to avoid me right!
  2. You are the sunshine in my life, the reason I am who I am - what a load of garbage, just get well ok!!
  3. You're really sick right? Really right? really honestly and truly right? Darn 'cause I needed you to paint the house!
  4. Give me six reasons I shouldn't be mad 'cause you're sick, go ahead...I'm waiting...see NOTHING! I'm mad that you're sick, 'cause I miss you
  5. In order to get well you have to actually be sick, so this card is a 'stop faking you're sick card' so you can actually get sick so I can get you the right card..a get well card. Gheesh you frustrate me!
  6. There's a chance you're just faking sick to avoid responsibility right? You better puke soon or you're done!
  7. Not everyone is scared to touch a sick person - hope those people can visit you 'cause I sure the h*ell can't !
  8. You want to know why you're sick, it's because you do too much, talk too much, help too much ... the only cure is to become totally selfish and useless like me
  9. If I could find the answers to life itself, I would be able to become the kind of person who writes extremely profound diatribes in a card - aren't you glad I'm a selfish tool now!
  10. Give me three reasons you became sick...never mind allow me....(1) You needed an excuse to get some time off, (2) You're looking for payback by making me do all the work now, or (3) You're really sick and I'm an A-hole.


Note: The author may receive a commission from purchases made using links found in this article. “As an Amazon Associate, Ebay (EPN) and/or Esty (Awin) Affiliate, I (we) earn from qualifying purchases.”


Wednesday, March 11, 2015

Reviewing Best Practices for Pinterest Success

pinterest on a tablet
Pinterest is one of the fastest-growing social media sites on the web. Follow these best practices to get your business noticed and achieve Pinterest success.

Of all the social media channels on the web, Pinterest has become the popular marketing site for small business owners, artists, designers and home-based crafters.

It is estimated that Pinterest will reach 47.1 million users in 2015. That's more than 25% of all social media users. And, these numbers are expected to grow to a user base of 59.3 million by 2019.

If you haven't joined Pinterest, you may want to seriously consider joining the crowd. But, before you do, take some time to create a Pinterest plan. If you're already on Pinterest, it may be time to review your plan.

Here is our review of the best practices to bring success on Pinterest.

Niche Your Pinterest Account


As web marketers, we're always told to "Find your niche." A niche is a fancy way of saying, "Stay on topic." And another way of saying, "develop a theme." Your niche/topic/theme is your business, art, craft or hobby.

While setting up your Pinterest account, make sure that your profile description, board titles and board descriptions always follow your main theme. And, create boards that encompass all of the areas that follow that theme to niche down your boards.
TIP:  When you have pins that don't pertain to your niche but you want to add them to a board, create a secret board where only you can see those pins. Or, create a separate Pinterest account for your personal and fun sharing.
For example, if you sell crochet craft items, build Pinterest boards around the types of items you crochet and other items that support your craft. This could include boards for crochet baby gifts, crochet plush toys, crochet tips and tricks, and crochet yarns.

Think of your Pinterest account as a department store and your boards are the different departments within your store.

Create Descriptive Boards


Pinterest boards with descriptive titles are more likely to be noticed by other Pinterest users and by the search engines. Write board titles that accurately describe the types of pins found on the board. And, don't forget to add a short description that offers more information about the board.

This may seem like a lot of work but visitors to your Pinterest page will appreciate the added descriptions. Adding titles and descriptions can turn a boring Pinterest page into an interesting and informative place where people will gather to find useful pins.

Design Eye-Catching Images


Pinterest is a visual place and the best looking images get the most notice. If you don't have any graphic design skills, this may be the most challenging Pinterest best practice that you'll encounter. But, don't give up hope, there are many online tools that will help you create incredible Pinterest graphics.

When creating images for Pinterest, keep these tips in mind:

  • Use clear photographs that accurately portray the pin.
  • Make images large to make your pins stand out from the crowd.
  • Add text to add more description.

Find Group Boards in Your Niche


There are two ways to grow your following. The first is to promote your Pinterest account and pin regularly. The other way, and an easier way, is to find group boards that match your niche and interests. When you add your pins to a group board, you reach every follower of every member of that group board. And, you may make some new friends in your niche that will help you in your cross-promotion efforts.

Post on a Regular Schedule


This is the most difficult part for many people. It's easy to get started and it's easy to pin for a while. But, as time goes on, life and work get in the way. Don't get caught in the trap of putting off your pinning until tomorrow. If you have to, set a schedule and pin by it. Even if you can only spend a few minutes a day, make a schedule and stick to it.

If you find it difficult to keep up your Pinterest enthusiasm, join a Pinterest networking group.

Join a Pinterest Networking Group


It's not always easy playing the social media game and finding a method that fits your marketing style. One of the best ways I've found to stay focused and find synergysm is to join a Pinterest networking group.

A new Pinterest network group that showed up just a few months ago and has achieved awesome success is Pinterest Party. Pinterest Party is not one of those "you share mine and I'll share yours" kind of groups. The group administrators have daily activities that help members stay active, keep their Pinterest page interesting and grow their exposure.


Posted by Coletta Teske
Coletta Teske

About This Contributor

Coletta Teske writes reviews on books, business management, writing, crafting, cooking, and gardening. She is also an avid recycler and shares her tips on recycling. She delights in upcycling an old object, recycling or transforming discarded items into a new treasure.


Note: The author may receive a commission from purchases made using links found in this article. “As an Amazon Associate, Ebay (EPN) and/or Esty (Awin) Affiliate, I (we) earn from qualifying purchases.”


Monday, March 2, 2015

Writing and Remembering the Old-Fashioned Way

Blue Butterfly
Writers are well aware of how quickly a great plot or idea for an amazing article will come into our heads. They are such good ideas that we are sure we will remember them until we finish whatever it is we are doing.  Right?  Wrong. We don't remember and the ideas flit away as quickly as they came. Finding a way to save our thoughts is something we need to learn to do.  I prefer the old fashioned way - a favorite pen and a journal.

Technology for Writers


Recording our thoughts as soon as we get them has been highly recommended or practiced by many authors, including Mark Twain. Currently, some authors still create that novel with pen and paper. But for the most part, typewriters followed by keyboards have been a writer's best friend.  We sit at our electronic gadgets to write, edit, and sometimes to add our thoughts to the internet.  I love my laptop and would be lost without it. But I also have to capture those fleeting thoughts when my gadgets aren't available.

During very long drives, I often wish I had a voice recorder.  I always end up with great ideas when I'm driving.  I don't pull over on the interstate to jot those ideas down. And no matter how good the thoughts were I have forgotten them by the time I arrive at my destination.  While driving, a recorder would be an excellent choice.  However, my preferred method of keeping track of ideas is with a good spiral journal.

Spiral Journals for Writers


Orchids on Brown
I have kept journals for many years. I write both important and trivial things in them.  My journals are a combination of address book, tracking politicians and legislation that I'm interested in, personal diary, research organizer, and fiction blurb depository.  I am occasionally fearful that upon my passing from this earth, someone will read my journals and confuse the factual entries with the fictional blurbs. After all, one page might contain my current weight and exercise information and the next might contain a few paragraphs describing how the lady-next-door lost her mind and planned to murder the annoying neighbor. Let's hope the only people who see my journals after my passing either understand my writing habits or have an odd sense of humor.

Piccadilly -- In looking back at my collection of journals, I realized that Piccadilly is a brand that I most often use.  I like the colorful and durable covers, the sturdy wire spiral, and the quality of the paper.  I often feel as though the act of unplugging and physically writing sometimes gets my creative juices flowing. This Orchids on Brown and a butterfly are my two favorite journal designs. The large journals are approximately 9 x 11 and fit perfectly in the bag I carry to work. This size lends itself to longer rambling entries.

Occasionally, I prefer to carry a smaller journal. On long hikes, other outdoor adventures, or traveling in public venues (such as the metro) I don't want the extra weight of a large journal. So I carry a small version.  While I use this for rambling notes and bits of fiction, the medium sized journals are also good for jotting short notes and not feeling like I'm wasting an entire page.

Zazzle -- I have several friends who use their photography to create gorgeous spiral journals on Zazzle. Their original artwork makes these journals unique.  In addition, you can often personaizel Zazzle items further by adding a name. CrypticArt's Web of Pearls spiral notebook and Melkav's Beautiful Bouquet are just two examples of the many spiral notebooks offered.


If you don't yet have a way to hang on to those fleeting story ideas, I hope you try jotting them down in a journal. If you have a tried and true method of not losing those ideas, I hope you share your secret with the rest of us. 


Note: The author may receive a commission from purchases made using links found in this article. “As an Amazon Associate, Ebay (EPN) and/or Esty (Awin) Affiliate, I (we) earn from qualifying purchases.”


Wednesday, January 14, 2015

How to Write a Review of a Non-Fiction Book

glasses resting on open book


Looking for tips on how to write a review of a non-fiction book that gets your book review noticed? Come along. Let's read, write, and share our favorite books.

Non-fiction books are full of information. These sources of how to do most anything, self-help for all occasions, and true-life adventures fill bookstore shelves. How do we know if a book is worth reading? The best way is to ask a few friends or to read a few book reviews.

Every book is unique and each book reviewer has a different view. This makes for a diversity of opinions and myriad approaches to writing a review of a non-fiction book. The challenge for you, as a book reviewer, is to find your special touch that brings readers to you when they want to add to their reading list.

Make your book reviews stand out from the crowd by asking yourself a few questions while you read.

What does my audience want to know about this book?


A book review for a non-fiction book is a critique, a constructive evaluation of the book. As the writer of a book review, your job is to give readers a quick glimpse inside the cover. Here are few things your readers may want to know:
  • The main point of the book.
  • Why you decided to read the book.
  • What they will learn by reading the book.
  • The book's strong points and weak points.
  • Why they should read the book.
And, you only have between 500 and 1000 words to give them all this information. So, be brief, concise, and only cover the major points. Those points that left a lasting impression on you. But, where do you begin? Begin by reviewing the cover.

What is my first impression of this book?


The saying, Don't judge a book by its cover, does not apply to book reviews. Publishers work hard to design book covers that attract attention and to write cover copy that genuinely describes the book.

As you explore the book cover and the introduction pages, evaluate these items:
  • The author's background and qualifications to write about the subject.
  • How well the title describes the book.
  • The information revealed in the author's introduction and the table of contents.
  • The description of the book on the book cover.
With your first impression firmly in your mind, read the book and determine if the book meets your initial impression. Did the book deliver on the promises made by the cover? What impressions did you form as you read the book? Pay attention to your feelings about the book and the impact the book is making on your life. And, take notes.

What points stand out as I read this book?


As you read, keep a notebook by your side to take notes. These notes will help structure your book review and help you remember important points and lessons you learned from the book.

Here are a few note-worthy points:
  • Is the writing style easy to understand? How well does the author get the point across? Does the author stay on topic?
  • Did you learn something new? Does the book deliver on its promise? How helpful or informative was the book?
  • Is the book innovative? Does it contain new and updated information? Does it make you think about the topic differently?
As you take notes, also take note of passages that summarize the theme of the book. Select one or two good quotes in your book review to reinforce your critique of the book.

How should I organize and format the book review?


Your audience is your priority when writing a book review. What do they need to know about the book to make a decision? What parts of the book will your audience find useful and informative? What parts of the book will be less than helpful? Organize your book review around your audience's needs.

Here are some general guidelines on how to organize a book review:
  • Start with a brief summary of the book and its benefits, new discoveries, and timely advice. Keep your summary to 1 or 2 short paragraphs.
  • Offer suggestions on how the book may be useful to readers. Does it solve a particular problem? Does it accomplish a specific task?
  • Provide your critique and evaluation. Describe the parts that you found most interesting or helpful. And, tell your reader what you didn't like about the book.
  • Close your book review by giving your honest opinion. Be brief and keep your personal input to 2 or 3 sentences.
Use these tips as a starting point for organizing your book review. The notes you took and the impressions you formed while reading the book will guide you through the writing process. Your audience's needs will also guide you. After you write the review, read it from your audience's perspective and edit as necessary.

What are some good examples of book reviews?


You'll find book reviews all over the Internet. Every bookstore, publisher, and blogger has book reviews of every genre and price range. My favorite place to find inspiration and new ideas is the New York Times Sunday Book Review.

What is the difference between a good book review and a bad book review? The Writing Center at University of North Carolina provides an example. The Book Reviews handout shows what it takes to write an expert book review. You'll also find more helpful tips that will help you get your book reviews noticed.


Posted by Coletta Teske
Coletta Teske

About This Contributor

Coletta Teske writes reviews on books, business management, writing, crafting, cooking, and gardening. She is also an avid recycler and shares her tips on recycling. She delights in upcycling an old object, recycling or transforming discarded items into a new treasure.


Note: The author may receive a commission from purchases made using links found in this article. “As an Amazon Associate, Ebay (EPN) and/or Esty (Awin) Affiliate, I (we) earn from qualifying purchases.”


Saturday, March 8, 2014

Recycle Words to Create a Compelling Story


green arrows in the shape of a heart

Reduce Vague Introductions and Reuse Powerful Statements


Words are the foundation of communication. How words are used and arranged in sentences and paragraphs determines the effectiveness of our communication. All it takes is just a few simple tricks to reduce a string of words into a powerful message. It's all about how you tell your story.


Hello Writing Friends!

Words are more than just a combination of letters. Words make the world go round. Words entertain. Words spread information. Words build relationships. You don't need a college education to use words effectively. It's all in the way you tell your story. 

Here are six simple strategies to craft compelling, clear and concise reviews, recipes and how-to articles.

Get Right to the Point


Capture your reader's attention in the first sentence. Starting a story with a quick and striking statement of fact can be very effective. Make this first sentence simple, direct and brief. Readers will stick around to read your story when you tell them the central and vital fact of your story at the very beginning.

Put Your Best Foot Forward


Phrases and word choices can lure a reader in or turn a reader away from a story. Statements that distract a reader, phrases that are trite and word meanings that are unclear are sure-fire ways to keep an audience from reading a story to the ending.

Here are a few tricks for writing a strong story introduction:
  • Avoid beginning a story by asking your readers an "If" statement. When a reader is asked, "If you were...?" or "How would you like it if...?" the reader's mind will want to answer the question and will forget to finish the story.
  • Find creative ways to begin stories and paragraphs. Using "a," "an" or "the" as the first word in a story or paragraph isn't very creative. Choose a word that is virile, a word that shows action.
  • Don't start with a time or date. Whether something occurred today or yesterday doesn't really matter. There are other things to be said which are more important.

Keep It Simple


Fancy words and phrases that require a dictionary can be a turn-off for some readers. Use common words and short sentences. Remember, you are writing for your readers and for your reader's enjoyment.

Be Honest


Always tell the truth in the stories you write. Don't exaggerate. Don't distort the facts. Just tell the truth, the plain truth.

Interview Interesting People


Adding another person's point of view, telling another person's tale or validating your story with an expert quote creates interest. Using quotes from others brightens up a story and gives it life.

Reveal Your  Sources


Anonymous interviews, general statements, inferences and implied accusations weaken a story and cause a writer to lose credibility. Every fact and every expert statement must be cited. Tell readers where you found your expert quotes, statistics and factual information.

I hope these tips have helped you recycle your inner editor so that you can create compelling stories that readers will want to share with their friends.

Until next week,

Coletta


Posted by Coletta Teske
Coletta Teske

About This Contributor

Coletta Teske writes reviews on books, business management, writing, crafting, cooking, and gardening. She is also an avid recycler and shares her tips on recycling. She delights in upcycling an old object, recycling or transforming discarded items into a new treasure.


Note: The author may receive a commission from purchases made using links found in this article. “As an Amazon Associate, Ebay (EPN) and/or Esty (Awin) Affiliate, I (we) earn from qualifying purchases.”


Saturday, March 1, 2014

How to Write an Informative How-To Article

Writing Step-by-Step Instructions Made Easy


green arrows

Do you know any useful Web tricks that make online marketing easier? Do you create unique crafts that other people would like to re-create? Do you stay updated on current cooking techniques that make meal preparation easier? Do you want to share your how-to stories with the world? Are you unsure about how to write a how-to article? It's easier than you think!


Hello Writing Friends!

Last week, a friend and I were chatting away and doing some brainstorming. I asked her to hold me accountable for a how-to article I had started. She mentioned how much she disliked writing how-to articles. Personally, I enjoy using my writing as a teaching tool.
Today I'd like to share with you a few tips and hints to create a how-to article that is unique, useful and updated.

Reuse Your Project to Get It Right


Wash, rinse and repeat. Build your confidence as a how-to writer by re-creating your project several times before you sit down to write. You'll learn something new each time you make a beauty elixir, use a smartphone app, start tomato seeds, decorate chocolate cupcakes or refurbish a picture frame.

Each time you re-create your project, take lots of photographs. Think of your photos as your notepad, a place to store your writing ideas. Each of my attempts to Recycle Egg Shells to Make Sidewalk Chalk resulted in a slightly different result. It took several attempts to get the chalk recipe just right.

Tip:  Pictures are only worth a thousand words if those pictures help the step-by-step instructions tell the story. Show readers exactly how to do a task and the result they should expect. Show the before and the after.


Reduce Your Project into Steps


The trick to the how-to article is to separate your project into a series of steps. Creating these steps is similar to writing an outline. Look for 6 to 8 items that need to be completed to perform the task. The pictures you took while you completed your project will give you some clues.

Your project may also give you clues to its natural step-by-step process. A project that I started many years ago to Recycle Avocado Seeds and Grow Luxurious Trees lent itself to steps describing each of the growth stages of the avocado tree.


Remember, Revisions Are Your Best Friend


There's always room for improvement in a how-to article. Friends may suggest a different approach that you didn't think about. Add it as a tip in the appropriate step. You may learn more about the subject. Share your new-found knowledge and update your how-to. While re-reading your article, you may think of a better way of explaining a step. Never hesitate to make your work better.

Writing the how-to article is fun. Sharing your knowledge and making new discoveries is a rewarding experience.


Until next week, happy how-to writing!

Coletta


Posted by Coletta Teske
Coletta Teske

About This Contributor

Coletta Teske writes reviews on books, business management, writing, crafting, cooking, and gardening. She is also an avid recycler and shares her tips on recycling. She delights in upcycling an old object, recycling or transforming discarded items into a new treasure.


Note: The author may receive a commission from purchases made using links found in this article. “As an Amazon Associate, Ebay (EPN) and/or Esty (Awin) Affiliate, I (we) earn from qualifying purchases.”


Monday, February 24, 2014

Insight

“I wish I could paint without me existing – that just my hands were there.  When I’m alone in the woods, across the fields, I forget all about myself. I don’t exist… but if I’m suddenly reminded of myself, that I’m me – then everything falls to pieces”Andrew Wyeth

Over the years, I have read many writing how-to books and tutorials.  There are so many that I can’t keep all of the tips and rules straight in my head.  Some have taught me entirely new information and others have reminded me of the writing rules I should have remembered from school.  None of them were the magic cure for my writer’s block.

The trick for me has been shushing myself and allowing my art to exist.

Does this sound confusing, the artist trying to lose herself in order to create her art?  After all, the artist has to exist in order to create. Right?  Well, yes. It is my mind, my body, and my imagination that produces my work. However, I understand Wyeth’s comment completely.

If I try to remember the rules, or worry about the expectations of others, I am not able to write.  If I set my imagination free and let it roam on it’s own, I am able to write. I must squelch the thoughts of rules, of chores and of the never-ending lists of things I must do.  I cannot allow my mind to wander into the realm of bills to be paid, chores to be done, and upcoming appointments blocks.  I am a slow writer, but I know that I write better and more productively when my mind isn’t stuck in the “what-ifs” and trying to figure out the rules before I write.

I also write better after I have had an emotional experience of some kind.  I am fortunate that I have had such an experience this weekend when I visited Longwood Gardens in Kennett Square, Pennsylvania.  The conservatory was bustling, despite snow still covering the ground outside.  The Orchid Extravaganza was in full swing.  The sights, the sounds, and the heavenly scents rejuvenated my writing spirit. And like a child, I gazed with wide-eyed and open-mouthed wonder.  I lost myself and found plenty to write. 

I am excited that I am able to share this wonderful experience at Longwood Gardens with you. 


Image Credit: ©Dawn Rae – All Rights Reserved (Click on photo for larger view)


Note: The author may receive a commission from purchases made using links found in this article. “As an Amazon Associate, Ebay (EPN) and/or Esty (Awin) Affiliate, I (we) earn from qualifying purchases.”


Sunday, February 23, 2014

Writing Online -- Learn by Example

pen and composition book with writing
Writing online, especially when sharing stories about a subject you love, is easier than you might think. Writing for the internet is a far cry from what was taught in English - Language Arts classing in high school.

While you should still watch your grammar (or have someone proofread for you), online writing is better described as "conversation writing". Write like you would tell a story to a friend. I actually have a friend that talks to herself while working through writing a story online. In essence she is dictating to herself as she goes.

It's funny, I read mine out loud after I've written it to make sure it's easy to understand -- she does it as she's writing. There is no right or wrong, just what works for you.

Storytelling Everyday


At parties, in the bleachers or around the water cooler at work, we tell stories everyday. Simply start writing the stories that can be helpful to other people in some way. The internet is about helping each other by sharing our passions, experiences, successes and even failures. (I personally believe there is no such thing as a failure as long as you learn something from it.)

I have recently written 2 articles (lenses) on Squidoo that revolve around party planning. One was about a baby shower I co-hosted and the other was my daughter's sweet 16 party. In both instances, I shared what we did and made suggestions others can use when they go to planning a party for any occasion.

They didn't take much time to write but can be found by the right person searching for ideas for their particular party or shower. 93% of online activity begins with a search engine. Hopefully, my stories -- my articles -- will be indexed and displayed for those searchers.

Learn by Example


The contributors on Squidoo write their own stories as well as promoting the stories of others to help get the word out. Learn by their examples and the examples they feature.

Writing a story from personal experience, about a topic you have passion for, and publishing it to the web will help others find you too. You can be a writer -- you just have to write from the heart!


Note: The author may receive a commission from purchases made using links found in this article. “As an Amazon Associate, Ebay (EPN) and/or Esty (Awin) Affiliate, I (we) earn from qualifying purchases.”


Sunday, February 16, 2014

Niche & Focus in Party Planning Articles

various colors of ribbon to use as streamers for a party
What is a niche? No, not the recess in a wall for displaying items but rather the definition as it pertains to writing for the internet.

Merriam-Webster defines a niche as:

: a job, activity, etc., that is very suitable for someone

: the situation in which a business's products or services can succeed by being sold to a particular kind or group of people

I think the contributors here on Review This Reviews! fit both bills. Our chosen niches are very suitable for us because we live them or are very active within the subject.

As the Squidoo Contributor in the Party Planning niche, I am always looking to hook up with others -- whether as readers or writers or both -- that are active within this niche topic.

If you are a young mom, you have lots and lots of birthday and other occasion party planning in your future and might could use some inspiration from others that have been there and done that.

Others of you might have already hosted a lot of different parties with great success. You have a sure-fire party food recipe or are super organized when it comes to planning and can share your tips or maybe you are a DIY Queen and want to share your party decorating ideas. All are welcome and encouraged!

There will always be people planning parties in need of inspiration and ideas. By sharing our personal experiences and knowledge, you help our fellow man/woman. What could be better?

Focusing When Writing in the Party Planning Niche


When we write, sometimes we have a tendency to include every little thing in our lens or article. What happens then is the helpful information a reader was searching for is lost in a sea of other information they don't really need. Result? Hitting the back button and no interaction or conversion from the article.

The best way to really reach our target audience is to focus on one or two elements instead of the whole. Squidoo used the example of a camera.

baby shower buffet table
My Sister's Baby Shower Buffet Table
Let's say you are taking a picture of a park playground. The whole picture involves lots of elements. This one might have a slide, a merry-go-round, monkey bars and swings. There's lots going on in the whole area. But, you can narrow the wide angle camera lens down to a telephoto shot of just the slide or the swings and have a much better chance of your target audience finding your article.

In party planning, there are tons of areas: Food, Games, Decorations, Invitations, take home treats, themes and more.

By narrowing the focus to one area, people that are looking for help in that particular area will find what they need quickly. They will also be more apt to interact or convert than they will if they have to sift through information they don't want or need.

I just published an article/lens in my niche this week. It had to do with a baby shower my sister and I threw for our other sister. But, instead of filling it chock full of ideas and possibly overwhelming a reader with unwanted information, I chose to focus or narrow it down to the baby shower food and buffet table we made for the party.

Remember, always tell people exactly what your article is about in the title and then deliver in the body of the article. Good luck and remember to contact me when you write in the party planning niche so I can help you promote and build a following!


Note: The author may receive a commission from purchases made using links found in this article. “As an Amazon Associate, Ebay (EPN) and/or Esty (Awin) Affiliate, I (we) earn from qualifying purchases.”


Sunday, February 9, 2014

Writing for the Party Planning Niche

witches hat party decoration or centerpiece
This week, I was asked the following question and I wanted to address it here on the Review This! blog. A visitor (lurker, really -- she reads a lot but is afraid to dive into the writing) asked me:

"How can you tell a story about party planning? You have a very hard task!"

Glad you asked! I'm gonna tell you.

The Basics of Storytelling

You can tell a story about almost anything. Stories are told day in and day out in print, online, videos, television and radio. Commercials are mini-stories -- or at least the good ones are. I apply the storytelling philosophy to everything write -- whether it's on Squidoo or on one of my websites.

People react well to stories. They look for parallels in our lives -- things they can relate to and then act or react accordingly.

So how does all this tie in with writing for a party planning niche? Easy. Tell the story.

Parties in Our Lives

Every single one of us has planned and/or hosted some sort of party(ies) in our lives. 1st birthday, a sweet 16, a weddding, a St. Patrick's Day party, an anniversary, a Super Bowl party...

Write about that particular party and your specific experiences.

For instance, last year, my niece turned 16. My sister asked me to help her plan the Sweet 16 party. I did, it was a blast and I wrote a lens about it -- Sweet 16 -- Let the Planning Begin.

It tells the story and gives examples (pictures) of ideas others can build on for their party planning needs. It also showcases some products I used during the planning. That's the key. Display products that you actually use(d) and tell people "How" you use them. Otherwise, your lens or article will sound like an ad copywriter spewing features of something they need to sell.

Yes, we sell. There is no shame in that. But, we sell what we use, have experience with and tell a story of what, where, why and how we used it. That's valuable to internet searchers. How do I know?

Because the Sweet 16 lens I just mentioned above --  on average, it stays in the high 2nd teir, makes sales and has been pinned 364 times from the Squidoo page (others repin the pin). I have had more than one person contact me (I do suggest you make sure your Squidoo contact button is turned on) asking specific questions and even sending me photos of their party my article inspired them to plan. That's a great feeling.

Start Writing About Your Parties

Think of the parties you have helped with or hosted. Did your neice just turn one? Did your sister have a baby shower? Are your parents celebrating a big anniversary? Did your brother have an engagement party? Did your son just graduate from high school? Are you hosting your annual St. Patrick's Day party?

All these life occasions usually involve celebrations of some sort. Let's hear about them, brag about what you did! It can help others that are looking for ideas and inspiration!

I came across a lens recently that does a great job of telling the story of planning her daughter's birthday party. It's titled Monster High Birthday Party Ideas written by BellaMommyDesigns. She wrote from her experience and shared photos, products and ideas to inspire others in their party planning.

So, as long as you attack the writing from the perspective of relaying personal experience or storytelling, anyone can write about planning parties! Come join me and let me help you promote your writing! Visit me at Party Planning Contributor at Hubpages. Can't wait to read what you write!


Note: The author may receive a commission from purchases made using links found in this article. “As an Amazon Associate, Ebay (EPN) and/or Esty (Awin) Affiliate, I (we) earn from qualifying purchases.”


Most Recent Reviews on Review This Reviews


Search for Reviews by Subject, Author or Title

The Review This Reviews Contributors


SylvestermouseSylvestermouseDawn Rae BDawn Rae BMbgPhotoMbgPhotoBrite-IdeasBrite-IdeasWednesday ElfWednesday ElfOlivia MorrisOlivia MorrisTreasures by BrendaTreasures by BrendaThe Savvy AgeThe Savvy AgeMargaret SchindelMargaret SchindelRaintree AnnieRaintree AnnieLou16Lou16Sam MonacoSam MonacoTracey BoyerTracey BoyerRenaissance WomanRenaissance WomanBarbRadBarbRadBev OwensBev OwensBuckHawkBuckHawkDecorating for EventsDecorating for EventsHeather426Heather426Coletta TeskeColetta TeskeMissMerFaeryMissMerFaeryMickie_GMickie_G


Review This Reviews is Dedicated to the Memory of Our Beloved Friend and Fellow Contributor

Susan DeppnerSusan Deppner

We may be apart, but
You Are Not Forgotten


“As an Amazon Associate, Ebay (EPN) and or Etsy (Awin) Affiliate, I (we) earn from purchases.” Disclosure Statement

X