Showing posts sorted by relevance for query fotojet. Sort by date Show all posts

Monday, October 3, 2016

FotoJet Free Photo Editor Review

FotoJet is a free online photo editor. It is extremely easy to use and offers photo editing, collage making, and graphic designs. I was skeptical when I signed up. I was certain it would have nothing new to offer that I don't already have access to with other photograph editing programs. But I was wrong. I love the FotoJet designs for social media posts. In this review, I will show you some of the samples I created using minimal time or energy.


Easy Sign up


So far, I've found no gimmicks with the FotoJet photo editor site. My pet peeve is trying to sign up to use a free program only to find that there is some catch. Perhaps you must enter your credit card number in order to register for the "free" site. Or it is free, but you have to download all sorts of things onto your computer and then their tool bar takes over.  Sometimes it is easy to sign in, and really is free, but then you learn that you only get to do one sample of something and your free use has ended. An upgrade (that costs) is required to continue.  I found NONE of those gimmicks with FotoJet. Registering was just this easy:

  • I entered my email address.
  • I entered the password I wanted to use.
  • I went to my email account and clicked the link for email confirmation
  • I returned to the site and began creating


Easy to Use


I clicked the link to confirm and entered the site. Because I'm not tech savvy, I expected to have to spend a day or two trying to figure things out.  I looked for FAQs and directions and found none. There are a few hints (such as using the arrow keys...and I wish I had paid attention to that hint!) while the page is loading. Otherwise, I found no instructions.

But within two hours, I have four photo samples edited.  And I am very excited about them.


FotoJet Editor for Social Media Posts


Personally,  have a really hard time remembering the image size requirements for my social media sites. Sites such as Facebook, Instagram, and Pinterest have different and ever-changing requirements.  My photos files have multiple photos saved in a variety of sizes and labeled with the site they were created for. FotoJet won 't decrease the amount of photo files I have, but it will take away the need to look at my image size cheat sheet each time I am re-sizing. 


FotoJet Photo Designs for Instagram


My first attempt was designing an Instagram photo with a personal photo for my personal blog.  I chose the design, chose my photo, dragged my photo onto the design and voila, was nearly finished. I clicked on the text boxes to add my wording, dragged it to where it looked best, and resized it easily. I also changed text colors and fonts easily. When finished, I saved it to my computer.


To show the variety of designs, I used a second design with the same photo. I think it gives my photo an entirely different look.


FotoJet Photo Designs for Pinterest


I then did the same for the designs sized for Pinterest.  With permission from our photography contributor Mary Beth, I used her amazing beach photos for these designs.


Aren't her photos gorgeous?! Anyway, with the first design, I dragged and dropped two photos, clicked on their existing text boxes, and changed the wording to my own. With the second image, I dragged and dropped the photo, changed the opacity of the existing text box, and left their text as is. 

What a happy coincidence to find a design with my name.


FotoJet Social Media Designs in Summary


I had a bit of difficulty finding the trash bin initially.  But I am content with clicking around and trying things out. Clearly, the "click and hope" technique worked well for me. Everything else was very easy to navigate. Especially after I started using the directional arrows to move the photos. 

I hope that FotoJet adds even more designs for Instagram and Pinterest. And perhaps some for Twitter.  Overall, I really like this free photo editor.  It seems to be a program free of gimmicks and tricks to purchase upgrades.  It is easy.  And if your goal is to create attractive images for your social media sites with as little muss and fuss as possible, I think you will be thrilled with FotoJet.


Related Links:


Thank you to Mary Beth for allowing me to use her amazing beach photos for these examples.  You can read more about her photography on Review This as well as purchase her items in her Sunrise/Sunset collection

The first image is a FotoJet design using a photo from Pixabay.  In addition to choosing one of your own photos while creating your designs, FotoJet includes a handy link to choose free photos from Pixabay.

You will find other helpful site reviews on ReviewThis!


Note: The author may receive a commission from purchases made using links found in this article. “As an Amazon Associate I (we) earn from qualifying purchases.”


FOLLOW US ON:

Wednesday, August 2, 2017

How To Trap Those Flies That Drive You Crazy: A Window Fly Trap Review

Flies in Your House Can Drive You Crazy

I'm usually pretty sane, but if I'm preparing a meal or trying to eat, seeing flies buzzing around me drives me nuts. Flies are dirty and carry diseases. I don't want them in my kitchen when I'm preparing, serving, or trying to eat food. 

How To Trap Those Flies That Drive You Crazy: A Window Fly Trap Review
Photo Courtesy of Pixabay, edited on FotoJet


Imagine my distress when my husband left the door open two weeks ago while he went outside to get something and about a dozen flies flew in! Once the flies were in, they didn't want to go back out.

 For at least ten days I fought them with folded newspapers and a fly swatter to no avail. Those pesky flies knew how to settle just where they would land on a clean dish or plate of food were I to swat them. I did get a couple who lit where I could hit them, but most escaped from my attacks. It seemed for every one I killed, two more would appear in its place. It seemed everywhere I went in the kitchen or family room, at least five flies were circling in the air. My stress level was high. 

My Electronic Fly Trap

After a few days of watching helplessly as the flies treated my table and walls as their personal airport, I remembered I once had an electronic trap for mosquitoes and other flying insects. I hadn't used it for years and was, in fact, storing it in the kitchen at our other house. I decided to retrieve it. In the past, it had caught a few flying insects. The one I own is obsolete now, but it was similar to this one and worked the same way. 


It uses light to attract the insects. Then it sucks them into a lower compartment with a powerful fan and traps them there. Eventually, they dehydrate. These traps work pretty well for mosquitoes, as I remember. Reviewers on eBay seem to agree with me. It may work for you if you have a problem with mosquitoes.

However, it did not work very well on my flies. I had it on the kitchen table and turned it on at night before I went to bed after other house lights were off. At my first morning bladder call, I'd shut the trap before the sun was up.  Unfortunately, my husband got up after me and thought he should turn it on again, which opened the trap. I'm not sure it ever caught a fly for long. Their numbers did not seem to decrease.

I brought my vintage Stinger NOsquito Ma06 Indoor Insect Mosquito Bug UV Light Quiet Electronic Trap | eBay decades ago. I don't remember where. I did find one like mine on eBay, which you can see if you follow the link above. 

Shopping for a Solution to My Fly Problem

Finally, I couldn't stand it anymore. I had to find a solution! I went to Walmart in search of fly paper, but they didn't have anything but sprays. I don't like poisons, especially spray poisons, anywhere I prepare or eat food. Rather than drive all over town, I checked Amazon. I found a description for Catchmaster Window Fly Traps.

These simple window traps got four to five-star reviews, depending on package size and seller. They were really cheap in comparison to the electronic zappers and light traps, some of which got much lower reviews. I figured I didn't have much to lose by trying the Catchmaster traps. They are very simple to use. They catch the flies that land on them with a very sticky surface that holds them in place. I keep my traps beneath the blinds that cover the windows.

How to Set the Catchmaster Window Fly Trap


How To Trap Those Flies That Drive You Crazy: A Window Fly Trap Review
Image created on FotoJet, © B. Radisavljevic

Here's how to prepare your traps:

  1. Open the package
  2. Pull out the trap
  3. Tear the narrow release strip off the trap
  4. Stick the trap in the corner of a window
  5. Be careful to put it where you won't need to touch it to open and shut the window
  6. Peel off the large release liner that faces toward you. 
  7. Wait patiently for the flies to land

My Results

How To Trap Those Flies That Drive You Crazy: A Window Fly Trap Review
Victims Trapped in My Kitchen Window. © B. Radisavljevic


I tend to be impatient, and catching flies this way isn't instant. I had put six traps in windows the day I got them. The next day only four flies were stupid enough to land on them. (I hate that flies seem to be smarter than I am.) As I write this, I've had my traps up for about ten days. I have trapped thirteen flies, a few gnats, and a couple of baby spiders that must have just hatched. I still have one very smart fly who continues to stay away from the traps. My east windows seem to catch the most flies.

Two days after I'd placed my first traps, Hubby went to shopping and found some Pic Window Fly Traps and brought them home. He didn't realize I still hadn't used all my Catchmaster traps. I finally decided to try a couple of the Pic traps to see if they would do any better at catching the flies still in the air. I picked one window and a bathroom mirror where I'd not yet caught any flies and put a Pic trap in another position in each of those places. They haven't caught any flies, either. Not yet.

Perhaps I just put the Pic traps in bad places, but a fly had circled that bathroom about every time I'd walked in. The Pic traps got better reviews a couple of years ago, but more recent users say they aren't as sticky as they used to be and aren't catching flies as well anymore.


How To Trap Those Flies That Drive You Crazy: A Window Fly Trap Review
God Designed the Very Best Fly Trap, © B. Radisavljevic
Of course, there is the messiness factor, and one can't be too squeamish.

My Recommendation

If flies are your primary problem, electronic zappers and light traps with fans probably won't work for you. I've read the reviews for just about all of them. I was leaning toward the light-fan combinations that plug in like night lights, but they got bad reviews. The electronic gadgets seem to work better on smaller flying insects with lighter bodies. They may be effective with gnats and mosquitoes, but the house flies that drive me crazy are much heavier. 

The Catchmaster Window Traps I tried worked pretty well. I'd much rather deal with one stubborn fly than fourteen. Getting the gnats and baby spiders, along with anything else that wants to land on my windows, is a bonus. 

I believe these traps are a great value for the money. My life has been much calmer since I put them in my windows. There is a bit of a yuck factor in having to look at trapped flies, but you can decide where to place your traps. If you put them in top window corners instead of the lower ones you won't have to look at them so often. You also need to be careful not to touch the sticky part of the traps. My mini blinds hide the traps, including the one next to the table, most of the time.

If flies in your kitchen drive you as crazy as they do me, I believe these window traps will help you as more or more than the other fly catching gadgets I've tried or looked at. Why not pick up an inexpensive package now so you'll be ready immediately to fight any flies who invade your home. Any mosquitoes, gnats, fruit flies, moths, and spiders you catch will just be a bonus. 


See more product reviews from our contributors.


Note: The author may receive a commission from purchases made using links found in this article. “As an Amazon Associate I (we) earn from qualifying purchases.”


FOLLOW US ON:

Wednesday, July 3, 2019

Reviews of My Favorite Graphoanalysis Books

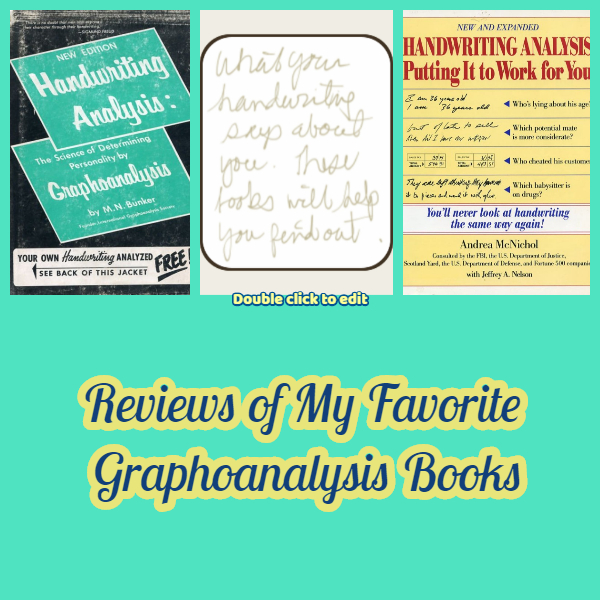
Image created on Fotojet.com

What Sold Me on Graphoanalysis 

I had my first experience with graphoanalysis in the 1990s. At the time I had an IBM clone  computer in the days before Windows and before I had the internet. I don't quite remember how I acquired the floppy disks I got my shareware programs on or how I even found out about them back then. But one of those disks had a program for analyzing people's signatures for their hidden meanings.

My friends and family weren't safe. I immediately used the program to find out all about them. Of course, I shared  my results and most people thought the results were correct assessments of their personality traits.

In 1990 the IRS decided to audit us. They asked for a ridiculous amount of paperwork and receipts over the course of several weeks. We'd go to an appointment and then the agent would ask for more. By mail. With her signature. Hubby said, "Why don't you analyze her signature?" So I did. That analysis gave us enough information to plan a strategy that worked and helped us win our case. After that handwriting analysis became a sort of hobby.

Later I Turned to Handwriting Analysis Books


As technology progressed, I had to upgrade my computer. I could no longer use a floppy disk. But I wanted to learn more about graphoanalysis. So I started buying books. My collection now includes six books on the subject. I will review my two favorites here.

My foundational book was Handwriting Analysis: The Science of Determining Personality by Graphoanalysis by Milton Bunker, founder of the International Graphoanalysis Society. He was a shorthand teacher who had learned and taught seventeen different shorthand systems. He began to research handwriting in 1910 and through his observations developed his techniques for analyzing it. He explains how he developed and tested his system. He believes it's as valid a science as psychology is. Not everyone agrees. My own experience leads me to believe there's something to it.

After the first chapter, every chapter teaches you a rule to use when evaluating handwriting. Each of these chapters is followed by an short exam so you can test yourself. All the answers are at the back of the book. There is a "Dictionary of Grapho Analysis" at the very end of the book.

The book itself was first published in 1959. I have the 1975 printing and its cover design shows it. The type style  and layout of the book are not as easy to read as more modern styles, but it's still worth what I paid for it and I'd buy it again because it's so interesting. The covers below give you an idea of the style. That back cover will get big enough to read if you click it.

My Scans of Front and Back Covers of Bunker's 1975 Printing, © B. Radisavljevic


See the signatures of the rich, famous, and infamous, as well as their analyses. Learn how the ability of someone to analyze another's handwriting prevented suicides.  Between the covers of this book are numerous stories I simply enjoyed reading. People have used graphology to settle court cases, help law enforcement, and protect loved ones from unhappy marriages and even murder.

Milton Bunker introduced me to the way graphoanalysis developed and its basic principles and techniques. He showed me how useful it is to learn it. Andrea McNichol provides a more modern book that makes handwriting analysis easy to learn -- Handwriting Analysis: Putting It to Work for You. Both books are entertaining and held my interest with anecdotes, case histories, and instruction.

Nuggets from Milton Bunker


Bunker calls the ability to analyze handwriting "an insurance policy." He says it can protect your wallet and even your life. He tells several stories where this turned out to be the case. Appearances are often deceiving. Some scoundrels are very good actors and convincing liars. But their handwriting doesn't lie. You can learn a lot about someone from their signature alone. I certainly found that was true as I dealt with the IRS agent during our audit. Graphoanalysis helps one look behind a person's facade.

Here is Bunker's advice for applying what you learn from his books:

  1. Study the rules
  2. Use them to study actual samples
  3. Test and prove your result
He says if you do these things, what you learn will stay in your mind even if lose your books. 

Bunker says analyzing your handwriting will help you get to know yourself better. It can also help you help your child. Sometimes it can uncover unrecognized family dynamics so families can deal with unhealthy situations. 

Bunker tells the story of a family that was about to "lose" their son. The parents knew he was headed for trouble and they didn't know what they were doing wrong. After an analysis of a sample from the parents and the child, they discovered the boy felt his parents didn't love him. They had both been so active outside the home they didn't give the son the attention he craved. The boy agreed that was the problem and the family was able to make changes and turn the situation around.
*
*

What to Do with Your Discoveries


Milton Bunker cautions us to be ethical in the way we use what we find when we analyze someone's handwriting. He reminds us that we should not use it to judge people or as a basis for gossip. He offers this example. As you analyze someone's signature, you may discover its owner has a tendency to steal. But because a person has that tendency doesn't mean he has ever actually stolen anything or ever will. You should simply recognize that the tendency is there and not let him handle your money. Watch him carefully if he handles money or other things of value. Use the information to protect yourself and those you love. 

You may also discover things about yourself you don't like when you analyze your own writing. Bunker and many other graphologists believe you can actually change some traits you don't like by changing your handwriting. I have no personal experience trying to do this, but he does offer some guidance on the subject. 

A Fun Way to Learn Handwriting Analysis 


My Scan of My Book
Andrea McNichol wrote a workbook designed to help anyone learn to analyze handwriting for personal reasons. Handwriting Analysis: Putting It to Work for You is easy to use and makes learning enjoyable.

Ms. McNichol has sterling qualifications. She did her undergraduate work and got a teaching credential at UC Berkeley and studied graphology in Europe. She also participated in more specialized study and research related to substance abusers, mental patients, and criminals, some under the auspices of the University of California. She designed and taught the first graphoanalysis course at UCLA and went on to teach the course at seven other UC campuses. Her students have given her consistently high ratings in their reviews. As a professional consultant for law enforcement and businesses, she has used her skills in high profile cases such as the contesting of the will of Howard Hughes.

The book cover I scanned above gives you a good preview of the format and style of her book. My affiliate links above or below will take you to the book page where you can look at a few sample pages inside. They will give you a realistic idea of what it's like to use this book. You will see the introductory quiz that demonstrates how much just your common sense can discern.

McNichol defines graphology as the study of all graphic movement. She believes it applies not only to handwriting but also to doodles, sculpture, and painting. She says it gives insight into the writer or artist's physical, mental, and emotional state, but in this book she limits herself to handwriting analysis. She does devote a brief chapter at the end of the book to doodling.

When We Write We Leave "Brain Prints"


Image Created on Fotojet.com


Ms. McNichol points out that people's handwriting is as unique as their fingerprints. Our handwriting is like an x-ray that reveals what's in our minds. Scary? She says "Our brain prints reveal who we are and how we think, feel, and behave. The are an x-ray of our minds....No two people have the same brain prints."

The purpose of McNichol's book is to show us how to read these brain prints so  we can understand more about people than their spoken words and their actions may reveal. Her easily readable presentation is full of samples and illustrations that will engage you in actually testing what you learn as you go.

Two Approaches to Handwriting Analysis


McNichol offers two paths to interpreting handwriting.

  1. Look for the individual traits of a person's handwriting and determine what each reveals. 
  2. Start with an individual personality trait you want to check for and then see if the person's handwriting has signs of that trait being present. 

Suggestions to Increase Accuracy When Analyzing Handwriting


Don't jump to the wrong conclusion when you see one or two traits that point in the same direction. Look for several different traits that mean the same thing. If possible, use several samples of a person's writing that were taken at different times. 

Consider the conditions a person wrote under. In the introductory photo at the top of this post is a sample of my writing taken under abnormal conditions. I was writing with the "pen" that came with my Samsung Galaxy Note 9 smartphone. I wanted to use a handwriting sample as part of the image and the easiest way to do that was to use the pen to write on my phone screen and then make a screen shot to edit as part of the total image collage. I then used Fotojet to build the collage of cover scans and the handwriting sample. 

Writing on a phone screen is a bit like signing your credit card on one of those terminals that supplies the pen and allows you to scribble something that only faintly resembles your signature. On the phone screen I can at least see what I'm writing, but the surface is much different than paper and one needs to concentrate more. Handwriting samples are best taken when a person is not trying to concentrate on the writing process. The important part of an analysis is what a person is unaware of doing. Something written on paper at a table or desk is a better sample than something written on a computer train or while holding a phone in one hand and the pen in the other. You get the idea. 

Make sure the person who wrote the sample intended for others to read it. We are often careless when we are taking notes just for ourselves, especially if we are trying to hurry. A grocery list may not be the best thing to use. 

Other Considerations 


McNichol tells us that children's writing is often undeveloped. We need to analyze their writing differently than that of adults. They often display traits in their writing that is normal for their age but would horrify us if we saw it in an adult's writing. This book is intended for analyzing adult handwriting only. 

It can also be useful to know which system a person learned to write with. Many people learned to write with the Palmer method and some parts of the book applies mostly to people who learned that way.  If you know how a person learned, it's easier to spot deviations from that method of writing. 

Why Not Learn to Analyze Handwriting Yourself?


It's not only an enjoyable hobby, but it's a great way to get to know people -- really know them. Most of the friends I asked were happy to give me samples. Of course, they also wanted to see the results. Most were surprised their writing revealed so much they'd never told me. 

Write a letter to your younger self and sign it. Or write a letter to anyone you don't intend to send. Don't think about your handwriting -- just what you want to say.  Then use one of these books or a computer program to help you analyze your writing. I have used all of the books below and found them helpful. Many others have been written since I bought mine that I'm also tempted to try. Sometimes it's better to learn from more than one teacher.

You may surprise yourself with what you learn from your handwriting.  And you will also begin to notice the traits you see in the writing of others. Have fun.


Note: The author may receive a commission from purchases made using links found in this article. “As an Amazon Associate I (we) earn from qualifying purchases.”


FOLLOW US ON:

Saturday, February 15, 2020

Site Review ~ Dinner, then Dessert, a Recipe Website

https://www.reviewthisreviews.com/2020/02/site-review-dinner-then-dessert-recipe.html
Source:  Pixabay & Fotojet

The other night I decided I wanted to fix Egg Foo Young for my dinner, as I had some leftover ham to put in it.  I almost always order Egg Foo Young at a Chinese restaurant, as it is my favorite. Since one doesn't often 'eat out', I sometimes fix restaurant favorites at home.  

I have made Egg Foo Young often over the years, but, while good, it just never tasted the same as my favorite at a Chinese restaurant or Chinese Take-out. And I never knew why. So I decided to look online for a new recipe to see if I could duplicate my favorite. Much to my surprise, I discovered that I have been 'cooking' my version incorrectly.  I would beat the eggs and add the ingredients (vegetables, and  sometimes meat or seafood) and cook it all at once like an omelet.  Aha ~ THAT was my mistake.  I discovered you cook individual helpings like a pancake! 

When I did a Google search for a new Egg Foo Young recipe, I accidentally came across a recipe blog called Dinner, then Dessert, and I am SO glad I did.  The author is a trained professional cook who worked as a Private Chef for 10 years, and all the recipes on her site are her own. Not only are her recipes delicious, but her presentation is attractive and easy to follow and her writing is delightful. Her name is Sabrina Snyder. 


Meet Sabrina Snyder


Sabrina Snyder, Professional Chef
Author of Dinner, then Dessert
Sabrina Snyder is a professionally trained personal and private chef of over 10 years. 

She started Dinner, then Dessert as a business in her office as a lunch service for her coworkers who admired her lunches, before going to culinary school and becoming a full time personal chef and private chef. 

As a personal chef Sabrina would cook a family's entire week of dinners one day a week, including all grocery shopping, cooking and cleaning up, and leave them with instructions on reheating each meal.

As a private chef, she cooked for private parties in family homes in the evenings.

Sabrina enjoyed this lifestyle for 10 years, until her life and kids became her priority and  she stepped away from other people's kitchens to stay in her own kitchen.

In  2015, Dinner, then Dessert became an online recipe website where Sabrina began posting recipes she had shared with clients over the years. 

In addition, she still has private chef clients she cooks for.  Sabrina treasures her distinction of being a trained professional  chef. 


Sabrina's Egg Foo Young Recipe


Sabrina Snyder's Egg Foo Young Recipe
Sabrina's Photo from Dinner, then Dessert

Egg Foo Young is a Chinese egg omelet dish made with  vegetables with an easy gravy topping. I share her recipe here:

Course: Main Dish
Cuisine: Chinese

Prep Time: 5 minutes
Cook Time: 10 minutes
Total  Time: 15 minutes

Ingredients:

8 eggs
½ onion, chopped
½ cut carrots (chopped and steamed)
¼ cup green peas
½ cut green bell pepper, chopped
¼ cup bean sprouts, cut in half
½ cup mushrooms
1 tablespoon light soy sauce
3 tablespoons sesame oil, divided

Instructions:


  1. Add the eggs, onion, mushrooms, bell pepper,  bean sprouts and soy sauce together in a bowl and whisk to combine.
  2. In a large skillet, heat 1 teaspoon sesame oil at a time for each pancake you cook on medium heat.
  3. Add about 1/3 cup of mixture per pancake and cook for 3-4 minutes on the first side and 1-2 minutes on the second side.


Egg Foo Young Gravy

1 cup chicken stock
2 tablespoons light soy sauce
1 tablespoon dry sherry
1 tablespoon cornstarch

Add everything to a small sauce pan and whisk well before the liquid heats up.  Cook and whisk until thickened. 


Recipe Notes from Sabrina about this Egg Foo Young Dish:


Egg Foo Young is sort of the classic leftovers meal made into a restaurant favorite. At our local Chinese restaurant the classic egg version of the dish comes out with a different assortment of ingredients mixed in almost every time we go.
I’ve asked our favorite waiter (who puts up with our circus of a family) why the fillings change and he explained to me that Egg Foo Young is a leftovers recipe and that when they have more or less of certain vegetables they just adjust the filling to what they have.


My Recipe Notes:


Cooking my version of Egg Foo Young
from Sabrina's Dinner, then Dessert site
Photos by Wednesday Elf, using a Fotojet collage

Following what Sabrina learned  about this Egg Foo Young recipe filling being adjusted, I made my recent version using only fresh mushrooms, diced onions and ham diced up from a leftover ham slice. I briefly sauteed the ham, onions and mushrooms in butter prior to adding them to the egg mixture.

I used only 3 eggs and cooked my pancakes one at a time in a small pan, as I was only making enough for myself. I chose NOT to make the gravy, as I like my Egg Foo Young plain. 

I then served the Egg Foo Young pancakes on rice. The  image below is of my result. YUM!


My Egg Foo Young Dinner

PS: In addition to learning the proper way to COOK this dish as pancakes, I think the other secret to getting homemade Egg Foo Young to taste more like a Chinese restaurant version is using sesame oil to cook it in. 


Site Review Summary


Having now discovered this delightful online recipe website by Sabrina Snyder, I will be visiting Dinner, then Dessert frequently to try out several of her other delicious-looking recipes  from her Main Dish, Desserts, Appetizers and Slow Cooker lists. Her 'Easy Chicken Parmesan' recipe is already calling my name! 

Quick Link:

Dinner, then Dessert Recipe Website

For more Chinese Takeout dishes to  fix at home, check out this cookbook:


(c) Dinner, then Dessert Website Review by Wednesday Elf, written on 2/15/2020


Note: The author may receive a commission from purchases made using links found in this article. “As an Amazon Associate I (we) earn from qualifying purchases.”


FOLLOW US ON:

Saturday, June 22, 2019

Color Outside the Lines – Reviewing Summer Color and Activity Books for Kids or Adults

Collage created on FotoJet
Summertime brings us wonderful weather for favorite outdoor activities. But sometimes it is too hot to play outside or rainy days force us inside. That's when some indoor activities are needed. 

Television programs and noisy games are fun, but sometimes 'quiet times' are welcome. Having a variety of coloring and activity books can be a perfect fit for such times. 


Coloring Books


Coloring books for both kids and adults are always fun. Here are a couple new ones to try.

Dr. Seuss Coloring Book


Available on Amazon

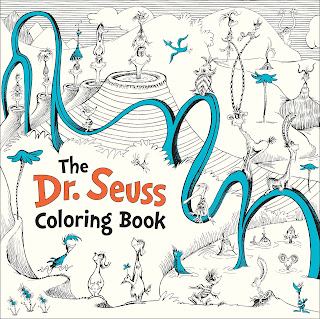
The Dr. Seuss Coloring Book is filled with playful patterns and intricate images based on everyone's favorite Dr. Seuss characters, this 80-page coloring book will occupy children from age 7 and up all the way to parents and grandparents who remember the lovable Dr. Seuss books. 

The illustrations come from such Dr. Seuss titles as The Cat in the Hat, Oh, the Places You'll Go, One Fish Two Fish Red Fish Blue Fish, Horton Hears a Who and How the Grinch Stole Christmas, to name a few. 

Now you can color Dr. Seuss any way you want!

The World of Debbie Macomber: Come Home to Color: An Adult Coloring Book


Available on Amazon

While the kids are coloring Dr. Seuss, mom or grandma fans of Debbie Macomber can enjoy their own coloring book. Based on the Blossom Street and Rose Harbor series, this special adult coloring book has 45 original illustrations that depict scenes from the series. Revisit favorite locales and relive the themes from these favorite Debbie Macomber stories. 


Summertime Activities


See on Amazon

Keep the kids entertained when inclement weather spoils vacation fun or the 'kids' start their “I'm Bored” routines with this fun DIY activity book called The Dad Lab.  The book contains 50 projects in the interesting realm of science and technology. The projects are simple and use materials found around the house.  I can already see that the project “make slime with only two ingredients” is one my young grandsons would enjoy. 

A fun way for mom & dad and grandparents to spend quality time with the kids in a way the kids would also enjoy.


Summary


Image from Bev Owens Article
Reviewing Fine Art Colored Pencils
on ReviewThisReviews

Add in some colorful crayons for the kids, and special pens and pencils for the intricate designs for adults and you'll be creating beautiful pages. 

So don't let weather spoil your summer vacation. These coloring and activity books will give everyone hours of fun and enjoyment. 


Check out a variety of fun reviews of other coloring books and coloring pencils on ReviewThisReviews: Coloring Books


(c) Wednesday Elf 6/23/2019


Note: The author may receive a commission from purchases made using links found in this article. “As an Amazon Associate I (we) earn from qualifying purchases.”


FOLLOW US ON:

Saturday, December 19, 2020

Games Day Reviewed


Games Day Review
"Stack O' Games" by Chealion is licensed under CC BY-NC 2.0


Games Day is held each year on December 20th. It began in 1975 by the Games Workshop of Birmingham, England in the UK.  If you are not in England, you can still get involved by playing some games wherever you live.  It's a day that brings us all together. 


History of Games Day


Source: Pixabay

Games Day was created by Games Workshop, a British game production and retail company. The company started out producing more traditional games such as backgammon and later moved on to fantasy universe games, such as Warhammer (my cousin's favorite game!). Since 1975, this day of carefree fun has become extremely popular in England and then in the United States.


How to Celebrate Games Day


Source: Pixabay

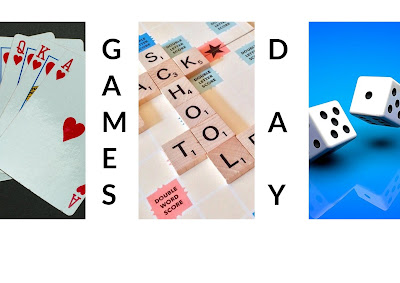
Family and friends can enjoy this Games Day in hundreds of ways. There are so many games available from the traditional ones of Chess, checkers, dominoes and backgammon to the modern day ones, which naturally include video games. Just ask any teenager! 


The 10 Most Popular Board Games


Source: Pixabay


  1. Chess
  2. Stratego
  3. Monopoly
  4. Risk
  5. The Setters of Catan
  6. Scrabble
  7. Battleship
  8. Clue
  9. Dominion
  10. Ticket to Ride


Other Game Day Celebrations


Source: Pixabay


*Links in the above list are game reviews by contributing members of ReviewThisReviews.


Summary


Some games have had enduring popularity, such as Monopoly and Scrabble. Card games have been popular since early times. There is no end to the number and variety of games in all forms and for all age groups. 


Source: Pixabay & Fotojet


MY most favorite games of all time are any card game, Scrabble and Yahtzee, in that order.  What are yours?


Games Day Review written by (c) Wednesday Elf on 12/19/2020


Note: The author may receive a commission from purchases made using links found in this article. “As an Amazon Associate I (we) earn from qualifying purchases.”


FOLLOW US ON:

Saturday, October 21, 2017

How to Create Pinterest Images with Photoshop


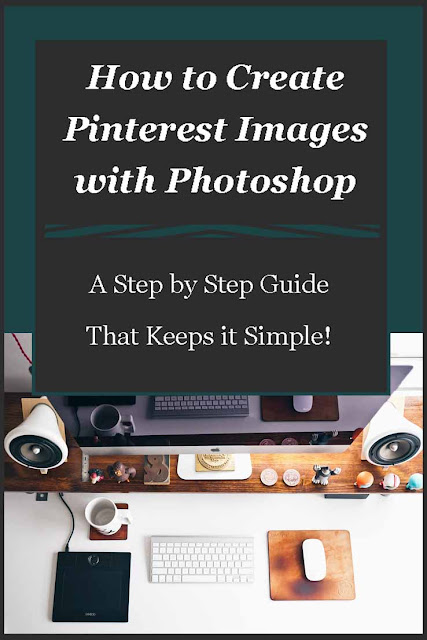
How to Create Pinterest Images with Photoshop - A Step by Step Guide
Today I'm going to review how to create Pinterest images with my favorite photo editing software - Photoshop!  I create most of my Pinterest images with Photoshop, I have tried a few other places, but I always come back to Photoshop.

I've been asked quite a few times how I create my images for Pinterest which is why I thought I'd just show you.  Now I can't promise you that your images will take off in popularity on this social media platform, but I can promise you that the steps will be easy to understand.

I have been using Photoshop for a few years now, but the way I create the majority of my images are easy for beginners and experts alike to follow.

The first thing you have to do is open up your Photoshop and select a new file, I simply press Ctrl N to do this, but you could use the file menu and open it that way.

You will be greeted with a pop up box where you have to select your image details, it looks like this -


I only change two things on the default and that is the width and height as you can see on the image.  I have changed the image height a few times, but the majority of the time I just use the standard 738 x 1105.

The next step means finding the image you want to use for your pin so I've decided that I want to do a pin for my welcome to Lou16.com post (I can't believe I was missing a Pinterest image on that post until I wrote this!)

I'm going to use the image I have in my introduction as the main image for my Pinterest image as well so let's have a look at what we're going to do....


So the first thing I do is create a new file, then I open up the photo I want to use and drag it onto the new file.

1.  Here you can see that this image has a border that I created previously.  I'm going to use this color for the background so to do this I need to use the eyedropper tool to select the exact color.
2.  This is the eyedropper tool.  To use this you click on the tool and then click on the color that you want to select.
3.  After selecting the color I make sure to select the correct layer (in this case the blank one as I'm using this for background.
4.  The paint bucket tool will cover the layer with the selected color.

After doing all of these steps you'll be left with the next image.


3.  I'm going to do things backwards here and get you to look at number 3!  When I did the background color the teal was on top and the white was underneath, as I'm thinking of doing the text in white I switched them around.  Sometimes when you're using two colors you can just change between these two to save having to use the eyedropper tool again.

Back to our image..

Now I want to add some text to the image so I have to select the text box.

1.  This is the Text box and you have to click on this before adding any text.
2.  This is the text tool bar, you can change the color from here (it will default to the top square at number 3 unless you change it), you can also alter the font, the font size and whether you want to use a bold or italic or both.


As you can see I dragged the image down a little so that I could add text above and below it.  Above I just used regular and underneath I selected italics.  You can also highlight just one or two words and change their color or size in order to make an impact.

1.  There are different things you can select on the side including a border which I always use for my Pinterest images.  You select the border (or arrow as I have done on these images for you) and click apply - the color on top of the color box is what color the object will appear as.

I didn't want to use white as a border because the website background is white so I used the eyedropper tool to select another color from the photograph.

I always try to pull either the border, background or text (sometimes all of them) from the actual photo as you know it's going to go.


I always keep Photoshop open until I see the final image uploaded to the website.  In this case I uploaded the border from a light green in the foliage that really made it pop on Photoshop, but looked strange on the white background of the website.

I then changed the border to the blue of my t-shirt, but again on the white background of this site it just didn't look quite right.  The third and final one is what is pictured above and I've use the brown of my hair!

Now you don't always have to use a photo, sometimes I'll use a graphic from a site like Pixabay and use that.

This is a very basic way to create a Pinterest image using Photoshop, as you get used to using it you can get more and more creative with using several images merged together like this one from another post I created -


In this image I used an image of traffic which I reduced and played with to get it to fit onto the laptop screen.  The background is taken from the laptop color and you can see I changed the color and font size of the 21 in the image.

Start off simple and as you get used to using these tools you'll find yourself creating all kinds of images, try not to become too addicted to Photoshop as once you start down this rabbit hole you can lose all sense of time!

You might be interested in my other Photoshop tutorial (and there will probably be more to come!) -


Peach Cobbler RecipeHow to Remove Blemishes From Photos Using Photoshop
Let's review how easy it is to use Photoshop to remove blemishes from photos, trust me it's really simple and well worth the time spent to restore old family photos.


Our contributors here on Review This also use other platforms to create their images for Pinterest so be sure to check out our tips for writers including -


... and let's not forget our Pinterest tips -


Before leaving I'd like to tell you one of the things that really helped me with getting traffic from Pinterest (obviously the images help!) and that was using Tailwind, I highly recommend this scheduling tool for anyone who wants to harness the power of this visual social media platform.

If you've found this article helpful please share on your favorite social media platform.

A Step by Step Guide to Creating PInterest Images with Photoshop
Image by Lou of Lou's Designs


Note: The author may receive a commission from purchases made using links found in this article. “As an Amazon Associate I (we) earn from qualifying purchases.”


FOLLOW US ON:
Review This Reviews Quick View Home Page

The Review This Reviews Contributors


Cynthia SylvestermouseDawn Rae BMary Beth - mbgphotoBrite-IdeasWednesday ElfOlivia MorrisRenaissanceWomanThe Savvy AgeMargaret SchindelRaintree AnnieTreasures by BrendaSam MonacoTracey BoyerLou16BarbRadBev OwensBuckHawkDecoratingforEventsHeather426Coletta TeskeMissMerFaeryMickie_G


Review This is Dedicated to the
Memory of Our Beloved Friend and Fellow Contributor

Susan DeppnerSusan Deppner


We may be apart, but
You Are Not Forgotten


“As an Amazon Associate I (we) earn from purchases.” Disclosure Statement

X