Why Pinterest Is Different from Other Social Media Platforms
If you've got a pile of content and you're wondering how to get more eyes on it, especially over time, Pinterest might be exactly what you need. While Instagram, TikTok, and Facebook are great for engagement in the moment, Pinterest works differently. It's less about real-time interaction and more about long-term discovery.
Let's break it down.
Pinterest Is a Visual Search Engine
Most people think of Pinterest as a social media platform, but it's actually a visual search engine. That's a game-changer if you're a content creator, blogger, or small business owner.
When people go to Pinterest, they're not necessarily looking to chat or scroll mindlessly—they're looking for ideas, inspiration, and solutions. Think of it like Google, but prettier.
Someone might search:
-
"Neutral living room decor ideas"
-
"Spring front door wreath"
-
"Easy slow cooker recipes"
-
"How to start a blog"
And when your pin shows up in those results, you're meeting someone at the exact moment they're interested.
Content on Pinterest Has a Long Shelf Life
One of the best parts about Pinterest? Your content doesn't disappear after 24 hours.
On platforms like Instagram or TikTok, your post might only get attention for a day or two. But on Pinterest, a well-designed pin can circulate for months, even years.
You can:
-
Create a single photo promo with a compelling headline and link it to your blog, shop, YouTube, or lead magnet.
-
Schedule that pin to go live next week—or next month.
-
Rinse and repeat with all your content.
It's the perfect place to build a library of visual content that keeps working for you behind the scenes.
Pinterest is Built for Clicks
Unlike many social platforms where outbound links are either hidden or discouraged, Pinterest encourages users to click through. That's why every pin you create can be connected to whatever URL you feel fits best:
-
A product page
-
A blog post
-
A YouTube video
-
A landing page
-
Even an affiliate link
If your goal is to drive traffic (not just likes or follows), Pinterest should be part of your strategy.
You Don't Need to Be "On" All the Time
With TikTok or Instagram, consistency usually means showing your face, filming videos, or engaging with comments regularly. But Pinterest doesn't require that kind of presence.
Instead, you can:
-
Batch-create your pins
-
Schedule them out days (or weeks) apart
-
Let the Pinterest algorithm do the rest
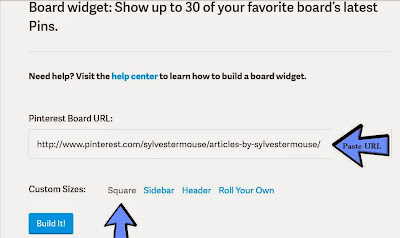
This means more breathing room and less pressure to be constantly visible. I use scheduling a great deal.
I'll create numerous variations of a marketing graphic and schedule them to go out hours, days, or even weeks apart.
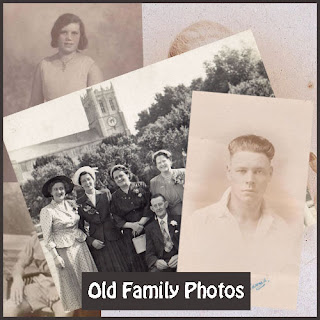
Here's an example of a Pinterest graphic I recently created for one of my activity books.
Note that I created five other original versions of this marketing piece and scheduled them to go out days apart, actually, a few are scheduled to go out weeks apart:

Got Tons of Content? Pinterest Helps You Use It All
If you're sitting on a treasure trove of blog posts, product photos, videos, or quotes, Pinterest gives you an easy way to repurpose them.
Each piece of content can inspire multiple pins:
-
One with a bold title
-
Another with a quote or benefit
-
A third with just a clean, eye-catching image
The more pins you make, the more chances you have to be found.
Because we may write on numerous topics, having the freedom to create marketing graphics for one location, if you've structured your Pinterest account that way, is incredibly convenient.
An article I posted here several weeks ago about an affordable men's wallet inspired me to create this pin, which leads back to that article; and yes, I created five different versions of this wallet pin to go out at different times to different boards.

Final Thought: Pinterest Isn't Just Social—It's Strategic
If you spend time creating content but feel like it's getting lost in the shuffle of fast-moving feeds, consider Pinterest. Think of it as your quietly powerful sidekick—always working in the background, helping the right people find your content when they're actively looking for it.
If you have a lot to share but not a lot of time to promote it constantly, let Pinterest do some of the heavy lifting.
You can find me on Pinterest here. There, you'll see the boards I've created over the years. To date, with nearly 12,000 followers, the traffic is between 250,000 and 350,000 monthly views, depending on the time of year. Don't hesitate to follow!
___________________
**If you're into more creative fun, in January of this year (2025), I posted an article on how to use Pinterest's new collage feature. The instructions are here.**