Showing posts with label gardens. Show all posts

Tuesday, May 31, 2022

Growing Magnificent Magnolias In The Garden Reviewed

When we moved here many years ago we inherited a gorgeous Magnolia tree. If you have a garden and suitable conditions I would recommend growing a Magnolia.

There are many types from small trees to very large trees. Colours are so beautiful and range from a shell-like pink, dark pink, yellow, purple, red and white. If I could I would have one of each. 

beautiful pink magnolia blossoms blooming on tree
 

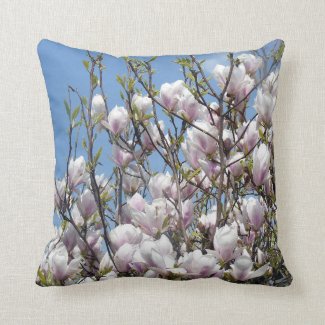
The Beauty Of  A Magnolia

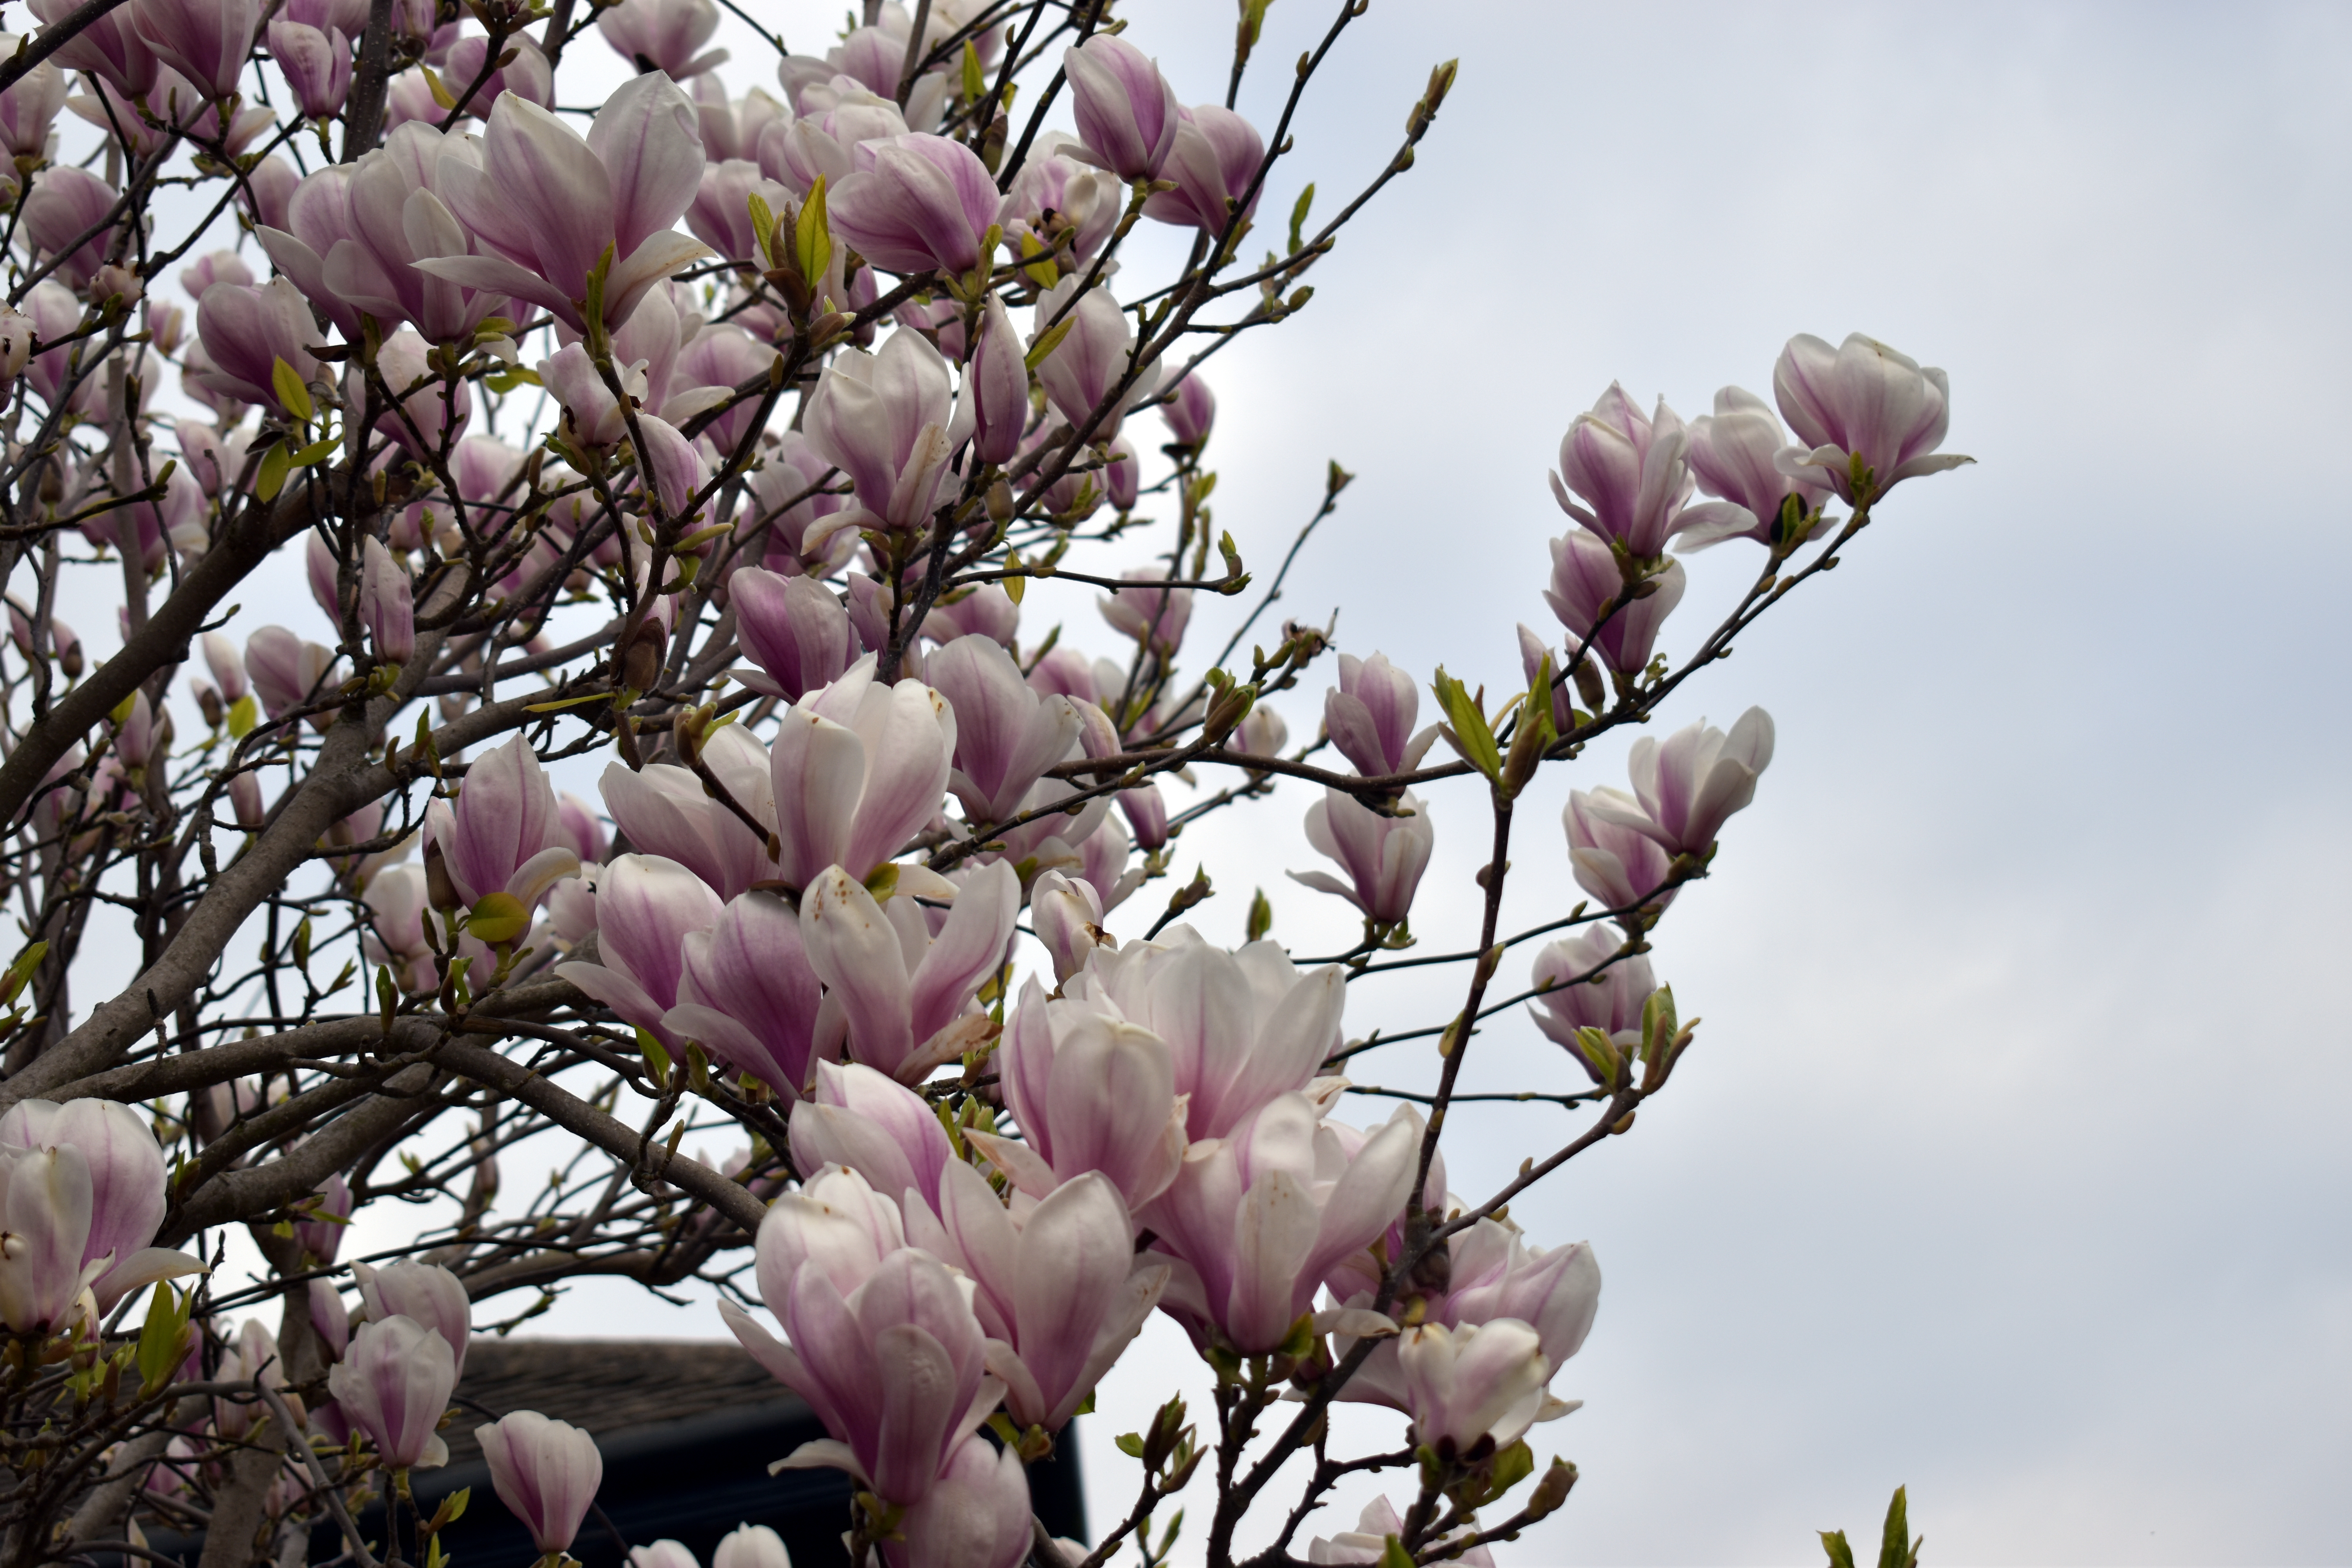
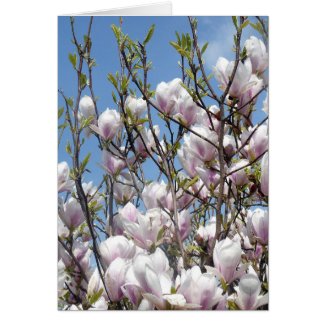
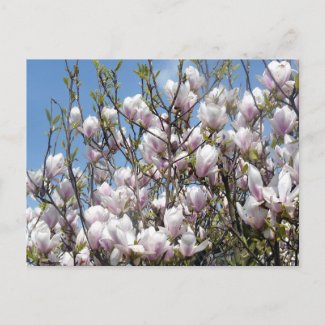
It is true that the flowers only last a few weeks or just over a month in Spring but they are so worth waiting for each year and for me signal that Spring is truly here and the poor weather is mostly behind us. It is a sign of hope, of joy and more than once has made my heart full of happiness. 

Nothing lifts my spirits quite like looking out of the window on a spring morning to see our beautiful Magnolia in full bloom its delicate yet robust flowers carried proudly on bare stems.

Magnolia generally flower on bare stems so you just see the beautiful flowers carried on bare branches. As the flowers fade the leaves come in, gorgeous soft green leaves that last all summer and well into autumn.

Winter gives us the bare branches that have their own architectural splendor especially when snow or frost lies on the branches. We drape the bare branches in festive lights which look very pretty. 

Magnolias are fascinating. They are an ancient tree primarily pollinated by beetles. Flying insects and bees may well visit now to take advantage of any pollen, but they are not what Magnolia originally sought to attract. 

However, do not worry you will not be overrun with beetles as you really do not often even see them.

Magnolias come in a wide variety of sizes and colours. They usually carry gorgeous tulip shaped flowers or in the case of Stellata, a star shaped flower.

Most are deciduous but there are a few that are evergreen though these will usually require a more sheltered place. If you want fragrance then there are Magnolias with scent. 


pink magnolia blossom bud


Colours vary from a light blush pink of Magnolia Soulangiana, the deep purple of Magnolia Susan and the delicate white fragrant stars of Magnolia Stellata or the yellow flower of Magnolia Acruminata "Yellow Bird". There are too many to mention here but you can easily find a Magnolia you like.

Magnolias can grow to be very large but we can also buy smaller varieties more suitable for smaller town gardens. It is really a case of checking the full grown size of the tree. 

This is not however a quick growing plant. We will need to have patience for it to grow over ten or even twenty years. However, it is still so very beautiful in its younger years, it is always worth introducing a Magnolia into a garden. 

I know we will be leaving this house and garden in the next few years so I have bought two smaller magnolia varieties which I am growing on in pots that will be ready to plant out in our new garden once we move. 

It may be that we do not get to see them full-grown but they will bring us so much pleasure as they grow from beautiful delicate buds to full gorgeous blooms with lovely green leaves. 


magnolia tree in full bloom - full of pink magnolia blossoms
  

Magnolia Soil Conditions And Watering

Magnolias love neutral to slightly acidic soil which is free draining. Our soil is slightly acidic but is heavy clay and our magnolia has grown very well. This is perhaps as our soil is very fertile which is also something Magnolias love. 

However, not everyone will have acidic soil so if you have alkaline soil and want to grow a Magnolia you are best to buy Magnolia Grandiflora or Magnolia Delavayi.

It is best to plant your Magnolia in a sunny spot. If it is sheltered as well that is a bonus as the flowers won't be blown off so much by the wind or so damaged by frost. 


pink magnolia blossoms on tree branches


A good rule of thumb is that the colder the area you live in choose a later flowering variety. That way you will be less troubled by frost and cold winds damaging the flowers or tree. Good varieties for cold areas are Magnolia Apollo or Magnolia Caerhays Surprise.

A grown magnolia takes care of itself with regards to water, in fact, you can do more harm than good watering it once it is well established. Naturally, its roots will go down to seek water so best to leave it alone. The last thing you want is for the roots to grow upwards seeking the water you are providing. 

However, in its first year it will need good deep watering and maybe also in its second year, you can give it deep drinks of water. It is always a good idea to mulch around a Magnolia of any age each year with bark.


Pruning A Magnolia

This plant has specific pruning needs but do not be worried by this. If you have planted it in an appropriate area for its size pruning will be minimal. 

Each year after flowering check it over for any broken or crossing branches and prune those out completely. 

Be careful not to prune too much as Magnolias can become stressed and cease to flower. A good rule is no more than a third of the plant is pruned each year. 

Sadly our naturally huge magnolia was planted by previous occupants really too close to the house so we have to prune it rather more than I would like to keep it smaller than its natural size. 

We are careful though to prune only up to a third each year and over the last 20 years have left at least one year in every 3 where we do not prune anything except broken or crossing branches. 

A smaller magnolia or one that has more space to grow naturally may well only need pruning once every few years. 

If you have a Magnolia only ever prune it after it has finished flowering and the green leaves are growing in. Mid-summer is a perfect time. If you prune in the autumn you will cut off many of the flower buds. 


Planting A New Magnolia.

it is a good idea to buy your Magnolia as a mature plant as you can afford. It will establish itself much better. However not too large a plant that it is difficult to plant easily. Also do your research as to variety, so that you know the fully grown tree will fit comfortably into the space available. 

The roots of a Magnolia are surprisingly shallow so you don't need to dig a really deep hole. Do however make it wide enough so there is no competing grass around the plant. 

The planting hole needs to be the same depth as the pot and we should be careful to treat it gently and not damage any roots. Firm in carefully and after watering deeply give it a good acidic mulch. Bark mulch is perfect for this purpose. 


We give Magnolia the best chance if we plant it in Spring or late Autumn. Patience is a virtue though as a young newly planted magnolia may need a couple of years before it flowers well. However, I promise you it is well worth the wait. 


Magnolia Flowers In The Home. 

Each Spring I pick a few whole blooms or take the fallen petals and place them in a large bowl of water. This makes a pretty display. The petals are quite thick and sturdy so are easy to handle and float in the water. sometimes I also place whole flowers in the water to float which is a beautiful display. 


magnolia petals in a dish for home decor


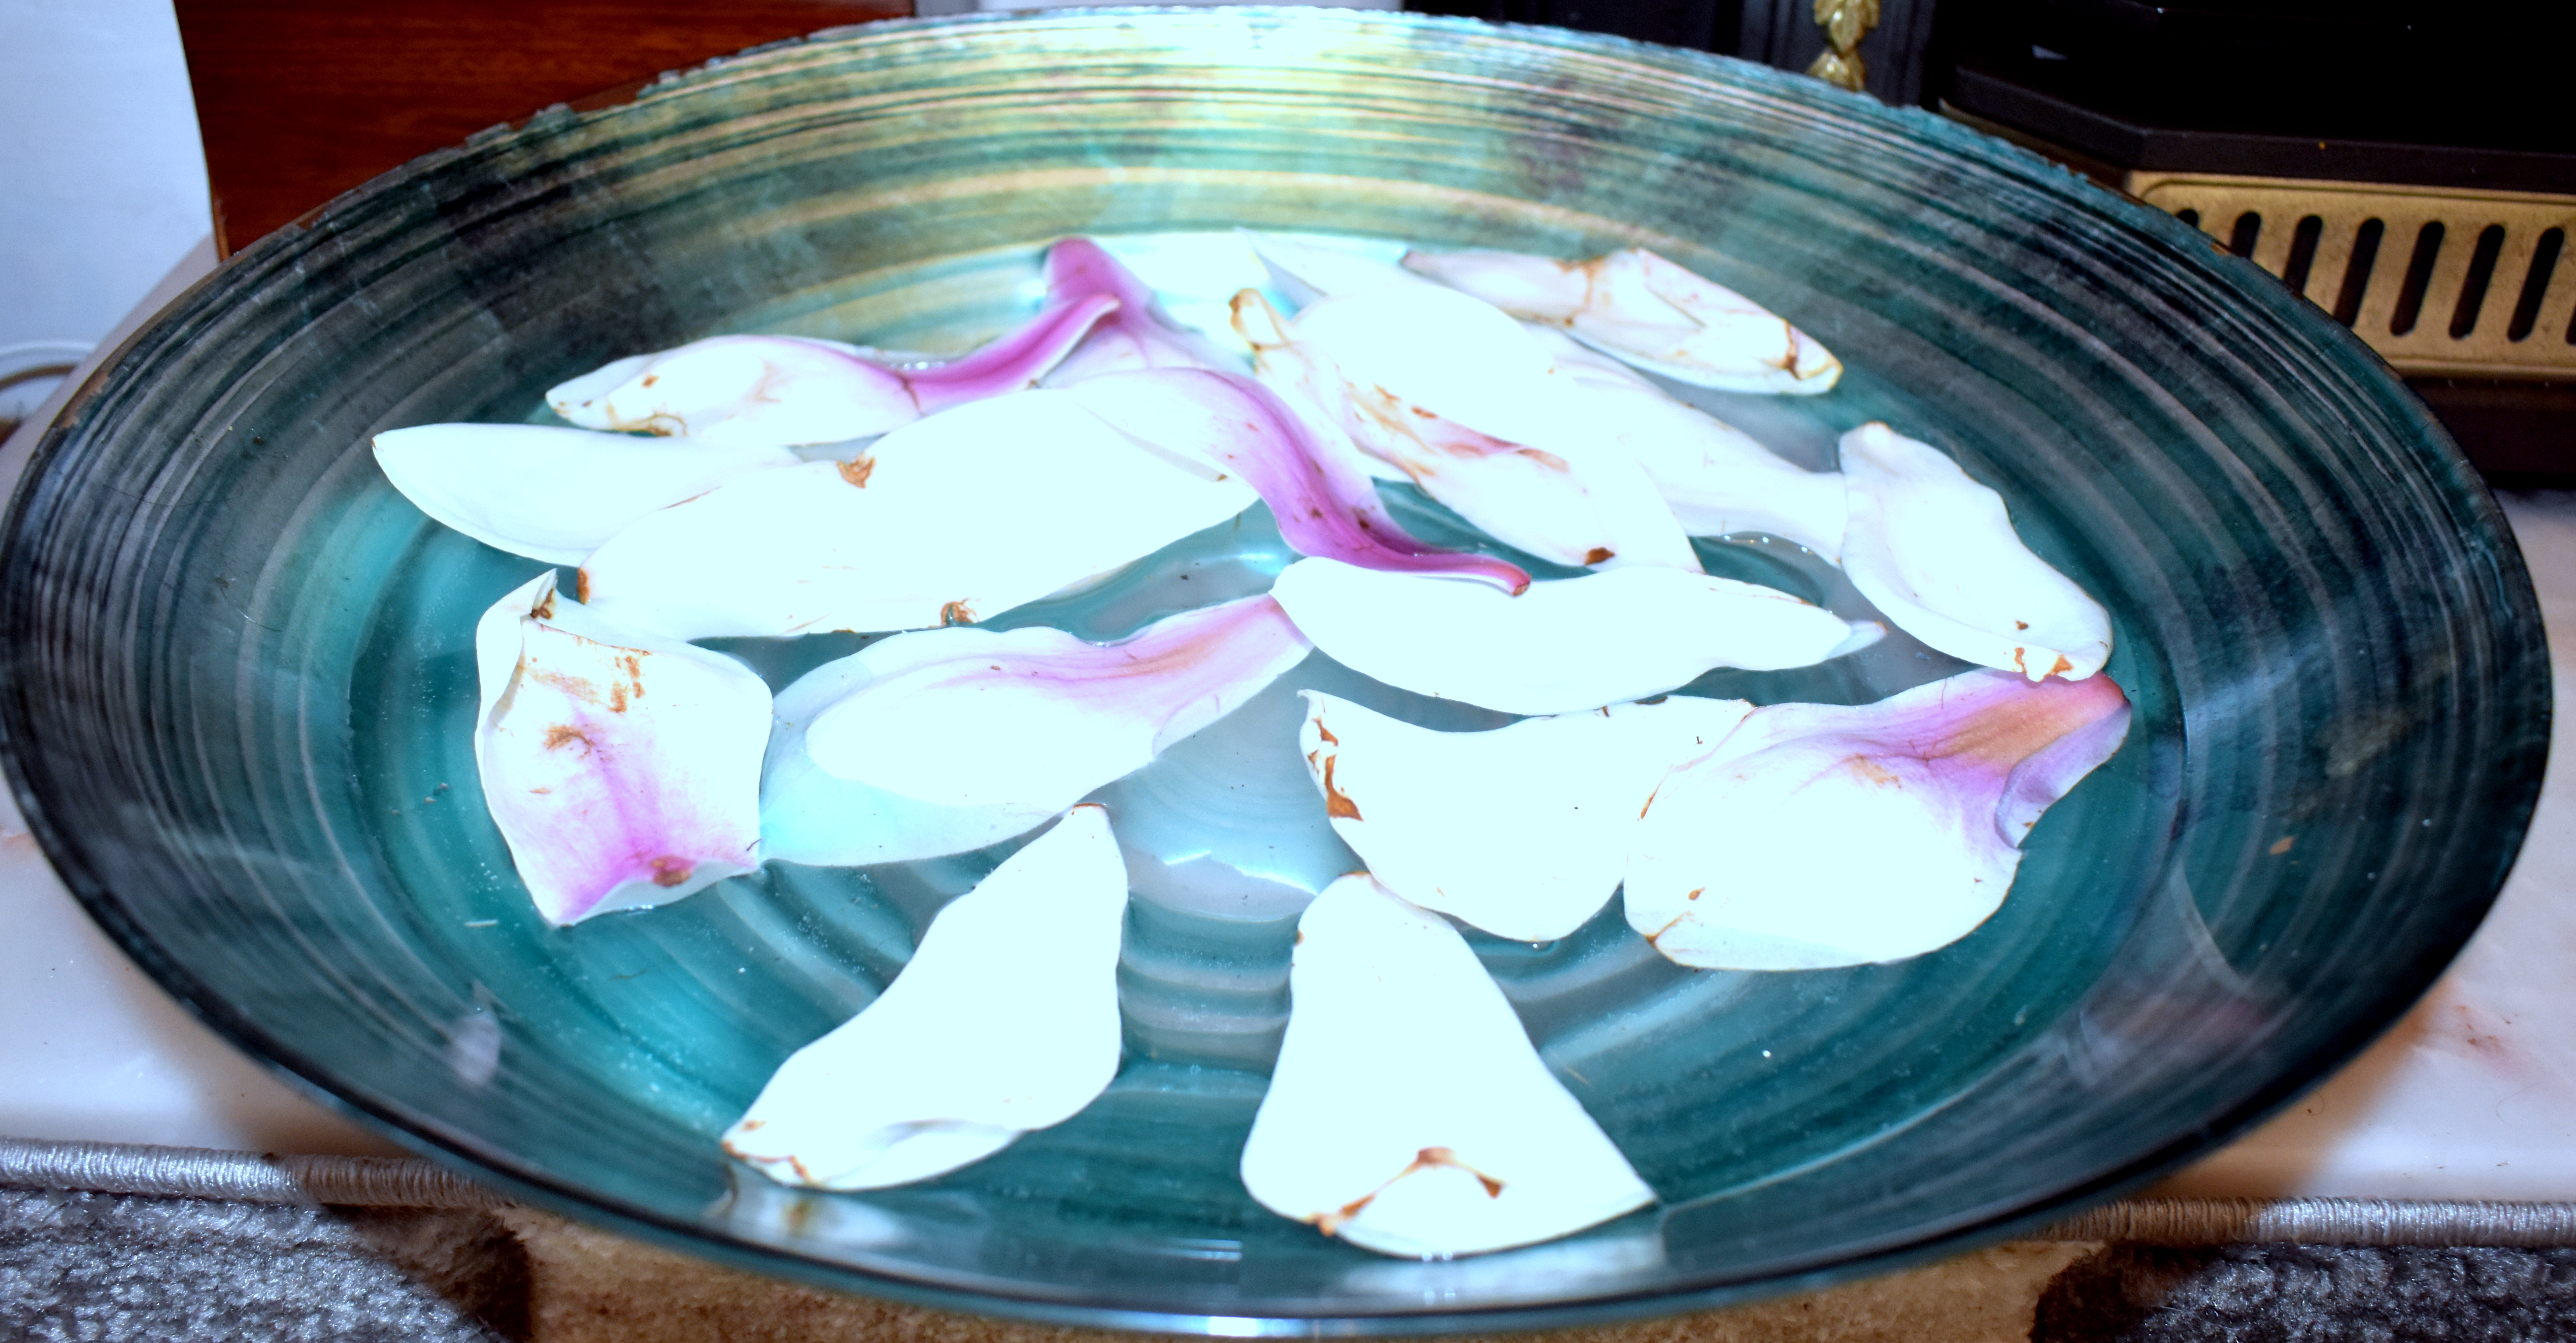
Simply replace the petals every few days or if they start to go brown to keep the display fresh.

It really is a gorgeous way of having Magnolia flowers inside our homes to enjoy all day and evening. 

Spring really is showtime for the Magnolia but it is a beautiful and majestic tree all year round. 

I absolutely love Magnolias, they always lift my spirits after winter and I look forward to seeing their beautiful and exquisite flowers each and every year. 


pink magnolia bloom bud
 

More Gardening Articles


Note: The author may receive a commission from purchases made using links found in this article. “As an Amazon Associate, Ebay (EPN) and/or Esty (Awin) Affiliate, I (we) earn from qualifying purchases.”


Tuesday, August 24, 2021

Reviewing The Benefits and Drawbacks Of A Manual Lawn Mower

manual lawn mower sitting on grass

This is my personal review of our manual lawnmower. Over the years we have had maybe five or six lawnmowers all electric, apart from one petrol powered one.

However, last year we bought a manual lawnmower. I am not really sure why we decided to do that, but I know we were fed up with our electric ones breaking down or cutting the cord accidentally and the whole hassle of fixing up extension leads inside the house as we have no outside power. The one petrol lawnmower we had was very heavy and noisy and really too big for us and our lawn and neither of us liked it.

The electric one had just given up, more expensive to fix than to buy another one and of course, it was at peak mowing time so we needed another one quickly.

Searching For A Lawn Mower

We started trawling Amazon for lawnmowers. We did not want a petrol mower as we do not have a massive amount of lawn and it would have been too much. We were fed up with electric lawnmowers and all the issues we had found with them. 

So we decided to hone in on manual lawnmowers. At first, I was not sure this was a good idea. My husband has health issues and I need to be careful with my back having a history of severe back problems. I wasn't sure we would be able to push it without added power.

I also wasn't sure if it would cut effectively. It felt in this age of technology, powered appliances and high specifications to be a step backward. Yet in a way also felt completely appropriate for our nature-friendly, wildlife garden and for the more power-saving, environmentally aware times we live in.

The manual lawnmower we found had an appealing price point and looked very sturdy and we were fed up replacing lawnmowers too often. So we bought a Bosch manual lawn mower. 


looking down on a manual lawn mower in use
Bosch Manual Lawn Mower


Our First Experience Of A Manual Lawn Mower.

When it arrived I was pleasantly surprised that it was sturdy looking but not too heavy.

Set up was easy with only the long handles to fix to the frame which even for us was easy. We never fitted the grassbox as we intended to cut the lawn often and have always found a grassbox to be an encumbrance. However, the grassbox is there if we ever need it. 

Hubby was the first to try to in the garden. We set the blades on high and he simply pushed it and it cut cleanly and efficiently.  After a few laps he stopped and said it was really easy to push and no more work than our previous electric mowers! In fact, he seemed to be rather enjoying it!

So then I tried it and to my joy, it was indeed easy to push and did not hurt my back that time or any other time I have mowed the lawn.

For some reason I have yet to pin down it always seems more fun to use than our powered ones ever did!  

So after using this manual lawnmower for nearly a year now we have found clear benefits and drawbacks as we see it from our personal experience.

pushing a manual lawn mower
Manual Lawn Mower Is Easy To Use


Benefits Of A Manual Lawnmower

It is easier to push than we expected and no more physical strength is required than with our previous powered mowers

Much quieter than our electric or petrol mowers and it has quite a soothing muted sound

There are no electricity costs and no petrol costs. So we can mow to our heart's content knowing we are not incurring any ongoing financial costs at all! This is great for us as power costs are due to rise by a significant amount, so any savings are good. 

Regarding the environment, there are no emissions from a manual lawn mower so this is all good for our planet.

There is the joy of knowing that never again will we cut through an electric cable!

With no trailing wires, no extension leads required, no outdoor power needed and no wires trailing from the house into the garden, it is an easy-use tool.  

Fewer components mean there is less to go wrong

The manual lawn mower is ready to go as soon as you are! We now have no worries that it won't start or that a component will suddenly go wrong.

manual lawn mower turned over to see the blade
Close Up Of Bosch Manual Lawnmower, blades, wheels and roller


Even with battery lawnmowers you have the battery life or recharging to concern yourself with, while with a totally manual machine none such concerns. 

Significantly better for wildlife. We don't disturb any more wildlife using our manual lawnmower than we would with our presence walking down the garden. 

The frogs, toads,  hedgehogs and birds -especially fledglings - have plenty of time to move away from it and there's no risk if any of them getting caught up by the blades.


baby robin perched on wooden rail
Fledgling Baby Robin 


To us, it does appear to give a better cleaner cut rather than tearing the grass.

It was less expensive than other powered mowers we have purchased in the past.

As it has a smaller footprint than most powered mowers it is easier to store and takes up less space. 

We can carry it easily as it is not too heavy, though it is sturdy. 

The manual lawnmower feels safer around wildlife, pets and children as there are no wires for them to get caught up in or trip over. There is no electricity to worry about and no fast-moving blades. We do take all the usual safety precautions of course. 

hedgehog in the grass
Hedgehog In Our Garden


Drawbacks Of A Manual Lawnmower

I do think that if you have a very large lawn a manual lawnmower will take more time to achieve the task. While it is perfectly possible to cut a large lawn with a manual lawn mower you will need to decide if you wish to do that. 

We find you need to cut a little more often than with a powered mower as it is much easier to cut shorter grass than longer grass with it.

If you attach the grassbox you may need to empty it more often, but I think if you cut more often this would not be an issue. 

Long grass will be more difficult to cut and certainly take more effort. Little and often is easier to cut than letting the grass grow longer which makes it harder to cut and then does require more physical power.

It is not so good at cutting wet grass as it does take more effort and seems to clog up more easily, but we rarely try to cut wet grass anyway even with our powered mowers, preferring to cut it when it is dry.

We will need to sharpen the blades every few years with our size lawn, but given the saving in electricity, this will not be a cost issue.   

Ours does have a roller but many manual mowers won't have rollers, so stripes will be more difficult to achieve. If this is important to you check that you can achieve stripes with it. If you want one with a roller function do check all the specifications. 

If you are considering a manual lawn mower do research properly what is important to you in a lawnmower. We bought a Bosch Manual Lawnmower and there are many more choices that are equally suitable. 

Here are a few available on Amazon to browse. Do consider what you need in a manual lawn mower and read all the specifications carefully.

American Lawn Mower Company 


Great States lawnmower


Happy With Our Manual Lawn Mower 

In summary, we are both really happy with our Bosch manual lawn mower. We have owned it for nearly a year now with no issues at all and are very content that we never need to worry about it breaking down or not starting. 

We don't worry about wires or electricity costs. We have no need to worry about safety with wildlife or pets or children getting caught up in the wires or blades. Obviously, the blades are sharp so you would take all the usual precautions regarding children and any type of machinery. 

We find it a gentle, easy, quiet way to mow our smallish lawn that is environmentally and wildlife-friendly and does not annoy us or the neighbours. 

manual lawn mower
Bosch Manual Lawnmower


More Product and Gardening Reviews


Note: The author may receive a commission from purchases made using links found in this article. “As an Amazon Associate, Ebay (EPN) and/or Esty (Awin) Affiliate, I (we) earn from qualifying purchases.”


Tuesday, March 2, 2021

Mantis Tiller Review


Mantis Tiller ReviewSpringtime and the warmer weather will be here soon.  The warm weather will finally bring us outside to start cleaning up the yard. It's a time to get the deck or patio in shape, clean up the lawn furniture and get ready for a beautiful summer.


Once the yard is cleaned up, you’ll want to get the flower beds and garden ready to plant.


This usually requires a lot of digging, bending, and raking. I can’t think of a better tool than the Mantis Tiller/Cultivator to help you with all of this work. Well, you’re still going to have to do some work, but this tool makes it so much easier.


I’ve had my Mantis Tiller for more than 10 years now, and it still runs like it’s brand new. I’ve used it year after year to till my garden, flower beds, and around shrubs.


 We planted a brand new garden for my daughter, and it easily tilled through the untouched sod. The handles just fold down and the Mantis fits in the trunk of my car or stores easily in my garage.


Mantis Tiller Features:


Easy fast start technology.

Comes with a handy carrying handle.

Weighs only 21 pounds so it's easy to move around.

A 9-inch wide pattern for digging and weeding.

Tines dig down 10-inches for cultivating.

Reverse the tines for weeding and only dig down 2-3-inches


What I like the best is that the tines pull off of the shaft with a simple pull of a cotter pin, and can be reversed for two different jobs. One position is for cultivating and will dig about 10 inches deep for planting your flowers or plants in your vegetable garden. The other position will only dig 3 to 4 inches deep, this is really handy for easy weeding around plants and shrubs.


My Tiller also has the border edger attachment with a wheel; this makes short work of edging around walkways and the driveway for that nice clean look.


A few years ago my outside drains were clogged with mud, and not draining, causing the rainwater to just settle around the foundation of my house. 
I decided to abandon the old drain on the side of the house that was clogged and replace it with a new PVC pipe to the street. This required me to dig a trench from the edge of the house to the street a total of about 30 feet.


So, short of digging this trench with a shovel and pick, I used my  Mantis Tiller to do the digging for me. I set the tines in cultivate position and shoveled the dirt out as I went along, this made the job so much easier.


You can also buy these attachments for the Mantis Tiller for complete lawn care:


Aerator - Will cut tiny slits in your lawn to allow nutrients and water to reach roots.

Border Edger -  Make nice clean edges around sidewalks and driveways.

Dethatcher - Will remove dead grass early in the spring to promote growth.

If you have a garden, and flower beds and like to keep a neat lawn, I highly recommend The Mantis Tiller Cultivator.


Find more Product Reviews here: ReviewThisProductReviews.com


Find more Gardening Tips here: ReviewThisGardening.com


Mantis 7920 2-Cycle Plus Tiller/CultivatorMantis 7920 2-Cycle Plus Tiller/CultivatorChech the Price


Note: The author may receive a commission from purchases made using links found in this article. “As an Amazon Associate, Ebay (EPN) and/or Esty (Awin) Affiliate, I (we) earn from qualifying purchases.”


Saturday, May 7, 2016

Backyard Garden Birds: Springtime Review

cardinal on white gazebo bird feeder
Backyard Bird World
With the arrival of Spring, many of us see charming birds return to our backyard gardens. So, it's time to review what these birds need to encourage them. Besides Robins, which nearly everyone of us sees as heralding Spring, there are many regional birds. Like the Eastern Bluebird. OK, that's one of my personal favorites. And I found an article on Easy Backyard Gardening that highlights these delightful little birds.

Great Photo Opportunities


The author of Best Wooden Birdhouses shares photos of the Eastern Bluebirds that occupy her own backyard garden. She has a wooden birdhouse for them that blends well with her wooden fence. A nice security features for the birds themselves.

Anytime you add bird-friendly features to your own backyard gardens you get great photo opportunities. I can attest to that. I have been able to get photos of baby Swifts in the nest, brilliant Northern Cardinals on my window feeder and Yellow Finches hanging out in my Cedar trees.

The simple addition of a good wooden birdhouse will give you plenty of photo opps. Just make sure to stop and see the birds.

Hummingbirds in Backyard Gardens


Most everyone can enjoy the return of the tiny hummingbird. With a few-well placed feeders (www.backyardbirdworld.com/bird-houses-feeders/care-of-hummingbird-feeders), these
hummingbirds at hummingbird feeder
Care of Hummingbird Feeders
birds will return to your backyard garden year after year. Hummingbird feeders take a little bit of care, but are definitely worth the time. Seeing the hovering little birds around your yard is a site worth enjoying.

So make sure to add feeders that will encourage hummingbirds to share your garden space with you. For those of you who enjoy planting flowers, add some bright red ones. That will also help hummingbirds be attracted to your backyard gardens. The beauty of the flowers will be enhanced by the presence of charming birds.

Get Your Backyard Garden Ready


Make sure to take a little time and get your own backyard garden ready to welcome back the springtime birds. Whether it's a new wooden birdhouse or a hummingbird feeder, the birds will appreciate it. And you will appreciate seeing the birds in your garden.


Posted by: BuckHawk
Buckhawk

About This Contributor

BuckHawk decribes herself as "Basically a lazy person who prefers the easy things in life." So that's what she writes about. Easy home decorating, easy recipes, easy entertaining. But, she is also a lover of animals, gardening and crafting. You'll find her writing all over the Web, but with Review This Reviews! she has the opportunity to write about all of her loves.


Note: The author may receive a commission from purchases made using links found in this article. “As an Amazon Associate, Ebay (EPN) and/or Esty (Awin) Affiliate, I (we) earn from qualifying purchases.”


Friday, May 8, 2015

I Love My Garden Kneeler

Don't Wait Like I Did to Get Yourself a Garden Kneeler

My Garden Kneeler, photo © B. Radisavljevic
I love gardening. I like taking a neglected flower bed and bringing it to life with color. That's why I decided to redo the flower beds at the house I inherited from my mother. This Garden Kneeler has made it possible for me to work on this transformation more safely and with less pain than I was able to before I bought it.
Let's face it. If you are going to pull weeds and plant flowers, you will be either bending over or kneeling. Kneeling is more efficient. It never used to be a problem for me, but I'm seventy now. When I kneel, it hurts my knees. 
At Work on My Garden Kneeler, photo © B. Radisavljevic
I'm resting my arm on the kneeler as I work on this bull thistle plant that had babies in my herb garden.

The Step 2 Garden Kneeler, however, has a foam pad that keeps my knees from hard surfaces like the ground and the concrete sidewalk.
Notice the Foam Pad and Handles on My Garden Kneeler, photo © B. Radisavljevic
I was planting and weeding in this bed and wanted you to see the kneeler without me inside it. I need to get that bucket with the caddy.

Another problem one has at my age is getting back up from that kneeling position. The body just doesn't want to move up. It needs some help. The handles on this kneeler are sturdy enough to support me when I start to rise. This makes a lot of difference in how much I enjoy my gardening.
Before I bought the Step 2 Garden Kneeler, I tried two other brands available in a local store. One was a folding kneeler, but it wasn't very sturdy. I have a neck problem that makes falls especially dangerous for me, so I didn't want to take chances on something flimsy just to save a few dollars. Another brand I tried just wasn't roomy enough to get in and out of comfortably.
The Step 2 Garden Kneeler has made me look forward to my work in the garden again. It's light enough to easily move where I need it. Although it had a handy hole in the top that acts as a handle when it's standing up, I normally transport it upside down as the kneeler. It makes cleanup easier, since I can fit a wastebasket for weeds and a small box with gardening utensils on the pad, pick up the kneeler by the handles, and carry it all to the garage. That saves me some extra trips.
Sitting on My Garden Kneeler, photo © B. Radisavljevic
Taking a rest on my overturned kneeler in bench mode in front of the rosemary, black sage, and butterfly bush

One great feature I didn't mention yet is that if you are tired and need to get off your knees and rest for a bit, you can turn the kneeler over and use it as a bench. It was sturdy enough to hold my husband, who weighs close to 260 pounds.
I really love this kneeler. I don't know how I managed without it all these years. It would have made my life more comfortable even when I was younger. After all, no one enjoys having one's knees on a hard surface.
I tried to get along with just a cheap green pad before, but it was of poor quality in comparison to this one, and it wasn't as thick. The pad on this kneeler rests on a thick hard surface that won't let you feel the rocks and thorns you can feel through the stand-alone foam pads. And I still had to get up and down to and from ground level with no help. This product solves all the mobility problems and saves my knees. I highly recommend this Garden Kneeler to anyone who spends much time working on the ground.

OK. I'll Admit it. I'm Showing Off

garden kneeler beside a flower bed

This is my garden kneeler in bench form so you can see the details without me covering them up. But the real reason I'm displaying it is to show off. It's sitting in front of a flower bed I completely transformed, as I did the other flower beds in the front yard of this home in Paso Robles. This used to be a bunch of nothing with some scattered gazanias, mostly close to the house, between two juniper bushes.
I left the gazanias at the very back, where they continue to spread. I planted one calendula and all the others in this bed are its babies. If you have a good eye, you can see the opal basil next to the pot of catmint in bloom. Behind the catmint is some African Blue Basil in bloom with a tall borage in bloom behind it. I also added some petunias, mums, and pansies for seasonal color. There is a large hyssop behind the carnations that has finished blooming, leaving only its rust-colored spikes. What you can't see are the chocolate cosmos and the monarda which are hidden by the borage.
My garden kneeler has made it possible to do this job faster and in more comfort than I ever could have managed without it. I use it most while pulling the weeds and planting, but at least I can sit and rest when I'm tired without leaving the yard.

Get Your Garden Kneeler Now to Save Your Knees


While You're Already Shopping, Why Not Add These?

The kneeler makes gardening more comfortable, but nothing is more frustrating than having to get up and go back to the shed or garage to get a tool you forgot to bring with you. The bucket caddy, which attaches to a five-gallon bucket (not included) will help you organize all that stuff and you can sit it beside your kneeler within reach. As you can see in one of my photos above, I need one.
Since I write a lot about gardening, I also like to keep my digital camera with me to photograph interesting things I find as I work. I'm sure one of the pockets would accommodate that, and my cell phone would fit in another.
This is on my wish list, since I'm currently just throwing my tools in a small cardboard box and using a small plastic waste basket to throw the weeds in as I work. I would prefer to keep my tools in a more organized fashion. This caddy even has a special place for seed packets, which don't fare very well tossed in the box with my tools.
The garden cart I have is slightly different than the one pictured here. This is the closest I could find to it. Mine is green and does not have telescoping handles as this one does. What they have in common is their shape and their maneuverability. Mine is light and easy to move, even when full of dirt or compost. I can stick packages of fertilizers on top of the dirt I'm moving so they get to the garden with me. The bucket caddy could also ride along on top.
Together, all these items will supplement your kneeler to make your gardening life easier. If you are in need of hand tools for your gardening activities, you might want to look at the Japanese Sickle my friend reviewed elsewhere on this site.


Note: The author may receive a commission from purchases made using links found in this article. “As an Amazon Associate, Ebay (EPN) and/or Esty (Awin) Affiliate, I (we) earn from qualifying purchases.”


Tuesday, May 5, 2015

Magic in the Air from Spring to Fall

hummingbird
Photo from Pixabay
While most birds do not have any difficulty finding food for themselves in the spring, summer and fall, there is one exception to that rule.  Our everyday (I won’t ever call them ordinary) birds, the ones that frequent our gardens throughout the year, know very well how to forage for seeds, nuts and bugs.  However there is a bird that frequents us in the nicer months and I’m sure that everyone would love to have them in their gardens especially through the summer months.  Right now they are on their way to us, migrating thousands of miles in order to make it to our backyards.  They are so little and so pretty, about the size of a mouse, only much more colourful and faster than a speeding bullet.

If you look at the migratory maps, you can see where these lovelies have been spotted already and watch their quickening arrivals on our shores.  Every year there is a Hummingbird Migration Map put out, so that you can record the first sightings of these migratory birds.  This image is the map for 2015.  http://www.hummingbirds.net/map.html

As you can see, they travel a long distance to make it to us and so when they arrive and all along their journey northwards, they love to stop at red feeders that are filled with sugar water, so that they can have the energy to continue on their way. 

Scientists believe that the Ruby Throated Hummingbirds can spot the red colored feeders from miles away and will make a bee line for those feeders.  Being such tiny creatures, they need lots of energy in a food source that is easy for them to metabolize.   Sugar water is just the thing for them.  Put the feeders out in the spring time and watch what happens. 

You have choices when it comes to feeders, the one I have  showcased for you here, is probably the top  model of feeders that catch the eyes of the “Hummers”.  

You also want a feeder that is easy to clean.  Sugar water needs to be replaced and replenished daily.  Start with a feeder with only a little bit of sugar water in it.  Once you know that you have Hummers coming to visit the feeder, increase the amount of sugar water in the reservoir.  Put the feeder somewhere where the red is visible from the skies, but also close to some bushes so that the little Hummers can rest in safety.  If you are really lucky, they may even choose to nest in the available shrubbery and you will be witness to the birth of the next generation of these beauties.

If you have time to watch, and see what all the excitement is about these birds, then check out this YouTube overview and you will begin to understand why people are so fascinated with these little critters.The Wonderful World of Hummers.

Once you fall in love with these little Mini-Mites, you will understand why so many people put out these hummingbird feeders.  Just to have a chance to see them up close and personal, is a treasure of nature that is unparalleled.

Keep those feeders full of nectar and the hummers will visit you until they start their trek back to the warmer climates....they need that energy.

They will also come back next year and delight you all over again.

Nectar recipe:  1 cup of sugar (granulated)
                         3 cups of water.
Boil water and add sugar, stirring mixture until the sugar is liquid.  That's all there's to it and you don't need to add any red fool coloring.....it's better for them without it.


Note: The author may receive a commission from purchases made using links found in this article. “As an Amazon Associate, Ebay (EPN) and/or Esty (Awin) Affiliate, I (we) earn from qualifying purchases.”


Most Recent Reviews on Review This Reviews


Search for Reviews by Subject, Author or Title

The Review This Reviews Contributors


SylvestermouseSylvestermouseDawn Rae BDawn Rae BMbgPhotoMbgPhotoBrite-IdeasBrite-IdeasWednesday ElfWednesday ElfOlivia MorrisOlivia MorrisTreasures by BrendaTreasures by BrendaThe Savvy AgeThe Savvy AgeMargaret SchindelMargaret SchindelRaintree AnnieRaintree AnnieLou16Lou16Sam MonacoSam MonacoTracey BoyerTracey BoyerRenaissance WomanRenaissance WomanBarbRadBarbRadBev OwensBev OwensBuckHawkBuckHawkDecorating for EventsDecorating for EventsHeather426Heather426Coletta TeskeColetta TeskeMissMerFaeryMissMerFaeryMickie_GMickie_G


Review This Reviews is Dedicated to the Memory of Our Beloved Friend and Fellow Contributor

Susan DeppnerSusan Deppner

We may be apart, but
You Are Not Forgotten


“As an Amazon Associate, Ebay (EPN) and or Etsy (Awin) Affiliate, I (we) earn from purchases.” Disclosure Statement

X