


If I was to buy a lemon squeezer today, however I would buy a different one, read on and find out why I absolutely love, love, love my lemon juicer, but would still buy a different one if it needing replacing!
I have a hand held aluminum lemon squeezer style of citrus press that I use for my lemon juice and what's not to like? This is what it does -
- It produces lots of lemon juice
- It is really easy to use
- The bright yellow really brightens up your day when you get it out of the drawer!
Really it does everything it needs to do and it does it really well so why would I not say that it's the best lemon juicer around anymore?
Well I was browsing Amazon as you do and I came across a citrus squeezer with that little banner over it - Amazon's Choice - so I looked at it and wondered where it had been a few years ago because I would definitely have brought it instead.
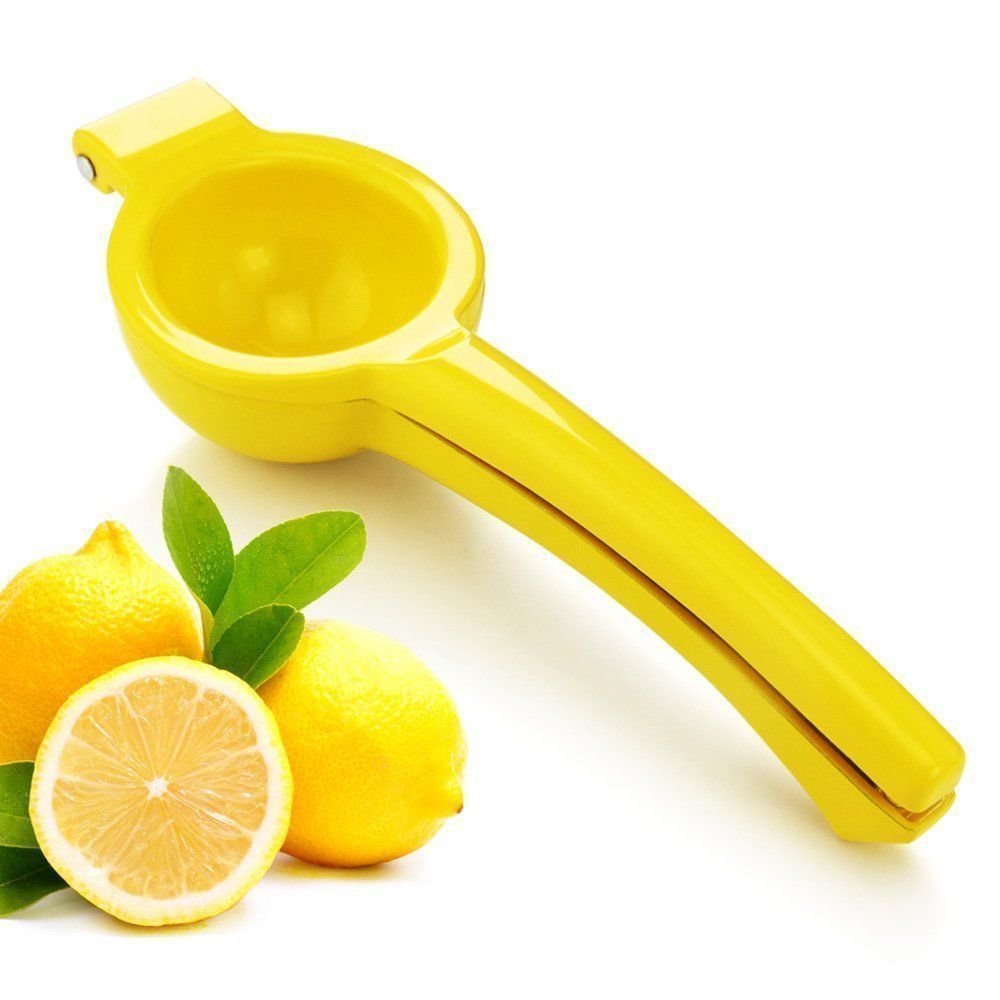
Let's look at the two of them and see if you can guess why (mine is on the left)
Enameled Aluminum Lemon Squeezer
Easy to Use
Gets out every drop of juice
Made with heavy duty aluminium
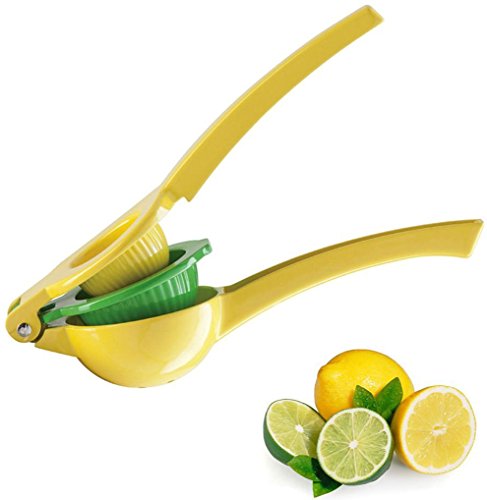
Cleans in no time!Metal Lemon Lime Squeezer
Easy to Use
Gets out every drop of juice
Made with heavy duty aluminium
Cleans in no time!
Easy to Use
Gets out every drop of juice
Made with heavy duty aluminium
Cleans in no time!Metal Lemon Lime Squeezer
Easy to Use
Gets out every drop of juice
Made with heavy duty aluminium
Cleans in no time!
Can you spot the difference? It's the lime insert!
Fresh Lemon Juice is the BEST Lemon Juice!
Now when I was younger no one I knew used fresh lemon juice they used a bottle of lemon juice that was kept in the fridge once opened and that was what I thought lemon juice was until I moved to New Zealand.
In New Zealand back then most people seemed to have a lemon tree in their gardens (this isn't the case as much any more unfortunately) so fresh lemons were abundant and the idea of buying lemons was almost unheard of! When my husband and I brought our first home we had the requisite lemon tree and I realized that I was never going to go back to using 'fake' lemon juice again!
Unfortunately these days I have to buy my lemons, but I am planning on planting my own tree again soon!
Why Use a Lemon Squeezer?
When I squeezed my first lemon by hand I used one of the type of lemon squeezers pictured below, what about you?

The problem with these is that the action required is no good for my wrists (I have Rheumatoid Arthritis so twisting motions aren't the easiest for me), plus it takes more strength then the hand held squeezer I now use. I also used to always find that the pips would manage to get into my cup/bowl every single time!
Now if you don't fancy the old fashioned lemon squeezer featured you could try an electric juicer. I do have one and it is awesome, but if I want to squeeze some lemon or lime juice for a recipe or drink I find it's too much trouble. To be honest making a lemon and honey drink or squeezing some lemons to add into my tea or for cooking (like this Tex Mex Lasagne) I'm not going to use my electric juicer. I'm lazy and as great as the juicer is I'm not cleaning it for a little lemon juice!
The heavy duty hand held lemon squeezer is awesome - it squeezes the lemons or limes with little effort on your part, no pips get into the cup/bowl and you can wash it up in no time - perfect!
Why a Metal Lemon Squeezer?
I choose a metal lemon squeezer because I really wasn't sure that a plastic one would last for long. The one I have is an enamel coated heavy duty aluminium lemon squeezer and I've had it for years. It still looks brand new even though I couldn't begin to calculate how often it's been used.
My lemon squeezer was also available in two other sizes -

The smallest one is for limes, the yellow for lemons (which is the one I chose) and the orange for oranges. My husband was going to buy the green one for me as well, but I said no.
I have actually used the lemon one for limes as well because basically I didn't want two gadgets that did the same thing cluttering up my kitchen drawer. If the other hand held juicer had been available with the lime insert in it I would have purchased it in a heart beat!
So as much as I love mine, it's not the one for you - the one I recommend for you has a lime insert with it
So Which Do You Think is the Best Hand Held Lemon Juicer
I recommend the hand held metal lemon/lime squeezer myself, but I do still love my own lemon squeezer and I have no problems squeezing limes with it!
Note: The author may receive a commission from purchases made using links found in this article. “As an Amazon Associate, Ebay (EPN) and/or Esty (Awin) Affiliate, I (we) earn from qualifying purchases.”
FOLLOW US ON:


 Turn Steaks Only ONCE
 Cover grill again and cook an additional 9 minutes for medium rare or 12 minutes for medium well.
  Remove steaks from the grill and wrap in aluminum foil. Allow to set for 5 minutes before you eat.


 Cheeseburger")


