Showing posts with label Gardening. Show all posts

Monday, September 21, 2020

Reviewing Baker Creek Seeds: Strawberry Watermelon

 I am excited to have been able to order a packet of Watermelon seeds from Baker Creek Heirloom Seeds. I am very excited about this coming gardening season. This Watermelon variety is the "Strawberry". It is the most delicious watermelon I've ever tasted. 


For the sake of transparency, I have to share that I am not currently gardening. I am in a metro-area apartment. I have grown some fantastic tomatoes on my southwest facing balcony. But I barely remember my last real garden. I own some land in a rural area. While I don't have a garden there yet, I did experiment this summer and was surprised to grow some monster zucchini squash and some very healthy looking cabbage. That experiment made me even more anxious to plant more edible plants this spring.

However, with the current craziness of 2020, including difficulty with the supply chain, I thought I'd buy my garden seeds now. In order to ensure I have seeds when it is time to start them.  This watermelon is one of the plants I am most excited to try to grow.

Watermelon - Strawberry 

I had been hearing, from serious gardeners, that they were extremely pleased about their Strawberry Watermelons. They were happy about the plants, the size of the melons, and the wonderful taste. At that same time, I had the opportunity to taste some of this melon. It was delicious! So flavorful. I love watermelon and eat some about 5 days a week during season. Some from the grocery and some from local farms. But none were as flavorful as the Strawberry Watermelons.  There is a bit of a berry flavor - slightly different than a typical watermelon. But it is not overpowering. And the traditional melon flavor is present.

More about this variety:

  • Name: Citrullus lanatus
  • 85 days
  • sugary sweet pink flesh
  • ripens to within a 1/2 inch of the rind
  • oblong melon, 15-25 lbs.


About Baker Creek Heirloom Seeds


Baker Creek specializes in heirloom seeds.  It is highly recommended by avid gardeners, especially those who like to save their own seeds for future gardens. You can find Baker Creek seeds at their website: rareseeds.com

They carry familiar plants and varieties as well as plants and varieties you have likely never heard of. I have placed two orders and have received both orders without problems and in a timely fashion. 

The headquarters is a place that during normal times (as opposed to during times of quarantines and social distancing) can be visited. Watch for announcements for the re-opening of their village, store, and restaurant near Mansfield, MO. 

In the meantime, you can browse their selections online or request a printed catalog. 

In addition to their vegetable seeds, they offer some gorgeous flowers. I always try to plant some flowers for the pollinators. This year I can't wait to plant these gorgeous Zinnia's along with several varieties of sunflowers.

I have never seen these types of Zinnias, have you? I love "regular" zinnias. I can only imagine how amazing these will be in my "garden". 


Note: The author may receive a commission from purchases made using links found in this article. “As an Amazon Associate, Ebay (EPN) and/or Esty (Awin) Affiliate, I (we) earn from qualifying purchases.”


Friday, August 21, 2020

About Raintree Annie On Review This Reviews

About Raintree Annie On Review This Reviews  


Raintree Annie Hi, my writing name is Raintree Annie and I am otherwise known as Jasmine Ann Marie. In life and online I get called any combination of those names! I am really happy to be a part of the Review This Reviews writing group. I started writing many years ago and always love it most when I am part of a creative and enthusiastic writing family. 

I like to write about what I know and experience. From a young age I developed an interest in nature and loved animals, birds and plants. I was given my own little patch of garden by my parents who encouraged me in these interests. 

My interests merge together really. My love of creating a beautiful garden that has wildlife at its heart, has become a passion and I find a great sense of calm, peace and happiness from learning about and nurturing our garden.

I am never happier than when I am immersed in nature and wildlife. I also like to have plants in the house to carry the natural world through into our home. 

I love taking photographs of natural environments, wildlife, flowers, plants and landscapes. I spend hours in the garden and whenever we can my husband and I go out to visit the countryside, beaches, woods and nature reserves so we can exercise and spend time together relaxing in nature. I enjoy making unique cards and gifts from those photographs. 

I gained a significant back issue over a decade ago and now take good care of my back and keep as fit and healthy as I can in order to continue to care for our garden and be out and about in nature. I always take my back into account when I am gardening and choosing products to assist me.


Articles By Raintree Annie


Joy of First Snowdrops
When I am not in our garden, the countryside or a nature reserve you can find me online at these places! 

Diary Of A Wild Country Garden, my blog where I write about my reflections of everyday life gardening and looking after wildlife in our wild country garden.


Life With My Pet Back blog covers reflections on life with back pain and the journey to recovery. 


Raintree Earth Designs is my blog where I share my love of photography with cards and gifts made from my photographs of wildlife and countryside with the stories behind them from my Raintree Earth Designs Zazzle Store. 


Essential Wildlife Gardening Gifts where I share practical, fun and beautiful gardening items which make lovely gifts for the gardener.


Note: The author may receive a commission from purchases made using links found in this article. “As an Amazon Associate, Ebay (EPN) and/or Esty (Awin) Affiliate, I (we) earn from qualifying purchases.”


Thursday, August 6, 2020

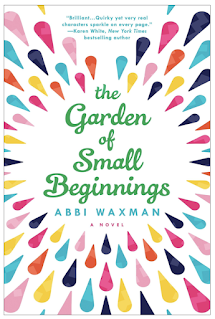
The Garden of Small Beginnings - Book Review

multi-colored paint splashes on white background
Check Here for Lowest Price
Let's start with the harvest here.  Lest you think this is going to be a book about a widow who has had a breakdown after her husband's untimely and tragic death, and who is still struggling with that loss, let me assure you that this is a book where the reader reaps joy.  I found The Garden of Small Beginnings, by Abbi Waxman, to be a brilliantly written, and delightfully humorous, take on how we get through the gritty times in life.

It's not often that a book begins with whale genitalia.  This is when you know this is not going to be your grandmother's gardening guide.  No... not at all.  This is where the irreverent humor and quirky cast of characters begin to emerge.  

You see, Lilian Girvan is a textbook illustrator.  And sometimes, though perhaps not every day, you are called upon to draw things like a whale's, ahem, penis.  Am I allowed to use the word penis in a book review?  This is surely a first for this reviewer.  

Anyway, getting back to Lilian.  On the day of her infamous illustrating assignment, she is called up to meet with her boss.  Lilian has been assigned a plum project designing the illustrations for a series of vegetable guides.  In order to garner favor with an important client, Lilian has been volunteered to take a Saturday morning gardening class at the Los Angeles Botanical Garden.  This is where the plot (literally) thickens.

Over the course of six weeks, lives will be changed in beautiful and unexpected ways by an eclectic crew of aspiring gardeners.  Though this is not a gardening book, per se, it is a book about how we grow from loss, and grief, and other heartbreaks into who we will become in the next season of life.

I loved this book's characters and witty banter.  Lilian's young children are sheer delight.  This is my favorite kind of read: so well-written, clever, funny, and full of heart.  Highly recommended.


Note: The author may receive a commission from purchases made using links found in this article. “As an Amazon Associate, Ebay (EPN) and/or Esty (Awin) Affiliate, I (we) earn from qualifying purchases.”


Wednesday, August 5, 2020

Totally Natural Healthy Ways to Increase Your Garden's Growth - A Garden Review

growing cucumbers

It's mid-summer and everyone who has a garden is starting to reap the rewards of their spring labor.  Now I must confess, I did not do a whole lot of back breaking labor.  I live on the 18th floor of an apartment building and digging in the ground is not an option for me.  So I have three Rubbermaid Tubs on my balcony.  These are my "garden" and that is my space to grow my tomatoes and cucumbers.  

tomatoes on the vine


Don't go feeling sorry for me, I like it this way.  I gave up my "home garden" a few years ago, but missed my fresh tomatoes so much, I had to find a way to grow some higher up.  

When we first moved into the apartment, I tried to grow tomatoes in smaller pots (10 inch diameter), I would water, feed (with fertilizer) and talk to them daily.  I was somewhat successful that first year.  My husband would eat his balcony fresh tomato and say, "that was a lot of work for this tomato, you can buy them cheaper at the farmer's markets now that they are in season!"  

He was right, the first year, even though I did my best at caring for these plants, they did not produce anything that would have made a gardener's heart go pitter-patter!  Our garden produced a few tomatoes that we did enjoy, but overall we were disappointed.

Fast Forward to today:  My balcony garden has been expanded (no more little pots) and I have found the secret (I think it's the difference between the first year and now) to keeping my garden happy, healthy and producing more fruits than ever before.  

growing tomatoes on the balcony

So do you want to Know What Made the Difference?

As a gardener (we share what works and what doesn't work) I will tell you!  I have NOT used one ounce, tablespoon, teaspoon or any other measuring device, of fertilizer this year!  Yet, I have already picked, eaten and enjoyed at least 10 cucumbers since the beginning of July, and countless cherry tomatoes!

As you can see in the picture above and the ones below, there is no lack of little tomatoes for us to enjoy in the next little while.


Our balcony garden has been prolific in producing these cherry tomatoes for our enjoyment.  I attribute it all to the help I have procured for my containers.  The "help" is totally organic, pesticide free, natural and abundant.

What is this help that I keep mentioning? 

Red Wigglers (they get all the credit)  have made all the difference in my containers this year.  

As I mentioned earlier, I have used NO chemical fertilizers in my containers this year.  A dear friend of mine (Cheri Kochir Salt (owner and operator of  Mobius8Organics.) and I have been trying our best to minimize our carbon footprint on the earth.  Many people are interested in doing this and have no idea where to start.  If you are a gardener, you could start right here.
 
In many discussions with her, I found that red wigglers can make all the difference in the world to your gardens (whether in the ground proper or in a container). Helping the earth to renew, means (for me anyways) not adding any extra chemicals and getting rid of organic wastes, without adding to landfills.  

When you have red wigglers in your containers you can do both of these things.  Red Wigglers love to eat all your organic waste (peels, cores, egg shells, coffee grounds, tea bags and even your paper products).  Yes you should read that list again (and it's just a small list, there is much more they could eat if you have an outdoor garden and compost heap.)
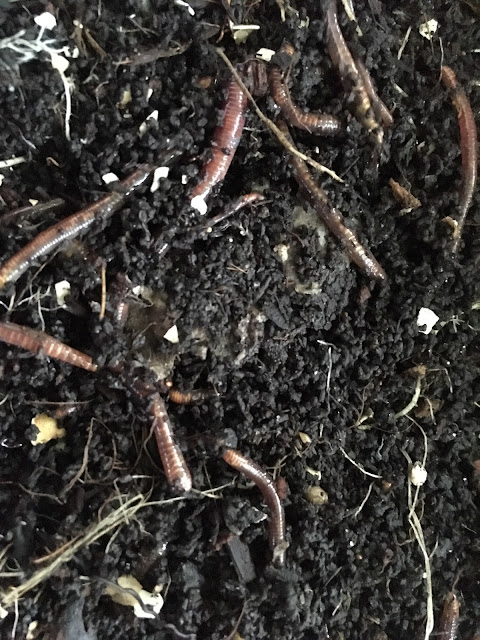
red wigglers
These are just a few of my "Red Wiggler" family, who are enjoying their home on my balcony!  I have uncovered them for you to see how these guys and gals (actually worms are both male and female scientifically known as hermaphrodites) work.  Their home usually looks more like this picture below:
plants in a cardboard box

Red Wigglers and earthworms in general do not like the light!  They work best in a dark, damp environment.  So, I make sure that they are happy by covering the soil surface with damp cardboard or my weekly newsprint flyers!  You can also see coffee filters with the coffee grounds still in them on the surface of the soil.  My worms, like myself,  seem to love coffee.......

Now the only absolute must that you have to maintain is a certain level of moisture in your containers.  You cannot let them dry out, or your earthworms will dehydrate and die as well.  So far in my experimentation this year, that has not been a problem.  I water regularly and sometimes the rain helps too.  My worms seem to be happy and multiplying without any further help from me.  

What do these worms do that makes the garden grow so well?

Earthworms and red wigglers in particular are prolific at eating  organic waste.  When they eat this waste, the worms then expel the waste(worm poop) and if your garden is in a container, this waste becomes part of the soil composition. Vermicomposting is the "proper name" for working with worms in the garden.  For you homesteaders who are looking for a cottage industry growing  worms and selling Red Wigglers for both fishermen and farmers is a growing industry (no pun intended).  Once you have your vermiculture set up, there is nothing more for you to do!  

The worms will provide you with deep rich soil, full of nutrients and depending on how you set yourself up, you may even have worm compost tea to feed your plants.  This worm tea (my version) is the best fertilizer you could ever want.  It's rich in nutrients, has no odor and your plants will thrive. This worm compost tea won't burn the roots of your plants either.  I have a set up on my balcony that allows me to enjoy collecting this worm tea and if you are interested you can do this too. 
compost tea

Behind the picture of my worm tea, you can see my garden tower.  It has 50 different pockets to plant and a nice tower in the center to add organic waste without disturbing your plants.  There is a drawer at the bottom which collects all the extra water and worm tea (again my version).  The castings remain in the tower for your plants to thrive on.  You can watch a video here and see the difference between this and other vertical gardening options: Garden Tower 2 Project

There will be no need for Chemical fertilizers!  Chemical fertilizers, if they are incorrectly mixed  can sometimes do more harm than good.  Save yourself the time and trouble by using an Earth Friendly Natural Way to fertilize your plants. I know that this has made the difference between my first attempts at gardening 18 stories up and this year's attempt!  We've had a great year so far and I'm sure it will continue to prosper and grow well into the fall.

If you want to know more about Vermiculture or Worm Farming there are several really good websites and YouTube Videos that you can watch. 
Basic Vermicomposting or 
How to Compost are just two of the really good sites to learn from. 

If you want to get started you will need a good bin.  I use these ones for both growing my garden and I will use these for my worm farm too! 


My own experiment will continue in the fall as I try to bring my worms indoors so they won't freeze over the winter months.  I will let you know how it goes come spring of 2021.
 
Stay tuned there is more good sound ecological information coming up!


***All of the pictures in this Post are from my balcony garden, taken August 4, 2020.  


Note: The author may receive a commission from purchases made using links found in this article. “As an Amazon Associate, Ebay (EPN) and/or Esty (Awin) Affiliate, I (we) earn from qualifying purchases.”


Sunday, August 2, 2020

The Best Garden Yard Hose for Women - A Review For Women by a Woman!

The Best Garden/Yard Hose for Women!


If the marketing gurus aren't marketing this garden hose to women, they need to get on it!

For years we've known about flexible, retractable hoses for the yard, but never bothered to invest in one.

Maybe it's Covid-shopping-itis, or something like that, but this year was the year we jumped in and bought one of these lightweight, shrinkable garden hoses.

Best. Decision. Ever. 

We've purchased one for the backyard, and now I want one for the front!

I honestly don't think my husband cares one way or the other, but I care! 

Here's the female perspective on this garden/yard hose:

1. It's so light! Yes, that matters. Dragging that heavy water/garden hose around was brutal for me. This lightweight hose is nothing to maneuver! I do mean nothing. I can haul that thing all around the yard without a problem.

2. When it's time to put the thing away, gheesh, it's easy to hang up over the hose holder - why? because it's light.

3. We bought the 50-foot hose for the backyard and it takes up no space at all on the hose holder. Of course, the reason is that it shrinks up when not in use.

4. It's not bulky and ugly. 

5. The other regular hose we had never assembled nicely over the holder. I know you can put the regular type hoses on those standing wind-up hose holders (we have one in the garage for the front yard). However, we didn't want one of those sitting on our backyard patio.

6. When I get up in the morning, I like to water the flowers and grass. It used to be a chore to haul the hose out to do that. Now, I just grab the new lightweight hose and bob's-your-uncle. Job done. No sweat. No effort.

Here's the hose on the holder in our backyard:

Can you believe this is 50 Feet of Garden/Yard Hose? I love this thing!

We purchased our hose at Canadian Tire. However, you can find these just about anywhere, even Costco or Amazon. Here's a popular 100-Footer on Amazon.

In summary, if you're a yard-working-junkie, get yourself one of these!


Note: The author may receive a commission from purchases made using links found in this article. “As an Amazon Associate, Ebay (EPN) and/or Esty (Awin) Affiliate, I (we) earn from qualifying purchases.”


Tuesday, May 26, 2020

Reviewing The Tall Bearded Iris

Bearded Iris Bloom In Late Spring

The tall bearded Iris is blooming in my backyard right now. Do you have one of the many varieties in your garden? They are one of my all time favorites in the springtime.

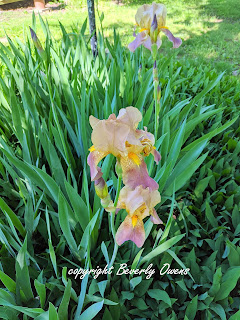
bearded iris
Tall Bearded Iris in my own garden
I don't know about you but my favorite time of the year is Spring. I love when the buds begin to pop out and the flowers begin to dot the landscape with color. One flower I look forward to in May is my Tall Bearded Iris. It just brings me so much joy when they bloom.


The Iris Has A Long History

The iris has been around for a very long time. I'm not sure why it was decided to name this particular plant after the Greek Goddess of the Rainbow but it appears that it was. It is a flower that has been a symbol of royalty and monarchs throughout history. It is a long history, too. The palace of King Minos on the Greek Island of Crete has a fresco showing the iris. That fresco dates back to somewhere around 2100 B.C. 

The Bourbon Kings of France used a symbol of an iris to show power and position. We all know that symbol as the "Fleur de Lys". Great Britain adopted the iris as a symbol of the monarchy when Edward III added it to his coat of arms in the 1300's. Queen Elizabeth I had her portrait made in a gown covered with irises.  

Whether it has anything to do with royalty or not, the beautiful iris has been around for people to admire for a very long time. There are non-bearded irises but that isn't what most people think of when they think of this lovely flower in their gardens. 

tall iris
Clump of bearded iris in my yard.

Planting Bearded Iris

You want to plant the rhizomes of the bearded iris in the summer. The reason for this is that they need time to grow and establish in the ground before winter takes hold. If you don't already have them in your garden you can buy the rhizomes from a local nursery or you can find them online.

Every few years you should divide your current colonies of iris. If the plants become to crowded they don't bloom as well. It is really easy to divide them. After they have bloomed for the season, dig around the green stems of the plants. Cut out some of the fleshy brown root looking rhizomes and take to a new area where you want to see irises bloom next year. I like to take a large cutting and then divide it in two or three pieces. It is that easy. Just make sure you water the new area to help the new cuttings take hold and that is it. Next year, you will have more of the tall bearded iris to enjoy.

I'm thinking of adding a different color this year, I particularly liked this color. I think it will blend nicely with the ones that currently grow in my yard.

Click Here To See Yellow and purple bearded iris


Note: The author may receive a commission from purchases made using links found in this article. “As an Amazon Associate, Ebay (EPN) and/or Esty (Awin) Affiliate, I (we) earn from qualifying purchases.”


Sunday, May 24, 2020

The Best Lawn Repair Product - Tested and Approved

We've used this product for years - works every time,
Highly Recommended!
Scotts EZ Seed Lawn Repair tested, approved, and now, reviewed.

It's a combination of mulch, seed, and fertilizer.

We've lived in our home for the past 26 years. We bought the house new and tackled our own landscaping.

In the early 1990's we put in about 52 small cedar trees around our backyard fence. The trees have since grown to about 25 feet tall.

Cedar trees require a lot of moisture and can slowly eat away your lawn - or so we discovered. We replaced our backyard lawn three times until I found EZ Seed Lawn Repair about ten years ago.

Why Scotts EZ Seed Lawn Repair?

In between our lawn replacements in those early years, we tried the usual - spread topsoil and add lawn seed. Nah, that sucked. It was still sparse in spots and didn't have the tidy finished look I personally prefer.

I also tried another lawn repair product by a popular competitor. Nope, it didn't take nearly as well as Scotts EZ Seed. I used the competitor's seed on one section, and Scotts on the other, and Scotts won the battle hands-down.

Scotts advertises that their seed consists of continuous release lawn food with super-absorbent growing material making it possible to grow grass anywhere. Yep, that's true. This stuff works.

How and Where I Use the EZ Seed Lawn Repair

I buy two large bags every year - our backyard lawn area is smaller - probably 600 square feet if I had to guess.

1. Wearing gloves, I scoop out handfuls and place the seed where it's needed  - I don't dump it from the bag - it's pricey stuff - so I place the handfuls of seed exactly where I want it.

2. I put seed along the entire perimeter of our cedar trees - the cedar trees eat away a good chunk of lawn, so I'll fill in the dead areas completely with seed.

3. I'll spread the seed about 1/8 of an inch thick, and evenly.

4. Once the perimeter of the trees is completed, I then fill in the thin areas in the center parts of the lawn.

5. Oh, and I don't do much to prep the lawn - just rake it - and sometimes sprinkle it with some water if it's bone dry dirt.

6. I've also used it in between our neighbor's driveway and ours - the grass just didn't grow well there and like I mentioned above, regular grass seed didn't take. So I used EZ Seed Lawn Repair, and yep, the lawn is now thick and lush. The stuff is amazing.

7. Water it every day! When you put this on your grass (in large sections) - don't cut the grass for four to six weeks. It needs time to grow. You have to water it. When I first put it on the lawn I'll water it by hand with the hose on a light spray setting. Once the lawn starts to grow, I'll use the sprinkler.

The clean edges of grass that come right up to the patio and trees are what I prefer - This photo is after the last sod was put in over ten years ago - Using Scotts EZ Seed keeps our lawn looking like this every year

In this photo, I've edged the lawn with Scotts EZ Seed - Turns out perfect every time
This picture is from a year or two ago

I highly recommend this product. It is pricey but in my opinion, worth every penny. We haven't had to resod our lawn. The lawn regains it's thick lush appearance with EZ Seed.

Today was the day I spruced up the lawn for spring/summer 2020. The EZ Seed project is all done for another year.

Oh, and yep, we've never had to resod the lawn since we started using Scotts EZ Seed.

Here's my other DIY gardening solution for areas of the yard where grass won't grow at all!

Scotts EZ Seed is Available on Amazon.


Note: The author may receive a commission from purchases made using links found in this article. “As an Amazon Associate, Ebay (EPN) and/or Esty (Awin) Affiliate, I (we) earn from qualifying purchases.”


Wednesday, March 18, 2020

A Time to Grow, Now is the Time! A Garden Review!

tree branches

If there ever was a time to look forward, it is now.  

Don't be stuck with the majority looking for doom and gloom, there is life out there and we gardeners mean to have it to the full extent we can.  

To that end, I am offering you some "jobs" that need to be done before the growing part can start!


My Spring To Do List!

  1. Clean out the pots! Seedlings  for this year are coming up.
  2. Trim Bushes
  3. Check Foundation Beds
  4. Select the flowers and vegetables that I want to grow this year.
  5. Make sure I have all the necessities (to avoid frustration)
  6. Plant, Mark and Place in the Sun
  7. Watch patiently as Mother Nature does her magic!


This is Just the Beginning, Now Let's Get Started!


1.  Cleaning out last years pots is necessary.  You don't want to carry over any diseases or bugs from last year into this year.  So empty the pots of their ground, but don't throw it away!  Place it into your compost bins!  The heat generated in the composting will kill off any bugs or disease so don't worry. 

When the pots have been emptied, take them into the shed, or garage or whatever work space you have and sanitize them as well.  A Bucket of warm water with bleach and a good scrub brush are all that's needed.  Mix your solution approximately 9 parts water to 1 part bleach and soak your pots for at least 10 minutes.  The warm water will soften the mineral deposits and dirt from the pots for easier scrubbing.  Use a stiff brush or a pot scrubber to remove any deposits on the pots .  If there is still some residue, you can soak your pots in dish detergent to remove any other debris.  Let your pots air dry before refilling them with new soil. If you like you can watch this video on cleaning pots it's only 3 minutes long (How to Clean Pots)

While your pots are air drying, get outside and check out how the garden fared through the winter months.  It's a good time to pull back any debris that you did not remove in the fall.(See #3)  Now BEWARE,  you should check your own climate to make sure that no further hard frosts will happen.  Be ready to cover young growth in case of really cold nights that might still happen.


clay pots on posts


2. Before the weather gets really warm, you can trim some of your flowering bushes!  Again, be knowledgeable you don't want to trim those bushes that will flower early in the spring, especially lilacs and forsythias.  If you trim these in the spring, you will likely lose all the flowers for that year.  A rule of thumb to follow for good results is this:  If it flowers in early spring (lilacs, forsythia, azaleas and such) do not prune until after they have flowered for this year.  If the bushes flower later in the year, early spring is a good time to trim and resize.  These bushes will have plenty of time to set buds for this coming 2020 season.  The Farmer's Almanac is a good guide just click on the link: When to Prune Shrubs

3.  Your pots are drying and you are doing a foundation check.  It's a great time to look at the flower beds, see what is sprouting already and gently pulling back on the ground cover (leaves) that you put there in the fall.  Look for bees that are coming out of dormancy and leave them some mulch to use as blankets at night when it's still cool.

4.  When you have done all this cleaning and spotting what's new in the garden, you just might need a little rest.  All work and no fun is not a good way to garden.  The Fun comes from checking out all the seed catalogs for new and exciting plants you want to try to grow for this year.

There are numerous garden centers that offer seeds and you should check out your local growers/suppliers for their catalog.  If you don't have any local suppliers, you can try Veseys, Dominion Seed House  and many, many more.  The Spruce offers 60 free seed catalogs where you can either get a hard copy catalog or view it online. 

5.  What are the necessities?  Well, you are going to need fresh garden or potting soil.  If you are doing seeds, then a good seeding mix would be a good idea.  You have your clean pots and hopefully you have some old saucers or containers to use for catch trays (please make sure these are clean as well)

You need the seeds, so hopefully you have had some time to check out what's new for the gardens this year.  Or maybe you have kept seeds from last years harvest.  Good for you! 

Clean tools are also needed.  You don't want to spoil all the hard work you have done, by plunging a dirty trowel into your newly cleaned pots. 

6.  Plant markers, unless you are a master gardener and can spot a bean sprout from a pepper sprout, then marking your seedlings is a must.  Maybe you are trying a new variety and want to log it's growth and more, then plant markers are a must!  Even for flowers, I find that I can't rely on my memory to tell me what I planted in which pot.  (Brain Fog comes to me naturally, so I rely on my markers)  These can be home made by cutting up white plastic and using a waterproof marker to label the pots.  If you are creative there are many other ways to make some really nice markers. I've included a video here!  Making Garden Markers 

7. Now you can sit back and relax, watch a video or two, and dream.  Hopefully there are some nice sunny days coming your way.  Find a nice little sheltered spot where the sun shines and just sit back and let your body get it's quota of Vitamin D. 

Now it's time to order whatever it is you still need to get those seedlings started.  New soil is the Number 1 item that should be on your list and if you are a Prime Member, you will get it tomorrow.....


This is my favorite potting medium and I get free shipping with my Prime Membership.  Miracle Gro has been around for years and it has a 5 star rating, do I know it's a good choice. I still don't like having to lug these bags of soil around, so shopping online is the way I get mine.  It comes to my door and that makes me very happy.  My garden this year will be off to a great start.  Join me!


flowers growing in pots


Note: The author may receive a commission from purchases made using links found in this article. “As an Amazon Associate, Ebay (EPN) and/or Esty (Awin) Affiliate, I (we) earn from qualifying purchases.”


Wednesday, March 4, 2020

Spring Forward, Renewal, Rebirth, Revival and Joy!

March 8th is Spring Forward Time! A Garden Review!


orange crocus bud
Image from Pixabay

Yeah, for all our Naturalists/Gardeners/Backyard Enthusiasts and those who are patiently (or not so patiently) waiting for Spring's arrival.  From my own personal experience I know how most of us are feeling right about now.  We can't wait for longer days and warmer temperatures and getting our hands back into the soil.  We want to poke around to see what's about to spring up out of the ground.  We also look up to see where the birds are too.  That first robin or yellow finches just make us so happy.  Our time is coming quickly!


Things Outside are Changing Quickly!

 
Now that it's March, we can look forward to longer daylight hours (it's already light at 6:00 in the morning)!  The bugs and the bees are waking up from their long winter slumber and looking desperately for a food source.  Even the birds are making a comeback.  

Those of us who love hummingbirds will be watching the Hummingbird Migration Maps for 2020!  They are already in parts of Florida and coming to your neighborhood soon!  Be the first one in your neighborhood to mark the map with the first sighting in your area. 


Spring, so much to do and so much pleasure in doing it too!


If you hang out bird feeders, now is the time to get them ready.  Clean and disinfect them all carefully.  We want to feed the birds and not harm them.  Clean feeders are a must!  Pathogens that can harm them can and might live over in the winter months.  There is need to be extra vigilant in making the birds source of food a safe source.  

Wash down all bird feeders, clean out birds nests from last year and give this years birds a really good chance of thriving and surviving.  Clean them out with a mild bleach solution (1/2 cup bleach to a sink full of hot soapy water).  Make sure you rinse them well and let them air dry before setting them out again.  


Special Care for Hummingbird Feeders!


Many people give up on putting out hummingbird feeders because they do require extra care.  It may seem wasteful, but their nectar needs to be changed every week.  Spoiled nectar in feeders can cause their death.  No one wants to be responsible for that!  So in the early spring, before you even see them, you need to change that nectar every week.  

Make only a cup of nectar at a time, so as not to waste all that sugar water.  And remember, red dyes are NOT NECESSARY  to attract those little flying gems.  Your hummingbird syrup should be roughly 1 cup of sugar to 4 cups of water.  The measurement does not have to be exact, but close is good.  Use only 1/2 to 1 cup of syrup in your feeders (keep the rest in the refrigerator) until you are sure the hummingbirds have found you!  Once you know they are coming to your feeders, go to town and fill it right up.


Maybe this is the year you decide to help the birds and the bees.

 
You can easily do this with bird feeders, bird houses and even bee houses.  The birds and bees give us so much enjoyment, it's the least we can do to make them welcome in our yards.  Our own Renaissance Woman will even teach you how to make your own bird feeders if you feel so inclined.  It would be a great spring time activity for your children or grandchildren.  Check it out right here: DIY Mason Jar Bird Feeder!

Building bird houses is also a lot of fun and an easy craft to share with your family as well.  The most important thing to remember is that certain birds require different housing.  Some are solitary breeders, while others love to be in community.  You might have to do some research to find out what kinds of birds come to your neighborhood, before you start building.  This review might help you get started! What you need to know about  Basic Bird House Construction!


The Bees are Getting a Lot of Press Lately!  The Key to Success

 
Science has let it be known that the bee population is in trouble.  If we don't have them as pollinators our whole food sources are at risk.  So let's help those pollinators by growing gardens that feed them all spring, summer and fall.  It's not hard to do and I'm sure you will enjoy the efforts that you put into making a beautiful "bee" friendly garden. 

There are a few guidelines that will help you to help the bees!  
  • Plant a garden that will give lots of blooms all season long.
  • Plant single flowered species rather than the big double and triple flowers.  The singles produce more nectar and the bees can easily get to it.
  • Plant lots of different annuals as well as perennials.
  • Build a bee house.
  • Have a water source available too!

Do you need more information?  I like this website for all inclusive information about bees and keeping them happy!  The  Honey Bee Conservancy  I like to keep my family happy, so, with my son-in-law being a beekeeper, this is for him!  I try to do my part in helping him help the bees and I get to enjoy some of the honey too.

Spring is a time of Renewal, Revival, Rebirth and Joy!  Let's make an effort to help Mother Nature in all of this,  by doing something to help all her little creatures.

bee on a orange flower
Image by jggrz from Pixabay


Note: The author may receive a commission from purchases made using links found in this article. “As an Amazon Associate, Ebay (EPN) and/or Esty (Awin) Affiliate, I (we) earn from qualifying purchases.”


Wednesday, September 18, 2019

Autumn Chores: Planting Trees Now It's the Right Time! A Garden Review

Autumn chores in the garden should include planting some trees! A Garden Review for you!

plant sitting in an open hand


Now don't get your knickers all in a knot!  Some people think that fall is the time to stop gardening, clean out the flower beds and put everything to sleep for the winter months that are fast approaching.  I'm here to tell you that you are wrong, so wrong!  Those are some of the jobs that will need doing, but right now think about trees!

Autumn is a great time to plant trees and shrubs.  There are several reasons that you should be doing some tree planting at this time.  Trees are the lungs of the earth and healthy air around your home is a must! 

In the fall the ground has been nicely warmed up.  Summer heat gets right down to the deeper parts of the ground.  The soil is warm and generally moist.  When you dig a hole for a new tree you will see for yourself that the soil is nice and warm .  When you plant a tree in that warm soil, the roots that have been bound up in a root ball, will nicely ease their way into that warmth.  You can wait till spring, but have to wait until the soil is frost free for best results.  Late April or early May are target times for spring planting.  In the fall you can plant right up till the first signs of snow.  The ground will keep it's warmth even with a snow cover.  The snow, believe it or not, is a great insulator.


In the fall, trees naturally go into a state of dormancy.  The saps run down into the roots and the leaves fall. The energy of the trees are already in the lower parts of the trees.  So placing them into warm soil will make them very happy.   Autumn rains will also help get those roots to stretch out and grab hold.  But proper planting techniques are still a good rule to follow.

Before you start to think about planting a tree, make sure you know what kind of tree you want in your space.  If you have a large area, then plant whatever you like, but, if you live in an urban area, you may have to think about this a little more.  Do you want a lot of shade in your yard?  Are you looking to mask the sounds of traffic, or are you wanting some fruit for your efforts.  All these questions should be asked and answered before you buy and plant anything.


Some trees have deep roots, some have shallow ones!  Planting a tree close to foundation walls is never a good idea.  Nor is planting a tree that gets very deep expansive roots.  Some research is necessary if you want to have a good result.
 

tree images

Trees have different shapes and natural heights that they will grow to.  Depending on what you want from the tree, you will have to make some educated choices.  I like this link from Arborday.org, for some really good information, so that once you decide to plant the trees, you will have made the right decisions.  

Trees are a wonderful addition to any landscape and will give you years of beauty.  The birds, bees, and small critters will thank you and grace you with their presence.  Mother Nature will appreciate your help in keeping the air fresh and clean as well.   

Put this book on your shelf, so that you will have easy access to some of the best information and suggestions for picking, planting and maintaining your trees as they mature.


It is wonderful to be able to reach the information you need in the garden when you are busy with the task at hand.

Happy tree planting and here's to your healthy!  I hope you enjoy your happy gardening space.


Note: The author may receive a commission from purchases made using links found in this article. “As an Amazon Associate, Ebay (EPN) and/or Esty (Awin) Affiliate, I (we) earn from qualifying purchases.”


Wednesday, August 7, 2019

Mid Summer Heat and Your Garden, It's Time to Rejuvenate!

Oh the Summer of 2019 will probably go down as one of the better ones we have had in a long time.  But, the heat can do some pretty mean things to your garden.  Let's do a quick review on how you can make those baskets and annuals look a little nicer than they do right now!

When May and June rolled around, everyone was just so happy to see the weather become warmer.  Garden centers everywhere were busy selling plants of every kind under the sun to people who had the worst cases of itchy fingers ever!

Who didn't go out to buy at least one or two hanging planters with bright colored geraniums or petunias?  I know I did and the garden centers thanked me.  

This is what they looked like when I bought them:

man sitting on a ledge surrounded by flowers
*photo from pixabay

Now that we are well into August, they are looking tired and sparse.  The stems that were so full of flower buds, have elongated into wisps of bare stems with maybe a flower or two at the end of the stem.  Nothing at all like they looked when I first purchased them.

flowers in a hanging pot
                                            portulaca looking sad

But wait a minute, these plants can be revitalized with just a little tender loving care.  I'm here to help you make the next two to three months much nicer again with the same plants that you already have.

How to Revitalize Your Plants 

Let's get started.  

Cut back the long strands of petunias, calibracoas, or moss roses (portulaca). Dead-head your geraniums so that more flower heads will appear.  

1. Let the plant dry out just a little, so that you can remove it from it's hanging pot.
When you have the plant out, place it (soil ball and plant) into a pail of water.  You will notice that the soil around the plant has probably gotten very solid and holds the shape of the pot it was in.  That is part of the problem.  When you water this plant, the water just falls right out of the bottom of the pot.  The soil no longer holds any water close to the roots.  We need to fix that!  

2.  Take the roots and gently pry them apart (or if you are not too scared, take a knife and cut the root ball into quarters)   Do this inside the pail and place the pieces back into water.  You may notice that some of the old soil is starting to fall away from the roots.  Don't worry, that's what you want to have happen.  

3.  Get some fresh potting soil.  I like to use Miracle Gro soil.** I'll tell you why later.  Now take those quarters and place two or three back into the hanging pot.  Fill the rest of the space with fresh soil and water well.  You can even bury the crown of the plant in the new soil.

4.  Leave these plants in the shade for a day or two, just to give them some time to get over the shock.  Keep them watered well, but not drowning.  

5.  In a week, you should be able to see new growth coming up from the original root system.  In two weeks they will look like brand new plants, even though there isn't a garden center around with fresh planters.  

6.  Sit back, relax and enjoy your hanging baskets for another two months or more.  

If your hanging baskets are full of annuals, they will  keep blooming until frost arrives and that could be late October or November even.  They will slow down in blooming naturally once the long summer days are done, but they will bloom!  They will also look so much nicer than those long wisps with only one flower on the end of each stem.   

Now why do I like Miracle Grow Soil?**  I told you earlier that I would explain.  So here it is:
Purchased hanging planters from Pop-up Garden centers use plain potting soil for their planters (it's cheaper).  Miracle Gro soil is not just soil, but Sphagnum peat moss, perlite and compost.  It is also infused with Miracle Gro fertilizers that are time released for better blooms and healthier plants.  I have used this for years and I can't remember ever having a summer of disappointment with my hanging plants.  Now that I am in my apartment, I use this type of soil in all my balcony planters too. 


Annual plants are wonderful for their color, long lasting blooming period and they are not too expensive either.  So you really get a good bang for your buck.  At then end of the season, remember to compost your annuals or if you are really keen, start seed saving so that next year you can make your own hanging baskets with Miracle Gro soil from the start and seeds that you have saved.  

You can find out more about seed saving on another review right here: Let's Review The Best Proven Seed Saving Practices


Note: The author may receive a commission from purchases made using links found in this article. “As an Amazon Associate, Ebay (EPN) and/or Esty (Awin) Affiliate, I (we) earn from qualifying purchases.”


Monday, July 22, 2019

Defiant Wireless Motion Sensor Solar Light Review

Need an outdoor light but no electrical outlet? The wireless motion sensor solar light by Defiant can assist. I recently needed to light an outdoor walkway which was marooned between electrical outlets and hard wiring the area was not an option.

Defiant Wireless Motion Sensor Solar Light

I purchased the Defiant Wireless Solar Light to solve the no electrical outlet, need light problem and have been very impressed with its' performance. 


Brightness

Brightness
Motion Sensor

x
This is a bright light! It is not for subtle soft lighting along the deck, patio or home. The solar light has the equivalency of 20 LED lights.

The unit actually has two lights. The main light facing out and an interior back light behind the main light. The two lights are synchronized to provide the full brightness. The motion sensor feature then regulates how the lights are dimmed after activation.


Defiant Wireless Motion Sensor Solar Light


Motion Sensor


I found the motion sensor to be very accurate. The small unit is deceiving as to how quickly it will pick up motion. Activity to trigger the motion sensor is up to 26 feet with a 120 degree radius according the the specifications.

There are two settings for the motion sensor:

1. When motion is detected the front and back light turns on to full brightness. After 10 seconds of no motion both lights turn to low brightness.

2. Standby mode. When motion is detected the front and back light turns to full brightness. After 10 seconds of no motion the front light turns off and the back light turns to low brightness.

The light does not have an option for both lights to be turned off after activation. 


Solar Light & Wireless

The solar light takes eight hours of charging to provide 12 hours of continuous light during the night. 

The wireless feature is perfect for areas of the home, deck, landscape or yard which are not located near an electrical outlet. The unit is easy to install as it is lightweight and requires two wall screws (included.) However I liked the portability of the unit due to its' lightweight and shape so I positioned the unit on the deck stairs to face the sun.


More Home Reviews


Note: The author may receive a commission from purchases made using links found in this article. “As an Amazon Associate, Ebay (EPN) and/or Esty (Awin) Affiliate, I (we) earn from qualifying purchases.”


Most Recent Reviews on Review This Reviews


Search for Reviews by Subject, Author or Title

The Review This Reviews Contributors


SylvestermouseSylvestermouseDawn Rae BDawn Rae BMbgPhotoMbgPhotoBrite-IdeasBrite-IdeasWednesday ElfWednesday ElfOlivia MorrisOlivia MorrisTreasures by BrendaTreasures by BrendaThe Savvy AgeThe Savvy AgeMargaret SchindelMargaret SchindelRaintree AnnieRaintree AnnieLou16Lou16Sam MonacoSam MonacoTracey BoyerTracey BoyerRenaissance WomanRenaissance WomanBarbRadBarbRadBev OwensBev OwensBuckHawkBuckHawkDecorating for EventsDecorating for EventsHeather426Heather426Coletta TeskeColetta TeskeMissMerFaeryMissMerFaeryMickie_GMickie_G


Review This Reviews is Dedicated to the Memory of Our Beloved Friend and Fellow Contributor

Susan DeppnerSusan Deppner

We may be apart, but
You Are Not Forgotten


“As an Amazon Associate, Ebay (EPN) and or Etsy (Awin) Affiliate, I (we) earn from purchases.” Disclosure Statement

X