Showing posts with label Recipes. Show all posts

Monday, February 27, 2017

Recipes for Real People a Site Review

Recipes for Real People is a recipe and kitchen website that offers recipes and food ideas that are quick, easy, and useful for everyday meals. From Aprons to Vegetables, you will find comfort food recipes, meal ideas, and kitchen gifts for you and your family.

Why I Turn to Recipes for Real People


I can't even begin to guess the number of recipe websites on the internet. So why would I turn to Recipes for Real People?  There are several reasons I look to this site for ideas. Just this morning I woke with many things on my mind. I have household chores to do, reports to write for work, and assorted things I would like to accomplish with my own website. I have to find a way to save some time today.

After unseasonably warm days, a thunderstorm rolled through last night and brought behind it a very cold and cloudy morning. I am craving comfort food and not sure what I have in the kitchen. After having spent the past few days driving around with the Jeep top open and enjoying the warm weather, I had no reason to buy ingredients to make chili or stew. But now it is very cold outside, the furnace is on, I am under the blankets, and I am craving something warm and filling. Something like stew or chili. However, to make either of those things, I'd have to run out to the store.

Thanks to a recipe found on Recipes for Real People, I have found a meal idea and won't have to go to the grocery after all.

I should clarify that I am writing this on Sunday and it will be published on Monday. On Monday I will be back at the office, hard at work - giving my time and energy to others. So I am especially thankful for time-saving ideas that allow me to spend more time on the weekends on myself. 

Hamburger Vegetable Soup Recipe


Susan's Hamburger Vegetable Soup recipe is just the type of thing I am craving.  Her four-ingredient recipe is easy and made from ingredients that are often found in the kitchen at any given time.  I do not currently have any fresh ground beef in the fridge. But I do have ground sausage. So I will substitute the sausage for the ground beef and have a filling, warm, comfort meal and won't have to leave the apartment today!  In fact, come to think of it, I have a few different cans of soup that I could use as substitutes for the vegetable soup in Susan's recipe. Perhaps I'll add the sausage to a can of creamy chicken soup.  I don't know. I will decide later.  But I am relieved that a trip to the grocery is something I can remove from today's full to-do list.  All thanks to Recipes for Real People.
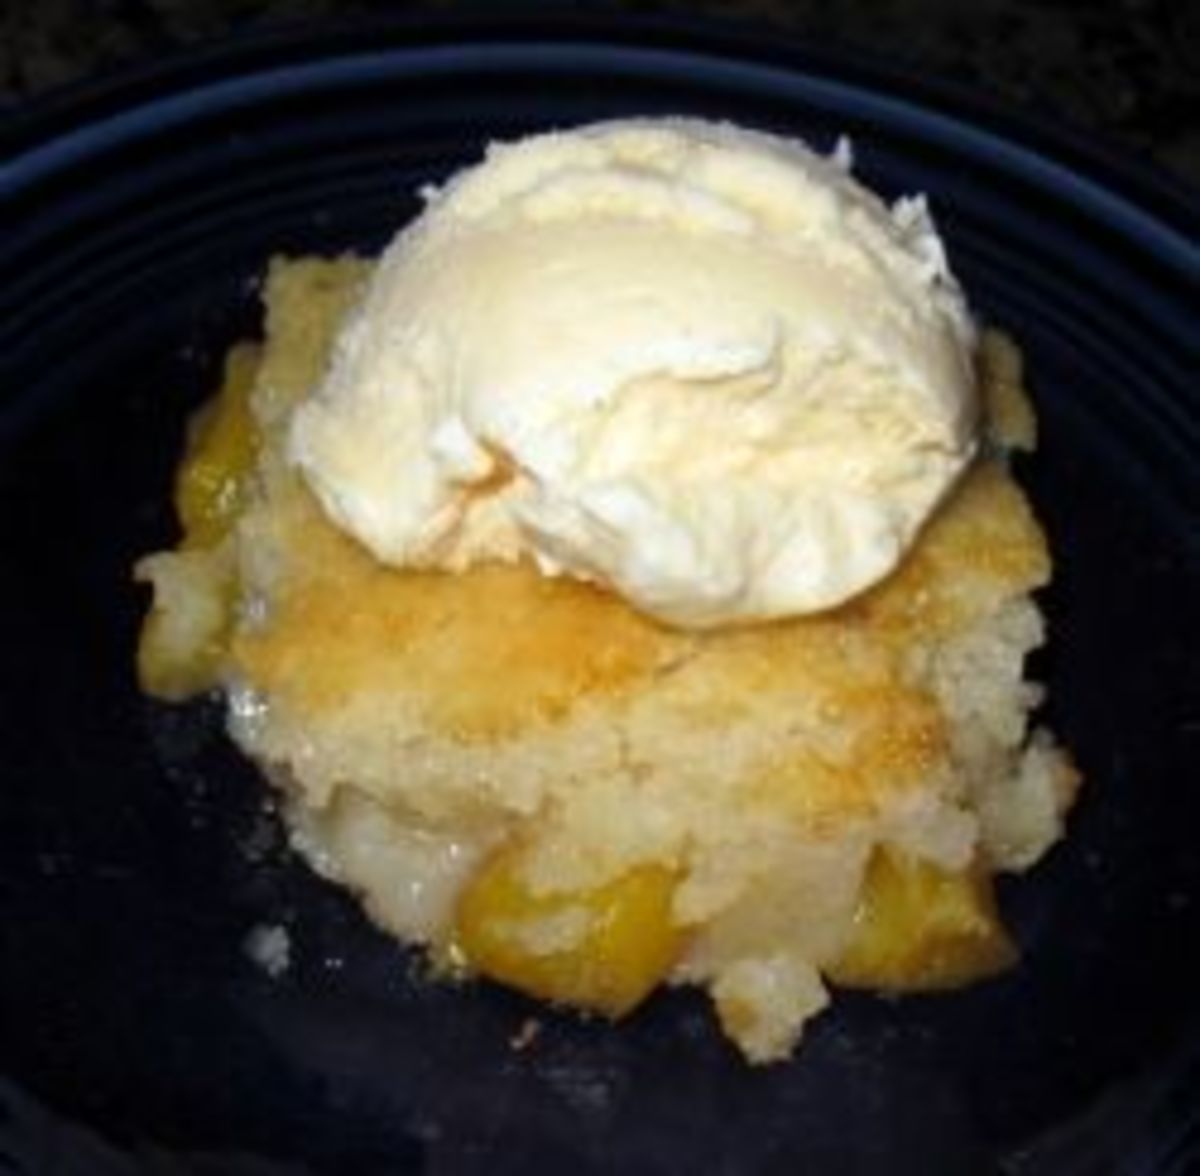

 (photo by Susan)


A few more reasons I turn to Recipes for Real People


  • Recipes for Real People is a website owned by one of our Review This! contributors - Susan Deppner
  • I trust that Susan is sharing recipes that she cooks in her own home
  • these recipes call for few ingredients that are readily available
  • quick and easy prep recipes
  • leftovers are used in the Recipes for Real People kitchen - I am a firm believer in using leftovers


  • Susan's kitchen helpers are adorable


    Related Recipe Links


    The Review This! contributors share some of their favorite recipes on this site. The variety of recipes, meals, kitchen items, and food reviews that the contributors bring is amazing. From slow cooker beans and TexMex lasagna to buttery shrimp pasta and party menus, there is something to suit everyone's tastes. To see those recipes, use the Review This! recipes tab and scroll. Our own Sylvestermouse Cynthia enjoys food, entertaining, and the holidays.  She is the owner of two food-related sites Fun Food and Cooking for the Holidays.

    Fun Food focuses on "fabulous fun food". I swear some of the ideas shown are works of art!  From bright and colorful swirls of jello to snake cakes and food castles, these recipes are as fun to look at as they are tasty to eat.


    Cooking for the Holidays is exactly as advertised - meals, desserts, and appetizers specific to holidays and entertaining. This website is elegant and offers recipes that will likely never happen in my little kitchen for one but are perfect for those who enjoy celebrations and entertaining. 


    Note: The author may receive a commission from purchases made using links found in this article. “As an Amazon Associate, Ebay (EPN) and/or Esty (Awin) Affiliate, I (we) earn from qualifying purchases.”


    Saturday, February 25, 2017

    Easy in the Kitchen: Slow Cooker to Make Homemade Beans

    programmable slow cooker
    Programmable Slow Cooker
    Yes, I admit it. I have 2 slow cookers and I use them both regularly. Easy in the kitchen is my preference and I'm going to review with you how I make things easier with my slow cookers. They aren't just for making dinners anymore. There's plenty to enjoy about slow cookers.

    My two are different sizes. I have a smaller one that is a 4-quart cooker, and I have a larger programmable 6-quart size (www.kitchen-basics-small-appliances.com/programmable-slow-cookers-easy-cooking). I have made plenty of chilis, stews and soups in my slow cookers and I will continue to do so. The joy of tossing in all the ingredients, turn the thing on and come back to dinner ready to serve can't be beat. Plus, why not make enough for 2 or more dinners? That's easy in the kitchen in my book.

    Homemade Beans


    One of my favorite uses for my slow cookers is making my own homemade "cans" of beans. I was one of those people who would buy cans and try to force myself to use them. Sure beans are good for you, but I could never stomach the boring taste and slimy liquid canned beans were packed in. Discovering how to make my own beans made a world of difference.

    • Black beans
    • Chickpeas
    • Black-eyed peas
    • Pinto beans
    • Navy beans or any white bean
    I start with dried beans - so much cheaper! About 1/2 cup of dried beans will equal a standard can size of cooked beans (about 1 1/2 cups). My smaller slow cooker easily handles a cup and half of dried beans, so I make 3 "cans" of beans at a time. 

    Dried beans need to be soaked first, so I do this in my slow cooker. Usually overnight. Then drain and rinse the beans, put them back in the slower cooker, add enough water to cover the beans with about 2 inches of water on top, and cook. I set my slow cooker on high for 4 hours and the beans are cooked to perfection. If you have a programmable slow cooker, you can set it to cook the beans when it's most convenient for you. 

    Packaging Homemade Beans
    black beans


    Freezing your cans of homemade beans is the easiest option.  I use half-pint mason jars which hold about 1 1/2 cups of cooked beans - the equivalent of a standard can. Remember to label them with the date as well. Frozen beans should last about 6 months. Of course, I can't ever test that out, I use my frozen beans too fast! 

    Here's an easy in the kitchen trick for you. With any frozen foods, top the food with a piece of parchment paper. That will prevent ice crystals from forming and will keep freezer burn out of your food. 

    Choosing a Slow Cooker


    If you're in the market for a slow cooker, whether your first, second or ninth, there are things to consider before you buy. The options are numerous. You'll want to think about what size you need, what features will be helpful and what your budget allows. When you have the right appliance for the right cooking needs, you will have an easier time in the kitchen. 

    So stop depending on store-bought cans of beans. Make your own. Flavor them to your own tastes and enjoy healthy and delicious homemade beans in your slow cooker. 


    Posted by: BuckHawk
    Buckhawk

    About This Contributor

    BuckHawk decribes herself as "Basically a lazy person who prefers the easy things in life." So that's what she writes about. Easy home decorating, easy recipes, easy entertaining. But, she is also a lover of animals, gardening and crafting. You'll find her writing all over the Web, but with Review This Reviews! she has the opportunity to write about all of her loves.


    Note: The author may receive a commission from purchases made using links found in this article. “As an Amazon Associate, Ebay (EPN) and/or Esty (Awin) Affiliate, I (we) earn from qualifying purchases.”


    Tuesday, January 17, 2017

    TexMex Lasagna Recipe Reviewed

    A Twist On A Classic Recipe

    texmex lasagna
    TexMex Lasagna By Bev Owens
    Typically one thinks of lasagna as a classic Italian dish. Today I want to share a recipe that I created for TexMex Lasagna. It is a  little twist to an old favorite. 

    I was inspired by a commercial that I kept seeing on television advertising Creamette pastas. A young woman finds out that her husband likes her Texmex lasagna even better than his mother's chicken noodle casserole. I kept thinking that it sounded good and what would I put in a dish like that. 

    So, I put my thinking cap on and came up with an idea to try. I will admit that I could never con a panel of judges into thinking that I was a professional chef. On the other hand my cooking is not so bad that I would be invited to the show "Worst Cooks" either. My presentation isn't always the most lovely but usually the meal is pretty good. I think I would be graded as a decent cook with a fair amount of successes and more than enough failures in my lifetime.

    When it comes to this little creation, my husband gave his seal of approval with the comment, "Honey, this is really good! I think it is my new favorite meal!" 

    Momma Bev's TexMex Lasagna Recipe


    Ingredients:

    1 box Creamette lasagna noodles (or your favorite brand)
    1 1/2 lb lean ground beef
    1 16 oz container sour cream
    2 large eggs
    lemon juice
    2 cups 4 cheese Mexican blend
    1/2 tsp chili powder
    1/2 tsp minced garlic
    salt
    pepper

    Directions:


    Pre-heat oven to 350 degrees.

    In a dutch oven size pot boil your lasagna noodles in salted water for 10 minutes. The salt keeps the pasta from getting sticky.

    Brown the ground beef with the chili powder, garlic and salt and pepper to taste. When you add the seasoning to the raw beef the flavors are sealed in better to the meat as it browns. Once browned add the jar of picante sauce and simmer for 5 minutes.

    In a mixing bowl beat the 2 eggs, add a little salt and pepper, lemon juice (about 2 cap fulls) and the sour cream. Blend well. Set aside.

    Grease a 9 by 13 inch baking dish. Cover the bottom with a thin layer of the meat mixture. Place a layer of noodles on top. Pour about 1/3 of the sour cream mixture on top of the noodles. Sprinkle a light layer of the cheese blend. Add a new layer of noodles, thin layer of meat sauce, repeating the layers ending with meat sauce on top. Sprinkle more of the cheese blend on top.

    Bake for 30 to 35 minutes.


    Mildly hot or hotter?


    Depending on what your family likes, you have the option of using a mild, medium or hot version of the picante sauce. We used the medium and that was just right for the two of us. Also, I chose picante sauce instead of salsa because it is better for cooking. Both have the same ingredients it is just that the picante is basically a pureed version of a salsa and will bake better in this recipe. 

    I hope you will give this recipe a try and I sincerely hope that you and your family like it as much as my husband and I did. I know I will make it again! 


    Note: The author may receive a commission from purchases made using links found in this article. “As an Amazon Associate, Ebay (EPN) and/or Esty (Awin) Affiliate, I (we) earn from qualifying purchases.”


    Saturday, January 7, 2017

    Five Guys Restaurant Review

    Five Guys Restaurant near Savannah, Georgia
    (c) Wednesday Elf
    The holidays brought lots of cooking and baking for holiday guests and celebrations. Now the cook(s) need a day off. Your nearest Five Guys restaurant will provide you with a quick, inexpensive and delicious meal of those good old American standards of hamburgers, hot dogs and French fries.

    Five Guys Restaurant is known as a fast casual restaurant as opposed to your typical fast food place. Fast-Casual restaurants typically offer higher quality food at a slightly higher price level. The difference is made-to-order, fresh cooked food. 


    Five Guys Beginning


    The  restaurant founders, Janie and Jerry Murrell, began Five Guys in Virginia in 1986.  The name "Five Guys" comes from the couples' five sons, Jim, Matt, Chad, Ben and Tyler, who are all involved in the restaurant chain that today includes over 1,000 restaurants throughout the United States and Canada with more than 1500 more planned.  Since 2013, several have opened overseas in England, the Middle East and Europe. 


    Menu


    Example of a Five Guys burger, hamburger photo
    Five Guys (restaurant) Cheeseburger. Source: Wikimedia
    The Five Guys menu is simple and centers on hamburgers (offered with American cheese or bacon), kosher style hot dogs, grilled cheese and vegetable sandwiches. 

    Five Guys uses buns that are sweeter and "eggier" than normal buns. 

    Fresh-cut French fries are the sole side item, available "salted only" (in Five Guys style) or seasoned "Cajun style".

    The burgers are available as 'single' or 'double' with 15 fresh toppings to choose from. The toppings are available at no extra charge and you can have as many or as few as you want. My favorite is a single burger with mayo and tomato slices.


    Five Guys also features Milkshakes in a variety of flavors!


    Peanuts Galore


    Five Guys offers Complimentary 'while-you-wait' peanuts - image of peanuts
    (c) Wednesday Elf
    Complimentary roasted in-shell peanuts are offered for on-site consumption while you wait for your order.  Signage is provided alerting customers who may have a peanut allergy.


    A Five Guys restaurant typically consists of red-and-white checkered decorations, open kitchens, a single counter for purchasing and picking up food, and tables and chairs for customers.


    Five Guys has won numerous awards over the years and signs are posted showing some of them.


    Sign in the window at Five Guys Restaurant
    (c) Wednesday Elf


    Sign in the window at Five Guys Restaurant
    (c) Wednesday Elf

    Sign in the window at Five Guys Restaurant
    (c) Wednesday Elf

    So, take a well-deserved break from your kitchen and pick up dinner tonight from Five Guys! My closest one is just 2.4 miles away!


    Bonus Idea for Gifts


    Five Guys Gift Cards & Christmas Cards for Teen Grandsons
    (c) Wednesday Elf

    Teenage boys like nothing better than food, so for Christmas for my three teen grandsons I sent Five Guys Gift Certificates. They love Five Guys Burgers as much as I do. These gift cards work equally as well as birthday gifts. 

    Pick up a gift card at your local Five Guys while you are waiting for your order.  Or grab a gift card online at the Five Guys website and send either a physical card or an eGift Card to your favorite Five Guys fan! 


    A Five Guys app to order your burger & fries
    Five Guys (Free) App for Androids

    Get the Five Guys App for Android phones and place your order in a minute!  The app is free to download and is a very handy way to have your order ready when you arrive at your favorite Five Guys restaurant! 

    Happy Eating! 


    *Restaurant Review written by Wednesday Elf


    Note: The author may receive a commission from purchases made using links found in this article. “As an Amazon Associate, Ebay (EPN) and/or Esty (Awin) Affiliate, I (we) earn from qualifying purchases.”


    Saturday, December 24, 2016

    Buttery Pasta and Shrimp Recipe Review


    Our Favorite Seafood Meal


    Image of my buttery pasta & shrimp dish
    Having lived in coastal communities a number of times over the years, from the California Central Coast to the Gulf Coast of Florida to (today) Coastal Georgia, seafood dishes are popular favorites in our household. 


    While living on the California Central Coast in 1980, I came across a shrimp recipe put out in a little cookbook leaflet by Land O Lakes, using real butter (yum) in the recipes. This shrimp/pasta buttery combination has become a standard for company dinners and has also become a family favorite for Christmas Eve dinner every year.


    cooking time on Buttery Pasta and Shrimp Recipe


    Ingredients


    Ingredients for Buttery Pasta and Shrimp Recipe
    Ingredients, prepped and ready

    • 3 cups cooked spaghetti, (7 oz. Uncooked)
    • 1/4 cup Sweet Cream Butter
    •  1 cup chopped green pepper, (1 medium)
    • 1/2 cup chopped onion
    • 2 (12 oz.) packages frozen cocktail shrimp (or fresh shrimp as noted below)
    • 1-1/2 tsp. Garlic powder
    • 1/2 tsp. Salt
    • 1/2 tsp. Oregano leaves
    • 1/4 tsp. Pepper
    • 2 cups cubed fresh tomatoes
    • Grated Parmesan or Romano Cheese 

    *Cooks' Note

    The recipe calls for frozen cocktail size shrimp, which is fine, but living near the coast where fresh seafood is available I naturally substitute fresh shrimp for the cocktail shrimp.

    I take about one pound of medium shrimp, peeled & deveined, cut them in half most times, and sauté them separately in a bit of butter & garlic before adding them to the pot of vegetables simmering in the butter & seasonings. I've also added fresh sliced mushrooms to the original vegetables of chopped onions and green pepper in the recipe. As you can see, your own preferences are easy to substitute in this dish.


    Instructions


    Image of the cooked Angel Hair Pasta for recipe
    Angel Hair Pasta - Cooked
    • Cook spaghetti; set aside.  I used angel hair pasta in this recipe, but you can use any pasta that you desire.

    Pan holding vegetables sautéed in butter
    Sautéing the vegetables in real butter
    • In a 3 qt. Saucepan melt butter over medium heat (5-7 minutes).
    • Add remaining ingredients, except tomatoes and spaghetti. Stir to blend.
    • Cook over medium heat (5-7 minutes).
    • Add cooked spaghetti; stir to blend.
    • Continue cooking over medium heat, stirring occasionally until spaghetti is heated through (3-5 minutes).
    • Remove from heat; add chopped tomatoes. Cover; let stand 1 minute or until tomatoes are heated through.
    • To serve, sprinkle with Parmesan cheese.


    Dinner photo: Pasta dish with garlic toast & coleslaw
    Pasta dish with garlic toast & coleslaw

    Serve this buttery pasta and shrimp dish with slices of garlic bread or Texas Toast, and either a salad or coleslaw, and you have a very delicious and satisfying meal anytime you crave shrimp & pasta.


    Land O' Lakes Chicken and Seafood Cookbook


    Land of Lakes Cookbook
    Land O Lakes Chicken & Seafood Cookbook

    The buttery pasta with shrimp recipe featured in this review can also be found in this cookbook of recipes for chicken and seafood made using real butter. I've used my copy for years!


    This 44-page booklet from 1980 has recipes for both chicken and a variety of seafood, all using delicious butter.

    Shrimp Lovers Recipes


    Forrest Gump knows ways to eat shrimp - shrimp kabobs, shrimp creole, shrimp gumbo, shrimp cocktail...

    Looking for more shrimp recipes, you'll find them here! 

    Bubba Gump Shrimp Cookbook book cover
    Over 75 Shrimp Recipes from Forrest Gump


    For other delicious recipes, shrimp and otherwise, check out ReviewThisReviews Recipes for a variety of yummy dishes from our contributors.


    +Images are personal photographs by (c) Wednesday Elf

    (c) Wednesday Elf. Article originally written in October 2013 on another site.


    Note: The author may receive a commission from purchases made using links found in this article. “As an Amazon Associate, Ebay (EPN) and/or Esty (Awin) Affiliate, I (we) earn from qualifying purchases.”


    Saturday, December 17, 2016

    Sweet Ginger Cheese Muffins - Recipe Review

    plate of sweet ginger muffins
    Sweet Ginger Muffins copyright BuckHawk 


    Looking for easy, vegan and gluten-free muffin recipes, I came across a delicious looking sweet ginger one. But, it wasn't completely perfect to go with the soup I was planning for dinner. Therefore, I did the conversions needed to end up with Sweet Ginger Cheese Muffins.

    Here I'll tell you about the original recipe along with the changes I made to create my new muffin recipe. Although my recipe is both vegan and gluten-free, I've included the easy changes you can make to convert it to standard diet fare.


    The Original Muffin Recipe


    gluten free cookbook
    Great Gluten-Free Vegan Eats
    One of my favorite vegan and gluten-free cookbooks is Allyson Kramer's Great Gluten-Free Vegan Eats from Around the World. In her section titled Tasty Treats from Central and South America, she includes a recipe for Chilean-Style Sweet Ginger Cake. This was the recipe that enticed me into creating my own version.

    Sweet Ginger Cake is meant to be a dessert. But, to go with the potato leek soup I was serving, I wanted something a bit less desserty. Ergo, less sugar and sweet ingredients and the addition of vegan cheese shreds and nutritional yeast. The result was a delicious cheesy muffin similar to sponge cake in texture.

    Sweet Ginger Cheese Muffins Recipe


    Ingredients and directions:
    • 2/3 cup vegan margarine 
    • 1/3 cup raw sugar
    • 1 teaspoon vanilla extract
    Cream these ingredients together until they form a smooth paste. I used my stand mixer for this. It just goes so much faster.

    Then add in:
    • 2 teaspoons dried, ground ginger
    • 1/3 cup tapioca flour
    • 1/2 teaspoon sea salt
    • 1 teaspoon xanthan gum
    • 3 teaspoons baking powder
    • 2 tablespoons nutritional yeast
    • 2 cups gram flour
    • 1/4 cup honey, agave or other sweetner
    • 1 1/2 cups almond milk
    Mix all of this together until you have a smooth batter. Finally fold in 1/2 cup of shredded cheese. I used a combination of Daiya brand mozzarella and cheddar style vegan shreds.

    Grease and flour 12 standard muffin cups and divide the mixture among the tins. Bake at 350 degrees for 25 minutes or until golden brown on top.

    Recipe Notes


    For those of you who are not familiar with vegan and gluten free cooking, many of these ingredients will sound foreign. But every single one is available in health food stores and online.

    If you want to make these muffins in a more conventional way, you can easily replace the vegan margarine for butter, replace both the tapioca and gram flour with all-purpose flour, skip the xanthan gum and replace the vegan versions of milk and cheese with dairy versions.

    Nutritional yeast is not like standard bread yeast. It's deactivated and more similar to brewer's yeast. It adds a cheesy flavor and vitamin B12 to anything it's added to. Nutritional yeast is found in a dried version, either flakes or powder. If you don't have nutritional yeast, you may want to add more cheese shreds.

    Either way you want to make this recipe, you will enjoy a combination of flavors. Unexpected combination, I agree, but the result will complement soups and stews wonderfully.


    Posted by: BuckHawk
    Buckhawk

    About This Contributor

    BuckHawk decribes herself as "Basically a lazy person who prefers the easy things in life." So that's what she writes about. Easy home decorating, easy recipes, easy entertaining. But, she is also a lover of animals, gardening and crafting. You'll find her writing all over the Web, but with Review This Reviews! she has the opportunity to write about all of her loves.


    Note: The author may receive a commission from purchases made using links found in this article. “As an Amazon Associate, Ebay (EPN) and/or Esty (Awin) Affiliate, I (we) earn from qualifying purchases.”


    Monday, December 5, 2016

    Easy Snickerdoodle Cookie Pie Recipe Review

    I have always loved Snickerdoodle cookies. I remember eating them as a child, growing up in Amish country. I love eating fresh baked goods - cookies, breads, and pies. Unfortunately, I have very little time to spend in the kitchen so I am always looking for tasty shortcuts. This is a super fast, easy, and delicious way to bake something we call Snickerdoodle Cookie Pie.


    Why and How I Make Snickerdoodle Cookie Pie


    I regularly bake brownies (from a box mix, of course). Brownies from a box are quick, easy, and fairly fool-proof. Even for me. I love eating cookies, but because I'm fairly lazy in the kitchen I rarely bake cookies. After all, dropping cookies onto sheet after sheet and having to be attentive to the oven every few minutes seems like a lot of work to me. I end up burning more cookies than I bake successfully. Because of these tendencies, I thought I'd try to make bar cookies using Betty Crocker Snickerdoodle cookie mix. 

    I have used the different Betty Crocker cookie mixes and have found every single one tasty and dependable. I know what I am getting when I buy this brand of cookie mix. I recommend this cookie mix for folks like me who aren't very talented in the kitchen. Or for people who have minimal time for baking.

    After experimenting with a 8" square baking dish and just one pack of cookie mix, I then experimented with a 10 1/2" round baking dish and two packs of cookie mix. I do like the 8" baking dish with one package of peanut butter cookie mix (just follow the directions) but for the Snickerdoodles, I prefer the round dish.

    Ingredients:

    • 2 packages of Betty Crocker Snickerdoodle cookie mix
    • 2 eggs
    • 2 sticks of butter
    • 2 T water
    • only 1 of the packs of cinnamon (included with each cookie mix package)
    • optional - crystal sugar sprinkles

    also:
    • Baking dish 10 1/2" round and at least 1" deep baking dish
    • non-stick cooking spray

    Step-by-Step directions:

    pre-heat oven to 375 
    set butter in dish and warm to room temperature


    set the cinnamon packs aside

    add cookie mix (both packages) to the bowl
    add eggs and water

    mix together


    lightly grease the bottom of the baking dish

    sprinkle approximately 1/4 of one of the cinnamon packs in the bottom of the baking dish


    drop the cookie dough by large spoonfuls into the dish flatten/spread slightly

    (the dough is very thick. Trying to pour then spread is only successful in pulling the cinnamon up from the bottom of the dish)


    sprinkle the cinnamon remaining in one packet on the top

    (you can choose to use both cinnamon packets, but I prefer less cinnamon. I simply save the extra packet for use on toast or oatmeal)


    optional - during the holidays I use red and green crystal sugar in addition to the cinnamon


    bake at 375 for approximately 30 minutes

    test for doneness with a toothpick or small wooden skewer
    when the skewer pulls out clean, bake for an additional few minutes

    (I bake for an additional 5 minutes. If you end baking as soon as the skewer comes out clean, your cookie pie will be doughy in the center.)


    cool, slice and serve

    can be served with a scoop of vanilla ice cream


    Notes:

    You will need to adjust the length of baking time for your oven, elevation, and preference. I prefer my cookie pie to be a bit on the doughy or under-cooked side. You may prefer yours cooked through a bit more. 

    As I was preparing this article I noticed that the Betty Crocker Peanut Butter cookie mix is less expensive in Amazon's Prime Fresh category than it is at my local stores. Be sure to check out the lower prices if you are an Amazon Prime and Prime Fresh member.


    Note: The author may receive a commission from purchases made using links found in this article. “As an Amazon Associate, Ebay (EPN) and/or Esty (Awin) Affiliate, I (we) earn from qualifying purchases.”


    Saturday, December 3, 2016

    Aroma Digital Rice Steamer Review

    rice steamer of cooked rice
    Rice Steamers Review
    It's been 3 years since I got my Aroma Digital Rice Steamer. So I decided it was time to share my review of how it's worked in my kitchen. Along with sharing some of my favorite recipes for delicious rice and grains, you can learn a few of the tricks I've discovered to make perfect grains every time. You can never go wrong with a great rice side dish. Or maybe a base for a yummy stir-fry. Or any number of other ways to enjoy rice and grains.


    Review of Aroma Digital Rice Steamer


    rice steamer
    Aroma Digital Rice Steamer
    After reviewing many different choices, I picked the Aroma brand for my rice steamer for several reasons. First, the capacity. This can make 8 cups of rice. At a half cup per portion, you could feed 16 with one batch. Granted I've never tried to feed 16 people at once, but it's nice to know I can. Second, it has both a white rice setting and a brown rice one. That's important when you use healthy grains like quinoa and millet. Use the brown rice setting for these, which cooks a bit longer giving you fluffier grains.

    The third and final reason I chose the Aroma brand was the price. It's not the cheapest one on the market, but it's certainly affordable and fit nicely into my tight budget.

    A feature of the Aroma Digital Rice Steamer that I didn't think I would need is a delayed timer setting. WOW - that has turned out to be the feature I most enjoy. If I want to serve dinner at 6, I just start the rice steamer at 3, set it for 3 hours delayed and the perfect rice is ready when the rest of dinner is finished. The delay cycle is long enough that you can set it before leaving for work if you want.

    Cooking Different Grains in the Aroma Rice Steamer


    Since I've cooked different grains and a variety of rices, I can offer you a few tips to make them perfectly every time. For grains like quinoa and millet, I've found that a little bit less liquid makes a perfectly cooked grain. The Aroma rice steamer comes with a measuring cup for the grains. Per each cup of grain, I use 1 1/2 cups of liquid. For wild rice, I use 2 1/4 cups of liquid. For stickier rice, I use about 2 cups of water and for long grain rices, I use about 1 3/4 cups of liquid.

    This may seem a little picky, but it matters. You want the rice or grains to turn out to be perfect for the recipe you're making so a little pickiness works wonders. All the water is absorbed into the rice so the amount does matter.

    Onion Wild Rice Recipe


    One of my family's favorite recipes is Onion Wild Rice. And it's so easy to do. This recipe makes 4 servings.
      onion wild rice
    • Finely chop about half of a yellow or white onion.
    • Add the onions and the dry wild rice to your rice cooker.
    • Add 2 1/4 cups of broth, vegetable, chicken or beef broth works.
    • Add in a dash of salt and pepper to your own taste.
    • Stir the mixture up and turn on the rice cooker to the brown rice setting. 
    See, I told you it was easy. I've tried it with ground dried Shitake mushrooms as well and that works great, too. With a rice steamer, you can let your imagination help you create interesting dishes.

    Coconut Almond Grains


    This is another easy recipe using quinoa and millet together. They are similar grains, but have slightly different flavors. To your rice cooker add:
    • 1/4 cup shredded unsweetened dry coconut flakes
    • 1/4 cup almond slivers or chopped almonds
    • 1 cup of mixed quinoa and millet - can be equal portions or not
    • 1 1/2 cup of liquid - water works just great, as does broth
    • Salt and pepper to taste
    Stir this up and turn on your rice cooker, setting for brown rice. Another simple way to add healthy grains to you meals.


    Choosing a Rice Steamer


    The market has many different rice steamers. Nearly every small kitchen appliance maker makes one. So you will need to make a choice. The Aroma brand is not as well known as others, which is why I felt it needed a review after all my years of using it. 

    Companies like Oster and Cuisinart also make rice steamers. You may be more comfortable with a brand you recognize. Besides the brand name, you also want to consider capacity. Make sure you can make enough cooked rice to feed your family. For many price is a major consideration. You need to balance how often you will use the rice steamer, the features, the capacity, and the price.

    See more great product reviews at Review This! Products


    Posted by: BuckHawk
    Buckhawk

    About This Contributor

    BuckHawk decribes herself as "Basically a lazy person who prefers the easy things in life." So that's what she writes about. Easy home decorating, easy recipes, easy entertaining. But, she is also a lover of animals, gardening and crafting. You'll find her writing all over the Web, but with Review This Reviews! she has the opportunity to write about all of her loves.


    Note: The author may receive a commission from purchases made using links found in this article. “As an Amazon Associate, Ebay (EPN) and/or Esty (Awin) Affiliate, I (we) earn from qualifying purchases.”


    Friday, October 28, 2016

    Instructions for Easy Stenciled Cupcakes for Halloween

    Decorate Halloween Cupcakes with Stencils Reviewed

    Stenciling cupcakes is a fun and easy way to decorate a cupcake. I am sharing simple step by step in instructions for stenciling Halloween Cupcakes along with lots of photos and tips.
    Stenciling cupcakes is a fun way to decorate cupcakes. Using stencils is a pretty easy way to decorate beautiful Halloween cupcakes that are certain to be a frightening fantastic addition to your party table.

    By simply using stencils, confectioners sugar or sanding sugar, you too will be able to create tasty treats that double as great Halloween decorations.

    If you can't find the cupcake stencil you want, why not use a small cookie cutter?

    Let me show you exactly what I am talking about and what your guests will be talking about at your Halloween party when you make these creepy cupcakes!


    Choose the Right Cupcake Recipe


    Stenciling cupcakes is a fun and easy way to decorate a cupcake. I am sharing simple step by step in instructions for stenciling Halloween Cupcakes along with lots of photos and tips.
    For convenience, I used boxed cake mixes to make my cupcakes. I baked 12 large Triple Chocolate Fudge with a Betty Crocker Super Moist cake mix and 12 large Lemon Supreme cupcakes with Duncan Hines Moist Deluxe cake mix. 

    I selected these flavors because I knew I would not be icing all of them and I wanted cupcakes that would taste good without icing.

    Delicious filled cupcakes would be ideal for these stenciled cupcakes for Halloween since they will not be frosted.

    Here are a few recipes you might like for your frost-less cupcakes.

    Recipes for Cupcakes that are Delicious Without Icing


    Supplies You Will Need to Get Started Stenciling

    Supplies for Stenciled Halloween Cupcakes
    • Baked Cupcakes ~ I baked Triple Chocolate Fudge and Lemon cupcakes
    • Stencils or Cookie Cutters
    • Confectioners Sugar
    • Sanding Sugar ~ your choice of colors
    Decorators note:  An essential tool for decorating with Confectioner's sugar is a cup with a mesh top.


    Recommended Powdered Sugar Shaker


    With Stainless Steel Mesh Dome Lid 


    This cup will allow you to literally sprinkle confectioners sugar onto your cupcake once the stencil is in place. It will cut down on the mess often associated with decorating with confectioner's sugar.


    Directions for Stenciling Cupcakes


    1. Using Cupcake Stencils - Place the stencil on the cupcake
    2. Sprinkle Cupcake with Confectioners Sugar then Slowly
    3. Gently Lift Stencil Off of Cupcake

    Easy Stenciled Cupcakes for Halloween


    Use A Cookie Cutter to Stencil

    If you don't have stencils on hand, you could also use a small cookie cutter.  Owls and ghosts were not included in my stencil pack, but I wanted cupcakes decorated with them.  Since I love owls and ghosts at Halloween, I used my cookie cutters.  It is the same process, you simply have to make sure you have a good hold on the cookie cutter and have it firmly pressed against the cupcake top so the powdered sugar doesn't escape the sides. 

    Stenciling Iced Cupcakes


    Stenciling cupcakes that have icing is a little messier and a bit more tricky, but can certainly be done!  

    To stencil an image on icing or frosting, you would want to use sanding sugar instead of powdered sugar.  The sanding sugar does have an added "sparkle" benefit.

    You do need to be extremely careful when you lift the stencil or cookie cutter off the icing to keep from dropping excess sugar outside of the image lines.  The icing tends to try to hold on to your stencil.  I recommend lifting it straight up and off the cupcake  without tilting the stencil.

    Directions for Stenciling Cupcakes with Sanding Sugar


    1. Using Cupcake Stencils - Place the stencil or cookie cutter on the frosted cupcake
    2. Sprinkle Sanding Sugar on the Cupcake,  then Slowly
    3. Gently Lift the Stencil Straight Up & Off of Cupcake 


    Cupcakes for Halloween Stenciled with Sanding Sugar

     These Cupcakes were Decorated with
    Lemon Frosting and Brown Sanding Sugar


    Using Cookie Cutters & Stencils to Decorate Cupcakes


    Stenciling cupcakes is a fun and easy way to decorate a cupcake. I am sharing simple step by step in instructions for stenciling Halloween Cupcakes along with lots of photos and tips.
    Black Cat Cupcake
    Lemon Cupcake & Black Sanding Sugar
    When you decorate your Halloween cupcakes with stencils or cookie cutters, your variety is limited only by your cookie cutters, stencils and supplies.   I have dozens of cookie cutters and several packs of Halloween stencils.  I enjoy playing around with them and seeing what unique cupcakes I can create.  Now, everybody knows you can't celebrate Halloween without the black cat.  Isn't he spectacular on his golden moon cupcake!

    They are also great for cakes! 


    You can see my directions on how to stencil a Halloween cake by clicking this link to Cooking for the Holidays


    Supplies Used in This Article


    Confectioners Sugar is available in most grocery stores.  A variety of sanding sugar colors is not as easily obtained.  I purchase mine online.  

    I also purchase my cookie cutters and stencils online. 


    The Stencils


    The stencils used in this article are an older pack of Martha Stewart Halloween stencils - M230600 (UPC #015586743364). The pack includes the bat, 2 jack o' lantern faces, the witch, the spider, the web, the skull & crossbones and the raven. (Neither the raven nor the web are shown on the front of the package.)  The only place I could find them at the time of writing this article was on eBay.


    Since eBay inventory changes constantly, I recommend checking here again soon if you don't see exactly what you want right now.


    See More Recipes On ReviewThisRecipes.com


    More Recipes by Sylvestermouse
    Peach Cobbler RecipeQuick and Easy Peach Cobbler Recipe
    My mother's peach cobbler is one of my favorite desserts.  Actually, it is my favorite breakfast too. I have even been known to eat it for lunch.


    Peanut Butter Fudge RecipePeanut Butter Fudge Recipe
    This is my mother's recipe for Peanut Butter Fudge.  I have never seen it published anywhere else, but it is the best I have ever tasted.


    "This Tutorial for Easy Stenciled Cupcakes for Halloween" Written by:
    House of Sylvestermouse


    Note: The author may receive a commission from purchases made using links found in this article. “As an Amazon Associate, Ebay (EPN) and/or Esty (Awin) Affiliate, I (we) earn from qualifying purchases.”


    Most Recent Reviews on Review This Reviews


    Search for Reviews by Subject, Author or Title

    The Review This Reviews Contributors


    SylvestermouseSylvestermouseDawn Rae BDawn Rae BMbgPhotoMbgPhotoBrite-IdeasBrite-IdeasWednesday ElfWednesday ElfOlivia MorrisOlivia MorrisTreasures by BrendaTreasures by BrendaThe Savvy AgeThe Savvy AgeMargaret SchindelMargaret SchindelRaintree AnnieRaintree AnnieLou16Lou16Sam MonacoSam MonacoTracey BoyerTracey BoyerRenaissance WomanRenaissance WomanBarbRadBarbRadBev OwensBev OwensBuckHawkBuckHawkDecorating for EventsDecorating for EventsHeather426Heather426Coletta TeskeColetta TeskeMissMerFaeryMissMerFaeryMickie_GMickie_G


    Review This Reviews is Dedicated to the Memory of Our Beloved Friend and Fellow Contributor

    Susan DeppnerSusan Deppner

    We may be apart, but
    You Are Not Forgotten


    “As an Amazon Associate, Ebay (EPN) and or Etsy (Awin) Affiliate, I (we) earn from purchases.” Disclosure Statement

    X