Showing posts with label Recipes. Show all posts

Wednesday, February 8, 2023

Funny Grill Master Aprons

 It's still winter here in Western New York, but grilling season will be here soon. There is nothing I like better than being outside cooking or smoking meats on my grill and smoker. 

There are many essential tools needed for the grill master, meat thermometers, gloves, towels, cooking utensils, cleaning equipment, and most important of all a funny apron.

Funny Grill Master Aprons
Grill Masters funny aprons - Reviewed

In the photo above I'm preparing to wrap my Babyback Ribs to go back on the smoker for another two hours. Whenever I'm grilling or smoking meats you will find me wearing my funny apron. 

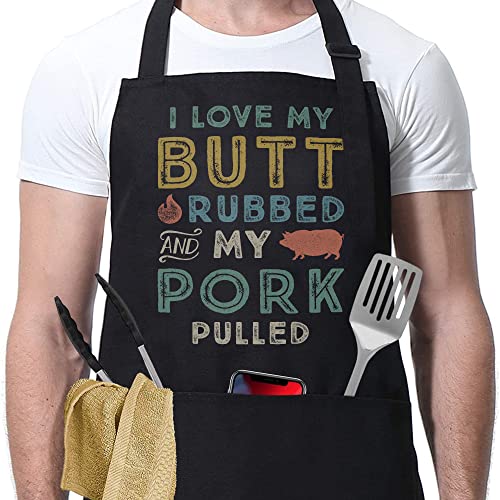
My son got this funny apron for me a couple of years ago for Father's Day. In case you can't the whole thing, the apron reads:  "I LIKE MY BUTT RUBBED AND MY PORK PULLED" Whenever we have friends over and I'm grilling they all just get the biggest kick out of it.

Not only is my apron funny, but it does protect my clothes from any splashing of sauces that I'm using, and any sparks from the wood when I'm tending the firebox on the smoker. It also has two handy pockets up front to hold my phone, meat thermometer, or towel while I'm cooking.

Back to the photo, yes, that is a bottle of Bourbon in my hand because I'm smoking my Honey Bourbon Babyback Ribs  Click the link to get the full recipe and method of these delicious ribs. If you don't have a smoker that's okay you still make these on your grill, or even in the oven, either way, don't forget your apron.

By the way, it's easy to clean your apron, just wash it on the cold cycle and air dry cycle in your dryer.

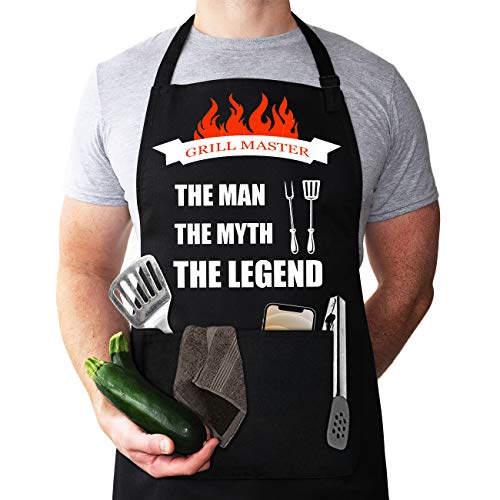
You will find a full range of funny aprons on Amazon. Any one of them is a perfect birthday or Father's Day gift for the grill master in your life or for yourself.

Grill Gifts for Men - Funny Apron for Men Grilling - Grill Apron for Dad, Husband, Boyfriend - Adjustable Bib Aprons Waterproof with Pockets - Black Apron Gift for Fathers Day, Birthday, ChristmasGrill Gifts for Men - Funny Apron for Men Grilling - Grill Apron for Dad, Husband, Boyfriend - Adjustable Bib Aprons Waterproof with Pockets - Black Apron Gift for Fathers Day, Birthday, ChristmasGrill Gifts for Men - Funny Apron for Men Grilling - Grill Apron for Dad, Husband, Boyfriend - Adjustable Bib Aprons Waterproof with Pockets - Black Apron Gift for Fathers Day, Birthday, ChristmasFunny apron for men, BBQ aprons for men, Grilling aprons, Chef cooking apron, with two tool pocket, Adjustable Neck Strap Waterproof and OilProof Best for Grilling, Birthday Gifts for Dad, Mens gifts.Funny apron for men, BBQ aprons for men, Grilling aprons, Chef cooking apron, with two tool pocket, Adjustable Neck Strap Waterproof and OilProof Best for Grilling, Birthday Gifts for Dad, Mens gifts.Funny apron for men, BBQ aprons for men, Grilling aprons, Chef cooking apron, with two tool pocket, Adjustable Neck Strap Waterproof and OilProof Best for Grilling, Birthday Gifts for Dad, Mens gifts.Fay People Funny Aprons for Men in 2 Colors; As Seen On Fox, ABC, NBC, CBS Funny Grilling Apron for Men can be BBQ Aprons for Men or Funny Aprons for WomenFay People Funny Aprons for Men in 2 Colors; As Seen On Fox, ABC, NBC, CBS Funny Grilling Apron for Men can be BBQ Aprons for Men or Funny Aprons for WomenFay People Funny Aprons for Men in 2 Colors; As Seen On Fox, ABC, NBC, CBS Funny Grilling Apron for Men can be BBQ Aprons for Men or Funny Aprons for WomenMacorner Funny Cooking Apron Gifts for Men - I Love My Butt Rubbed And My Pork Pulled - Dad Gifts - Birthday Christmas Gifts for Dad Husband Boyfriend Him - Cooking Grilling BBQ ApronMacorner Funny Cooking Apron Gifts for Men - I Love My Butt Rubbed And My Pork Pulled - Dad Gifts - Birthday Christmas Gifts for Dad Husband Boyfriend Him - Cooking Grilling BBQ ApronMacorner Funny Cooking Apron Gifts for Men - I Love My Butt Rubbed And My Pork Pulled - Dad Gifts - Birthday Christmas Gifts for Dad Husband Boyfriend Him - Cooking Grilling BBQ Apron


Find More Product Reviews Here:


Note: The author may receive a commission from purchases made using links found in this article. “As an Amazon Associate, Ebay (EPN) and/or Esty (Awin) Affiliate, I (we) earn from qualifying purchases.”


Monday, February 6, 2023

Cookbook Review - Farm to Table Cookbook: Seasonal Recipes Made with Farm-Fresh Ingredients

I was thrilled when I recently won an item during a homestead giveaway. Even more thrilled when I learned it was the Farm to Table Cookbook: Seasonal Recipes Made with Farm-Fresh Ingredients. This cookbook is full of recipes for those farm fresh items that you've grown or that you've purchased from the local farmer's market. 


Learning to grow and prepare more of my own fresh vegetables is a goal of mine. I like vegetables, I just don't have a wide repertoire of vegetable recipes. I grew up with a vegetable menu limited to potatoes, green beans, peas, and carrots for the most part. As an adult, I branched out and found that I love summer squash, roasted beets, spinach and different varieties of tomatoes. But I still either haven't tasted, or don't know how to prepare, things such as bok choy, kale, winter squash varieties, okra, and other vegetables that are a staple in some kitchens. 

Farm To Table Cookbook

Farm to Table Cookbook: Seasonal Recipes Made with Farm-Fresh Ingredients is 180+ pages of recipes geared specifically toward using ingredients directly from the farm or garden.

"Whether your farm is your backyard, garden, a farmer's market, a CSA box, the community garden or a local farm, this book will help you make the most out of your bounty. From hearty breakfasts, satisfying sandwiches and impressive entrees to homemade breads, sharable snacks and decadent desserts, you'll find everything you need to pile your table high with simple farmhouse goodness" - back cover of Farm to Table

Some of the recipes that immediately catch my eye are:

Kale Fittata with Bacon - with an abundance of eggs from my chickens I already have the majority of ingredients for this recipe here at home. If I learn that I don't care for kale, I imagine that spinach would be a good substitute.

Farmer's Market Grilled Chowder - includes corn, potato, zucchini, and onion in a cheesy/creamy broth. The photo makes my mouth water.

Butternut Bisque - I only very recently learned that I love the taste of roasted butternut so I am looking forward to finding more ways to prepare it. This looks creamy and delicous (and easy!)

Spinach Noodle Bowl with Ginger - vermicelli noodles, carrots, snow peas, spinach, and meet (shrimp or cooked chicken) with soy sauce and ginger is definitely a recipe I'm excited to try.

Butternut Squash Gnocchi with Savory Herb Butter - I've watched gnocchi being made on some of the cooking shows but haven't been brave enough to try. I LOVE the idea of butternut gnocchi.


These are just the first five recipes that I've bookmarked for myself. I hope to become more successful at both raising a variety of my own vegetables and then being able to cook tasty, healthy meals. I know that my health would improve with consuming fewer pre-made foods that contain preservatives and this book is helping in my next step toward eating farm fresh foods. 


Note: The author may receive a commission from purchases made using links found in this article. “As an Amazon Associate, Ebay (EPN) and/or Esty (Awin) Affiliate, I (we) earn from qualifying purchases.”


Monday, January 30, 2023

Cookbook Review - 5 Ingredients by Jamie Oliver

I recently purchased a cookbook that I'm very excited about. It is 5 Ingredients Quick and Easy Food by Jamie Oliver. 


Sometime during the past year I have seen Jamie Oliver on his cooking shows on television. He was a new name to me and I only had the show on as background noise. But he caught my attention during one episode when he ran tomatoes across the shredder leaving behind a seedless, skinless tomato pulp. He added his resulting tomato sauce to small pieces of crusty bread. I don't recall now what else he added to his tomatoes, perhaps cheese and herbs but I had to try it. I used the tomatoes as a dip for my bannock bread. It was so easy, fresh, and delicious that I looked forward to more new ideas from Mr. Oliver. 

5 Ingredients Quick and Easy Food Cookbook

5 Ingredients Quick and Easy Food is exactly that; a collection of recipes that require only 5 main ingredients. I am adding the word "main" because it ends up that you still need things like salt, pepper, cooking oil. But the shopping list truly consists of 5 ingredients. 

For example, I had the Sausage and Apple Bake this morning for brunch. The shopping list was apples, red onions, parsnips, small pork sausages, and honey. The prep was exceedingly easy, the aroma coming from my kitchen was wonderful, and I had a delicious one skillet meal.

I was unable to find parsnips. After a quick internet search I found the recommended parsnip substitutes and chose carrots. The recipe also used salt, pepper, olive oil, and a tablespoon of red wine vinegar (which I did have but in previously years I wouldn't have had on hand and I would have been irritated that this item wasn't listed more prominently in the ingredients list). Other than the parsnips (which are available here at certain times of the year), I can easily find all of the ingredients in the recipes that I've bookmarked for later.

Tomorrow I will make the Peachy Pork Chops which includes adding bourbon and lighting it. This will be my very first attempt at flambe. Wish me luck!  Fortunately, Mr. Oliver gives a super easy meal to try which includes only garlic, rosemary, porkchops, a can of peach halves, and bourbon which gives me the confidence to try.


The book itself is beautiful. The recipe is on one page and a photograph of the finished dish is on the facing page. It is full of recipes (approximately 300 pages of recipes) and a gorgeous photo for each dish. 

The introduction states:

"Quick & Easy Food focuses unapologetically on genius combinations of just five ingredients that work together to deliver an utterly delicious result, giving maximum flavor, with minimum fuss. These are dishes you can get on the table in 30 minutes or less; or that are ridiculously quick to put together with just 10 minutes hands-on time, while the oven or stove then does the rest of the work."

There is no false advertising in that statement. The meals are quick and easy. Just my style. Yet, flavorful enough to feel as though I am eating something completely new from my usual weekly menu.

I was fortunate to find my copy on deep discount at a discount store. But the book is widely available on Amazon and in book stores. Personally, I would not have spent the original $35. However, now that I own the book I believe it is worth every penny. If you are on a budget I think you can find it in your price range.

As I mentioned above, the "5 ingredients" seems to include the main ingredients. You will also need salt, pepper, oil, and other small items that seem to be in most pantries. This is addressed in the brief introduction. 

Are these meals as complex and flavorful as the multi-star, multi-course restaurants I've been to? No. And that's not the goal. But they are different and delicious flavors that are super easy for the most busy home cook.


Note: The author may receive a commission from purchases made using links found in this article. “As an Amazon Associate, Ebay (EPN) and/or Esty (Awin) Affiliate, I (we) earn from qualifying purchases.”


Tuesday, January 17, 2023

Easy Pumpkin Spice Bread


Pumpkin Spice Bread
Pumpkin Spice Bread Reviewed


I always like making things from scratch, but sometimes you just have to go with a box mix.

I wanted to make some banana bread but didn't have any ripe bananas. So I started looking through the cabinets and found this box of Krusteaz pumpkin spice bread.

Fran had picked this up at the store and thought it would be a good idea to make with the grandchildren.


Well, I guess I just couldn't wait so I went ahead and whipped this up. It was so easy to make and really moist and delicious. All you need is water, vegetable oil, and a couple of eggs. Stir everything together and bake in a 5-inch x 7-inch bread pan. Just follow the easy instructions on the box and you'll be enjoying this pumpkin spice bread in no time at all.

To be honest I've never heard of Krusteaz (Crust + Ease) before this. So I looked them up and found out that they have been around since 1932. Wow, where have I been?

The Krusteaz Story:

Times were tough during the great depression. A few women who always traded recipes together came up with a recipe for an easy-to-make pie crust and called it Krusteaz. They would go door to door and visit small cafes to sell their creation, and the rest is history. Today Krusteaz is still a family-owned business. 

They make a variety of easy-to-make bread and muffins, and I'm sure that they are all equally as delicious as this pumpkin spice bread. I will certainly be giving some of their others a try.

If you're looking for an easy and delicious dessert or snack to serve your family or friends just pick up a box of Krusteaz.

Find more product reviews on Review This Here: ReviewThisProductReviews.com

Try my made-from-scratch: Quick Cinnamon Swirl Bread

You will find a variety of Krusteaz products in your local grocery store or you can find them on amazon.

Krusteaz Quick Bread Supreme Mix, Pumpkin Spice, 30 OunceKrusteaz Quick Bread Supreme Mix, Pumpkin Spice, 30 OunceKrusteaz Quick Bread Supreme Mix, Pumpkin Spice, 30 OunceKrusteaz Chocolate Chunk Muffin Mix - No Artificial Flavors/Preservatives - 18.25 OZ Box (Pack of 12)Krusteaz Chocolate Chunk Muffin Mix - No Artificial Flavors/Preservatives - 18.25 OZ Box (Pack of 12)Krusteaz Chocolate Chunk Muffin Mix - No Artificial Flavors/Preservatives - 18.25 OZ Box (Pack of 12)5 Pounds Krusteaz Sweet Cream Pancake Mix Just Add Water5 Pounds Krusteaz Sweet Cream Pancake Mix Just Add Water5 Pounds Krusteaz Sweet Cream Pancake Mix Just Add WaterKrusteaz Snickerdoodle Cookie Mix, 17.5-Ounce Boxes (Pack of 2)Krusteaz Snickerdoodle Cookie Mix, 17.5-Ounce Boxes (Pack of 2)Krusteaz Snickerdoodle Cookie Mix, 17.5-Ounce Boxes (Pack of 2)


Note: The author may receive a commission from purchases made using links found in this article. “As an Amazon Associate, Ebay (EPN) and/or Esty (Awin) Affiliate, I (we) earn from qualifying purchases.”


Friday, January 6, 2023

Easy Cheesecake Recipe Reviewed

Cheesecake
A Cheesecake Recipe for Success!

My family loves cheesecake, therefore, it is probably the most frequently baked dessert in my kitchen.  I bake several each month and most recently baked a cheesecake instead of a birthday cake for my mother's birthday. 

This easy cheesecake is most often what I make for dessert when we are entertaining.  I can either make it the day before, or the morning of an event.  It seems everyone loves cheesecake!

The only drawback is that it does take about 2 hours to make, bake & cool.  Plus, it needs to set in the refrigerator for at least 4 hours. 

While it is very easy, it does take time.  However, it is worth the wait!


Easy Cheesecake Recipe by Sylvestermouse
ReviewThisReviews.com


Prep Time Cook Time Cool Time Total Prep Time Fridge Set Ready In Yields
15 min. 50 min. 60 min. 2 hrs. 5 min. Time 4 hrs. 6 hrs. 8 - 10 servings


Cheesecake Ingredients 

     • 2 cups graham crumbs (15 graham cracker sheets) 

cheesecake ingredients

     • 2 tablespoons sugar 

      • ⅔ cup butter melted (11 Tablespoons) 


   For Cheesecake: 

      • 24 ounces cream cheese softened 

     • 1 cup sugar 

     • 1 teaspoon vanilla 

     • 3 eggs 


Instructions 

1. Wrap the springform pan with 2 layers of 18” heavy duty aluminum foil 

2. Preheat oven to 350°F. (Convection Oven 325°F) 

3. By hand, Mix crust ingredients until well combined.  

4. Press into a 9" springform pan. 

5. Beat cream cheese, sugar and vanilla until fluffy. 

6. Add eggs one at a time, beating until incorporated (do not overbeat). 

7. Pour cheesecake mixture into crust. 

8. Place in

waterbath
   (Pour enough HOT water in the pan to reach half way up the foil covered springform pan.)
   Water Bath Pan is really heavy when filled with water. It is easier to set it in the oven and
   then add the water.  

9.   Bake 50 minutes. 

10. Turn off oven, open oven door slightly and allow the cheesecake to cool in the oven for 1 hour. 

11. Remove from oven and from waterbath 

12. Remove springform pan and cool completely in the fridge at least 4 hours or overnight. 

homemade cheesecake


Related Articles 


 Heavy Duty Aluminum Foil Roll, 18"Check Price Kraft Philadelphia Brand Cream Cheese CookbookCheck Price Calphalon Nonstick Bakeware, Spring Form Pan, 9-inchCheck Price Wilton W6516 Perfect Results Sheet Cake PanCheck Price


Check Out More Recipe Reviews at
ReviewThisRecipes.com


Easy Cheesecake Recipe Reviewed Written by:
House of Sylvestermouse


© 2023 Cynthia Sylvestermouse


Note: The author may receive a commission from purchases made using links found in this article. “As an Amazon Associate, Ebay (EPN) and/or Esty (Awin) Affiliate, I (we) earn from qualifying purchases.”


Friday, December 30, 2022

How to Make a Water Bath for Cheesecake Baking Review

Cheesecake Water Bath
There are benefits to preparing and using a water bath when baking cheesecakes or custards.  For one thing, it will keep your cheesecake from cracking and will prevent the filling from drying out.  Plus, it will prevent the cheesecake springform pan from leaking in your oven. 

A water bath is simply a pan of hot water, which will low boil when baking your cheesecake.  It will be very hot!  Be sure to leave your cheesecake cooling in the oven, in the water bath, for an hour after the baking is complete.  Just turn your oven off, leave the oven door slightly open and walk away for an hour.

Since you will be setting your filled cheesecake springform pan in the water bath, it is important to select a pan that your springform pan can easily sit in without tilting it or forcing it.  I have an oversized cake pan that I use.  The size of your springform pan will determine what size you need for the water bath.

For instance, I use a 9" springform pan and an old 18" x 12" sheet cake pan.  (that is all I use that cake pan for now because the coating is ruined)

Water Bath


How to Make a Water Bath for Cheesecake

When you have used a water bath for the first time, you will realize how very easy it is to set up.  

Since I have been asked the "what" question several times, I realize that just saying "bake your cheesecake in a water bath" is lacking in information.  Therefore, I'll share exactly what to do to make a cheesecake water bath here.

Cheesecake Water Bath
Step 1:  Wrap your springform pan in aluminum foil to prevent the water leaking into the cheesecake pan. I use heavy duty 18" wide aluminum foil, but you can use two pieces of standard, everyday 12" aluminum foil by folding them together with a seam that will not leak to create one large piece of foil.     

Step 2:  Set your filled cheesecake springform pan in the wider cake pan.

Step 3:  Add hot water in the wide cake pan, halfway up the outside of the springform pan.

Step 4:  Place in the oven & bake according to recipe.

Step 5:  Turn off the oven and leave the cheesecake in the water bath in the oven for one hour to cool.


Note:  The cheesecake and hot water together can be very heavy.  You may prefer to set your cheesecake in an empty cake pan in the oven, then add the hot water using a oven proof measuring cup.

cheesecake in the oven for waterbath


Click Here to See My Cheesecake Recipe Published on Review This Reviews!

 Wilton W6516 Perfect Results Sheet Cake PanCheck Price Calphalon Nonstick Bakeware, Spring Form Pan, 9-inchCheck Price Reynolds Wrap Heavy Duty Aluminum Foil, 18 inch, 37.5 Square-Foot Roll (Pack of 1)Check Price


Check Out More Recipe Reviews at
ReviewThisRecipes.com


How to Make a Water Bath for Cheesecake Baking Review Written by:
House of Sylvestermouse


© 2022 Cynthia Sylvestermouse


Note: The author may receive a commission from purchases made using links found in this article. “As an Amazon Associate, Ebay (EPN) and/or Esty (Awin) Affiliate, I (we) earn from qualifying purchases.”


Monday, December 26, 2022

Reviewing Herbes de Provence for Stews and How I Made Venison Stew

I've never been a fan of stews. Over my lifetime I've occasionally had a stew that was delicious. But typically, I'm just not a fan of the flavor. I never knew what the difference in flavor was and I never thought to ask. Now I believe that I know the answer: Herbes de Provence! I am a fan of Herbes de Provence.


What is Herbes de Provence?

I'd never heard of that seasoning blend until recently. While searching for a recipe for venison stew I found a young lady that uses Herbes de Provence in her recipe. I listened to why she recommended it and I looked it up. 

Herbes de Provence is a blend of herbs that were used in the Southeastern region of Provence France. These herbs were widely used because they were widely available in that area. The blend began to be bottled in the 1970s and became more widely available. The bottled version that I have contains:

  • Thyme
  • rosemary
  • basil
  • parsley
  • oregano
  • tarragon
  • marjoram
  • lavender flowers
I was a bit hesitant when I learned that lavender was included. In my opinion, lavender has become one of those scents and flavors that is becoming too widely used. And used with a heavy hand. But I decided to give a try just once. It turns out that the hint of lavender with the other herbs in a stew adds a wonderful flavor.

How Did I Make Delicious Tender Venison?

Venison is a very lean meat making it a healthy choice. Because it is so lean it can be overcooked and become rubbery. I have made the mistake of overcooking venison. This is why searched for tutorials on making venison stew. I wanted something other than a roast made in the crockpot and I wanted to attempt a flavorful stew.

I decided to use the recipe from Miss Allie's Kitchen, Her recipe includes venison, celery, potatoes, onions, and carrots. Her recipe is also how I heard about Herbes de Provence.

I seared the chunks of venison and removed them from the pan. I placed the other ingredients into the pan for just a bit to aid in softening them. I didn't realize that I didn't have diced tomatoes. So my first attempt did not include that ingredient but the stew turned out great despite that omission.  I then removed the vegetables from the pan, added the venison back into the pan with a sprinkle of flour as other recipes suggested to thicken the stew. I added the remainer of the ingredients and closed the pressure cooker.

Because venison is so low fat, I used a small pressure cooker. I prefer a stovetop pressure cooker although my son is trying to convince me to purchase an Instapot. I am accustomed to the stovetop style pressure cooker and get good results. But there are several ways to cook this stew and you can choose what works best for you.

(note: The brand shown in the Amazon link is the brand I use and prefer. However, at the time of this writing, the product listed on Amazon is double the price of the same product in local stores)

Related Links:

Watch Miss Allie's Kitchen Classic Venison Stew video tutorial here

Find the ingredients and Miss Allie's Kitchen written recipe here

I recently began baking popovers which are perfect with venison stew! You can see my review of popovers here


Note: The author may receive a commission from purchases made using links found in this article. “As an Amazon Associate, Ebay (EPN) and/or Esty (Awin) Affiliate, I (we) earn from qualifying purchases.”


Tuesday, December 6, 2022

Air Fryer Italian Style Roasted Potatoes

 These Italian-style potatoes are a perfect complement to any main dish. I'm calling these roasted potatoes, but they were really air fried in our Ninja Foodi Grill and Air Fryer.

a dish of Air Fryer Italian Style Roasted Potatoes
Air Fryer Italian Style Roasted Potatoes Reviewed

Fran picked up a nice rump roast last week and cooked it in our Instant pot. While it was cooking I remembered the days when my mother would cook a roast in the oven for hours with these delicious roasted potatoes. So, I thought why not try to duplicate these potatoes in the air fryer. 

Air Fried Italian Style Roasted Potatoes:

4 or 5 medium potatoes (washed and peeled)
3 tablespoons olive oil
1 clove of garlic (minced)
2 tablespoons of Italian seasoning 
1 teaspoon of garlic powder
Salt and Pepper to taste

Directions:
  1. I washed and peeled the potatoes and cut them into quarters. 
  2. Placed them in a one-gallon plastic freezer or storage bag.
  3. Add the olive oil close the bag, shake and mix.
  4. Open the bag and add the remaining seasoning, close and mix again.
  5. Preheat the air fryer to 390 degrees and set the time to 20 minutes.
  6. After 10 minutes I turned them over.
Although I set the timer for 20 minutes, I checked them again at 15 minutes and they were done. It's always a good idea to check the food when you're making it for the first time. Different brands of air fryers may vary with temperature and time.

Needless to say, these potatoes were a perfect side dish for the rump roast. They were crispy on the outside, tender and soft on the inside, and full of flavor.


Note: The author may receive a commission from purchases made using links found in this article. “As an Amazon Associate, Ebay (EPN) and/or Esty (Awin) Affiliate, I (we) earn from qualifying purchases.”


Monday, December 5, 2022

Reviewing Popover Recipes - Easy and Delicious Baked Treats

Once I was served warm popovers at a brunch I was obsessed. I had to have more. I had to be able to bake my own. These small baked treats are great with soups, stews, quiches, roasts, and so much more. They are surprisingly easy to throw together and throw into the oven. And they only require 6 ingredients: flour, eggs, salt, butter, milk, and eggs. There is a good chance you've heard of popovers. But just in case you haven't I want to make sure to spread the word.

photo: Fox Run Popover Pan

Earlier this year I was invited to a neighbors home for brunch. She served quiche and popovers. I had no idea what popovers were and when she shared what was on the menu I had a brief thought of "did she say PopTarts?".  It turns out that she did not say PopTarts. She was serving the most delicious quiche with these funny-looking biscuits called popovers. 

It is easiest for me to say that popovers are biscuits. They can be served in place of biscuits with breakfasts, roasts, soups, and stews. But for some reason, I want to call them a pastry. I don't know if baking experts would call them a pastry. But they are crispy on the outside while light and flaky on the inside. In fact, if you bake them on the shorter end of the recommended time, they are a bit like custard on the inside. 

The 6 Popover Ingredients

Popover recipes are all over the internet. They are basically equal (or almost equal) amounts of flour and milk. Added to 3 - 4 eggs, 2-3 tablespoons of butter, and a pinch of salt. The recipe I use is:

  • 1 c flour
  • 1 c milk
  • 3 eggs
  • 1/2 tsp salt
  • 2 Tbsp butter
Beat the ingredients until smooth. The batter is similar to pancake batter. You may think you've made a mistake and added too many wet ingredients. You haven't.

Martha Stewart uses 1 1/2 cup flour and 1 1/2 cup milk in her recipe. She also gives step-by-step instructions. Her recipe is here if you'd like to use that recipe. 

Popover Tips for Better Results


The same neighbor who served the popovers at the brunch also gave me a popovers pan. Popovers can be made in muffin tins but they do much better in a specific popover pan.

Spray just a small bit of cooking spray in the bottoms of the cups. 

Fill the popover pan cups only 1/2 full. They will rise and pop over the tops of the pans. If you are prone to overfill things, place the popover pan on a cookie sheet to catch any spillage. 

Hot oven. Popovers like 400 degrees or more. Some recipes call for a hotter over to begin with and lowering the temperature part way through. I don't mess with that. I do 400 degrees for 35-40 minutes. Remove the popovers from the pan as soon as they come out of the oven. 

The recipe I use makes almost 12 popovers. I tend to fill my popover cups slightly more than half. If I only filled them halfway the recipe would make 12 popovers. I also found that it makes it much easier to fill the cups using a glass measuring cup with a spout.

On the popover episode on America's Test Kitchen, they recommend bread flour and warming the milk and butter for better results.  I agree. When I remember to use bread flour and warm both the butter and milk (with the eggs at room temperature) I do have slightly better results. However, the recipe is forgiving. My neighbor sometimes uses almond milk and uses all purpose flour. I prefer whole milk and bread flour. 

Popovers are an excellent part of your daily menu and a wonderful item to serve to guests.


Note: The author may receive a commission from purchases made using links found in this article. “As an Amazon Associate, Ebay (EPN) and/or Esty (Awin) Affiliate, I (we) earn from qualifying purchases.”


Friday, October 28, 2022

Reviewing Homemade Instant Oatmeal

 homemade instant oatmeal in a bowl with a cup of coffee


I really like oatmeal for breakfast.  It is warm and filling and keeps you going till lunch or beyond.  Unfortunately, I rarely want to take the time to make it.  Boil the water, stir and stir, trying to figure out how much sweetner to put in, it is just a hassle for only one person. As a result, I used to buy instant oatmeal in the package; pricey but quick and easy was my reasoning until one day I took a look at the ingredients:

  • Whole Grain Rolled Oats
  • Sugar
  • Natural and Artificial Flavor
  • Salt
  • Calcium Carbonate
  • Guar Gum
  • Carmel Color
  • Niacinamide
  • Reduced Iron
  • Vitamin A
  • Palmitate
  • Pyridoxine
  • Hydrochloride
  • Riboflavin
  • Thiamin Amononitrate
  • Folic Acid

Hydrocloride?  Pyridoxine?  What is that?  Whatever it is I don't think it sounds very healthy.  I would prefer something that is a bit more good for you than store bought instant oats that are full of stuff I never heard of.  

So I decided to see if I could make my own instant oatmeal that would be convenient, quick and best of all not chocked full of additives and preservatives that are definitely not good for you!  I wanted to make a recipe that I could do in bulk and then split it up into individual servings, that was easy to store and would keep for at least a week.  

I sat down with a pencil and paper and did some thinking.  After coming up with a plan, I did some checking on the internet to see if the ingredients needed refrigeration and how long they would stay fresh.  When I had my formula (I actually did feel kind of like a mad scientist.....hehe) I made my first batch.


It took some experimentation but after a few tries, I finally came up with my favorite recipe for instant oatmeal:

Ingredients:

  • 4 cups oats
  • 1 teaspoon cinnamon
  • 1/4 teaspoon nutmeg
  • 2 tablespoons of brown sugar (can use Splenda Brown Sugar)
  • 1/2 cup raisins
  • 1/4 cup sliced almonds

Directions:

Mix these together in a bowl

Put 3/4 a cup into a small zipper bag


How to Cook:

Pour the contents of the baggie into a bowl or mug

Add 1 to 1 and 1/2 cups of skim milk and stir

Cover with a paper towel 

Microwave for about 3 minutes

Stir and let sit for a couple minutes


To keep from getting bored, sometimes I put other things in my oatmeal to give it different flavors like:

  • Pistachio nuts or any nuts you like, chopped
  • Coconut
  • Dried apricots, chopped
  • Dates, chopped
  • Dehydrated apples, chopped
  • Mini Chocolate or Peanut Butter Chips
Sometimes I put fresh fruit in my oatmeal, if I have any in the fridge, like strawberries or blueberries.  I have also been known to put maple syrup or honey in it instead of brown sugar. There are so many things you could put in your oats, it would take years to find them all.  Actually, its kind of fun to come up with different flavor combinations.  I have run across a few that were surprisingly delicious like:

  • chocolate chips and peanuts
  • sliced fresh bananas and coconut
  • dried cranberries and pecans
  • diced dehydrated apples and chopped walnuts

These zipper bags do not need to be refrigerated and they last a long time without spoiling.  They also make great jar gifts for friends that have the bad habit of skipping breakfast!      My homemade oatmeal is much healthier and cheaper than what you buy in a store and frankly much more yummy!  Try making some and see for yourself.

__________________________

Image Credits: 

https://www.flickr.com/photos/cogdog/3180105556/sizes/z/


Note: The author may receive a commission from purchases made using links found in this article. “As an Amazon Associate, Ebay (EPN) and/or Esty (Awin) Affiliate, I (we) earn from qualifying purchases.”


Friday, October 21, 2022

Quick & Easy Baked Lemon Chicken Recipe Reviewed

Lemon Chicken Recipe

Our son's favorite dinner is my baked lemon pepper chicken. I serve it over rice, which I make in my rice cooker while the lemon chicken is baking in the oven.

I normally make 6 servings, but the recipe can easily be doubled.

Six serving may sound like a lot, but each serving is 1/2 of a chicken breast. Baking the chicken in smaller pieces allows the flavor to bake fully through the piece of chicken and makes it very tender.  The recipe, as shown below, is enough for 3 or 4 adults.

When my oven went out last year and I had to wait months for a replacement, I started baking this recipe in my Calphalon Performance Cool Touch Countertop Toaster Oven.  Since it has a convection bake option, the lemon chicken baked up beautifully in the small oven without heating up my kitchen. Now, I bake it in my countertop oven every time I make it, unless we are having company and I need more chicken.


Delicious Baked Lemon Pepper Chicken Recipe


Because the rice takes 45 minutes to cook in my rice cooker, I start the rice before I put my chicken in the oven. I make 2 cups of rice for this dinner.  


Prep Time Cook Time Ready In Yields
15 min. 35 min. 50 min. 3- 4 servings

lemon slices on top of chicken for lemon chicken recipe
Ingredients 

  • 3 boneless, skinless chicken breasts (Cut in half to make 6 pieces)
  • 2 Lemons - Thinly Sliced
  • 8 Tablespoons Butter, plus more for coating the pan
  • 2 1/2 Tablespoon McCormick Lemon Pepper Seasoning
  • 2 1/2 teaspoon salt
  • Chopped Fresh Parsley (if desired)

Directions

  1. Heat the oven to 425°F. (Convection 400°F)
  2. Lightly coat baking dish with butter
  3. Wash and pat dry chicken breast with paper towels – Cut in halves
  4. Melt butter in the microwave. Add Lemon Pepper seasoning & salt to melted butter. Stir until combined
  5. In a large bowl, roll each piece of chicken in the butter mixture and place it in the prepared baking dish. (brush any remaining butter on top of the chicken pieces once they have all been rolled in it)
  6. Place 2 or 3 lemon slices on each piece of chicken
  7. Bake for 35 minutes
  8. Garnish with chopped parsley, if desired


Note: The author may receive a commission from purchases made using links found in this article. “As an Amazon Associate, Ebay (EPN) and/or Esty (Awin) Affiliate, I (we) earn from qualifying purchases.”


Most Recent Reviews on Review This Reviews


Search for Reviews by Subject, Author or Title

The Review This Reviews Contributors


SylvestermouseSylvestermouseDawn Rae BDawn Rae BMbgPhotoMbgPhotoBrite-IdeasBrite-IdeasWednesday ElfWednesday ElfOlivia MorrisOlivia MorrisTreasures by BrendaTreasures by BrendaThe Savvy AgeThe Savvy AgeMargaret SchindelMargaret SchindelRaintree AnnieRaintree AnnieLou16Lou16Sam MonacoSam MonacoTracey BoyerTracey BoyerRenaissance WomanRenaissance WomanBarbRadBarbRadBev OwensBev OwensBuckHawkBuckHawkDecorating for EventsDecorating for EventsHeather426Heather426Coletta TeskeColetta TeskeMissMerFaeryMissMerFaeryMickie_GMickie_G


Review This Reviews is Dedicated to the Memory of Our Beloved Friend and Fellow Contributor

Susan DeppnerSusan Deppner

We may be apart, but
You Are Not Forgotten


“As an Amazon Associate, Ebay (EPN) and or Etsy (Awin) Affiliate, I (we) earn from purchases.” Disclosure Statement

X