Showing posts sorted by date for query fotojet. Sort by relevance Show all posts

Thursday, November 29, 2018

DesignCap Free Online Poster Maker Reviewed

DesignCap is the free online poster maker offered by PearlMountain to make all your poster and flyer graphics easy to make and easy to design. The variety of templates, colors, text and background options are endless and will whet your appetite to make free posters in a few minutes for all your events.
Doggie in a blanket banner

WYSIWYG What You See Is What You Get


The DesignCap software is WYSIWYG which is very helpful for all levels of poster designers.
Beginner designers will enjoy the ability to change a template with the click of a mouse and the visual changes are immediate. Graphic designers with more advanced skills will find the templates easy to adjust with the text, color and image options.

DesignCap is an online program which is a bonus as software is not required to download to your computer; design the poster and simply save the poster as a download for its' future use.

I used the cover of my cookbook to test DesignCap and loved the ability to upload an image and change the background in a few seconds.

Background Options DesignCap

DesignCap offers a large variety of background colors and one can get lost (in a good way!) browsing through the options and making changes.

This is the DesignCap template I used for my cookbook.

cookbook poster


This is the same template with a different border using the background menu.
The Low Oxalate Cookbook

The border was changed with a quick of the mouse when browsing the background menu. It was very helpful to have different colors and designs available to change the colors of the background.

Intuitive Design

Overall I found the menus easy to use and intuitive. The text menu to change the font size was less intuitive; however this is more than likely dependent upon the skills the designer has prior to using DesignCap. Two options exist to change the font size: the A+ or A-  or the font size can be changed manually. I like the ability to choose the font size manually; however, a first glance it appears the font size is limited to the drop down menu sizes when in fact any size font can be chosen by typing in the size. DesignCap offers tutorials for assistance and step by step guidance through its' menu options.

Image Size


The design can be saved in either jpg or png format. Remember this is a poster therefore the size is large. The image can then be scaled down if necessary or optimized prior to using on a website.

PearlMountain

DesignCap is the latest online design program from PearlMountain along with the established Fotojet and DesignEvo, the free online logo maker. The mission of PearlMountain, "We aim to make professional photo editing and graphic design capability accessible to everyone."


Note: The author may receive a commission from purchases made using links found in this article. “As an Amazon Associate, Ebay (EPN) and/or Esty (Awin) Affiliate, I (we) earn from qualifying purchases.”


Saturday, August 18, 2018

DesignEvo: Free Logo Maker Reviewed

Need a logo in minutes? DesignEvo is a free online logo maker which gives users the ability to make a logo in minutes; whether a novice or graphics professional DesignEvo provides the online software to make, create and design a logo quickly and easily.

Easy As 1-2-3


DesignEvo promises that a logo can be made in minutes and what is promised is delivered. I actually timed the making of this logo with a DesignEvo template. I used my lifestyle website and tagline to explore designing a new logo.


How To Use DesignEvo


I launched the free logo maker, scrolled down to my chosen category (Letter), scrolled through the options, entered the website name (or Company Name),  tagline and voila! Total creation time including download and social share =  2.5 minutes.
Savvy Age Logo
After creating the logo I quickly modified a few parts of the design. I tweeked the size,  modified the dot icons, changed the background color and then proceeded to download the logo and the required social share.

The requirement for a FREE logo to download for your use is very simple; a social share is required prior to downloading and credit on your website or blog. After downloading you will find a zip file with the logo as a jpg, png and a readme file with the share requirements.


What You See Is What You Get

The design interface is very user friendly and intuitive. Once the logo is created a Preview is available to see your logo on business cards, letterhead or media products.

This is a very nice program for novices to instantly create a logo by using the provided templates; for those with more advanced graphic skills the online software has the features to further customize the logo.


Customize Your Free Logo

Your logo can be easily customized with the color, font and transparency options. If you have the HEX colors for your company then the color of your logo can be changed with a few clicks of the mouse. The interface is clean, self explanatory and easy to navigate; if help is needed video tutorials and FAQ's are available under Support.


Who Is DesignEvo?

The About page of DesignEvo gives insight into the evolution of DesignEvo. Pearl Mountain developed Fotojet, a free online collage maker and is also the creator of DesignEvo. The logo maker is free or users have the option to purchase advanced features for a one time annual fee. Logo features such as resolution, copyright, vector files are restricted to the paid version.


Recommendation

I enjoyed the ease of using DesignEvo, the user friendly interface and the instantaneous results of a ready to use logo within minutes.  Colors, fonts, icons and graphics are just a click away to personalize your logo to your brand or create a brand new logo with a customizable template.


Note: The author may receive a commission from purchases made using links found in this article. “As an Amazon Associate, Ebay (EPN) and/or Esty (Awin) Affiliate, I (we) earn from qualifying purchases.”


Saturday, April 28, 2018

Crobots – An Amigurumi Robots Crochet Pattern Book Review

Robot image
Pixabay Image w/Text by Fotojet
Robots have fascinated people for many years and are especially popular with children. No doubt the favorite robot in recent years is R2D2 from Star Wars!  The robots, androids and artificial intelligence we have seen are machines made of metal or some other hard material which are fascinating to watch and fun to look at, but not to hold. 

How about if we made playtime toy robots out of something soft, such as yarn?  If you were to crochet a yarn robot, it might be called a CROBOT


Crobots


Crobots book cover
Crobots: 20 Amigurumi Robots to Make
In this crochet pattern book called Crobots by Nelly Pailloux, there are instructions to create 20 tiny creatures which are cute and cuddly and adorable. 

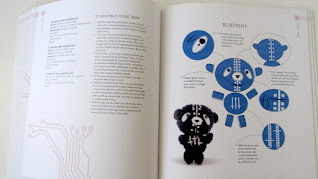
Each Crobot pattern includes a color photo of the finished 'robot', an ingredients list showing you everything you need to match the photos in each section, along with instructions for creating them.  Each Crobot is crocheted in sections, then joined together. The instructions also include a Blueprint page showing you how the sections fit together. 


Example of a Crobot creature page of instructions

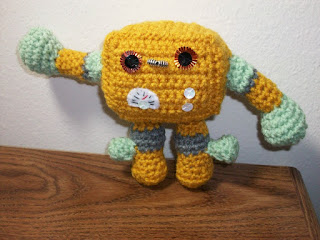
Many of these crobot creatures are decorated with beads, sequins, buttons, jewelry fasteners, and even nails & wire springs. 

A crocheted Crobot
Big Bot Created for an Anime Shop
This is Big Bot made using sequins for eyes and a spring nose.This version of a Crobot looks really cute if you are making it for an adult Sci-Fi, Steampunk or Anime Fan to perhaps decorate a work space or give as a unique gift.  

Toy Crobot (crocheted robot) from the Crobots pattern book
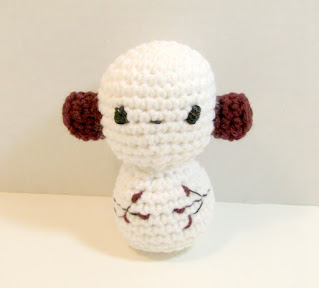
Thinker I call Snow Bot

But I crochet primarily for children, so my version of these crobots are finished with simple embroidery to keep them soft & safe all over. Whichever version you choose, these tiny Crobot robots are fun to make in crochet. They include a Space Mouse, a Cosmic Bear, a Dogbot, a Catbot, a Zombiebot, a Geisha Girl, a Ninjabot, an Alienbot and a dozen more.  They each take very small amount of yarn and are fun to make. 


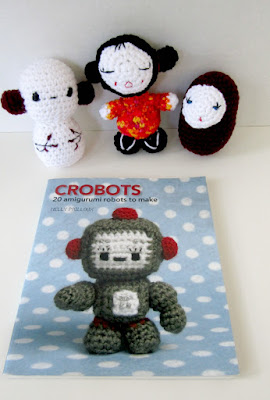
A Few Examples of Crobots I Created from this Book

Image of the Crobots crochet pattern book with some handmade examples


The Thinker


A plush doll called The Thinker looking at his crochet pattern in the Crobots crochet book
This quiet little doll is called THINKER in the Crobot crochet book.  I decided he looked like a Snow Bot and crocheted him in white acrylic yarn filled with soft polyfil toy stuffing. He has burgundy ears on his large Amigurumi head, and embroidered features. His spindly embroidered arms and sweet wistful face show off the fact that he is a thinker who likes to sit quietly and figure things out. He's the perfect companion for a quiet child. He'd also sit quietly on someone's desk at work to help them concentrate.

Sammy the stuffed snow bot robot doll measures just 5 inches tall. He's soft and sweet and ready-to-ship. 


Matryoshka the Housekeeping Crobot


A Babushka doll in plush crochet looking at her crochet pattern
Burgundy Babushka Robot Doll

In the Crobot pattern book, Matryoshka is described as having a babushka mother and a robot for a father, making her quite technical at heart with the rivets, dials and switches shown in the pattern.  I decided she'd make just a sweet babushka doll, so her features are embroidered.  My version is round and soft and comfortable for little hands to hold.

My cute little Babuska doll is hand-crocheted in burgundy acrylic yarn with a white face with embroidered features. She is softly stuffed with polyfil toy stuffing and measures just 4 inches tall. 

Burgundy Babuska doll will fit nicely in a pocket for a child to carry around to play with. She is very squeezable in her round shape and would fit perfectly on someone's desk at work as a cheerful presence. She could also make an excellent stress ball and wouldn't mind at all if you squeeze her. :)

Burgundy Babuska would also make a cute Valentine's Gift, stocking stuffer, or a cute gift for little girls for a birthday or anytime gift.


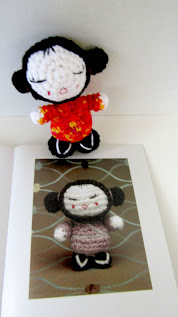
Geisha


Geisha Girl Amigurumi Doll in crochet
Geisha Girl Amigurumi Doll
This is a Geisha Girl Amigurumi Doll who is a sweet and shy little doll dressed in Geisha Girl style. 

She measures 6 inches tall and has a sweet hand-embroidered face. 

Her elaborate hairstyle has red ties and she is wearing little sandals on her feet. 

Geisha Girl Doll is hand-crocheted in acrylic yarn in black and white with a Sunshine print Kimono. 

She is filled with new polyfil and is ready-to-ship to a toybox near you or be a friendly companion on your desktop.  


Past Examples


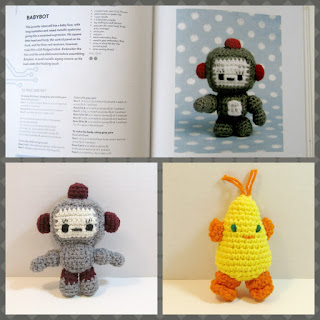
Collage of  crochet pattern book, The Crobots, with examples of crocheted robots

A few other examples of Crobots (a Baby Bot and a Sumo Robot Doll) I have made from this book are shown above.  These have sold, but can be recreated by a request through my Etsy Shop, Coastal Crochet Crafts.


Crobots Summary


A Collage of the crochet pattern book 'Crobots'
Crobots Craft Book is Available on Amazon

This is a unique and interesting little crochet pattern book for crafters who like to make little dolls, especially with a Sci-Fi or Steampunk theme to them. 


(c) 2018 by Wednesday Elf


Note: The author may receive a commission from purchases made using links found in this article. “As an Amazon Associate, Ebay (EPN) and/or Esty (Awin) Affiliate, I (we) earn from qualifying purchases.”


Saturday, October 21, 2017

How to Create Pinterest Images with Photoshop


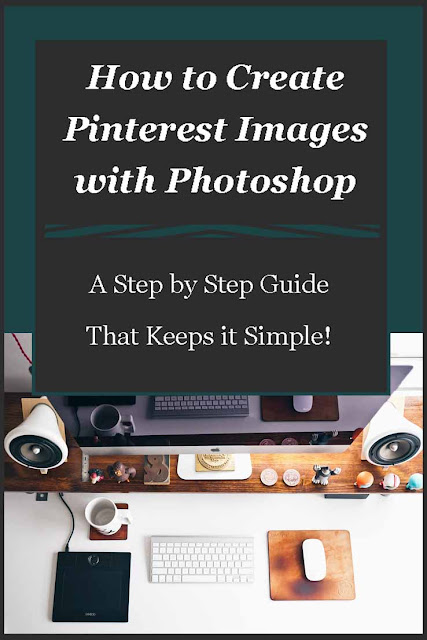
How to Create Pinterest Images with Photoshop - A Step by Step Guide
Today I'm going to review how to create Pinterest images with my favorite photo editing software - Photoshop!  I create most of my Pinterest images with Photoshop, I have tried a few other places, but I always come back to Photoshop.

I've been asked quite a few times how I create my images for Pinterest which is why I thought I'd just show you.  Now I can't promise you that your images will take off in popularity on this social media platform, but I can promise you that the steps will be easy to understand.

I have been using Photoshop for a few years now, but the way I create the majority of my images are easy for beginners and experts alike to follow.

The first thing you have to do is open up your Photoshop and select a new file, I simply press Ctrl N to do this, but you could use the file menu and open it that way.

You will be greeted with a pop up box where you have to select your image details, it looks like this -

set image measurements on photoshop

I only change two things on the default and that is the width and height as you can see on the image.  I have changed the image height a few times, but the majority of the time I just use the standard 738 x 1105.

The next step means finding the image you want to use for your pin so I've decided that I want to do a pin for my welcome to Lou16.com post (I can't believe I was missing a Pinterest image on that post until I wrote this!)

I'm going to use the image I have in my introduction as the main image for my Pinterest image as well so let's have a look at what we're going to do....

add image to draft for Pinterest with Photoshop,

So the first thing I do is create a new file, then I open up the photo I want to use and drag it onto the new file.

1.  Here you can see that this image has a border that I created previously.  I'm going to use this color for the background so to do this I need to use the eyedropper tool to select the exact color.
2.  This is the eyedropper tool.  To use this you click on the tool and then click on the color that you want to select.
3.  After selecting the color I make sure to select the correct layer (in this case the blank one as I'm using this for background.
4.  The paint bucket tool will cover the layer with the selected color.

After doing all of these steps you'll be left with the next image.

add background color to Pinterest images with Photoshop,

3.  I'm going to do things backwards here and get you to look at number 3!  When I did the background color the teal was on top and the white was underneath, as I'm thinking of doing the text in white I switched them around.  Sometimes when you're using two colors you can just change between these two to save having to use the eyedropper tool again.

Back to our image..

Now I want to add some text to the image so I have to select the text box.

1.  This is the Text box and you have to click on this before adding any text.
2.  This is the text tool bar, you can change the color from here (it will default to the top square at number 3 unless you change it), you can also alter the font, the font size and whether you want to use a bold or italic or both.

add text on Pinterest images with Photoshop,

As you can see I dragged the image down a little so that I could add text above and below it.  Above I just used regular and underneath I selected italics.  You can also highlight just one or two words and change their color or size in order to make an impact.

1.  There are different things you can select on the side including a border which I always use for my Pinterest images.  You select the border (or arrow as I have done on these images for you) and click apply - the color on top of the color box is what color the object will appear as.

I didn't want to use white as a border because the website background is white so I used the eyedropper tool to select another color from the photograph.

I always try to pull either the border, background or text (sometimes all of them) from the actual photo as you know it's going to go.

Create Pinterest images with Photoshop,

I always keep Photoshop open until I see the final image uploaded to the website.  In this case I uploaded the border from a light green in the foliage that really made it pop on Photoshop, but looked strange on the white background of the website.

I then changed the border to the blue of my t-shirt, but again on the white background of this site it just didn't look quite right.  The third and final one is what is pictured above and I've use the brown of my hair!

Now you don't always have to use a photo, sometimes I'll use a graphic from a site like Pixabay and use that.

This is a very basic way to create a Pinterest image using Photoshop, as you get used to using it you can get more and more creative with using several images merged together like this one from another post I created -

Get Traffic to Your Website

In this image I used an image of traffic which I reduced and played with to get it to fit onto the laptop screen.  The background is taken from the laptop color and you can see I changed the color and font size of the 21 in the image.

Start off simple and as you get used to using these tools you'll find yourself creating all kinds of images, try not to become too addicted to Photoshop as once you start down this rabbit hole you can lose all sense of time!

You might be interested in my other Photoshop tutorial (and there will probably be more to come!) -


Peach Cobbler RecipeHow to Remove Blemishes From Photos Using Photoshop
Let's review how easy it is to use Photoshop to remove blemishes from photos, trust me it's really simple and well worth the time spent to restore old family photos.


Our contributors here on Review This also use other platforms to create their images for Pinterest so be sure to check out our tips for writers including -


... and let's not forget our Pinterest tips -


Before leaving I'd like to tell you one of the things that really helped me with getting traffic from Pinterest (obviously the images help!) and that was using Tailwind, I highly recommend this scheduling tool for anyone who wants to harness the power of this visual social media platform.

If you've found this article helpful please share on your favorite social media platform.

A Step by Step Guide to Creating PInterest Images with Photoshop
Image by Lou of Lou's Designs


Note: The author may receive a commission from purchases made using links found in this article. “As an Amazon Associate, Ebay (EPN) and/or Esty (Awin) Affiliate, I (we) earn from qualifying purchases.”


Wednesday, August 2, 2017

How To Trap Those Flies That Drive You Crazy: A Window Fly Trap Review

Flies in Your House Can Drive You Crazy

I'm usually pretty sane, but if I'm preparing a meal or trying to eat, seeing flies buzzing around me drives me nuts. Flies are dirty and carry diseases. I don't want them in my kitchen when I'm preparing, serving, or trying to eat food. 

How To Trap Those Flies That Drive You Crazy: A Window Fly Trap Review
Photo Courtesy of Pixabay, edited on FotoJet


Imagine my distress when my husband left the door open two weeks ago while he went outside to get something and about a dozen flies flew in! Once the flies were in, they didn't want to go back out.

 For at least ten days I fought them with folded newspapers and a fly swatter to no avail. Those pesky flies knew how to settle just where they would land on a clean dish or plate of food were I to swat them. I did get a couple who lit where I could hit them, but most escaped from my attacks. It seemed for every one I killed, two more would appear in its place. It seemed everywhere I went in the kitchen or family room, at least five flies were circling in the air. My stress level was high. 

My Electronic Fly Trap

After a few days of watching helplessly as the flies treated my table and walls as their personal airport, I remembered I once had an electronic trap for mosquitoes and other flying insects. I hadn't used it for years and was, in fact, storing it in the kitchen at our other house. I decided to retrieve it. In the past, it had caught a few flying insects. The one I own is obsolete now, but it was similar to this one and worked the same way. 


It uses light to attract the insects. Then it sucks them into a lower compartment with a powerful fan and traps them there. Eventually, they dehydrate. These traps work pretty well for mosquitoes, as I remember. Reviewers on eBay seem to agree with me. It may work for you if you have a problem with mosquitoes.

However, it did not work very well on my flies. I had it on the kitchen table and turned it on at night before I went to bed after other house lights were off. At my first morning bladder call, I'd shut the trap before the sun was up.  Unfortunately, my husband got up after me and thought he should turn it on again, which opened the trap. I'm not sure it ever caught a fly for long. Their numbers did not seem to decrease.

I brought my vintage Stinger NOsquito Ma06 Indoor Insect Mosquito Bug UV Light Quiet Electronic Trap | eBay decades ago. I don't remember where. I did find one like mine on eBay, which you can see if you follow the link above. 

Shopping for a Solution to My Fly Problem

Finally, I couldn't stand it anymore. I had to find a solution! I went to Walmart in search of fly paper, but they didn't have anything but sprays. I don't like poisons, especially spray poisons, anywhere I prepare or eat food. Rather than drive all over town, I checked Amazon. I found a description for Catchmaster Window Fly Traps.

These simple window traps got four to five-star reviews, depending on package size and seller. They were really cheap in comparison to the electronic zappers and light traps, some of which got much lower reviews. I figured I didn't have much to lose by trying the Catchmaster traps. They are very simple to use. They catch the flies that land on them with a very sticky surface that holds them in place. I keep my traps beneath the blinds that cover the windows.

How to Set the Catchmaster Window Fly Trap


How To Trap Those Flies That Drive You Crazy: A Window Fly Trap Review
Image created on FotoJet, © B. Radisavljevic

Here's how to prepare your traps:

  1. Open the package
  2. Pull out the trap
  3. Tear the narrow release strip off the trap
  4. Stick the trap in the corner of a window
  5. Be careful to put it where you won't need to touch it to open and shut the window
  6. Peel off the large release liner that faces toward you. 
  7. Wait patiently for the flies to land

My Results

How To Trap Those Flies That Drive You Crazy: A Window Fly Trap Review
Victims Trapped in My Kitchen Window. © B. Radisavljevic


I tend to be impatient, and catching flies this way isn't instant. I had put six traps in windows the day I got them. The next day only four flies were stupid enough to land on them. (I hate that flies seem to be smarter than I am.) As I write this, I've had my traps up for about ten days. I have trapped thirteen flies, a few gnats, and a couple of baby spiders that must have just hatched. I still have one very smart fly who continues to stay away from the traps. My east windows seem to catch the most flies.

Two days after I'd placed my first traps, Hubby went to shopping and found some Pic Window Fly Traps and brought them home. He didn't realize I still hadn't used all my Catchmaster traps. I finally decided to try a couple of the Pic traps to see if they would do any better at catching the flies still in the air. I picked one window and a bathroom mirror where I'd not yet caught any flies and put a Pic trap in another position in each of those places. They haven't caught any flies, either. Not yet.

Perhaps I just put the Pic traps in bad places, but a fly had circled that bathroom about every time I'd walked in. The Pic traps got better reviews a couple of years ago, but more recent users say they aren't as sticky as they used to be and aren't catching flies as well anymore.


How To Trap Those Flies That Drive You Crazy: A Window Fly Trap Review
God Designed the Very Best Fly Trap, © B. Radisavljevic
Of course, there is the messiness factor, and one can't be too squeamish.

My Recommendation

If flies are your primary problem, electronic zappers and light traps with fans probably won't work for you. I've read the reviews for just about all of them. I was leaning toward the light-fan combinations that plug in like night lights, but they got bad reviews. The electronic gadgets seem to work better on smaller flying insects with lighter bodies. They may be effective with gnats and mosquitoes, but the house flies that drive me crazy are much heavier. 

The Catchmaster Window Traps I tried worked pretty well. I'd much rather deal with one stubborn fly than fourteen. Getting the gnats and baby spiders, along with anything else that wants to land on my windows, is a bonus. 

I believe these traps are a great value for the money. My life has been much calmer since I put them in my windows. There is a bit of a yuck factor in having to look at trapped flies, but you can decide where to place your traps. If you put them in top window corners instead of the lower ones you won't have to look at them so often. You also need to be careful not to touch the sticky part of the traps. My mini blinds hide the traps, including the one next to the table, most of the time.

If flies in your kitchen drive you as crazy as they do me, I believe these window traps will help you as more or more than the other fly catching gadgets I've tried or looked at. Why not pick up an inexpensive package now so you'll be ready immediately to fight any flies who invade your home. Any mosquitoes, gnats, fruit flies, moths, and spiders you catch will just be a bonus. 


 Window Fly Traps by Catchmaster - 12 CountCheck Price Pic-Corp Window Fly Traps (12 Pack of 4)Check Price RESCUE! Outdoor Disposable Hanging Fly Trap - 12 TrapsCheck Price


See more product reviews from our contributors.


Note: The author may receive a commission from purchases made using links found in this article. “As an Amazon Associate, Ebay (EPN) and/or Esty (Awin) Affiliate, I (we) earn from qualifying purchases.”


Wednesday, May 24, 2017

Review of Before, Afdre, and After: Memoir of a Stroke Survivor

Just Imagine if This Were You

You are 33 years old, healthy, and in the prime of life. You have a great job in an advertising agency as a copywriter. One day at work you have a massive stroke and nothing is ever the same again. That's what happened to Maureen Twomey. It's a miracle she survived her stroke and recovered enough to write Before, Afdre, and After (My Stroke...oh what fun). Maureen's story is one of courage, the support of friends and family, and dedicated doctors and therapists. It's a must-read for anyone who knows someone or is caring for someone who is recovering from a stroke. 

Review of Before, Afdre, and After: Memoir of a Stroke Survivor
Image Courtesy of Pixabay, edited on FotoJet.com

Maureen's Miracle Story -  Before

The book opens as Maureen shows us her life before the stroke. She was born and grew up in California, graduated from UCLA as I did (but much later) and got some great jobs in advertising. At the time of her stroke, she was working in the Bay Area. She had oodles of friends and an active social life. She was taking a class in improvision, which she loved. She was known for her sense of humor. The stroke could not kill that in her. 

Maureen was at work the day she had her stroke, June 6, 2000. The first symptoms manifested while she had taken time away for an appointment with a dermatologist who saw her after 2 PM. She started to feel funny. Her right eye was flashing, but a few seconds later she felt better and walked back to work. It was there her coworker Amy found her crying in the hallway outside her office because she is anxious about her symptoms. The flashing lights in her eye are back and there is some tingling in one side of her body. She has a slight headache. But when she talks to her doctor and tells him she's not in pain, he just said to call back if the symptoms get worse. She starts to work again. It is now 3 PM.

At 4:20 she is still at work and her symptoms get worse and more resemble classic stroke symptoms. She had decided to skip her improvisation class that night and was typing an email to explain her absence. Suddenly the words made no sense to her. Then she fell on the floor. Amy heard her fall and start crying. Symptoms are full-blown. Amy calls the doctor back to get an appointment for Maureen and the doctor told her to call 911. 


At the Hospital - Afdre


When the paramedics arrive to interview Maureen it is 4:50. Maureen can express herself with some difficulty. Although the paramedics take her to the emergency room at California Pacific Hospital, they don't think this is an emergency that merits lights and the siren. It takes 20 minutes to get to the emergency room. By this time three hours have elapsed since the onset of symptoms. At 6:20 they do a CAT scan. At 7:30 they do a spinal tap. They release her to spend the night with her father and his wife Judy. 

The next morning, June 7, as Maureen tried to eat breakfast, she started feeling strange. Then she couldn't remember anything. Her dad was so alarmed he carried her to the car and drove her straight back to the emergency room. By then Maureen could neither walk nor talk. She finally was diagnosed with a massive stroke, but it was too late to give her the clot-busting drug that can prevent permanent damage. It has to be given in the first hours after onset of symptoms. 

Stroke Survivor Memoirs 

I plan to soon read some of these stories by and about others who have survived strokes. Some contain helpful information on recognizing early symptoms months before the onset of a stroke, as well as advice for stroke prevention. It amazes me how many of these stories were written by people only 33 -- like Maureen. 

Maureen's Miracle Story: After

The rest of the book was written after Maureen recovered enough to use words again. She had to completely rebuild her life and learn again everything she'd ever learned -- how to talk, the alphabet, words, how to read, how to write. Before she recovered any of these abilities, her father sent our regular updates on her progress to her circle of friends and extended family. These emails are part of the book, as are illustrations of some of Maureen's first attempts to write during her recovery.

Although Maureen's recovery was much longer than she expected, she writes with a humorous and optimistic voice that won't accept defeat. As a result of that spirit and a lot of hard work, she accomplished much more than the doctors expected her to. She now is able to live alone again, drive, and write. You can follow Maureen Twomey on Twitter


My Review of Before, Afdre, and After

This book is different than most I read because the author is working under an extreme handicap compared to most. Although her stroke happened 15 years before she was able to write and publish her book, she has not completely recovered the all verbal and motor skills she once had. Her typing speed isn't what it used to be. She still can't always retrieve the words she wants to use from her memory bank. (If you are reading this, Maureen, please feel free to comment and correct anything that may have changed in the past two years.) 

I read the book to see what a stroke looks like to the one who has experienced it. Maureen is good at explaining what it was like for her, day by day. Although much of the book is in her voice, some of it consists of copies of emails sent by her father, coworkers, and friends. She also includes a copy of her resume and a list of resources. 

There are a number of photos and scans of some of the work Maureen did as part of her rehabilitation. She even has scans of some pages she completed from Explode the Code, a popular phonics workbook I used to sell at homeschool conventions. I was thinking how hard it must have been for her to start over learning to read and write with disadvantages healthy children learning the same things don't have. I can't even imagine how difficult that would be.

I'm glad I read the book and I recommend it to others who want a day-by-day look at what life is like for someone recovering from a  massive stroke. Maureen tells her story in a matter-a-fact way with a touch of humor. Since her stroke, she has moved back into an apartment, learned to drive again, participated in a walk for the Heart and Stroke group of the American Heart Association, and finished her book. She still can't run as she used to.

The only thing I didn't like was that I had chosen to buy the ebook so I could start reading right away. On my Kindle Paperwhite the illustrations, especially the scans of Maureen's written work, were too small to see clearly. I suggest you get the paper copy of the book if you don't want to miss anything. In this case, the illustrations are an important part of the book. I am finally able to see them on the Kindle App for my iMac. 

I hope you will show support for Maureen by buying her book and leaving her a review on Amazon so that her book may start showing on the first page of an Amazon search for stroke survivor memoirs. That way more people may be able to find it. Also, why not follow her on Twitter? 

Review of Before, Afdre, and After: Memoir of a Stroke Survivor
Image Courtesy of Pixabay, edited on FotoJet.com

Have you ever had a stroke, known someone who survived one, or cared for someone recovering from a stroke? Is your experience similar to Maureen's?

***


Note: The author may receive a commission from purchases made using links found in this article. “As an Amazon Associate, Ebay (EPN) and/or Esty (Awin) Affiliate, I (we) earn from qualifying purchases.”


Wednesday, May 10, 2017

Read Tweep-e-licious to Help Increase Your Engagement on Twitter: A Book Review

Do You Wish You Had More Engagement with Your Twitter Tweets?

So was I. That's why I decided to buy Tweep-e-licious by marketing expert Lynn Serafinn. She believes in ethical marketing and is also the author of bestselling book The 7 Graces of Marketing. I bought Tweep-e-licious because I wanted to increase engagement with my followers and to get more followers targeted to my accounts. I was also looking for help in using Twitter more effectively to market my blogs and Zazzle products. I knew what I was doing wasn't working.


Increase Your Engagement on Twitter with Tweep-e-licious: A Book Review


My Twitter Accounts and How They Grew


If you are new to Twitter or haven't paid much attention to your account, you may find it hard to get the followers you want. I also had that problem -- especially when I was getting started. I didn't just want followers -- I wanted the right followers who would enjoy my content. How I wish I'd had Tweep-e-licious back then! What a difference it would have made. I gradually learned some of what the book covered on my own, but the going was slow, by trial and error. Lynn's book would have helped me get off to a much faster and better start.

I now manage three Twitter accounts I started in different years. As of three days ago in the morning, @barbsbooks had 2457 followers. I opened that account for my book business in March 2009. That averages out to about 308 new followers a year. Of course, the first 200 followers are the hardest to get, since it takes time to build more credibility. This account targets readers, writers, educators, and bloggers.

I opened @Gale427 in March 2012. I had reluctantly become somewhat of a political activist by then. I didn't want to mix politics and business -- especially since most of my target audience on my first account did not have similar thoughts on politics. I wanted to separate these topics so as not to alienate customers for no good reason. This account had 1074 followers three days ago and I follow 814. The account targets those with similar religious and political views, photographers, gardeners, affiliate marketers, bloggers, and those who like to read.

By 2013 I was starting to be more involved in my local community. I had started a blog completely about my local area and I wanted to target people who lived in California, who were not necessarily writers or bloggers, and who liked to share photos of their travels and Zazzle products.  I opened the @barbsloco account in November 2013. It was very slow to take off, compared to the others. I had 388 followers three days ago and I follow 304.

It took forever to get to 100. Perhaps that's because it was also harder to pinpoint my target audience. I knew I wanted followers as close to my local area as possible, but also anyone interested in traveling to the area. What I discovered is that the people following me tended to be either businesses in my area or travel bloggers and photographers from far away. Lynn's wonderful book of tips is answering all the questions I had about how to find my ideal followers and how to engage them. I also learned which content my current followers like to see and I'm trying to keep providing it. It's possible I was targeting the wrong audience.

Increase Your Engagement on Twitter with Tweep-e-licious: A Book Review


How Will Tweep-e-licious Help Me Grow My Account?

Here's what the book will help you learn to do:

  1. Master the basics. Even if you've had your account for a long time, you may have missed some of the basics of using Twitter you thought you knew or had been misinformed about. Lynn takes you through choosing the right ID and setting up or editing to create an engaging profile. Using her advice, I just edited the profiles of all three of my accounts. I found I wasn't making the best use of that very important space. 
  2. Manage followers effectively. Learn who to follow, how to follow, who not to follow, and who to unfollow. I had my own ideas on how to do this and most of what I've been doing after a lot of trial and error in the first years is pretty close to what Lynn teaches, except I don't yet use any automation to find followers. 
  3. Make the best use of Twitter lists to their best advantage. I already had lots of lists in my accounts, but I still got some great tips on how to make better use of them. I just finished the book, so I haven't had time to fully implement the tips. I have started a private VIP list for each account. I never would have thought of that. Most of my lists are based on a profession, a topic, or a location. 
  4. Create content that will attract and engage followers. Some of this I knew, but there were still a lot of useful tips I hadn't thought of. Learn what not to tweet. Many Tweeps make tweets every day that annoy people and it's one reason I didn't follow them or I later unfollow them. 
  5. Determine how often to tweet. People often disagree on this issue, but if you don't tweet often enough, no one will see you. How much is too much? Lynn helps you decide.
  6. How to repeat tweets often without annoying followers. I found this section very useful. Most of us have a number of evergreen tweets we want to keep active. There is a better way to do it than most people, including me, have used. 
  7. Make and use effective hashtags. I try to make effective use of hashtags, but Lynn offered even more tips I can try. 
  8. Determine when and how to use automation and applications. Lynn did explain at the beginning that because technology and Twitter rules change so often, some of her book, last updated at the beginning of 2014, might be obsolete. Most of her tips are still good, but when reading this section I discovered some of it was out of date. ---- You might as well skip the sections on Tweet Adder because it's gone. I could no longer find a free version of Gremln. Lynn suggested Tweepi.com for targeting followers by location, but I found out when I got there that you need the most expensive version to use that function.  I'm still using Buffer, Hootsuite, and Tweetdeck, so they are still good, but they have also evolved since the book was updated. 
  9. Build relationships and not get overwhelmed by them. This group of tips is important. It's easy to get overwhelmed while using the tips to build relationships -- especially if you are also implementing suggestions on using lists and finding the right followers. Lynn suggests ways to avoid getting overwhelmed. 
  10. Use Twitter ethically to market products and expand your influence. Many of these tips are for bigger fish than I am, but I found some tips on marketing and monetization I can use. If you are planning a virtual blog tour, have joint venture partners, want to run a contest, get a media interview, or do some crowd funding, you will find help here. Lynn also discusses another topic many wonder about  -- whether and when to set up multiple Twitter accounts. 


The summary above barely scratches the surface of what the 158 tips in this book cover. Don't start a new Twitter account without Tweep-e-licious! It's still helpful even if you've had an account for years.

My Recommendation

I was feeling invisible on Twitter. Do you ever feel that way? There were occasional likes and retweets, but few clicks or replies. If you are frustrated on Twitter because you don't have enough of the right followers and/or it seems no one is engaging with your content, you need this book. 

I finished Tweep-e-licious just a few days ago and started using the tips right away. Already I see my engagement increasing. I have more new followers than usual on my two oldest accounts. Since I changed my profile and cleared a lot of inactive followers,  the smallest and newest account lost one today. Many people use automation to unfollow anyone who unfollows them. I don't mind since a follower who won't be interested in your content won't be engaging with you anyway. 

The only downside to the book is that some of it has become obsolete, as Lynn predicted it would. I suggest you check out apps you aren't familiar with before reading her tips on how to use them, in case they have disappeared.

I ordered this book in paper. I recommend you do the same since it's much easier to flip back and forth to the tips you want to read again if you have actual pages. 

The Table of Contents lists all the tips in order. They are organized so that related tips are together. This makes the book very easy to use. If you want to be all you can be on Twitter, increase your following and engagement, and learn to run effective marketing campaigns, Tweep-e-licious is the "textbook" you need. It is so practical you can start applying the tips immediately as you read them. Get the book today. 

Increase Your Engagement on Twitter with Tweep-e-licious: A Book Review
Image Courtesy of Pixabay
Image Credits:

Top image: https://pixabay.com/en/twitter-banner-message-sky-1566735/
Middle image: https://pixabay.com/en/tweet-twitter-bird-blue-twig-155281/
Last image: https://pixabay.com/en/twitter-mobile-phone-social-media-1183719/
All images were edited and modified on Fotojet.com.

****


Note: The author may receive a commission from purchases made using links found in this article. “As an Amazon Associate, Ebay (EPN) and/or Esty (Awin) Affiliate, I (we) earn from qualifying purchases.”

Most Recent Reviews on Review This Reviews


Search for Reviews by Subject, Author or Title

The Review This Reviews Contributors


SylvestermouseSylvestermouseDawn Rae BDawn Rae BMbgPhotoMbgPhotoBrite-IdeasBrite-IdeasWednesday ElfWednesday ElfOlivia MorrisOlivia MorrisTreasures by BrendaTreasures by BrendaThe Savvy AgeThe Savvy AgeMargaret SchindelMargaret SchindelRaintree AnnieRaintree AnnieLou16Lou16Sam MonacoSam MonacoTracey BoyerTracey BoyerRenaissance WomanRenaissance WomanBarbRadBarbRadBev OwensBev OwensBuckHawkBuckHawkDecorating for EventsDecorating for EventsHeather426Heather426Coletta TeskeColetta TeskeMissMerFaeryMissMerFaeryMickie_GMickie_G


Review This Reviews is Dedicated to the Memory of Our Beloved Friend and Fellow Contributor

Susan DeppnerSusan Deppner

We may be apart, but
You Are Not Forgotten


“As an Amazon Associate, Ebay (EPN) and or Etsy (Awin) Affiliate, I (we) earn from purchases.” Disclosure Statement

X