Showing posts sorted by date for query serving. Sort by relevance Show all posts

Saturday, August 15, 2026

Celebrating the Centennial of Route 66 - The Middle Part


Celebrating the Centennial of Route 66 - The Midpoint


MIDDLE STATES OF ROUTE 66: Oklahoma, Texas


Route 66 in Oklahoma and Texas


If you have ever wondered how Route 66 acquired the nickname “The Mother Road”, here is the backstory!


The nickname came from author John Steinbeck. He coined the term in his 1939 Pulitzer Prize-winning novel, The Grapes of Wrath, to describe the highway as a primary lifeline for Dust Bowl refugees migrating west to California.


OKLAHOMA: 432 miles - The State with the Longest Stretch of Route 66


Route 66 in Oklahoma

The state of Oklahoma has the longest continuous stretch of the Mother Road of any of the 8 states it passes through. The route enters the state in the northeast corner near Quapaw, runs southwest through Tulsa and Oklahoma City, and exits near Texola.


A few of the landmarks to visit as you travel on your Route 66 road trip include:


  • Blue Whale of Catoosa: This is a quirky, iconic roadside attraction built in the 1970s. It is perfect for photos. It is located just east of Tulsa at Catoosa, Ok. The attraction is quite literally a ‘blue whale’ built of concrete and iron. This waterfront structure has become one of the most recognizable attractions on old Route 66.
  • The Golden Driller in Tulsa is a 76-foot statue of an oil worker. It was originally erected for the 1953 International Petroleum Exposition. The statue depicts an oil worker leaning on an oil derrick. It is the seventh-tallest statue in the United States. 
  • The Arcadia (OK) Round Barn was built by a local farmer in 1896 and has become one of the landmark tourist attractions along the stretch of Route 66 in Oklahoma near Oklahoma City. . It has a unique architecture. 
  • National Route 66 Museum Complex in Elk City, OK features exhibits, classic cars, and a peek into the golden age of American road trips. Another interesting tourist stop on your Oklahoma Route 66 road trip.


TEXAS - 186 Miles - The State with the Midpoint of Route 66


Adrian,Texas, the Midpoint of Route 66

Route 66 across Texas generally parallels Interstate 40. The route features quirky art installations, ghost towns, and classic diners, with Amarillo serving as the major hub along the way.

Start by visiting the restored Tower Station and U-Drop Inn Café in Shamrock. Then on to McClean, Texas to see the Devil's Rope Museum, which showcases a massive, quirky collection of barbed wire, and the first Phillips 66 station in Texas.

MIDPOINT: The official geo-mathematical midpoint of historic Route 66 is located in Adrian, Texas, at exactly 1,139 miles from both Chicago and Los Angeles.

In Amarillo you will find 13 blocks of vintage architecture, as well as antique shops and local dining. Don’t miss the infamous Cadillac Ranch, then treat yourself to a massive steak at The Big Texan Steak Ranch.


Summary


Having finished the middle section of your road trip of Route 66, you will next enter the last stretch of the three western states, taking you to the Pacific Ocean in Santa Monica.

Related Links:


*This Travel Review was written by Wednesday Elf 


**All photos are courtesy of Pixabay & Wikipedia


Sightseeing along Route 66 in Oklahoma and Texas:


ROUTE 66 AND OKLAHOMA PARKS ADVENTURE GUIDEROUTE 66 AND OKLAHOMA PARKS ADVENTURE GUIDECheck PriceRoute 66 - 20 Points of Interest in TEXASRoute 66 - 20 Points of Interest in TEXASCheck PriceRoute 66 in Texas (Images of America)Route 66 in Texas (Images of America)Check Price


Note: The author may receive a commission from purchases made using links found in this article. “As an Amazon Associate, Ebay (EPN), Esty (Awin), and/or Zazzle Affiliate, I (we) earn from qualifying purchases.”


Saturday, July 4, 2026

National Ice Cream Sundae Day Review

This delicious food holiday is held each year on July 8th. 


Image of ice cream sundaes


National Ice Cream Sundae Day


This is a sweet celebration that happens on July 8 every year. It is called ‘Ice Cream Sundae Day’


Ice Cream Sundaes are the most popular ice cream dessert in America. The top favorite Sundae flavors are chocolate, caramel, butterscotch, and strawberry. These concoctions of cold, creamy sweetness are seemingly loved by everyone. They consist of one or more scoops of ice cream, favorite flavors of syrup, then topped with your preferred fruits, maraschino, cherries, nuts, and whipped cream!  Kids also love various ‘sprinkles’ on their sundaes!


History of National Ice Cream Sundae Day


The first ice cream sundae dessert was a scoop of vanilla ice cream with strawberry-flavored syrup drizzled over it and topped with whipped cream and a maraschino cherry. It was served in a tulip-shaped glass vase which was given the name “sundae glass”.  Over the years, sundaes began to come in many forms and shapes and have become one of  the most popular desserts today! 


The origin of the sundae has several versions, with Two Rivers, Wisconsin, Ithaca, New York and Evanston & Plainfield, Illinois each claiming that they served it first.  Two Rivers, Wisconsin is now believed to be the original site of the ice cream sundae. It was invented in 1881 by Edward C. Berner, owner of Berners’ Soda Fountain located in Two Rivers, WI.


How Do You Make a Regular Sundae?


Hot Fudge Sundae

Put scoops of ice cream in a bowl, pour on your favorite syrup (mine is chocolate fudge), then top with whipped cream, nuts, and a cherry on top! 


The banana split dessert is a classic sundae loaded with vanilla, chocolate, and strawberry ice cream, syrup, nuts, whipped cream, and cherries. It is a perfect summer sundae.


*Personal Notes: As a child, my Uncle Bud frequently came over on summertime Saturdays to take my brother and I out to our local soda fountain for a sundae treat. Mine was always a Hot Fudge Sundae; my brother always had a  Banana Split. Such fun (and delicious) childhood memories.


Why We Love National Ice Cream Sundae Day


Image of a Banana Split

Besides being a delicious food holiday, it reminds us of joyful times where we shared moments together, such as mine with Uncle Bud and the Saturday Sundaes. It is the simplest things that feel special when looking back. Those fun trips down memory lane become the important times.


So spread a little joy with your friends, family, and children on July 8 by treating yourselves to an Ice Cream Sundae!


*National Ice Cream Sundae Day Review was written by Wednesday Elf.


Make your own ice cream sundae with these handy supplies added to scoops of your favorite ice cream: 


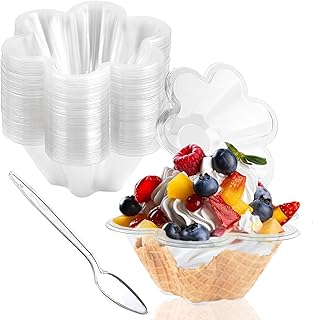
Smuckers Sundae Syrup Chocolate, Caramel, Butterscotch, and Strawberry (Variety Pack of 4)Smuckers Sundae Syrup Chocolate, Caramel, Butterscotch, and Strawberry (Variety Pack of 4)Check PriceHeated Ice Cream Scoop Rechargeable, Electric Warming Ice Cream Scooper with LED Display, Heats to 158°F for Hard Ice CreamHeated Ice Cream Scoop Rechargeable, Electric Warming Ice Cream Scooper with LED Display, Heats to 158°F for Hard Ice CreamCheck Price50ct 8oz Plastic Dessert Cups with Spoons, Clear Flower shaped Ice Cream Bowls, Party Sundae Serving Bowls50ct 8oz Plastic Dessert Cups with Spoons, Clear Flower shaped Ice Cream Bowls, Party Sundae Serving BowlsCheck PriceSet of 4 Reusable Banana Split Boats with Color Matching Spoons Use as Desert Dish, Ice Cream SundaeSet of 4 Reusable Banana Split Boats with Color Matching Spoons Use as Desert Dish, Ice Cream SundaeCheck Price


Note: The author may receive a commission from purchases made using links found in this article. “As an Amazon Associate, Ebay (EPN), Esty (Awin), and/or Zazzle Affiliate, I (we) earn from qualifying purchases.”


Thursday, July 2, 2026

Easy No Bake Strawberry Cheesecake Dessert

 Our granddaughters are visiting for the week, and we made this easy strawberry cheesecake dessert for the 4th of July. We used strawberry pie filling, but you can use any pie filling you like. Following is our review of how to make this easy and delicious dessert.

Easy Strawberry Cheesecake

Ingredients:

Ingredients


1 SaraLee Pound Cake (cut into small pieces)
2 cans of strawberry pie filling
1 24.3oz Philadelphia No-Bake cheesecake filling (You can find this at Wal-Mart)
1 container of Cool Whip

We thought pictures would be best for our step-by-step instructions.

Cutting the cake

Here, Giada is cutting the cake into about 1-inch pieces.

Add the pie filling

Giada and Guiles spread the cut-up cake into a 13 x 9-inch glass baking dish and mixed in the pie filling.

Spread the cream cheese filling


Now they are spreading the no-bake cream cheese filling evenly over the top.

Spread the cool whip


Spread the cool whip over the cream cheese filling. Now it was time to decorate our patriotic dessert with fresh blueberries and strawberries. Set it in the refrigerator for about two hours before serving.

This was easy and fun to do. The girls finished and decorated this in about 20 minutes. So there is plenty of time to make this for your 4th of July celebration.

Have a Happy and Safe 4th of July


Note: The author may receive a commission from purchases made using links found in this article. “As an Amazon Associate, Ebay (EPN), Esty (Awin), and/or Zazzle Affiliate, I (we) earn from qualifying purchases.”


Saturday, June 27, 2026

National Onion Day - A Holiday Review


June 27 is the day selected to celebrate oodles of onions. The date was chosen by the National Onion Association(NOA) to document the creation of their organization in 1913. It’s definitely nothing to ‘cry’ over. LOL.


Image of a group of various kinds of onions


Culinary Versatility


Onions have countless culinary uses. You can take a raw onion and slice it, dice it or chop it to add to recipes. This can be either a condiment (such as a slice of onion on a burger) or diced or chopped as an ingredient to almost any recipe. 


Onions can be the featured star of a meal or appetizer, such as homemade onion rings or the delicious ‘blooming onion’. Onion Soup is a popular beginning to the main course in many restaurants. 


The Onion is Good for You


In addition to the flavor it adds to foods, onions are beneficial. They have very few calories, no added cholesterol, rich in vitamin C and antioxidants, plus vitamin B5. It also gives you an increase to your dietary fiber. 


Funny Personal Onion Story


Years ago our daughter & son-in-law were in town visiting us. We had just acquired our very first gas grill and planned on burgers-on-the-grill for dinner. Instead of offering sliced onions as condiments, we decided to add chopped onions to the burger patties before cooking. 


Our son-in-law, Paul, does not like onions (can’t imagine life without onions, myself). So we made two burger patties plain for him.  


Well, somehow in the confusion of learning the new grill and turning the hamburgers, some of them must have gotten switched. When dinner was served, Bob took a bite of his burger and declared “I can’t even taste the onion in this”. Paul said “I can!” LOL. Seems Paul got Bob’s onion burgers and Bob got Paul’s Plain burgers! So, naturally, they simply switched.


The moral of the story (other than the impossible task of teaching Paul to like onions) is ‘never try a new recipe out on company’ (or, perhaps while learning a new appliance). :) 


A Related Holiday:


Slices of Onions


Close to Onion Day, we find National Onion Ring Day on June 22. So, while you are enjoying your onion dishes, add in a serving of fried onion rings made from scratch. My favorite is my friend’s tempura batter used to deep fry the onion rings. Paired with a burger or a steak, it would be a delicious meal to end both National Onion Day and Onion Ring Day.

So, enjoy the versatile onion in all its many forms! 


For more Holiday reviews, click on
ReviewThisReviews: Holidays


*National Onion Day Holiday Review is written by Wednesday Elf


Onion Cookbooks and Handy Tools

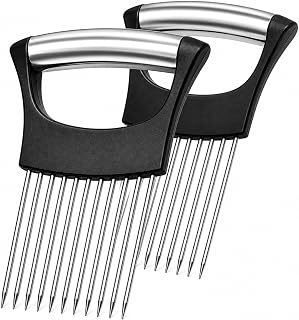
Perfect Onion Cookbook: The Complete Guide to Cooking with OnionsPerfect Onion Cookbook: The Complete Guide to Cooking with OnionsCheck PriceOnion Holder for Slicing (2 Pack) - Stainless Steel Vegetable Slicer Guide, Tomato/Potato/Lemon/Meat Holder - Safe, Even Cuts Kitchen GadgetOnion Holder for Slicing (2 Pack) - Stainless Steel Vegetable Slicer Guide, Tomato/Potato/Lemon/Meat Holder - Safe, Even Cuts Kitchen GadgetCheck PriceOnions: A Country Garden CookbookOnions: A Country Garden CookbookCheck PriceOnion Storage, Avocado Saver Keeper, Reusable Tomato Lemon Holder Storage Container (Onion Saver)Onion Storage, Avocado Saver Keeper, Reusable Tomato Lemon Holder Storage Container (Onion Saver)Check Price


Note: The author may receive a commission from purchases made using links found in this article. “As an Amazon Associate, Ebay (EPN), Esty (Awin), and/or Zazzle Affiliate, I (we) earn from qualifying purchases.”


Tuesday, April 21, 2026

A Review of How to Make Homemade Olive Garden House Dressing and Salad

homemade olive garden house dressing


Olive Garden is one of my husband's favorite restaurants.  He especially loves the salad that comes with the meals.  He always raves about the salad dressing.  Italian is his favorite, but he claims that the Olive Garden salad dressing is especially good, so I made a copy cat recipe so he could enjoy delicious salads at home.  He says he cannot tell the difference......much!  Here's how I make it:


How to Make the Green Salad:


  • 2 Romaine lettuce hearts, chopped how you prefer your salads
  • 1/4 cup of red onion, sliced fairly thin, keep individual pieces 1 to 2 inches long
  • 2 medium tomatoes chopped
  • 4 pepperoncini, the pickled type
  • 6 to 8 pitted black olives 

and just before serving add:

  • large croutons
  • shredded Parmesan cheese 

Don't cut the lettuce until close to the time you plan to serve it, it is more crispy.  I usually serve the dressing on the side, so people can put the amount they want.  

Dressing Ingredients:

  • 1/2 cup mayonnaise
  • 1/4 cup water
  • 6 tablespoons of white vinegar
  • 1/2 tablespoon lemon juice
  • 2 tablespoons of light olive oil
  • 2 tablespoons of grated Romano cheese (can substitute Parmesan)
  • 1/2 teaspoon of sugar
  • 1 teaspoon Italian seasoning
  • 1/4 teaspoon garlic powder
  • 1/4 teaspoon of salt

I think this dressing tastes almost identical to what they serve at Olive Garden.  If you want to tweak the flavor, try adjusting the amount of sugar or the amount of lemon juice, I think these have the biggest impact on the taste.  Put your dressing in a pretty glass carafe and don't forget to shake well before serving.


vegetables


How To Store Your Homemade Dressing

Because it is made from scratch, with no preservatives, this dressing will not keep nearly as long as what you buy in the store.  However, it will be fine in your refrigerator, in an air tight container, for a week or a bit more.  The flavors blend together and it is even more delicious after a day or two, so if you can, make it at least a day before you plan to use it.

Other Uses For Your Homemade Dressing

  • Dressing macaroni salad
  • Marinating chicken for broiling or baking
  • Brushing on steaks or chops while grilling
  • Vegetable dip - you may want to add a bit more mayo to thicken it
  • Stir it into plain cooked pasta and vegetables to make it a tasty side dish

I hope you enjoy this salad dressing as much as I do, I use it a lot. The ingredients are usually always around and it is easy to make, though sometimes if I am out of Romano, I substitute Parmesan cheese in the dressing.  Below you will find my favorite shaker carafe that I use to store my dressing.  I love that it has a pour spout and a top.

Enjoy!


shaker


Note: The author may receive a commission from purchases made using links found in this article. “As an Amazon Associate, Ebay (EPN), Esty (Awin), and/or Zazzle Affiliate, I (we) earn from qualifying purchases.”


Monday, April 13, 2026

Reviewing Arbonne's GreenSynergy Elixir


Reviewing Arbonne's drinkable smart nutrition and skincare routine aka GreenSynergy Elixir
Arbonne's GreenSynergy Elixir is a drinkable smart nutrition + skincare routine that features your greens, collagen builder and happy gut formula all in one delicious shot. Let's review why I love it and highly recommend it to all my friends.

I have been drinking some form of greens drink for about 10 years and have reviewed the two previous 'versions' here on ReviewThisReviews. For the last year, I have replaced my Green Gut Glow drink with this GreenSynergy Elixir and I haven't looked back!

The GreenSynergy Elixir is a three-in-one formula that combines all of the ingredients from my previous Green Gut Glow drink; however, in my opinion, this tastes so much nicer - it's a citrus flavour which I really enjoy. The convenience of having just one sachet to mix with water makes my life so much easier - but is it just as good?

Let's break down the three components of this drink - greens, collagen builder and digestive enzymes.

First, let's look at the Greens component. The Green Gut Glow drink featured the BeWell Superfood Greens supplement, which contains a blend of 36 different fruits and vegetables per serving. The GreenSynergy Elixi still contains a serving of fruit and vegetables, but the blend only includes 12 different fruit and vegetables in their blend. I have a reasonably good diet and it works for me. If you need more nutrients, I recommend the Green Gut Glow bundle.

Secondly, we have the collagen builder. I have reviewed the Skin Elixir supplement previously and explained that I started taking this because I thought it might help with my Rheumatoid Arthritis (this has not been tested for this, it was only anecdotal evidence that collagen could help). I was concerned as I wasn't sure if there would be the same amount of collagen builder in this product.

I haven't had any adverse reactions with switching from the Skin Elixir (as part of the Green Gut Glow bundle) to the GreenSynergy Elixir, as far as my reasons for taking a collagen builder.

Thirdly, we need to look at the gut health component and this is where I have found a difference. The GreenSynergy Elixir contains a blend of 13 full-spectrum digestive enzymes to help support digestion. I have found that on a daily basis this supplement works really well for me, however, if I am sick, need to take medication, am stressed, or on holiday (where my diet changes), then I need to take a probiotic supplement if I want to avoid indigestion. When I was taking the Green Gut Glow bundle, this wasn't the case.

I basically keep some Biotic Sticks on hand for times when I need a little extra help. If you are looking to improve your gut health you may want to take the Green Gut Glow bundle, but I am still choosing to stick with the GreenSynergy Elixir.

At the end of the day Arbonne's GreenSynergy Elixir wins in both taste and convenience in my opinion, however, there is definitely room for both the GreenSynergy Elixir and the Green Gut Glow bundle - which do you want to try?


Note: The author may receive a commission from purchases made using links found in this article. “As an Amazon Associate, Ebay (EPN), Esty (Awin), and/or Zazzle Affiliate, I (we) earn from qualifying purchases.”


Friday, April 3, 2026

Moist and Delicious Carrot Cake Recipe Review

Not all carrot cakes are created equal!

carrot cake recipe

Many times I have heard people say they did not like carrot cake.  They tried a layered carrot cake from a grocery store or in a coffee shop that, while beautifully decorated, tasted dry and yucky.  Let me encourage all of you to try again, but make the cake yourself.  This recipe will change your opinion of carrot cake and totally rock your world of desserts.  You will never think of carrot cake the same way again.  

For many years, I have been making this carrot cake recipe.  Everyone loves it.  Even I, who normally hate nuts in anything, love this cake and the nuts don't bother me one bit.  Of course, I chop them up very fine with my nut chopper.  Therefore, we get the nut flavor without having to contend with chomping or choking on larger nuts. 

As for the "dry cake" issue, this single layer carrot cake is quite moist and delicious.  Plus, it has a glaze icing that soaks into the cake, as well as a cream cheese frosting.  We like to heat each individual slice in the microwave for 20 seconds before serving so the cream cheese icing melts slightly.  If it has been refrigerated for more than a day, the microwave heating takes about 5 seconds longer.  


Moist Carrot Cake Recipe 

This cake recipe takes longer to make than most cake recipes that I bake, but it is worth it!  The cake is baked, of course, but the glaze icing is cooked on the stove top.  The cream cheese frosting is spread on top of the cake after it is refrigerated for 2 hours or more.  So, it isn't quick, but as I said, it is well worth the extra time and attention.

One big tip I like to share, when using a hand mixer, I set my mixing bowl in my kitchen sink to eliminate the splatter across my counter tops.  It definitely makes for a faster clean-up.


Ingredients:

  • 2 cups & 4 Tablespoons Swans Down Cake Flour (or all purpose flour: 2 cups)
  • 1 Tablespoon baking soda
  • 2 cups sugar
  • 1 Tablespoon cinnamon
  • ¼ teaspoon salt
  • ¾ cup canola oil (plus more for pan)
  • ¾ cup buttermilk 
  • 3 large eggs  
  • 2 teaspoons vanilla extract
  • 1 (8-ounce) can crushed pineapple, drained  
  • 1 cup shredded coconut (I use Angel Flake shredded coconut)
  • 1 cup finely chopped pecan pieces
  • 2 cups grated carrots (4-6 carrots needed)
  • _____

  • Ingredients for the Cake syrup (made separately - see recipe below)
    ½ cup buttermilk
    1½ sticks Unsalted butter  (6 ounces)
    1 cup sugar
    1 teaspoon vanilla extract
  • Ingredients for the Cream cheese frosting (made separately - see recipe below)
    8 oz cream cheese
    1½ sticks Unsalted butter 
    2 cups confectioners sugar


Directions

     
    carrot cake batter
  1. Set out 1 1/2 sticks unsalted butter to heat to room temperature even though it won't be needed until you make the syrup recipe
  2.  
  3.  Generously grease a 9x13-inch cake pan 
  4.  Preheat oven to 325°  (Convection Bake 300°) 
  5.  Grate Carrots & Chop pecans
  6.  Combine cake flour, baking soda, sugar, salt and cinnamon in a large mixing bowl & stir together 
  7.  In a separate bowl & using a mixer, mix canola oil, buttermilk, eggs, vanilla extract, crushed pineapple, shredded coconut, chopped pecans and grated carrots
  8.  Combine the wet ingredients with the flour mixture, mixing well 
  9.  Pour batter into oiled pan 
  10.  Bake approximately 40 minutes, until a toothpick inserted in the center comes out clean  
_________ 

Start the syrup recipe (see below) 10 minutes BEFORE cake is out of oven so it will be ready when the cake is removed from the oven


Cake Syrup Recipe

    carrot cake glaze
  • 1 cup sugar 
  • ½ cup buttermilk 
  • 1½ sticks unsalted butter, room temperature 
  • 1 teaspoon vanilla extract 
Using a medium saucepan over medium-high heat, combine ingredients. Cook, stirring occasionally, until sugar is dissolved. – Takes about 5 min. in my *Magnalite pan
  1. While the cake is still hot, poke holes all over the top with a large fork
  2. Pour the cake syrup over the top, allowing cake to soak up the syrup.  Use a spoon if needed to redistribute the syrup that gathers at the sides 
  3. Refrigerate cake until completely cool (minimum of 2 hrs)
  4. Set out 1½  sticks unsalted butter & Cream Cheese to heat to room temperature for frosting recipe below  


    Cream Cheese Frosting Recipe

    • 1½ sticks unsalted butter, room temperature 
    • 8 ounces cream cheese, room temperature 
    • 2 cups confectioners sugar 

    Combine ingredients - Using an electric mixer on medium speed, mix until smooth and free of lumps.  

    Then frost the cooled cake


    frosted carrot cake

    In the directions above, I mentioned using my *Magnalite pan to cook the syrup.  Wagnerware Sidney Magnalite (produced in the 1930's and only available through secondary markets like eBay or antique stores) is my preferred pan for cooking candy & glazes.  It is heavy and has superior heat conductivity.  Current day Magnalite is not the same as the Wagnerware Magnalite of the past that was made in Sidney, Ohio.  While I highly recommend Wagnerware Magnalite, any heavy stainless steel saucepan should work fine to make this simple glaze.  


    Check Out More Recipe Reviews at
    ReviewThisRecipes.com


    Carrot Cake Recipe Written by:
    House of Sylvestermouse


    Note: The author may receive a commission from purchases made using links found in this article. “As an Amazon Associate, Ebay (EPN), Esty (Awin), and/or Zazzle Affiliate, I (we) earn from qualifying purchases.”


    Monday, March 9, 2026

    Copycat Tate's Cookie Recipe Review

     If you are a Tate's cookie fan than you can spot the infamous green bag of Tate's from a distance at your favorite market (or white bag if gluten free). My local market first started carrying Tate's, the original Chocolate Chip flavor, known for its' crispy buttery flavor; the market now carries the entire line of cookies including gluten free. 

    chocolate chip cookies

    If you like your chocolate chip cookies on the crispy side then you will enjoy Tates! I came across a copycat recipe for Tate's Chocolate Chip Cookies which I have tried quite a few times and found very enjoyable. Not exactly the same of course as the original Tate's but still yummy on its' own.

    CopyCat Tate's Chocolate Chip Cookie Recipe

    Ingredients


    • 2 cups all purpose flour
    • 1 tsp baking soda
    • 1 tsp salt
    • 1 cup salted butter
    • 3/4 cups sugar
    • 3/4 cup dark brown sugar, firmly packed
    • 1 tsp water
    •  1 tsp vanilla
    • 2 large eggs
    • 2 cups semisweet chocolate chips

    Heat oven to 350 degrees.  Serving size is a medium to large cookie. Line cookie sheets with parchment paper. 

    1. Combine dry ingredients and set aside.
    2. Cream softened butter and the two sugars in another bowl.
    3. Then add vanilla and water to the sugar creamed mixture.
    4. Add eggs, mix together. 
    5. Stir flour mixture into bowl. 
    6. Fold in chocolate chips.
    7. Bake at 350 degrees for 12-16 minutes depending on your oven and how large you make the cookies.

    Medium-Large cookie size is 1.5 tablespoons of dough per cookie. Adjust up or down to your preference and don't forget to adjust baking time.

    History of Tate's

    The idea and recipe behind Tate's is from Kathleen King from the Hamptons.  She has been creating desserts since 1980 and has two cookbooks: Baking For Friends and the Tate’s Bake Shop Cookbook still available on Amazon or used online book sites. As Tate's grew through the years with the inevitable ups and lulls business' encounter, Tate's rise and success of it's products was ultimately purchased in 2018 by Mondelez for a reported 500 million dollars.


    Note: The author may receive a commission from purchases made using links found in this article. “As an Amazon Associate, Ebay (EPN), Esty (Awin), and/or Zazzle Affiliate, I (we) earn from qualifying purchases.”


    Friday, February 27, 2026

    Easy Apple Cake Recipe

    apple cake recipe
    When we received a bushel of Honeycrisp apples for Christmas, I immediately thought of the apple cake recipe that my mother-in-law gave me many years ago. 

    I've often made this cake during the holidays because we have so many out of town guests. Our family members come in from all across the United States, which means they hail from different time zones. Therefore, we have early risers who quietly start their mornings so others who are still sleeping can rest uninterrupted.

    With the various sleep habits, we are not going to find a great time to have breakfast together. The apple cake is perfect for me to make in advance and have available for whatever time of the day our guests need breakfast. 

    This apple cake is similar to a pineapple upside down cake.  The fruit goes on the bottom of the prepared pan which means it is on the top of the cake when it is turned out of the pan.

    The cake does not need to be refrigerated, which is another plus for making this delicious cake and leaving it out for breakfast, or throughout the day as a snack. 


    Apple Cake Recipe

    To begin, set out the butter to soften.  Also, wash, core and thinly slice apples.  Each apple will be cut into sixteenths.


    Ingredients  

    • 3 large eggs 
    • 2 cups sugar 
    • ½ cup vegetable oil 
    • ½ cup softened butter 
    • 1 tsp. baking soda 
    • 2 cups flour (I use 2-1/4 cups Swans Down cake flour) 
    • 2 tsp. ground cinnamon 
    • 1 tsp. vanilla extract 
    • 1 cup walnut pieces (if desired) 
    • 4-6 large Granny Smith or Honeycrisp apples, cored and sliced  

    Directions 

    1. Preheat oven to 350 F 
    2. Generously butter a 9 x 13 x 2 inch baking dish 
    3. Combine all of the dry ingredients and set aside  (cake flour, baking soda, ground cinnamon) 
    4. In a large mixing bowl, beat the eggs with an electric mixer until frothy. Gradually add the sugar, oil and butter (a little of each at a time). Beat until sugar has dissolved. 
    5. Stir in the vanilla (with the mixer on low speed is fine) 
    6. Add dry ingredients mixture to the egg mixture along with the walnuts (with the mixer on low speed is fine) 
    7. Spread the apples over the bottom of the prepared baking pan and drizzle with a few pinches of sugar 
    8. Pour the batter over them, smoothing to cover all the apples 

    Bake for 1 hour 

    Set aside to cool to room temperature. Turn upside down on serving plate. I use my cutting board as the serving tray for this cake. Not only is it the right size, but a knife will not harm it.

     PrepWorks Dishwasher Safe Apple Slicer and Corer – 16-Slice Thin Apple Cutter with Safety CoverCheck Price Swans Down, Cake Flour, 32oz Box - Pack of 6Check Price Thirteen Chefs Large Acrylic Cutting Board, 16x10 Inch with Rubber Feet, Clear - Dishwasher SafeCheck Price


    If you happen to be the recipient of a bushel of apples, you may also wish to check out my Apple Cobbler recipe or my Chocolate Covered Apples.  They are both delicious! 

     Easy Apple Cobbler Recipe Chocolate Dipped or Covered Apples


    Check Out More Recipe Reviews at
    ReviewThisRecipes.com


    Apple Cake Recipe Written by:
    House of Sylvestermouse


    Note: The author may receive a commission from purchases made using links found in this article. “As an Amazon Associate, Ebay (EPN), Esty (Awin), and/or Zazzle Affiliate, I (we) earn from qualifying purchases.”


    The Review This Reviews Contributors


    SylvestermouseSylvestermouseDawn Rae BDawn Rae BMbgPhotoMbgPhotoBrite-IdeasBrite-IdeasWednesday ElfWednesday ElfOlivia MorrisOlivia MorrisTreasures by BrendaTreasures by BrendaThe Savvy AgeThe Savvy AgeMargaret SchindelMargaret SchindelRaintree AnnieRaintree AnnieLou16Lou16Sam MonacoSam MonacoTracey BoyerTracey BoyerCheryl Paton Cheryl PatonRenaissance WomanRenaissance WomanBarbRadBarbRadBev OwensBev OwensBuckHawkBuckHawkDecorating for EventsDecorating for EventsHeather426Heather426Coletta TeskeColetta TeskeMissMerFaeryMissMerFaeryMickie_GMickie_G


    Review This Reviews is Dedicated to the Memory of Our Beloved Friend and Fellow Contributor

    Susan DeppnerSusan Deppner

    We may be apart, but
    You Are Not Forgotten


    “As an Amazon Associate, Ebay (EPN) and or Etsy (Awin) Affiliate, I (we) earn from purchases.” Disclosure Statement

    X