Showing posts with label nature photography. Show all posts

Monday, October 8, 2018

The Robin Revue: Watching Our Baby Robins Hatch

Oh what a show I enjoyed this Spring! I enjoyed an up close and personal seat to a family of baby robins being born. As a nature and animal lover I was in awe of two industrious robins persevering in a city neighborhood to expand their family on my front porch. I usually write reviews on Review This!, but thought this was a revue all could enjoy.
baby robin birth


Day 1 What Is On The Porch Light?


As I drove into the driveway I noticed something hanging on the front porch light. Hmmm. The something looked like straw. Upon further investigation I determined the something was dried lawn clippings and a few pieces of string. Hmmm. The light bulb had not quite shown brightly yet.

The light bulb began to glow a wee bit brighter when hours later I drove down the driveway and noticed quite a bit of activity on the porch light; I saw a bird flying to the porch light with a mouthful of string. When I returned hours later I discovered a nicely built nest on top of the porch light. (It took awhile for the light bulb to burn brightly, some days are like that!)
baby robin nest


I wasn't sure this would be the best place for a nest - but what do I know. I love all animals, but admit I know little about birds. At this point I wasn't sure what type of birds had built the nest as I had not gotten a good look at the nest. Although the nest looks lopsided and perhaps flimsy the nest was actually anchored around the point of the top of the porch light.

 Mom And Dad Robin Continue Nest Building


The nest became a very popular hangout for Mom and Dad Robin. I had identified the birds as robins and they must have been doing a little internal nest housekeeping with the amount of activity to and from the nest from the trees nearby. I was still questioning if this was a great place for a nest. I tried to look at the location from the robins' point of view. Yes, the nest was high off the ground and well, that was about all I could come up with ...  I thought about not turning the light on at night or what would happen if the light was accidentally turned on? I thought about the UPS deliveries, the dog walkers, the dog who lives in the home of the nest! The porch light did not seem like a great location, but of course I was vested in keeping this nest safe.

As the robins did housekeeping in the nest I found both robins quite nonchalant about the location and the bustling activity in and out the door. I was warned robins could dive bomb you if you are too close to the nest, but these two robins were pretty laid back. Until.... the eggs were laid.

We've Got Robin Eggs


Disclaimer: The photos are not always are not always the best quality as the porch light is 8 feet high and I had to get on a step ladder and then blindly hold out the camera over the top of the nest while trying not to fall off the ladder! 

One egg and Two Newborn Robins

robin eggs

And then there were 3 baby robins. Okay, not exactly the cutest little fuzzballs!


baby robins

But growing fast!

baby robins

Starting to get feathers!


Dad Robin Is An Excellent Guard


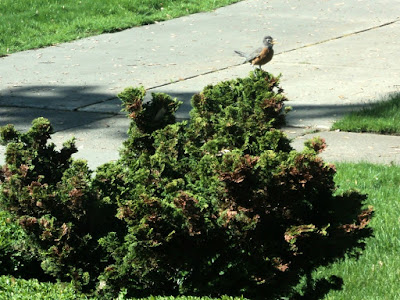
As Mom robin tended to her duties on the nest it was clear Dad Robin was not going to allow anyone near the nests. He was either in a tree about 50 feet away chirping or on this bush 10 feet away standing guard. If you opened the front door or he saw you approach the front door from the interior through the storm glass he would start shrieking and start dive bombing the door. (Dive bombing bird = not good photos!) I was so curious to see the robins, but did not want to disturb their newborn family or stress the birds. 

baby robins


Taking photos of the bird nest became a two person challenge. If both birds were gone I would very very quickly try to take a photo.

The Family Of Three Robins Grows


Since I could not see what image I was taking it was always a surprise when I checked the photos.

baby robins in a nest

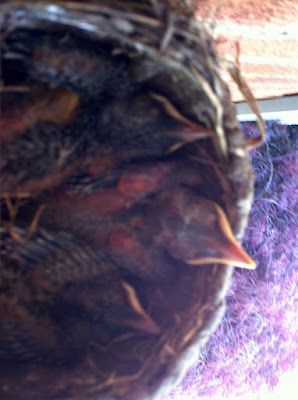
I can't believe how quick the baby robins grew. The average baby robin takes two weeks to reach the size of their parents. The nest was quickly becoming a tight fit for the three babies.

baby robins

The babies would hold their heads up and cheep cheep waiting for mom to return.

baby robins

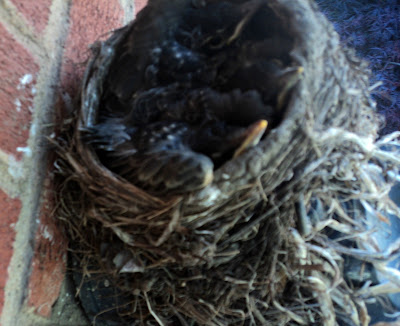
By ten days old the feathers had grown and it was difficult to find the babies in the nest with all the feathers.

baby robins


I don't know if there is a runt of the litter in the bird world, but one little robin always seemed to be buried in the nest while two of the babies were adept at sticking their heads up above the nest.

baby robins

Day 12 brought a nest full of what appeared to be very mature robins. By this time the family had become very territorial of the robins and anxiously checked all day to make sure they were safe. However due to their size it was clear leaving the nest was in the imminent future.

Time To Say Goodbye!


Right on schedule Day 13 brought the departure of the baby robins. I did not want to disturb the robins as we anxiously awaited lift off so did not take any photos. My family kept their distance to nervously watch the departure. It was more of a kerplunk then lift off. Thankfully the exit was a safe kerplunk into the fluffy tree and then the babies and parents flew to the tree about 50 feet away.

Whew! I was definitely vested in this little ole family and was relieved it was a successful journey from egg to exit.
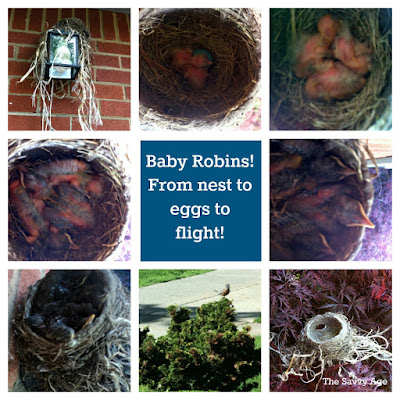
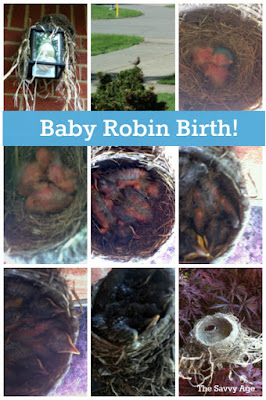
Collage of the birth of baby robins.


All that was left was the nest as a reminder of our time together! As if on cue after the babies exit the nest fell off the porch light on Day 14. 

baby robin nest


Note: The author may receive a commission from purchases made using links found in this article. “As an Amazon Associate, Ebay (EPN) and/or Esty (Awin) Affiliate, I (we) earn from qualifying purchases.”


Wednesday, June 6, 2018

Photographing the Salinas River: A Review

Watching the Salinas River Go By


The Salinas River was not part of my life until 1995, when my mother moved to a part of Paso Robles California only three blocks from river access. It was the first time I had lived near a real river. I grew up in Los Angeles County, and the only rivers I saw were mostly empty cement waterways that only filled after heavy rains. When we lived near Seattle for four months I was delighted to see some real rivers. I had always wanted to live near one, and now I live in Mom's house where the Salinas River is a short walk away. I love to watch it.

Photographing the Salinas River: A Review
An Ideal Place to Sit and Watch the Salinas River in Paso Robles, taken with Nikon Coolpix S9300

Getting to Know and Photograph the River


Once I had such easy access to the Salinas River, I began to study it and observe and photograph it on a regular basis. The Salinas is a subterranean river. That means I don't see it most of the year because it's flowing underground. If we get heavy rains, it becomes visible again for a few weeks and then disappears from sight. I try to make the most of the weeks when I'm able to photograph the flowing river. I have put many of my Salinas River photographs on puzzles, greeting cards, posters, postcards, and other print-on-demand products at Zazzle. You can see most of those products here. Among them are a poster and greeting card of the bench photo above.

I just made a new poster of my favorite river shot. The river always makes me feel peaceful as it flows by me. So I added a bit of text that reminds me of one of my favorite hymns: "Like a River Glorious"

Here is my new poster. For ordering information, please click the photo. If you'd prefer to have the poster without the words or if you want to change the words, it's easy to do once you click through to Zazzle and click to customize.


You can listen to the hymn here. Sample the many digital professional recordings of the hymn on Amazon.


The Day the Salinas River Came to Me


One January day I had been walking in the dry riverbed after some recent rains, hoping the river was visible again. I didn't see much more than a few puddles. I was walking away with my camera to return to the riverbank when suddenly the river first trickled and then rushed toward me. I was able to capture it on video. I also got some still shots. You can see the video and the photographs I was able to capture that day and also learn more about the river in this article: The Salinas River: Now You See It. Some of my products also feature photos you will see on that page.

What I Like about Photographing the Salinas River


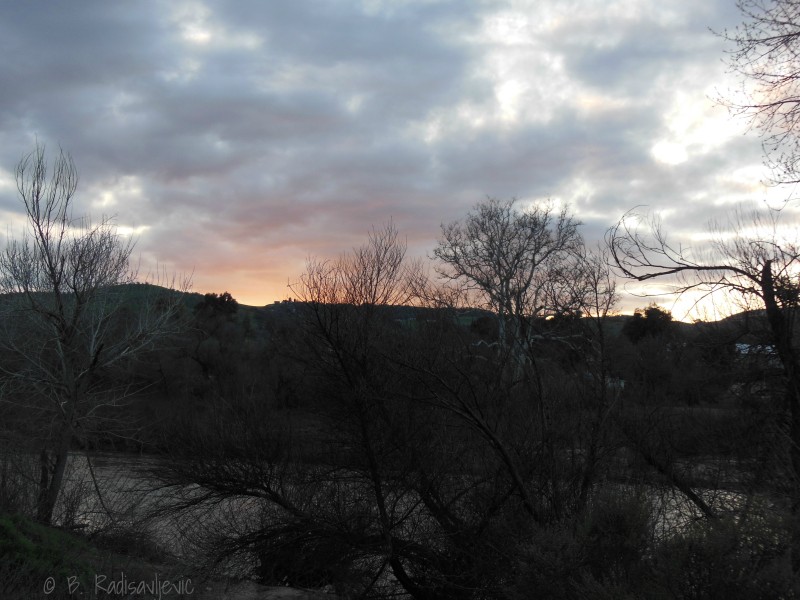
Access to the river from Larry Moore Park is easy. It's also easy to find a parking place beside or very near this neighborhood park. I get some interesting sunset shots over the river if I walk the river trail at dusk. Here are a couple of them.

Photographing the Salinas River: A Review
Taken with my Canon PowerShot SX410 IS


Photographing the Salinas River: A Review
Taken with my Canon PowerShot SX410 IS

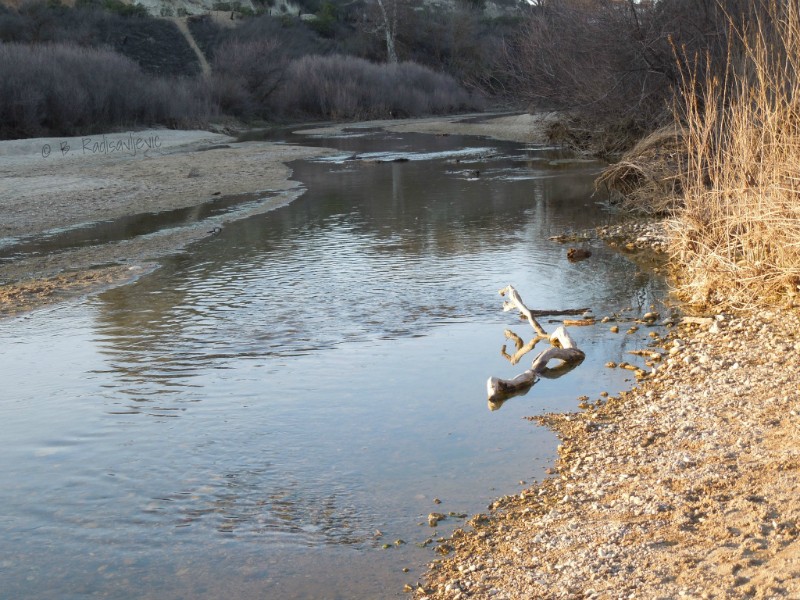
I can also find a wide variety of native plants, weeds, and trees to photograph beside or even in the river. I also see a lot of driftwood. I especially like this shot of a log in the river.

Photographing the Salinas River: A Review
Taken with Nikon Coolpix S8200


The sand on the bank also provides some interesting shots. In the photo below, you see footprints leading down to the river.

Photographing the Salinas River: A Review
Taken with my Canon PowerShot SX410 IS


Sometimes one may see some unexpected wildlife. Birds are common, but hard for me to shoot. Rabbits, though,  appear quite often at dusk. I almost didn't see this one. Do you see it?

Photographing the Salinas River: A Review
Rabbit Blending with River Sand, taken with my Canon PowerShot SX410 IS

After the winter rains, the riverbank can come alive with color, as in the shot below. I was looking down from the trail when I took this photo.

Photographing the Salinas River: A Review
Taken with my Canon PowerShot SX410 IS

No matter when I visit the river, whether it's flowing or dry, there is always something new to discover and photograph. My shots aren't as professional as my friend Mary Beth Granger's who gives us some tips in Challenge Yourself to Take Better Photographs, but I have fun.

My Photography Equipment


Photography is my hobby, and I get along fine with a point and shoot camera. My favorite was a Nikon Coolpix that fit in my purse or pocket, but somehow I lost it when I went out one day with friends and we made a number of stops.

Some of these photos were  taken with my Canon PowerShot, another point and shoot. It has a longer zoom than the Nikon did. The zoom helped me capture that almost hidden rabbit above. The Canon won't fit in my pocket, but I got a nifty case for it that will also hold my cell phone and extra battery packs and San Disks. Nothing is worse than finding out that your battery is dead just as you find the perfect shot you'd been searching for.

The case below is the one I chose to go with my Canon PowerShot SX410 IS. It's light and the strap is so comfortable that I don't mind having to carry the larger camera. When I still  had my Nikon, I could even fit it in the slot next to my Canon, though I think it was really meant for a lens. Now the PowerShot and the case go with me everywhere because every time I leave them home I find a shot I wanted to take and couldn't.

Did You Enjoy this Brief Look at the Salinas River?

If you would like to photograph the Salinas River from Larry Moore Park, here's a map to help you find it. My directions are from the Paso Robles Walmart parking lot. You can drive to the park from the southeast exit and park along Riverbank Lane. Or you can park just west of J. C. Penny, that white building on the map closest to the river. That diagonal path you see next to Penny's leads to a park entrance. When you reach that entrance, go straight toward the river. You can't miss it. 


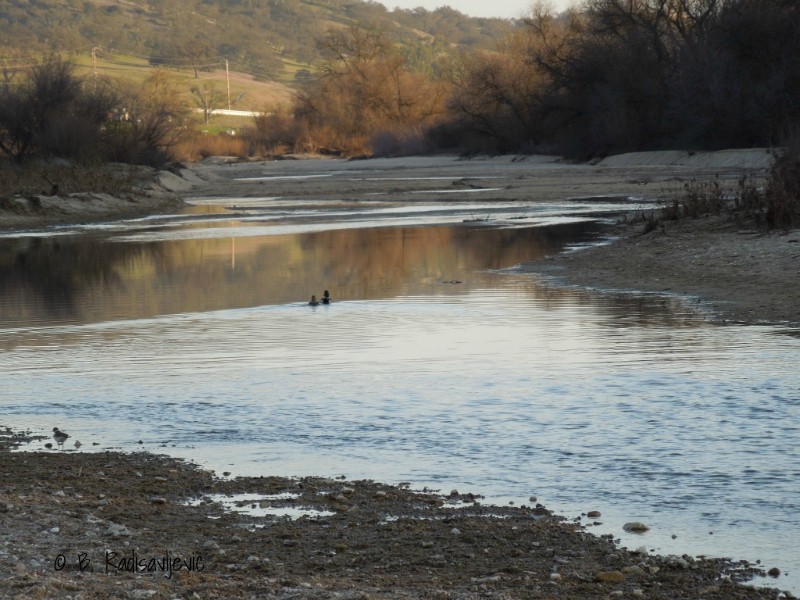
I'll leave you with one last photo with a bit of wildlife. I couldn't get close enough, even with my zoom, to bring the ducks closer, but occasionally they do get to the river. This shot was taken with my Coolpix S8200 and it didn't have as long a zoom as my Canon,  which I did not yet own back in 2013 when this was taken. I didn't want to crop the photo to make the ducks show up better because it would diminish the view of the river.

ducks swimming on a river
Ducks Swimming in Salinas River


Note: The author may receive a commission from purchases made using links found in this article. “As an Amazon Associate, Ebay (EPN) and/or Esty (Awin) Affiliate, I (we) earn from qualifying purchases.”


Thursday, June 9, 2016

Review of Tips for Photographing on a Hike

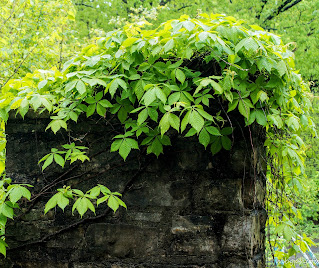
leaves growing over stone wall photo by mbgphoto
There is nothing like a hike in the woods to find great material for nature photography.  During the past month I have gone on several outings with photographer friends to capture the beautiful images of springtime in Missouri.  These images were taken on two of our outings at state parks in the St. Louis metro area.  The photo above was taken at Cuivre River State Park in Troy,  Missouri.  The second park we visited was Lone Elk Park just off Hwy 44 in the southwest portion of the region.

Preparing for Your Trip

Good preparation is important for your trip.  On both of the occasions there was a chance of rain so some rain gear was added to my checklist.
  • Camera and back pack
  • Extra batteries and memory cards for the camera
  • Lens cloth to wipe away dust and dirt
  • Two lenses- one wide angle(18-70) and a longer lens (70-300)
  • large trash bag (to sit on if the area is muddy)
  • rain poncho (just in case)
  • lens hood
  • filter
  • tripod
Although I make sure all of these things are in my backpack, when I get to the place where we are going to shoot I leave most of the items in my car.  I do this because we were going on trails of 1 mile or less and if I need something else I can go back to the car.  For my first trip from the car to shoot I will put on one of my lenses and make sure to wipe it off.  I then check my battery and memory card and head out to shoot.  Later depending on what I'm wanting to photograph, I will come back and change lenses and/or pick up my tripod.  I used to always carry my backpack and tripod with me, but I have found that to be too cumbersome and not needed for short hikes.

 Photographing Wildlife

I have not done a lot of wildlife photography but on my trip to Lone Elk Park I had two photography buddies who really helped  me to hone in on wildlife to photograph.  Dina was great at listening for birds and pointed out the Pileated Woodpecker  that I was able to capture with my long lens in the photo below. In the photo below that you will see an Elk.  Our photo buddy Mac drove ahead of us through the park and would point out places where we could find Elk and Bison. I found that photographing wildlife takes a lot more patience than photographing flowers.

Pileated Woodpecker photo by mbgphoto

elk in the woods photo by mbgphoto


Photographing Plants and Flowers

I enjoy photographing flowers and foliage.

pink flowering tree among green trees in the woods photo by mbgphotoThere is always something interesting to shoot in the parks. The first shot  is some pink dogwood I spotted through the trees.  This photo was taken in Lone Elk Park and the shot was taken out of the window of the car.  I had my lens set on aperture priority f8 and was able to capture the pink as I saw it through the trees.
leaves cascading over a stone wall photo by mbgphoto


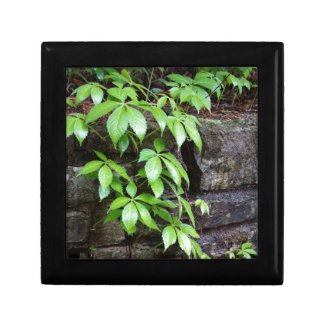
We were hiking down a small path in Cuivre River State park when I saw part of an old stone wall. I stopped on the path and took several shots of the wall from different directions. It is amazing the different looks you get just by walking around an area and looking at it from a different angle.

I love the way the leaves were growing over this stone wall.  The sunlight filtering through the trees also gave it an interesting look.
 

Waterdrops and Puddles Create Interesting Photos

trees reflected in a pool of water photo by mbgphotoWe were at Cuivre River right after a rainfall and there were puddles everywhere and raindrops still falling from the branches and leaves.  Sometimes new photographers avoid rainy days, but I find that you can capture some of your best images on a rainy day.  The first photo was looking down at the top of an old stone pillar.  The pillar was about 3 feet high and a oval pool of water had collected in the top of the pillar.  I stood over the pillar and focused my camera down on the puddle of water that showed a reflection of the trees above.              

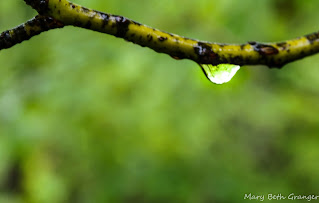
This next photo depicts a waterdrop on a branch.  I was having trouble getting a good shot when a fellow photographer suggested I back up a bit and refocused.  It took a few tries but I was finally able to get a fairly clear shot of the waterdrop with the background blurred.  

raindrop on a tree branch photo by mbgphoto

Watch for Special Features to Photograph

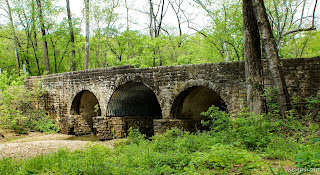
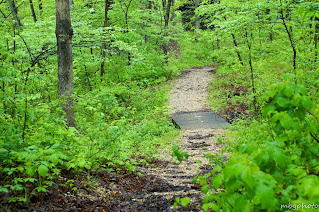
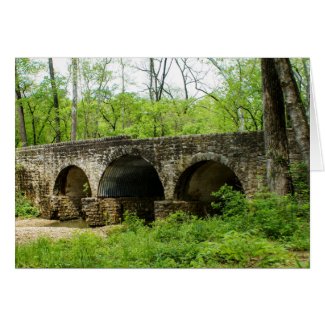
As you are out in a park look for special features to add to your photographs.  Old stone bridges like the one below make an interesting photograph.  Don't forget to turn around and look at the path you've just walked down.  The leading lines will also make for an interesting photo.

old stone bridge photo by mbgphoto

path through the woods photo by mbgphoto

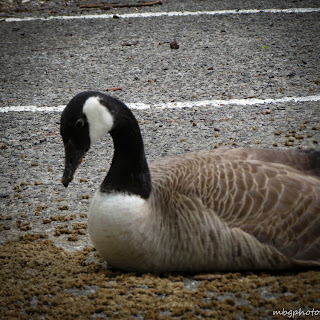
I couldn't resist photographing this goose that sat out right in the middle of the parking lot.  He didn't move all the while I was shooting.

goose photo by mbgphoto

Gifts from  my Photographs

Here are some items I made on Zazzle from my photographs.  You can see other items on my Zazzle shop by clicking through either of the links below.
Old Bridge at Cuivre River Card
Old Bridge at Cuivre River Card by mbgphoto
Look at other Old stone bridge Cards at zazzle.com
Leaves on Old Stone Wall Gift Box
Leaves on Old Stone Wall Gift Box by mbgphoto
Check out Cuivre river state park Gift Boxes online at zazzle


Note: The author may receive a commission from purchases made using links found in this article. “As an Amazon Associate, Ebay (EPN) and/or Esty (Awin) Affiliate, I (we) earn from qualifying purchases.”

Thursday, February 11, 2016

Review of Winter Snow Scene Photography

Winter Snow Scenes

Winter is a Great time for a Photographer 

Ice on Wild Geraniums photo by mbgphoto
Photographing winter scenes is a wonderful way to pass your time on a snowy winter day. The snow covers all the dullness of the winter scenery and gives a beautiful field of white to everything you photograph.
 
I have found that I don't have to go any further than my own backyard to find some great photographic subjects. The birds outside my window always lend to some nice photos and if I want to wander a bit further away, a walk around the neighborhood will produce lots of trees covered with snow.
This page was created to showcase my winter photos and to present them on some of the Zazzle products I have designed. I hope you enjoy your tour through my winter wonderland!
Intro photo is "Ice on wild Geraniums" taken in my front yard


Winter Snow Scene

Snow Laden Evergreen

I photographed this tree while taking a walk in my neighborhood just after a big snowfall. The tree had a lot of houses and other things in the background so I put it in Photoshop Elements and use the impressionist brush to smudge out the background. I like the effect it gives showing just the tree as the center of the scene.
snow laden evergreen photo by mbgphoto
You can purchase my photos on cards at zazzle.com/mbgphoto

Winter Scene Note Cards

Winter snow scenes make wonderful note cards. Keep in touch with friends and family and write your own message inside. This photograph was taken from my front porch on Christmas evening. I used a flash to illuminate the small Japanese maple tree that was laden with snow. This effect highlighted the tree and kept the black background.
Japanese maple tree photo by mbgphoto

Christmas Snow Scene Cards

Winter Snow Scene

Snow scenes make beautiful Christmas cards. You can create your own from your photographs. I recommend sights like Zazzle and CafePress to use your own photos to make quality looking greeting cards.

Christmas Wreath

Christmas wreath photo by mbgphoto
Stop by my Zazzle store at zazzle.com/mbgphoto to purchase copies of my photos on a variety of products

Birds in the Snow

Birds make great subjects in a snowy background . I have a bird-feeder in my backyard and in snowy weather I will sit by our patio doors with a telephoto lens on my camera and photograph the birds in the snow.

Birds in my Backyard

birds in the snow photo by mbgphoto

I think the male Cardinals are particularly pretty in the snow. Their bright red feathers look stunning against the white snow. We have been having several male and female cardinals visiting our bird-feeder in the snow.

Male Cardinal

male cardinal photo by mbgphoto

Majestic Cardinal

cardinal photo by mbgphoto

Female Cardinal

female cardinal photo by mbgphoto

Pansy peaking through the Snow

pansy in the snow photo by mbgphoto


Note: The author may receive a commission from purchases made using links found in this article. “As an Amazon Associate, Ebay (EPN) and/or Esty (Awin) Affiliate, I (we) earn from qualifying purchases.”


Thursday, October 8, 2015

Review of Tips on Photographing Waterfalls

Photographing Michigan Waterfalls

Melting Snow Equals Beautiful Waterfalls

Michigan waterfalls photo by mbgphoto
The Upper Peninsula (UP) of Michigan is known for large snowfalls. It is not unusual to have over 200 inches of snow in a season and the record snowfall stands at 390.4 inches according to a sign we saw in the Keweenaw Peninsula. When all of this snow melts in the spring the waterfalls in the area are full of rushing water. In the UP you will find over 324 different waterfalls.

When we visited, in mid June, we found waterfalls everywhere we went. Many times we would pull off the road and hear the rushing water. Other times we would follow signs that led us to paths to the nearby waterfalls.

Earlier in the spring, I had attended a class where the instructor gave us tips on photographing waterfalls, so I was anxious to try out these tips and photograph some waterfalls.

On this page, I will pass on the tips that worked for me as I show you photographs from 5 of the waterfalls I photographed in Michigan. We returned to Michigan in September and was able to photograph the beautiful Tahquamenon Falls. I am adding that photo near the end of this page.

all photos by myself-mbgphoto

Alger Falls - forgetting the tips

Alger Falls photo by mbgphoto


The first waterfall that I photographed was on the side of a busy road. My husband pulled off the road and I jumped out with my camera. The ground in front of the waterfall was rocky and hilly and I thought I could shoot it without a tripod. 

I use aperture priority when I shoot. This allows me to pick the aperture and the camera sets the speed. In order to get a slower speed to get the smooth waters that I like to take you have to use a larger number on your aperture. Ideally I would like to use an F22 or higher but without a tripod the largest number I could use successfully for this photo was a F11. This gave me a speed at 1/20 a second. It was not really good enough for what I wanted, but then I was in a rush. 

The resulting photo is, in my opinion, mediocre. In the photos that follow you will see the results when I use the following tips.
  1. Always use a tripod 
  2. Slow down and take your time 
  3. Use a polarizing filter to reduce the glare and slow the speed 
  4. Use a remote shutter release

Munising Falls - 50 foot drop

Munising Falls photo by mbgphoto

 
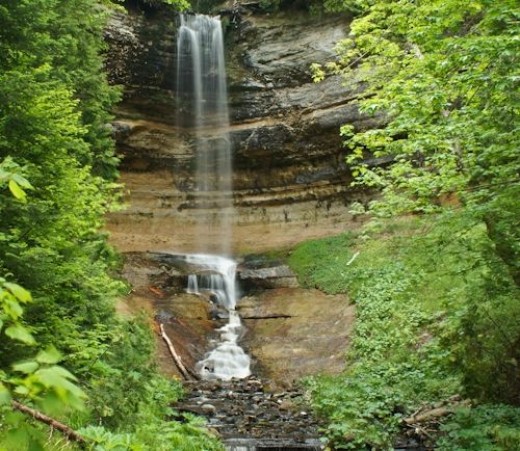
This beautiful waterfall was located near where we were staying in Munising. We parked in a lot and then I walked a well maintained path into the woods for about 1/2 mile to reach two of the viewing platforms for the waterfall. This waterfall has a breathtaking 50 foot drop into a canyon. 

The platform for viewing made it easy for me to set up my tripod to get a good shot. A tripod is essential to get the smooth looking water in this photo. I shot this photo using the aperture setting of F22 this gave a shutter speed of .6 seconds. I had my ISO set at 200 and used a shutter release to keep the camera steady.


Photography Equipment - three items to capture perfect waterfall photos


  • If you are looking to get the look of the smooth flowing water in your waterfall photos, a tripod is an essential piece of equipment. The tripod listed below is the one I use. It is not a high priced piece of equipment and it works with all of my cameras (yes even my point and shoot). To get the steady shot you need for waterfalls I highly recommend using a tripod.
  • Using a polarizing lens will help you to slow down your shutter speed to get the smooth look of the water. It also helps to reduce any glare. This is especially important if you are trying to shoot on a sunny day. On a cloudy day it wouldn't be necessary.
  • A shutter release is also helpful in keeping your camera steady. I have one that attaches to my camera, but I think a remote one would be really nice.

tripod
Tripod on Amazon.com
tripod


Smooth Flowing Water - Wagner Falls

Wagner Falls photo by mbgphoto


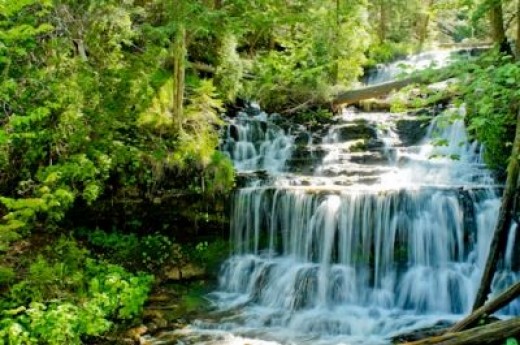
The Wagner falls was also near Munising, Michigan. It starts with Wagner Creek which flows over a number of rocky ledges to create this beautiful waterfall. There was also a tree limb that had fallen across the area, which added to the falls of the water.

I got to this waterfall by walking a short gravel path to a viewing platform. As was the case for the Munising Falls, the platform made a perfect place to set up my tripod. I was shooting from several angles, moving around the platform, when another photographer came and stood near me. He watched me for awhile and then inquired as to whether I had a polarizing filter in my camera bag. Now, I knew that was a way to slow down my shutter speed, but I had forgotten to add the filter. I thanked him for the tip and then went and put on the polarizing filter. This made a really nice difference.

It was a sunny day and the filter helped to reduce the glare and slow down the speed. I was able to shoot this photo using a F25 aperture and a speed of .5 seconds. I was pleased with the smoothness of the water in the resulting photo.

Wagner Falls with an Aperature of F8

Wagner Falls photo by mbgphoto


Jacobs Falls

Jacobs Falls photo by mbgphoto


The next two waterfalls are ones that we encountered as we were visiting lighthouses in the Keweenaw Peninsula in upper Michigan. In both of these photos I remembered to use all of the waterfall photography tips I had learned. I took my time, used a tripod, used my polarizing filter and used an off camera shutter release. 

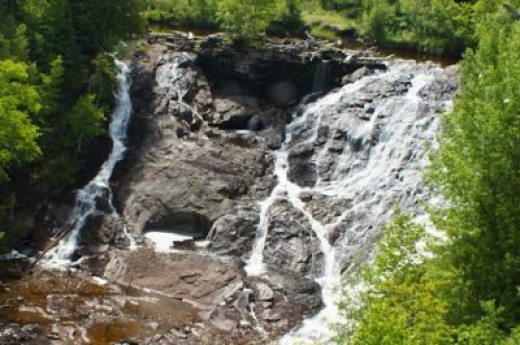
In this photo of Jacob Falls I used a setting of F22 which gave me a speed of 1/3 second. I also pushed my ISO down to 100 to further slow the speed. 

In the photo of Eagle River falls I used a F22 setting at 1/15 second. 


Eagle River Falls

Eagle River Falls by mbgphoto


Tahquamenon Falls - beauty in the fall

Tahquamenon Falls - beauty in the fall


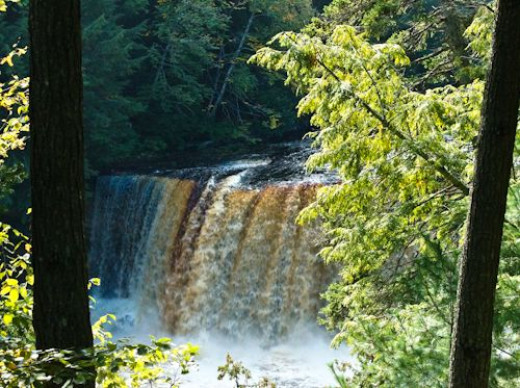
The Tahquamenon Falls are beautiful. They have a orangish brown color that comes from the tanic acid that leaches into the river from cedar and hemlock swamps. When we were there in September of 2013 I took many photos of the falls. Sometimes I tried to capture some of the fall colors of the trees to pick up on the orange color of the water. On other photos I looked for a way to frame the falls to show off the beauty of the falls.

In this photo I found a place where I could take the photo with a tree stem on each side of the picture. I think it works well to frame the photo.


My Waterfall Photos on Zazzle

Michigan Waterfalls Greeting Card
Michigan Waterfalls Greeting Card by mbgphoto
Shop for Michigan waterfalls Cards online at Zazzle.com


Note: The author may receive a commission from purchases made using links found in this article. “As an Amazon Associate, Ebay (EPN) and/or Esty (Awin) Affiliate, I (we) earn from qualifying purchases.”


Most Recent Reviews on Review This Reviews


Search for Reviews by Subject, Author or Title

The Review This Reviews Contributors


SylvestermouseSylvestermouseDawn Rae BDawn Rae BMbgPhotoMbgPhotoBrite-IdeasBrite-IdeasWednesday ElfWednesday ElfOlivia MorrisOlivia MorrisTreasures by BrendaTreasures by BrendaThe Savvy AgeThe Savvy AgeMargaret SchindelMargaret SchindelRaintree AnnieRaintree AnnieLou16Lou16Sam MonacoSam MonacoTracey BoyerTracey BoyerRenaissance WomanRenaissance WomanBarbRadBarbRadBev OwensBev OwensBuckHawkBuckHawkDecorating for EventsDecorating for EventsHeather426Heather426Coletta TeskeColetta TeskeMissMerFaeryMissMerFaeryMickie_GMickie_G


Review This Reviews is Dedicated to the Memory of Our Beloved Friend and Fellow Contributor

Susan DeppnerSusan Deppner

We may be apart, but
You Are Not Forgotten


“As an Amazon Associate, Ebay (EPN) and or Etsy (Awin) Affiliate, I (we) earn from purchases.” Disclosure Statement

X