Showing posts with label Gardening. Show all posts

Tuesday, August 6, 2024

Reviewing Sensory Garden For A Person With Sight Loss Part One

 Golden yellow rubekia flowers


My husband has been gradually losing his sight and this is something we both need to learn and adjust to.

One of the areas I have been looking into recently is how to have a garden that will be beautiful, fun and interesting to him as his sight declines. We are also anticipating a house move in the next few years  to make life easier long term so I am looking into what will work and how I need to change my gardening style. 

There are always five elements to take in to account when making a garden and these revolve around the five senses of

Smell, Hearing, Sight, Touch and Taste and then the next important area is safety.

It is vital that we work together on this project so that I understand what he wants and needs from the garden. Our aim is to retain his independence as much as possible in all areas of life and that includes the garden.

We aim to arrange it so that he will know where he is in the garden by the location of key plants and structures and take notice of the five senses.  

In Part One we will discuss the senses of Smell, Touch and Sound and in Part Two we will discuss Sight, Taste and Safety. 

I have presented these elements in the order my husband would like me to concentrate. I find the best approach to be led by him in what he needs and wants in the garden. 

In this article we will be using the terms sight impaired, blind, low vision, partially sighted and sight loss as these are the current acceptable terms in my country for people with sight loss. This may change over time and be different in different countries. No offence is intended by any of these terms.

Elements To Address in The Garden

Smell : Scent: Scented Plants

Touch : Different textures and feel. Safe to Touch Plants

Hearing : Sound: Windchimes Water Features and Birds

Sight : Colour and form, Light

Taste : Fruit, veg and herbs Edible Plants. Avoid poisonous plants. 

Safety : Moving around independently and safely


Sense Of Smell-Scent


Scented Sweet Peas In Vase- red, purple, pink colours
Scented Sweet Peas

Scented plants are very important in any garden but particularly when thinking of a person with sight loss. I am aware of many scented plants. The next step was to ask which scented plants he preferred, so I made sure I included those. 

I will not be limited to these plants though as I always think it is good to have surprises. Some plants are all year round scent from leaves, others only have scent for a part of the year they are in flower. 

We discussed having these plants mainly in raised beds so that it is easier to smell them and easier to maintain, plus better to be able to give them the conditions they like. In addition, the plants that have Mediterranean origins like free drainage, difficult to provide on our mainly heavy clay soil.

So we will plant:-

Lavender

Lemongrass

Basil

Thyme

Rosemary

Jasmine

Salvia

Scented Sweet peas

Artemisia

Curry plant

Scented roses

Thyme

Honeysuckle

Chamomile

Scented Daffodils

Cushion Bush/Silver sand 


Rosemary with light blue to mauve tiny flowers
Rosemary


Sense Of Touch

Although I love plants like Holly and pyracantha, they are both very prickly and  it is not a great idea to have them central in a garden suitable designed for a sight impaired, partially sighted or blind person. 

A better idea is to have plants that can be touched safely and that do not mind being touched. 

Some of these plants can be the same as the ones with lovely distinctive scents, many have leaves that are evergreen and release amazing scent when touched. Also they are not harmed by being touched.


Choysia shrub pale yellow leaves and white flowers

So we will plant:-

Choisya Shrub

Curry plant

Artemisia

Lavender

Rosemary 

Chamomile

Lambs ears


White scented roses
White Scented Roses

A reality check are our love of roses. Now roses usually have thorns which is not a great idea. However we both adore roses and do not want to give them up so we worked on what we hope is a solution by planting roses in raised beds and surrounding them with lavender and chamomile. 

That way my husband will know if he smells or feels lavender or chamomile he has a safe space before he gets to roses. However once in flower the roses will have a gorgeous scent he can enjoy safely.

Sense Of Hearing -Sound

Plants

In the garden sound can be achieved by  plants making the sound such a bamboo or grasses. The distinctive rustling in the wind or a gentle breeze is a lovely sound for anyone and makes it a restful place for a bench to sit and listen. 

Wind Chimes

Materials are also useful in making a sound such as wind chimes.  They can be a useful item in the garden to provide a different element and even announce a separate area.


Bamboo
Bamboo

Water In The Garden

Water is an important element but while we both want a pond for wildlife it can be a real danger for someone who is sight impaired.

 So our solution is to have elements near the pond that will alert him to the water such as a physical barrier of a fence around the pond, a windchime near it and for added safety we will add a grid over the pond in case he does walk onto it.

We may have a small running water feature pump, not so much so that it disturbs wildlife but enough for it to be heard.

We will change the ground near the pond to something very different so if there is grass mainly near the pond we will put slabs down. 
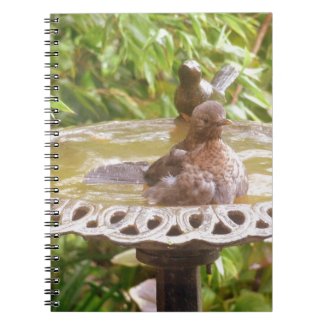
Bird Bath

We will also continue to have a bird bath. Even if he eventually cannot see the birds very well, he can hear them having a bath as they splash around. We love our garden birds so we intend to have maybe three bird baths in different areas.


So with a little thought and discussion and some plant knowledge it is I believe very possible to make a beautiful sensory garden with Touch, Sound and Scent for a person with sight loss and being an interesting garden for everyone. 

See Part Two in a few weeks, which will cover Sight, Taste and Safety. 


Read More Gardening Articles

Essential Wildlife Gardening Gifts


Diary Of A Wild Country Garden


Note: The author may receive a commission from purchases made using links found in this article. “As an Amazon Associate, Ebay (EPN), Esty (Awin), and/or Zazzle Affiliate, I (we) earn from qualifying purchases.”


Wednesday, June 19, 2024

The Best, Most Practical Large Capacity Filtered Water Pitcher

Even though we live in an area with high-quality drinking water, the water is hard. We have found that our plants do better with filtered water, so we have always used a Pur or Brita filtered water pitcher when watering our plants. Until recently, we had only a few indoor houseplants. However, when my green-thumbed sister moved across the country last month, I inherited quite a few more. Since it takes time for the water to drip through the pitcher’s filter each time it is refilled, I quickly realized I needed a large-capacity filtered water pitcher for my indoor gardening and filling our large ultrasonic humidifier.

Today I am reviewing the Brita Large Water Filter Pitcher I chose. This simple yet effective water filtration system has a 10-cup capacity and a sleek, bright white design that combines functionality with style. You can buy it with one filter that lasts up to two months or 40 gallons of water or order a bundle that includes the pitcher and four filters.

It has been such a practical solution that I ordered a second one, which lets me water all our indoor plants without having to refill multiple times and wait for the water to drip through the filter each time.

The Most Practical Large Capacity Water Filter Pitcher

Design and Build Quality

The pitcher boasts a modern, bright white aesthetic that complements most kitchen decors. It is made from high-quality, BPA-free plastic, ensuring durability and safety. The ergonomically designed handle makes pouring easy and the flip-top lid simplifies refilling. The construction feels sturdy and the high-quality materials promise long-term use without significant wear and tear. That has certainly been the case with our previous, smaller Brita water filter pitchers.

Performance and Filtration

The Brita pitcher uses an advanced filtration system that reduces chlorine taste and odor and is certified to reduce copper, mercury, and other contaminants often found in tap water. Users have reported a noticeable improvement in the taste and clarity of their water. The filter is easy to install and replace. The model we purchased, which uses stickers to remind us when to change the filter (a pain in the neck), has been replaced by a model with a much more convenient, built-in electronic indicator that lets you know when it’s time for a new filter.

The pitcher holds up to 10 cups of water, making it suitable for small to medium-sized households. The filtration process is relatively quick, allowing you to enjoy clean, great-tasting water within minutes of filling the pitcher.

Environmental Impact

One of the standout features of this Brita pitcher is its potential environmental impact. It can significantly reduce plastic waste by replacing up to 1,800 16.9-fl. oz. single-use plastic water bottles annually, making it an eco-friendly choice for the environmentally conscious consumer. The long-lasting filter further minimizes the environmental footprint compared to frequent plastic bottle purchases.

Usability and Maintenance

Using the Brita Large Water Filter Pitcher is straightforward. The flip-top lid design makes refilling hassle-free, and the pitcher is easy to clean. It should fit comfortably in most refrigerators, should you wish to use it for drinking, providing convenient access to chilled, filtered water. Its dimensions are 10.47" high by 5.59" wide by 10.94" deep.

Maintenance involves regular filter changes every two months or after 40 gallons, whichever comes first. The electronic filter indicator is a handy feature that takes the guesswork out of knowing when to replace the filter, ensuring optimal performance and water quality.

Value for Money

The Brita Large Water Filter Pitcher is priced competitively and offers excellent value for money. The cost savings from not purchasing bottled water and the environmental benefits make it a cost-effective and sustainable option.

The pitcher comes with one filter that lasts up to two months or 40 gallons of water. I recommend buying six Brita replacement water filters (a year's worth of water filters) for each pitcher you order.

Pros

Effective Filtration: Significantly improves water taste and quality by removing common contaminants.

BPA-Free: Safe and durable construction.

Eco-Friendly: Reduces plastic waste by replacing up to 1,800 16.9-fl. oz. plastic bottles a year.

User-Friendly: Easy to refill, clean, and maintain with a convenient electronic filter indicator.

Stylish Design: Modern look that fits well in any kitchen.

Cons

Filter Replacement Cost: The ongoing expense of replacing the filter every two months can add up. At the time of this article's publication, the cost of a six-pack of filters (one year's worth) on Amazon was less than $30, or $4.95 per filter.

Capacity Limitations: Even the 10-cup capacity may not suffice for your needs. If that is the case (as it was for me), you may want to buy a second pitcher.

My Brita Large Water Filter Pitcher with one of my houseplants

Conclusion

The Brita Large Water Filter Pitcher is a reliable, eco-friendly, and user-friendly solution for improving tap water quality. Its effective filtration system, ease of use, and stylish design make it a valuable addition to any household. Despite the recurring cost of filter replacements, the long-term savings and environmental benefits make it a worthwhile investment. 

Whether you are looking for a convenient way to enjoy cleaner, better-tasting water or filtered water for gardening while reducing your plastic footprint, this Brita pitcher is an excellent choice.


The Best, Most Practical Large Capacity Filtered Water Pitcher by Margaret Schindel


Read More Product Reviews by Our Review This Reviews Contributors

Read More Gardening Reviews by Our Review This Reviews Contributors


Note: The author may receive a commission from purchases made using links found in this article. “As an Amazon Associate, Ebay (EPN), Esty (Awin), and/or Zazzle Affiliate, I (we) earn from qualifying purchases.”


Tuesday, May 14, 2024

Reviewing Ten Tips For A Beautiful Garden On A Budget

Weigelia in flower

Gardening is an amazing, absorbing hobby and one that I love. However, 
especially these days, it can get very expensive. 

There are now so many things you can buy for the garden and plants have become more expensive to buy. We may not all always have lots of cash to spend on the garden and this should not deplete our enjoyment of this wonderful hobby and enjoyment of any outdoor space we have.  

Gardening on a small budget doesn’t have to mean sacrificing a lovely garden or a creative approach to gardening, in fact sometimes quite the opposite. Here are some inexpensive or free garden ideas we can implement to save money where we can so that your garden does not need to suffer if you are on a tight budget.

If you do have more to spend you can spend on really lovely items. Many gardeners do these garden tricks without being on a tight budget to save money !  

Purple large flower clematis


1. Grow From Seed And Take Cuttings.

Growing your own salads, vegetables, annuals, and perennials from seeds is cost-effective and truly rewarding. We can use egg boxes to grow your seeds in rather than buying seed trays. 

Rather than buying them part grown from the garden centre or buying salad from the shop  start growing from seed. You can use old margarine or yoghurt pots and really any clean washed container really to start the seeds. 

If you grow Bamboo you can harvest the canes and use them to make your own plant supports and tripods which saves money on buying them. 

 Take cuttings of plants you love in your own garden and ask friends, family and neighbours if you can take cuttings of plants you admire in their gardens. You can use these to increase your supply of plants for free. I love taking cuttings and seeing them grow. Do take more cuttings than you need as some may not take. 

 If you are very successful and do not need all the cuttings you can see if any friends, family or neighbours would consider a swap with you.  

 You could also try to sell the cuttings at a car boot sale or use an honesty box outside  your home to sell the excess cuttings. 


Purple geraniums

2. Repurpose.

 Get thinking creatively about materials you already have around the house and garden. Think before you throw anything away if it can be used in the garden in a creative or useful way. 

Reuse old equipment as planters, for example old sinks can be reused in the garden as a planter, an old plastic dog bed can become a small pond. You are only limited by your imagination!


3. Buy Second Hand Tools And Share Equipment

 Look for second-hand gardening tools or discuss tool sharing with your friends, family or neighbours. Some of our best spades and forks have been found at car boot sales and even at an Antique shop.

You may only need some expensive tools a couple of times a year, so makes sense if you can club together to buy together and share or alternatively see if you can rent any tools. 

Get a sharpening stone to keep tools in good order and last longer. Also oil tools that require it to make them last longer. 


4.Look for Free And Discounted Plants

Keep an eye out for free or discounted plants.

I am always searching for the section in garden centres where they put the old last season plants that did not sell or ones that look shabby. I call them my  "rescue" plant section and usually with a little care and watering you can being them back to life and have paid a fraction of the cost.  

 Sometimes neighbours or local gardening groups share excess plants.

golden rubekia and blue flowers


5. Paint Your Fence

 We have just done this to give the garden a different look. Painting protects it from the weather which is always good and smartens up an old fence. 

You can either go for black or brown or a dark green to blend or make your fence a bold feature by painting it a bright colour.

All it takes is a pot of paint and a little work.

We went for black Cuprinol fence paint this time as we have found it to be durable and gives a good coverage and colour.  

The plants really stand out against it and the black colour helps to make the garden feel bigger as the dark colour recedes. 


clematis montana pink flower on black fence


6. Mulch Pots And Containers. 

Highlight your containers and pots by adding a decorative mulch. It is surprising what a difference this can make to a container. As it is a small space you can look to buy decorative mulches like pebbles, slate, shells or black river rocks

Mulch helps conserve moisture in the soil and suppresses weeds, while also giving your display a beautiful finish. As you will not use much in a container you can use a good quality decorative mulch which will give a dramatic impact.


7. Make Your Own Bird Bath

I advocate for every garden to have a bird bath as it is one of the single most important things for garden birds for water and bathing. If you can afford one of the beautiful iron or decorative ones then that is great. 

However if money is tight you can make your own bird bath. You will need a terracotta or stone pot, a saucer, and glue suitable for outside work. Simply turn the pot upside down, glue the saucer to the bottom of the pot, wait until the glue has dried and then fill it with fresh clean water. The birds will love you for it. 

Alternatively simply use old  plastic or terracotta saucers, or even an upturned bin lid and fill with water. Place them in a safe area for birds and watch them enjoy a place to drink and bathe.


8. Make Your Own Plant Labels. 

Reuse ice cream or lollipop sticks or any similar product to label your plants in containers, seeds or in the garden. They may not last as long as more expensive or beautiful bought plant labels,  but they are useful as a temporary measure for seeds and you can replace them when they wear out. 

Personally I strike a balance using free or cheap plant labels for seeds and more expensive but durable metal plant labels for more permanent plants


9.Lighting In The Garden

Sorting  our gardens with  lighting makes them a useable and lovely space to be in the evenings.

However employing an electrician to fix up outdoor electrical lighting can be very expensive. An alternative is to use Solar-powered lights which are more cost-effective, portable and require no installation costs.


10. Protect Your Pots.

Instead of buying expensive terracotta feet to raise pots off the ground to improve drainage, prevent waterlogging and frost damage,  try using old bricks you may have and placing pots on those. 


Even though gardening is one of my main hobbies and interests, I employ most of these money saving tips. It means that I then have money to spend on other things for the garden that I may need or want!


Read More Gardening Reviews on 

ReviewThisGardening.com


Growing Vegetables in Outdoor Containers Reviewed

 Read More Articles By Raintree Annie 


Note: The author may receive a commission from purchases made using links found in this article. “As an Amazon Associate, Ebay (EPN), Esty (Awin), and/or Zazzle Affiliate, I (we) earn from qualifying purchases.”


Tuesday, May 7, 2024

How to Grow Potatoes in a Bag


growing potatoes


If you want to grow your own potatoes, but you don't have a yard, or your soil is too hard, or even if you just don't want the work of having to dig them up, I have a great and easy solution!

Grow your potatoes in a bag!  I know it sounds ridiculous, but it is actually easy and fun.  It's also a great way to get lots of tasty and healthy spuds to eat!  Anyone can do it, you don't even need to buy any seeds because potatoes are grown from other adult potatoes.

How to Sprout Potatoes to Plant:

It is best to start with organic potatoes, since they are less likely to be a funky hybrid that can't be sprouted or have toxic insecticides on them or even in them.  You can use red or white potatoes.

Wash the potatoes well and then place them in direct sunlight.

In two to three weeks you will have sprouts.  When they get an inch or so long, you are ready to begin the planting process.


red potatoes


Cut the potatoes, with one sprout on each piece.  Leave the potato connected to the sprout, because as it rots it will be fertilizer to the new plant

It is very important that, before planting, you let the cut potatoes sit for two or three days so the cut portion of the potato can dry out and form a protective layer.  If you plant newly cut potatoes, diseases, fungus, worms and insects can easily burrow into the fresh cut flesh and kill the sprout.

While your potatoes are sprouting and curing, order your grow bags.  You can find them on Amazon for a good price, about $2.50 to $3.00 a piece, less if you order a larger quantity.  I usually get the 5 gallon size.  They look like this:

bag


growing bag


They also have bags that have a roll up flap on the side near the bottom, but I find these to be more expensive and the flap are basically useless because the growing potatoes should not be bothered by opening the side of the bag and poking around.  


How to Grow Potatoes in Bags:


1. Fold the bag down till it is about 6 inches tall.

2. Put 3 inches of good dirt in the bottom of the bag.

bag for growing


3. Set three to four potato pieces in the dirt with the cut side down, sprout side up and cover with 3 inches of dirt.

4. Water well.

5. Keep the soil moist but not mud and when the plants are 6 inches tall, unroll the bag about 4 inches and add more dirt, up to the bottom leaves.

8. When the plant has grown to 8 inches above the dirt, unroll the bag again, and add more dirt, up to the bottom leaves.

9. Keep doing this until the bag has dirt three inches from the top.

10. Make sure to keep them watered.  If you repeatedly let the bag dry out, the potatoes will shrink and wrinkle and not be edible.  You will have to water them more often than if they were planted in the ground.

11. When the potato vines turn yellow and look wilted, stop watering them and wait about two weeks.

12. Pick up the bag and turn it upside down in a wheelbarrow or washtub and you will find fresh, tasty and pesticide free home grown potatoes.

This is what one of my bags looked like when the plants came up:


sprouts

Don't be upset if all the sprouts don't come up.  The fewer the plants the more room there is for the remaining plants to grow bigger potatoes.  You must make sure to keep them watered, it is the defining factor of whether you get a nice harvest or a big disappointment.

You don't have to use these bags, you can use any kind of bag that will take to weight of dirt pressing against the sides of it.  Canvas tote bags, plastic feed bags, reusable grocery bags, any kind of bag will do.  Just make sure if you use a plastic bag to poke lots of holes in the bottom so it has good drainage.

Grow bags are a great way to grow some of your own food in a very small space.  You can grow any type of veggie or fruit plant you want in bags, it does not have to be potatoes.  I have also grown peppers and cucumbers and I have friends that use them for tomatoes and they love them!  They take up so little space you can even use them on an apartment balcony or condo patio.  You don't need to have land to grow your own food!  The best thing is, at the end of the harvest you just empty them, fold them up and put them away till next year.  A real space saver!

_____________________________________


Note: The author may receive a commission from purchases made using links found in this article. “As an Amazon Associate, Ebay (EPN), Esty (Awin), and/or Zazzle Affiliate, I (we) earn from qualifying purchases.”


Wednesday, April 17, 2024

Early Spring Seeds to Plant NOW! A Garden Review

 At this time of year every gardener I know has itchy palms and fingers that are just craving some dirt!  Yes, you heard me right,  DIRT!

It doesn't matter where you garden, whether above the ground or right into the ground, there are things that need to be done and then the fun can begin.

https://www.westcoastseeds.com/?rfsn=6505867.508219


I'm going to take you to my balcony garden, because that is where I have been doing all of my "dirty" work!  I have containers and planters that I use for my flower beds and vegetable beds too.

What's great about this time of year is that you can start those flowers and vegetables that really prefer the cooler days.  And if you don't think there are quite a few of them, you would be wrong.

So let's start by taking a look at what loves to be planted outdoors NOW!

Flowers:

  1. Sweet Peas are my #1 cool weather seeds to sow!
  2. Marigolds (for protection from some bugs)
  3. Nasturiums (they can be eaten you know)
  4. Sunflowers (not for balconies)
  5. Pansy
  6. Rudbeckia or Black Eyed Susan
  7. Snapdragons
Vegetables:

  1. Broccoli
  2. Cabbage
  3. Peas
  4. Cauliflower
  5. Beets
  6. Brussel Sprouts
  7. Carrots
This is just a little sample of what can be sown right into the planters right now!  If you are lucky enough to have garden space in the great outdoors, the list is even bigger and right now is the perfect time to start those seeds in the ground.  Check out West Coast Seeds for their great selections.

My balcony is not too big and yet it is also not too small, so I manage to plant quite a few on my favorites.  I don't plant more than two or three of any variety of vegetables, but the flowers I can go crazy if I choose to.

On the balcony the most important part of getting your garden going is probable going to be the watering!  Spring can sometimes be very wet or very dry.  The best way to check that is to push a finger into the soil and see how far down it can go before it feels wet.  Too much water and the seeds will drown and too little water will have them sprouting and then dying off.  So a good balance needs to be maintained.  

Keep your containers happy and the seeds will sprout and you will have a prolific garden all your own.  I love getting quality seeds from a reputable company.  I love West Coast Seeds because not only are they quick, reliable and cost effective, but they also have lots of videos and blog posts for any problems you might have.  There is always something to learn!

So if you have been holding back, it's time to let go and get those hands and fingers back into the Dirt!  Come and join me for some fun in the garden where ever that may be for you!


West Coast Seeds

Just for your information this is a Canadian Company and most of it's Non-GMO products are available for shipping to the US.  There are some exceptions and West Coast takes this into account when you order.


Note: The author may receive a commission from purchases made using links found in this article. “As an Amazon Associate, Ebay (EPN), Esty (Awin), and/or Zazzle Affiliate, I (we) earn from qualifying purchases.”


Sunday, April 14, 2024

10 Essential Steps to Prepare Your Yard for Spring: A Guide to Yard Cleanup and Flower Preparation

10 Essential Steps to Prepare Your Yard for Spring

Spring is just around the corner, and it's time to prepare your yard for the vibrant blooms of the season. 

As the snow melts away and the days get longer, your garden awaits a rejuvenation after the winter slumber. 

To ensure your yard is ready to burst with color and life, here are 10 essential steps to focus on yard cleanup and prepare for spring and summer flowers, including perennials and annuals.

10 Steps to Prepare Your Yard for Spring

  1. Clear Away Debris: Start by giving your yard a thorough cleanup. Remove fallen branches, dead leaves, and other debris accumulated over the winter months. This step not only enhances the aesthetics of your yard but also helps prevent pests and diseases.

  2. Inspect and Prune: Look closely at your trees, shrubs, and perennial plants. Trim back any dead or damaged branches to encourage healthy growth. Pruning also stimulates flowering in many plants, so don't be afraid to trim where necessary.

  3. Prepare the Soil: Good soil is the foundation of a healthy garden. Turn over the soil in your flower beds to loosen it up and remove any weeds or old plant debris. Consider adding organic matter such as compost or aged manure to enrich the soil and provide essential nutrients for your plants.

  4. Divide Perennials: Periodic division rejuvenates perennial flowers and promotes better growth and flowering. Spring is an ideal time to divide overcrowded clumps of perennials such as irises, hostas, and daylilies. Replant the divided sections in your garden or share them with friends and neighbors.

  5. Inspect Bulbs: If you planted bulbs such as tulips, daffodils, or hyacinths in the fall, now is the time to check on them. Look for signs of growth and remove any debris covering the emerging shoots. Consider adding a layer of mulch to help retain moisture and suppress weeds around the bulb beds.

  6. Plan and Plant Annuals: Annual flowers add instant color and variety to your garden. Research which annuals thrive in your climate and soil conditions, and plan your flower beds accordingly. Consider factors such as sunlight exposure, water requirements, and bloom times to create a harmonious display throughout the season.

  7. Prep Flower Beds: Before planting annuals or transplanting seedlings, prepare your flower beds by amending the soil and adding any necessary fertilizers or soil amendments. Remove weeds and cultivate the soil to create a loose, well-draining planting environment.

  8. Start Seeds Indoors: For certain annuals and vegetables, starting seeds indoors can give you a head start on the growing season. Invest in some seed trays, potting soil, and grow lights, and begin sowing seeds for flowers such as marigolds, zinnias, and cosmos. Transplant the seedlings outdoors once the danger of frost has passed.

  9. Plan for Pollinators: Remember the pollinators as you design your flower beds! Choose various flowers that attract bees, butterflies, and other beneficial insects. Incorporate native plants and flowers with different shapes and colors to provide pollinators a diverse and inviting habitat.

  10. Mulch and Water: Finally, after all your hard work, mulch your flower beds to help conserve moisture, suppress weeds, and regulate soil temperature. Water newly planted flowers thoroughly, especially during dry spells, to help them establish strong root systems.

By following these 10 steps, you'll be well on your way to a vibrant and flourishing garden that will delight you throughout the spring and summer months. With proper yard cleanup, soil preparation, and thoughtful plant selection, your outdoor space will become a haven for colorful blooms and buzzing pollinators. So roll up your sleeves, grab your gardening tools, and let the beauty of spring unfold in your yard!

ReviewThisReviews Gardening Guru:

Check out Raintree Annie's informative articles for more tips and advice on yards and gardens. She's always very helpful - You can scroll through many of them here.


Note: The author may receive a commission from purchases made using links found in this article. “As an Amazon Associate, Ebay (EPN), Esty (Awin), and/or Zazzle Affiliate, I (we) earn from qualifying purchases.”


Tuesday, March 19, 2024

Reviewing the Beautiful and Cheerful Daffodil.

Yellow Daffodils In The Garden

Daffodils are abundant in my garden right now and I love to see their beautiful vibrant colours  and gently swaying trumpet shaped heads bringing sunshine to a cold day.

Daffodils are native in Europe and North Africa and although the name Daffodil is most commonly used, the botanical  name is Narcissus and they are part of the Amaryllidaceae family. 

Regarding the name there is also a link with the Greek myth of Narcissus. The story goes that he was renowned to be very beautiful  and he fell in love with his own reflection, so much so that he pined away until he died and turned into the flower narcissi or daffodil. 

Tall Yellow Daffodils
 

Daffodils In The Garden 

Even though it has been very cold here ever since they flowered, their appearance symbolising  rebirth and new beginnings gives me hope and joy. Although it has not been a particularly harsh winter this year, it has been very cold, damp, grey and very rainy so it is lovely to see some colour and brightness in the garden which certainly lifts the spirits for warmer weather and Spring. 

Most of mine are golden yellow colours but some are white and some are fragrant which is lovely. There are also orange flowers and combinations of yellow and white or orange and yellow. 

 Daffodils are very versatile in planting schemes for the garden. I like to plant little Tete a Tete daffodil in pots and troughs where their delicate looking blooms can be easily seen. The bigger daffodils are planted in the borders of the garden. Daffodils can also be naturalised in grass. 

 As we have a lot of daffodils, some can be spared to be used as cut flowers and brought inside to place in a vase. This is lovely to bring Spring into the house. They look lovely in a vase by themselves or mix very well with other flowers perhaps white, purple or blues being my preferences. 

 Daffodils come in a wide variety of shapes and sizes from the tiny to the large and different colours from yellow gold, white and orange.  Many have the classic strong trumpet shaped flower head and others have multi petaled varieties.


Looking After And Planting Daffodils 

Daffodils are bulbs and hardy perennials. This is lovely as they come back every year once planted. 

While planting bulbs in borders can be a little tedious, once it is done you will have daffodils every year with little effort involved.


Planting Daffodils

We can plant daffodil bulbs in the autumn/fall around September to November time. This gives them time to establish roots before winter cold sets in. Before planting check to make sure that the bulbs are  clean and firm, discard any that are mouldy or very soft as these may be too old or diseased. It is best to buy and plant bulbs in the same season so that they do not get hence to get any mould or go soft. 

Daffodils prefer full sun or partial shade and they do appreciate a well-drained soil so it is ideal to plant in an area that will get a decent amount of sunshine. We have an area of heavy shade and I never plant daffodils there as they will not do well. Other flowers fair better there. All my daffodils planted in the soil are in sunny spots and I move the ones in pots into sunny places as soon as I see shoots coming up.

I put a grit and compost mix in my containers for the bulbs. For planting in the garden we do have heavy clay soil which although I have improved over years is still less than ideal but the bigger ones have managed to thrive in it. So if you have a sunny spot but perhaps less than ideal soil give it a try with a small number of the bigger bulbs to see if they can be successful.  

Bulbs should be planted  approximately 6 inches or 15 centimetres deep below the soil surface. For this you can simple dig a hole with a trowel or use a bulb planter. Having done a lot of this I would advise if you are planting a lot, to invest in a bulb planter to make the job easier and quicker.  


When planting in the soil space bulbs about four to six inches apart, it will not be too long before  you will have daffodil clumps.

If planting in a container you can space them much closer together, just ensure that none of the bulbs are touching each other.

It might be a good idea to protect the bulbs from squirrels and rodents who may try to steal them! A wire mesh over the top of containers usually deters most of them.

Water them immediately after planting. Do also water them in dry spells,  but they do not usually require any special feed or much other attention.


Care Of Daffodils

All that you need to do is enjoy the blooms then allow them to die down naturally. The flowers will fade and at that point you can cut off the flower and its stem down to the base and then allow the leaves to die down naturally. Some people just cut off the heads of the daffodils and that is fine too, I just prefer to take the whole stem down as I think it looks better. 

 Some people tie up the leaves, I believe so they look neater as the plant fades, but there is no need to do that and I prefer to allow them to die down naturally which is also a lot less work.

If you have naturalised in grass, you must wait to cut the grass until the leaves have completely died down as they are feeding the bulb for flowers next year. Do it too early and you will have no or limited flowering next year. 

I always like to have daffodils in pots and troughs so that when they are blooming I can display them where we can see them and even up on tables. Then as they fade we move the pots to an unnoticed area of the garden. Then I can plant annual seeds in the pots and bring them out again when those flowers bloom, thus not wasting the space in the containers. 


A Word Of Warning About Daffodils.

 While daffodils are beautiful flowers and so cheerful, they do contain toxins and are not edible in any of its parts. I do tend to wear gloves when planting them and handling the bulbs a lot.

 It is important to teach children not to eat them. If you are concerned then it is easy to plant bulbs in a pot and put them high up out of reach of small children. 

My parents always had daffodils in the garden and I was trained to respect the plants in the garden and only to eat what my parents said was safe and never came to any harm.


Daffodils Inspiring Artists

Daffodils have long inspired poets and artists and you can see why.  The most famous example of poetry  is probably the ode to daffodils is William Wordsworth’s poem “I Wandered Lonely as a Cloud,” where he describes the wonder of happening across a field of stunning golden daffodils dancing in the breeze.


In terms of art, the one that springs to mind immediately is Van Gough's  "Daffodils". The painting is in oils with vibrant colours and thick brush strokes and is hanging in the Norton Simons Museum in Pasadena California.


Read More Gardening Articles


Essential Wildlife Gardening Gifts


Note: The author may receive a commission from purchases made using links found in this article. “As an Amazon Associate, Ebay (EPN), Esty (Awin), and/or Zazzle Affiliate, I (we) earn from qualifying purchases.”


Most Recent Reviews on Review This Reviews


Search for Reviews by Subject, Author or Title

The Review This Reviews Contributors


SylvestermouseSylvestermouseDawn Rae BDawn Rae BMbgPhotoMbgPhotoBrite-IdeasBrite-IdeasWednesday ElfWednesday ElfOlivia MorrisOlivia MorrisTreasures by BrendaTreasures by BrendaThe Savvy AgeThe Savvy AgeMargaret SchindelMargaret SchindelRaintree AnnieRaintree AnnieLou16Lou16Sam MonacoSam MonacoTracey BoyerTracey BoyerCheryl Paton Cheryl PatonRenaissance WomanRenaissance WomanBarbRadBarbRadBev OwensBev OwensBuckHawkBuckHawkDecorating for EventsDecorating for EventsHeather426Heather426Coletta TeskeColetta TeskeMissMerFaeryMissMerFaeryMickie_GMickie_G


Review This Reviews is Dedicated to the Memory of Our Beloved Friend and Fellow Contributor

Susan DeppnerSusan Deppner

We may be apart, but
You Are Not Forgotten


“As an Amazon Associate, Ebay (EPN) and or Etsy (Awin) Affiliate, I (we) earn from purchases.” Disclosure Statement

X