Showing posts with label Crafts for Everyone. Show all posts

Tuesday, December 2, 2014

Crafty Signs of the Season

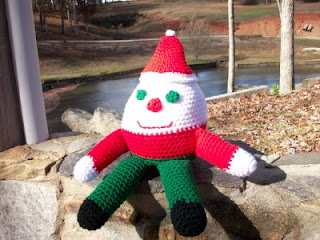
Santa Claus Humpty Dumpty plush doll in crochet
A Humpty-Dumpty Santa Doll
As we enter December and the beginning of the holiday season, we realize that the Christmas season began as Thanksgiving weekend ended. In many cities people enjoyed watching Thanksgiving parades and the traditional finale to every parade is the arrival of 'Santa Claus'.


Santa Claus and Friends


Toy Santa dolls in crochet
Christmas Decor Toys Santa Dolls on Etsy

Images of jolly old St. Nick in all forms make darling seasonal decor.  This set of a crocheted Santa Claus and Mrs. Claus would look terrific as part of your Christmas holiday decor or would make cute stocking stuffers for your kids.

Handmade by HelenaCrochetToys in the Ukraine.


Holiday Decor


Other signs of the season begin to appear as Christmastime gets closer. Christmas bells and poinsettias, Gingerbread men and candy canes, ornaments for the tree and stockings hung by the chimney with care.


Handmade beverage coasters in a Christmas theme
Christmas Design Coasters
It's time to display holiday themed items, like these Christmas Coasters for your holiday beverages.  These colorful coasters are the crafty work of the Christmas Elf at Coastal Crochet Crafts on Etsy.


Snowman wall hanging craft kit
Snowman Wall Hanging


Snowman Wall Hanging


For a seasonal wall hanging that doesn't have to be taken down after Christmas, as it is a nice decor all winter long, create this Woodland Friends Snowman Door or WallHanging from a kit. Everything you need, except the stuffing, is all in one package ready to craft. 


Turtle Cookie Balls

Turtle Cookie Balls recipe card
Turtle Cookie Balls Recipe Card


Christmas cookies are another sign of the season and cooking is every bit as much a craft as needlework and sewing.  Mary Beth Granger (mbgphoto) shares her recipes for Cookie Balls which are wonderful for your own holiday time and also make terrific homemade gifts for friends.  Mary Beth created a beautiful recipe card on Zazzle for her cookie balls and the card would be a lovely addition to your gift.  Tuck it into the package and your friend can have a gift that 'keeps on giving'.


Christmas Tree Ornaments


Beaded and Sequined Christmas Balls craft kit


Don't forget the Christmas Tree ornaments.  Sylvestermouse shows us a wonderful group of Bead & Sequin Christmas Ornament Kits we can craft for our own tree or to give as a gift.  


Christmas ornaments crafts

Another contributor to Review This Review, Dawn Rae, brings us some easy Christmas ornament crafts you can do with your children as you get ready for the holiday season.


When it's Time to Put Away the Crafts

At the end of the day, it's time to put away our craft supplies.  Susan Kennedy (BuckHawk) helps us get organized with helpful tips and tools at her "Organize Craft Supplies" site.


Christmas Shopping Ideas


And for an extra easy way to begin your Christmas shopping, check out this handy online Holiday Gift Guide brought to you by the contributing members of 'Review This'.


Have a Happy Holiday!


Note: The author may receive a commission from purchases made using links found in this article. “As an Amazon Associate, Ebay (EPN) and/or Esty (Awin) Affiliate, I (we) earn from qualifying purchases.”


Wednesday, November 19, 2014

Sharing Thanks With Handmade Crafts for Thanksgiving

Thanksgiving is a time for expressing thankfulness for all of the good things we've received in our lives. Some families have traditions where they express their gratitude during dinner while other families may find it hard to share these feelings verbally. Sometimes it takes a little creativity to find just the right words and the right way to express those sentiments.


Here are four DIY handmade crafts for Thanksgiving that will make it easy for you to express your love and gratitude to your family and friends. These crafts are easy to make and most of the materials can be found in your recycle bin or backyard.

Hang Your Gratefulness on a Tree


Simply Vintage Girl designed The Thankful Tree, With Chalk using items found in her backyard. This tree is made from a broken branch that is used as the tree form. Small wooden discs are painted with chalkboard paint and suspended from the branches. Before your guests arrive, place a piece of chalk under the tree so that family and friends can write down those things for which they give thanks when the spirit moves them.

Stuff Your Thanks in a Turkey


I {Heart} Crafty Things created a Thankful Turkey Box Tutorial from an upcycled tissue box. This is an awesome craft for kids because it is so easy and downright adorable. The kids can explore their creativity and when the crafting fun is done, they can write their thanks on a slip of paper. During Thanksgiving dinner, have everyone take a turn at pulling a slip of paper out of the box and reading the words of thankfulness.

Set a Place Mat for Giving Thanks


Abby M. Interiors has 8 Ideas for Creating Your Thanksgiving Table that will show your gratefulness all through dinner. I especially like number 7 on her list. Make place mats out of upcycled paper bags or kraft paper and draw lines on the mats for guests to write down the good things in their life.

Spread a Garland of Thanksgiving


Carina Gardner shares her gratefulness with a Giving Thanks - Free Thankful Banner Download that makes it easy for family and friends to write their reasons to be thankful on a decorative garland strung near the dinner table. Use your own creative skills or download the free printout to make leaf shapes for the garland. Put the shapes in a jar with a pen and clothespins, find a convenient place to hang the garland string, and encourage your family to write their thanks on a leaf and pin it to the garland.

May the holiday season bring you comfort, joy, and good tidings.
Coletta


Posted by Coletta Teske
Coletta Teske

About This Contributor

Coletta Teske writes reviews on books, business management, writing, crafting, cooking, and gardening. She is also an avid recycler and shares her tips on recycling. She delights in upcycling an old object, recycling or transforming discarded items into a new treasure.


Note: The author may receive a commission from purchases made using links found in this article. “As an Amazon Associate, Ebay (EPN) and/or Esty (Awin) Affiliate, I (we) earn from qualifying purchases.”


Wednesday, October 29, 2014

Handmade Harvest-Time

It's Harvest Time, the time of year crops are traditionally harvested. This coincides with Autumn, the season of colorful leaves, cooler nights, pumpkins and apples, and the holidays of Halloween and Thanksgiving.


The term 'Harvest' came from England and was the name for the season between summer and winter until Autumn began to be used in the 16th century. In Britain the season is usually considered to be from August through October and in the United States from September through November. The term 'Autumn' is also interchangeable with 'Fall', used mainly in America. Unlike the other three seasons, there does not seem to be a common word for this season in all the Indo-European languages. Autumn and Harvest-Time are my favorite terms to use.


Autumn Themed  Crafts


Acorns


Autumn is a favorite time of year for crafters and the Indie-artists in the fields of art and photography because the lovely harvest-related colors of orange, brown, red and yellow lend themselves to beautiful creations. 

Since acorns are plentiful in the Fall, this crochet acorn hat is perfect for the season.  A leaf and a small acorn adorn the top of the hat, and are attached to the stem of the acorn. Made in super soft cotton yarn, the hat is available in sizes from newborn to adult large.

Place your order for an acorn hat with Monica of Costa Mesa, California.  You can find her in her Etsy Shop "Ruffle Stitch Kids." These hats make a great gift for all the 'nuts' on your list and is perfect for those Fall photos. 


Pumpkins


Handmade pumpkin potholder/washcloth
Pumpkin Potholder and Matching Dishcloth
Pumpkins are also perfect for a harvest time decor as seen with this set of pumpkin potholder 
and dishcloth combo.

In addition to sprucing up your Fall home decor, this pumpkin set makes a unique hostess gift when invited out to dinner, especially during the Harvest-Time season.  Or nice for a wedding gift for a Fall wedding. 


More Ideas for Handmade Harvest Time


  • Sylvestermouse shows us a collection of beautiful beaded cross-stitch kits with lovely Thanksgiving designs to stitch up for the most popular 'harvest holiday' – Thanksgiving Day!


When you think of 'handmade harvest-time', you may consider crafts as the only field that's considered handmade. Not so, in my opinion.


Pumpkin Muffins Recipe Card
Pumpkin Muffins by Mary Beth Granger


  • I consider cooking a handmade 'delicious delight', as you can see in this yummy pumpkin muffin recipe by mbgphoto.

  • And 'gardening' gives us all that wonderful homegrown food. You don't need to have a farm or even a large garden plot in your yard. As Dawn Rae shows us, you can also grow and harvest your favorite foods like squash and tomatoes in a simple container garden on your apartment balcony.


Enjoy the colors of the Autumn Leaves as you 'trick or treat' for Halloween and plan your Thanksgiving feast in a multitude of handmade ways from crafting to cooking to planning your next garden for Spring.


Have an Awesome Autumn and Harvest-time.


(c) 12/02/2014 Wednesday Elf. Updated 9/27/2019


Note: The author may receive a commission from purchases made using links found in this article. “As an Amazon Associate, Ebay (EPN) and/or Esty (Awin) Affiliate, I (we) earn from qualifying purchases.”


Friday, October 3, 2014

Halloween Crafts

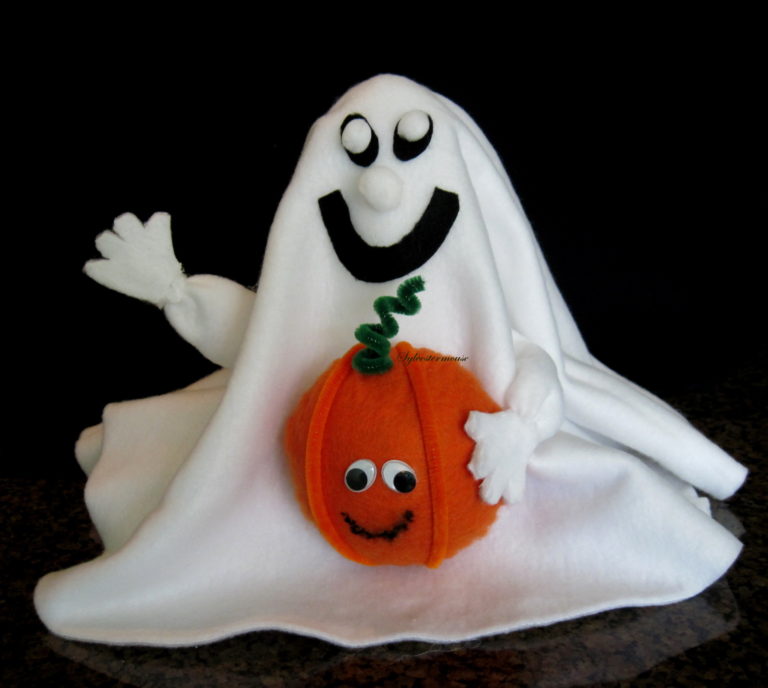
Halloween fleece pumpkin
Little Pumpkin Held by Fleece Ghost Below
Halloween is the perfect month to get creative!   

Halloween crafts can range from really cute to down right scary.  There is definitely plenty of  room to play when crafting for Halloween.  

Some kits and crafts featured here today are easy enough for children to make.  Some were created with the elderly in mind, but all of these Halloween crafts are designed to be a lot of fun to make and display for Halloween.  

I feel certain there is a Halloween craft here for a crafter of any age.


Halloween Crafts for Kids

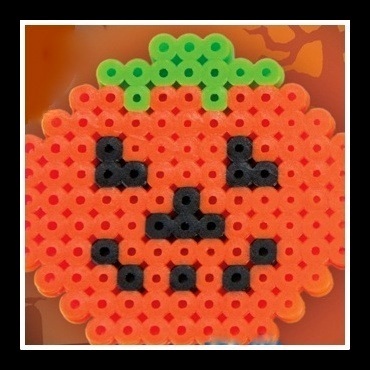
Halloween perler beads pumpkin
Halloween Perler Bead Kits

Perler Bead kits are designed for children to make a fast and fun craft.  They do require a parents supervision so this is a great Halloween project for a parent and child to make together.  

There truly are a variety of Halloween Perler Bead kits available.  You will find my instructions for how to make  Halloween Perler Bead kits, as well as a selection of kits in my article,  Halloween Perler Bead Kits.  If you haven't worked with Perler Beads before, you will be surprised at how easy it is to make an awesome design.  

Here are a few more great Halloween craft projects for anyone published by a fellow contributor, The Savvy Age!


Halloween Crafts for the Elderly


Halloween crafts for the elderly
Photo by mbgphoto
Mbgphoto has been kind enough to share some easy craft ideas in her article Halloween Crafts for the Elderly.  

With several years of volunteer experience to rely on, she offers her favorite suggestions for crafts that are easy for the elderly to make.  

Intricate patterns or small piece projects are often too tedious for an elderly patient, but they still love to create and craft.  It really is imperative to select craft projects and kits that are appropriate for their limitations.  You will want these projects to be fun for them, not taxing or upsetting because the selected craft emphasizes their reduced skills.

Many of Mary Beth's (mbgphoto) Halloween crafts would also be fun for children.


Halloween Crafts for the Crafter 

Halloween fleece ghost
How to Make a Halloween Ghost with Fleece

A great project for any age, or even skill level, is to make a Halloween Ghost with Fleece.  

This is also a great family project.  While a parent would need to handle the glue gun, a child could easily cover the Styrofoam with the fleece and also design the face of the ghost.  

This article is an actually step by step tutorial for How to Make a Halloween Ghost with Fleece.  It also includes plenty of pictures of the creation process.

Here are a few more crafty ideas for Halloween offered on Review This Reviews or by a fellow contributor, Jade, on her website.

 Cheesecloth Ghosts and Spooky Shirts on Handmade by Jade Make Halloween Ornaments With Easy Craft Kits Reviewed on ReviewThisReviews.com Cute Candy Corn Cans on
Handmade by Jade


Halloween Beaded Cross Stitch Kits


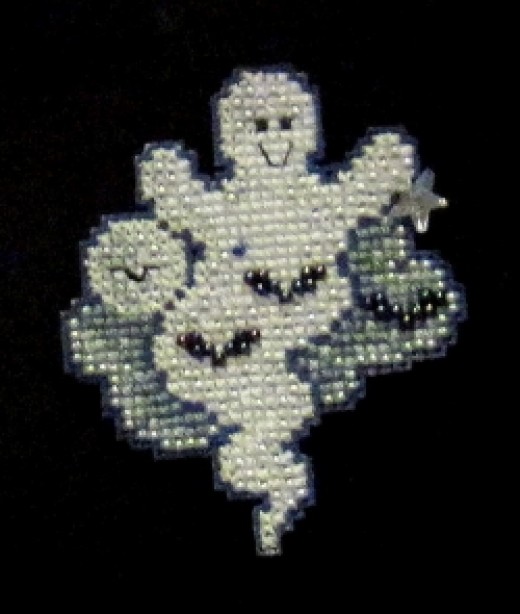
Beaded Cross Stitch ghost pin
How to Make a Halloween Beaded Cross Stitch Pin 
My personal favorite Halloween craft has to be the beaded cross stitch ghost pin.  I made this little ghost pin several years ago as a special Halloween treat for my favorite trick-or-treater.

This particular project is easy for someone with cross stitch experience and it is a great introduction to adding beads to your cross stitch projects.  It would also be an excellent cross stitch beginner project simply because of it's smaller size.  

Click the image or link to find a step by step tutorial for How to Make a Halloween Beaded Cross Stitch Pin.  

The tutorial features the ghost pin, but the basic instructions would be applicable to any beaded cross stitch pin kit. 


Share Your Halloween Crafts

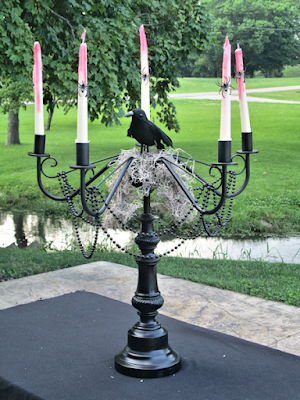
creepy candelabra

DIY Creepy Candelabra by Mandee


We are always searching for great Halloween crafts and I invite you to share the link for your published online article for your favorite Halloween craft.  Please leave your link in the guestbook below.

Happy Halloween! 


Note: The author may receive a commission from purchases made using links found in this article. “As an Amazon Associate, Ebay (EPN) and/or Esty (Awin) Affiliate, I (we) earn from qualifying purchases.”


Wednesday, August 20, 2014

Let's Sew Together and Build Lasting Memories


lets sew together book cover
Ask me where I learned to sew and you’ll get the answer that’s commonly expressed by seamstresses, tailors, and designers all over the world. “My mom taught me to sew!” Ask that question and look into our eyes. You’ll see a fondness as we recall awesome memories of spending time with our moms and their sewing machines.

When I opened the cover of Let's Sew Together: Simple Projects the Whole Family Can Makelet's sew together by Rubyellen Bratcher (Potter Craft, New York, 2014), memories of the time I spent sewing with my mom flooded my eyes. No matter what kind of problems mom and I may have had while I was growing up, we always ironed things out with the help of mom’s sewing machine.

Mom and I bonded early in life over the sewing machine. She didn’t have a how-to manual, she just let me play along with her on projects that wouldn’t harm my tiny hands. As I got older, she trusted me to cut the fabric, not my long hair.

Mom and I made some cool projects over the years. Clothes, dolls, handbags, quilts, and anything else that caught our eyes. As I thumbed through Let’s Sew Together, I saw how mom and I could have made our projects even cooler with the tips offered by Bratcher. With four young daughters, Bratcher knows what kids like, how to get kids involved in sewing, and how to hold their attention.

Let’s Sew Together is written for the mom that has a basic knowledge of sewing and knows how to operate a sewing machine. Moms with no sewing skills shouldn’t be discouraged from trying this book. There are ten no-sew projects for moms and kids to learn together. Start by making a pom-pom for some soft ball tossing fun. Make little boys a bold bow tie and little girls barrettes with baubles. Or, make stories come to life with a no-sew storytelling box.

For the mom that feels comfortable using a sewing machine, there are 27 sewing projects that are appropriate for pre-school age kids. Bratcher provides easy-to-sew projects that even adults will love. I fell in love with several of the projects and have already started the Quirky Rag Doll found on page 124.

I admire the way Bratcher combines sewing lessons with learning lessons. While helping children make Cheerful Flip’Em Placemats (page 68) and Prep & Play Place Settings (page 71), Bratcher suggests books with a food theme for parents to read with kids, shows how to teach proper place setting, and talks about the importance of feeding our children well. There are similar helpful learning activities sprinkled generously throughout the book.

I appreciate that Bratcher includes sewing projects for boys. Not only can boys help make their own clothes, there is a super hero robot to share adventure stories, a fortress for hide-and-seek fun, and drums to make a lot of noise.

If your child has expressed an interest in sewing, I highly recommend this book. There are a variety of projects for clothing, jewelry, table settings, pillows, educational toys, fun time toys, and party decorations. You’ll also find ways to make each project unique by letting kids have their hand at fashion design.

I give this book 5 stars. Click on the book cover below. This is an Amazon link that will take you to the book's detail page where you can purchase your copy.

lets sew together book coverlets sew together
Disclaimer: I received this book from the Blogging for Books program in exchange for this review. My opinions are my own.


Posted by Coletta Teske
Coletta Teske

About This Contributor

Coletta Teske writes reviews on books, business management, writing, crafting, cooking, and gardening. She is also an avid recycler and shares her tips on recycling. She delights in upcycling an old object, recycling or transforming discarded items into a new treasure.


Note: The author may receive a commission from purchases made using links found in this article. “As an Amazon Associate, Ebay (EPN) and/or Esty (Awin) Affiliate, I (we) earn from qualifying purchases.”

Wednesday, July 30, 2014

Getting Organized and Going Back to Work

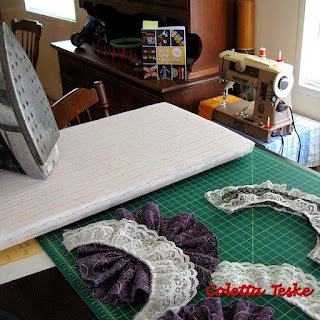
craft room with sewing machine
Just the other day, a friend reminded me that it's only 24 weeks until Christmas. Do you wonder where the time has gone this year? Does time fly while you're having fun? Or, have you been too busy to notice?

It's been too busy around the Recycler household. The year started with the hunt for the perfect home. It took us a month of sorting through the list of foreclosures and estates sales in our town until we found a home, that, if we didn't look too closely, looked like the home of our dreams.

After the papers were signed, we had a short party and then spent the next three months getting the place in shipshape condition with An Environmentally Friendly Spring Cleaning Solution and a lot of pruning to recover from what was definitely not an example of how to Plant the Right Tree the Right Way.

Now that the hard work is done, it's time for us to get organized and go back to work. It's important that our home be organized and work-ready. Our dream home is not just the place where we eat, drink, and be merry. It is also our home office, art studio, and crafting room.

One corner of the house has been set up as a combination office and crafting room. In the middle of the room is a very large, pub-height table that we use as a computer workstation and a crafting table. I wanted a tall desk so that I could stand while working. I had experimented with standing at the kitchen counter at our old home and I loved it. I felt more productive and stronger by just standing for a few hours each day.

Finding the perfect standing height desk setup wasn't as easy as I had thought. There's a lot to consider before standing while working. How the standing height workstation will be used and personal health issues should be considered, along with preferences about the size of the desktop and the storage features.

Standing and working isn't a full-time gig for us. We keep a couple of comfortable stools next to the bar, excuse me, desk, so we can saddle up for some serious sitting time. It doesn't take a permanent standing height workstation to get the benefits. There are several Stand Up Workstation And Adjustable Desk Options that convert a standard desk into a temporary stand up workstation. Sometimes it just feels good to mix up the work routine.
steampunk big bows

With the crafting workstation in place, the place needed some organization. There must be a thousand and one Craft Room Ideas, Designs and Organization tips on the Web. Our workroom has plenty of bookshelves and cubby holes to fit art supplies, upcycle materials, and books. As we grow accustomed to our new workspace, we're learning what organization methods work best for our working style. Our organization style... Implement the best and toss the rest in the recycle bin.

Now that the neglected house we purchased has been turned into a clean, well-lighted home with an awesome workspace, it's time to give the old resume an update and a good polish. This girl needs to get back into the work-at-home workforce. And, create a few more Steampunk fashions on mom's vintage Singer sewing machine.

As we slide on into the last half of this exciting, changing, and busy year... reduce the stress, reuse the best, and recycle the rest.

Here's to your health and happiness!

Coletta


Posted by Coletta Teske
Coletta Teske

About This Contributor

Coletta Teske writes reviews on books, business management, writing, crafting, cooking, and gardening. She is also an avid recycler and shares her tips on recycling. She delights in upcycling an old object, recycling or transforming discarded items into a new treasure.


Note: The author may receive a commission from purchases made using links found in this article. “As an Amazon Associate, Ebay (EPN) and/or Esty (Awin) Affiliate, I (we) earn from qualifying purchases.”


Wednesday, June 18, 2014

Handmade Dolls from Upcycled Materials

handmade doll
Dolls create special magic for children and adults, especially when those dolls are lovingly made by hand. The writers on Squidoo share their secrets to doll-making success with projects for a Tin Can Man, a Lalaloopsy Rag Doll, a Japanese bottle doll and doll clothes made from a sock.

Dolls were a memorable part of my childhood. My Dad Was an International Traveler when I was a kid and he brought me a doll from every country he visited. My mom taught me to sew and one of our favorite mother-daughter sewing projects was a set of Raggedy Ann and Raggedy Andy rag dolls.

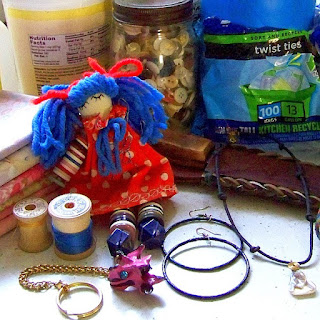
When I was selected as the Recycler Contributor on Squidoo, I wasn't too sure what to do about a logo for The Recycler Network's social media channels. I grabbed an assortment of recycled and upcycled items found around my home, arranged those items artfully on the kitchen counter and started shooting pictures.

One of the items I grabbed was a doll that my aunt had made for me many years ago. She's only 6 inches tall but she's 100% recycled. From her button arms and legs to her hand-me-down dress, her sock stuffed body and her yarn scrap hair. She begged to be the mascot for The Recycler Network.


If the traditional rag doll is more to your liking, chibikitty shows us How to make a Lalaloopsy Rag Doll and even supplies a free pattern to make it even easier to create your own rag doll.


Until next time, share the love and give the gift of a handmade doll!

Coletta


Posted by Coletta Teske
Coletta Teske

About This Contributor

Coletta Teske writes reviews on books, business management, writing, crafting, cooking, and gardening. She is also an avid recycler and shares her tips on recycling. She delights in upcycling an old object, recycling or transforming discarded items into a new treasure.


Note: The author may receive a commission from purchases made using links found in this article. “As an Amazon Associate, Ebay (EPN) and/or Esty (Awin) Affiliate, I (we) earn from qualifying purchases.”


Monday, June 16, 2014

How to Turn An Ordinary Rock Into an Oil Lamp

rock oil lamp
Yes, you can make a rock into a lamp like the one seen here. My friend, Shelley, recently published a tutorial, Caveman Lamp for a Modern Table, on Hubpages and I would love to share it with you.

Shelley used to work for a "home and garden" magazine and learned a great deal about crafting home decor during her tenure there.

It might be hard to believe that my friend (who is a real lady) made this de-light-ful lamp from an ordinary rock. In her tutorial, Shelley shows you exactly what products she used to craft this cozy lamp. I will tell you that on a scale of 1 (easy) to 10 (difficult), this project will probably be a 5. Having the help of a resident "caveman" would come in handy, I am sure. Shelley also makes recommendations for products to use for making this oil lamp. Her step-by-step instructions make this craft project a do-able one.  I honestly think that even this "Wilma" could make a rock into an oil lamp without the help of a "Fred, but I am really quite handy. My husband might not realize this fact because I allow him to believe that he is the head caveman.

I can just picture a set of these rock oil lamps on the railing of my deck. Shelley says that one can use citronella oil in the reservoir to ward off bugs if you use these lamps for outdoor lighting. Ah, the bug free atmosphere is already calling me to find some rocks and get drilling!


Note: The author may receive a commission from purchases made using links found in this article. “As an Amazon Associate, Ebay (EPN) and/or Esty (Awin) Affiliate, I (we) earn from qualifying purchases.”


Friday, June 6, 2014

Garden Decor Project: Make a Mosaic Pot

handcrafted mosaic pot
Mosaic Pot by Mickie_G
A few summers ago, I made the mosaic pot you see to the left at a workshop sponsored by Aldridge Gardens in Hoover, Alabama.

Ever since I was a child, I have loved creating crafts that involved tile. I remember my mother taking me to the hobby shop every year just before our annual summer visit to my grandmother. My mom knew that if she let me pick out a craft kit, I would not get bored. More often than not, I chose a mosaic kit.

I still remember the 6" circular dish I made with prayerful hands in the middle. The kit came with enough 1/4 inch square tiles for me to play with the design if I did not want to make one just like the example on the box lid. I usually I ended up choosing a checkerboard pattern.  These mosaic craft kits filled my days with much happiness and gave my parents a vacation from entertaining me, I imagine. But enough reminiscing!

I won't go into how I made the mosaic pot shown in the images on this page, but I will share with you some things I did learn about tile covered pots:


  • Do not leave your mosaic pot outside during the winter months as the freezing temperatures will cause the pot to break and the mosaic pieces to fall off.
  • If you use broken dishes or crockery, it is best to use totally flat pieces if you use larger, broken bits.  It is easier to rub off the grout if there are no sharp points that are higher than your decorative shards. You can see in the photo below that I used some broken pieces from a plate. I should have trimmed the sharp points on the edges off. 
  • To break up dishes and crockery, put them between several sheets of newsprint before you break them up with a small hammer. 
  • If you want to preserve the pattern as it is on the dish, use duck tape on the back of the dish before you break it into pieces.
  • Try to fit the "tiles" close together as possible but still leave enough room for the grout. I think I left too much space so there is a lot of grout space. 
  • Wear a mask to mix up your dry grout and powdered mastic. This is a MUST!
  • Gloves for your hands are another must when rubbing in the grout. Surgical ones work best. 

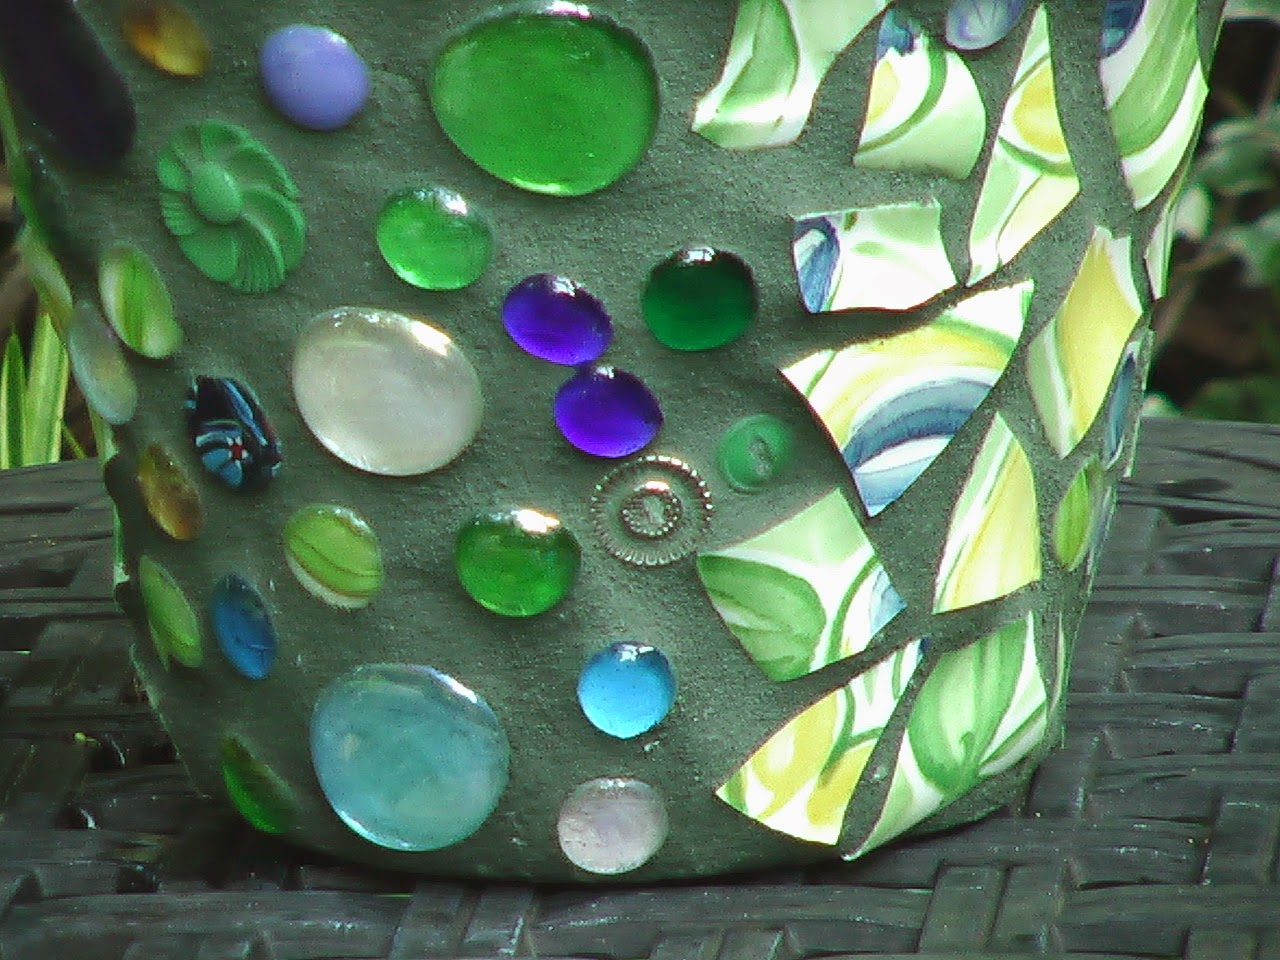
Close up of my mosaic pot. 

mosaic craft 
I used glass globs and a broken dish. 
Can you see the buttons, too?


I am a "keeper" of useful things and a recycler of the broken and chipped, so I have a stockpile of broken dishes and pottery. However, I do not have the supplies like the grout and ceramic tile adhesive for making a mosaic piece.


Here is a video by "DIY Maven" that I discovered on YouTube that shows a very similar and easy process for making a mosaic flower pot.


There are several articles on Squidoo that might whet your appetite for making other types of mosaic crafts. Unfortunately, there are none about how to make a pot like mine. How To Mosaic: Art For Your Garden is a good introductory article to the craft of mosaics. 


If you like the idea of a "kit", I found several mosaic craft kits for children available on Amazon. Here are a few links for you: Kits for ages 14+kits for ages 14 or overkits for ages 8 to 13kits for age 8-13; Kits for ages 5-7 yearskits for ages 5-7; Kits for ages 2 to 4. Most of the kits for young children use foam pieces and no grout. That is a good thing.

Keep your hands busy, y'all!


Photos: Mickie_G - all rights reserved.


Note: The author may receive a commission from purchases made using links found in this article. “As an Amazon Associate, Ebay (EPN) and/or Esty (Awin) Affiliate, I (we) earn from qualifying purchases.”


Friday, May 30, 2014

Flip Flop Time!


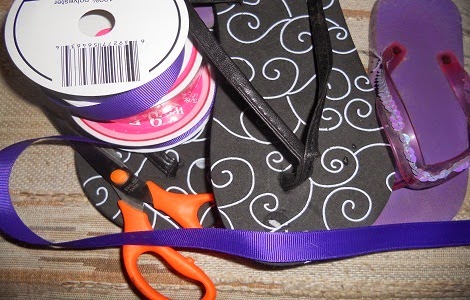
flip flop craft idea
With summer on the horizon and beach vacations in the works, I have decided that it is definitely "Flip Flop Time!"

What better way to get your family excited about summer than creating cute, inexpensive footwear to wear on that beach vacation?  If you shop wisely and use stuff you already have on hand, you could create new sandals for every summer outfit or bathing suit you own. Of course, you should remember that "You Get What You Pay For",  so if you want your personalized sandals to last, buy the best shoe you can afford.  Really examine the shoe to make sure it is made well and will not break the first time you wear it.  Bend that shoe and pull on the straps!

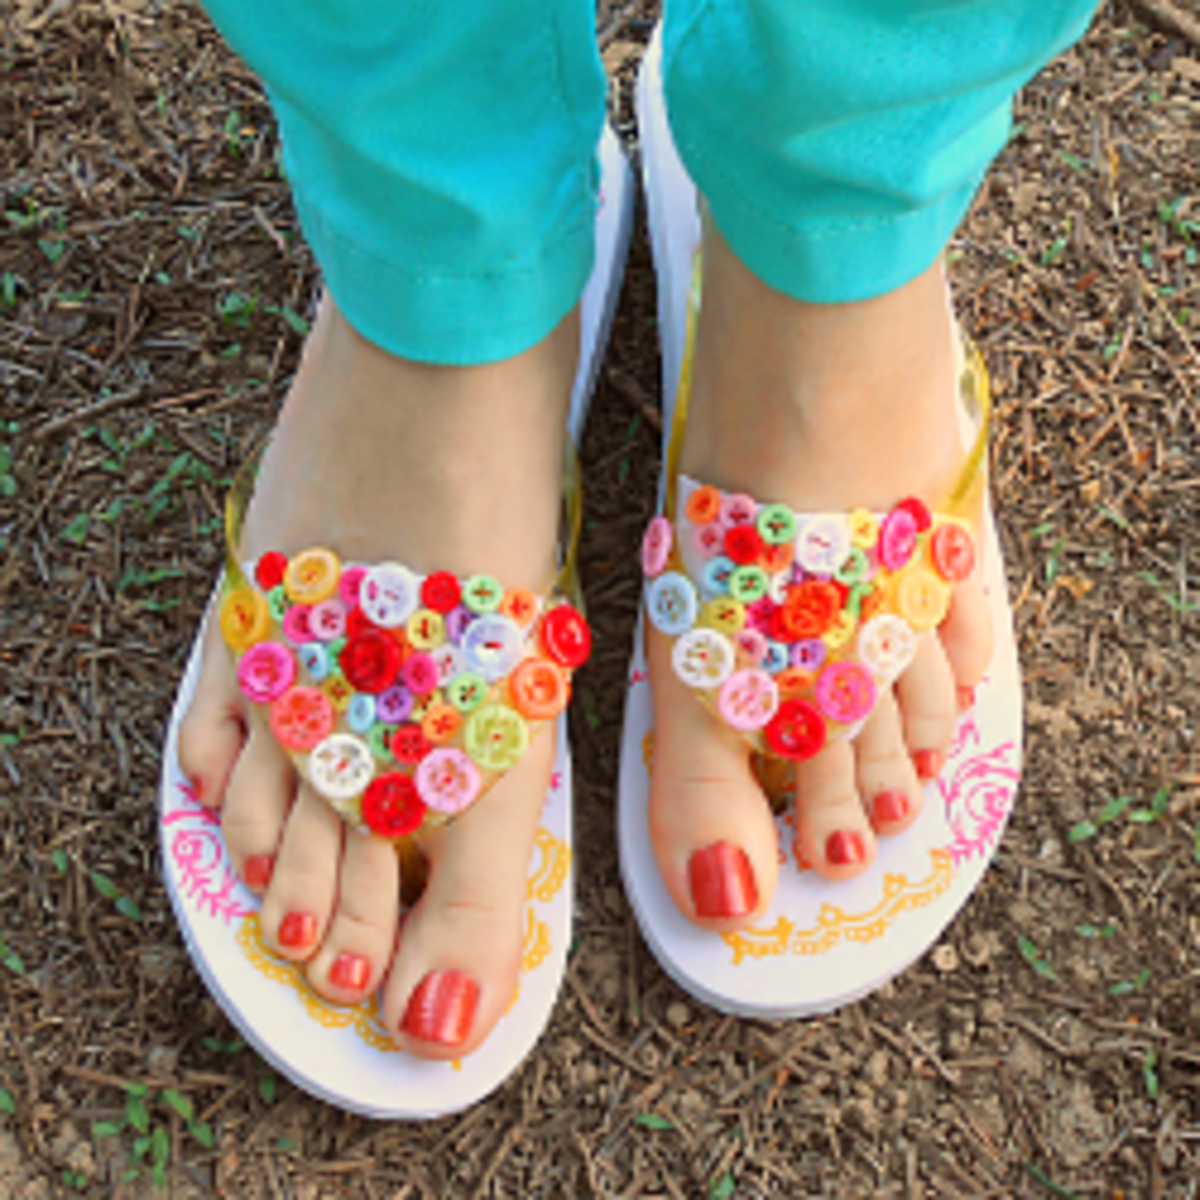
If you have a ton of buttons in your craft cache, you should read DIY Button Flip Flops . One of the best ideas I found on malina123's page on Squidoo, involved recycling an old pair of shorts for use on her summer flipping footwear! By reusing a bit of fabric, she completely refashioned an ordinary pair of beach thongs into a colorful fashion statement. (Thank you, malina123 for letting me use the image below!)

colored button flip flops


Of course if you think you might try this project shown above, you should probably own a glue gun. (Click here to find a top rated glue gun on Amazon!glue gun)

However, one does not have to use a glue gun to decorate your flips if you want to use beads or rhinestones. One blogger suggested using E6000 Adhesivedecorate flipflops with beads and rhinestones.  I have read many good reviews for this product on Squidoo and on the Amazon website. I highly recommend that you research products before you buy them.

Need more ideas for creating summertime sandals with lots of bling? Then I would like to send you to Make Your Own Bedazzled Flip Flops on Hubpages.com. There you find will several suggestions (ie. buy your flip flops at Old Navy) and tips for adding your own style to your flip-floppy summer shoes.

Another blogger alerted me to a product I had never heard of before, Beacon Flip Flop Glueflip flop glue.


One last Tip: Prepare the rubber straps on your purchased flip-flops by cleaning them with rubbing alcohol or vinegar to remove any reside that might inhibit the glue from sticking to the shoe. It also helps to scuff up the surface of the strap with an emery board, too.

Now that you have all of these wonderful summer sandals, you might need to store them somewhere! I saw an "green" idea to recycle old wire clothes hangers that just might help you out! Click "Shoe Hanger"  to be taken directly to a photo of that shoe hanger. Lensmaster lbrummer found  lots of ways to upcycle clothes hangers from all over the web.

Now, you can begin summertime with your best-looking foot forward.


(flip flops with ribbon photo credit: Lyn Lomasi via photopin cc)


Note: The author may receive a commission from purchases made using links found in this article. “As an Amazon Associate, Ebay (EPN) and/or Esty (Awin) Affiliate, I (we) earn from qualifying purchases.”


Most Recent Reviews on Review This Reviews


Search for Reviews by Subject, Author or Title

The Review This Reviews Contributors


SylvestermouseSylvestermouseDawn Rae BDawn Rae BMbgPhotoMbgPhotoBrite-IdeasBrite-IdeasWednesday ElfWednesday ElfOlivia MorrisOlivia MorrisTreasures by BrendaTreasures by BrendaThe Savvy AgeThe Savvy AgeMargaret SchindelMargaret SchindelRaintree AnnieRaintree AnnieLou16Lou16Sam MonacoSam MonacoTracey BoyerTracey BoyerRenaissance WomanRenaissance WomanBarbRadBarbRadBev OwensBev OwensBuckHawkBuckHawkDecorating for EventsDecorating for EventsHeather426Heather426Coletta TeskeColetta TeskeMissMerFaeryMissMerFaeryMickie_GMickie_G


Review This Reviews is Dedicated to the Memory of Our Beloved Friend and Fellow Contributor

Susan DeppnerSusan Deppner

We may be apart, but
You Are Not Forgotten


“As an Amazon Associate, Ebay (EPN) and or Etsy (Awin) Affiliate, I (we) earn from purchases.” Disclosure Statement
X