Showing posts with label Recipes. Show all posts

Monday, December 4, 2023

White Beans and White Bean Soup Recipe Review

white bean soup recipe
Making white bean (Great Northern Beans) soup is a holiday tradition in our home.  I don't just make white bean soup during the holidays, but it is a part of the holiday week menu of recipes that I look forward to making and eating.

Every holiday, whether it is Thanksgiving, Christmas or Easter, I bake a big ham for the family.  I can hardly wait for the ham to be devoured so I can use the bone in a big pot of white bean soup.  The ham, itself, is usually served at least twice over the course of a few days.  I admit, sometimes (like this past Thanksgiving) I don't wait for all of the ham to be gone before I claim the ham bone for soup.

I love the holidays and cooking for the holidays, but after several days of heavy feasting, I am always ready for a lighter fare of soup for a few days.  For some, white beans are exclusively a side dish.  For me, they make a fabulous soup!  And, just so your know, I do make white beans as a side throughout the year.  I make the side dish exactly the same way as I make the soup, but with less water.


White Bean Soup Recipe by Sylvestermouse
ReviewThisReviews.com


I use a package of dried white beans.  I do have a preferred brand, but I have been known to use different brands if I can't find the Camellia Great Northern Beans in the store.  I have found that the Camellia brand has less beans that I need to throw away before cooking.

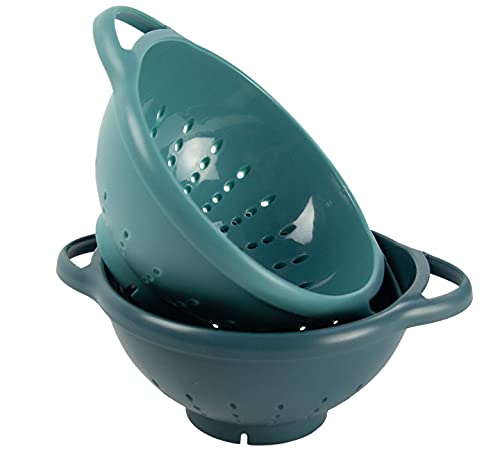
I use the entire package of beans in one pot of soup.  I start by inspecting the beans as I rinse them in small batches in my colander.  I toss any shriveled, dark or broken beans, as well as any bean loose or floating "skin". 

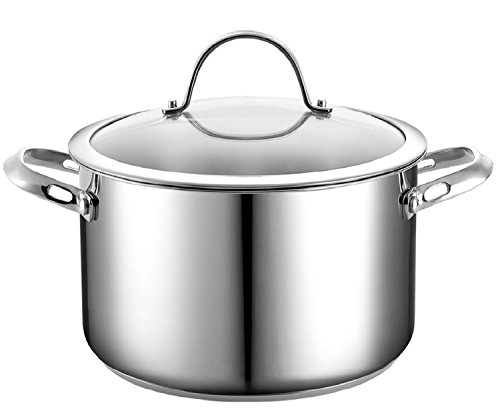
All whole, white beans that pass inspection are placed in a large dutch oven size cooking pot, covered with water, and left sitting out on the kitchen counter to soak for 8 hours, or overnight. 


Directions for White Bean Soup

  • Rinse the Beans & Soak for 8 hrs. or overnight (water should be 2/3 up the pan since the beans absorb water while soaking)
  • After 8 hours, Rinse the Beans again and put them in a dutch oven pot with Ham (Ham Bone Preferred) OR (2 T Bacon Grease if a ham bone is not available)
  • Bring to a Boil, then turn the heat down to a low boil  (on my stove top that is 3­½)
  • Add a generous amount of salt and pepper and stir the seasoning into the beans
  • Cook covered (tilted lid or Pampered Chef Boil Over No More cover) on low simmer for 1½ - 2 hours 


*Note: I normally check the cooking beans a few times to add water as needed to keep the water from boiling down too low 


 Pampered Chef Boil-Over No More Pot Cover Splatter Guard


Bacon Grease

I mentioned bacon grease in the recipe above because I season white beans with bacon grease if a ham bone is not available.  Bacon grease is exactly what it sounds like.  It is the grease that is rendered when cooking bacon.  I cook bacon in the microwave on a bacon tray or rack that allows the grease to settle below the bacon.  I literally pour the bacon grease from the tray into a bacon grease jar to use as needed, whenever needed.  You will find a partly filled jar of bacon grease in my kitchen at all times.


Check Out More Recipe Reviews at
ReviewThisRecipes.com


White Beans (Great Northern Beans) and White Bean Soup Recipe Review Written by:
House of Sylvestermouse


© 2023 Cynthia Sylvestermouse


Note: The author may receive a commission from purchases made using links found in this article. “As an Amazon Associate, Ebay (EPN) and/or Esty (Awin) Affiliate, I (we) earn from qualifying purchases.”


Friday, December 1, 2023

Banana Bread Mini Loaves Recipe and Mini Loaf Pan Review

mini loaf bread
After getting the Wilton mini loaf pan that makes 8 mini loaves of bread at one time, I have found that I actually prefer the mini loaves to one large loaf of bread.

My husband likes walnuts in banana bread, but I don't like walnuts in mine.  Therefore, I often end up making two large loaves or one loaf that is not going to please both of us.  Making a pan of mini loaves is the perfect solution!

After I have mixed the batter, I add walnuts to half of the batter.  Therefore, I can make 4 mini loaves of banana bread with walnuts and 4 without walnuts. 

I can also share the mini loaves with friends and family.  These would make lovely gifts of homemade food during the holidays.  For our friends who have differing ingredients preferences like us, I could send several loaves.  

A variety of bread mini loaves will certainly make the food at family gatherings more appealing.  By labeling the mini loaves, everyone will know exactly what they are getting.  No more surprise walnuts in my piece of banana bread!


Mini Banana Bread Loaves Recipe by Sylvestermouse
ReviewThisReviews.com


Heat Oven to 350°

Grease & flour pan 


Ingredients 

  • 1/4 Cup Shortening 
  • 3/4 Cup Sugar 
  • 2 Eggs 
  • 2 Cups  Bisquick or Jiffy Baking Mix  
  • 1 Cup Mashed Banana (usually 2 or 3 very ripe bananas) 
  • 1/3 Cup Chopped Nuts, if desired

Instructions 

In a large mixing bowl, cream shortening and sugar together with a mixer

Then, add eggs, baking mix, & mashed bananas. Mix until well blended 

Stir in walnuts - If you are dividing the number of loaves that have walnuts, divide batter into two mixing bowls and stir walnuts into only one

Pour into the prepared pan 

Bake mini loaves for 30 minutes - Check if done by sticking a toothpick in the center of a mini loaves.  If the toothpick comes out clean, the bread is done

Let cool for 10 minutes and remove from pan 

Let the mini loaves cool completely before you wrap them in foil or plastic wrap.  


Check Out More Recipe Reviews at
ReviewThisRecipes.com


Mini Banana Bread Loaves Recipe and Loaf Pan Recommendation Review Written by:
House of Sylvestermouse


© 2023 Cynthia Sylvestermouse


Note: The author may receive a commission from purchases made using links found in this article. “As an Amazon Associate, Ebay (EPN) and/or Esty (Awin) Affiliate, I (we) earn from qualifying purchases.”


Friday, November 10, 2023

Black Magic Chocolate Cake Made with Coffee Recipe Review

Black Magic Chocolate Cake
This black magic chocolate cake is made with black coffee and buttermilk (the magic part) which makes it a rich, delicious cake.  It is my son's favorite cake, therefore I make it for his birthday every year.  

If you love chocolate, this is definitely the cake for you!  The combination of real cocoa, buttermilk and coffee make it a chocolate lovers dream cake.  

For the last few years, I have frosted it with Barbara's chocolate icing recipe which is better than the icing recipe I previously used.  Serve it with chocolate ice cream, if you dare, and you have a triple chocolate masterpiece.  


My Mixing Note

I set my mixing bowl in my sink to keep ingredients from blowing or splattering when mixing.  It is so much easier to simply rinse the sink when I am finished mixing batter than it is to clean the counters, walls and floor.

I also pre-measure ingredients before I start.  That way, I know I haven't forgotten any of the ingredients should I get interrupted. 


Black Magic Chocolate Cake Recipe by Sylvestermouse
ReviewThisReviews.com


Prep Time Cook Time Cool Time Ready In Yields
20 min. 30-35 min. 60 min. 2 hrs. 12 - 16 servings

Ingredients 

  • 2 cups Swans Down Cake Flour (or 1¾ cups all-purpose flour)
  • 2 cups sugar 
  • ¾ cup unsweetened cocoa powder (100% cacao)
  • 2 teaspoons baking soda 
  • 1 teaspoon baking powder 
  • 1 teaspoon salt 
  • 2 eggs 
  • 1 cup strong brewed coffee 
  • 1 cup buttermilk 
  • ½ cup vegetable oil 
  • 1 teaspoon vanilla extract

Directions 

  1. Preheat oven to 350°
  2. Grease & flour two 9" round cake pans or one 9"x13" pan
  3. In large bowl, combine/whisk flour, sugar, cocoa, baking soda, baking powder and salt.  (Set mixing bowl in the sink to keep the flour/cocoa from blowing everywhere) 
  4. Make a well in the center of the dry ingredients and add eggs, coffee, buttermilk, oil & vanilla
  5. Beat for 2 minutes on medium speed. Batter will be very thin
  6. Pour into prepared pans
  7. Bake at for 30 to 35 minutes, or until toothpick inserted into center of cake comes out clean
  8. Cool for 10 minutes, then remove from pans and completely cool
  9. Frost as desired


Black Magic Chocolate Cake


See the Items I Use For Pre-measuring in the Following Reviews:

 Cooking & Baking Prep Tools: Shot Glasses Used As Pinch Bowls Set of Stainless Steel Stackable Magnetic Measuring Spoons Reviewed Mini Increment Measuring Spoons for Tad, Dash, Pinch, Smidgen & Drop


Check Out More Recipe Reviews at
ReviewThisRecipes.com


Black Magic Chocolate Cake Made with Coffee Recipe Review Written by:
House of Sylvestermouse


© 2023 Cynthia Sylvestermouse


Note: The author may receive a commission from purchases made using links found in this article. “As an Amazon Associate, Ebay (EPN) and/or Esty (Awin) Affiliate, I (we) earn from qualifying purchases.”


Tuesday, November 7, 2023

Thanksgiving - The Best from Review This Contributors

 Thanksgiving is a time for family and friends to gather, celebrate, and give blessings, and thanks.

Thanksgiving - The Best from Review This Contributors
Photo from Pixabay - Credit monicoe

Thanksgiving is also a time for a great feast with your family, and friends. Thanksgiving dates as far back as 1621, and became a National Holiday in 1863. Today, we will review some typical Thanksgiving menus.  Everyone has their traditions and favorites. 

Typical Thanksgiving Menu:

  • Turkey
  • Stuffing
  • Cranberry Sauce
  • Sweet potatoes
  • Mashed Potatoes
  • Green Beans
  • Pumpkin Pie

Thanksgiving Table

This was our table last year, with all of our Thanksgiving favorites. The homemade cranberry sauce is one of my favorites. 

Our daughter makes the best homemade cranberry sauce, get this delicious cranberry sauce recipe here. This cranberry sauce is much better than the cans I remember growing up.

Roasted Turkey

Everybody knows I love to cook, but when it comes to the Thanksgiving turkey it's all Fran. I do get to check the internal temperature and carve the turkey. Fran insists on buying a fresh turkey every year.

 Oh, there is one other thing I get to do, inject melted butter into the turkey breast. This really helps keep it juicy.

Pumpkin Pie

After all of that delicious food, you must save room for dessert. There is always a traditional pumpkin pie on our table. Last year these pies were crafted by our granddaughters and grandson.

The Thanksgiving food is wonderful, but for me, it's all about having our family together in one place. That is a blessing in itself and what makes me so thankful.

Take some time to click the link below for many wonderful Thanksgiving ideas from the ReviewThis Contributors. You will find Thanksgiving history, inspiration, main dishes, side dishes, and desserts to help plan your Thanksgiving Holiday.

Wishing you all a Safe and Healthy Thanksgiving


Note: The author may receive a commission from purchases made using links found in this article. “As an Amazon Associate, Ebay (EPN) and/or Esty (Awin) Affiliate, I (we) earn from qualifying purchases.”


Monday, October 30, 2023

Cookbook Review: Betty Crocker Bisquick Impossibly Easy Pies

Imagine, "Pies That Magically Bake Their Own Crust". The Betty Crocker Bisquick Impossibly Easy Pies cookbook has been a very welcomed addition to my kitchen. With just several ingredients, Bisquick, an egg, and milk I have been able to make savory and sweet pies and have over 130 pages of recipes to try.

Homemade chicken pot pie


As someone who isn't incredibly talented in the kitchen but likes good food, I have tried baking pies in the past. (Sams recipe?). Combining my lack of experience with my lack of time and energy, I am always looking for hardy - but extremely easy - meal ideas. These Impossibly Easy Pies hit the mark perfectly. I can whip one together very quickly after work, pop it into the oven, and dinner is ready by the time I walk the dogs and feed the chickens.

My favorite so far is the chicken pot pie.

Stir together these ingredients and place in a pie plate:

  • 2 cups of chunks of cooked chicken (I used canned chicken)
  • 1 cup of frozen peas and carrots (I used a frozen vegetable mix that also included green beans)
  • 1/4 cup sliced mushrooms
  • 1/4 cup chopped onion

Stir together the Bisquick, egg, and milk. Pour this mixture over the vegetable mixture. Bake.

The final product is a hot, filling, delicious, comfort food. In my household, as a single person, I am left with extra portions to use for my lunches at work. 

Betty Crocker Bisquick Impossibly Easy Pies 

I have begun to use a can of cream of chicken soup, the frozen vegetables, and the cooked chicken chunks routinely. Making a creamier version of the meal. 

I did find that my cookbook recommends one part Bisquick to two parts milk. This makes a thin crust that forms more evenly over the top of the dish. The recipes on the internet reverse that to two parts Bisquick and one part milk. I prefer that amount as it makes more of a thick biscuit or dumpling topping (as seen in the my photo). 

homemade chicken pot pie

This week I am going to make a beef pot pie - with a can of vegetable beef soup, frozen vegetables, and grilled chunks of steak.

Additional Tips:

I found my copy of Betty Crocker Bisquick Impossibly Easy Pies cookbook at a store called Ollies for only $3.99. If thrifting is your thing, have a look at the discount stores.

Similar recipes can be found on the internet. I usually refrain from the expense of the cookbook purchase by using the internet. However, in this case, having the book with all of the different menus in one place is easy and inspiring. In this case, having the printed version is helpful to consider the varieties of pies that could be made.

The cookbook has a contents section that lists the pies into chapter based on the ingredients. Such as Beef, Chicken and Turkey, Ham/Sausage/Bacon, Fish and Seafood, Meatless, Fruity, and Sweet-Tooth Temptations. They also list some of the pies into these helpful categories:

  • All-American Supper
  • Summer Dinner on the Deck
  • Mexi-Meal
  • Sunday Brunch
  • Kids' Choice
  • Thanksgiving
  • Special Occasion Dinner
  • Appetizer Party


Note: The author may receive a commission from purchases made using links found in this article. “As an Amazon Associate, Ebay (EPN) and/or Esty (Awin) Affiliate, I (we) earn from qualifying purchases.”


Friday, October 27, 2023

Homemade Pineapple Upside Down Cake Recipe - Dessert Review

pineapple upside down cake
We recently celebrated my father's birthday.  When I was going through my recipes, trying to select a cake to bake for him, I remembered his love of pineapple.  I decided to return to an old favorite and made a homemade pineapple upside down cake. 

For this birthday celebration cake,  I made a vanilla cake batter from scratch with pineapple juice instead of milk/buttermilk.  

I used a 10" Cast Iron Skillet, which I cleaned before I started.  I didn't want the taste of bacon grease or other residue transferring to my cake.

As always, I also pre-measured each ingredient before I started.  It is amazing how much salt and sugar look alike when sitting on top of flour.  Or how much baking soda can look like baking powder once you start mixing ingredients together.

Here is my recipe and the directions to make my pineapple upside down cake exactly as you see it in the photo.

By the way, the cake was such a hit with the entire family, I will be making it again very soon.


Pineapple Upside Down Cake Recipe by Sylvestermouse
ReviewThisReviews.com


Prep Time Cook Time Cool Time Ready In Yields
20 min. 40-50 min. 60 min. 2 hrs. 8 - 10 servings

Before You Start - set out butter, eggs, sour cream, & milk to warm to room temperature (approx. 30 minutes)

Ingredients - Cake Batter 

      • 1½ cups Cake Flour (I use Swans Down Cake Flour

     • ¼ teaspoon Baking Soda

     • 1 teaspoon Baking Powder 

     • ½ teaspoon Salt

     • 6 Tablespoons unsalted butter, soften to room temperature

     • ¾ Cup of Sugar

     • 2 Egg Whites (large eggs)

     • ⅓ Cup of Sour Cream

     • 1 teaspoon Vanilla Extract

     • 2 Tablespoons Milk (room temperature) 

     • ¼ - ½ cup Pineapple Juice (juice the pineapple slices were canned in - save any remaining pineapple juice)


Instructions 

1. In a bowl, combine dry ingredients: cake flour, baking soda, baking powder and salt.  Set aside

2. In a separate bowl, beat the butter with a mixer on high until creamy.  Slowly add the sugar, beating on high until creamy again.  Beat in egg whites.  Then, beat in sour cream and vanilla extract.

3. Pour the dry ingredients (bowl 1) into the wet ingredients (bowl 2) and blend together on low speed.  Continue using the mixer on low and slowly add the pineapple juice and milk.  Mix on low until well blended. 


Ingredients - Top of Cake

      • Canned Pineapple Slices - 7 slices (2 - 8oz cans) for 10" cast iron skillet 

     • Maraschino Cherries - I use 19 cherries

     • 1½ Sticks (12 Tablespoons) of Butter

     • Brown Sugar


Instructions 

1. Preheat oven to 350°F. (Convection Oven 325°F) 

2. Mix the Cake Batter (recipe above)

3. Melt 1½ Sticks (12 Tablespoons) Butter in the Skillet in the Oven

4. Generously Sprinkle Melted Butter with Brown Sugar

5. Place Drained Pineapple Slices on the Top of Brown Sugar 

6. Add Maraschino Cherries in the center of each Pineapple Slice and between the slices (if desired)

7. Carefully Pour the Cake Batter into the Skillet on Top of the Pineapple & Cherries

8. Bake for 40 to 50 minutes (toothpick to center will come out clean when done)

9.  Cool for 15 minutes, then turn out cake unto a large plate


I did take the remaining pineapple juice and spooned it onto the bottom and the top of the cake for a little extra pineapple taste.  It was delicious!


See the Items I Use For Pre-measuring in the Following Reviews:

 Cooking & Baking Prep Tools: Shot Glasses Used As Pinch Bowls Set of Stainless Steel Stackable Magnetic Measuring Spoons Reviewed Mini Increment Measuring Spoons for Tad, Dash, Pinch, Smidgen & Drop


Check Out More Recipe Reviews at
ReviewThisRecipes.com


Homemade Pineapple Upside Down Cake Recipe Written by:
House of Sylvestermouse


© 2023 Cynthia Sylvestermouse


Note: The author may receive a commission from purchases made using links found in this article. “As an Amazon Associate, Ebay (EPN) and/or Esty (Awin) Affiliate, I (we) earn from qualifying purchases.”


Most Recent Reviews on Review This Reviews


Search for Reviews by Subject, Author or Title

The Review This Reviews Contributors


SylvestermouseSylvestermouseDawn Rae BDawn Rae BMbgPhotoMbgPhotoBrite-IdeasBrite-IdeasWednesday ElfWednesday ElfOlivia MorrisOlivia MorrisTreasures by BrendaTreasures by BrendaThe Savvy AgeThe Savvy AgeMargaret SchindelMargaret SchindelRaintree AnnieRaintree AnnieLou16Lou16Sam MonacoSam MonacoTracey BoyerTracey BoyerRenaissance WomanRenaissance WomanBarbRadBarbRadBev OwensBev OwensBuckHawkBuckHawkDecorating for EventsDecorating for EventsHeather426Heather426Coletta TeskeColetta TeskeMissMerFaeryMissMerFaeryMickie_GMickie_G


Review This Reviews is Dedicated to the Memory of Our Beloved Friend and Fellow Contributor

Susan DeppnerSusan Deppner

We may be apart, but
You Are Not Forgotten


“As an Amazon Associate, Ebay (EPN) and or Etsy (Awin) Affiliate, I (we) earn from purchases.” Disclosure Statement

X