Showing posts with label Gardening. Show all posts

Sunday, June 27, 2021

Reviewing The Growing And Care Of Dracaena As A Houseplant

dracaena houseplant with white brick background
Dracena House Plant

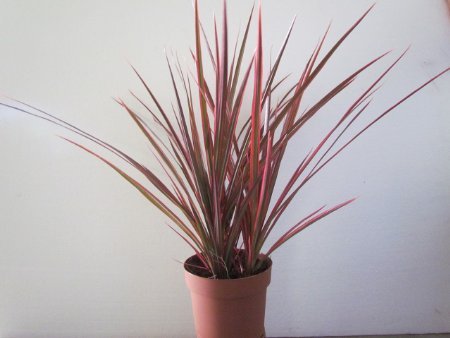
I rescued two lovely Dracaena houseplants recently. It was a spur of the moment decision, I had gone into the shop for compost!! Anyone who knows me will understand that I cannot resist a beautiful plant let alone two sitting unloved on a shelf. They were a quarter of the original price so an extremely good bargain, as long as I can keep them alive.

I do like to buy or rescue outdoor plants this way as bargains and bringing back to life the unloved and unwanted, but I have never bought a houseplant in need of rescue. Houseplants can be a little harder to restore to full health once they have been very neglected, but I wanted to give it a go. 

So this Dracaena is a stunning-looking plant. Both were sadly completely dried out and shrinking from their pots which is not good. So the first thing I did was to put the pots into a bowl of water and allow the plant to drink what it wanted for an hour. This way I did not overwhelm it with water but it could quench its undoubted thirst.

Next was to give it the very best of treatment. This means the correct position in the house, the food, water and environment it needs. It also means the correct soil, but on this, I am waiting as it is always stressful for a plant to be repotted and they had enough stress so far. So I will repot in a month or so when they are more settled.

dracaena houseplant in a kitchen window
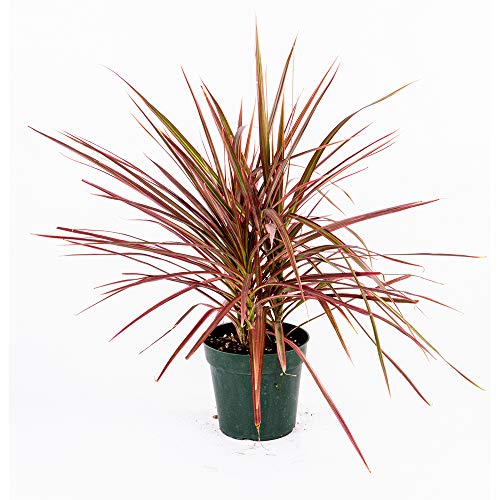
Dracaena House Plant In Kitchen

The Name Dracaena

This plant is named Dracaena which means female dragon in ancient greek. Apparently, the red stems that are found in many of these houseplants are like the colour of dragons blood! Sometimes it is also referred to as the Dragon Plant which I like.

Dracaena Are Good For Us! 

The Dragon plant is also a great air purifier and therefore very good to have in our homes. It is a lovely thing to have a plant that is beautiful in our homes and this one is stunning especially as it grows tall, but quite another when it benefits us directly. 

Our homes are surprisingly full of toxins and pollutants from our furniture, paint, materials for building, clothing and cleaning chemicals we use every day.

If we can help to offset at least some of this pollution with beautiful houseplants we are doing our health good. Dracaena is one of the most effective plants for air purification and so deserves a place in every home.  

Generally, for the majority of people this plant is safe to be around. For most people, this plants leaves are not toxic if touched and handled, but clearly as with any houseplant avoid anyone eating them. If anyone has especially sensitive skin or allergies to plants then direct contact with the plant is best avoided.  

Dracaena Is Toxic If Eaten By Pets

It must be noted that beautiful as it is, Dracaena is toxic if our pets eat it. It is the chemical in the plant, saponin that causes the issue. This will result in vomiting and diarrhea and if that occurs get your pet to a vet immediately for treatment. 

If you have pets it is wise to keep this houseplant out of their reach. 


dracaena houseplant in front of a textured glass window
Dracaena House Plant In Bathroom With Filtered Light

Where to Position Dracaena

Dracaena comes from the floor level of tropical rainforests and arid deserts. I know mine came from Costa Rica. Dracaena like humidity so unlike the houseplants I have reviewed previously this one loves being in a bathroom or kitchen.

This is great news as I love houseplants in these rooms. To keep them happy and in good condition, they appreciate regular misting of the leaves and a humid environment so placing them on a dish of pebbles topped up with water is also helpful.

The dragon plant likes to keep warm so heat of about 15 to 20 degrees celsius is good, but it hates direct bright light so after some thought I have positioned one in the bathroom window that is south facing but the window is opaque so it filters the suns rays very well which is just what this plant requires, filtered sunlight.

This plant is currently quite small but it will grow much taller which is not a problem here as the window is quite tall as well. The taller one is in the kitchen again by a window this time east facing but quite sheltered from the sun by the foliage in the garden. So I will see if it likes it there.


dracaena houseplant leaves
Leaves Of Dracaena House Plant 


Water And Food Requirements For Dracaena


The soil must always be moist for this houseplant but it does not like to sit in soggy wet conditions. The best soil is free draining so compost mixed with perlite would be a good combination. It allows for generous watering but permits good drainage to let excess water through. Always make sure there is an inch or to at the top of the pot to allow for easy watering. 

Once watered allow the plant to drain through before you site back in its outer container. I would recommend having the plant in a plastic or terracotta pot then putting that pot inside a slightly larger decorative pot. That way you can water thoroughly but allow it all to drain off before repositioning.

If the leaves go yellow and droop then it has been overwatered and we must cut down on the watering and ideally repot into fresh compost to give it the best chance of recovery.

My two both need repotting and then placing into proper decorative pots but that will wait until they have settled down.

Feeding is quite important and a task we need to do every fortnight during spring and summer, reducing to once a month in autumn/fall and no feeding is necessary during winter. You can buy Dracaena feed or any usual houseplant fertilizer is fine.


Pruning Dracaena

It is not necessary to do any pruning of this houseplant. The only reason I can see to prune is if it grows too tall for the space. It grows in an upright habit so actually occupies only a small space on any surface. 

However, if you need to prune the canes or stems to reduce the height you can simply cut them with secateurs like these Wolf By Pass Garden Secateurs and then in time new growth will shoot from the pruning cut.

I am going to allow these two to grow pretty tall as I think they look especially stunning as a huge plant and I love having them in our home.

dracaena houseplant
Dracaena House Plant 

So in summary Dracaena is a stunning plant that takes up little room on a surface, but can grow quite tall. It is beautiful and requires filtered sunlight, warmth and steady watering and feeding.

Do be careful where you place it if you have pets as it is toxic to them. Keep it out of the way of any person who is especially sensitive or allergic to plants. 

It is a very easy care plant overall and has air purification qualities to help us be more healthy in our homes. Overall a very deserving plant and one I am glad I rescued.


More Garden And Houseplant Reviews


Note: The author may receive a commission from purchases made using links found in this article. “As an Amazon Associate, Ebay (EPN) and/or Esty (Awin) Affiliate, I (we) earn from qualifying purchases.”


Sunday, June 20, 2021

Caring for A Mother In Laws Tongue As A Houseplant Reviewed


houseplant with many names known as mother in laws tongue, snake plant, or st georges sword

A Houseplant With Many Common Names

This striking plant has a prolific number of strange common names which include Mother In Laws Tongue- supposedly the ends of the leaves looking like the sharp tongue of the mother in law. Now I loved my Mum in law to bits so this does not hold true, but that is folklore...

Its other commons names are Snake plant as it could look a little like a snake and St Georges Sword due to its sword like look. 

In addition it is known as Viper's Bowstring Hemp due to it being one of the sources for plant fibers used to make bowstrings. 

It is also known as the good luck plant! There may well be many more names but that is enough names for one plant!

Its Scientific name is Sansevieria trifasciata. In our home it was always known as Mother In laws Tongue. In this article I will refer to it as the Mother In Laws Tongue or the Snake Plant.

It is a rather bold, striking houseplant with smooth thick sword like leaves hence I can see the St Georges Sword common name. 

The leaves are not soft but neither are they spiky rather firm and bold to the touch. They have I think rather beautiful individual markings which are worth apprecaiting close up and I can totally see why they are given the common name of Snake Plant. 


close up to show markings on a snake plant
Markings that give "Snake Plant" its common name.  


I can tend to these plants without gloves though I would wear gloves to repot. It can grow up to 3 or 4 feet high.  

It does flower but the flowers are insignificant and few people would grow it for its flowers. Neither is it scented. You need to like the shape and colour of the leaves to have this plant in your home. 

We always had two or three of these indoor plants around our home and the ones I have now are decendants or the original from my parents home. I find these house plants to be long lived and trouble free. 

It is essentially a succulent and as such needs a few care pointers which I cover below but is essentially a very easy houseplant to look after. 


Watering And Feeding The Mother In Laws Tongue. 

This plant has adapted to thrive on little water. All I do is to give it a good watering when I remember and let the soil dry out in between waterings. We need to water the soil, never the leaves or the space between the leaves as this will not be good for the plant.  

If we overwater or get too much water into the base of the leaves the signs are obvious. You will see the leaves go soggy to the touch and look damp and with possibly fungal or mold infections. If this plant is in standing water or overwatered for too long it will rot and then be more difficult to save. 

If we underwater and keep in a too sunny position as you can see in this photo the leaves shrivel up and may go brown or a pale sickly yellow. I have found it is a lot easier to rescue this plant if it is suffering underwatering simply by gradually increasing the water given and taking it a few inches away from the window. This is exactly what I will now do with this poorly underwatered plant and it will recover just fine.


mother in laws tongue houseplant in a window
Underwatered Mother In Laws Tongue In Wrong Position

If it is overwatered but not yet rotting, you can try to save it by totally repotting with fresh light well drained compost, leaving it in a light but not too sunny spot and watering lightly.  

We need to fertilise once a month in Spring and summer, but it is not necessary to fertilise in autumn or winter at all. 

Positioning A Snake Plant

It originates from areas of South Africa and Asia where the air is very dry and sunny with a desert like climate. Therefore it likes a light position and can even cope in strong sunlight though I think it does much better with a light spot out of direct sun.

The leaves on mine scorched a little and it never looked very happy when in a very sunny spot on a hot west facing windowsill. Positioned a few inches away from  the window on a table and it was quickly a different much happier plant. 

It needs to be in a dry room, not a bathroom or a kitchen or anywhere that is moist or damp. Perhaps a living or dining area or a study would be best. 


healthy mother in laws tongue, snake plant, or st georges sword
Beautiful Healthy Mother In Laws Tongue Houseplant


Division And Repotting

To make more plants I usually divide the plant in Spring and repot the separate parts. You can also grow from cuttings but I do find division easier and more instantly effective. 

You will know when the plant needs repotting as it will be pushing up against the sides of the pot and roots appearing through the end of th epot. I would advise repotting before you get to this stage as one of mine actually cracked the container it was growing in! 

Soil should be light and free draining so any good compost mixed with pearlight is a good choice for this plant. 


mother in laws tongue leaves show details of color and shape
Mother In Laws Tongue Houseplant Sword Like Leaves

Care Around This Snake Houseplant

Do be careful if you have pets or young children, as it is toxic and if they eat it can cause vomiting and diarrhea and you may need a vet or doctor. We always kept ours in a room the dogs did not go into or higher up on a surface so that no one could not easily reach it. 

To be honest we never had any problems. I was raised in a house where we had many houseplants which could have been toxic but my perents just kept them out of my reach and I learned not to handle them. 

None of our dogs have ever shown the slightest interest in this plant either, but I would still be cautious and exercise common sense, especially with puppies, young pets or children just in case. 


Varieties Of Sansevieria Trifasciata 

There are a few different varieties of the mother in laws tongue. I just have the one variety I inherited years ago from my Mum but more are now available. 

The usual variety is Sansevieria trifasciata ‘Laurentii’, which has very long dark green leaves with golden yellow edges.

There are also other variants  with different leaf colours and shapes such as those variagated with gold or silver. There is one which is almost white ghost like  and one that is verging on black. 

Some have a shorter length of leaf and some have rounder or more fan shaped leaves. Then there are those with smaller slimmer leaf shapes. 


Displaying Your Houseplant

 As this plant grows quite tall and fairly compact it is very useful for light areas of the home where you want some height and grandeur to a display.

 They good on their own but lovely when they are displayed together with other plants with different leaf shapes. If you have several of the different varieties of this plant it can look really stunning. I find this gives a lively, companion like social atmosphere to the display. 

 Another striking and possibly more modern way to display them is to have three or four in a row of the same variety, that can look very effective in its simplicity. I think this looks especially good in a minamilist white room where the shape and dark green colour really stands out as a feature. 

 As with many houseplants this one is very helpful and beneficial to us as it helps to purify and humidify the air thus providing a very useful service in our homes.


It is an excellent  houseplant and an easy guest.I think it is a great gift for a housewarming present or for a student or young professional who likes houseplants but perhaps does not have time to do a lot of caring for them.

It is arguably one of the best houseplants for beginners and busy people and thrives on very little care while still looking good. 


More Gardening Articles

Reviewing The Care Of Living Stone Flowers or Lithops As Houseplants


Note: The author may receive a commission from purchases made using links found in this article. “As an Amazon Associate, Ebay (EPN) and/or Esty (Awin) Affiliate, I (we) earn from qualifying purchases.”


Tuesday, June 1, 2021

Reviewing Restoring A Metal Garden Swing Seat


restored metal garden swing

We bought a metal garden swing seat recently for a good price as it needed some work and the shop needed the space. 

The swing is all metal and would have originally been painted black. It is very sturdy and quite heavy. It took two strong guys to carry it into our garden. 

My husband and I love this garden seat and like a bit of a challenge, so we embarked on revamping it. 

I always think if the bones are good then most things can be restored to look beautiful and useful again. 


weather garden swing that needs restoration
Original State Of the Garden Swing Seat


From the minute it arrived in our garden albeit quite rusty and certainly neglected and in need of serious tender loving care,  we loved it and it felt like it had been there forever. I love the details of the leaves and flowers and the general shape of the seat.

It is super comfortable as well. The swing has a lovely action and it feels so relaxing to sit on it and gently rock back and forth. It belonged in our garden and we love it! 


Preparation Work For Restoring The Garden Swing. Using Wire Wool Brushes. 

They say that preparation is the most important part of any project and it is important to take your time doing this part. 

While I love to get to the exciting part of making it beautiful, I am happy to accept that this preparation element needs to be given care. 

First, we used wire wool brushes to get rid of any flaking rusty parts. Quite a lot of old rust and flaking damaged parts fell off at this stage! 

We chose quite slim brushes as there were many nooks and crannies to get into that a larger brush would not have been able to reach.

This part of the work was quite hard slow going as it is important to get rid of all the loose sections and make sure it was as clean as possible. 

I am very glad we chose to use brushes with long handles instead of steel wool bundles to hold by hand, as it would have been hard on our hands. Using the brushes our hands were protected and the brushes did a great job.  


Then we wiped down the whole seat with an antibacterial spray to clean it all up and remove any dust particles. We repeated this again before painting.

We initially thought we might have to get in a welder to mend some of the worst parts, especially on this armrest section, but wanted to try out epoxy resin first to see if that would work. 


damaged metal garden swing that needs repair
Damage On The Garden Swing Seat


Repairing The Damaged Metal Sections

The next step was to use epoxy resin sticks to repair some of the damaged areas. Using this is quite easy. Do wear gloves as your skin may react to the epoxy resin. 

You simply cut the wrapping and the tube and I took a small piece and rolled it up in my gloved hands until the two parts were mixed evenly then simply applied it to the metal gap I needed covering.

It reminded me of using plasticine as a child. However, it is advisable to wear gloves when handling epoxy resin and of course, keep away from children and pets. 


repairing a damaged metal swing
Epoxy Resin Use On The Garden Swing Seat


I found you do need to work fairly quickly as it does dry in about 10 minutes. So best to only take what you need from the tube. I would keep any unused in a sealed container to help prevent it from drying out.  

I then smoothed it down and allowed it to dry. It took only about an hour before it was cured but we left it overnight before painting.

I thought I would need to sand it down but actually, on this type of item, it looked just fine as it was. I had taken care to smooth it out as much as possible when applying through. On some projects, you would need to sand down first. 

This type of epoxy resin can be drilled and sanded. It can even be used underwater and is waterproof rather than just water-resistant. We wanted this level of protection as this garden swing seat is too heavy to move around a lot so will be out in all weather. 

We were very pleased with the result. Even on the worst damaged sections of the armrest, the resin had set well and firm and the damaged sections were stable again.


Painting The Garden Swing Seat With Hammerite Paint. 

Once the epoxy resin was set hard we decided to paint the whole swing seat black with Hammerite Direct To Rust Paint.

This paint says it gives up to 8 years of rust protection and can be painted directly onto rust, though I still think sanding down and filling any damaged sections is advisable. I do think that with an outdoor seat like this we will repaint every couple of years to keep it looking good.

It is a great paint for a quick job as it is a primer, undercoat and topcoat all in one. This is very useful for outdoor painting when you are trying to paint when it is not raining for a while! 

You must keep it away from any aquatic life as it could be very harmful to them. Please wear gloves when handling and painting as it can provoke an allergic reaction and it is flammable so be careful where you leave it. 

It is important to keep Hammerite Paint away from children and pets. We even stayed out in the garden to make sure none of the local wildlife went near it until dry! 

Hammerite do many different colours, including gold, copper, white and green but as I eventually want to grow plants and climbers all around this seat we decided on a simple black so that the flowers and greenery will show up against it. I also think that this white would also have looked very stylish.


We have not used Hammerite paint before but we were very happy with the way it went on. It was about the right consistency. It did drip a little if we had too much paint on the brush so we learned to carefully wipe off the excess on the tin then paint.

We found it worked well on the larger sections of the A-frame and the broader metal lengths. It was also quite easy to use on the quite intricate leaves, stems and flowers as long as we did not load the brush up too much.


flower and leaf design on the frame of a metal swing
Beautiful Painted Leaves And Flowers


The Hammerite paint dried to a smooth sheen. It is a slightly glossy look which is what we wanted, rather than the rougher hammered finish of the original Hammerite paint. The finish is of course completely down to personal preference. 

Here is the garden swing seat when we had just painted the main A-frame but not yet painted the seat. 

You can see the difference once painted it looks significantly smarter, the rust is no longer visible and the metal is more protected from the elements. 


painted garden swing
A-Frame Hammerite Painted Garden Swing Seat


I would advise using an old paintbrush that you are happy to throw away afterward as getting Hammerite out of a brush is a difficult task! 

Normally I am not an advocate of throwing things away but in this case, weighing it up, I feel that using the necessary non-environmentally friendly cleaner is probably worse than throwing away the brush. 

The brushes were certainly a mess after use and I think it would have taken a lot of work and product to get them clean enough to use on any other project. 

So we got off the worst of the paint then wrapped the brush in newspaper and took it to the skip for safe disposal. 


The Finished Restoration Of The Garden Swing Seat!

So was it worth all the work? Well, I would say yes absolutely!

We do not mind the work and got quite a lot of satisfaction from restoring a decaying piece of garden furniture into a once again beautiful and useful garden swing.

 After one coat of Hammerite paint we have achieved a good finish. We will do another coat of paint at some point but it has rained part of every day since so it can wait a while. 

Here is the finished product! 


restored metal garden swing
Finished Renovation Of Garden Swing Seat 


It may well have been easier to simply buy a brand new garden swing seat. However, that would have cost us hundreds more. 

This way we have learned new skills, saved a lovely garden seat and now we have a beautiful piece we love sitting on with a nice cup of coffee and are very proud to have in our garden. 

The next stage is to choose suitable plants to position around the garden swing and to beautify it further with plants. 

Then I need to make some cushions for the seat. Now I am not all that handy with sewing. However, once we replace our mattress and memory foam topper, I feel I can cut the old one to size and use it as a garden seat cushion with a simple removable cushion cover. 


Read More Craft and DIY Projects On Review This Reviews Here: Crafts & DIY 


Read More Gardening Reviews On Review This Reviews Here Gardening


Note: The author may receive a commission from purchases made using links found in this article. “As an Amazon Associate, Ebay (EPN) and/or Esty (Awin) Affiliate, I (we) earn from qualifying purchases.”


Sunday, May 16, 2021

An Affordable Set of 10 Indoor Flower or Herb Planters


We don't have an outdoor garden and wanted a simple solution for naturally grown herbs for cooking.

I wasn't into getting an outside garden box or leaving planters with herbs on the outside patio table. 

Several years ago I had an outside planter with herbs, and just the mere fact that it was outdoors was inconvenient enough that I rarely went outside to gather them up for cooking. Mostly, I forgot it was there.

Kitchen Window Ledge Featuring Potted Herbs

When cooking, I prefer the grab-and-go solution for using herbs. Grab some parsley, grab some thyme, rinse, and add it to your sauce.

At Costco, we picked up four herb plants in simple black 4.5-inch pots. The herb containers needed a vase with something to catch the water on the bottom.

The above black planter pot fits perfectly inside this vase.

I had no intention of repotting them directly inside the pots. I simply slipped the potted herbs inside the vase.

Since the herbs are positioned on the kitchen window ledge, I didn't want anything made of ceramic or glass. 

Also, I didn't want anything expensive!


Above, four of the plaster planter pots are featured. 

This set of ten planter pots come in various colors.


The two flowers featured above are NOT part of the colored plastic planter pots. There are ten planter pots all in different colors. Above are the extras I'm currently not using. When I get tired of the colors featured on the window, I switch them up.


So there you have it, an inexpensive easy way to have your favorite herbs easily accessible in the kitchen. The four herbs we're using are parsley, basil, rosemary, and oregano. We went with the 5.1 inch vases.

We purchased these plastic vases from Amazon Canada - here. This particular set is showing unavailable on Amazon USA, however I've included a link to another set similar in price and design from Amazon USA here. Note that the vases from Amazon USA are an 8 piece set, versus the 10 piece set I purchased.


Note: The author may receive a commission from purchases made using links found in this article. “As an Amazon Associate, Ebay (EPN) and/or Esty (Awin) Affiliate, I (we) earn from qualifying purchases.”


Wednesday, May 12, 2021

In Two Short Weeks Gardening Will Become Everyone's Favorite Pastime!

For many Gardeners, waiting till the 21st of May is a ritual!

Garden centers all across the United States and Canada will be open for longer periods of time during that First Long Weekend and business will be brisk I'm sure!  Everyone knows that the chances of frost after this date is rare, so the plants you buy now will prosper without worry about weather conditions.

indoor display of plants and flowers


Everyone and their friends will be lined up to buy their bedding plants and vegetables that they plan on planting in whatever space they are gardening in.  

Did you know though, that you could be planning many ways in which to help your seedlings and bedding plants get off to a great start, right now?

How? 

Well let me take this opportunity to help you all become better gardeners and also become more ecofriendly too!

I'm sure that in your household there are many times through the week that you will be preparing eggs, either for breakfast or lunch or maybe in some wonderful baking.  Well, what do you do with the egg shells that are left behind from all this acitivty?

Don't throw them away!  

Egg shells are great in the garden!  

egg shells

If you throw them away, you have lost a great opportunity to feed your plants naturally with what you have at hand.  I keep a metal bowl in my kitchen to catch all those egg shells.  It doesn't matter if I have shells from hard boiled eggs or from fresh eggs that I use in baking or frying.  They all go into the same bowl.  

You can keep some of the egg shells as they are and use them for potting up seeds, The shells will hold soil and you can water them easily, When you plant them in your garden the whole little shell pot goes into the soil.   I personally don't do this but you can without any problems!

When the bowl is full or I'm ready to deal with them, I take the shells and bake them for 30 minutes in an oven set to 350 degrees.  I do this to kill any bacteria (salmonella) that could be present, especially in the raw egg shells.  Once they have been baked, the shells become much easier to pulverize or to break into smaller bits.

You can use either white eggs or brown it makes no difference in the garden, just remember to bake them before adding them to your plants.

broken up egg shells


Now, here's the part that I really like.  Egg shells broken up in small bits like the ones in the picture above can be used around the base of your plants to keep slugs and snails at bay.  They really don't like the sharp edges of the shells on their tender foot!  

Eggs are a great source of calcium and your plants will thrive with that added natural fertilizer and it doesn't cost you anything more than the time to save, break, and bake them.  (Who knows, you might even use breaking up the shells as a therapy for anxiety during these times!)  

But that's not the only use that egg shells have.  If you love birds and have bird feeders in your backyards, add some broken shells into the feeders.  The birds will enjoy an extra treat and again you don't have to spend any money to give them this added bonus.  The calcium in the eggs is great for all outdoor birds.  

Is your soil a little too compacted?  Adding egg shells will act as a natural way to add some aeration to your soil mix too!  If you are like me and add worms to your garden beds, egg shells will feed your worms and the worms will feed your plants.  It's a win-win situation!  

Egg shells are totally organic and there is no need to waste them by throwing them out with the trash.  Do yourself a favor and start using them for the birds and the flowers and veggies that your are growing this year.

Add a worm farm to your garden this year if you really want to up the WOW in natural fertilizing!  I was amazed last year when I added worms to my balcony containers.  My tomatoes and cucumbers just went wild for the added benefits that the addition of the worms made.  

There are many different styles of worm farms available, or you can make your own by following the instructions on YouTube.

If you are looking for a finished worm farm set up, you can get one on Amazon right here!

This one is inexpensive and will do the trick quite nicely!


 If you need worms (the red wiggler ones), let me know I have thousands of them!

We need to become aware of ways in which to garden efficiently and with an eye to being as eco-friendly as possible.   Mother Nature is counting on us to do our part.

If you want to read more about worms and my garden efforts you can do that right here! Then you will understand why you need the red wigglers too!
 
Happy Spring to everyone and Happy Gardening too!


Note: The author may receive a commission from purchases made using links found in this article. “As an Amazon Associate, Ebay (EPN) and/or Esty (Awin) Affiliate, I (we) earn from qualifying purchases.”


Most Recent Reviews on Review This Reviews


Search for Reviews by Subject, Author or Title

The Review This Reviews Contributors


SylvestermouseSylvestermouseDawn Rae BDawn Rae BMbgPhotoMbgPhotoBrite-IdeasBrite-IdeasWednesday ElfWednesday ElfOlivia MorrisOlivia MorrisTreasures by BrendaTreasures by BrendaThe Savvy AgeThe Savvy AgeMargaret SchindelMargaret SchindelRaintree AnnieRaintree AnnieLou16Lou16Sam MonacoSam MonacoTracey BoyerTracey BoyerRenaissance WomanRenaissance WomanBarbRadBarbRadBev OwensBev OwensBuckHawkBuckHawkDecorating for EventsDecorating for EventsHeather426Heather426Coletta TeskeColetta TeskeMissMerFaeryMissMerFaeryMickie_GMickie_G


Review This Reviews is Dedicated to the Memory of Our Beloved Friend and Fellow Contributor

Susan DeppnerSusan Deppner

We may be apart, but
You Are Not Forgotten


“As an Amazon Associate, Ebay (EPN) and or Etsy (Awin) Affiliate, I (we) earn from purchases.” Disclosure Statement

X