Showing posts with label Side Dishes. Show all posts

Thursday, January 4, 2024

Crispy Air Fryer Tater Tots

 Air fryer tater tots are quick and easy snacks or the perfect side to any meal. These tater tots come out of the air fryer so crispy on the outside and soft and tender on the inside.

Crispy Air Fryer Tater Tots
Crispy Air Fryer Tater Tots - Reviewed

Tater tots are just one of those foods that are loved by kids and adults alike. Our grandson Tyler loves his tater tots made in the air fryer. It is so easy to make tater tots in the air fryer from frozen to the table in about 10 to 15 minutes.

How to make tater tots in the air fryer:

The air fryer is the quickest way to make the crispiest tater tots right from the freezer.

  1. First, set your air fryer to air crisp and the temperature to 400 degrees. The high temperature is important for crispy tater tots. Set the timer for 12 minutes.
  2. I place the frozen tater tots in a one-gallon plastic storage bag. Add one tablespoon of olive oil and toss them around. You can also use a cooking spray if you like.
  3. Place the frozen tater tots in the air fryer basket and lightly season with salt. Cook for 6 minutes then open and toss them around in the basket. This is important so they don't stick together. Cook for the remaining 6 minutes. 
  4. Place them in a bowl and serve plain or with your favorite dipping sauce.
We like to have some different dipping sauces, such as ketchup, ranch, or barbecue sauce. My favorite is the barbecue sauce but when our granddaughters are visiting, the ranch is their favorite.

More seasoning suggestions for tater tots:

  • Smoked Paprika
  • Italian Seasoning
  • Taco Seasoning
  • Montreal Steak Seasoning
  • Old Bay Seasoning
These are just some ideas for different seasonings. You can season your tater tots with whatever you like. The amounts depend on your taste but usually, one tablespoon per basket in the air fryer is enough.

We use our Ninja Foodi Grill to air fry. The Ninja is a combination indoor grill and air fryer. We have had our Ninja for several years and just love it. Any air fryer will work just as well.

For more recipe ideas on ReviewThis Click Below:

ReviewThisRecipes.com


Note: The author may receive a commission from purchases made using links found in this article. “As an Amazon Associate, Ebay (EPN) and/or Esty (Awin) Affiliate, I (we) earn from qualifying purchases.”


Wednesday, August 9, 2023

Chocolate Covered Grapes Recipe Review

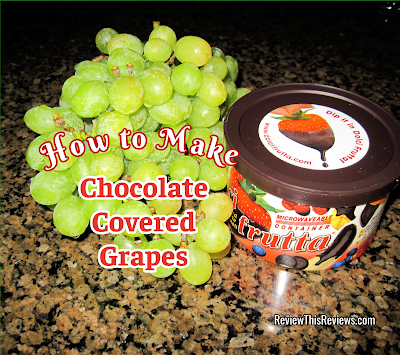
grapes and chocolate to make chocolate dipped and covered grapes
Chocolate Covered Grapes are Fun to Make and Delicious to Eat

Preparing Chocolate Covered or Dipped Grapes is fast and easy. They make a delicious appetizer, dessert or snack. Of course, when you enjoy them as much as I do, they might just make a meal.

Seedless Grapes are one of my favorite fruits and I love chocolate, so it only makes sense that I would combine the two and create Chocolate Covered Grapes.

I discovered Saco Dolci Frutta at the grocery store when I was making fruit selections to create a fruit platter for a party.  The Saco Dolci Frutta was stocked below the fresh fruits.  When I spotted the chocolate, I thought it would be fun to add covered or dipped chocolate to the tray.  It ended up being a big hit!  After the first trial, I started making chocolate fruit for every party.

In this article, I give instructions with photos so you can create this tasty treat for yourself and your family.


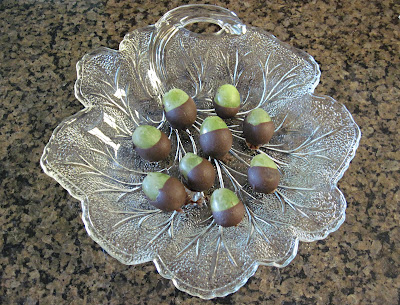
Chocolate Dipped Grapes

Supplies and Ingredients for Chocolate Dipped Grapes

  • Fresh Seedless Grapes
  • Chocolate for Melting ~ I prefer Saco Dolci Frutta featured below.
  • Wax Paper

Easy Directions for Chocolate Covered Grapes

Dolci Frutta Hard Chocolate ShellCheck Price

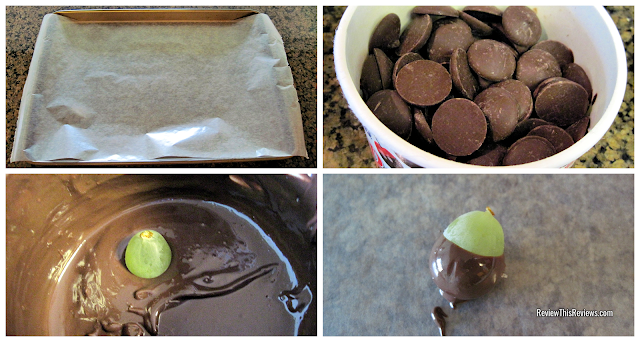
Step 1: Cover a cookie sheet with wax paper ~ The cookie sheet will make it easier to move your Chocolate Covered Grapes.

Step 2: Wash and Dry Your Grapes

Step 3: Melt Your Chocolate ~ If you use Saco Dolci Frutta, you can melt the chocolate in the microwave in their package container. Melt the chocolate in the microwave for 2 minutes on medium and stir the chocolate until it is completely melted. Other chocolates will need to be melted in a double boiler or a microwavable dish.

Step 4: Dip the Grapes in the chocolate

Step 5: Set on wax paper to cool

Step 6: When you have dipped all of your grapes in chocolate, serve or eat.


Best if not refrigerated


Step by Step photos for making chocolate dipped grapes


More Chocolate or Dipped Fruit for Your Platter


Check Out More Recipe Reviews at
ReviewThisRecipes.com


This recipe article was originally published by me in 2009 on a different site that no longer exists. Unless otherwise noted with the individual photo, all Photos are mine and should not be used without written permission.  © 2009 Cynthia Sylvestermouse
Chocolate Covered Grapes Recipe Review Written by:
House of Sylvestermouse


© 2023 Cynthia Sylvestermouse


Note: The author may receive a commission from purchases made using links found in this article. “As an Amazon Associate, Ebay (EPN) and/or Esty (Awin) Affiliate, I (we) earn from qualifying purchases.”


Thursday, August 3, 2023

Easy Air Fryer Corn on the Cob

 Air fryers are a wonderful tool to have in your kitchen. If you don't have an air fryer consider making room on your kitchen counter for one. From main dishes, and side dishes to desserts, there isn't anything you can't do with an air fryer.

Easy Air Fryer Corn on the Cob
Air Fryer Corn on the Cob - Reviewed
Photo credit Sam Monaco

Our daughter got us a Ninja Foodi Grill for Christmas a few years ago. It is a combination grill and air fryer, and we use it all of the time to make so many easy meals.

Summertime is corn season and grilled corn is a favorite of ours. If you don't feel like firing up the grill just for corn or boiling water to heat up the kitchen try the air fryer.

It's so easy to make in the air fryer, in just 15 minutes you will enjoy that delicious toasted corn flavor with your favorite garnish for added flavor.

How to Make Air Fryer Corn on the Cob:

Air fryer corn on the cob
Air Fryer Corn on the Cob
Photo Credit Sam Monaco

I started with five fresh ears of corn and brushed them with olive oil on all sides, or you could use melted butter. 

Then, I coated them all around with Hidden Valley Ranch Seasoning. I preheated the air fryer to 375 degrees and set the time for 15 minutes. We added melted butter and salt for a delicious side dish. My air fryer basket easily fits five ears of corn.

This works well for fresh or frozen corn, but I prefer fresh corn on the cob. If you have an air fryer give this a try, your family is going to love it.

Other Topping Ideas for Corn on the Cob:
  • Sour cream
  • Parmesan cheese
  • Cheddar cheese
  • Crumbled bacon
  • Chili powder
  • Paprika 
  • Old Bay seasoning
  • Cajun seasoning
These are just a few more ideas for garnishing corn on the cob. I'm sure everybody has their favorite.

You may also like some of my other Air Fryer Recipes:


Ninja Foodi 5-in-1 Indoor Grill with Integrated Smart Probe, 3.9 L (4 qt.) Air FryerNinja Foodi 5-in-1 Indoor Grill with Integrated Smart Probe, 3.9 L (4 qt.) Air FryerNinja Foodi 5-in-1 Indoor Grill with Integrated Smart Probe, 3.9 L (4 qt.) Air Fryer


Find more recipes on Review This Here:


Note: The author may receive a commission from purchases made using links found in this article. “As an Amazon Associate, Ebay (EPN) and/or Esty (Awin) Affiliate, I (we) earn from qualifying purchases.”


Friday, May 26, 2023

Betty Crocker Scalloped Potatoes in a Box Reviewed

Scalloped Potatoes
Scalloped Potatoes are the only potato side dish that I do not make from scratch.  

I decided decades ago that it was not worth my time in the kitchen to peel & thinly chop fresh potatoes when Betty Crocker Scalloped Potatoes were available in a box at the grocery store. 

Anyone who knows me knows that I rarely cut corners when cooking, but my family loves the Betty Crocker scalloped potatoes and they would be the measuring standard used if I did make homemade scalloped potatoes.  That is a challenge I have not been willing to accept!

The boxed scalloped potatoes are easy to prepare and allow me to focus on the main dish.  They simply make meal preparation simpler and I allow myself this break.  I liken the choice to use the boxed scalloped potatoes to opening a can of peas or green beans that I have not had to shell.

There are several varieties available, but I have only tried the basic Betty Crocker Scalloped Potatoes shown below.


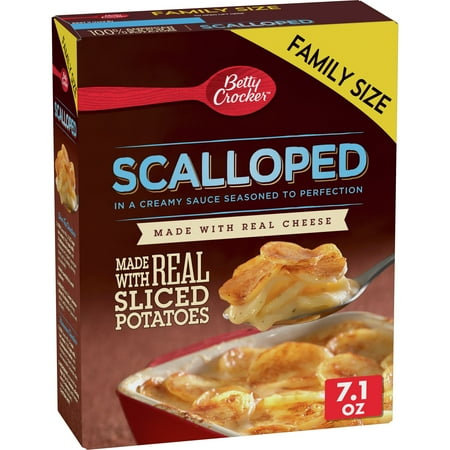
Betty Crocker Scalloped Potatoes 

Betty Crocker Scalloped Potatoes
Betty Crocker Scalloped Potatoes Made with Real Cheese 7.1 oz

Real scalloped potatoes in a creamy sauce seasoned to perfection.
These 100% American Grown Potatoes
make a perfect side dish for your family meal.

The box of scalloped potatoes can be cooked in the microwave, cooked on the stove-top, or baked in the oven.  I always bake mine.  On occasion, I bake them at the same time, in the same oven, as the meat for dinner.  There are baking instructions on the box for several oven temperatures to make baking them at the same time easier.

For the family size box shown on the right, you would need 2 cups water, 1½ cups milk, and 3 Tablespoons butter.

Simply stir the included sauce mix with water, milk & butter together, then add the potatoes and bake uncovered for 32 minutes on 450°F.

If you wish to make the potatoes while roasting meat, you can increase the time and decrease the temperature to the appropriate meat temperature.

  • 325° for 65 minutes
  • 350° for 60 minutes
  • 375° for 55 minutes 

Please refer to the box if you select a different size other than the family size box for specific ingredient measurements. 


Some of the Varieties Available on Amazon

Betty Crocker Scalloped PotatoesCheck PriceBetty Crocker Three Cheese PotatoesCheck PriceBetty Crocker Au Gratin PotatoesCheck PriceBetty Crocker Cheddar and Bacon Potatoes, 5.1 oz (Pack of 12)Check PriceBetty Crocker Julienne Potatoes, Made with Real Cheese, 4.6 oz. (Pack of 12)Check PriceBetty Crocker Cheesy Scalloped Potatoes, Made with Real Cheese, 5 oz.Check Price


Homemade Scalloped Potatoes

Betty Crocker does offer a homemade scalloped potato recipe on their website.  You can see it by clicking here


Read More Product Reviews On
ReviewThisProducts.com


House of Sylvestermouse


Note: The author may receive a commission from purchases made using links found in this article. “As an Amazon Associate, Ebay (EPN) and/or Esty (Awin) Affiliate, I (we) earn from qualifying purchases.”


Friday, March 31, 2023

Potato Salad Recipe - Uses for Dyed Easter Eggs Reviewed

Potato Salad
I love potato salad.  It is one of my favorite side dishes, especially when served with sliced ham.  In fact, I will eat only the potato salad for lunch or dinner.

Because it is so easy to make, I like to use the dyed Easter eggs each year in potato salad.  Plain boiled eggs are likely to sit in our refrigerator and spoil before we eat them.  Therefore, I will make a potato salad with the eggs.  There is no reason to waste them.

While it might seem sad to crack and dispose of the beautifully dyed egg shells, I hate throwing the whole eggs away more several days later.  So, I use them. It is a win-win situation then.  We have the pleasure of dying the eggs, or watching the eggs being dyed, and then making a lovely side dish for Easter dinner with the eggs.

Potato salad is a dish my family has been making for my entire life, throughout several generations.  Both of my grandmothers made potato salad, but it was my own mother that taught me how to make it.  

I have found in cooking, everyone has their own little "signature tweek" to family recipes that sets them apart slightly from others.  One family member may add a touch of sugar, while another might use more or less of a specific ingredient.  What we all have in common with how we make potato salad, we all use boiled eggs and potatoes!


Potato Salad Recipe

I make a very basic potato salad recipe in our home.  Anyone that desires an additional ingredient can simply add it to their own individual serving. 

    Potato Salad
  • 7 boiled red potatoes* (cooled)
  • 8 hard boiled eggs (cooled)
  • 2 Tablespoons Mustard
  • 1/4 Cup Mayonnaise
  • Salt & Pepper

Cut the potatoes and eggs into chucks.  Stir in the mustard, mayonnaise, salt & pepper.  Cover & Refrigerate 


*Boil red potatoes by covering the potatoes with water, bring it to a boil, then turning them down to a low boil and cook for 45 minutes.  You know they are done when a fork will go into them easily.


Optional Ingredients:  bacon pieces, diced celery, chopped dill pickles, sweet pickle relish, diced onion, or garlic salt.  

These are the optional ingredients I have heard of.  How about you?  Have you tried other optional ingredients that could be included in this list?


Deviled Eggs are another great use for dyed Easter Eggs.


See more recipes that use boiled eggs here:
Simple Egg Salad Recipe
Deviled Eggs Recipe
Taste of Home Magazine Recipes


Potato Salad Recipe - Uses for Dyed Easter Eggs Written by:
House of Sylvestermouse


© 2023 Cynthia Sylvestermouse


Note: The author may receive a commission from purchases made using links found in this article. “As an Amazon Associate, Ebay (EPN) and/or Esty (Awin) Affiliate, I (we) earn from qualifying purchases.”


Friday, March 24, 2023

Deviled Eggs Recipe - Uses for Dyed Easter Eggs

deviled eggs using dyed Easter eggs
Easter is just around the corner and I am already looking forward to my favorite use of dyed Easter eggs --- Deviled Eggs!

My mother and my son dye Easter eggs every year.  They have been dyeing eggs together for almost 30 years.  Even though they are both adults, they still enjoy that annual tradition and their fun time together. They usually dye a dozen eggs or more so they can make several colors.

Many families use the dyed eggs for Easter egg hunts.  Our family always ate the dyed eggs and used plastic, candy filled eggs for our Easter egg hunts.

After the pictures are taken of their egg dyeing "event", several of us will grab our favorite egg and eat it.  I use the remaining eggs to make deviled eggs or potato salad.  

I will share my potato salad recipe in a separate post, but today I offer you my very easy recipe for making delicious deviled eggs.


dyed Easter eggs


Basic Deviled Eggs Recipe

This recipe is based on using 1 dozen hard boiled eggs, which makes 2 dozen deviled eggs.  If I have more or less eggs, I simply adjust the measurements of mayonnaise and mustard accordingly below.

  1. Start by boiling the eggs and letting them cool (boiled egg directions below)
  2. Cut the boiled eggs in half lengthwise & remove the yolk 
  3. In a mixing bowl, mash and combine the yolks with 2 teaspoons mayonnaise & 4 teaspoons French's Classic mustard. *
  4. Fill the egg whites with the egg yolk mixture
  5. Sprinkle with salt, pepper & paprika (if desired) 

* I recommend tasting the egg yolk mixture before you fill the egg whites to make sure it is to your preferred taste.  We use more mustard and less mayonnaise than many recipes.  By comparison,  BettyCrocker.com recommends 6 Tablespoons of mayonnaise and 1 teaspoon ground mustard for a 2 dozen deviled eggs.


How to Hard Boil Eggs

Again, I am sharing my preferred method.  I've boiled eggs for the last 40+ years by simply placing a dozen eggs in a pan of water, adding salt, bringing them to a boil, and boiling for 10 minutes.  I let the eggs and the water cool in the cooking pan.  After the hot water has cooled to warm, I dump out the water out of the pan and run cold tap water on top of the eggs (still in the pan) so they will completely cool.

For a dozen eggs, I use my 5 quart dutch oven pan to boil.

 Cuisinart 6445-22 5-Quart Dutch Oven with CoverCheck Price Kraft Real Mayo Creamy & Smooth Mayonnaise, 22 fl ozCheck Price French's Classic Yellow Mustard, 30 ozCheck Price


For more of my tried and true family recipes, please visit Cooking for the Holidays 

I also contribute to our Recipes category right here on Review This Reviews alongside some really fabulous home cooks!  This is a category you will not want to miss. 


Deviled Eggs Recipe - Uses for Dyed Easter Eggs Written by:
House of Sylvestermouse


© 2023 Cynthia Sylvestermouse


Note: The author may receive a commission from purchases made using links found in this article. “As an Amazon Associate, Ebay (EPN) and/or Esty (Awin) Affiliate, I (we) earn from qualifying purchases.”


Thursday, March 2, 2023

Easy Air Fryer Baked Potatoes

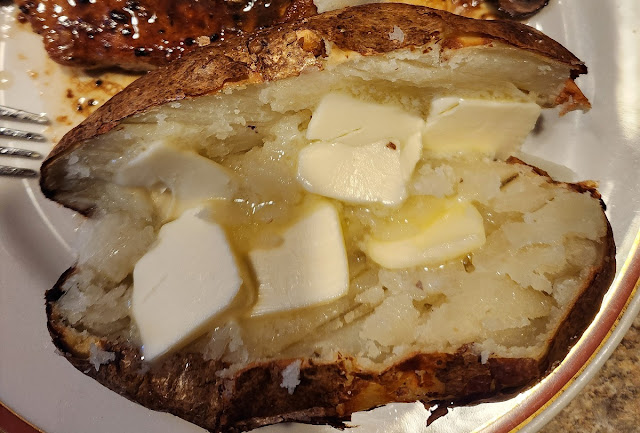
There are so many ways to make potatoes and a nice baked potato is one of my favorites. Now, there are several ways to bake potatoes. In the oven or microwave, some people use their instant pot to make baked potatoes, although I've never tried the instant pot.

Easy air fryer baked potatoes

Well, I've found another method to make baked potatoes, and it is now my go-to favorite. Try baked potatoes in your air fryer.

These air fryer baked potatoes are soft and tender on the inside with a wonderful crispy skin on the outside. The crispy outside is what sold me on using the air fryer. Baking them in the oven or microwave just doesn't turn the skin crispy.

Benefits of using the Air Fryer:

  • Air fryers use less energy than your oven does.
  • Your oven can heat up the whole house. If you live in a warmer climate then using the air fryer is a plus.
  • The oven will not give you that crispy skin.
I recently made some delicious pork chops and severed them with these air fryer baked potatoes. You can find the recipe for the pork chops here: Cast Iron Skillet Garlic Butter Pork Chops.


How to make Air Fryer Baked Potatoes:

  • Wash the potatoes and pat them dry.
  • Brush them with olive oil and add salt all around.
  • Poke holes around the potatoes with a fork
  • Preheat your air fryer to 400 degrees.
  • Air Fry for 40 to 50 minutes until the inside is tender.
  • Turn the potatoes over halfway through.
It may take a little longer depending on the air fryer and the size of the potatoes. I only did two potatoes but my air fryer basket would have fit four nice size potatoes easily.

Cut them open and add your favorite toppings such as butter, sour cream, chives, or whatever you like on your baked potato. The air fryer that we have is the Ninja Foodi Grill and Air Fryer. We use it often to grill and air fry, it's perfect for the two of us.


More Air Fryer Recipes:

Italian Roasted Potatoes

Apple Hand Pies

Crispy Chicken Wings

Sugar Cinnamon Biscuit Bites

Homemade French Fries


Find more recipes on ReviewThisReviews Here:

ReviewThisRecipes.com


Note: The author may receive a commission from purchases made using links found in this article. “As an Amazon Associate, Ebay (EPN) and/or Esty (Awin) Affiliate, I (we) earn from qualifying purchases.”


Tuesday, December 6, 2022

Air Fryer Italian Style Roasted Potatoes

 These Italian-style potatoes are a perfect complement to any main dish. I'm calling these roasted potatoes, but they were really air fried in our Ninja Foodi Grill and Air Fryer.

a dish of Air Fryer Italian Style Roasted Potatoes
Air Fryer Italian Style Roasted Potatoes Reviewed

Fran picked up a nice rump roast last week and cooked it in our Instant pot. While it was cooking I remembered the days when my mother would cook a roast in the oven for hours with these delicious roasted potatoes. So, I thought why not try to duplicate these potatoes in the air fryer. 

Air Fried Italian Style Roasted Potatoes:

4 or 5 medium potatoes (washed and peeled)
3 tablespoons olive oil
1 clove of garlic (minced)
2 tablespoons of Italian seasoning 
1 teaspoon of garlic powder
Salt and Pepper to taste

Directions:
  1. I washed and peeled the potatoes and cut them into quarters. 
  2. Placed them in a one-gallon plastic freezer or storage bag.
  3. Add the olive oil close the bag, shake and mix.
  4. Open the bag and add the remaining seasoning, close and mix again.
  5. Preheat the air fryer to 390 degrees and set the time to 20 minutes.
  6. After 10 minutes I turned them over.
Although I set the timer for 20 minutes, I checked them again at 15 minutes and they were done. It's always a good idea to check the food when you're making it for the first time. Different brands of air fryers may vary with temperature and time.

Needless to say, these potatoes were a perfect side dish for the rump roast. They were crispy on the outside, tender and soft on the inside, and full of flavor.


Note: The author may receive a commission from purchases made using links found in this article. “As an Amazon Associate, Ebay (EPN) and/or Esty (Awin) Affiliate, I (we) earn from qualifying purchases.”


Monday, October 3, 2022

Salt Potatoes a Tasty Side Dish

 These easy-to-make salt potatoes are a perfect side dish to compliment any meal, and your family and friends will love them.

Salt Potatoes a Tasty Side Dish

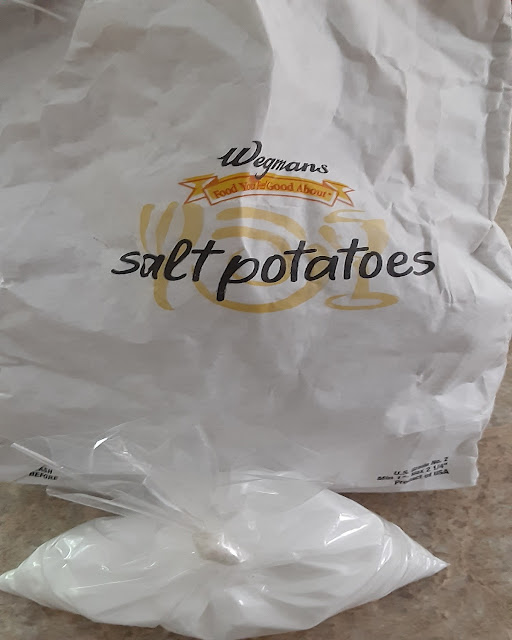
Salt potatoes are a regional side dish that originated in Syracuse New York. The potatoes used for salt potatoes are, first harvested small young potatoes.

As the potatoes cook, the salt forms a crust on the outside, while the inside is soft and creamy. I garnished my salt potatoes with fresh parsley and chives and served them with melted butter to pour over the soft creamy inside.

I honestly have never heard of salt potatoes before. I was telling a friend that I was going to smoke a turkey breast over the weekend and he suggested making salt potatoes as the side dish.

Salt Potatoes

We have lived in Western New York for 33 years and I have never seen these in the grocery store until now. Apparently, you can buy salt potatoes in a kit. So, look in your local grocery store to see if you can find Salt Potatoes in a kit.

If you can't find a kit, you can use young small white potatoes and one cup of salt to six cups of water.

How to make Salt Potatoes:

5 lbs. small white potatoes (Washed)

1 cup salt

6 cups water

1/2 cup melted butter

Fresh parsley (Chopped)

Fresh Chives (Chopped)

Directions:

  1. Bring the water and salt to a boil until all of the salt has dissolved.
  2. Add the potatoes and boil for 25 to 30 minutes until the potatoes are soft and tender.
  3. Drain the water, pour over the melted butter and garnish with parsley and chives. Serve with more melted butter.
Needless to say that these salt potatoes were a big hit with the whole family. They made a perfect side dish for my Hickory Smoked Turkey Breast.

Here is the link to my:

Find more recipes on Review This here:


Note: The author may receive a commission from purchases made using links found in this article. “As an Amazon Associate, Ebay (EPN) and/or Esty (Awin) Affiliate, I (we) earn from qualifying purchases.”


Monday, November 22, 2021

Sweet Potato Souffle Reviewed

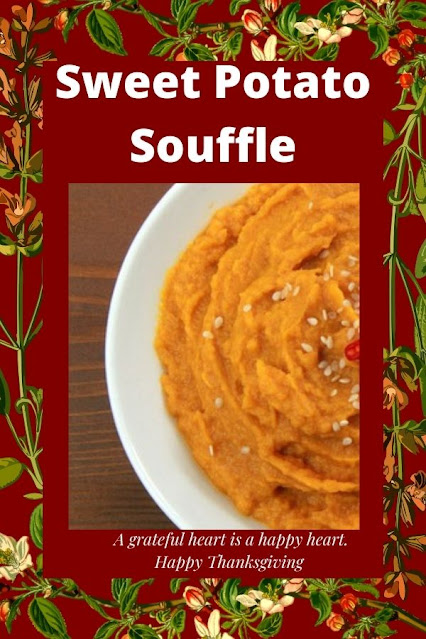
 All time favorite side dish for Thanksgiving is my families' Sweet Potato Souffle. Light, fluffy and just darn yummy! Serve it as a side dish or serve it for dessert - this recipe is just that flexible.

sweet potato souffle


A very easy recipe and no worries about the "Souffle" in the title as this is a quasi souffle and is a no fail recipe. As older family recipes tend to roll, real butter and whole milk is used.

How To Make Sweet Potato Souffle

Ingredients

3 sweet potatoes

1/2 cup sugar

1/4 cup milk

1 beaten egg

1/2 teaspoon vanilla

1/4 cup melted butter

a dash of salt

Directions

350 degrees, serves 6-8

  1. Grease a two quart glass baking dish.
  2. Boil sweet potatoes until fork tender. Cool.
  3. Peel the sweet potatoes.
  4. Mash the sweet potatoes to a smooth consistency. I use a ricer to ensure the potatoes are very smooth in consistency.
  5. Add the sugar, milk, butter, egg, vanilla and salt.
  6. Mix well.
  7. Pour sweet potato mixture into the baking dish.
  8.  Bake for 40 minutes, 350 degrees.
thanksgiving dinner banner
Serve as a side dish or dessert! Sprinkle with raisins or nuts for an optional, but fun twist. This sweet potato dish pairs well with holiday ham too! Enjoy...


Note: The author may receive a commission from purchases made using links found in this article. “As an Amazon Associate, Ebay (EPN) and/or Esty (Awin) Affiliate, I (we) earn from qualifying purchases.”


Monday, November 1, 2021

Air Fry Homemade French Fries


Air Fry Homemade French Fries

There is nothing like French Fries made from real potatoes. Oh, sure you can buy frozen French Fries, but I like fresh homemade the best. These real fries are so easy to make in your air fryer. They are crispy on the outside and so tender on the inside. My review will show you just how easy they are to make.

The way these French Fries turn out brings back some fond childhood memories for me. Growing up in New Castle a small town in Western Pennsylvania we lived near a small amusement park called Cascade Park.

The Park officially opened in May of 1897 and was a huge attraction. People would come from all over Pennsylvania and Ohio to visit Cascade Park. The park is still in existence today as a nature park.

As you walked through the midway of the park there were several food vendors. I had two favorites, one was the pizza vendor, and the other was the French Fries.

We would get a cup full of fresh real potato French Fries with vinegar and salt, oh my goodness, this was heaven when I was a kid. Now I enjoy that same goodness with my Air Fry homemade French Fries.

How to make the best Air Fryer French Fries:

3 to 4 medium potatoes (washed and peeled)

2 tablespoons of cooking oil

One-gallon plastic storage or freezer bag

Apple Cider Vinegar

Salt

Directions:

  1. Wash and peel the potatoes
  2. Cut to size (I have a French fry cutter for this you’ll see it below)
  3. Place the cut potatoes in the plastic bag, add the oil and shake
  4. Set your air fryer to 390 degrees
  5. Air Fry for 18 to 19 minutes
  6. When they are finished transfer to a dish or bowl, splash on the vinegar and add the salt while the fries are hot.
French Fry Cutter

This is a photo of our French fry cutter that we have had for years. I must tell you the story about this cutter.

When Fran and I were dating back in high school, yes, that was a long time ago. Fran's father knew how much I loved French fries. So, he went out and bought this French fry cutter just for me. We still use it today.

Just peel your potato, cut a flat spot on the bottom of the potato so the potato stands up. Set the cutter on top and push, Ha!! it's that easy.

We use our Ninja Foodi Grill and Air Fryer to make our French Fries. You can read my review of our Ninja here.

More recipes on Review This Here: ReviewThisRecipes.com

Get your very own French Fry Cutter, and may it last you as long as ours has.

Home Basics Stainless Steel French Fry Cutter, One Size, SilverHome Basics Stainless Steel French Fry Cutter, One Size, SilverHome Basics Stainless Steel French Fry Cutter, One Size, Silver


Note: The author may receive a commission from purchases made using links found in this article. “As an Amazon Associate, Ebay (EPN) and/or Esty (Awin) Affiliate, I (we) earn from qualifying purchases.”


Tuesday, October 19, 2021

Make Fresh Basil Pesto


Make Fresh Basil Pesto
Fresh homemade basil pesto reviewed

It’s easy to grow your own herbs. Every year in the spring, Fran buys fresh basil plants, we re-pot these plants and set them out on our deck.

We enjoy fresh basil all season long and into the fall. The plants just keep reproducing. This basil pesto is so easy to make and can be enjoyed in many ways.

Basil pesto is perfect tossed over pasta, spread on crackers or toast, try adding some to your favorite salad. Try it on Garlic bread or a baked potato. 

I’ve even made pesto pizza you can find my recipe here for Fresh Tomato and Pesto Pizza.

Our grandson Bobby loves to cook, and especially with fresh ingredients. This fresh basil pesto is one of his favorites to make. Bobby makes this basil pesto in about 10 minutes. So, it’s easy to have a meal on the table in less than 30 minutes.

Basil Pesto Ingredients:

2 cups fresh basil leaves

1/4 cup pine nuts

1/2 cup fresh grated Romano or Parmesan Cheese

1/2 cup extra virgin olive oil

4 cloves fresh garlic (We love our garlic so, you can cut this in half if you like)

1/8 teaspoon red pepper flakes (can be omitted)

1/4 teaspoon salt

1/4 teaspoon ground pepper

1 tablespoon lemon juice

Directions:

Add the basil leaves and pine nuts into the bowl of a food processor. Pulse the food processor several times to chop and mix.

Add the garlic, cheese, and lemon juice and pulse several more times

Place the lid on the food processor turn it on and pour the olive oil in a steady stream.

Stop and scrape the sides with a spatula and turn it on again for about 10 seconds.

Add salt and pepper to taste. If you use the red pepper flakes add them now and pulse a few more times to mix it all in.

We served our basil pesto over fresh Fettuccine that we made with our Emeril Lagasse Pasta and Beyond machine.

Read my review here: Emeril Lagasse Pasta and BeyondReviewed.

Basil Pesto

Our basil pesto with homemade fettuccine was on the table in 30 minutes or less for a delightful family meal.

We used our Ninja Food Processor to make this pesto. Any food processor or blender will work. If you don’t have a basil plant, you can buy fresh basil at your local grocery store and have this basil pesto at any time. 

It's easy to freeze the pesto to enjoy anytime on crackers or toast. Pour the pesto into ice cube trays and place them in the freezer. After the pesto freezes place the cubes in a freezer bag.


Note: The author may receive a commission from purchases made using links found in this article. “As an Amazon Associate, Ebay (EPN) and/or Esty (Awin) Affiliate, I (we) earn from qualifying purchases.”


Most Recent Reviews on Review This Reviews


Search for Reviews by Subject, Author or Title

The Review This Reviews Contributors


SylvestermouseSylvestermouseDawn Rae BDawn Rae BMbgPhotoMbgPhotoBrite-IdeasBrite-IdeasWednesday ElfWednesday ElfOlivia MorrisOlivia MorrisTreasures by BrendaTreasures by BrendaThe Savvy AgeThe Savvy AgeMargaret SchindelMargaret SchindelRaintree AnnieRaintree AnnieLou16Lou16Sam MonacoSam MonacoTracey BoyerTracey BoyerCheryl Paton Cheryl PatonRenaissance WomanRenaissance WomanBarbRadBarbRadBev OwensBev OwensBuckHawkBuckHawkDecorating for EventsDecorating for EventsHeather426Heather426Coletta TeskeColetta TeskeMissMerFaeryMissMerFaeryMickie_GMickie_G


Review This Reviews is Dedicated to the Memory of Our Beloved Friend and Fellow Contributor

Susan DeppnerSusan Deppner

We may be apart, but
You Are Not Forgotten


“As an Amazon Associate, Ebay (EPN) and or Etsy (Awin) Affiliate, I (we) earn from purchases.” Disclosure Statement

X