Showing posts with label DIY project. Show all posts

Wednesday, February 22, 2023

Prostormer Electric Paint Sprayer - Reviewed

Springtime is on the way, and with spring and summer weather comes many outdoor projects. One, in particular, is outdoor painting. Last year I took on the task of painting our deck.

Prostormer Electric Paint Sprayer

We have a large deck on the back of our house, it measures 35 ft. x 12ft. deep. Our large deck along with good weather provides us with the perfect outdoor space for fun, and entertaining family and friends.

Last summer it was time to paint the deck for another season of outdoor fun. The first thing that I had to do was clean and remove all of the dirt and loose paint. For this, I used my Wholesun Electric Pressure Washer click the link to see my review of the pressure washer.

After cleaning the deck it was time to paint, so, I painted all of the railings with a brush and the deck floor with a roller. 

lattice

That only left the lattice around the outside of the deck. Lattice is the framework of crossed boards around the bottom of the deck as seen in the photo. 

The last time that I painted our deck I painted the lattice with a small brush. This was not only backbreaking but took a long time to complete as I have 35 ft. and 12 ft. deep on both sides to paint. 

I needed an easier way to paint the lattice so, I started looking for an electric spray gun. I've never owned a spray gun before and really didn't want to spend a lot of money. After looking through what Amazon had to offer and reading many of the reviews, I found this Prostormer 750-Watt Spray Gun.

The Prostormer was reasonably priced and easy to use. We followed the easy operating instructions to get it all set up and ready to go. While I continued to paint the deck, my grandson Tyler sprayed the lattice around the bottom of the deck with the Prostomer 750. 

What you get with this Prostormer Spray Gun:

  • 1 Prostormer electric paint sprayer
  • 1 1200ml tank
  • 4 different size spray nozzles
  • 1 Funnel to fill the tank
  • 1 cleaning needle
  • 1 cleaning brush
  • 1 user manual

My new spray gun was also very helpful in between the deck boards. The roller or even a paintbrush didn't get paint in between the deck boards very well but, the sprayer did the job with ease.

Spray guns are a perfect option for fences, window shutters, furniture, ceilings, and hard-to-reach places with a roller or brush.

I'm very happy with my Prostormer spray gun, and as you can see it is a great price.

Prostormer Paint Sprayer, 750 Watt High Power HVLP Electric Spray Gun with 1200ml Container, 4 Nozzles, Easy Spraying and Cleaning for Home PaintingProstormer Paint Sprayer, 750 Watt High Power HVLP Electric Spray Gun with 1200ml Container, 4 Nozzles, Easy Spraying and Cleaning for Home PaintingProstormer Paint Sprayer, 750 Watt High Power HVLP Electric Spray Gun with 1200ml Container, 4 Nozzles, Easy Spraying and Cleaning for Home Painting


Find More Product Reviews here:


Note: The author may receive a commission from purchases made using links found in this article. “As an Amazon Associate, Ebay (EPN) and/or Esty (Awin) Affiliate, I (we) earn from qualifying purchases.”


Sunday, August 14, 2022

Simple DIY Home Hacks

 I'm certainly not a professional or an expert on home improvement or repairs, but I have learned some things over the years. Here is a review of some simple DIY home hacks that I have used over the years.

Simple DIY Home Hacks

The estimated cost of minor home repairs is said to be about 1% of the cost of your home per year. So, as the value of your home increases so do your repair costs.

Some of these hacks may save you a little money and some may save some time. These are just some tips that I have used myself over the years.

DIY Home Hacks:

Easy plumbing hack
This one is an easy plumbing hack. It's late night and all the stores are closed, and suddenly you find a leak under your sink in the drain pipe. What do you do?

Since there is no water pressure involved in drain pipes, simply wrap some electrical tape tightly around the leak.

This will stop the leak temporarily until you can replace the broken drain pipe.


Clogged drain

If you have a slow-running drain try some baking soda and white vinegar. Pour 1/2 cup of baking soda into the drain, have a stopper or washcloth handy. Then, pour 1/2 cup of white vinegar into the drain and quickly cover with the stopper or washcloth.

Wait about a minute and then flush with boiling or hot water. To keep my drains running free I do this about once a month. This really works for slow-running drains. If your sink is completely clogged you are going to need a drain cleaner or plunger.


Bees wax

Are you planning some interior painting? Painting around windows can be tedious work. Personally, I like to free-hand paint around windows. But, if you don't have a steady hand you can really make a mess on the windows, and create some extra work to remove the paint.

Applying masking tape takes some time, and is also a real pain to do. Try this, use a stick of Bees Wax and apply it to the window. Be careful not to get any wax on the wood that you're going to paint. Now, paint around the window, and after the paint dries wipe off the Bees Wax. The paint will not stick to the wax.


Denatured alcohol
Denatured Alcohol can be used for many things, such as cleaning glass, metal, and fuel for marine stoves.

This is another painting hack. If you are painting your walls and accidentally drip some onto the finished wood trim and you don't see it until it dries.

Denatured alcohol will remove latex paint without affecting the finish on the wood trim.

Just gently rub the paint spots with a rag wet with the alcohol.


One more hack that I have is removing old window glazing. This one applies only if you have old-style windows. The new windows today do not have window glazing. I don't have a photo because I haven't used this hack in years.

If you happen to have old windows, the glazing over time will dry out and crack.  It's not difficult to apply new glazing around the window, but removing the old glazing can be a pain.

To make this job easy use a heat gun or propane torch, the heat will soften the old glazing to make it easy to remove. A word of Caution: Be careful not to overheat, too much heat will crack the glass. After removing to old glaze, clean the area with a brush, and then brush on some linseed oil before applying the new glaze.

Find more Diy Tips on ReviewThis Here: ReviewThisCrafts.com

ReviewThisDecor.com


Note: The author may receive a commission from purchases made using links found in this article. “As an Amazon Associate, Ebay (EPN) and/or Esty (Awin) Affiliate, I (we) earn from qualifying purchases.”


Tuesday, May 24, 2022

How to Replace a Window Screen

 Five easy steps to replace a window screen reviewed.

How to Replace a Window Screen

Replacing window screens is not as difficult as some people may think it is. Our screen door into our kitchen has a screen at the bottom of the door. So, with traffic in and out all year long I replace this screen almost every year.

Replacing a screen requires a few simple tools. First, you need a fiberglass or aluminum screen. I always use fiberglass, then you will need a screwdriver, spline, utility knife, and 
roller tool all seen in the photo above.

Replacing a Window Screen Step 1:


Step one Remove the old screen

With a screwdriver locate the end of the spline in the old screen and pry it up. Continue to pull the spline out all around the window. You can save and reuse the old spline, but I never do, I always use a new spline it really doesn't cost that much.

Step 2:

Step 2

Now, roll out the new screen over the window frame. Before you cut it make sure you're 2 to 3 inches over on all sides. Don't worry you will trim the excess off later.

Step 3:

Step 3

There are two wheels on the roller tool, one wheel is smooth, and the other wheel is grooved. Using the smooth wheel, begin pressing the screen into the groove on the window frame one side at a time.

Step 4:

Step 4


Set the spline at one end of the window frame and stretch it to the other end. Now, use the grooved end of the roller toll and press the spline into the groove. Repeat steps 3 and 4 for the other 3 sides of the window frame.

Step 5:

Step 5

Now it's time to trim off the excess screen. Using the utility knife, carefully run it along the outside edge of the window frame groove. Take your time with this because you don't want to slip and cut your new screen. If the spline is not completely pressed down in the corners you can use a screwdriver to push it in.

Replacement Complete

My screen replacement is complete and ready to be placed back on my door until next year. Although, this year I have placed this screen on the top of the door so hopefully I won't have to replace it next year.

 Five easy steps and you can easily replace your window or door screens. You can find all the tools needed to replace window screens at any hardware store.

Find more DIY Projects here: ReviewThisCrafts.com

DIYSELF 2Pack Utility Knife Box Cutter Retractable Blade Heavy Duty(Red)DIYSELF 2Pack Utility Knife Box Cutter Retractable Blade Heavy Duty(Red)DIYSELF 2Pack Utility Knife Box Cutter Retractable Blade Heavy Duty(Red)Yoochee Screen Tools - Screen Rolling Tool and Screen Spline Remover Hook - Screen Roller Tool with Wooden Handle and Steel Wheel for Screen Repair - Durable Tools for Installing Door Screens WindowYoochee Screen Tools - Screen Rolling Tool and Screen Spline Remover Hook - Screen Roller Tool with Wooden Handle and Steel Wheel for Screen Repair - Durable Tools for Installing Door Screens WindowYoochee Screen Tools - Screen Rolling Tool and Screen Spline Remover Hook - Screen Roller Tool with Wooden Handle and Steel Wheel for Screen Repair - Durable Tools for Installing Door Screens WindowSenneny 7 PCS Screen Repair Kit - 39Senneny 7 PCS Screen Repair Kit - 39Senneny 7 PCS Screen Repair Kit - 39HOMWMPA Window Screen Replacement Kit, 36HOMWMPA Window Screen Replacement Kit, 36HOMWMPA Window Screen Replacement Kit, 36


Note: The author may receive a commission from purchases made using links found in this article. “As an Amazon Associate, Ebay (EPN) and/or Esty (Awin) Affiliate, I (we) earn from qualifying purchases.”


Thursday, May 20, 2021

DIY Cat Bed Fit for a Queen


cat in her drawer bed

The ruler of my household happens to be a cat of a certain age known as Miz Grizz.  She is The Queen, and as such, deserves royal treatment.  I noticed that Her Royal Highness is quite fond of the reimagined drawer beds I made for Gracie and Minnie (two Kingdom of Grizz subjects).  The time has come to honor Her Majesty with a cat bed fit for a queen.

open drawer

I still had a drawer left over from my first foray into creating upcycled pet beds, so I claimed it for this project.  As I looked around the house for additional inspiration, and potential supplies, a theme quickly presented itself.  One of the first items I found was a metal honeycomb that I decided to use as a stencil for the sides and back of the bed.  Now that I knew I was going with a queen bee motif, it was time to get started.  First, I removed the drawer's hardware.  Then, I sanded all of the surfaces to prep for painting (and filled holes).  

close up of drawer wood

Next, I primed everything with spray paint.  On the outside of the drawer, I used Rust-Oleum Chiffon Cream Chalked Paint.  The drawer's inside surfaces were painted with Rust-Oleum Metallic Gold.  Choosing to go with a metallic finish provided an unexpected, and very appealing, outcome.  How I love the way the underlying wood grain is highlighted by the shimmery play of light.

painted drawer exterior


metal honeycomb sheet

Following the application of the first coats of paint, I used the metal honeycomb sheet to overlay the creamy background with metallic hints of ongoing hive activity.  While working to evoke this effect, an additional idea came to mind.  If I modified the metal sheet for use on the front of the Queen's new bed, it could frame a name plate.

honeycomb sheet attached to wood as decor


That is when I began to envision another feature: an acid-etched brass bee emblem.  Though I had recently experimented with etching copper, I wasn't sure if the same method would work with other metals.  I discovered that the technique worked perfectly with brass.  My new etching became the centerpiece of The Queen's nameplate.

painted jars used as feet

In keeping with the bee theme, I used decorative jelly jars (think royal jelly) for the legs of the bed.  It was just a matter of painting the jars and then attaching the lids to the bottom of the drawer.

DIY Cat Bed Fit with cat inside

Finally, I added a luxurious faux fur mattress fit for a queen.  Miz Grizz works hard keeping everyone in line and has more than earned an extra measure of comfort.  I hope Her Majesty is pleased with my humble offering.  Though it is a small gift, it was made with great love.  She is the Queen of My Heart.

New Demo: Four-Poster Upcycled End Table Pet Bed


Note: The author may receive a commission from purchases made using links found in this article. “As an Amazon Associate, Ebay (EPN) and/or Esty (Awin) Affiliate, I (we) earn from qualifying purchases.”


Wednesday, June 17, 2020

Easy Bathroom Makeover

peel and stick flooring
Easy Bathroom Makeover Reviewed

Do you have a small bathroom in need of a quick, easy, and inexpensive makeover?

I use the word easy, I don't want to make you think that you just wave a magic wand and puff it's all done.

There is certainly some work involved but, it is really not that difficult.

We have a half bath in our house that really needed a new floor. Since we were going to replace the floor we thought it was a good idea to paint the walls and trim work. 


The first task for our new project was to remove the toilet and get it out of the way. If you're removing a toilet you'll need to clean up the wax seal and then stuff a rag in the hole to prevent the smell of sewer gas. 

The next step was to remove the old floor, I think this was the hardest part. Next, I removed all of the baseboards.  Do this carefully so you break of damage it.

We choose a light mint green paint for the walls although when we started to paint it was a little darker than we expected. So, I used the white paint that I had for the trim work and added a teaspoon at a time to lighten up the green.

Easy Bathroom Makeover: Install the new floor

Now it was time to install the new floor. We used peel and stick flooring. You can find some very durable and inexpensive peel and stick flooring. In total, we bought 45 sqft. of tile and paid only $25.00 for the floor. Prices will vary depending on what you buy.


Before you install a new floor you have to make sure that the subfloor is clean and flat. It's a good idea to use a Shop-Vac to get all of the dust off the floor.

Tools you will need:
Measure and divide the room in half by both length and width. Intersect the lines in the center of the room using a straight edge or chalk line.

Once the center is marked, start to lay the tiles from the center of the room out to the edges. You will have an even space on length as well as the width of the room from your last tile to the wall.

At this point, you will need to measure and cut the remaining tiles around the room. They are very easily cut with a sharp razor knife.

The following short video will show just how easy it is to measure and install a new floor.


Now that the floor was in I painted and re-installed the baseboard and re-installed the toilet. Overall it was a pretty easy project. That means if I can do this anybody can.

You might also want to know How to Re-Caulk your bathtub


Note: The author may receive a commission from purchases made using links found in this article. “As an Amazon Associate, Ebay (EPN) and/or Esty (Awin) Affiliate, I (we) earn from qualifying purchases.”


Sunday, October 21, 2018

5 Creative Household Pillowcase Hacks

Review of Multiple Ways to Use Pillowcases for Sorting, Storing, and Decorating

1. Use Pillowcases to Cover the Backs of Chairs

Last week I featured how to use a pillowcase to make a No-Sew Halloween Chair Cover

You can also use it to cover the backs of ratty or damaged armless desk chairs.

The worn faux leather desk chair in my son's room started to shed some of it's material. The pieces were making a mess on the floor. 

So not being in the mood to buy a new chair, I covered the back of it with a pillow case. The width of this particular chair was perfect. The pillowcase fit snuggly keeping all the worn pieces neatly inside. I simply tucked the excess pillowcase at the bottom of the chair into the seat.

2. Use Pillowcases to Line Baskets and Boxes

Have you ever been to the store and thought you'd love one of those lined hampers or decorative storage baskets but after seeing the price, changed your mind? 

You can make your own.

This no-sew pillowcase hack is very easy. Put the pillowcase inside the basket and pull it over the sides. For smaller baskets, just tuck the excess pillowcase up the side up and create a thicker border edge. If you want, use sticky double sided velcro strips under the pillow case border edge to keep it in place.

You could also put the excess in the bottom part of the basket.

3. Use Pillowcases to Cover Your Clothes

Instead of using plastic garment bags, cut a hole in the top of a pillowcase and pull it over your clothes on a hanger.

It's a handy way to store kids clothes. Place three or four items together under one pillowcase, tie it at the bottom. When you're ready to pass them down, they're neatly together in the closet.

Pass them down in a decorative way: Use pretty pillowcases and tie the bottoms with a satin ribbon.

4. Use Pillowcases to Organize Bed Sheets

How many times have you had to look for the sheets matching pillowcases? This hack is the best, it's my personal favorite. 

Put your sheets and other matching pillowcases that go with the set, folded inside one of the matching pillowcases! Best of all, your linen closet looks super organized. When you need your bedding, it's all together.

5. Use Pillowcases to Cover Stools and Create a Skirt

For taller stools this is especially simple. Pull the pillowcase over the stool. Take a ribbon or other decorative piece of material and tie it just under the seat part. The excess material will create a skirt. If there's room under the seat, you could also attach the material by using a heavy duty staple gun.

If the stools are small, use the smallest pillowcases you have. You may have to cut and hem them, or use a bit of creativity to pull the excess material up and then tie the tie below the seat.

These make a lovely decorating hack for parties and special events.

Have fun!


Note: The author may receive a commission from purchases made using links found in this article. “As an Amazon Associate, Ebay (EPN) and/or Esty (Awin) Affiliate, I (we) earn from qualifying purchases.”


Sunday, October 14, 2018

Easy No-Sew Halloween Chair Covers

Add Halloween Chair Covers for Parties or Just Because You're the Mommy with Magical Detail Decorating Powers

Small details create a finished décor scheme. Expert party planners think of the most mundane items to include when they decorate. 

The walls, the lawn, the windows, the doorways and table settings are the first choice areas most of us tend to decorate. Rarely do you see chair covers.

You Can DIY Your Own Chair Covers Simply By Decorating the Chair Backs

If you love to dip your paws into artsy festive projects, start with chair covers. 

The easiest way to DIY chair covers is to focus strictly on the backs of the chairs. The seats of chairs are little more work, so avoid those unless you're into more work.

Simple No-Sew Halloween Chair Backs:
  1. Use Pillowcases to put on the backs of each chair. 
  2. First check the size of your chair backs to see if a pillowcase will fit over it. Most likely it will. You may need king size pillowcases if your chair backs are quite high.
  3. Decorate the pillowcases.
  4. If you're not into decorating the pillowcases then purchase plain orange or black pillowcases and simply slip them over the chair backs as is.
  5. Or, get the kids involved with decorating each one.
  6. Decorate them anyway you want. Draw on them, tape or glue cut-out designs on them, use felt, or markers. Let your inner artist lose.
  7. Or buy pre-made Halloween themed pillowcases.
When Halloween is over, pack them away for next year.

Not a DIY Guru? No Biggy, Get them Ready-Made

We're not all the crafty type. Not to worry, you can find some creative pre-done Halloween chair covers online. Most are quite affordable. Here's a super cute cover for a little girl's Halloween Party:


You can find additional ready-made Halloween chair cover styles here.

Have fun, and Happy Halloween :)


Note: The author may receive a commission from purchases made using links found in this article. “As an Amazon Associate, Ebay (EPN) and/or Esty (Awin) Affiliate, I (we) earn from qualifying purchases.”


Thursday, May 17, 2018

DIY Mason Jar Bird Feeder - Tutorial and Product Review

diy mason jar bird feeder and hummingbird
One of my favorite things in all the world is to spend time observing and photographing wild birds.  Most avid bird-watchers and photographers know that providing food is one way to ensure a steady stream of visitors and photo moments.  For some time now, I have wanted to make a new feeder for the birds that bring me such great pleasure.

Right away I knew that a mason jar bird feeder would be perfect for my country home.  Who doesn't love the charm of the ever-popular mason jar?  I thought I would share this project and a few tips for those out there who might also enjoy treating their feathered friends.  It is likely you already have most of what is needed for this easy do-it-yourself craft.  Let's get started.


Supplies Needed

  1. A regular mouth canning jar.
  2. A chick feeder base.
  3. A bowl or plate for the canopy over the jar.
  4. E6000 glue (or another super strength clear adhesive).
  5. Birdseed.
  6. Chain or picture wire (plant or basket hanger).
  7. Optional: Decorative knob.
dish for diy mason jar bird feeder
Step One:  Acquire a regular mouth canning jar and proportionately sized dish for its canopy.  You can find inexpensive mason jars at thrift stores, any of the dollar stores, craft stores, etc.  Though I already had some canning jars at home, I fell in love with The Pioneer Woman's embossed Betsy mason jars.  In addition to being especially lovely, the jars are 32 ounces, which means you won't have to fill your bird feeder as often as with smaller containers.

chick feeder base
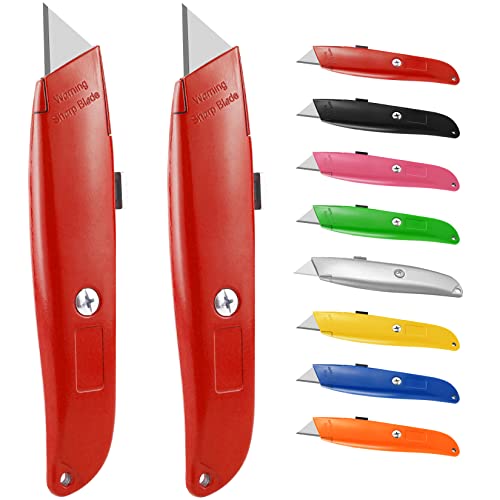
Step Two:  Buy a screw-on chick feeder base that fits a regular mouth mason jar.  Most feed stores will have them, or you can purchase one online.  I get mine locally from either Tractor Supply Company or Big-R.  Typically, I pay $2.99-$3.99, depending on whether I buy a plastic or a galvanized metal feeder.  There are usually a few colors from which to choose.  My store has red, green, yellow, purple, and the galvanized silver feeders.


drilling a hole in a dish
Step Three:  Determine if you are going to hang your feeder or place it on a post.  If you plan to hang your bird feeder, you may wish to use a decorative knob on the canopy (to provide an anchor point for a chain or hanging wire).  The ceramic knob I chose couldn't be glued on, so I used my Dremel and a tile bit to drill a hole in the center of my canopy dish.  The bit worked perfectly and created a very neat little hole for the screw that holds the knob in place.  Tip:  Keep the surface wet and go slow while you are drilling.  Angle the bit slightly.


dish with screw through it
Step Four:  Insert a screw and use two washers (one for the interior screw and one for the exterior knob) to protect the bowl's surface.  I used a 3/4-inch long machine screw (#8) that fit the thickness of the bowl and the knob threads.  Tip:  Be careful not to over-tighten the screw.  You wouldn't want to crack that beautiful bowl (part of the vintage floral pasta bowl set by The Pioneer Woman).  *You can skip steps three and four if you choose a scalloped edge bowl and hook your plant hanger chains between the rounded curves.


mason jar and e6000 glue
Step Five:  Apply E6000 glue on the bottom rim of the mason jar (around the entire rim).  Follow the instructions on the glue label to ensure the best adhesion results.


glass jar attached to dish
Step Six:  Center bottom of mason jar inside canopy bowl and apply gentle pressure while the glue is bonding.  Set aside for the glue to cure.  Depending on the temperature and weather conditions, curing time can take 1-2 days.  It's important not to rush this step.

*In this photo, you are looking down inside the open mouth of the jar.  You can see how it is centered over the screw for the canopy knob.  Tip: Use a flathead screw so the jar rim can sit flush on the bowl.


diy mason jar bird feeder
Step Seven:  After the glue is fully cured, fill mason jar with birdseed.  I used safflower seed.  Supposedly, squirrels won't bother a feeder with this kind of seed.  It is also said to keep bully birds from hogging all of the seed.  Safflower seed attracts the kind of birds I am hoping to feed.  I plan to hang my feeder, but decided to wait one extra day to ensure the glue is totally cured.

Because my hummingbirds are attracted to red feeders, I am thoughtfully considering the best location for this bird feeder.  You can see from the introductory photo on this page that the first bird to check out my new feeder was a hummer.

I love how my DIY mason jar bird feeder project turned out (so much so that I am making more than one feeder).  In addition to the Betsy mason jars, the dishes I purchased for the canopies are a part of The Pioneer Woman Collection.  The pattern on the red bowl matches the embossed pattern on the glass jar.  I bought everything at Walmart.

Now I'm excited to see who shows up at the feeder today. 


Note: The author may receive a commission from purchases made using links found in this article. “As an Amazon Associate, Ebay (EPN) and/or Esty (Awin) Affiliate, I (we) earn from qualifying purchases.”


Monday, May 16, 2016

The Best Air Freshener for People with Sensitivities

Peppermint
I have had to think a lot about air fresheners.  At work I share a small office area with three other offices and a public bathroom.  The space is a confined area in an old building. The windows are painted closed and there is no bathroom vent.  So, you can imagine why I've been thinking a lot about air fresheners lately. I want to avoid as many chemicals as possible but remove as many odors as possible. Oh yes, I forgot to mention that two of us have chemical sensitivities. Even in light of all of this, I have found the perfect air freshening solution.

New-to-Me DIY Natural Air Freshener


I get severe migraines that are often triggered by chemicals and scents. My office mate has asthma that is easily triggered. We are finding that we are triggered by opposite things. For example, original Lysol, in small amounts, doesn't trigger my migraine but causes breathing problems for her.  She can tolerate one of the other scented sprays (I can't recall the brand) but it triggers a migraine for me. As I mentioned, due to the layout of our office area, we both are adamant that an air freshener is mandatory. We are just having trouble finding something that suits us both.

As I move toward more natural cleaning supplies in my home, it was automatic to do some research about natural air freshening solutions.  I am always one step behind the times, so you probably have already heard of using baking soda and essential oil as a natural room freshener, but this was new news to me.  And I'm thrilled.

I immediately got a small glass container at work and a glass jar at home.  I purchased peppermint essential oil and made my own room freshener in a matter of moments. So far, so good. No migraine and no asthma attack for my friend at work. 

This natural and effective solution is amazingly quick, easy, and inexpensive to make.

my simple baking soda and peppermint air freshener
The items needed:

  • baking soda
  • essential oil (scent of your choice)
  • a jar
  • decorating supplies (completely optional)

The how to:

Pour some baking soda into the jar.  I used a couple of tablespoons. Some folks fill the jar halfway.  

Sprinkle a few drops of essential oil onto the baking soda. Stir or shake.

If using a lid (mason jar, paper, or cloth lid) place the lid onto the jar.  I am using a lid only if I want to interrupt the air freshening. Otherwise, I do not place the lid on the jar.


Essential Oil Reviews


Years ago, I had a friend who taught me a very small bit about essential oils. She used peppermint oil on me when I had migraines (she is a masseuse). So I knew that I'd be okay with peppermint oil and that is what I purchased locally for my first attempt at making my baking soda and essential oil room freshener.  

In the meantime, I am studying about different brands of essential oils. Peppermint oil is not my first choice for a room freshener.  I will switch over to a floral or citrus oil.  

I have found a detailed review and essential oil comparison that has been very helpful in narrowing down the brands I'd like to purchase. Now, the only problem that remains for me is narrowing down which scents to purchase. There are so many wonderful scents to choose from. 

Essential Oils from Plant Guru


CAUTION: There are children who have been poisoned when they have ingested essential oils or have been over-exposed via direct contact with essential oils.  Please read about the dangers of essential oils and children and keep your essential oils out of the reach of children. 

Related Links:

Tidy Mom shows us how she uses spray paint and scrapbook paper to make pretty jars to hold her baking soda and essential oil air freshener.  Such an easy and good looking project - I wish I had thought of it. 

Homemade Gifts Made Easy explains a few ways to dry lavender.  If I am successful with growing lavender I will dry some in order to make a lavender, lavender essential oil, and baking soda air freshener. 


Note: The author may receive a commission from purchases made using links found in this article. “As an Amazon Associate, Ebay (EPN) and/or Esty (Awin) Affiliate, I (we) earn from qualifying purchases.”


Wednesday, September 23, 2015

Reviewing Zinsser An Excellent Primer For DIY Paint Jobs

Before Painting You Should Use A Primer

Around our house we do a lot of  DIY projects which includes paint jobs around the house among other things. We have painted walls, furniture and in our latest project the sub-flooring before we laid adhesive tiles on the bathroom floor. I highly recommend Zinsser when you need to use a primer.

When it comes to painting either inside or outside it is always a good practice to use a primer first. I know, there are a lot of paints on the market that boast that a primer is already in the paint but honestly, I don't trust that fully. It just isn't as effective as using a product like Zinsser.

One of the reasons that I prefer to go a little old school and use that primer first is that Zinsser has some added protection. It seals the area that I will be painting, it covers up any stains that might be visible and it adds a coat of film that resists mold and mildew. That is particularly handy in bathrooms and on furniture that may be outdoors. It will even inhibit rust from beginning on anything metal.

You might be thinking that if you prepare your surface with a primer like Zinsser that it will add hours to your painting project, but let me assure you that you don't need to worry about that. This product dries fast. I've been able to go to the next step, whether that be adding a coat of paint or applying tiles, in about 1 hour. Yes, it dries that quickly!

I just love this stuff! In the past, I have used other primers but none of them had the added bonuses of the rust and mildew/mold protection. That is important to me and once I found this product I have never considered using anything else.

Clean-up is a breeze, too. Since it is water based all you have to do is wash out your brushes or rollers in warm water. No smelling petroleum based solvents are needed.

I have used it on bare wood, painted wood and metal and the application works well on all of those surfaces. I am, currently,  in the process of painting the exterior trim of our home and am applying Zinsser before I paint. Most of our trim was treated with a stain instead of paint and I did not want to go with stain again. No problem! I can apply the Zinsser primer on top of that stain and then safely cover it with my new fresh paint.

You can find this primer on line by following the link above or you can go to your local home improvement store like Lowe's, Home Depot or Menards. It is pretty easy to find besides being easy to use. So, the next time you have a paint job to tackle, consider using a good primer before you paint. I promise, you will not be disappointed.


Note: The author may receive a commission from purchases made using links found in this article. “As an Amazon Associate, Ebay (EPN) and/or Esty (Awin) Affiliate, I (we) earn from qualifying purchases.”


Wednesday, September 16, 2015

Review: Kohler Cimarron Toilet

When You Need To Replace A Toilet

toilet
We recently decided to remodel our master bathroom and one of the things we wanted to update was our toilet. The Kohler Cimarron was our choice and I have to tell you, we are not sorry that we made that selection! 

Actually, this is the first time in my over 60 years on this earth that I shopped for a toilet. It just is not something we find ourselves in the market for very often. I've owned several homes but have never felt the need to update or replace this very important fixture in our bathrooms. 

This all started when I decided that I wanted remove the carpet in the room. After I had ripped up the carpet and padding, my husband said that he thought it would be really easy to replace our "throne" while the carpet was out. I have to be honest, it wasn't in my original plan but I thought that it wasn't a bad idea. So, I started some quick research on what our options would be and of course how much this would add to our DIY update project. 

I quickly figured out that I wanted the newer option of the chair height. My husband and I are no longer spring chickens and the idea of having a toilet that was not so low to the ground appealed to both of us. It is so much easier on our knees for both sitting down and getting up. Our more maturely aged readers will understand what I mean!

I did quite a bit of looking online and then we went to our local Lowes to see my two choices. We both liked the Kohler Cimarron the best. The pricing was in the middle range as far as toilets go so we liked that. There were cheaper ones but honestly, they looked cheap, too. 

One thing that I said to my husband after we purchased our toilet and started to install it was, "Whoever designed this thing has cleaned a toilet before." Now, that may sound like a weird thing to say but let me explain. Most of the time the seat sits above the bowl about an inch or so and it causes nasty stuff to get on the seat and the rim of the bowl. You know what I mean! This seat fits snugly on top of the bowl which will prevent any of that gunk to have to be cleaned off. Another thing that I love is that the seat and the lid will slowly go into place on their own, no accidentally dropping the seat or lid or slamming it down. It is quiet and really kind of fun to watch.

Another feature that we like is that is a water saver. I was a little concerned about whether it would flush properly by using less water but I really had nothing to worry about. The release of the water is so powerful that the lesser amount of water is plenty to get the job done. No more wasted water!

Everything you need to install the toilet is included in your purchase. The wax ring (seals the toilet to the sewer drain), the seat and the mounting bolts. Some toilets do not include these things so this was a nice surprise. The only thing that we purchased extra was a new line for the water. We would not have had to buy it but we decided that it was a good idea to replace the old one while we were doing the job.

Now, here is something that I think is really cool. You can order this online from the website. It won't be shipped to your home (it weighs 100 pounds) but you can have it delivered to your local store and go pick it up. Another option is to have it delivered to the store and then for a delivery fee the store will bring it to your home. You can install it yourself, like we did, or you can have a professional do it for you. It will cost you for the install but that is an option, too. There are directions on how to do it yourself.

Getting the old toilet out was not as difficult as I imagined it might be. We emptied as much of the water as we could and then stuffed an old towel in to absorb the little bit of water remaining as we carried it out of the bathroom.

I would have never imagined that I could get so excited about a new toilet but I am so happy with our choice. As I mentioned before, it is not something I ever bought before but when I needed a new one I found making the choice wasn't very difficult. So, if you find yourself doing a remodel or building a new home and need to make a choice, I can highly recommend the Kohler Cimarron for your bathroom. 


Note: The author may receive a commission from purchases made using links found in this article. “As an Amazon Associate, Ebay (EPN) and/or Esty (Awin) Affiliate, I (we) earn from qualifying purchases.”


Most Recent Reviews on Review This Reviews


Search for Reviews by Subject, Author or Title

The Review This Reviews Contributors


SylvestermouseSylvestermouseDawn Rae BDawn Rae BMbgPhotoMbgPhotoBrite-IdeasBrite-IdeasWednesday ElfWednesday ElfOlivia MorrisOlivia MorrisTreasures by BrendaTreasures by BrendaThe Savvy AgeThe Savvy AgeMargaret SchindelMargaret SchindelRaintree AnnieRaintree AnnieLou16Lou16Sam MonacoSam MonacoTracey BoyerTracey BoyerRenaissance WomanRenaissance WomanBarbRadBarbRadBev OwensBev OwensBuckHawkBuckHawkDecorating for EventsDecorating for EventsHeather426Heather426Coletta TeskeColetta TeskeMissMerFaeryMissMerFaeryMickie_GMickie_G


Review This Reviews is Dedicated to the Memory of Our Beloved Friend and Fellow Contributor

Susan DeppnerSusan Deppner

We may be apart, but
You Are Not Forgotten


“As an Amazon Associate, Ebay (EPN) and or Etsy (Awin) Affiliate, I (we) earn from purchases.” Disclosure Statement

X