Showing posts with label upcycled. Show all posts

Thursday, February 17, 2022

DIY Vintage Suitcase Coffee Table

DIY vintage suitcase coffee table
Vintage Suitcase Coffee Table

I have loved old chests and trunks since my childhood.  Now that I qualify as vintage myself, I take an even greater delight in finding, and transforming, items that have a story older than my own.  Perhaps it is nostalgia.  Whatever it is, I am always on the lookout for something with an interesting history.

This DIY project actually began in the aisles of my local Habitat for Humanity ReStore (a nonprofit I enthusiastically support).  As a rescuer at heart, I couldn't let a battered metal traveling case sit there abandoned and unwanted.  There was no doubt in my mind that an item with plenty of mileage on it had interesting stories to tell, that it had more than proven its worth, and that it should be given the chance to be useful once more.  I laid down my five dollars and started imagining what that chest could become.

old suitcase
These metal trunks were in use during the 1940s and 1950s.

Any search on Pinterest will show you that DIYers are pretty gung-ho about converting antique trunks, chests, and suitcases into all kinds of cool furniture pieces.  You can also find a number of these reclaimed treasures being sold on Etsy.  This is a popular trend with staying power.  I can't imagine these vintage pieces ever going out of vogue.

scratched up top of an old suitcase
Top of Trunk - Mostly Surface Scratches in the Paint


suitcase bottom in bad condition
Bottom of Trunk Had Seen Better Days


interior of an old suitcase
Inside of Case - Paper Lining - Perfume Spills

You can see from the "before" pics that I had my work cut out for me.  As is common with these old metal cases, there was a good deal of rust to contend with, and the inside paper lining was spotted in places (smelling, thankfully, of perfume).  The first order of business was to remove the surface rust with abrasive pads.  I didn't want to lose the character and patina of age, so I was careful to remove only the top layer of corrosion.  A person can ruin a good antique by doing too much restoration.


power drill with sander pad
Removing Rust - Power Drill Abrasive Pad

dremel abrasive buff
Dremel Abrasive Buff - Perfect in Tight Spots

The rust had created a distressed metal effect that artisans work hard to achieve.


paint primed suitcase interior
Trunk Lid Primed With Spray Paint

To deal with the minor stains inside the trunk, I painted over the paper lining.  I could have attempted to strip out the paper, but the likelihood of getting all of it removed without creating a bigger mess was too great.  I knew the primer would not only cover the stains, but would make the trunk smell clean and fresh.  Once the paint coats were dry, I sprayed a clear matte acrylic sealer over them.  


tissue lining
New Liner - Tissue Paper Decoupage

In determining a decorative finish for the interior, I considered several options: stenciling a design, applying a decoupage treatment, lining with fabric, using decorative stick-on tiles, or inserting a thin cork liner. I decided to go with a lovely tissue paper decoupage (using a matte Mod Podge finish).

Towards the end of the project, I changed my mind about the exterior finish. Originally, my intent was to simply sand the finish and leave it with a wire brushed finish. That would have worked for my rustic cabin decor. However, once I decided to sell this piece, I felt a freshly painted finish would be more appealing to potential buyers. I used Rust-Oleum Chalked Spray Paint (in a neutral linen white) and then gave the trim a light distressing with fine grit sand paper.

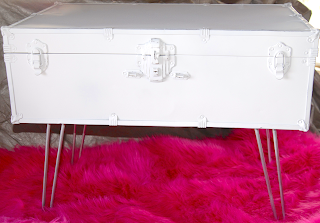
completed DIY vintage suitcase coffee table
After Pic - Suitcase Coffee Table Transformation

I could see the finish line in sight as I attached four hairpin legs to the bottom of the trunk.  Because the metal skin on the case is very thin, I reinforced the bottom interior of the trunk (essentially creating a false bottom).  This provided the added stability and thickness needed to bolt the legs securely to the case.

Would I tackle a project like this again?  Absolutely!  It's not easy to walk away from a vintage item needing some TLC.  Besides, these chests are iconic and incredibly versatile.  Not only will someone gain a unique conversational piece, but this suitcase is a great place to store things like remote controls, or dreams of future travel.

This coffee table and I now share our own unique story.  Sometimes, in quiet moments, I feel transported as I imagine where it has previously been, what it carried, and who might have packed and unpacked it time and time again.  I find myself composing little vignettes about the Sisterhood of the Traveling Case.  Pretty good entertainment for the price of a five-dollar admission. 


Note: The author may receive a commission from purchases made using links found in this article. “As an Amazon Associate, Ebay (EPN), Esty (Awin), and/or Zazzle Affiliate, I (we) earn from qualifying purchases.”


Thursday, August 5, 2021

Upcycled DIY End Table Pet Bed

Upcycled DIY End Table Pet Bed
Upcycled End Table Pet Bed

As a continuation of my DIY series on repurposed furniture projects, I present to you my latest pet bed creation.  These upcycled end table dog or cat beds are extremely popular with both fur babies and their pet parents.  I speak from direct experience.  My animals spend nearly all of their time in these beds.  

The four-poster pet bed featured here can be easily completed in a weekend.  Here's a quick rundown of the process I used to bring new life to a vintage end table.  

Supplies Needed: 

  1.  Vintage End Table
  2.  Sand Paper or Sanding Sponge
  3.  Paint (I used Rust-Oleum Chalked Spray Paint - Chiffon Cream)
  4.  Bun Feet (optional)
  5. Finials (I used crystal drawer knobs; lamp finials are another great option)
  6. Clear Coat Sealer (I used the Rust-Oeum Chalked Paint Matte Topcoat)
Tools Used:
  1. Screwdriver
  2. Hack Saw
  3. Sander
  4. Drill
  5. Pliers
  6. Brad Nailer

vintage end table
Vintage End Table (Before)

I started with a quick shopping trip to the Habitat for Humanity ReStore and the Goodwill Store.  This vintage end table was perfect for my project and easy on my budget (eight dollars).  It's nice to get a bargain while supporting a cause near and dear to my heart.

Step One: Flip table. Pull out drawer. Remove inner drawer supports to clear space for bed. I simply used a mini hack saw to cut the cross piece and then a screwdriver to remove the two side supports. 

upside down end table with drawers removed
End Table With Drawer Removed


cutting out the drawer base of a vintage end table
Cutting Out Drawer Brace


removing screws
Unscrewing Side Drawer Support


Step Two: Remove drawer pulls by unscrewing inside hardware.  Save parts for later.

removing handles
Removing Drawer Pulls

Step Three: Pull off the plastic leg disks used for leveling and protecting the floor.  Discard.

removing plastic leg disks
Removing Plastic Leg Disks

Step Four: Cut off the back part of the drawer and reinstall drawer front (I cut it with a hacksaw leaving an inch of the drawer's side and then used a brad nailer to affix it).  As you can see from the second photo, the drawer takes up room needed for the pet bed.  However, the drawer face is needed for the front side of the cabinet.  I considered using the drawer to make a little step up into the princess bed.  That would be a fun option if you have a tiny dog that could use a boost.


vintage end table prepared for refinishing
Drawer Front/Side After Cut-Off


end table drawer
Drawer Inside Table (Before)

Step Five: Install supports and false bottom for bedding area.  The wood pieces will provide enough depth to drill in the bolts for the bun feet (from the other side). The veneer of the end table top was too thin for the bolts and bolt inserts, hence the wood blocks covered by a sheet of masonite.

false bottom of vintage end table
Supports For False Bottom

masonite covering
Masonite Covering Bottom Supports

Step Six: Sand wood in preparation for two fresh coats of paint.

preparing and sanding a vintage end table
Paint Prep - Sanding

Step Seven: Prime and paint with two coats of Rust-Oleum Chiffon Cream chalked paint.

spray paint
Chiffon Cream Spray Paint

Step Eight: Seal the paint with a clear finish. I used the Rust-Oleum matte topcoat.

clear topcoat
Clear Topcoat Protective Finish

Step Nine
: Attach bun feet. This was done by drilling holes for the bolt inserts.

bun feet
Bun Feet Installed With Threaded Inserts

Step Ten: Screw in finials atop the legs.  I love the rainbows that wash over the bed when sunlight shines through the prisms.

crystal finials
Crystal Finials Installed

Step Eleven: Reattach the drawer pulls after painting them.  I used the same creamy chalk paint.

painted drawer pulls on painted end table
Painted Drawer Pulls Back In Place

Step Twelve: Select fabric and make a cozy bed cushion/pillow.  I used foam cushions and two fabric selections: one is a fleece damask pattern in pink and chocolate; one is a super soft ribbed pink chenille.  Which do you like best?  

fleece bed cushion
Damask Fleece Bed Cushion

chenille bed cushion
Pink Ribbed Chenille Bed Cushion

So there you have it.  Upcycling is a fun way to exercise your imagination while feeling great about saving an item from a premature demise.  Why send something to the landfill when it has plenty of life left in it?  

I like to think this old end table is pretty pleased to be looking better than ever and to be enfolding the life of a beloved pet.  There's nothing like being needed and valued.  

Interested in more pet bed demos?  Check out my DIY upcycled dresser drawer beds.  My cats adore them.

Stay tuned for upcoming DIY demo projects.  Up next is an antique door hall tree and a vintage metal suitcase coffee table (recent Habitat for Humanity ReStore finds that I could not resist).


Note: The author may receive a commission from purchases made using links found in this article. “As an Amazon Associate, Ebay (EPN), Esty (Awin), and/or Zazzle Affiliate, I (we) earn from qualifying purchases.”


Thursday, May 20, 2021

DIY Cat Bed Fit for a Queen


cat in her drawer bed

The ruler of my household happens to be a cat of a certain age known as Miz Grizz.  She is The Queen, and as such, deserves royal treatment.  I noticed that Her Royal Highness is quite fond of the reimagined drawer beds I made for Gracie and Minnie (two Kingdom of Grizz subjects).  The time has come to honor Her Majesty with a cat bed fit for a queen.

open drawer

I still had a drawer left over from my first foray into creating upcycled pet beds, so I claimed it for this project.  As I looked around the house for additional inspiration, and potential supplies, a theme quickly presented itself.  One of the first items I found was a metal honeycomb that I decided to use as a stencil for the sides and back of the bed.  Now that I knew I was going with a queen bee motif, it was time to get started.  First, I removed the drawer's hardware.  Then, I sanded all of the surfaces to prep for painting (and filled holes).  

close up of drawer wood

Next, I primed everything with spray paint.  On the outside of the drawer, I used Rust-Oleum Chiffon Cream Chalked Paint.  The drawer's inside surfaces were painted with Rust-Oleum Metallic Gold.  Choosing to go with a metallic finish provided an unexpected, and very appealing, outcome.  How I love the way the underlying wood grain is highlighted by the shimmery play of light.

painted drawer exterior


metal honeycomb sheet

Following the application of the first coats of paint, I used the metal honeycomb sheet to overlay the creamy background with metallic hints of ongoing hive activity.  While working to evoke this effect, an additional idea came to mind.  If I modified the metal sheet for use on the front of the Queen's new bed, it could frame a name plate.

honeycomb sheet attached to wood as decor


That is when I began to envision another feature: an acid-etched brass bee emblem.  Though I had recently experimented with etching copper, I wasn't sure if the same method would work with other metals.  I discovered that the technique worked perfectly with brass.  My new etching became the centerpiece of The Queen's nameplate.

painted jars used as feet

In keeping with the bee theme, I used decorative jelly jars (think royal jelly) for the legs of the bed.  It was just a matter of painting the jars and then attaching the lids to the bottom of the drawer.

DIY Cat Bed Fit with cat inside

Finally, I added a luxurious faux fur mattress fit for a queen.  Miz Grizz works hard keeping everyone in line and has more than earned an extra measure of comfort.  I hope Her Majesty is pleased with my humble offering.  Though it is a small gift, it was made with great love.  She is the Queen of My Heart.

New Demo: Four-Poster Upcycled End Table Pet Bed


Note: The author may receive a commission from purchases made using links found in this article. “As an Amazon Associate, Ebay (EPN), Esty (Awin), and/or Zazzle Affiliate, I (we) earn from qualifying purchases.”


Thursday, March 21, 2019

DIY Pallet Book Nook

decorative wall and window seat
Pallet Wood Feature Wall and Window Seat
When I purchased my current country home, many of the features that most appealed to me were the quirky, whimsical touches that made it so unlike all of the other cookie-cutter properties.  After moving in, though, I discovered a few things that were just a little too different for my taste.  Still, in renovating those oddities, I wanted to remain true to what had drawn me to this house in the first place: the use of character wood (weathered wood that captures your imagination).

In today's post, I am sharing part one of a two-part series focused on creating a DIY pallet book nook from a previously unused space in my upstairs bedroom.  We will start with the woodworking elements of the project and then finish with handcrafted decorating touches (a homemade cushion, pillows, rug, and other decor to cozy up the space).

Because I have poured so much of myself into my master bedroom renovations, it has become my favorite room in the entire house.  One last improvement remained to make this space visually and functionally cohesive.  There was a funky "hallway" in the room that housed my exercise bike (because it didn't lend itself to much else).  The thing that really bugged me about that long, narrow space was a weird, uneven application of drywall.  I couldn't knock that wall down because it housed my closet and was most likely structural (helping support the roof).  And, hanging, mudding, texturizing, and painting new sheetrock just wasn't on my bucket list.  Been there, done that.  Not my idea of a good time.  So, what to do?

drywall before finishing
Funky Drywall Before Renovation
Recycled pallets are the answer to most of the truly pressing needs in my world.  Seriously.  Pallet wood can right most wrongs.  It just requires a little—well, okay, a lot—of elbow grease.  I'm good with that.  The finished product has always proven worth it.  We'll just skip over the less than scintillating details of finding, hauling, deconstructing (pulling a massive number of ornery nails), and refinishing (cutting, sizing, planing, and sanding) a tall pile of pallets.  On to step eight.

marking the drywall
Tape Marks Studs Where Planks Will Be Nailed
With the feature wall pallet planks ready for installation, I prepped the wall by finding and marking the studs.

adding wall strips
Leveling Wall Sections With Lath
Next, I applied thin strips of wood lath to level the two sections of drywall, which will provide a more solid backing when nailing in the pallet planks.  The wainscoting pictured above consists of three framed pieces of corrugated metal topped by a chair rail.  It provides a nice contrasting texture, as well as adding a reflective surface to lighten up the space.

pallet wood on walls
Oh the Tales This Wall Could Tell
When I nailed in the rows of pallet wood, I decided to alternate different widths and colors.  I left all of the wood in its natural state, as the original saw blade marks, nail holes, knots, and checking is what adds personality.  As I started working on this step, I got the inspiration to separate rows of planks with horizontally placed strips of recycled lath removed from inside the plaster walls of an old ranch house.  The definition of the chiseled edges of lath created an effect similar to the chinking seen between bricks.  Really, though, it is the history of that lath, and the story it tells, that adds so much value and interest to the feature wall.

wood pallet window seat
Rustic Pallet Window Seat 
No book nook would be complete without a window seat.  Again, I used rustic pallet parts, purposely choosing planks with nail streaks, and then trimming the bench with pallet skids.  Where there was fresh wood from making the cuts, I applied chalkboard spray paint, and then sanded off most of it to blend the color with that of the naturally weathered surfaces.

feed and seed sign
Books Feed and Seed the Mind
Above the window, I created a decorative king post truss trim that matches the actual support truss on the front of my house.  I like the way it ties everything together.  While working on this truss, I happened to find the metal  Feed & Seed sign at Tractor Supply Co.  It seemed like the perfect message for my new space, as books certainly do feed and seed our minds.  When I got home with the sign, I was amazed that it fit exactly in place between the truss and the window.  That never happens.  I knew then that it was meant to be.

finished book nook window seat
My Nook is Ready for Accessorizing
With the construction work done, I am now in the process of accessorizing my new nook.  I have selected fabrics and will soon start sewing the window seat cushion and pillows.  Stay tuned for part two of this DIY series when I post the final reveal.  So, what do you think?  Could you see yourself curled up with a book in this sunny space?


Note: The author may receive a commission from purchases made using links found in this article. “As an Amazon Associate, Ebay (EPN), Esty (Awin), and/or Zazzle Affiliate, I (we) earn from qualifying purchases.”


Friday, February 22, 2019

DIY Upcycled Drawer Pet Bed

cat drawer day bed
Grizzly was quick to call dibs on this new drawer daybed.
One of the ways I express love for my animals is by making them things.  I'm always on the lookout for fun DIY projects for my kittens and pups.  While cruising Pinterest for inspiration, I came across something I could not wait to try: making a cozy pet bed by upcycling a drawer.  At the time I didn't have any old drawers, but then, like it was meant to be, I came upon a dresser that someone had abandoned.  Just like that I had four oak drawers that needed to be saved from a premature trip to wherever unloved drawers go.  I'd like to share with you how I took those vintage discarded drawers and gave them a new purpose in life. This is a simple weekend project that anyone can enjoy.

empty drawer

First, pick up a used drawer that will fit your pet.  You may find one at a garage sale or thrift store.  Since my pups are too big for a drawer, I'm making these beds for my kitties.   Given that they sleep most of the time—well, except for my wild child, Minnie—a custom bed is the gift they will use more than anything else.

painted drawer

Next, remove the hardware and sand the surfaces in preparation for your choice of finish.  At the moment, I'm in love with chalkboard paint, so I primed my drawer with it (Tip: Use the spray paint.  It goes on much smoother.).  Though a chalky soft black color may seem like an odd choice, I knew that I wanted to cover it with a white paint that would give it a stylish grunge look.  The nice thing about a dark primer is that it immediately enhanced the drawer's imperfections.

mini trellis and glass candle holders

Now it's time to use your imagination to come up with a unique twist on decorating your pet bed.  When I came upon this cute mini trellis at Dollar Tree, I knew exactly what I wanted to do.  It became the muse for a kitten daybed.  On the same shopping trip, I found these fluted glass candle holders.  They gave me the idea for an unusual set of legs for the daybed.  This is my MO as a maker: using things in unexpected ways.  Never one to be a copycat, I get my thrills from coming up with something really different.

mini trellis

Here's where sizing adjustments happen.  After determining the desired height of the daybed ends, I used my cordless Dremel with the cut-off wheel to shorten the trellis.  If you don't have a Dremel, you can use a hacksaw for this step.  I tried it both ways and the Dremel is definitely the easier and faster method.

drilling holes in drawer sides

Time to drill some holes to insert the trellis into the drawer's side panels.  I used a 1/8th inch bit to drill holes that are 3 1/2 inches deep.  This step required some care, as the wood panels are pretty narrow (about 1/4th inch wide).  I didn't want to accidentally drill through the side of the drawer.  By taking it slowly, I kept the holes where I wanted them to be.

white caulk

So, let's get back to those glass candle holder/wannabe legs I mentioned earlier.  After spray painting them with chalkboard paint, I used white chalk to highlight the fluted edges, creating a kind of pinstriping.  An important last step is to spray the containers with a clear matte sealer to keep the chalk from smearing or wearing off.

canning jar lid

At this point, I needed to screw lids for the jar legs onto the bottom of the drawer.  I replaced the candle holder insert with a regular mouth canning jar lid.  Because drawer bottoms are very thin, I bolstered the thickness by attaching strips of wood lath.  This ensured that the sharp points of the screws wouldn't poke through inside the drawer and pose a hazard to my kitten.  Once the lids were in place, it was just a matter of attaching the fluted legs.

cat drawer day bed

The final steps included creating a name plaque for my kitten and placing luxurious bedding inside the drawer.  I chose a silky faux fur rug for the mattress.  It will be easy to clean by just tossing it in the washer.  As for the pillows, I simply rolled up a comfy fleece blanket.  Easy peasy.

cat in cat drawer day bed

I was anxious to get up this morning to see who might be snuggled up in the drawer daybed.  Though I created the bed for Minnie Pearl, the kitten I rescued last August, I didn't think I would find her snoozing.  I haven't actually ever seen her sleep.  She is way too busy with her kitten shenanigans.  I was very happy to find my senior cat, Grizzly Girl (aka Miz Grizz), curled up in Minnie's place.

cat and mouse game

All throughout the day, my girls have been vying for a spot in the new bed.  Mission accomplished.  My heart is full.  I decided I better get a head start on converting another drawer.  While I was working on it this afternoon, Sugar Bear was "helping" me.

cat in cat drawer day bed

This bed has a cathedral theme.  I found a gothic garden fence for the headboard, which reminds me of stained glass windows, and experimented with an antique crackle finish for the front of the drawer.  I'm actually using plant hangers for the legs.  Go figure!  I invite you to stop back by for updates and additional photos, as I still have two more drawers to go (and two more lovely felines to feature).  Crazy cat lady?  Nah.  I'm still one cat short of crazy.


Note: The author may receive a commission from purchases made using links found in this article. “As an Amazon Associate, Ebay (EPN), Esty (Awin), and/or Zazzle Affiliate, I (we) earn from qualifying purchases.”


The Review This Reviews Contributors


SylvestermouseSylvestermouseDawn Rae BDawn Rae BMbgPhotoMbgPhotoBrite-IdeasBrite-IdeasWednesday ElfWednesday ElfOlivia MorrisOlivia MorrisTreasures by BrendaTreasures by BrendaThe Savvy AgeThe Savvy AgeMargaret SchindelMargaret SchindelRaintree AnnieRaintree AnnieLou16Lou16Sam MonacoSam MonacoTracey BoyerTracey BoyerCheryl Paton Cheryl PatonRenaissance WomanRenaissance WomanBarbRadBarbRadBev OwensBev OwensBuckHawkBuckHawkDecorating for EventsDecorating for EventsHeather426Heather426Coletta TeskeColetta TeskeMissMerFaeryMissMerFaeryMickie_GMickie_G


Review This Reviews is Dedicated to the Memory of Our Beloved Friend and Fellow Contributor

Susan DeppnerSusan Deppner

We may be apart, but
You Are Not Forgotten


“As an Amazon Associate, Ebay (EPN) and or Etsy (Awin) Affiliate, I (we) earn from purchases.” Disclosure Statement

X