Showing posts with label dinners. Show all posts

Thursday, May 16, 2024

Garlic Butter Noodles with Mushrooms

 This is one of my absolute favorite pasta dishes. Garlic butter noodles with mushrooms are so easy to make and you can have them on the table in 30 minutes or less.
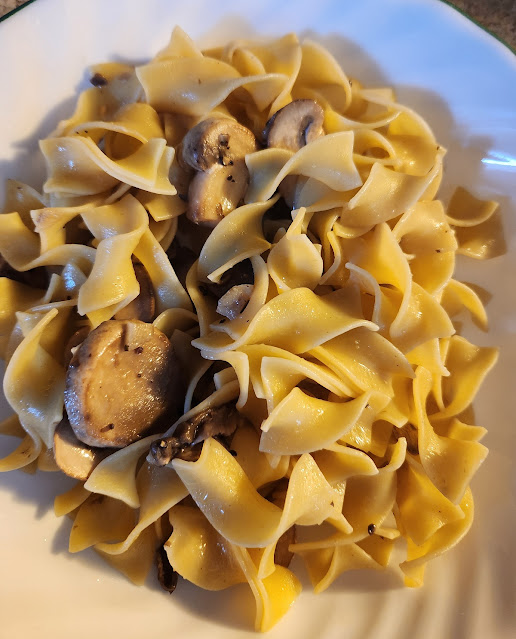
Garlic Butter Noodles with Mushrooms
Garlic Butter Noodles with Mushrooms - Recipe Reviewed

When looking for something quick, tasty, and easy to make this is one of our go-to meals. The butter garlic flavor really stands out. If you like mushrooms as I do, and pasta this is a perfect combination. The recipe below is enough for two people. If you're serving a crowd just add to it accordingly.

Ingredients: 

  • 12 oz. sliced mushrooms (washed and pat dry)
  • 4 tablespoons butter (2 for the mushrooms and 2 for the noodles)
  • 3 cloves of garlic finely chopped
  • 1/2 bag of noodles (or your favorite pasts)
  • Salt and pepper to taste
  • 1 tablespoon chopped parsley or basil for garnish (optional)

Directions:

  1. Begin cooking the mushrooms in a skillet over medium to high heat.
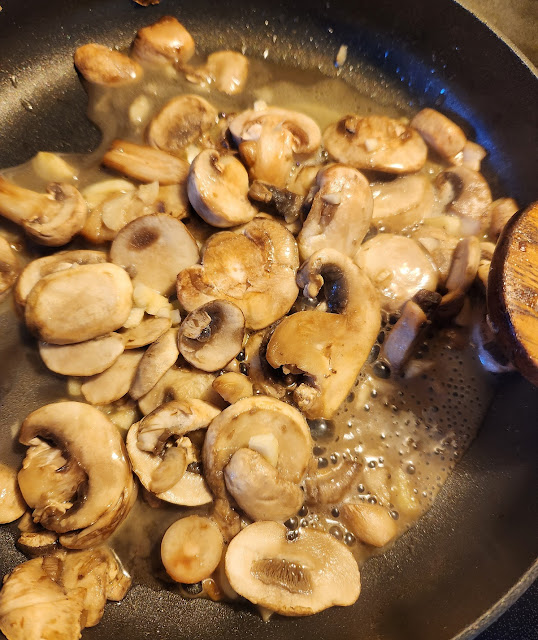
  2. Stir and turn the mushrooms until you see moisture in the pan.
  3. Add 2 tablespoons of butter and chopped garlic and continue to stir and turn until the mushrooms are golden brown.
  4. Lower the heat to simmer and cook your noodles.
  5. Drain the cooked noodles and return them to the pot or a bowl, add the other 2 tablespoons of butter and stir.
  6. Pour the cooked mushrooms over the noodles and stir. Add the garnish and serve.

Mushrooms and noodles

I always begin cooking my mushrooms in a dry pan first over medium to high heat. Mushrooms contain a lot of water, and this method allows the liquids to slowly evaporate and the mushrooms to caramelize. 

You will also want a skillet large enough so the mushrooms are not piled high on top of each other. After they burn off some of their liquids and turn golden brown it is time to add the butter and any seasoning you're using.

This is such a versatile meal, you can use whatever pasta you like instead of noodles. You can also season the mushrooms with your favorite seasonings or add a little lemon juice to the mushrooms as they are cooking.

Find more recipes on ReviewThis here:

Find more of my recipes here:

Lodge BOLD 12 Inch Seasoned Cast Iron Skillet, Design-Forward Cookware,BlackLodge BOLD 12 Inch Seasoned Cast Iron Skillet, Design-Forward Cookware, BlackCheck the Price


Note: The author may receive a commission from purchases made using links found in this article. “As an Amazon Associate, Ebay (EPN) and/or Esty (Awin) Affiliate, I (we) earn from qualifying purchases.”


Thursday, October 5, 2023

Extra Crispy Chicken Tenders

 These extra-crispy chicken tenders are so crispy on the outside and so tender and juicy on the inside. These are the perfect lunch, dinner or snack your family will love. What a great after-school snack for the kids.

Extra Crispy Chicken Tenders
Extra Crispy Chicken Tenders - Reviewed

With the busy schedules of everybody in the family, we have at least one meal together every week. A couple of weeks ago Fran made these delicious chicken tenders for dinner along with a salad. Everybody loved these chicken tenders, they were gone in no time at all. 

These are so easy to make in the oven, deep fryer, or in your air fryer. We used our air fryer, it's the healthier choice, and it's much faster. We used our Ninja Foodi Grill which is a combination grill and air fryer.

Extra Crispy Chicken Tenders - Ingredients

1 or 2 pounds of chicken strips

1 cup seasoned panko bread crumbs or 1 package extra crispy Shake N Bake

2 eggs beaten

Salt and Pepper to taste

Barbeque sauce or Ranch dressing for dipping

Beat the two eggs in a shallow bowl. Dip each chicken tender in the egg and then, coat the tenders with the bread crumbs. 

For the air fryer, spray the air fryer basket with cooking spray. Set the temperature to 400 degrees. Place the chicken tenders in the air fry basket at least 2 inches apart. If you overcrowd the basket, they won't be crispy. Cook the chicken tenders for 5 to 6 minutes per side until they are golden brown.

For the oven, Place the coated chicken tenders on a cookie sheet lined with tin foil. The tin foil will make it easy to clean up. Bake at 400 degrees for 30 minutes.

Make sure the internal temperature of the chicken reaches at least 165 degrees. I use my Thermo-Pro TP-18 instant-read thermometer. It's a good idea to have an instant-read thermometer handy for all of your cooking needs. 

Another thing that makes these so easy is that, you can buy the chicken tenders packaged and ready to cook at your local grocery store.

These chicken tenders are the perfect weeknight meal for the whole family. We enjoyed every single one of them.

By the way, the photo could have been better but everyone was sitting around the table waiting for me to take the picture.

Find more recipes on ReviewThis here:

ReviewThisRecipes.com


Note: The author may receive a commission from purchases made using links found in this article. “As an Amazon Associate, Ebay (EPN) and/or Esty (Awin) Affiliate, I (we) earn from qualifying purchases.”


Sunday, March 1, 2020

Roast Pan Steak - Another Family Favorite - It's So Good!

Roast Pan Steak - A Family Fave
I'm anxious to share this favorite family recipe with you. Since I've spent approximately the last four Sunday's posting our family faves, why not add another one?

Roast Pan Steak is a recipe passed along to me from my mom. I'm sure it came from her mother, my grandmother, and her mother before that.

This recipe is simple, just the way I like them.
Your house will smell amazing with this cooking in the oven!
I remember one particular time when we had visitors, I had this dish cooking in the oven. Our visitors kept repeating over and over how amazing the food smelled.

Roast Pan Steak Ingredients and Cooking Instructions:
  • Steak (cut into bite-sized cubes) - 1 large steak  If you add another steak, double the sauce; 3 steaks, triple it and so on.
Sauce for the One Large Steak:
  • 1 Cup of Ketchup or BBQ Sauce (I prefer Ketchup)
  • 1/3 Cup of Vinegar
  • 1/2 Cup of Water
  • 1/2 of a Large Onion Chopped - Use more if you like
  • 1 Tablespoon of Brown Sugar
  • 1 Tablespoon of Mustard
  • 1 Tablespoon of Worcestershire Sauce
Brown the cut-up steak in a frying pan. Once browned, remove it from the steak pan and put it in an oven roast pan.

Put the water in the steak pan with the steak drippings and steak juice. Mix it up nicely to get all that flavor into the water. Then mix all the other ingredients listed above (water already used) in a bowl and pour it into the frying pan.

Next, take that finished sauce that's in your frying pan, and pour it over the steak that's in the oven roast pan. Cook it in the oven for about 3 hours at 300 degrees (low and slow). It should fall apart. Each bite should be tender.

You can cook it with or without the lid, just watch if it's drying out. It should remain relatively saucy. Generally, I cook halfway through the time without the lid and just eyeball it from there.

If it seems a bit dry (which has never happened to me), add a bit of watered-down Ketchup (1/2 cup), pour it over, stir and put it back in the oven with the lid on.

NOTES
  •  As mentioned above, you can double or triple the sauce
  • You can use stewing beef, but it's way better with steak!
  • The amount of steak versus sauce is up to you - If you like it saucier, use less steak and more sauce. Or use lots of steak and lots of sauce. 
  • If you're serving a lot of people, I would use more sauce and more steak.

From Our Kitchen - A Collection of Sunday Shares


Don't hesitate to give Roast Pan Steak a try, it tastes and smells incredible. Serve it with a salad, veggies, and oven-baked or mashed potatoes.


Note: The author may receive a commission from purchases made using links found in this article. “As an Amazon Associate, Ebay (EPN) and/or Esty (Awin) Affiliate, I (we) earn from qualifying purchases.”


Tuesday, October 16, 2018

Rectangular Serving Plates Reviewed

Serving Platter For Large Dinners

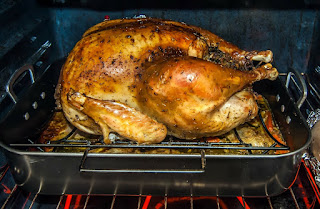
turkey needs plate
This turkey needs a serving plate (image from Pixabay.com)
Let's review an option for rectangular serving plates, today. I know, as I write this we haven't even celebrated Halloween yet this year. Before we know it, it will be time to sit down to Thanksgiving Dinner and then in December there will be the Christmas Dinner. Do you have enough serving plates to accommodate those larger portions of food?

I have found a set of three serving plates that will come in mighty handy for those dinners or parties that we often host during the year. What I love about this set is that they do not have a design that will make you feel like you can only use them for one specific holiday. I have always been fond of those wonder old turkey platters with the turkey design on them but they look a little silly if you use them for anything other than Thanksgiving. So, they sit in the cupboard to be pulled out once during the year. That is not very practical is it? 

What I love about this set of three is that you have three different sizes of plates to serve on: small, medium and large. The largest plate is 15.6 inches by 8.8 inches and will serve nicely for a large turkey, ham, or pot roast. The medium size is 13.8 inches by 7.5 inches and will work well with a variety of dishes for the dinner or party. The smallest plate is 12.2 inches by 6.5 inches and is perfect for appetizers or just about anything! 

I also love that they are white in color. There is nothing that will distract from any pattern we might have on our dinnerware. They can be used for any occasion we plan to serve a lot of people and will stack nicely in the cupboard. 

This set of three rectangular serving plates are made of porcelain so that can be used in the freezer or oven and can be washed in the dishwasher. Now, I think that makes them even more practical! 

How about you? Do you think that this set of serving platters would function well for your large gatherings of family and friends during the year? 


Note: The author may receive a commission from purchases made using links found in this article. “As an Amazon Associate, Ebay (EPN) and/or Esty (Awin) Affiliate, I (we) earn from qualifying purchases.”


Most Recent Reviews on Review This Reviews


Search for Reviews by Subject, Author or Title

The Review This Reviews Contributors


SylvestermouseSylvestermouseDawn Rae BDawn Rae BMbgPhotoMbgPhotoBrite-IdeasBrite-IdeasWednesday ElfWednesday ElfOlivia MorrisOlivia MorrisTreasures by BrendaTreasures by BrendaThe Savvy AgeThe Savvy AgeMargaret SchindelMargaret SchindelRaintree AnnieRaintree AnnieLou16Lou16Sam MonacoSam MonacoTracey BoyerTracey BoyerCheryl Paton Cheryl PatonRenaissance WomanRenaissance WomanBarbRadBarbRadBev OwensBev OwensBuckHawkBuckHawkDecorating for EventsDecorating for EventsHeather426Heather426Coletta TeskeColetta TeskeMissMerFaeryMissMerFaeryMickie_GMickie_G


Review This Reviews is Dedicated to the Memory of Our Beloved Friend and Fellow Contributor

Susan DeppnerSusan Deppner

We may be apart, but
You Are Not Forgotten


“As an Amazon Associate, Ebay (EPN) and or Etsy (Awin) Affiliate, I (we) earn from purchases.” Disclosure Statement

X